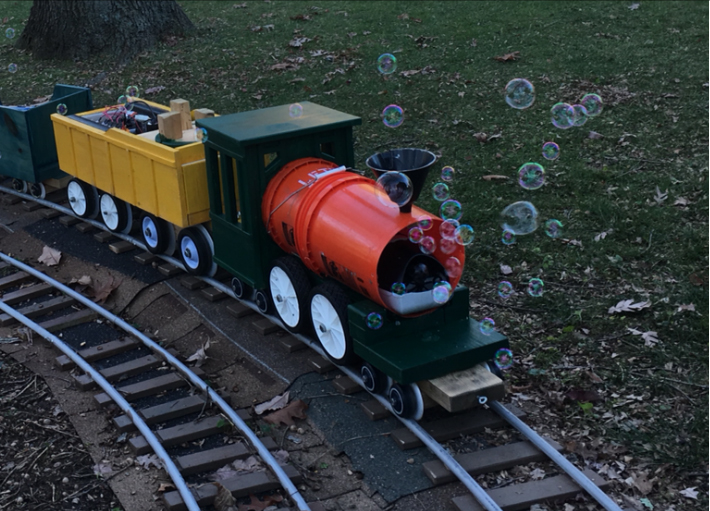
Larry sent this in and I just had to post. He’s made his own ride on train with track for a shoe string budget. Genius!
“The key to the ride on railroad I constructed is using pvc track.
It is inexpensive, and easy to assemble.
I used 8 inch spacing between rails, and 6 inch spacing between wooden ties.
PVC track component and total costs
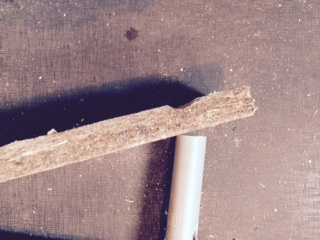
Electrical gray ½ inch pvc pipe 10 foot= $1.60
1 by 2 by 8 pressure treated wood x 8 feet=$2
misc: screws, pipe glue, ¾ inch pvc track tie
Cost per 10 foot of track (7.5 inch wide rail spacing on 1 foot long ties spaced every 6 inches)=$8.20 plus cost of misc or no more than $10 per 10 feet
PVC track is 1/10th the cost of steel track, and easy to assemble and make curves.

The track is assembled by screwing through the underside of the ties into the pvc using screws long enough to catch 1 side wall of the pvc pipe (3/4 inch long, but depends on thickness of your ties).
Assemble by predrilling 4 through holes at 8 inch spacing in each tie, then use a jig to hold rails in place with proper spacing upside down. Then, screw in to secure.
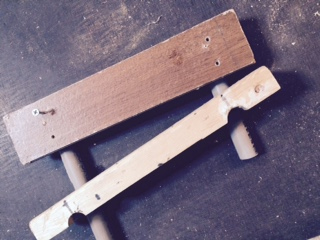
Another method is to router a groove at the 8 inch rail spacing distance, and then simply assemble the track without need for the jig.
Two screws per tie are sufficient, instead of 4, to hold the track together.
The last step is to fill the track with play sand to make it more rigid. It can support my weight (200 lbs).
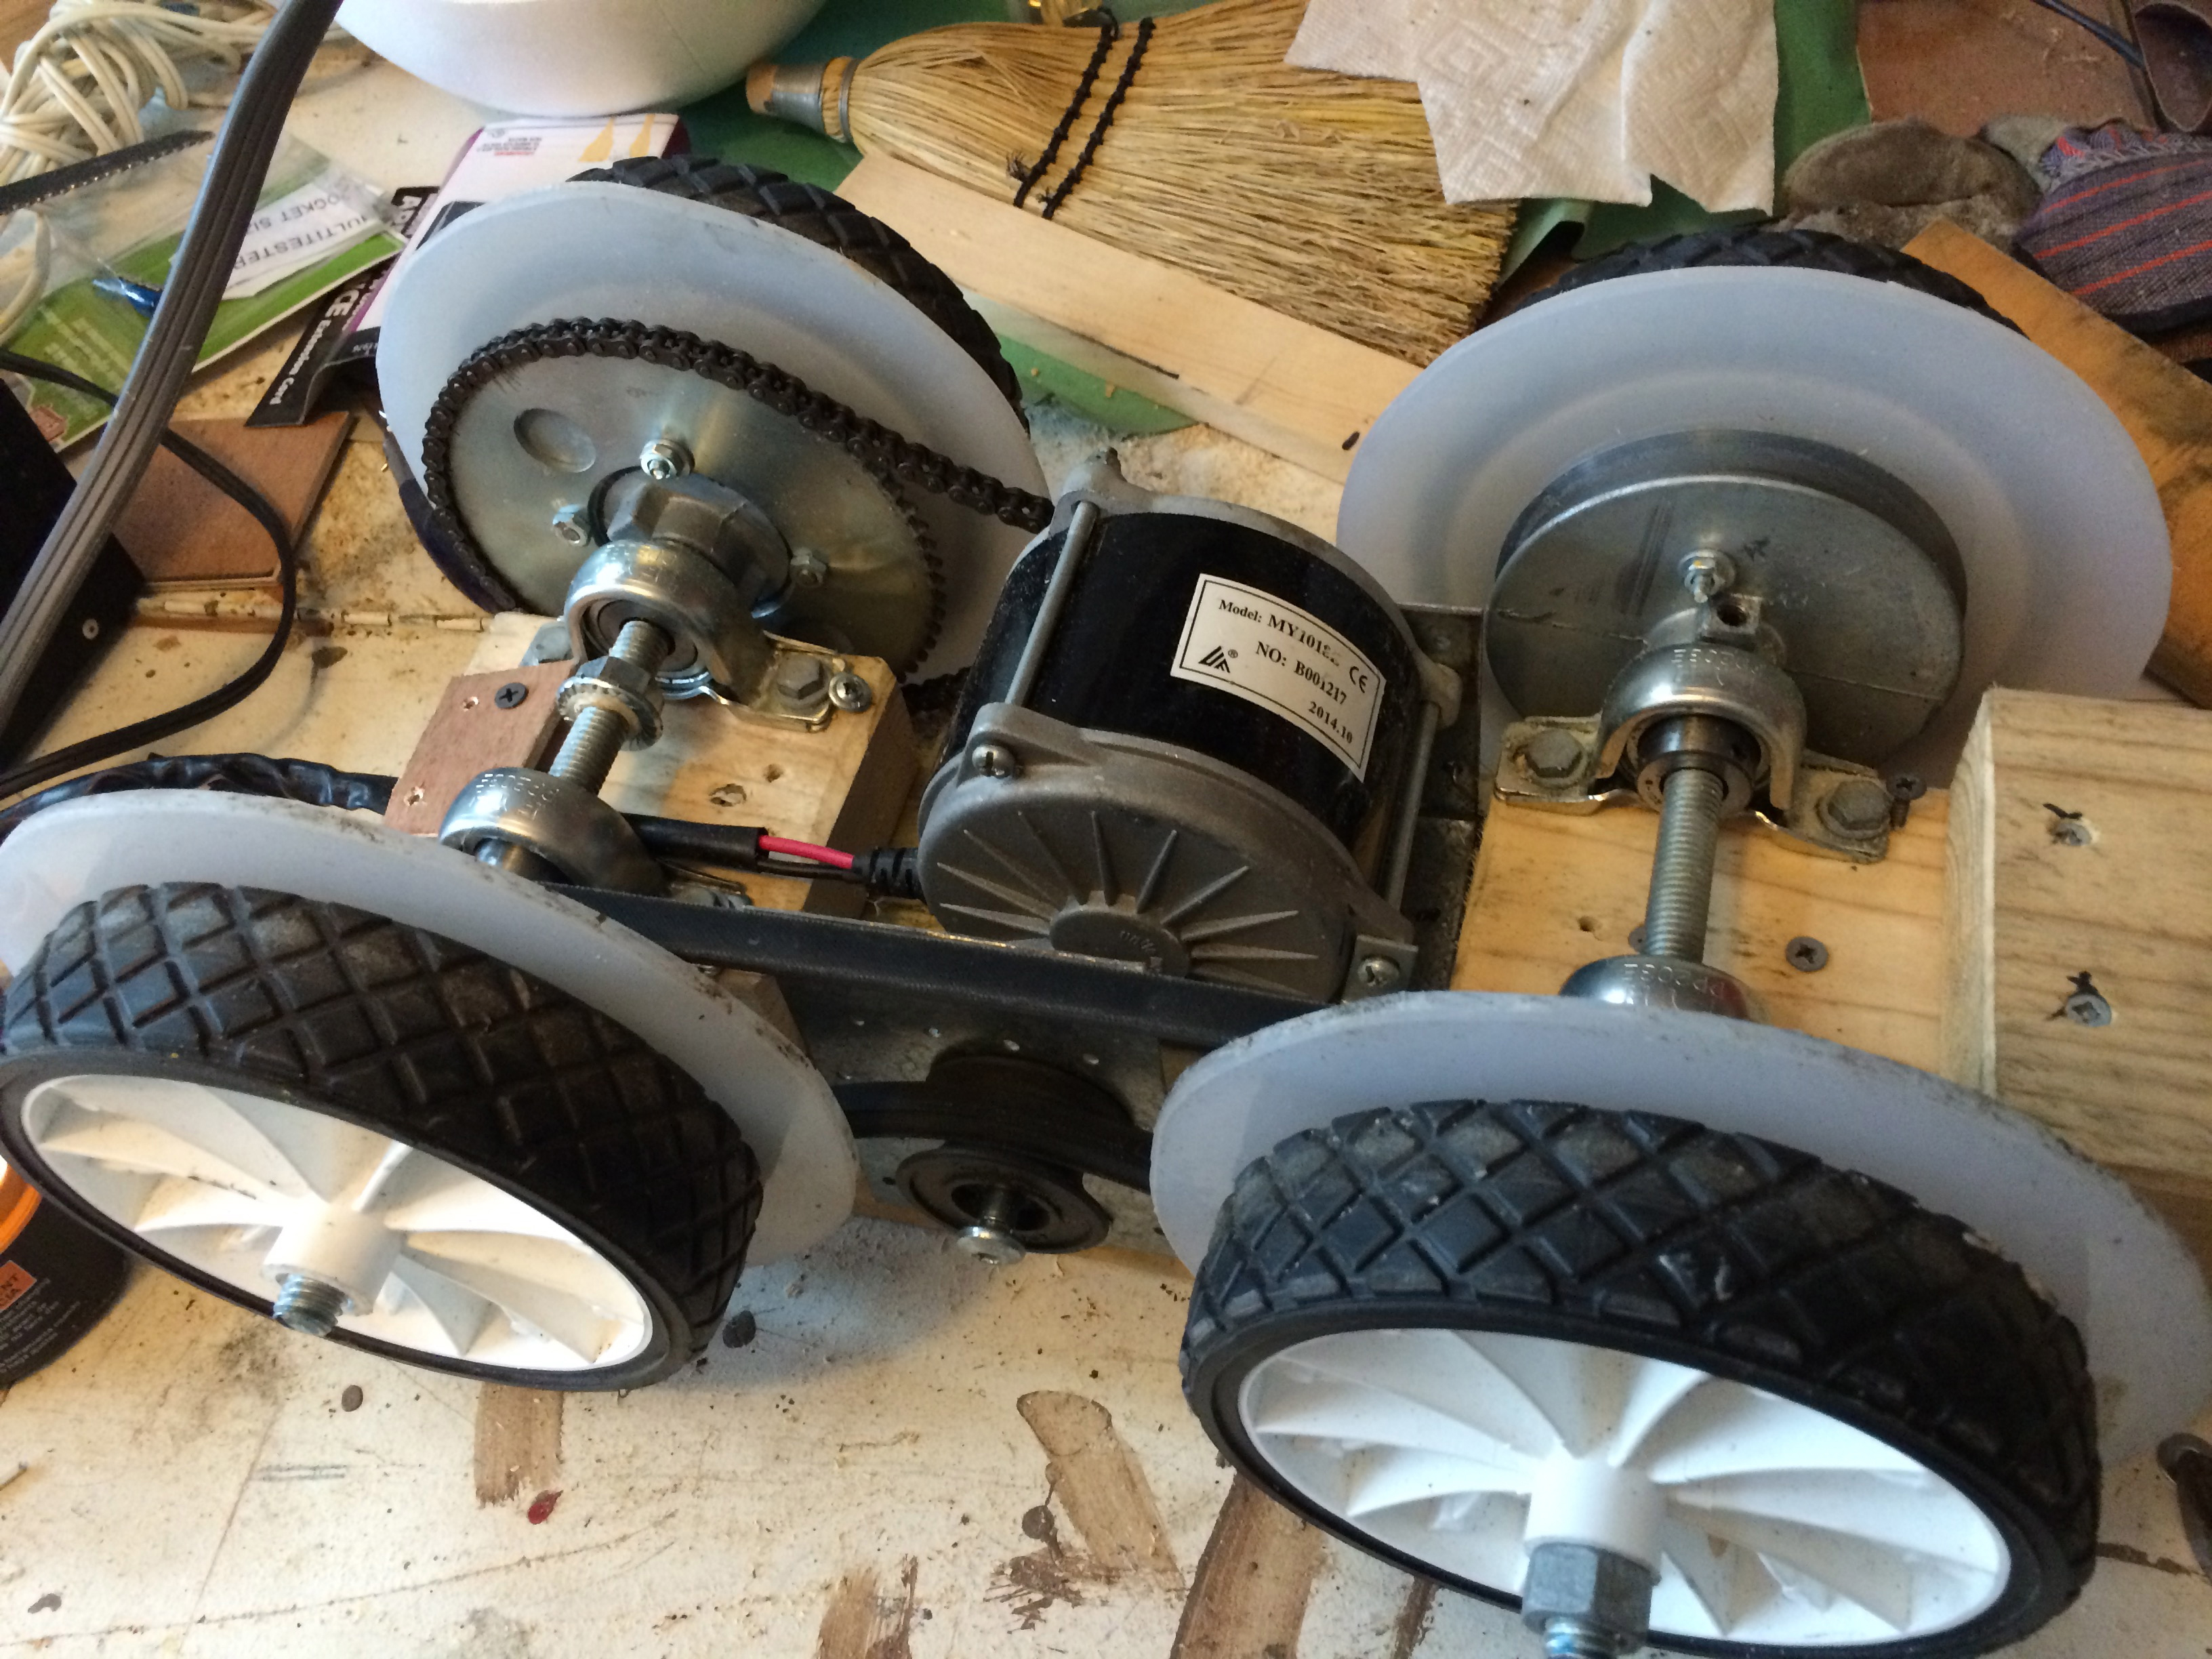
The drive systems for the crank car and engine are shown in the photos below.
I cut down a 16 inch kids bike to make the crank.
I used tricycle gear conversion sprocket on the axel.
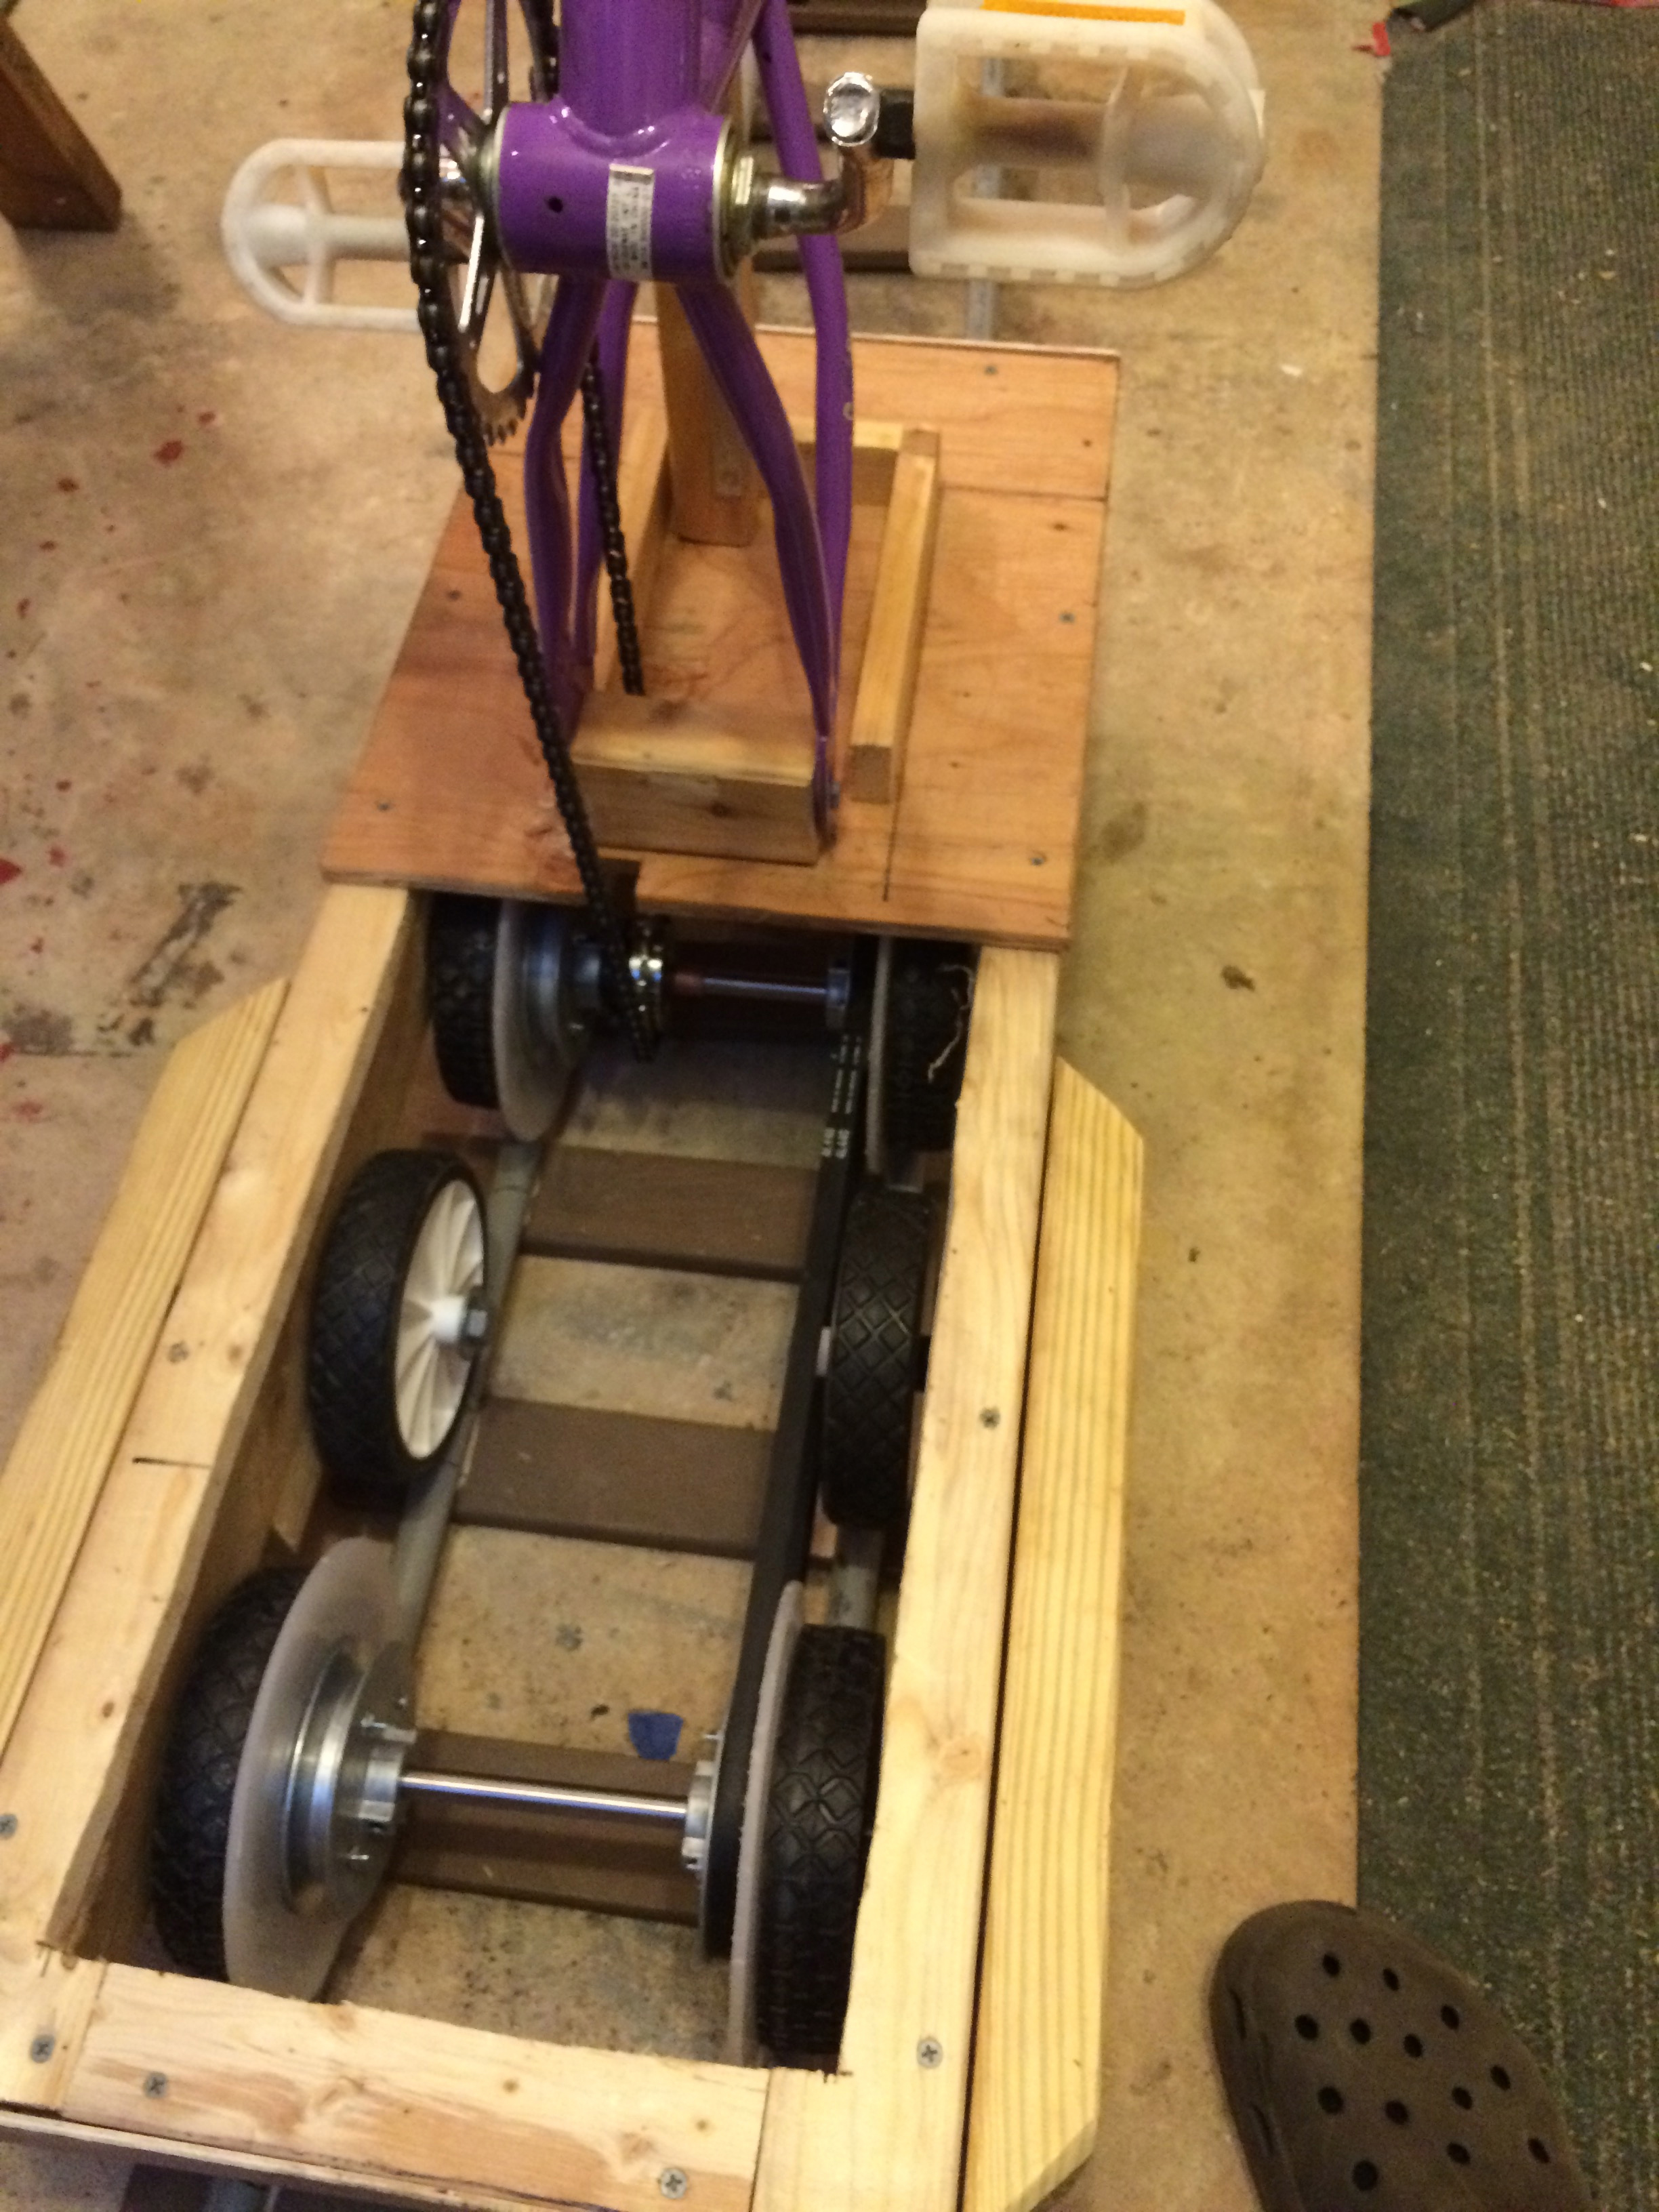
Wheels are made using lawnmover replacement wheels, with a circle of polypropylene to create the flang, all screwed together with a 4 inch zinc pulley wheel which can set screw onto a ½ inch steel axel.
The pulley serves as a wheel hub, and driver for the second axel. The primary axel is 25 chain driven by the scooter motor (35 or 50 watts).
If you want more details on my ride on train with track construction, please let me know.
Larry”
Ride on train with track:
I can’t thank Larry enough for sharing his ride on train and track ‘how to’.
I read his ‘how to’ and watched his vids, and found myself thinking, “That’s my summer project!”
Well, we’ll see.
Anyhow, hope you enjoyed it as much as me.
Have a look at John’s ‘minimal gauge‘ post to – it’s a monster project.
That’s it for today peeps.
Please do keep ’em coming.
And if today is the day you get started on your layout, the Beginner’s Guide is here.
Best
Al

Larry you have placed an ‘outside’ ride-on railway into an easily affordable and easy to achieve project that I’m sure many will want to emulate. Ingenious.
That is fabulous, can we please have lots more pictures, explanations and videos. I’m sure we all want to know everything?
Larry’s Ride on Railroad – fabulous! I wish I’d seen this about 10 years ago, but better late than never. I’ve lived on an acreage block for the past 40 years and always wanted to make a ride on railroad but the cost was beyond me. Now that I’m 70 I’m looking to move to something smaller, but I’d still like to see some more detailed instructions on the whole thing. eg how did you join track sections, how did you fill the track with sand, for a curve did you firstly fix one rail to the ties, make the curve, then fix the other rail? More details on the drive system and power source etc would be good too.
I enjoyed Larry’s layout and would like to have more details for the,power driven locomotive, esp. power requirements.
Thanks
Well done!
That is such a wonderful use of YANKEE ENGINEERING. Hope you have grand kids? They will have a blast
Also not using the motor would be great exercise for the arms & scooting your behind farther to the rear would get your legs involved.
WHAT A GREAT IDEA
What a HOOT. Very cool. Thanks for sharing.
Very ingenious ,looks like a lot of fun too.
What about switches
I like it. It is very nice and I would bet a lot of fun
My wife would kill me!!
Excellent. I did something similar to this on a smaller ‘route’ for my son many years ago, but with wood rails. It worked well for several years, but deteriorated rapidly after 3-4 years. It was a real hoot.
GREAT!!!….I’ll be waiting for the next installment about smoke and sound…lol…how did you come up with the pvc idea?…Are the kids lining up from the neighborhood already? GREAT JOB!!!!!….Mike
Great idea! Wish I would have known this years ago. How did you couple the sections of track together? Did you glue inserts of some sort on the inside of the PVC? Again, Thanks! Would make a nice addition to our town Christmas tree.
Bruce
I wish I’d thought of this…..your a genious. My boys would have loved this, to bad there all grown and gone. I don’t have an excuse to build one.
How cool! I think there is a summer project with the grandson here – something with a with a fairytale theme? Questions: how do you get the sand into the PVC pipes, & how do you join the pipes?
Bill
My question is how did you deal with joing the pvc sections together. This is an ingenious idea. I love it
Very COOL!
Dave F.
This is great and so simple to build. My soon to be grandson would love this.
Thanks for sharing this.
Larry, I can only echo the commentary already provided by other readers. It is a superlative example of creativity and ingenuity. It truly gives meaning to the phrase, “necessity is the mother of invention.” GREAT JOB!! Arnie
Awsom idea my kids are all grown , I wounder if Larry used the sand as ballast ?
Like a previous gentleman, I too am 70. The Good Lord has blessed me with a great constitution and excellent health along very many Grandchildren. Larry’s RR looks to be just the ticket for summer fun. Can we have a little more information?
Tom.
Really enjoyed this artical
Remarkable indeed!!!
My son who is a mechanical engineer and has PhD in physics builds something like this very similar to yours but in industrial applications. I will admit though, very simple and clean design, low maintenance, and the price is right! Good job Larry! I may want to show my son the simplicity of what you built for my grandchildren. Will you post up plans later?
wish I had the brains and the time, really fantastic stuff. Jon . Canberra,Australia.
that is an just a great how to , imagine the kids pushing peddles to make the train move. I really think we need to see more.
Great stuff Larry!!! I would like to see a longer video-at least 10 minutes on your railroad as I folund it fascinating. Thanks for sharing. Cheers Rossco. Adelaide, South Australia
Hello, I am offering some rebuttal to your comment on the cost of rail for 7.5″ guage railroads.Locally (lucky for us near by) I can drive 80 miles to winnebago industries who have a 1″ tall die for aluminum rail .Last time I was there and aluminum was reasonable I purchased rail for .39 a foot. Granted a minimum order is a 500′ ingot made in one batch. This price is very competitive with your pvc track.
One other thought on reasonable outdoor rideable track. There is a type of track that is called “groovey track” and uses ties with vertical slots cut in the ties at the right guage with steel (usually something like 1/4″ by 1″ or so tall) pushed to seat in the groove of the wooden tie. No fasteners needed to mate steel strap rail to tie. very good value and can use flanged wheel.
Genius!!! Oh man I wish I were younger and had some ground to build this. Way cool!
Pete-Rainy Silicon Valley.
Great engineering! I noticed in the second video that the wheels of the loco weren’t moving. What’s up with that?
Utter genius! My daughter would love this but not sure if my wife would approve!
I would love more specific details, I am considering building this for my wife’s daycare they would really love it.
I would love to see more, or at least links to follow. Sounds like a great project for my 90 year old father.
Well done!!! I really enjoy seeing that sort of thing. It brings back a memory of when I made a toy train for my son from part of a cardboard carpet roll. I found wheels from an old vacuum cleaner, The chimney was a cotton reel and the rest just odd bits of wood. Ah but that was over 40 years ago!!
Absolutely fantastic!!! Wish I had seen this before I started my G scale garden railroad, who would have imagined you could do that with PVC pipe. Well I guess Larry did! ! One of the best model railroading projects I’ve ever laid eyes on. Congrats and thanks for sharing. Cary, Crestwood KY
Brilliant idea well executed much more info PLEASE
way cool looks like he is using electrical conduit. the white water pipe will degrade quickly in sun light and is not made for above ground use . but conduit will last years.
Hi Larry, can you give you please give me more specifics on how to build the electric powered train?
Dear Mr Larry,
thanks a lot for sharing! We’re building a Harry Potter-themed Carnival float and this page saved our Hogwarts Express.
Would love to have complete blueprints and directions on how to build the hand crank and electric ride on railroad. This sounds way cheaper to build then using metal rails and power to it.
UNBELIEVABLE!!!! REALLY COOL!!!
We needed more video . very ingenious
The Critic
Incredible Larry, ingenious!
Brian, Wokingham, UK
Larry, Very clever and utterly delightful! I think in some electrical supply stores you can get 1/2 inch PVC in 20 foot lengths which would result in fewer rail joints. Did you use internal couplings like shark-bites to join the ends of the PVC together? I suppose you could just use a wooden dowel of the appropriate outside diameter to fit inside the 1/2 inch PVC pipe. A couple screws in the bottom of the “rails” would then hold the two ends together.
Some of the electrical PVC pipe I’ve used in the past come with one end belled out so it slips over the un-belled end eliminating the need for a coupling, but that would be a problem with using the pipe as track rails. You would need to cut of the belled portion in order to maintain the right outside diameter of the “rails”.
Do you have instructions on how to build the engine that drive the train
How innovative and how fun!
Maybe we can all contribute to Larry’s railroad by coming up with idea’s using Larry’s same ingenuous ideas. This is really mind blowing.
I am having trouble finding the video and pictures of the train. Are instructions available? I am hoping to build a ride in train fir Christmas and cannot find anything affordable and for a beginner! Thanks!
Yes! This is EXACTLY what I’m looking for this Christmas (and maybe to keep around for Halloween)! Where’s the instructions???
Awesome idea Larry, thank you for sharing. An affordable for a outside railway !!!!!!
Wow! Larry. Innovative, ingenious but simple engineering. Thank you for sharing it with us .
Andrew in Oz
From a 7-1/2″ gauge model RRer, not scale but incorporates all the fun I have ever had with my models.
Would like to see how you build track switches, which I assume you have from the photo with double track showing.
Larry! Very well done on making an affordable ride on garden train. Please send some longer videos of your outstanding efforts. Thanks for sharing. Cheers Rossco, Adel;aide, South Australia
Great work Larry. A suggestion for the ties. Clamp two ties together the using a spade bit drill down using the joint as the center line. The spade bit would be cheaper that a router bit.
For those who don’t have the time check out LawnTracks.com..
Hi Larry enjoyed the story my only question is what is the bubble machine you have used at the front of the engine, phil from Aus
Wow!!!! Love it that is such a great and ingenious idea!!!!! Now that’s what I call thinking outside the box!!! Thank you for sharing your idea and pics and video!
Chris,MI
I’m thinking we will be seeing more of these , what a great and seemingly not too expensive idea . Grandkids and neighborhood kids gotta love that. There’s probably a hundred guys saying to themselves … why didn’t I think of that ?… just friggin genius.
Well done, what a great project. Now, lets see how you make the points/turnouts. 😉 Just kidding. Love it.
At 68, I know it would never happen. We had a big property but as we got older, it became too much for us. I envy you. Looks great. I wish you well. The train I always wanted was the Kiddyland train from Berwyn IL. It was a G16 train that looked exactly like EMD 40’s deiseal engines. Like the F &’s or the E series. I sure wish I grew up rich. God bless you ! Have fun.