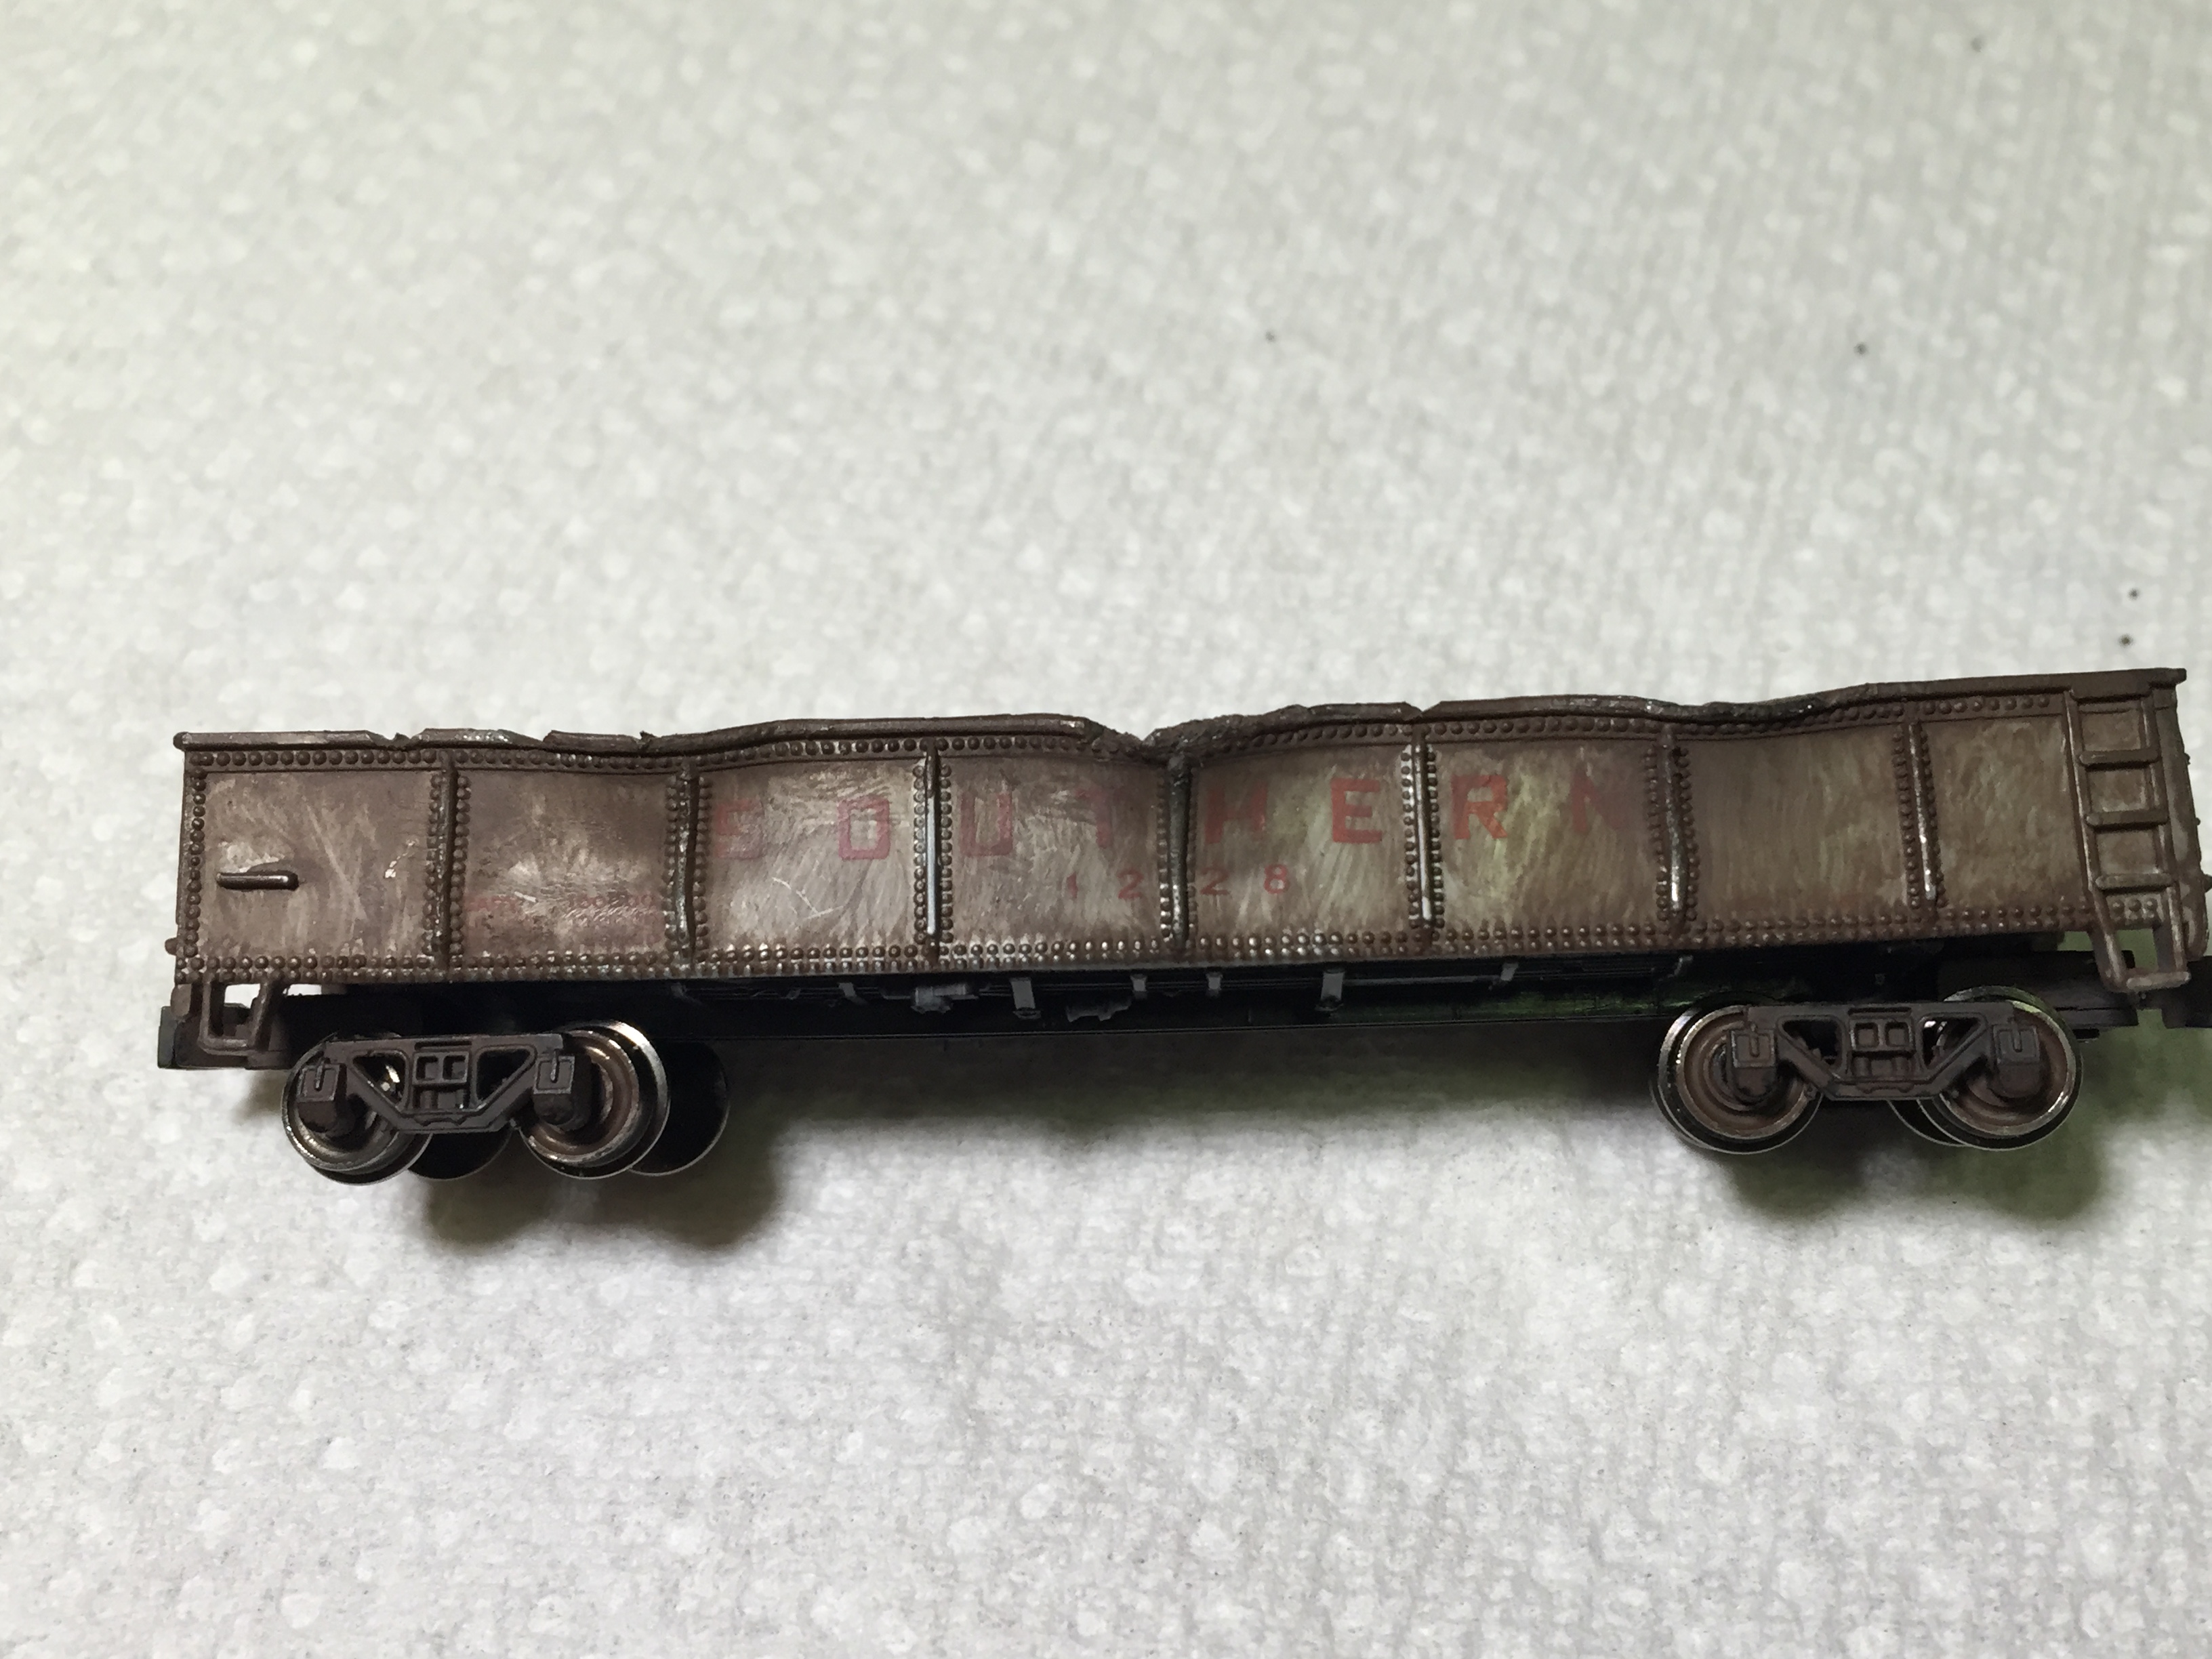
“You can salvage that vintage Polystyrene N scale clear jewel case!
If you have ever been frustrated by both the beauty, and frailty, of those vintage Rivarossi and similar N scale polystyrene jewel cases, this might offer a solution.
All too often they are crushed, corners snapped, split, or broken and crumbling. It was a cruel fate offered to the poor one that sat at the bottom of the box which housed all those trains in jewel cases. The usual remedy was to tape it with some poor choice alternative. Masking tape which either turns to crystals or mush, depending on the day of the week, or clear cheap tape that dried to stone. That, or you ended up buying that odd lot to get the one good lid, nesting liner, and the locomotive identification card that was saved and spared because of a case that did not suffer some cruel fate or damage.
But I have found a partial remedy. PVC and CPVC clear cement can work wonders. The Oatey brand, available in the states is a good example, although I am sure there are others.
If you have all the pieces, carefully place them together. If needed, support the joint beneath and underneath with wax paper and then some blue painter’s tape. Grab a couple flat toothpicks and carefully apply a few thins wipes of the glue. Thin is better. It won’t shrink, dries quicker, and is easier to work with. Don’t pull more than once or twice, as it sets quickly. And it will start to get ugly. Like a choppy sea, instead of a smooth lake on a still day.
I have found that three or four thin applications over several hours is best. Don’t place it on the inside edges where the case lid meets the base upper edges. And if you get too much, very careful scraping with a sharp X-Acto blade can remedy that.
Will it have the beauty of the original? No. Will it look as good as it did the day you brought it home? No. Will it have the original dimensional stability, it never really did? No, and I would not drive the family sedan over it or support your favorite two-wheel with it either.
But, it will keep it together. It can prevent further deterioration, and help secure that valuable (or invaluable) gem and its contents. Besides, there is nothing like a snoot full of tetrahydrofuran and acetone to get you going on those cold mornings. (No, not serious, do work with good ventilation and avoid breathing the stuff.)
I hope this helps. And to all those other contributors, thank you for your wonderful ideas.
All the best.
Terry”
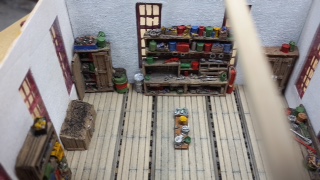
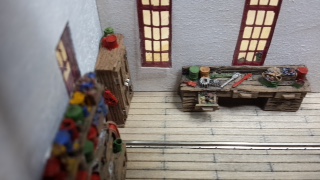
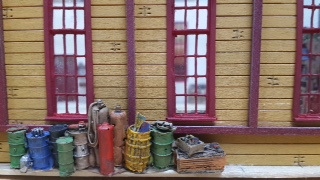
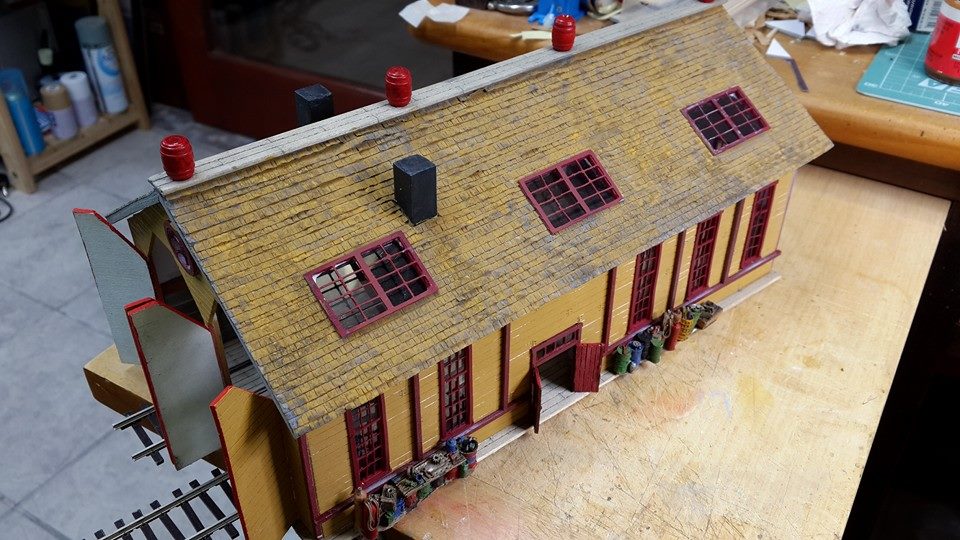
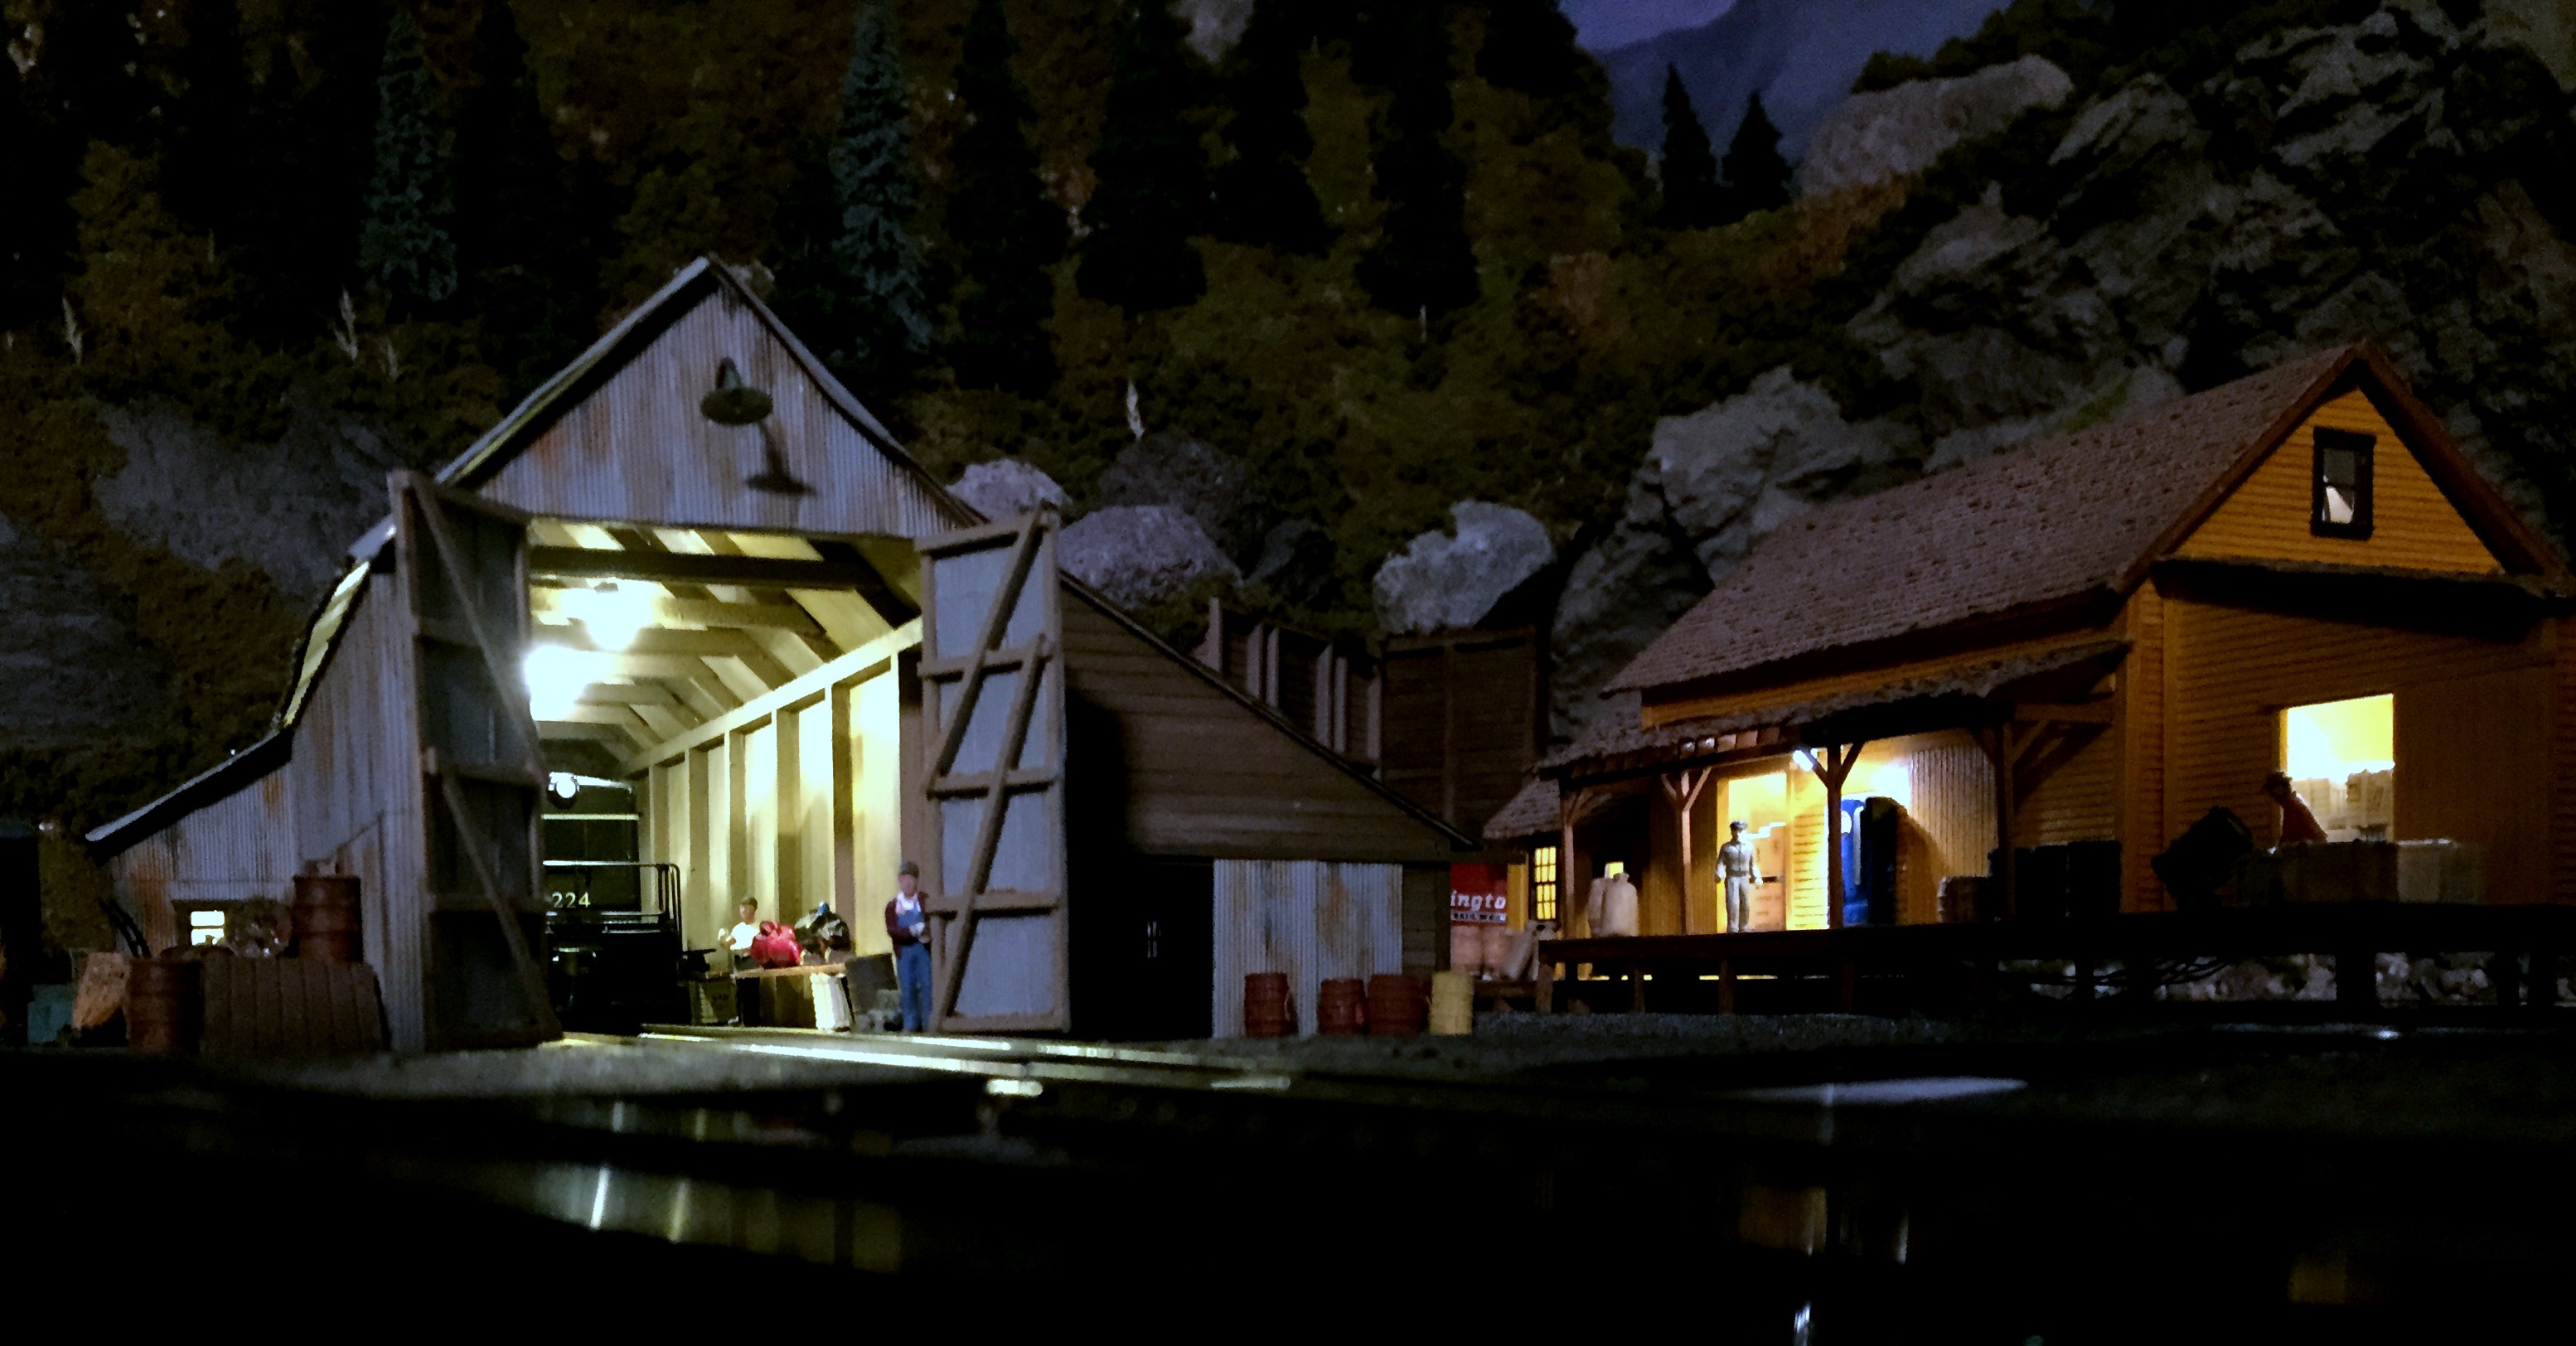
“Hi Al, progress on my friends two stall engine house. (54 hours of work so far).
Putting and positioning the painted details inside. Castings from my “bits box” all painted and weathered.
Then to mount all the interior lighting.
Next step is to weather it and make it look well used (weathered). Note the distressed siding on the walls and the “nail heads” all ready for the weathering process.
All the best and keep up the excellent work.
From a golden key subscriber.
Brian
Cape Town South Africa”
“Al
I am working with my 7 year old son on our first railroad layout (I never owned a train either). The layout is 4’8″x11′, One section is 4’8″‘x8’ and the other section is 3’x4’8” that is the only way I can get it up the stairs to the attic.
I find your e-mails very useful. Right now I have the layout in my wood shop but I finished a room in our attic complete with finished wall, floor insulation, and heat, where I will soon put it. I plan to do some painting in the wood shop before I bring it up stairs to lay the track and slowly do the scenery.
I have attached a couple pictures of the layout. If anyone has any suggestions for me I would appreciate hearing (or reading) them. Driving cars and trucks are just as important to him so those will not be stationary, or at least not all of them.
I do have one question which is “how do I make the pink foam board look like rocks? Do I use carving tools or something else? And how do I paint them to make them look real? Ok. that is more than one question!
Thank you
Larry”
Can anyone help Larry? I do enjoy reading the different suggestions and approaches. I’m looking forward to see what comes in.
Here is a fun photo, titled “Late evening after a horrendous thunderstorm”.
The tip here is for those that use their iPhone for layout photos.
Turn the iPhone upside-down so that the lens is right down on the ground level of the layout. Focus on the subject.
The foreground will be blurry but you can crop it out or, in this case, with the night shot it doesn’t really show up. Gives a good perspective!
Mark”
“Mr. Lee Alastair,
I have been in RR employ over 46yrs retired in May 2000. Now am 78yrs old, Also a model railroader since teenage years. Settling in HO scale.
In 1970 I designed the HO layout of the Walnut Creek Model RR Society in Walnut Creek, CA 2751 Buena Vista (in Larky Park) my pet peeve was lack of bright headlights on engines. Some members engines still don’t have headlights and some that barely can be seen at all. Factory headlights mostly are still not scale proficient in brightness.
I have perfected that by installing bright White LEDS in the unit shell complete with 1000ohm resister to power the LEDS. I apply brass contact plates to the inside of the locomotive shell on both sides. All the light wiring is in the shell.
On the power chassis I install power connector plates on each side of the motor to match the contact plates in the shell. Note: all these have to be custom made for the type unit you are lighting. I have five sets of F7’s ABBA’s of which four sets are of Ahearn super power mechanisms and 1 set F3 ABBA Stewarts. And all now have full bright headlights even at minimum voltage.
I also provided a Red LED for reverse movements on all the cab units. I have also lighted other members locomotives this way.
I also have replaced the incandescent lighting in KATO’s business cars to twin bright white 1.8MM LED’s each directly below the red & green plastic light receiving end on underside of car top plastic panel. N9ow there is a bright red rear light plus the green and red side markers. Red to rear and green forward. Another club member had 5 of these business cars that I lighted for him also.
Sincerely on track.
Robert”
Now on to Bobby:
“My name is Bobby and wanted to share my first scratch built bridges. Two are Howe through truss bridges. I have always been interested in scratch building so I gave it a shot. They are almost done so let me know what you think. Thanks.
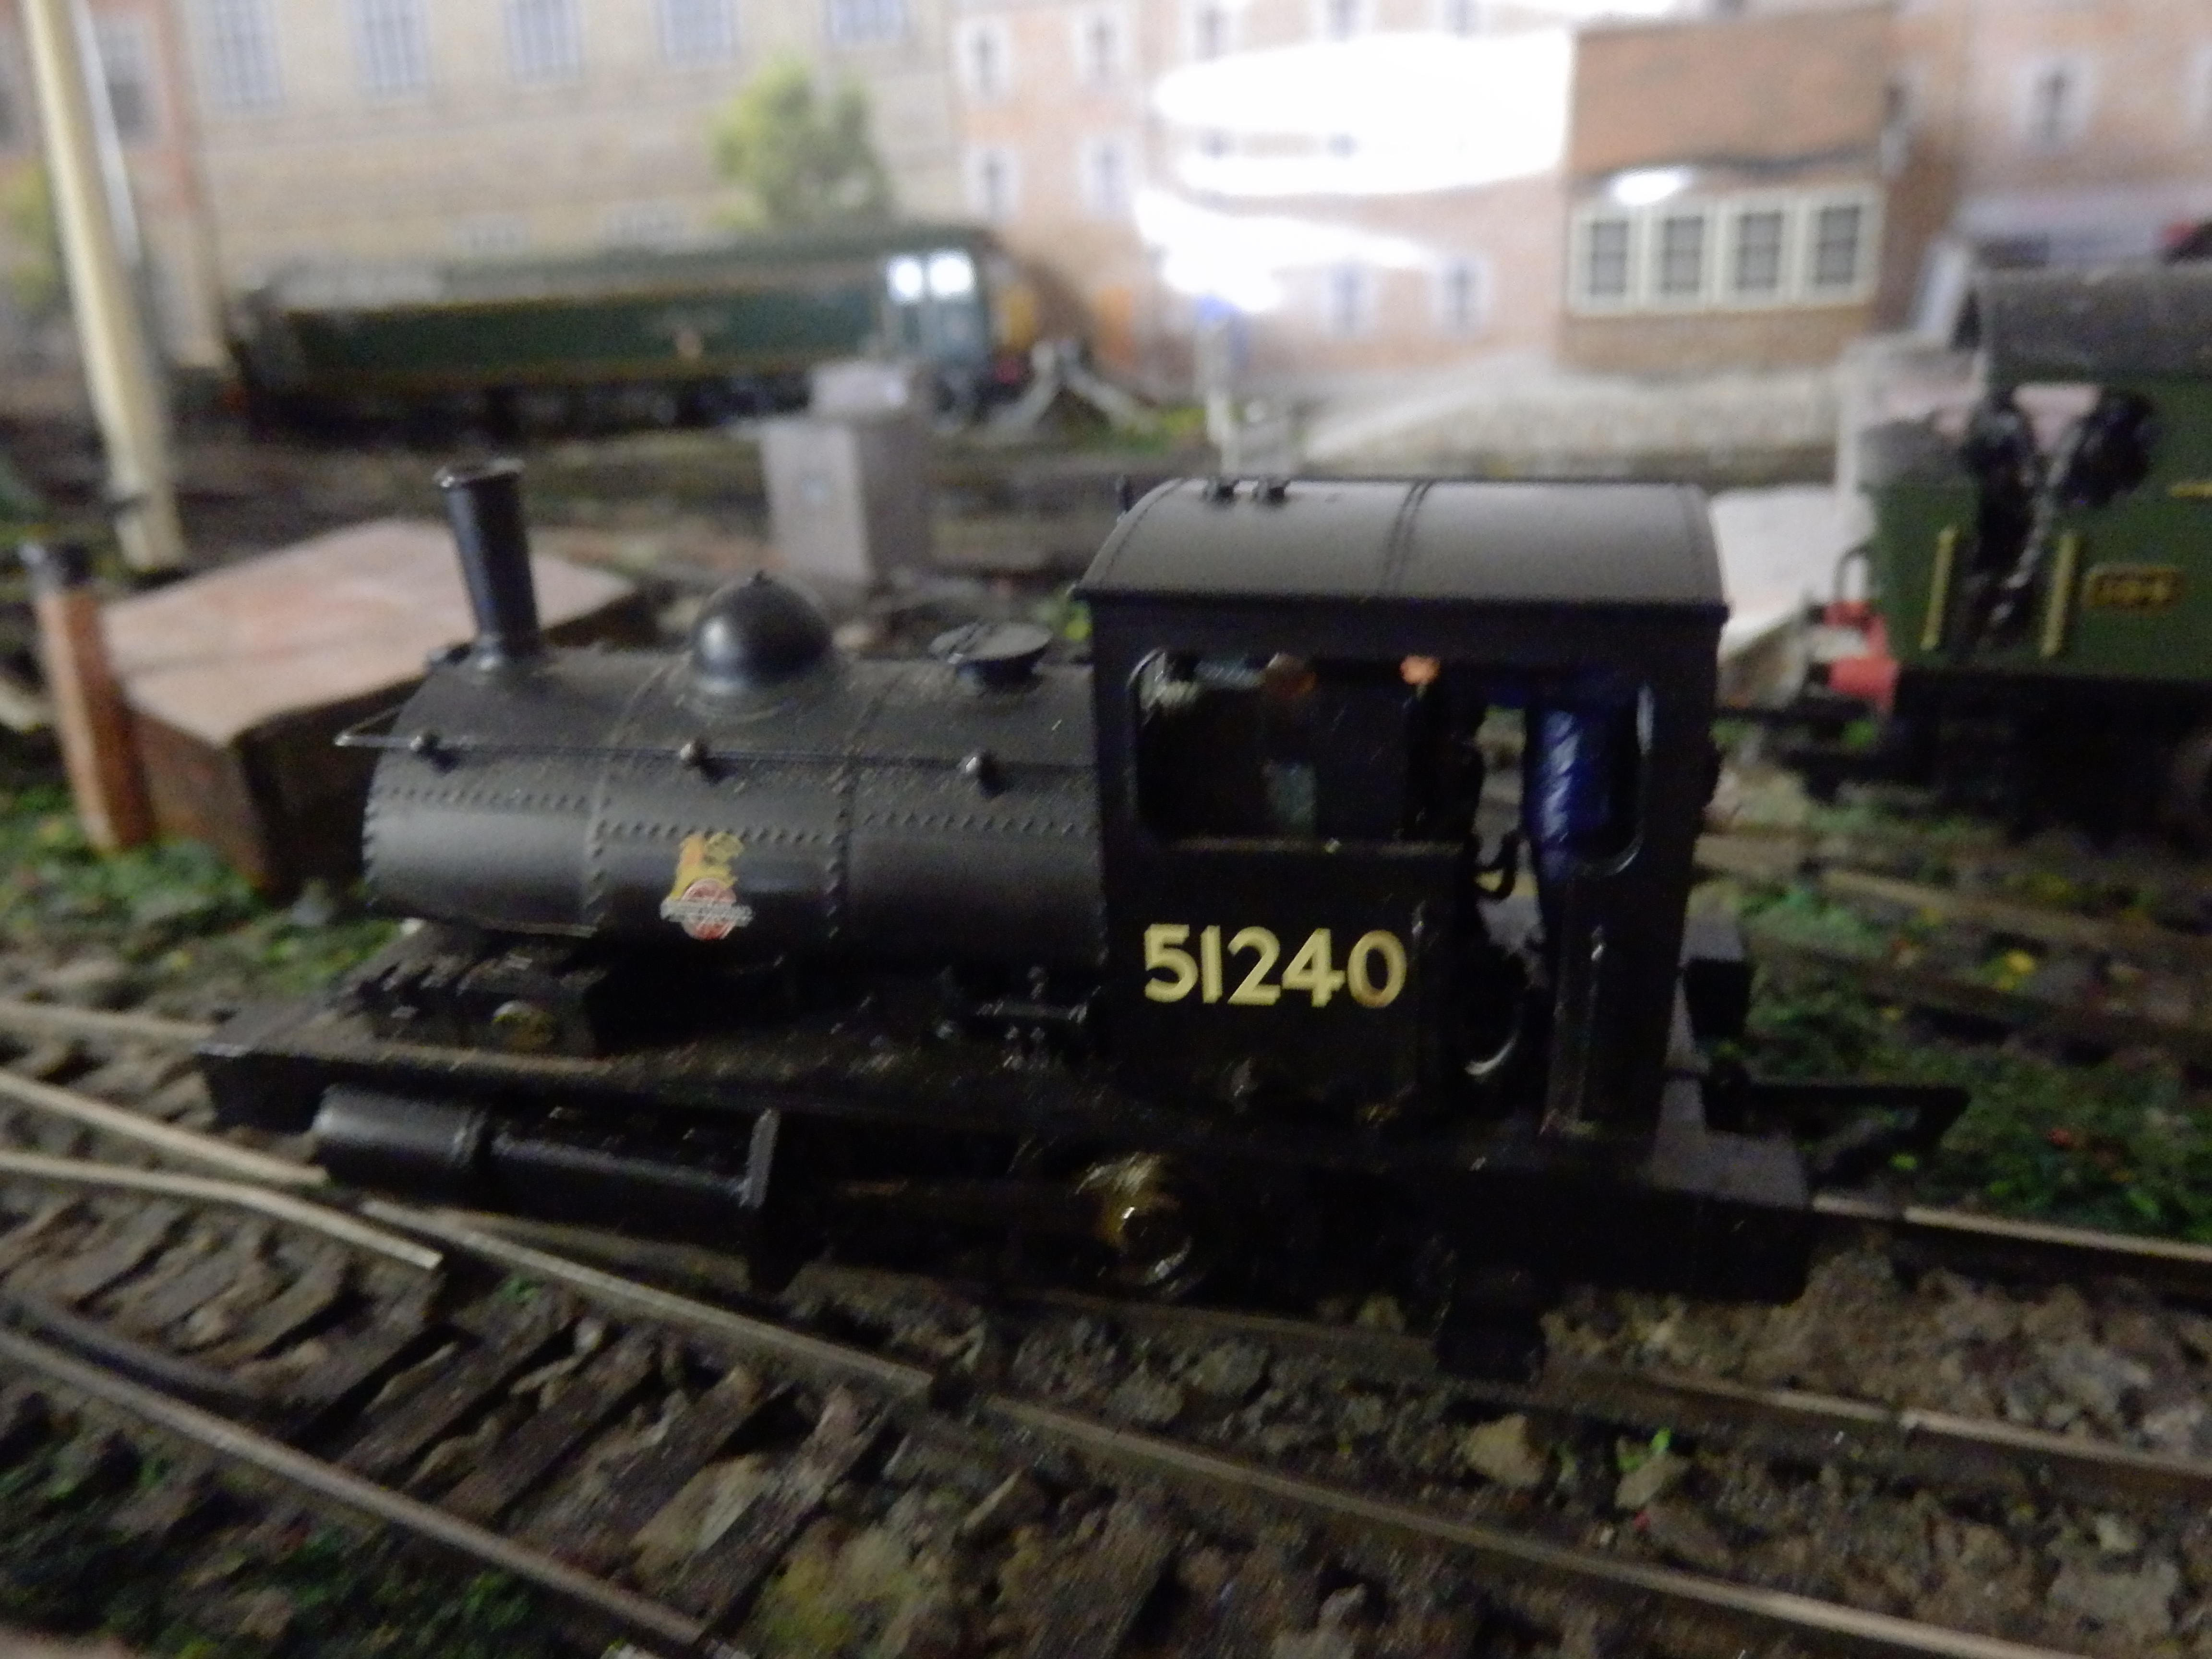
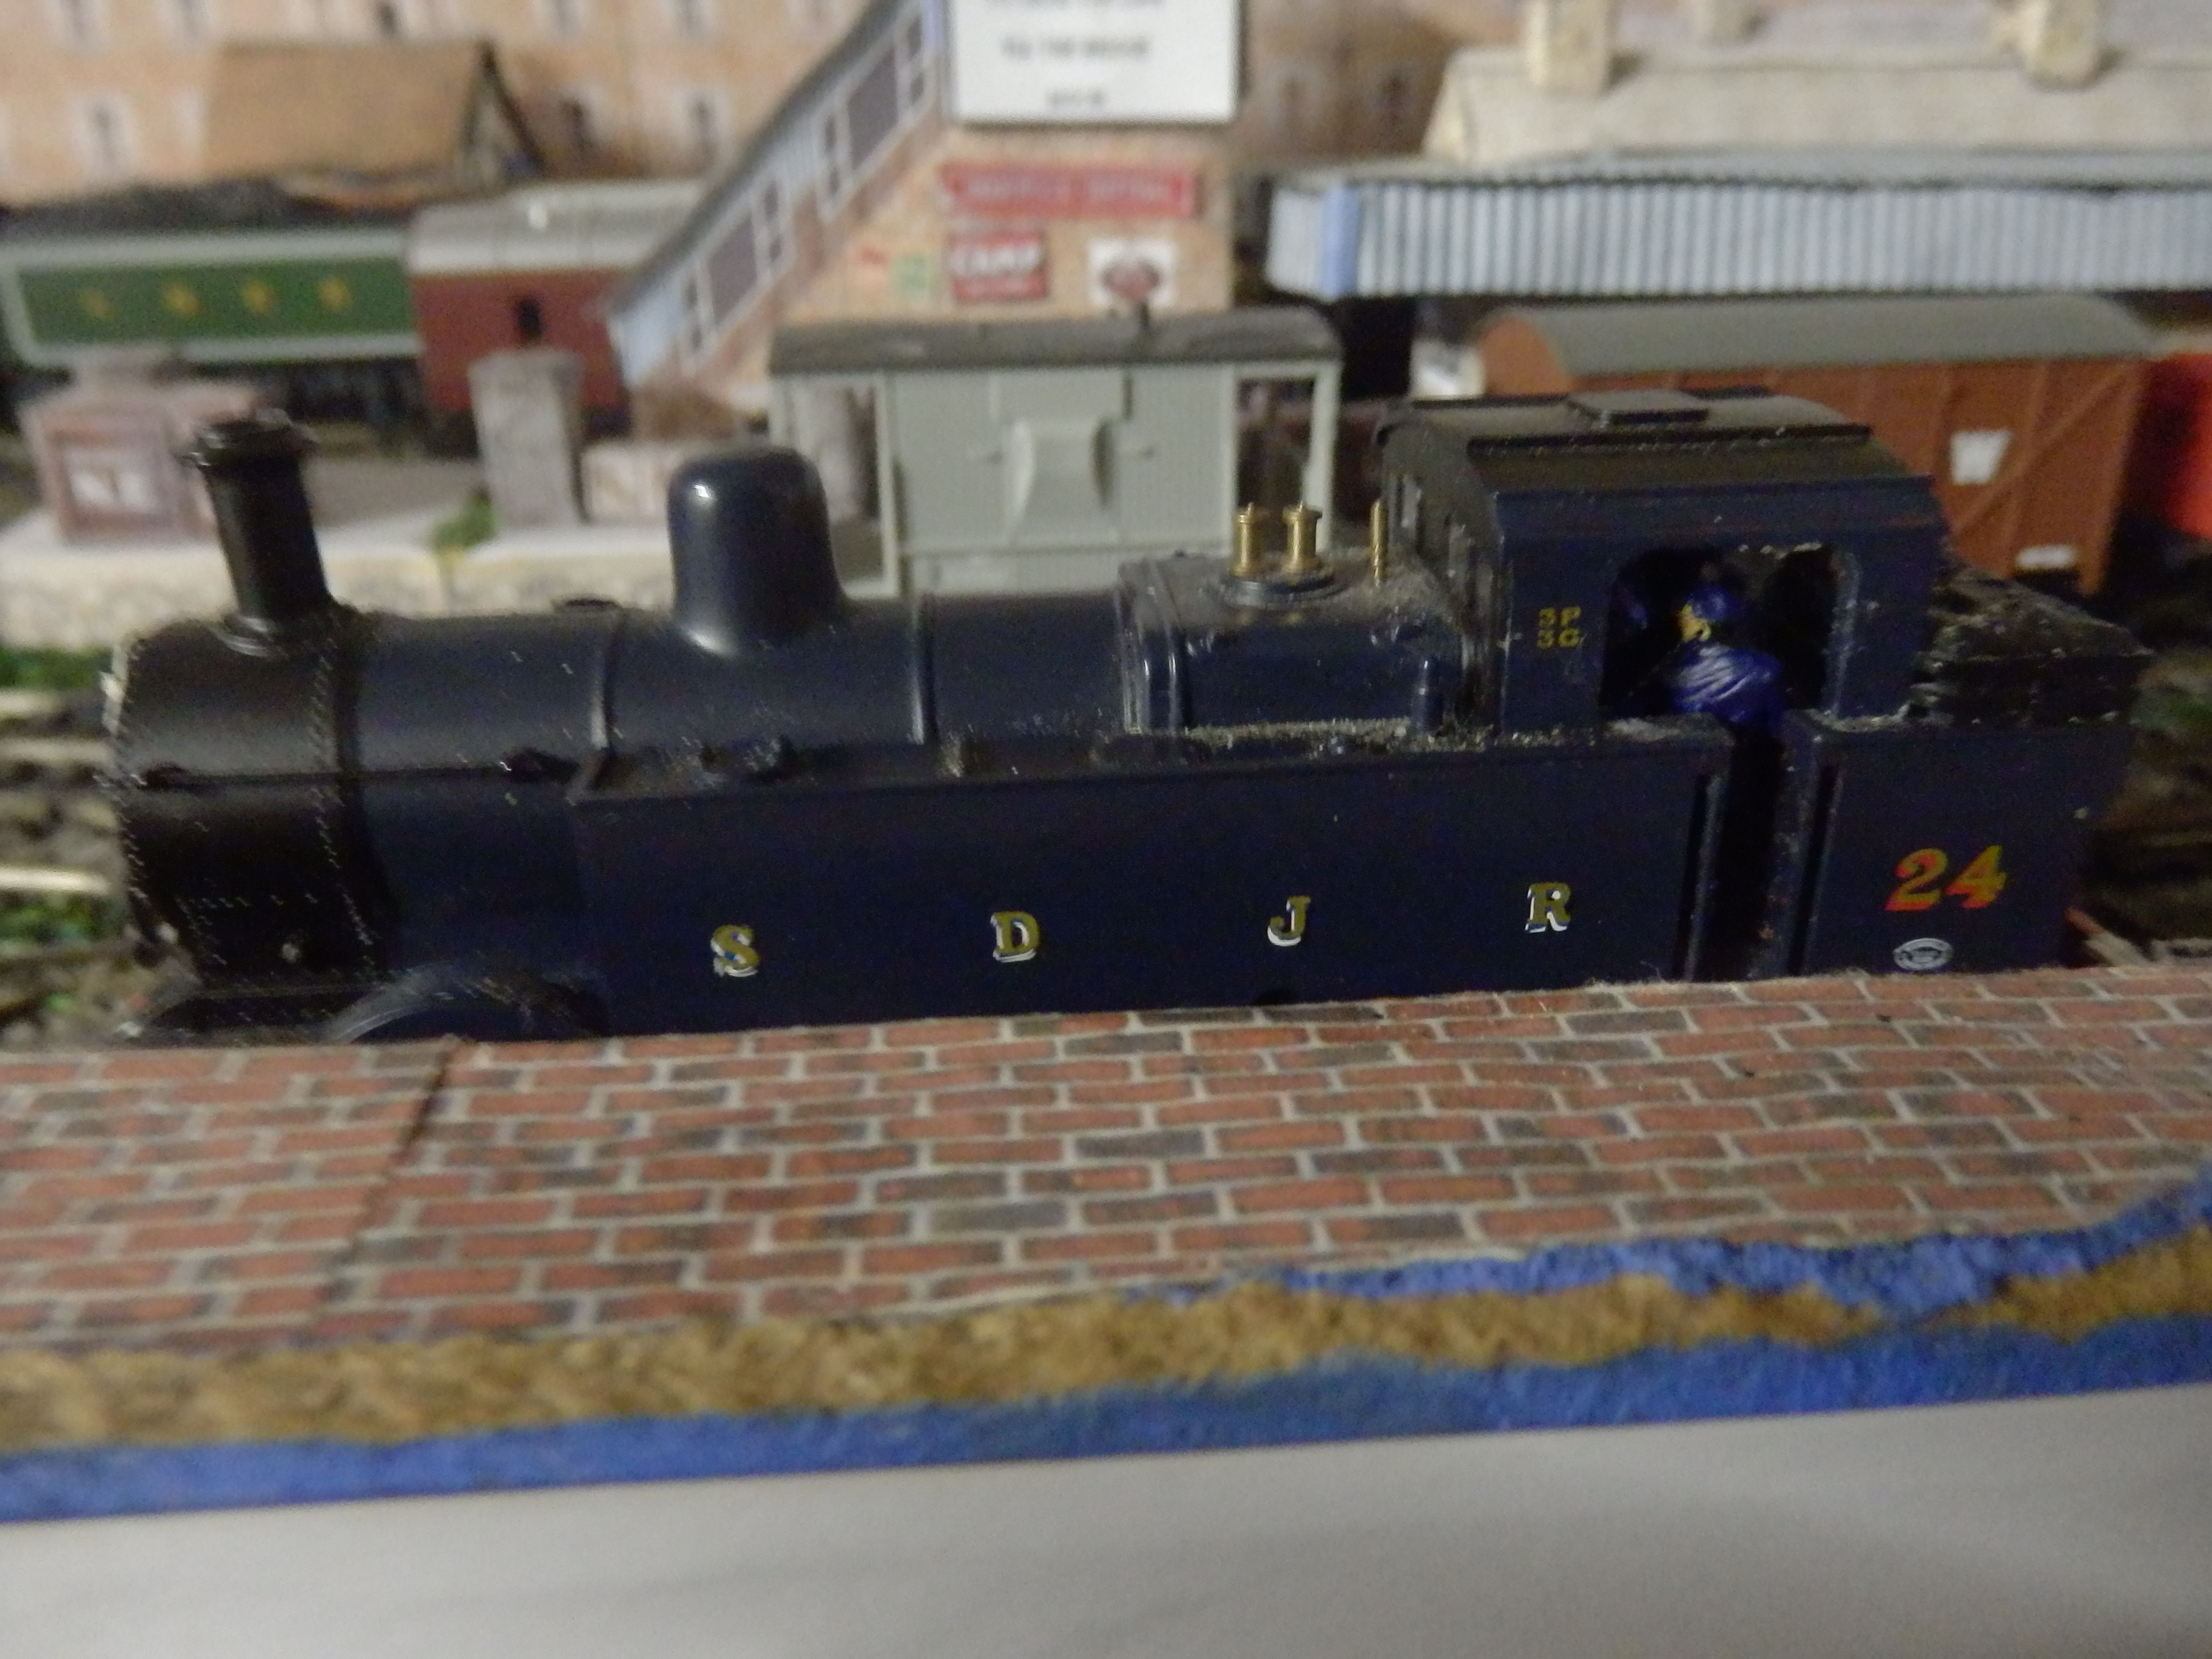
“These photos show hornby locomotives with crew figures in the cabs.
The 1st photo is the hornby pug, it has a crew of one.
The others are of a 101 clas tank, and a jinty.
The crew figures were supplied unpainted black.
I painted the figures using water colour paint. I used water colour because if you make a mistake it is easy to fix up the mistake.
Paul”
“Use thrown-away charcoal filter elements (like body shop respirators use) stripped open for REAL looking coal in coal hoppers.
It is light weight, and an exact match for coal. It is a might large for N scale. but looks great for HO and larger scales.
Gregg”
“Ground charcoal makes great scale coal…………keep breaking it till it’s the right size….then use the dust mixed with white sprit to age the rolling stock..
Dry cleaning hangers(plain) can be cut to make telegraph polls (solder cross bars) fence posts etc.
Eric”
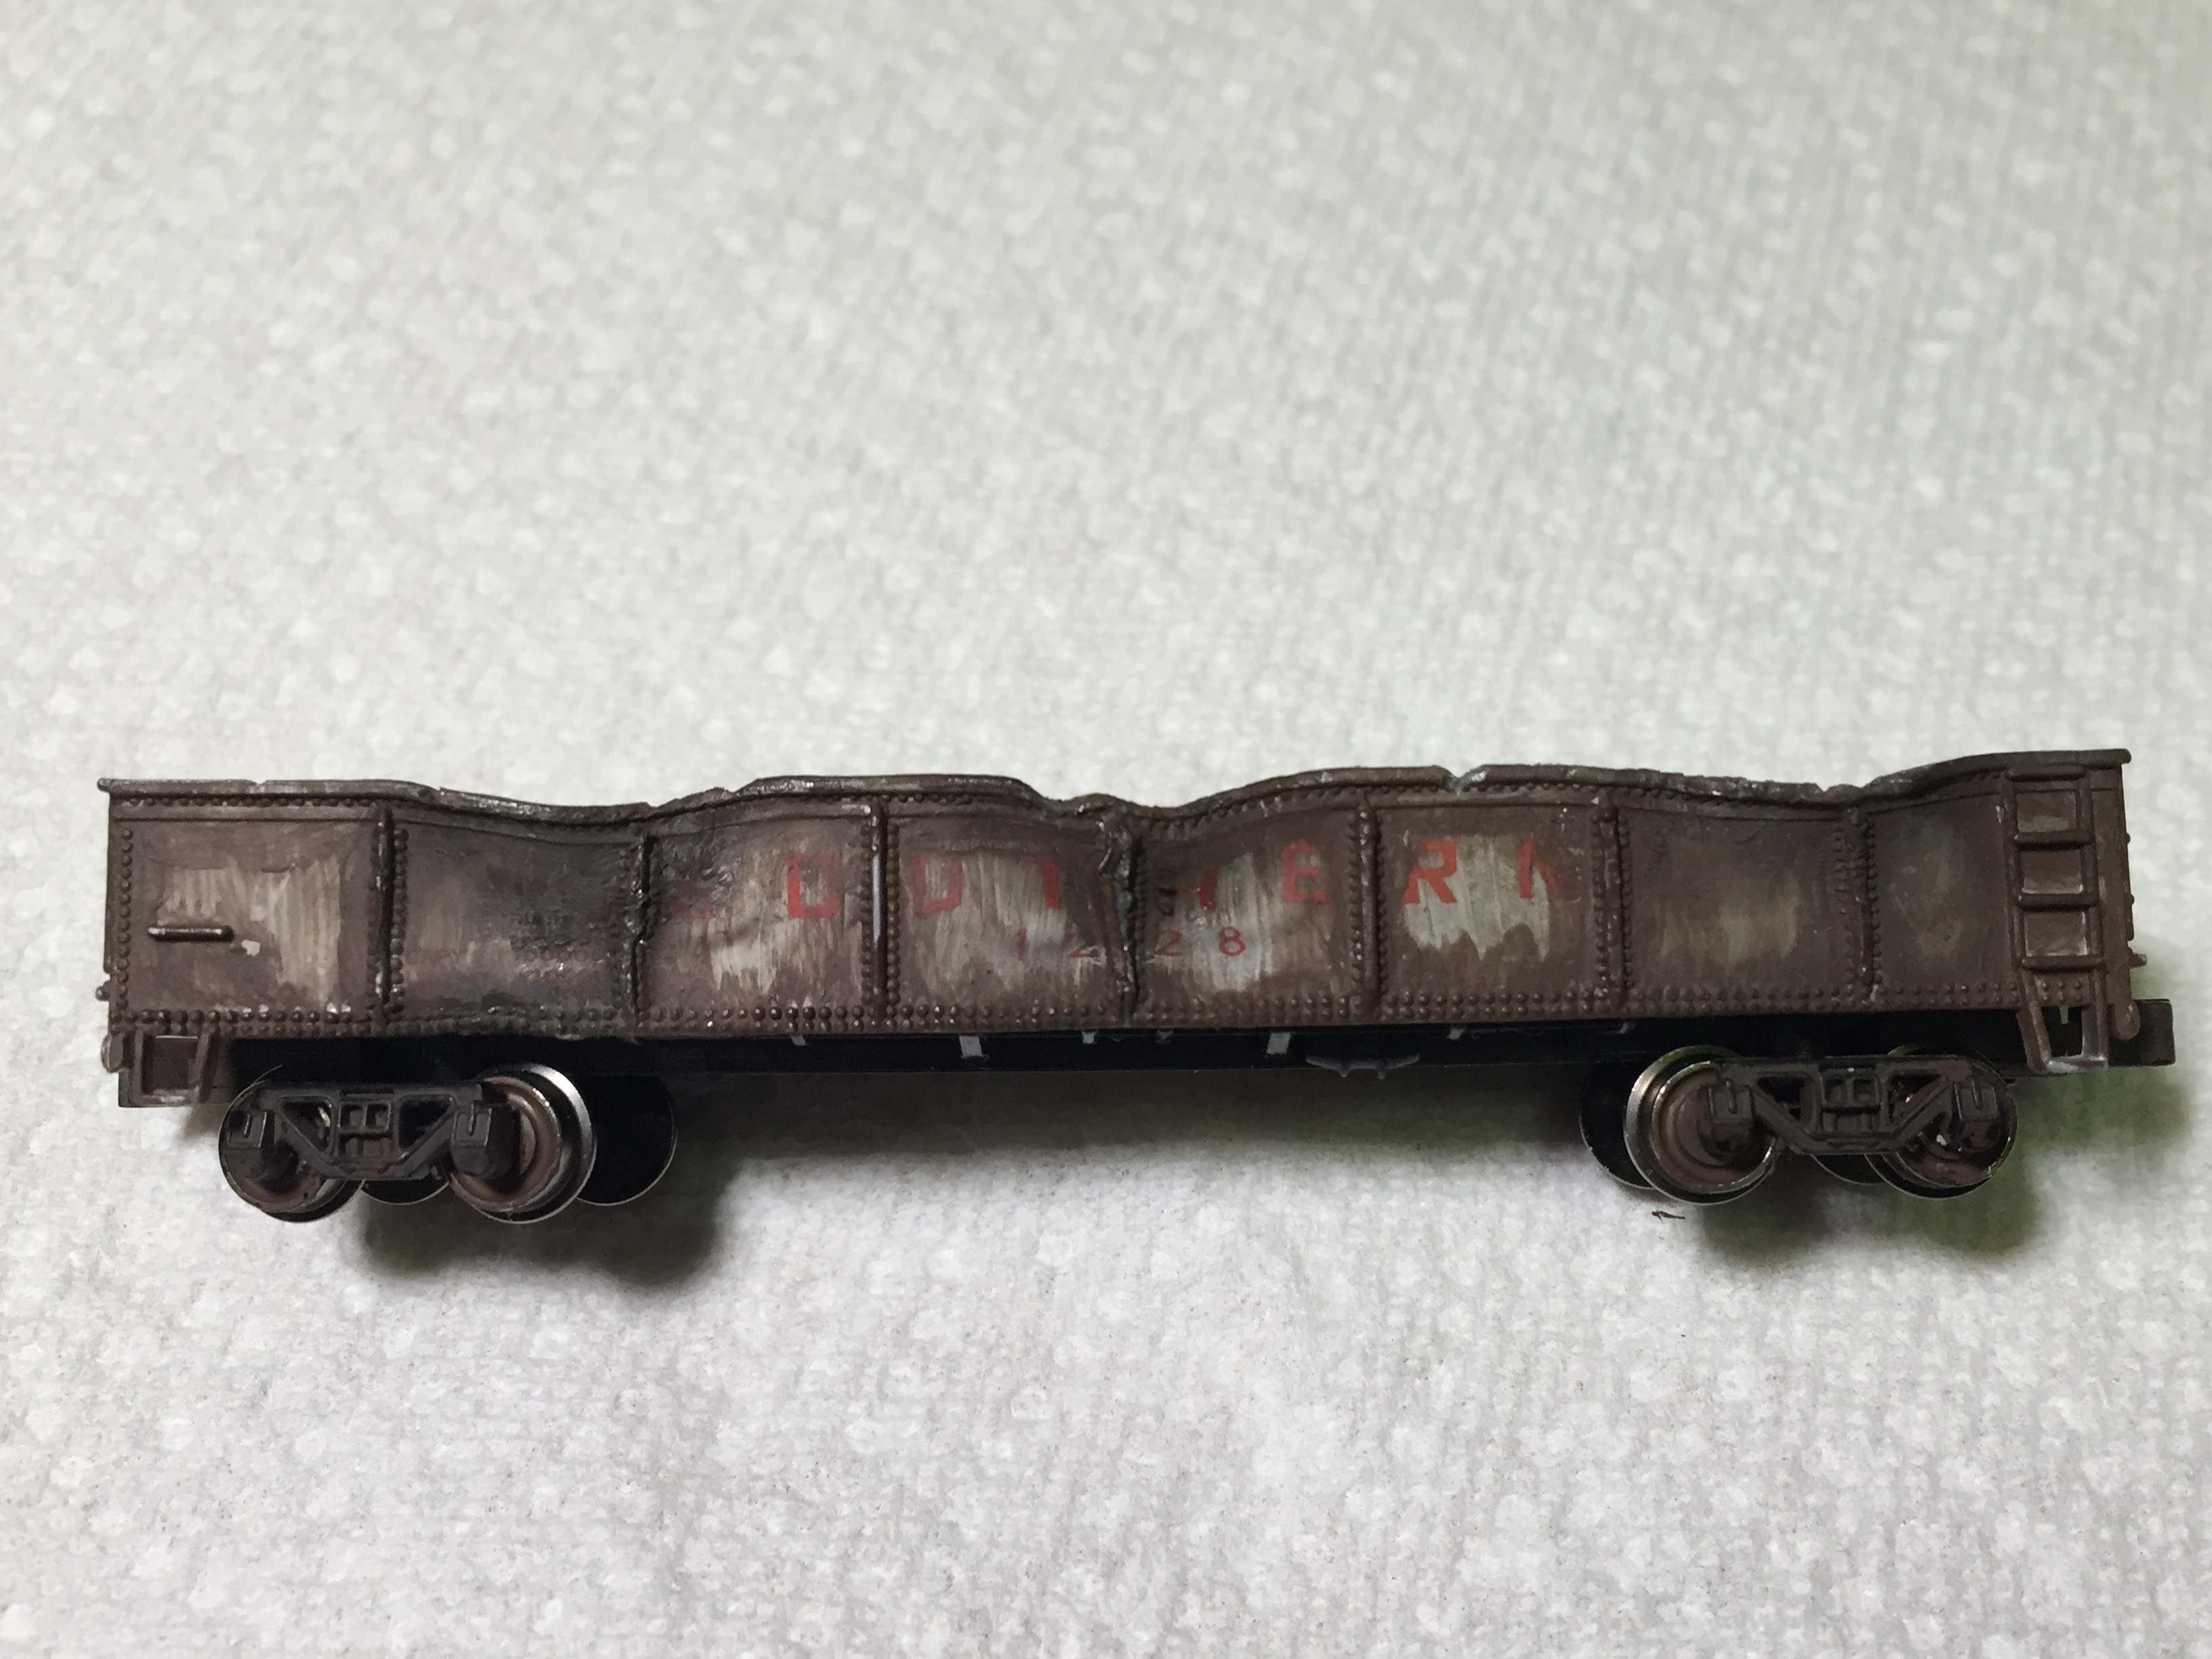
That’s all this time folks. Thanks to Robert, Mark and to ‘Roadrooster’ for his weathering gondola ‘how to’.
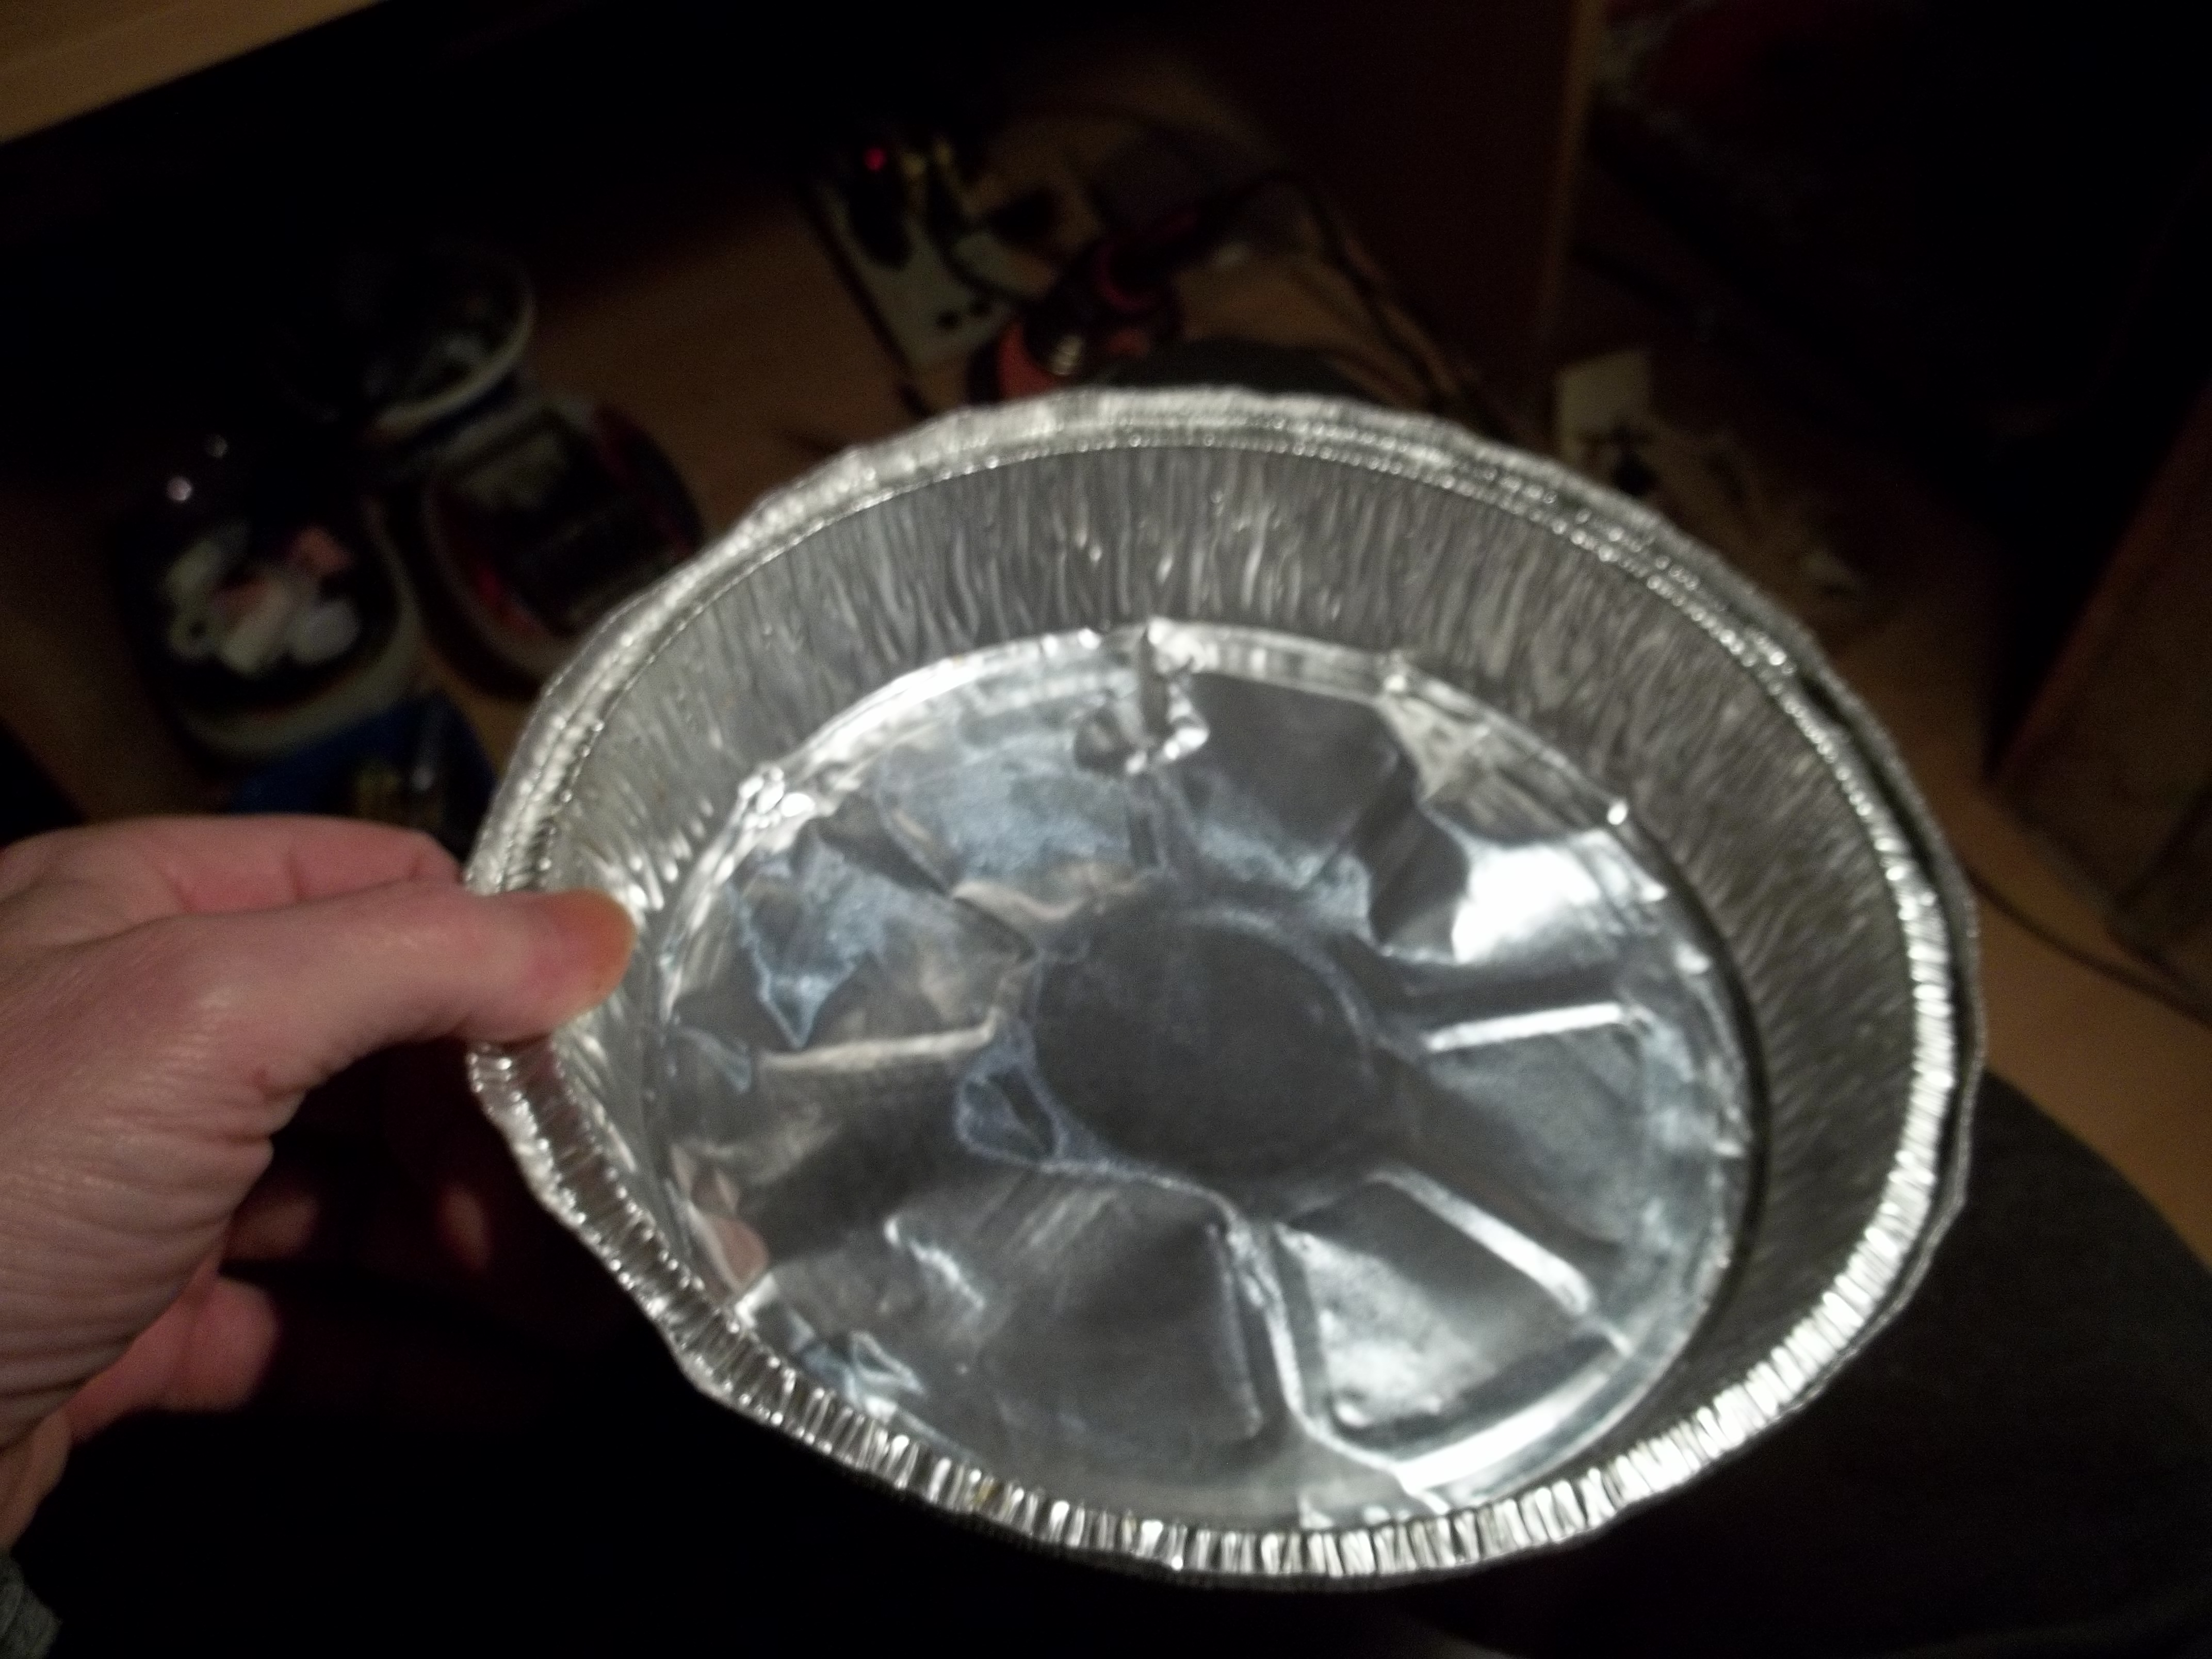
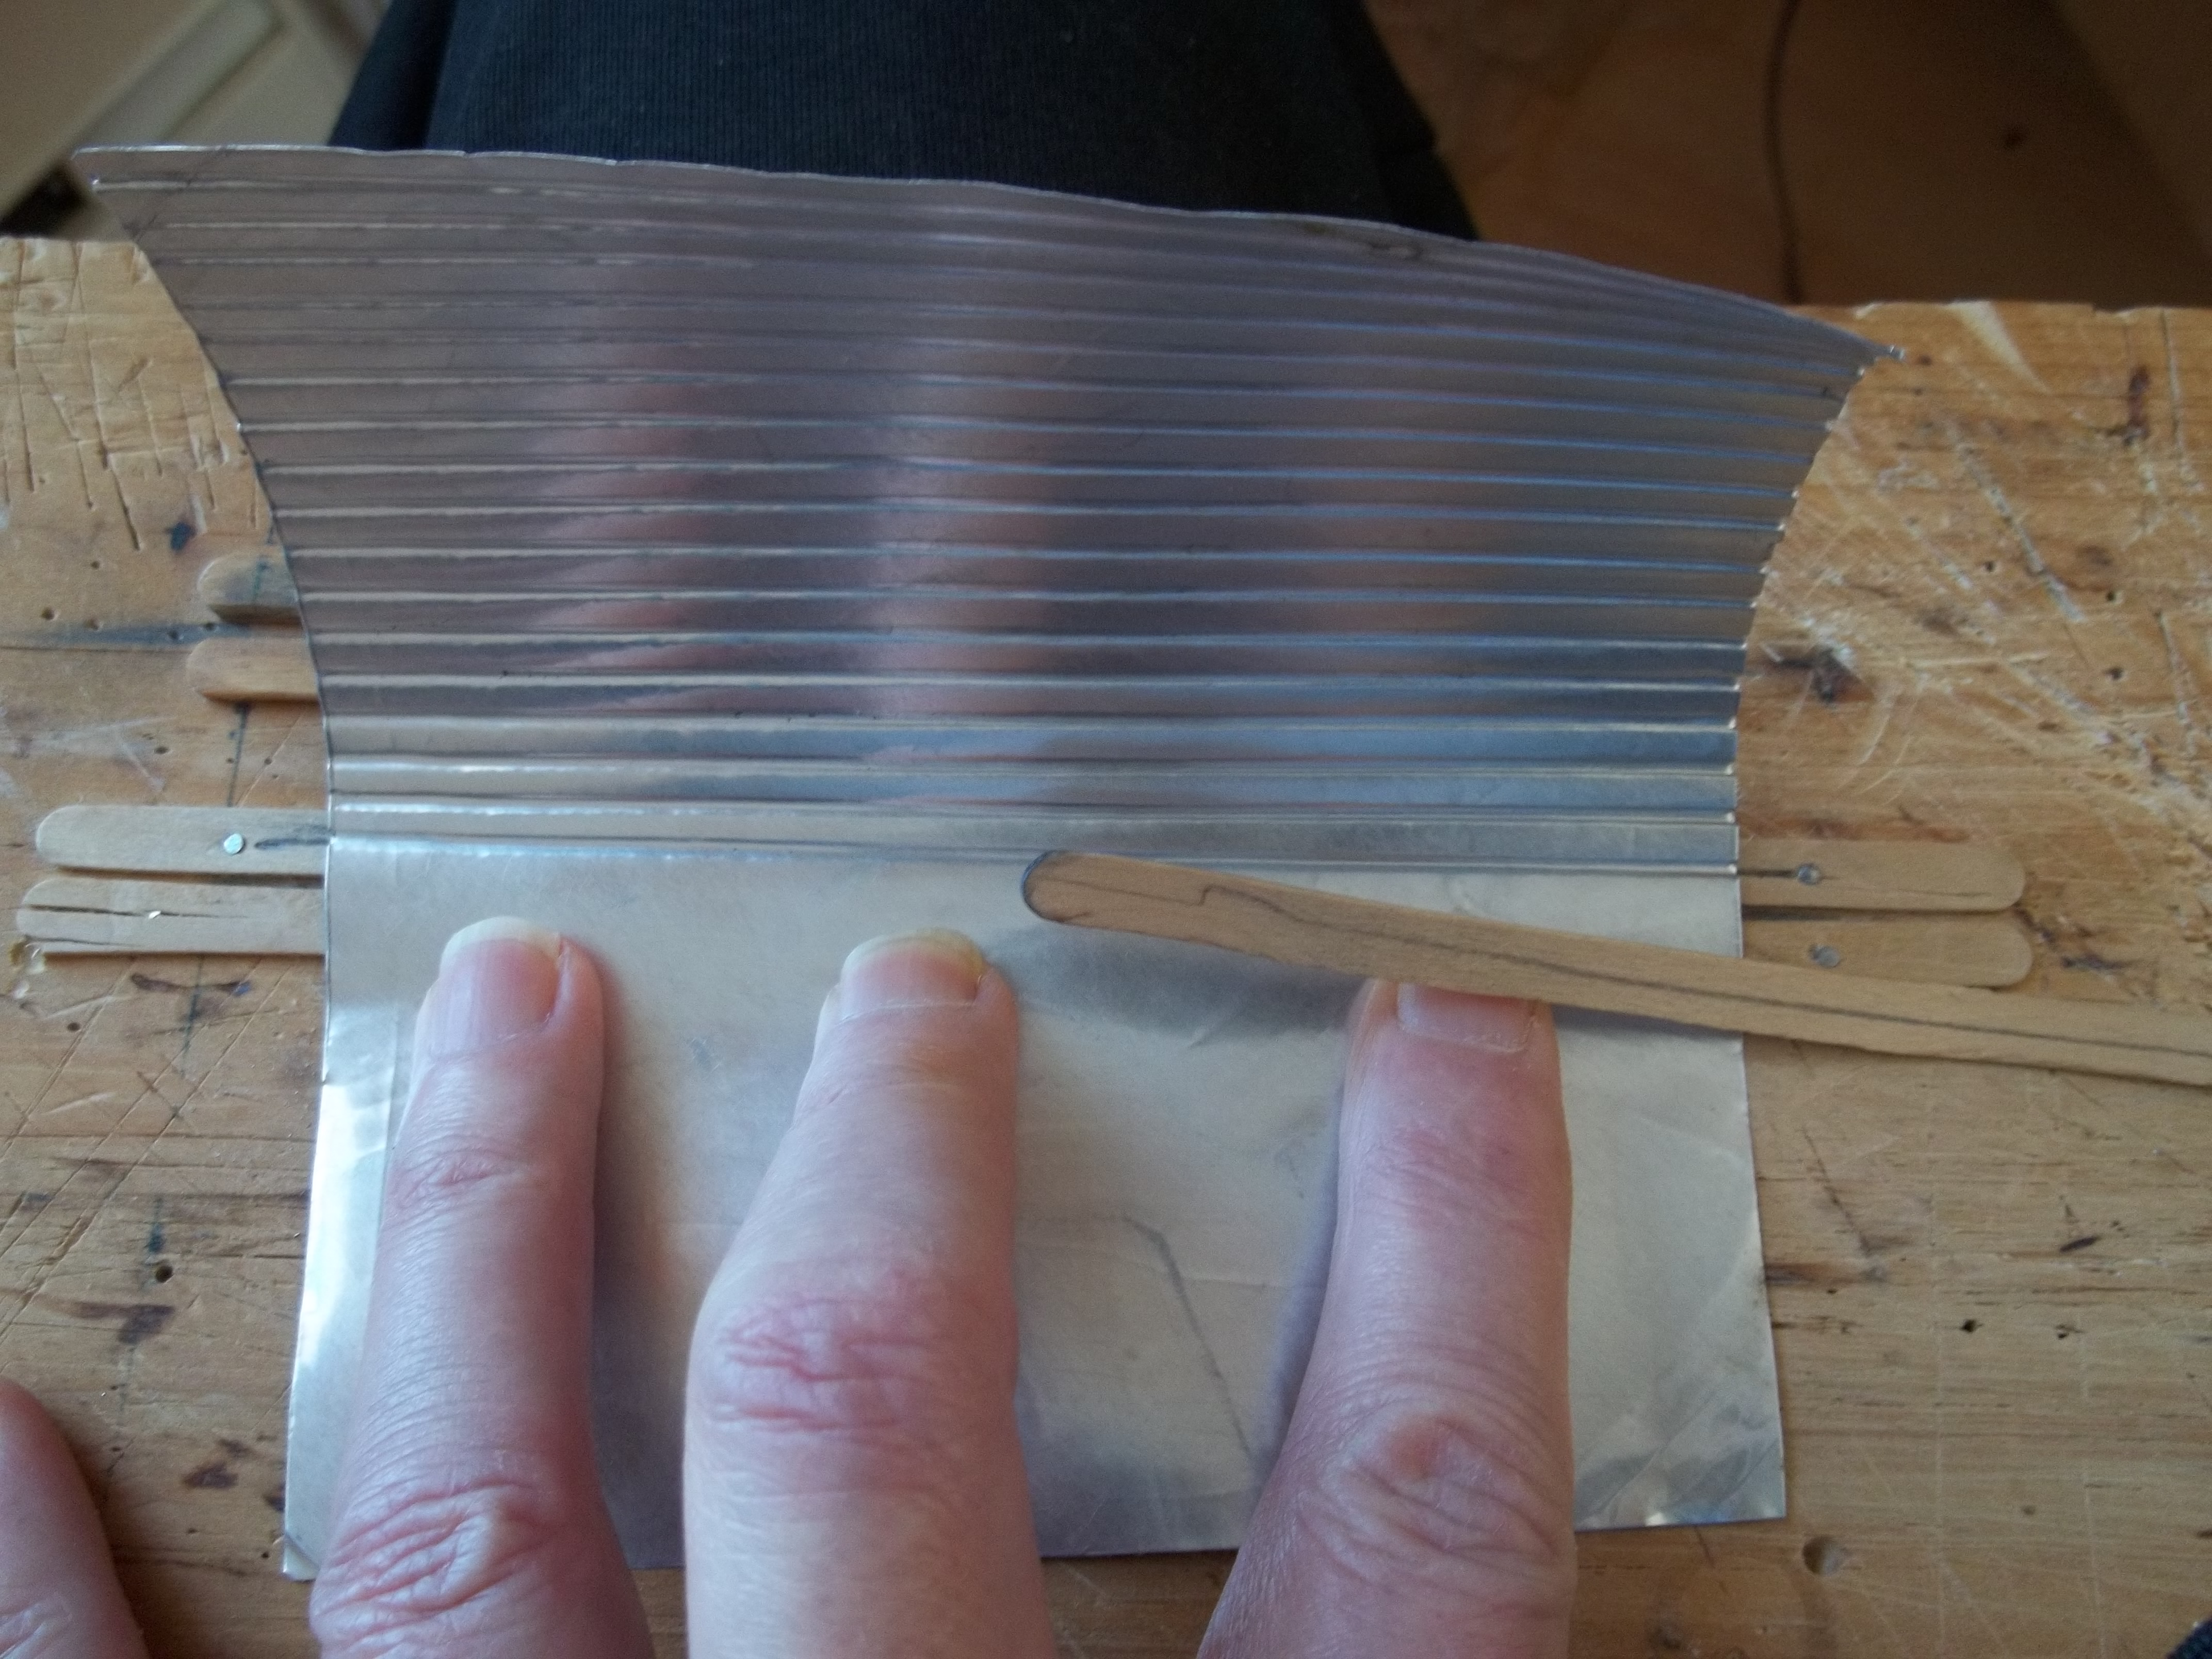
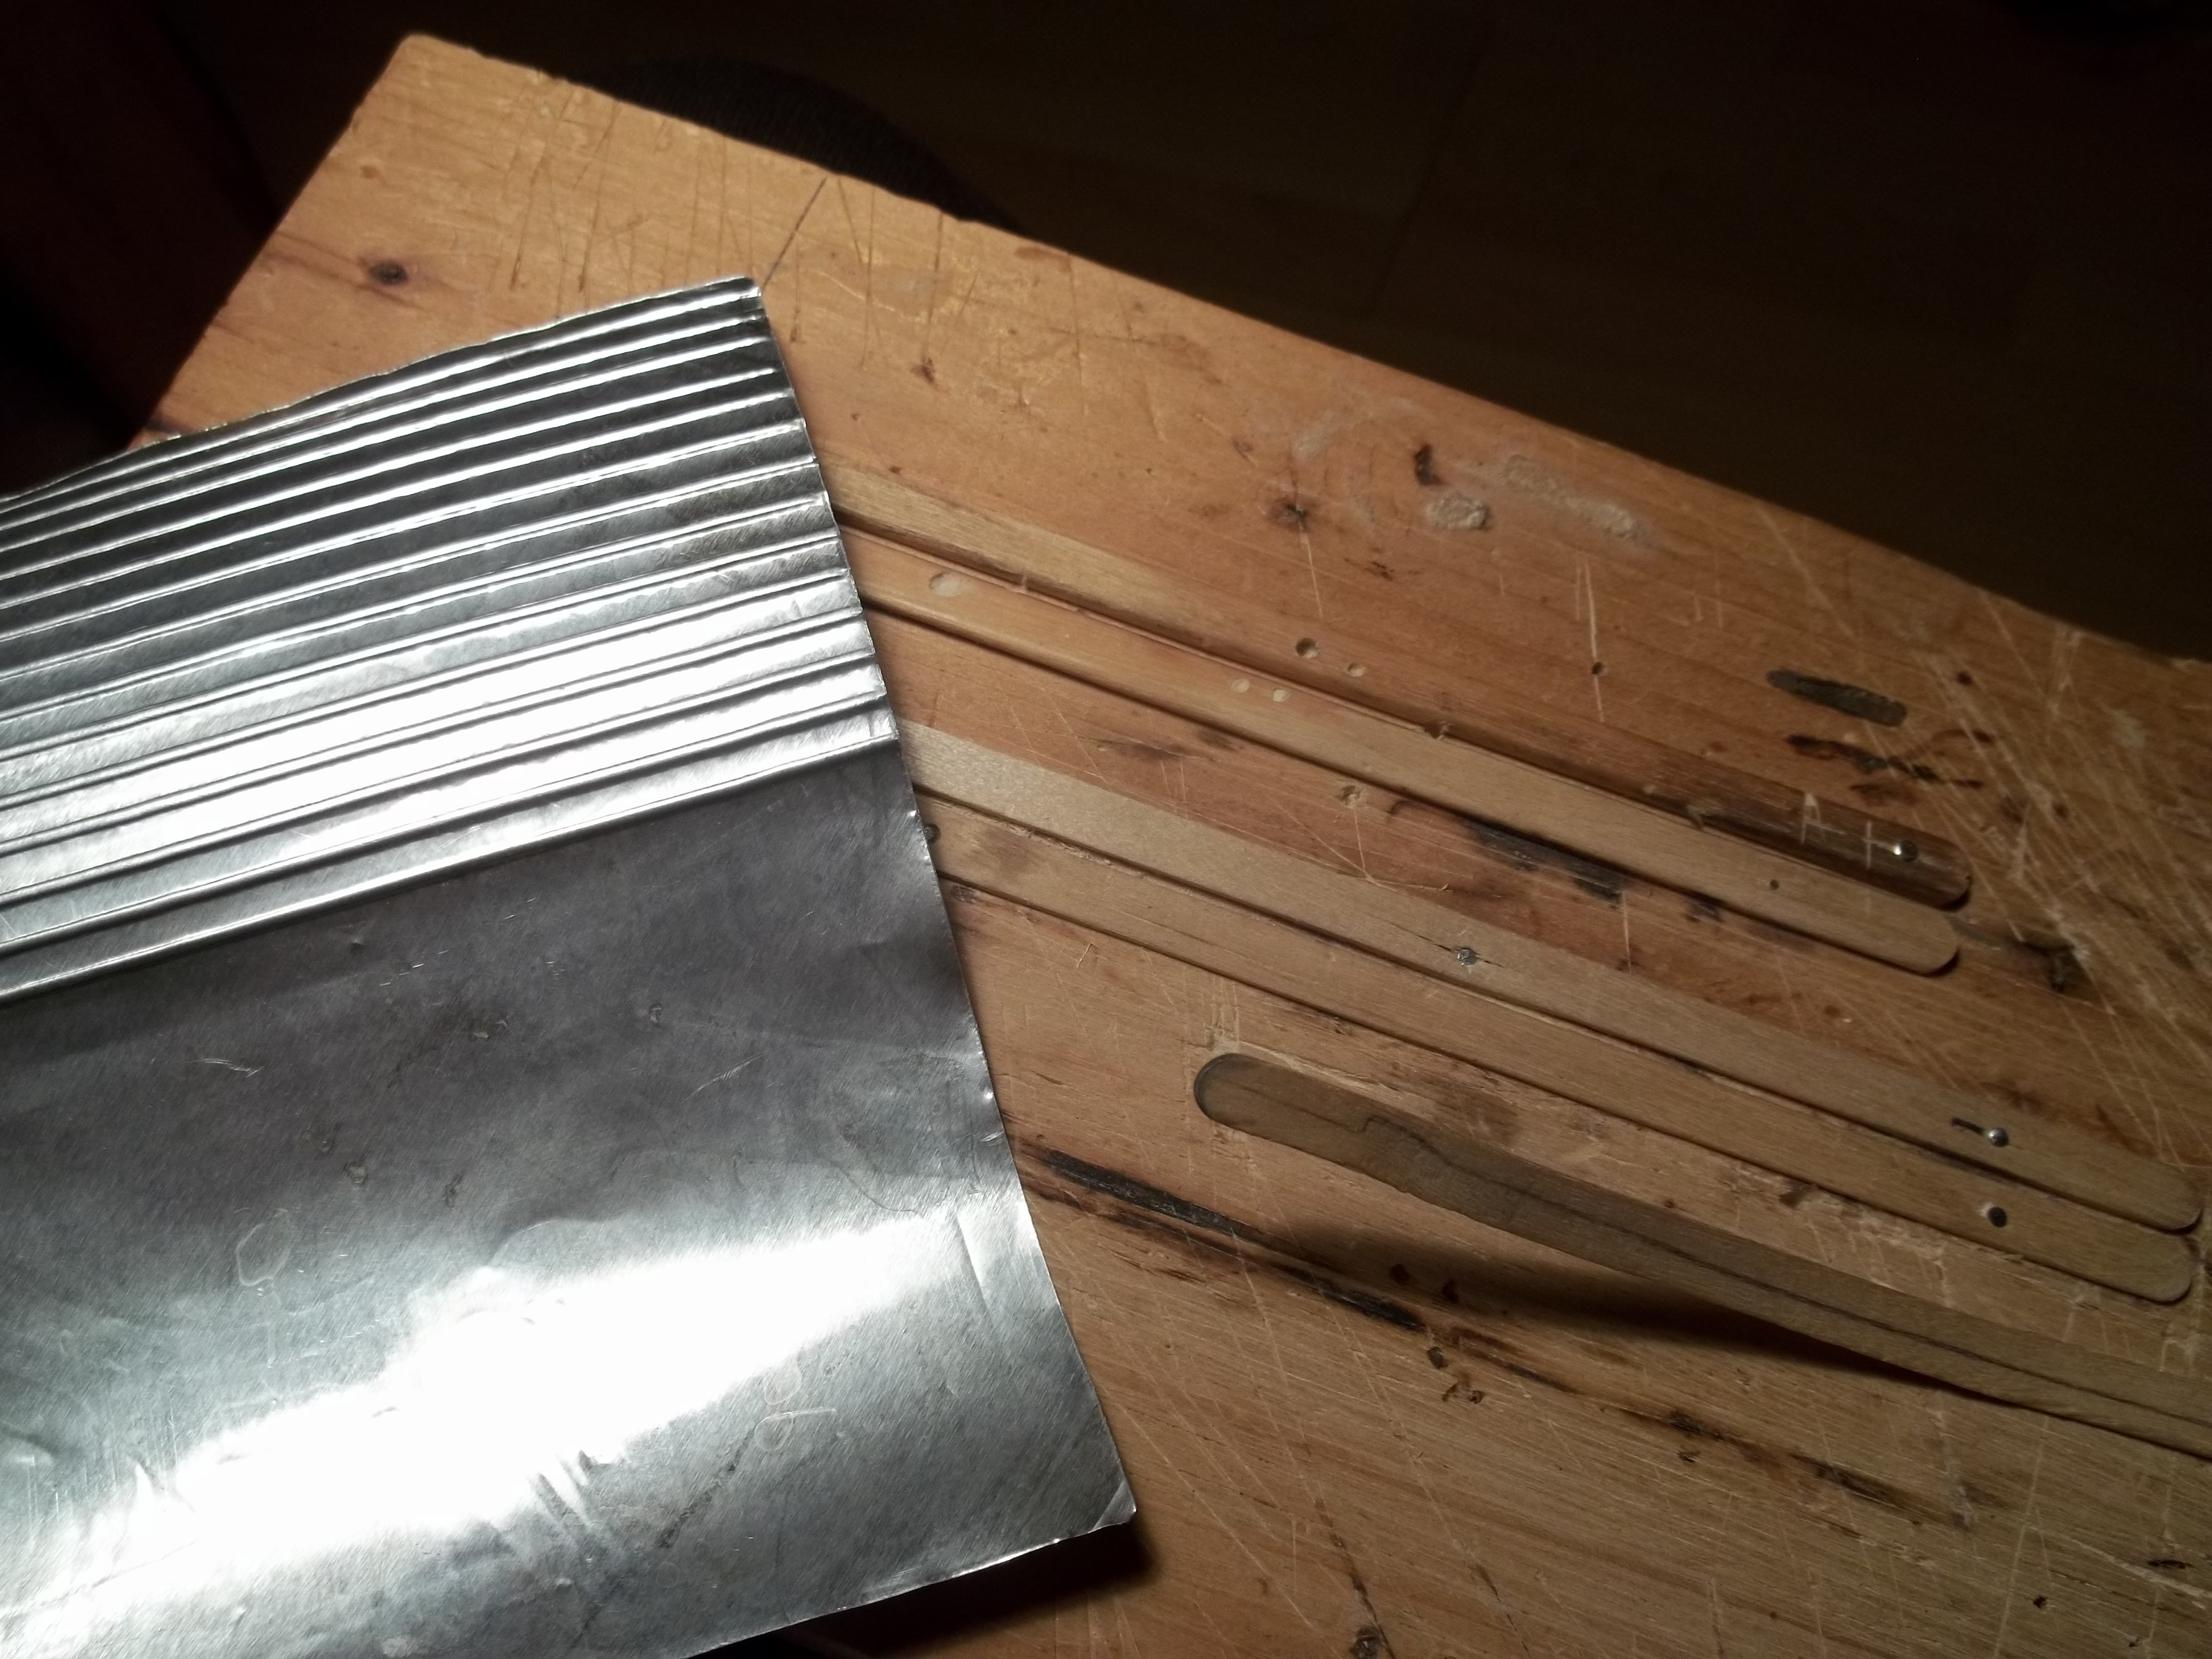
I took a piece of wood like you see. I then nailed down two lolly or popsicle stick’s to the board. Take another stick and slip it between the two your tacking down to keep it evenly spaced or gapped. I used large sewing pin’s with head’s as nails. then lightly sanded the top of the sticks to take any bur’s imperfections so it doent show up on the tin.
Draw a even line on one of the tacked down sticks as a guild line.Now take your tin, mine is from aluminum food container’s. First photo line your finger’s up against the tin. Take your stick and run it up and down a few time’s. Dont add a lot of pressure or you will rip through. Move the impression you just did, line it with the pencil line you did on the tacked down stick. Do another then another. After a few you will see the tin start to roll. That’s a pain. So after a few and without moving the tin. Pass your finger along gently over the impression’s and you will see the tin relax and go back down.
I have used the same sort of jig to make green houses,picnic tables, you name it if it is wood. Need window frame’s. Cut a stick up the middle in two. slip one into that lolly stick gap.Take a small wood block and wrap sand paper around it and sand way. Go’s very fast.
Kim”
“I am John McHugh, a lawyer in New York City and a resident of New Jersey.
I have been building train displays for about 55 years, in the last 40, several a year until a few years ago and now it is just one. My more recent effort have been in O and Standard gauge. While these are toy trains, largely, I do like to see them climbing hills through realistic scenery. I build fast as the halls these displays are in are available for only a few weeks before a show.
I use the scrap wool left over from cutting the road bed along with cheap furring strips, to build a frame, some several feet tall. The remains of curve cuts are particularly useful to give your hills or mountains some shape. They can be the entire strut or they can be attached to struts to add the shape you want. The same applies to other scraps.
Once the frame is done, with due attention to points which must bear weight, I then staple or screw on black aluminum window screen pulling it taught to minimizing sagging. This material is not that cheap but it is easily cut with a utility knife or a scissor and if pulled tight across the frame it needs less support than other materials, such as cardboard strips.
However, in smaller scales, such as N, cardboard and masking tape can do most of the entire job. Window screen is for O and Standard work generally where the size of the hill or cliff is significant. The cut edges of the window screen prick, so if possible fold them over as you staple to put that rough edge facing away from areas you expect to touch.
Once satisfied that the frame and screening is ok, I mix patching plaster in a large paint bucket. Now this is not plaster of Paris, this is patching plaster. Plaster of Paris sets much too fast to use for scenery. Lately I have only found it as a DAP product called Plaster Wall Patch. I understand that Sheet Rock still has it as patching plaster but I have not been able to find that product. It is hard to find but paint stores can order it. Plaster Wall Patch comes in 20 lb bags.
First put on latex gloves, this stuff will wreck your hands for a week or more. Put about a quart of water in the bucket and then add plaster slowly mixing with a stick until it is the consistency of latex paint. I then take good quality paper towels, ones with some fiber in them so that they do not shred when wet. Dip the towels in the plaster, get both sides. Place over the wire. With a large cheap wet paint brush smooth the plaster gently to cover up the seems, the sheets should overlap for full coverage, you do not want holes. You need not get it perfect yet. Always work the brush form the center of a sheet of towel toward the edges to avoid rolling it up with the brush. Keep the brush in a bucket of clean, to start, water.
For steep cliffs or overhangs you need to paint some plaster directly onto the screen, it should stick as long as the plaster has some viscosity. Press dry paper towel onto the screen without any plaster on the towel. Once the plaster holding the towel to the wire sets, paint the towels with several coats of plaster one at a time twenty minutes apart at least, starting with the latex paint consistency and getting heavier each round. Remember, too thick and it will fall off.
Plaster does not dry, it sets, a chemical reaction, thus, it does not wash off once set. Patching plaster takes about 40 minutes to set on a first coat. This first coat gives you an egg shell coating of the frame against which you can work gently. You need to add another coat or so this by again mixing the plaster but this time a bit thicker but not so thick that you can not continue to use a brush to apply it. Paint on one or two more coats. These coats will set in about ten minutes or less. As you put on the last coat, work behind yourself with a putty knife or any similar implement to carve the rock shapes, stroke in one direction and attempt to keep the rock shapes parallel, then do occasional strokes at right angles to produce cracks in the rock face. It is a good idea to study rocks in the field and try to copy what you see.
Where you are going to plant trees, make the plaster thick enough to give the tree trunk some support.
When you have gone over and have a hard and strong enough shell, mix plaster much thicker and apply that for major rock formations. It is also good for filling holes and fixing places were you need to bang the plaster in to clear your trains. I also use wallboard compound for patches. But the best material for roads is wallboard compound. Apply it, shape it and when it drys, (it drys in about 24 hours and unlike plaster, and it washes off) sand it to shape. Unlike plaster it does not absorb pigment so it must be painted. You can work this material, carving rocks, after it has hardened, but it makes a mess.
After each pot of plaster clean the pot and all your tools completely as if you leave any set plaster in your pot or on a tool it will cause the next batch to start setting quickly in the pot and once this stuff sets on a tool you will find it very difficult to get it off. For the same reason cover your track with masking tape or something else to make sure you do not get plaster on it or anything else. If you do, wash it off immediately.
Coloring plaster is slightly different. I try not to use paint, I use tints in water or water paint. On a small lay out, the contents of a child’s water coloring set may do alot of the work as to rock formations. Semi fresh plaster sucks in water. Thus, if you put pigment in water, it is absorbed by the surface of the plaster. Pigments can be purchased at paint stores, they are in tubes of tint. I use lamp black for grey, just do not use much of it on white plaster, you can mix it with other colors to get dark red of sand stone. Again study rocks for the proper color, and they come in almost all colors.
Try your technique on scrap plaster until you are satisfied. Remember that water runs, so start at the bottom and work up to limit the destructive effect of a run and control them as you see them. A paper towel works as does just brushing a run back up or just spreading it around so it no longer looks like a run. The same applies to earth colors, they also vary. Just do not flood your brush and all should work. If you intend to use a ground cover, you can kill many birds by mixing glue with your earth colored water, paint it on the surface and then sprinkle on your ground foam.
I do not use a drill to make holes in plaster for trees, I take the top off a nail and use that, point down, in my drill. I use a good glue to hold the tree trunk in place, but if the plaster is thick enough the tree should stand in the hole without help. But the best glue you can get is plaster. When you are ready to plant, mix up a very small amount and dip the tree trunk in it just enough then stick it in the hole. It will set as part of the plaster of your hill and will not move. Do not use trees made of wood (sticks) where you must reach over the scene as they will break. In such locations trees made of twisted wire work better as they bend and bend back. Remember, however, you have about a half hour to work before the plaster will be setting. So make just enough.
Finally, do not wash any large amount of plaster out of anything in your sink. Scrape it out into the garbage. You do not want this stuff setting in your pipes. After a few hours of washing out pots and brushes, pour a quart of white vinegar down your drain, it will soften plaster which has not yet completely set. White vinegar is relatively cheap and comes in gallon jugs.
I did not develop any of these techniques, but just picked this stuff up over the years and I do not know from who or when.
As a boy I used paper and flower to make my first mountain. Don’t unless you live in a desert. It grew mold as it was in a northeastern basement. You can use fungicide in the mix, but then there is a problem if there are children around.
John”
Thanks to John for taking the time to share his techniques. I’ve lost count on the number of tutorials on rocks – but that’s what makes this site, there’s always more than one way to do anything in this hobby.