Jim’s been back in touch. He’s been busy weathering HO freight cars, and they look spot on:
“Greetings, Alastair. Hope all is well with you and yours.
It’s been some time since I’ve posted anything any where. I have been busy adding a few things to my layout and weathering several rail cars.
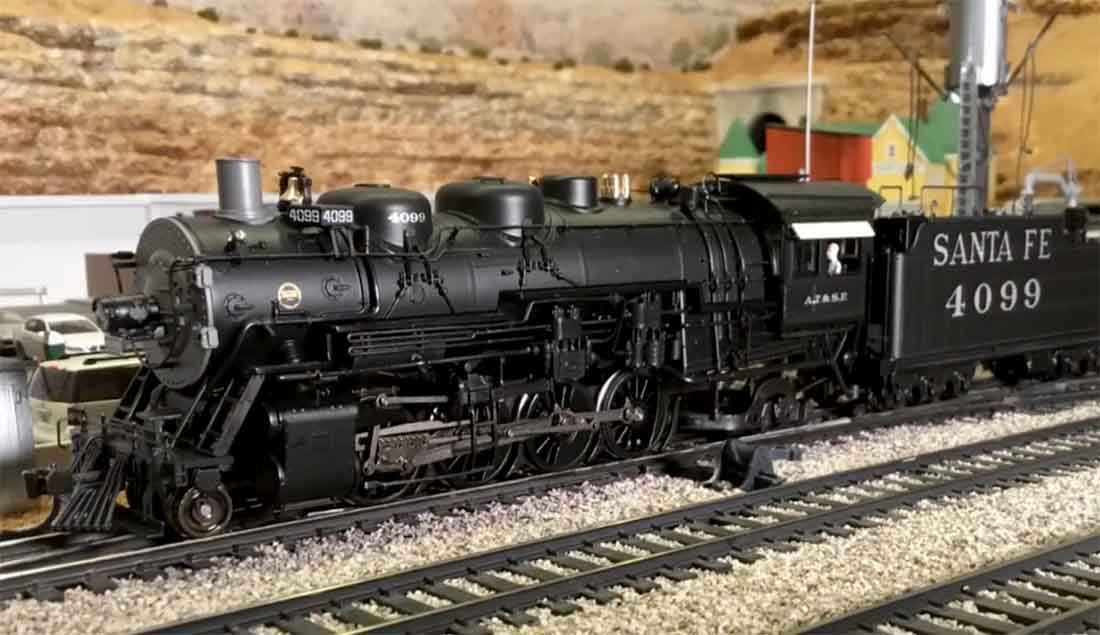
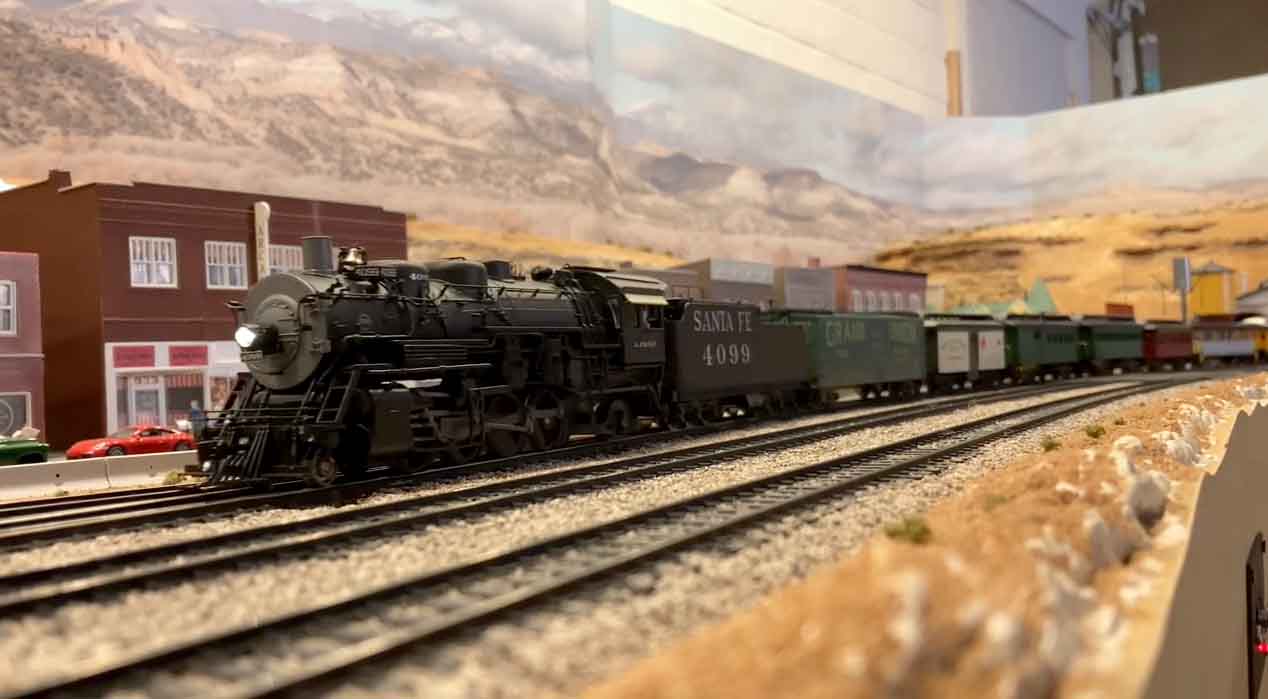
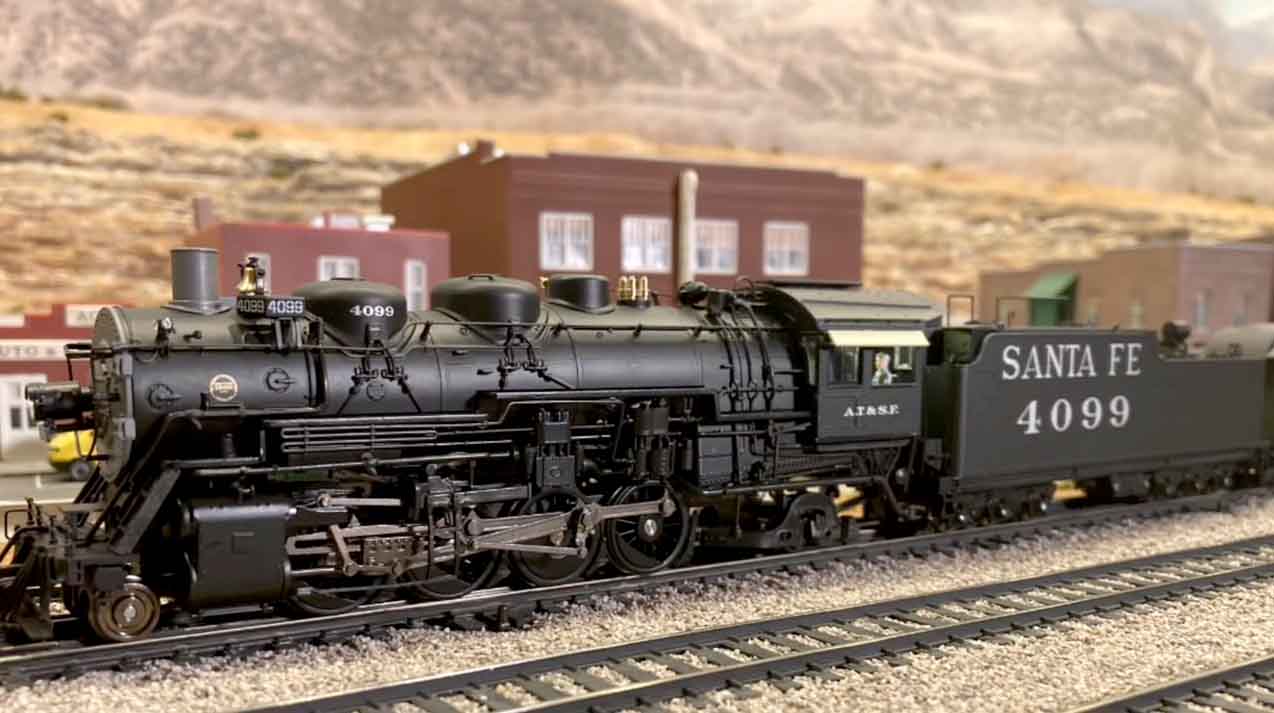
However, I recently purchased a new Broadway Limited 2-8-2 ATSF steam locomotive with oil tender, sound and smoke.
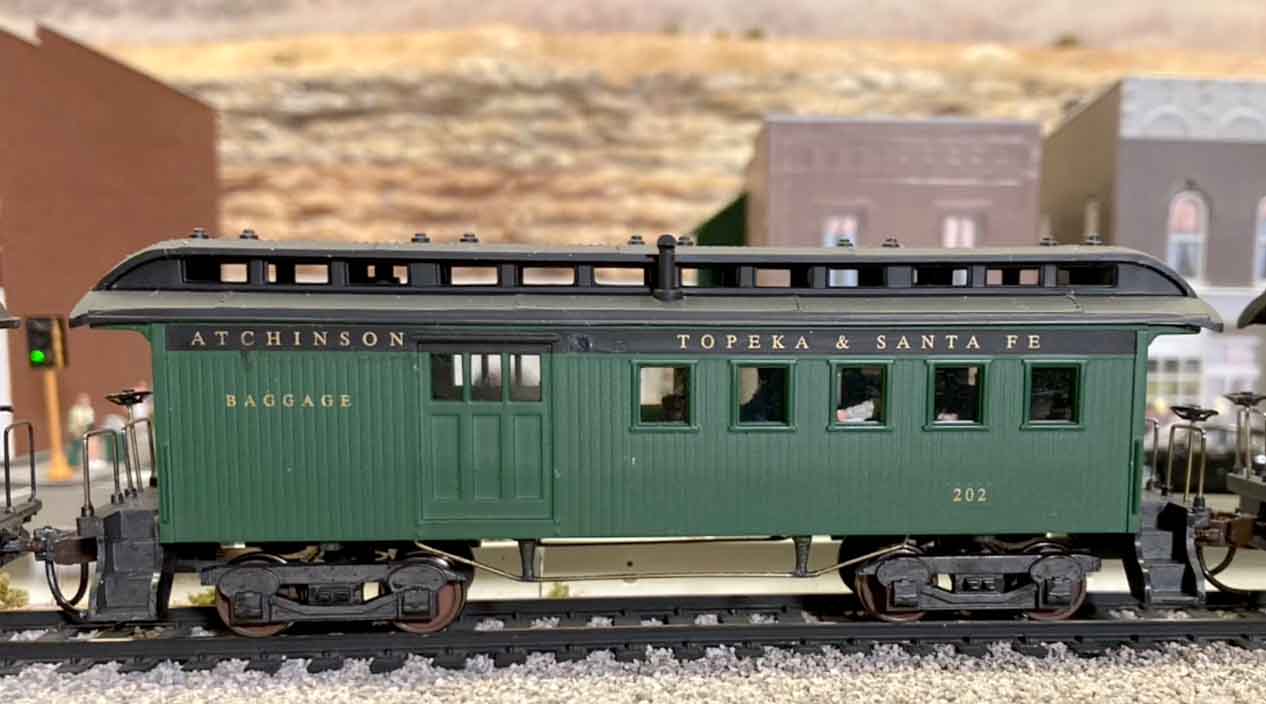
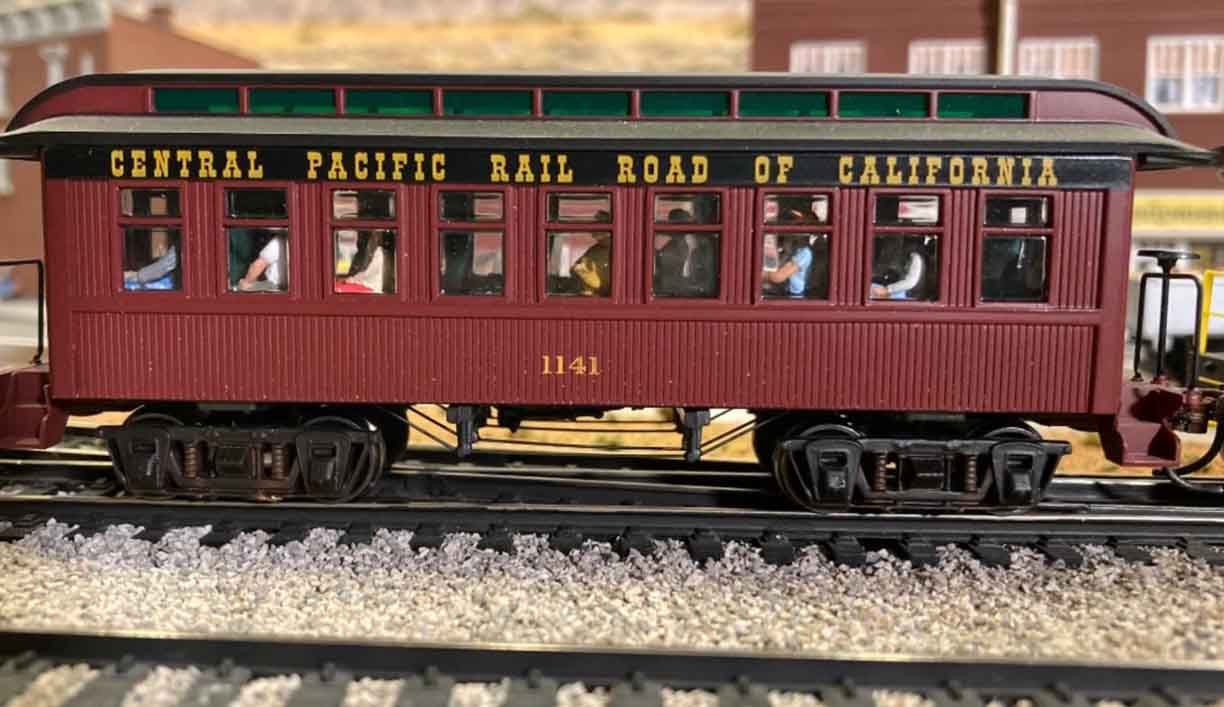
The B&B Depot needed additional equipment for their excursion train rides.
Business is good, so more cars plus a buffer car were needed.
Hope you and your subscribers enjoy.
Jim AZ”

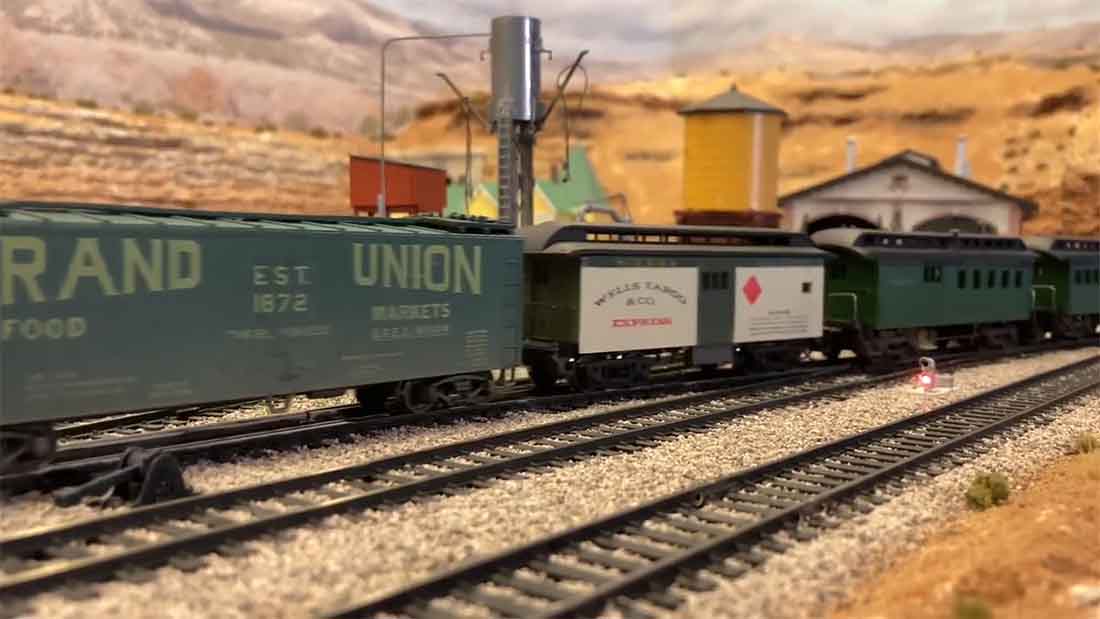
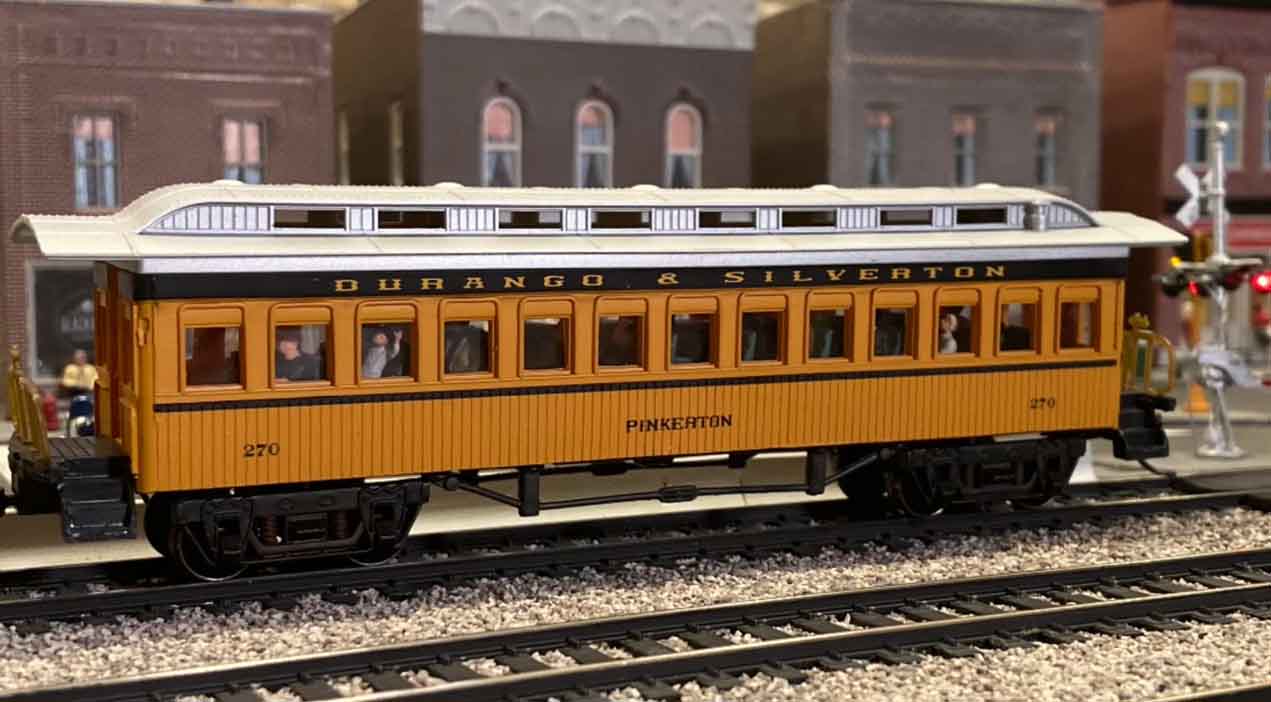

It really looks Jim is enjoying every minute of weathering HO freight cars, and that’s what it’s all about.
Jim’s last post is here:
And the one before that:
(Jim’s post also reminded me of Steve’s: Weathering model train cars.
Now on to Nigel:
“I have been following your blog for a couple of years now and it has very much helped we in wanting to fulfill a childhood dream of having a Model Railway.
I have found your blog to be an endless stream of useful information from all your contributors in helping me to try and avoid making any costly mistakes.
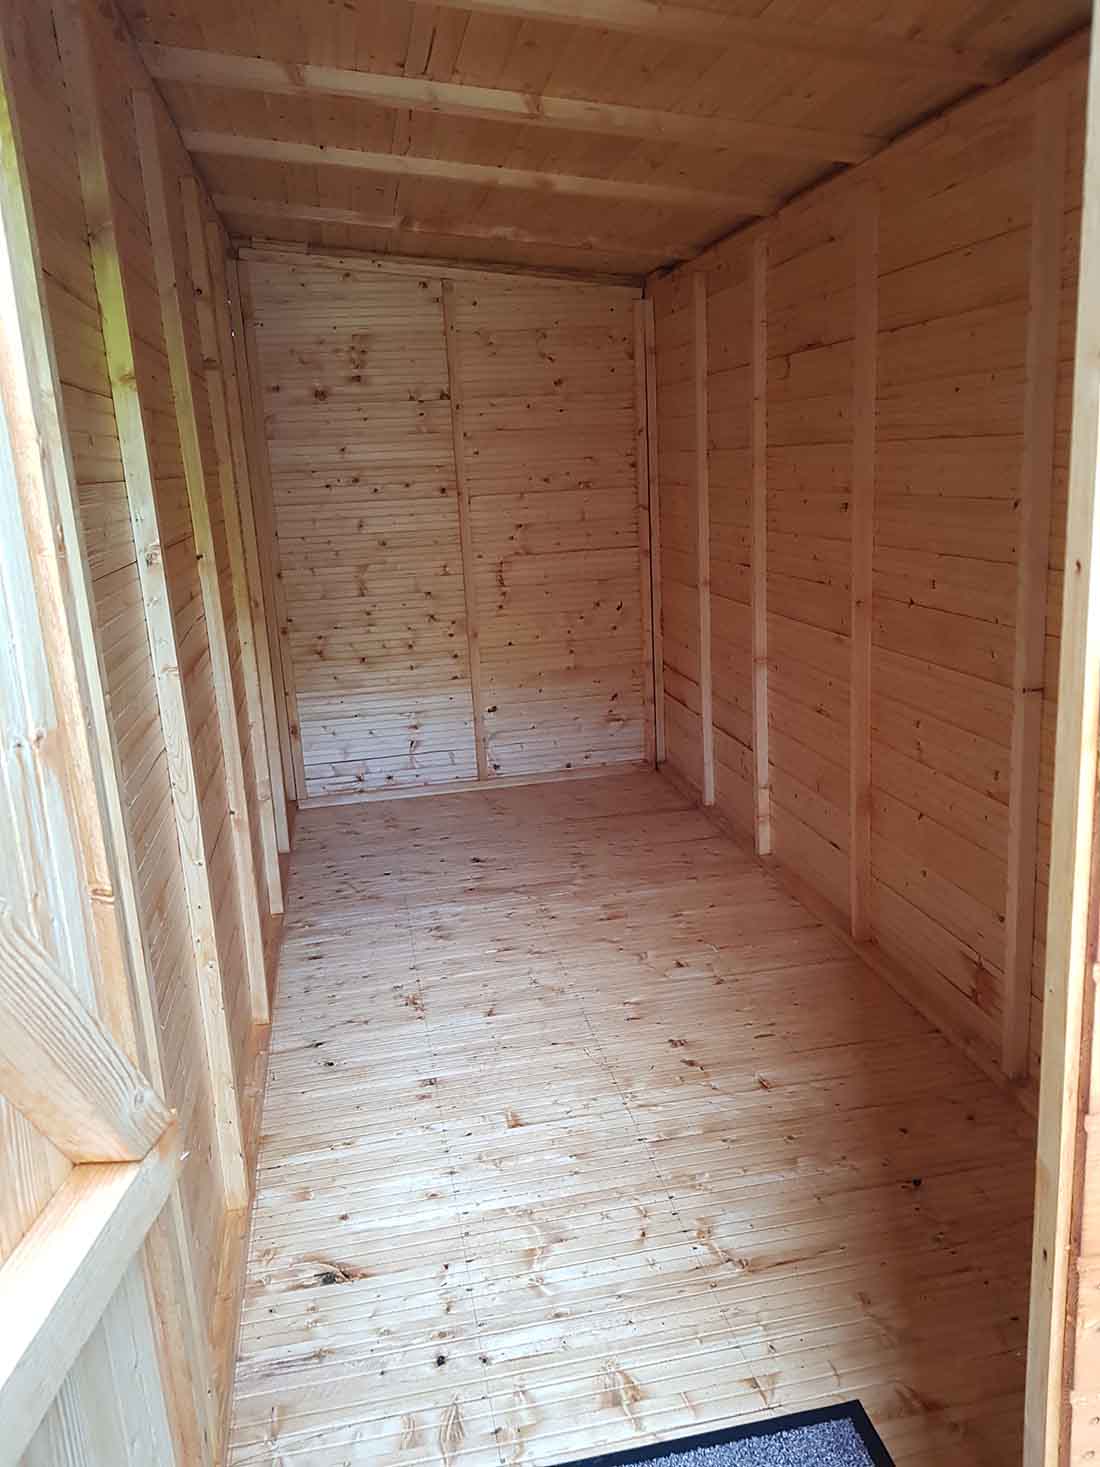
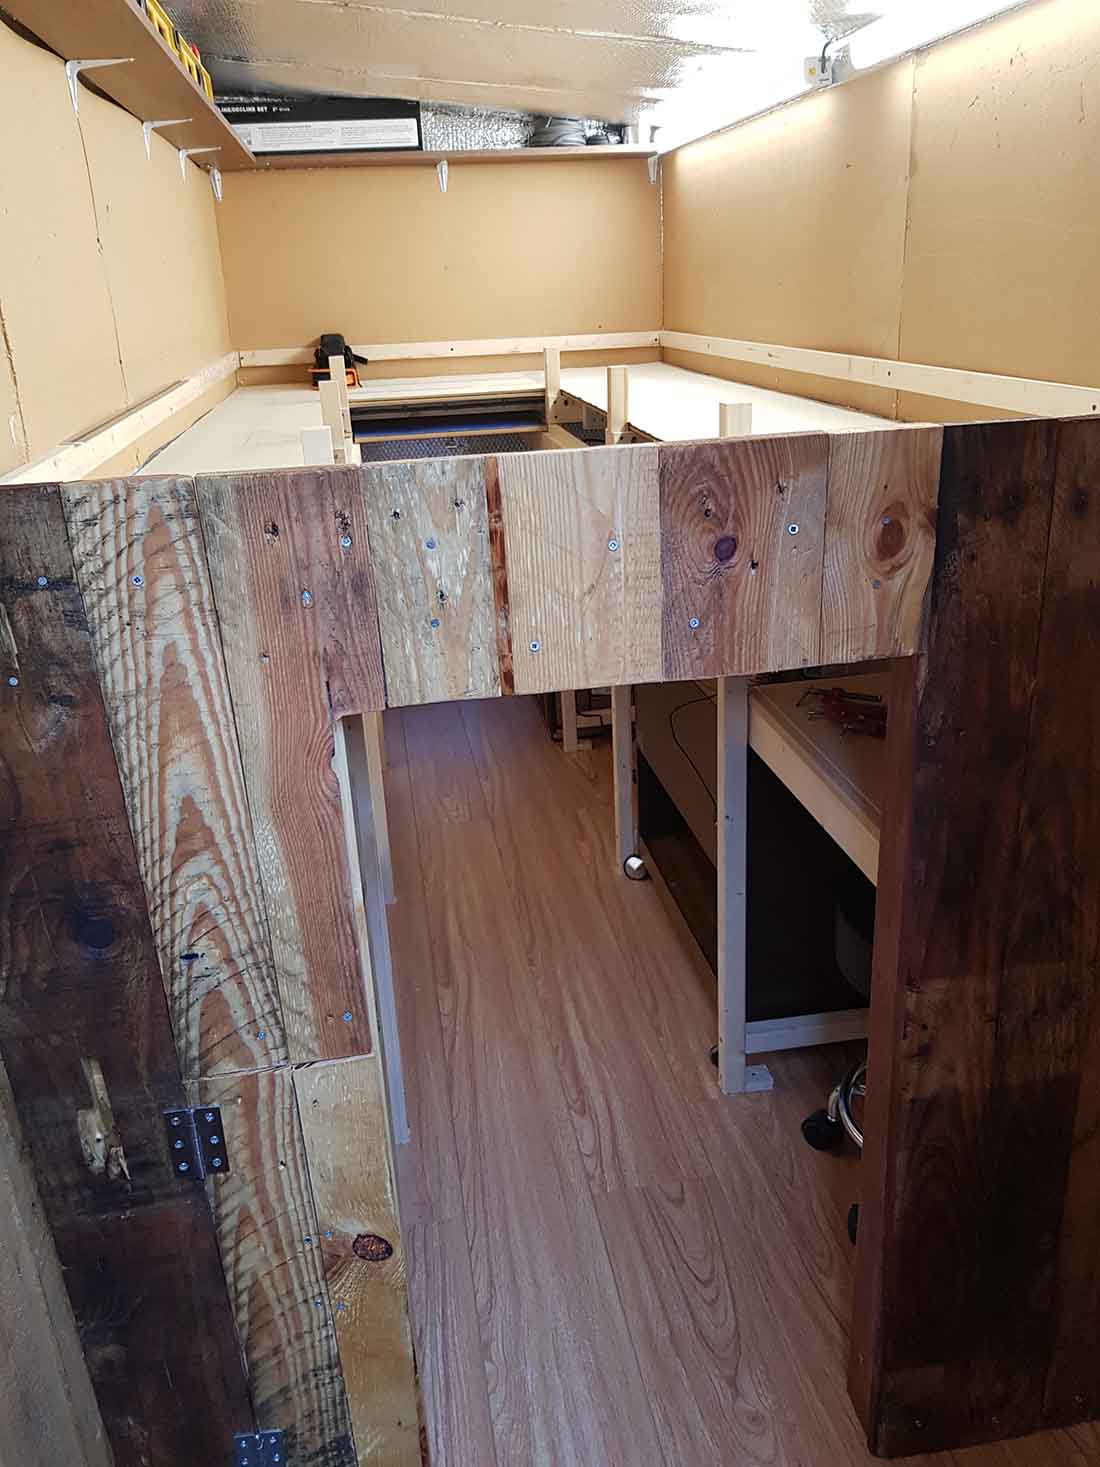
I live in Stacksteads in Lancashire and in the last couple of years kinda started the long journey of creating a Model Railway in a shed and wanted to give you some background as to how it came about and a progress report along with a few pictures.
When I was a young boy like many other kids I had a train set, it used to be put together on my bedroom floor most weekends and then have to put it away again.
I remember going to Hastings Pier in West Sussex as a young boy and seeing an amazing model layout of the Gotthard line (some of your followers may remember it), after seeing this fantastic model of trains going in and out of tunnels and the amazing scenery the dream was at some point to create a model of my own.
A marriage of over forty years to my lovely wife Lynda and the birth of my two daughters Charlotte and Becky and the time spent bringing them up removed any notion of railway modelling from my mind until I reached the milestone of my 60th birthday.
I started thinking about having a pastime in retirement, unfortunately still 5 years away those thoughts of having model railway of my own returned and the images of my visits to Hastings Pier came back to influence the sort of model I wanted to create.
I knew I would never get away with having a model in the house, even though the third bedroom would have been ideal, the wife would simply not entertain it. So I took the decision to make use of some spare outside space at the side of our house between the house and a conifer hedge which would allow me to make a good size model.
Now three months from my 63rd birthday progress has been made.
After deciding pre Covid 19 to create an N scale model operated by DC based on an Alpine scene with four main lines running around several loops of the layout crossing over each other thus using tunnels, bridges and gradients synonymous with the alpine region of Europe.
I started to purchase locomotives, rolling stock and track and after two years or so accumulated a good number of Swiss, German and Austrian locomotives albeit the majority of them used from ebay along with the rolling stock.
Having prepared the groundwork in early 2020 the erection of a 12 foot x 5 foot shed took place in June kindly being named Fernhill Station by my eldest daughter.
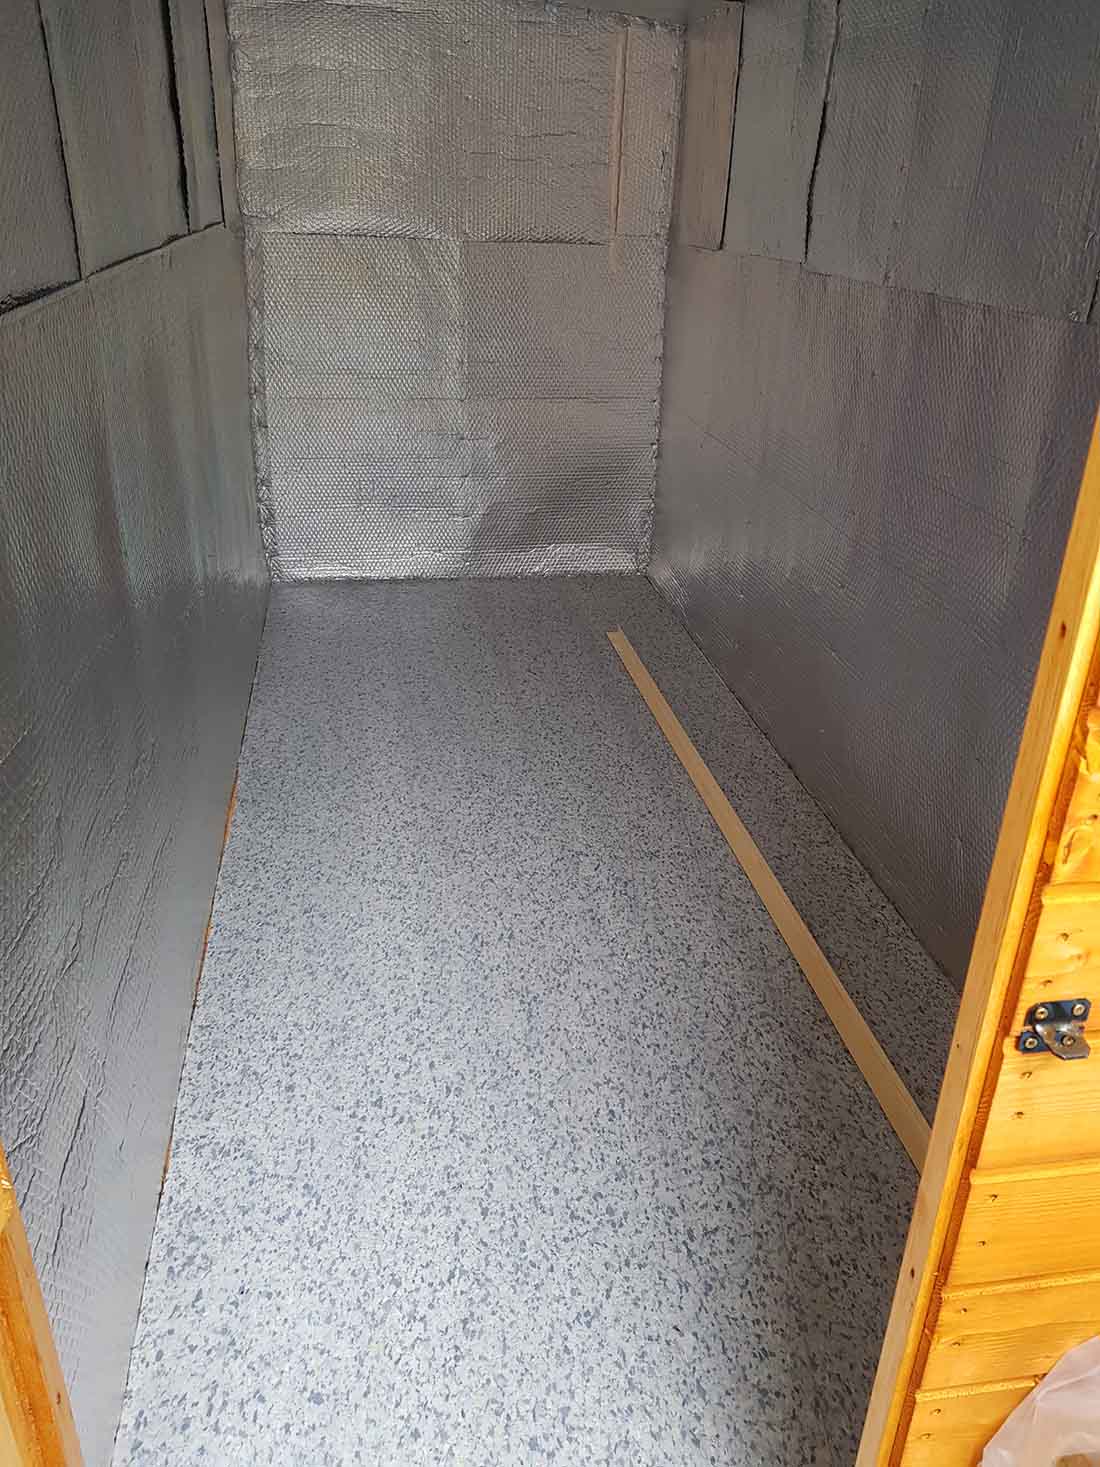
After triple coating the exterior of the shed with decking oil I started insulating it and installed the electrics.
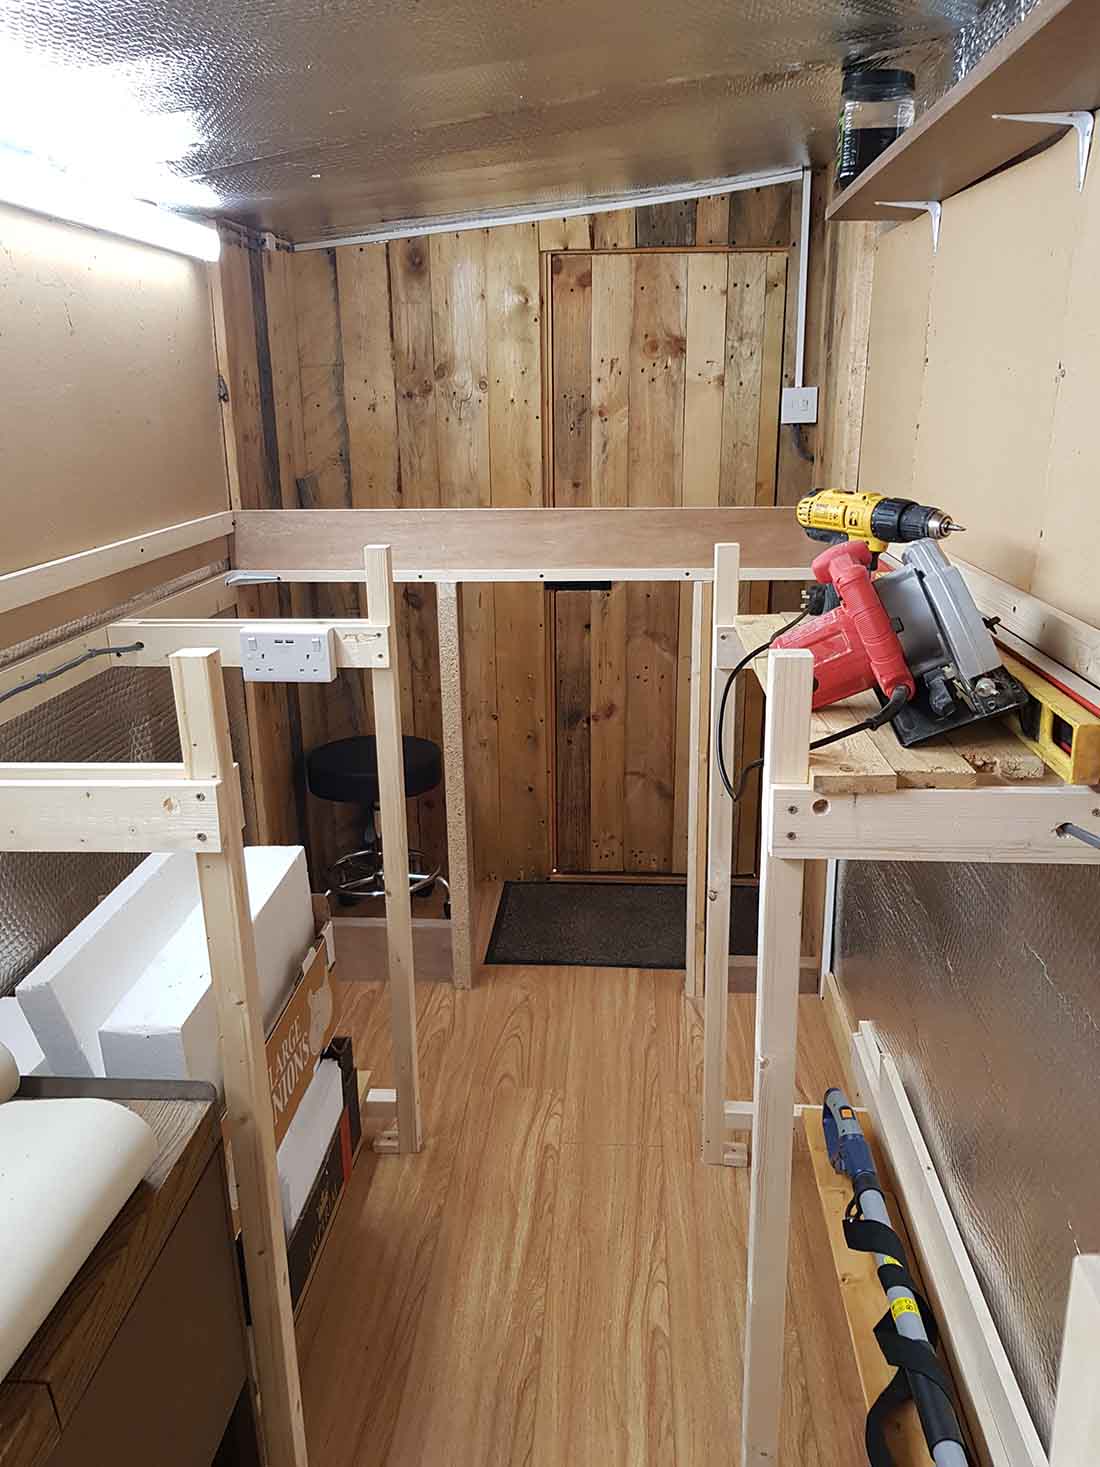
I calculated that I could achieve a layout 4 and a half feet wide by 10 feet in length with a 2 foot by 6 foot area in the centre for me to operate it from, accessed by me crouching forward sat low on a salon stool to avoid me crawling on my knees.
I also wanted to have a small place to work and managed to install a small slideaway work top.
I wanted to have a place to store trains off the main layout and chose to have a lower deck with sidings to hold upto 8 made up train sets with two of my four main lines running around the lower deck, to link to the sidings.
So in last four months of the year I built the frame to support a double deck baseboard and also installed the lower deck made up from the doors and casings from an old discarded wardrobe covering it with some spare lino face down, later adding the 3% gradients courtesy of woodland scenics to get the trains from the lower deck up to the main deck, having already tested all my locos with 7 coach sets to ensure they could all manage the inclines.
I am currently working on the bus wire and In the coming months plan to lay the cork on the inclines followed by the track, following on by moving onto laying the track on the lower deck.
Kind Regards
Nigel”


A big thanks to Nigel and to Jim for his weathering HO freight cars.
That’s all for today folks.
Please do keep ’em coming.
And if today is the day you pick the hobby back up, the model train Beginner’s Guide is here.
Best
Al
PS Latest ebay cheat sheet is here.
PPS HO scale train layouts here if that’s your thing.

To JIm, love it the detail is beyond belief. You put my mind back to those coach days we see (used to anyway) in old movies, the scenery just as I remember from my many travels west. Thank you
Now to you Nigel, that has to be some of the most determined wood work I have seen in a long time. Impressive the build you are doing. Since we have the complete foundation of your room from the floor to the rafters and on to the table and layout (built to a perfection I might add,) it will be an honor to see your build as it goes along. If the scenery is of the same quality. In my mind it will have several microcosms of it’s very own, I cannot wait after seeing your room come together and I do believe many will agree with me on this. Thanks. LS
Jim ..I just love those old coaches and the steam loco , just like back in the old Wild. |Westerns ….and Nigel thats some very nice joinery work you have done so far , good luck with the layout we look forward to watching the progress ..Dangerous Dave
Jim
Love those cars & # 4099. Please start off and tell us the scale or I can just say ” Hey! What a great G scale you have there. ”
Your layout & scenery are awesome & hope you update us.
Nigel
A little tight for a Mans Cave but whatever works. Keep up the good work and let us in on the progress.
Big Al
Thanks
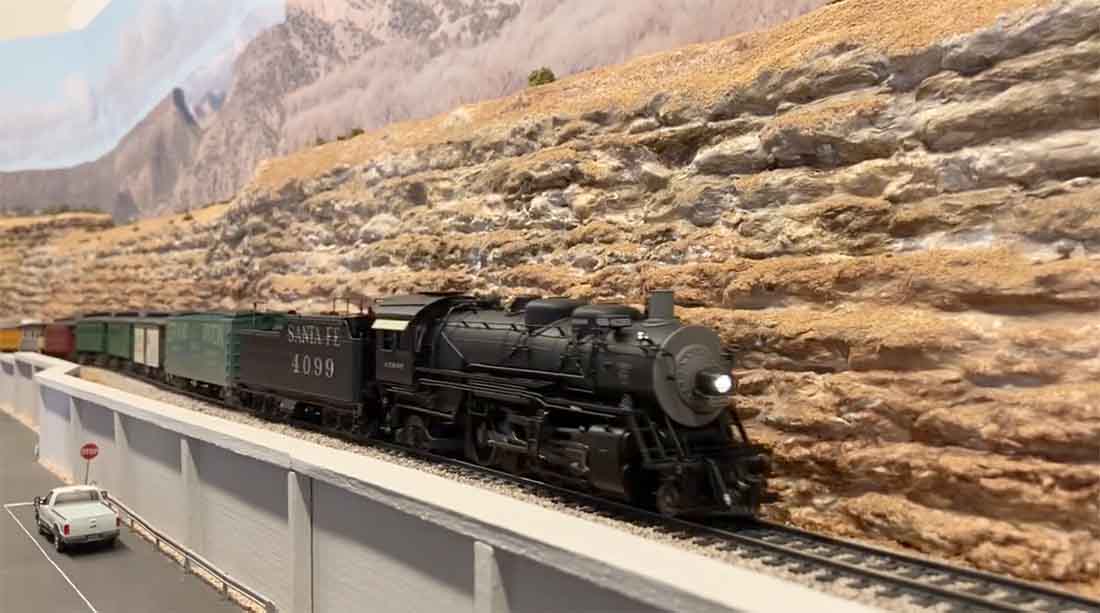
Jim…your “attention to detail”, is remarkable!!! It would be great if you could set up your own YouTube channel, and explain and demonstrate your knowledge and skills…I know I would subscribe to your channel based on what I am seeing. I only wish I could “weather” as well as what you have shown us. But what caught my eye, was in the 4th picture down…your rock ledge wall behind your Broadway Steamer…is that Pine Bark, or are those plaster-made rocks? I have seen a couple of your updates, of your set, however, I don’t always get to see Alistair’s daily posts. So maybe I missed that part of your update. I am at the point of beginning a rather long rock ledge that involves with some curves. Using ½” blue foam is great for a stone, brick, or even block retaining walls. However, anything thicker than ½”, will not bend to the contour I’m looking for, and ½” foam board will not give me the depth I’m looking for, as your rock wall has shown. The texture of your rocks reminds me of the raw edges of pine bark. I’ve been searching pictures for several months now, to find the look I’m wanting for my layout, and I finally found it, in your layout.
Again, awesome work on your details, in your layout.
Jim, Great layout. I really enjoyed seeing your craftsmanship and imagination on display. Rob McCrain – Farland Howe
Jim.
Sorry if you have been asked this a thousand times, but how did you create your backgrounds for layout? They look amazing!
Jim, what is your minimum track radius.
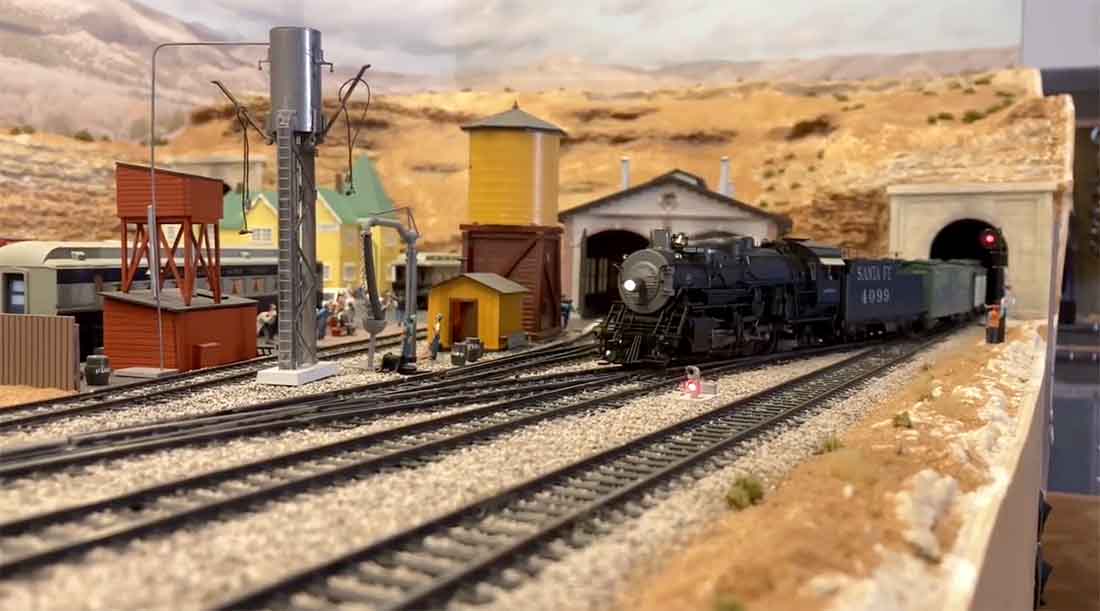
Great thanks for all your complementary comments and questions. My layout scale is HO and is located in my garage. No basements here in southern AZ. The radius is 18” and is a semi dog bone 4’ wide at each end and 3’ at the center (so I can get into and out of my car) and 14’ long. The background is a vinyl photo provided from Backdrop Junction (new owners now) and the hard scape is ceiling tile and hydrocal stained with water color washes and then dusted with dry powders. I do have a YouTube channel at Jim AZ with only a few videos. Some are good and some not so much. But they were fun to do. Again, thanks for the interest in and comments on my layout.
Jim AZ
Love the 4-0-9-9 and the rocky ridges on both sides of the railway.
Love the three coach cars and the number of little things that make a difference.
Landscaping Superb! Keep us posted on your craft as it unfolds into your little world.
Jim,
The new 4099 Mikado is nice addition to your diesel roster. I love back story of why it was added and justification for the new (old) passenger cars. Your weathering technique is very realistic. Any chance you might do a “how to” video or post on your weathering method?
Nigel,
You are one serious model railroader. The quality of your workmanship is outstanding. I’m sure the eventual layout will be every bit as excellent. Two thoughts about your design:
(1) If the shed door in photo #3 had been centered in the end wall, the layout could have been extended another 2 feet all the way to the end wall. Since the shed door opens outward, you could still scoot under the end of the layout (or make a lift-out section so you don’t have to duck under the layout.
(2) In photo #6 where the blue bridge crosses the lower track, the straight approach to the bridge and then the sudden turn to the straight bridge track looks to be a potential derailment site. I think it would be better to curve the bridge and give yourself a broader curve without the kinks in the track, even if you had to use flex-track for the bridge approach and crossing.