Lawrence has been back in touch with some on details on how he has wired his train lift bridge.
But first, another update from Dave:
“Hi Al, Here’s a vid of my Deltic, I call the Beast from the East.
I have shown in the past but so many have said its one of the best sounding Loco`s they have heard, so did this one yesterday of it doing the circuit, it is a Bachman version with a EM2 speaker fitted, the sound is very good.
Regards
Dave”
Now on to Lawrence and his lift bridge:
“Al
None of us can thank you enough for all the time and work you do for us.
A little history first.
When I was about ten years old Dad and Uncle Frank built a train layout that fit on a sheet of plywood. My two sisters and myself could watch (during the day) as they build the layout and ran the trains.
I think it was a double figure eight that crossed tracks a number of times. When we were sent to bed on the bottom floor, we could her them running the trains. And whooping with joy as they crashed the trains at the crossovers.
When we moved from Massachusetts to Florida the trains and tracks were stored in a thick cardboard barrel. The barrel moves with us and went into storage.
Years later when I was in the Navy and Dad passed away the barrel came into my possession. What a thrill was it to open and see the treasure.
I was an Electronics Technician in the Navy. In the Navy you move a lot. When I got out and as a Government Contractor with a couple of electronic companies, I also moved a lot. Lived in four countries (in Europe, Middle East, and Far East). Traveled in 32 different countries. The barrel with all the train treasure stayed in storage.
Finally, the travel ended and the barrel came out of storage every December. The Lionel train ran in circles or figure eights under the Christmas Tree for a month. The back into the barrel.
When the wife and I retired we got a one level house. That means she got the main level and the full basement was mine to do as I wanted.
First project was a DC track around half the basement hanging from the ceiling. Then added another track that was DCC. I started basically knowing nothing. Learning from chatting with the local train store.
Next project was a two track HO DCC U shaped layout. Using three sheets of plywood at about 43” off the floor.
Digging through the storage I found the barrel again. Took apart the HO layout and started on the O layout with the Lionel Train and tracks. Got three new larger engines from an auction. Now I had four engines that took four minimum track curves (32”, 45”, 54”, and 72”). Designed the layout on AnyRail6.
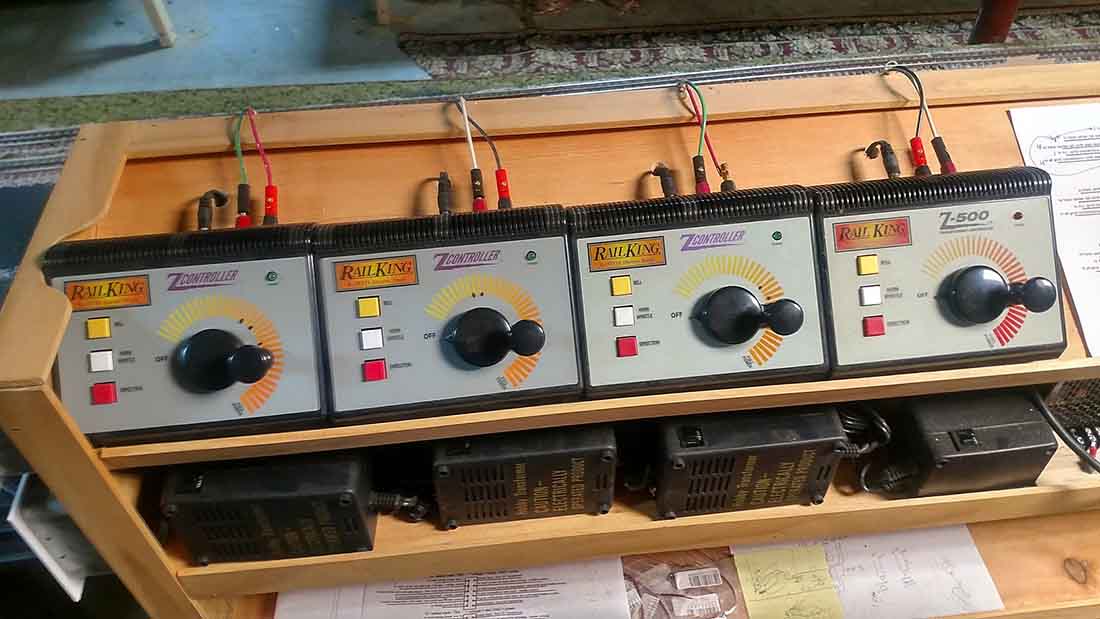
Built the track base (ten inches off the floor, 30 feet long and 20 feet wide) and put down the track for all four engines. Bought four transformers, one for each track. Time to wire it now.
After talking to the local train store was recommended to split the track in half with plastic rail joiners. And put a Booster SB5 on one side and a Booster DB5 on the other.


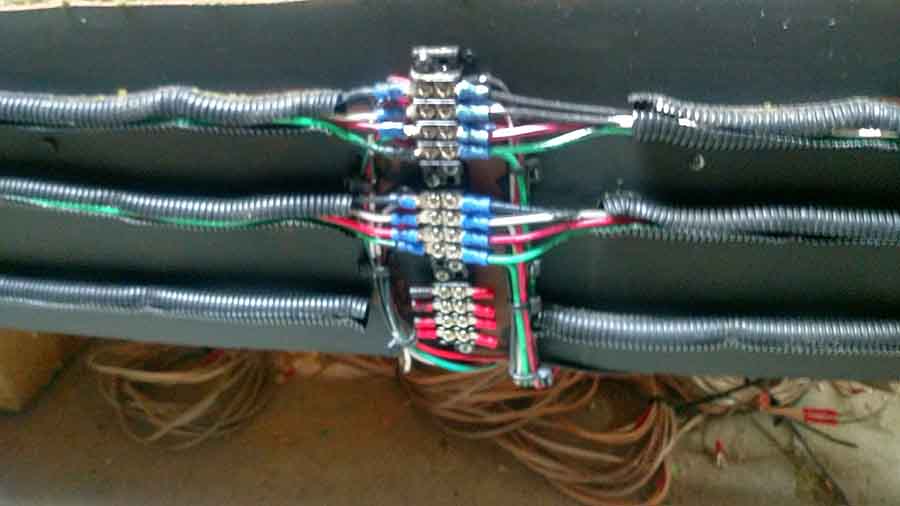
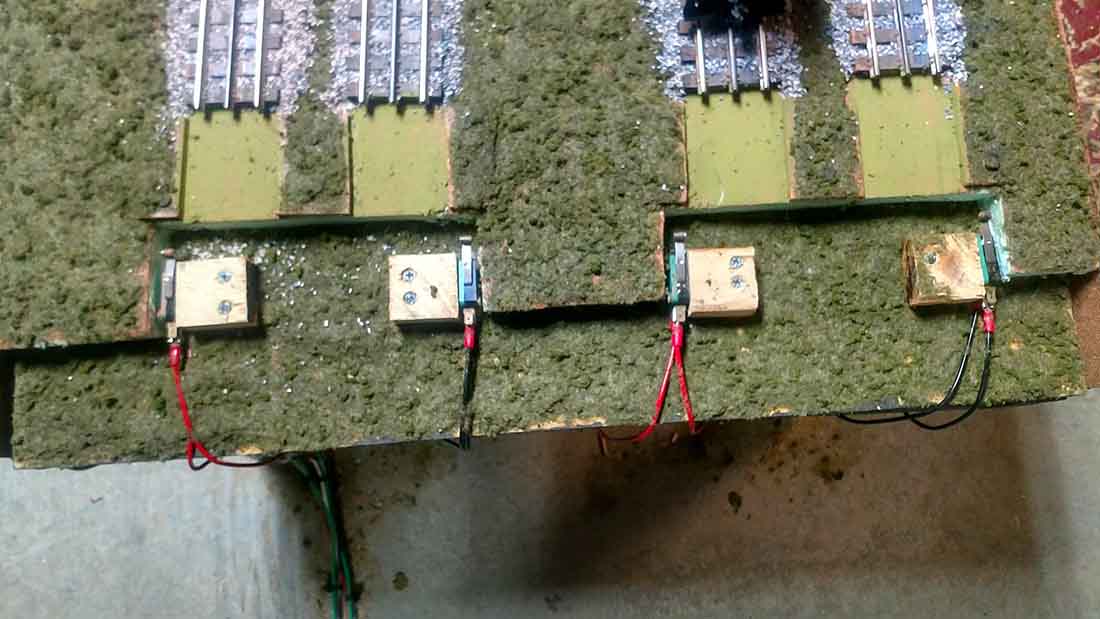
To keep the resistance down on the Buss Wires, broke the layout into four sections.
The output of the transformers went to four terminal strips, one for each track.
Displayed in the next picture is the distribution of the Buss wires to the four track sections and the lift bridge. Just the 32” track distribution is displayed. The other three terminal strips respectively match the first one except for the respective track.
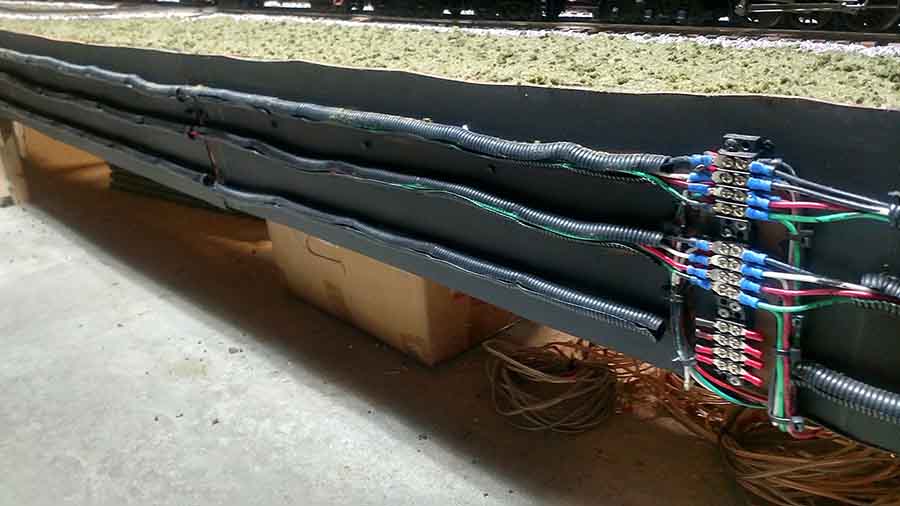
With the layout so close to the floor all the wiring had to run on the side of the layout. For that I installed terminal strips at specific points for feeder wires to the tracks. Drilled a hole at the track and dropped the feeder wires and pulled them to the front to attach to the terminal strips.
I used split wire plastic conduits to distribute the wires between the terminal strips. Refer to the next two pictures. The third conduit and terminal strip is for accessories.
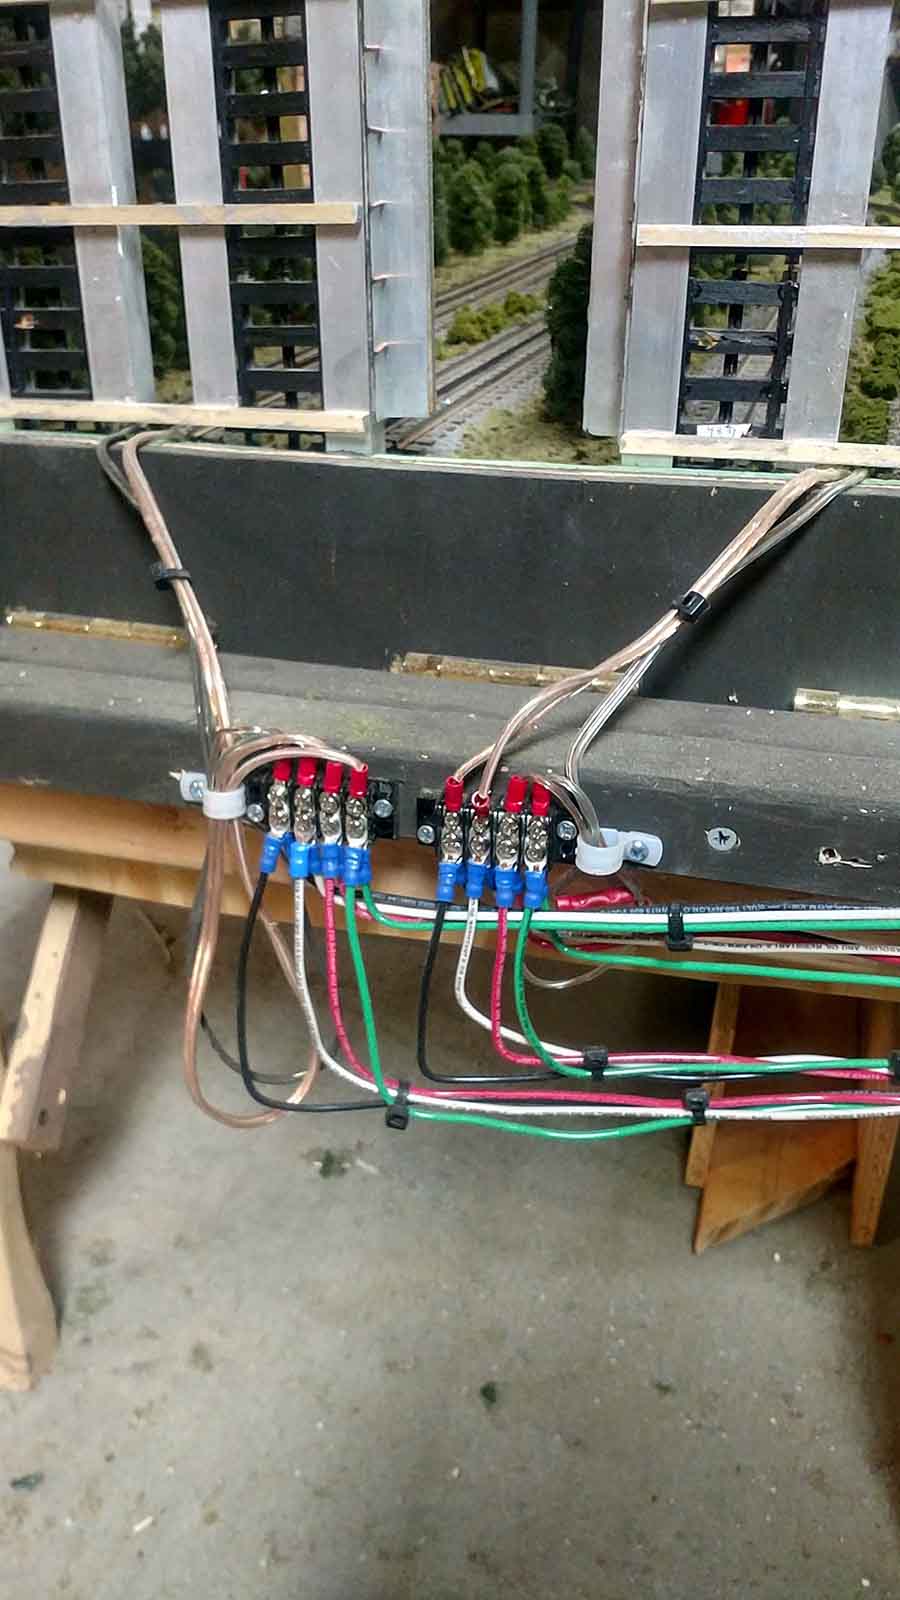
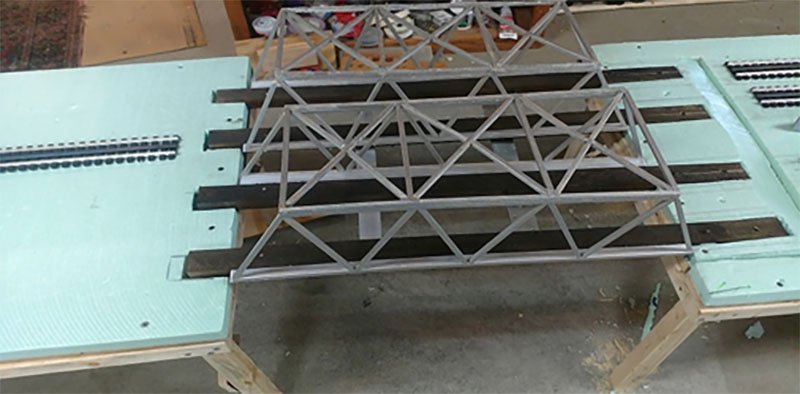
The last picture display the power to be applied to the lift bridge. When the lift bridge is up there is not power to the bridge and to six feet of track to the west of the bridge. When the bridge is down the micro switches applies power to the bridge and the track displayed in the picture.
Thus, if the train is running, forgot the bridge is up, the train will run into the bridge from the east and will have no power on the track from the west.
I hope this answers all the questions on the wiring.
Lawrence”
If you want to catch up with Lawrence’s layout and his lift bridge, have a look at this post.
As always, a big thanks to Dave and to Lawrence for sharing his train lift bridge.
That’s all for today folks.
Please do keep ’em coming.
And if today is the day you leave the comfort of your armchair and join in with the fun, the Beginner’s Guide is here.
It’s all about making that start…
Best
Al
PS Latest ebay cheat sheet is here.

And there’s the Silly Discount bundle too.

Love the sound of those Napier Deltec diesels!
Jeff
That’s a fantastic layout you have. The diesel really sounds great although I, from the U.S. don’t know how a Deltic sounds. I love the background sound in your video.
Be sure to check the amp rating of the micro switches. In the miniature size that you appear to be using, there are 3 different amperages available.
Hey Dave,
I’m very familiar with the Napier Deltics, and I was very impressed with your run-up of your locomotive on your layout. It’s sound was incredible.
OUTSTANDING!!!!
Please show me how to build a bridge that goes up to let me into my layout and then back down again
excellent
Like both tDave’ sound and the O-gauge but would strugglw with 10″ from the floor. !
Just beautiful, especially the bridge.
very nice job. keep it up.