Brian’s been back in touch with the latest on his building kit bash:
“Hi Alastair, hope you can use this.
Not much done on the HO scale Seafood Emporium this month as I decided to take a break and get on with other model railroad bits and pieces.
On the Seafood Emporium, I assembled the guards/store building to add to the side of the main building.
The walls had shingles added and the corrugated iron roof was painted and weathered.
I found it very easy to add the corrugated iron sheets onto double sided tape and it sticks very well. I do the same with the shingle strips and is much easier and less messy than the suggested glue method.
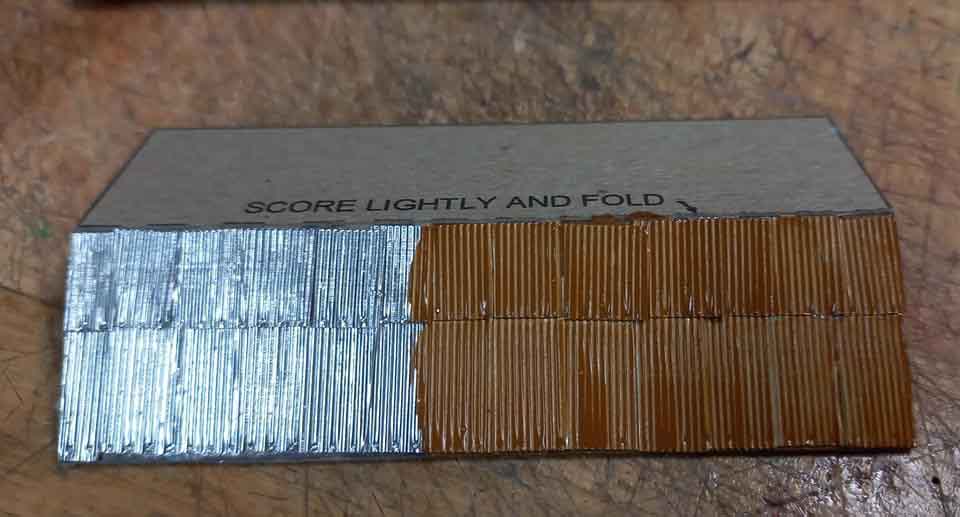
I half painted and weathered as well as the nails added to the corrugated iron sheets to show the process of my technique.
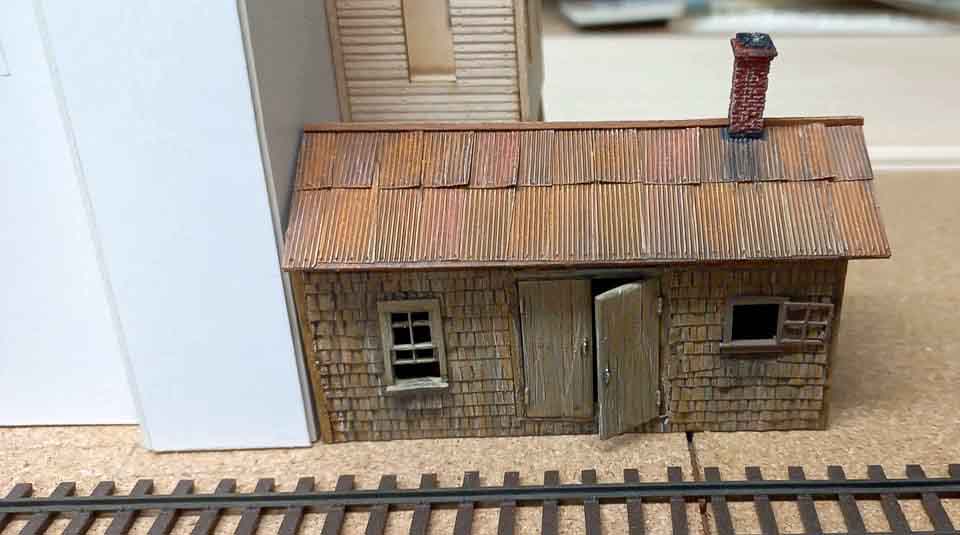
Doors and windows added to the shingled walls.
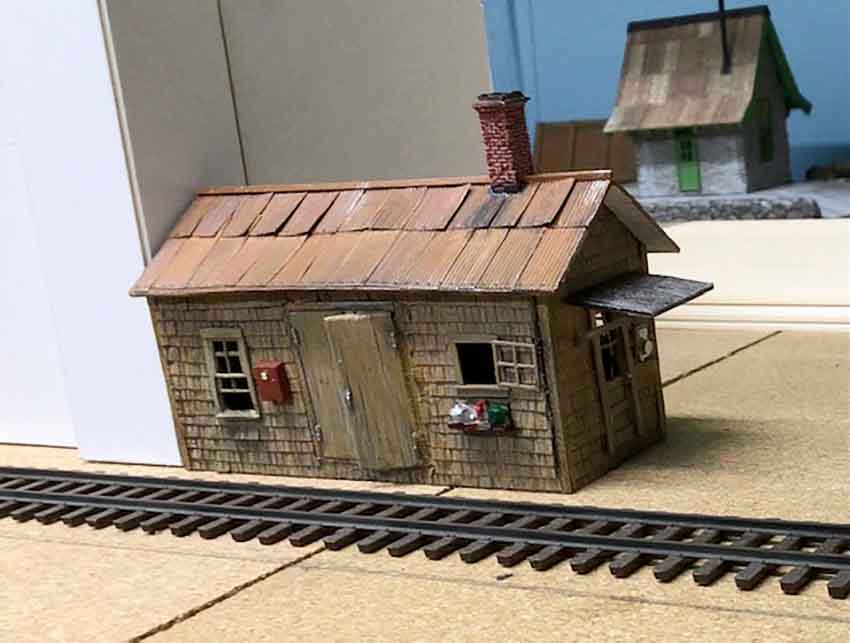
Final placement of it for the time being next to the card stock mock-up.

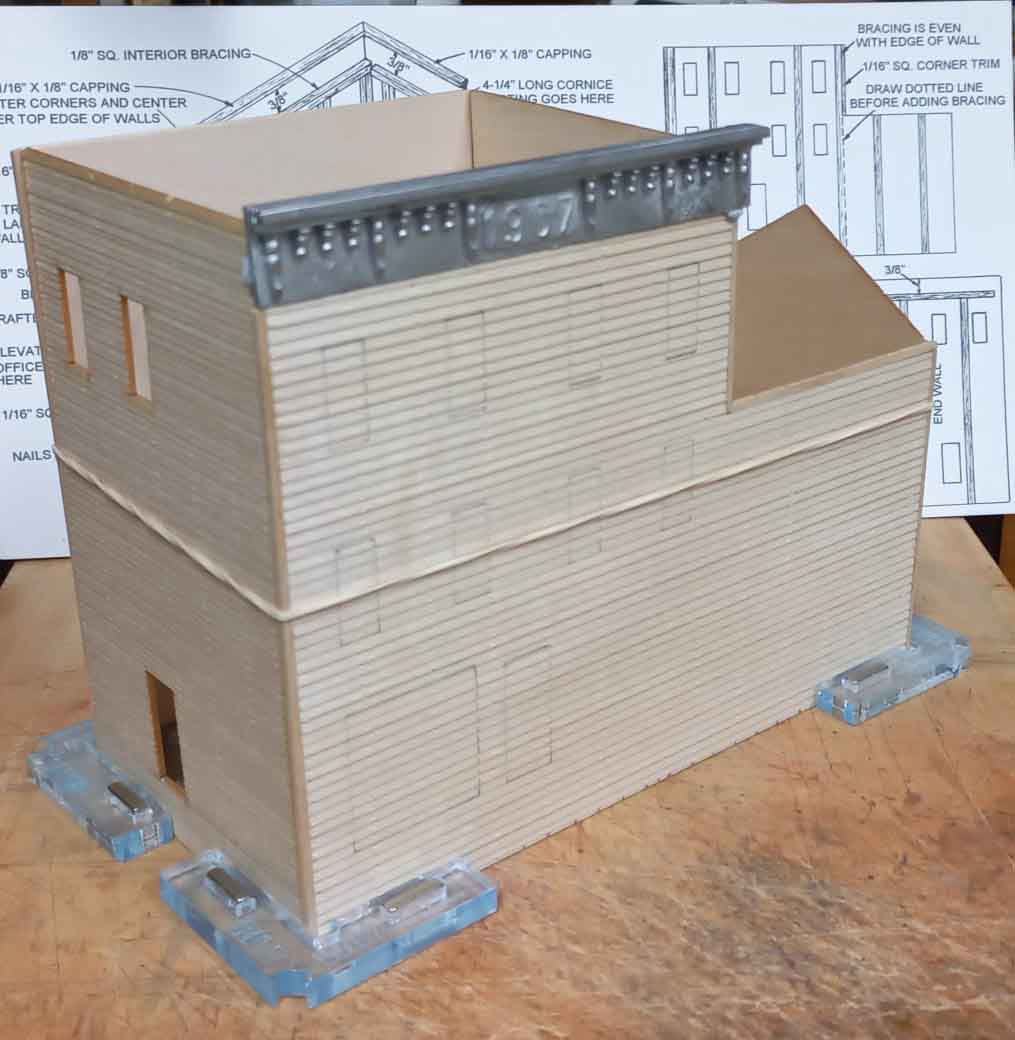
A start on the main building (modified and a mirror image of the kit).
All the nail holes added using a dress makers (ponce wheel) tool to add them. It is now is ready to cut out the door and window placements.
I could not use the original front and back walls as the clapboard siding would be on the inside.
I cut new walls from sheets of the clapboard siding that I have on hand all the time. (Made by Northeastern Scale lumber) available from Walthers in the USA.

I use my magnetic corner clamps to hold the walls in place to check assembly and fitment.
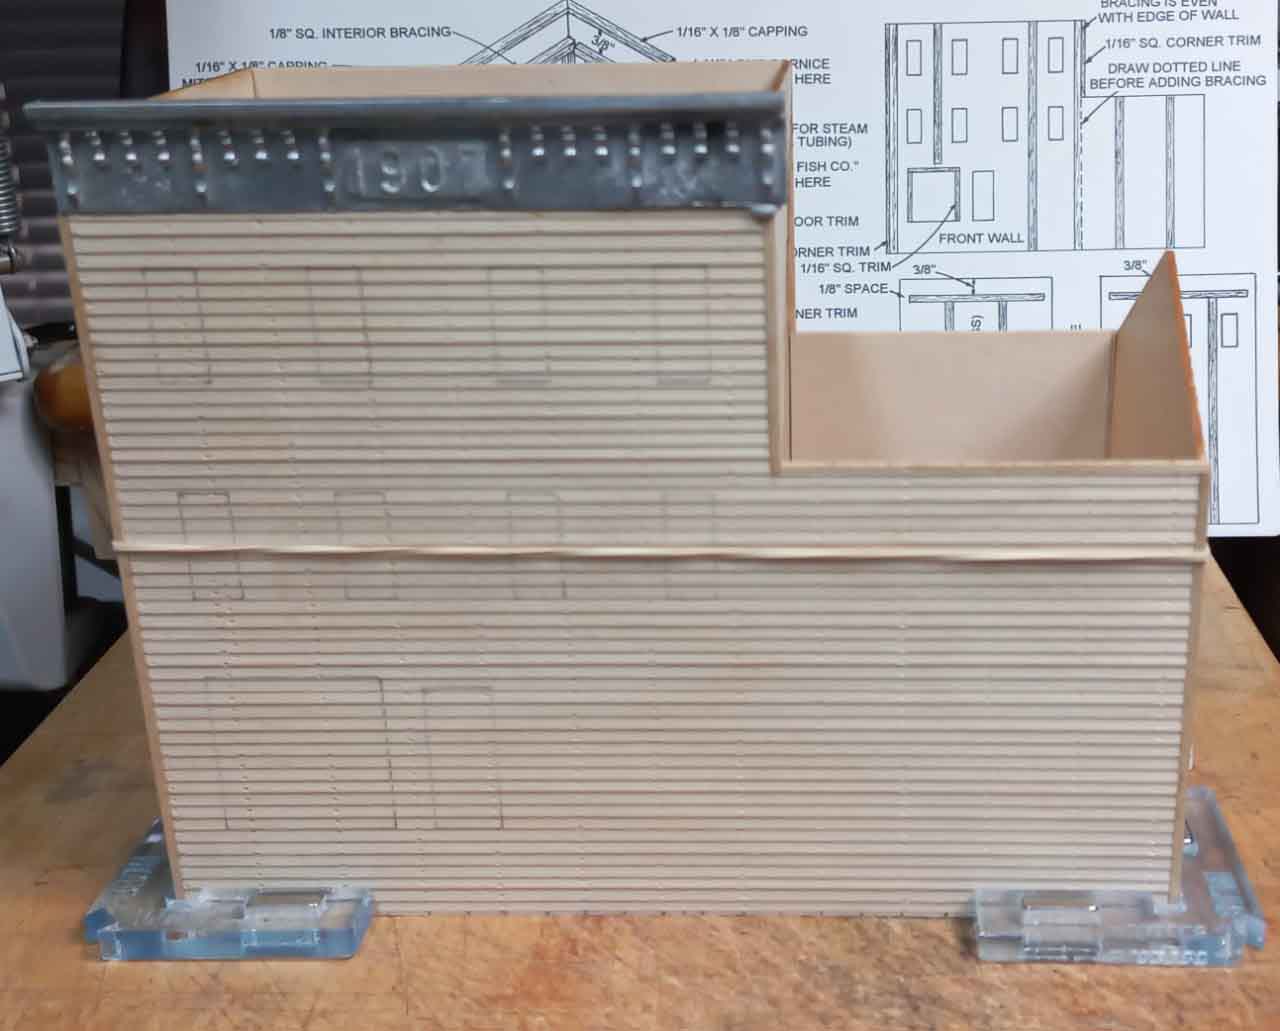
The top casting temporarily in position. Note the elastic band holding the top section together. Another great modelling tool.
I was able to use the end walls as they remain the same whether mirror imaged or not.
This is where I deviated from building the SF kit to do something else.
I was given an HO scale MDC (Roundhouse Climax kit) with plenty of parts missing. My intention was to convert it to a static non powered HOn3 loco to place it at my car repair shop.

I delved into my bits box and found enough detail to add to it.
I had a spare pilot deck (a brass one removed from one of my brass locos and replaced it with a snow plow) in the bits box and added it to the Climax loco below.
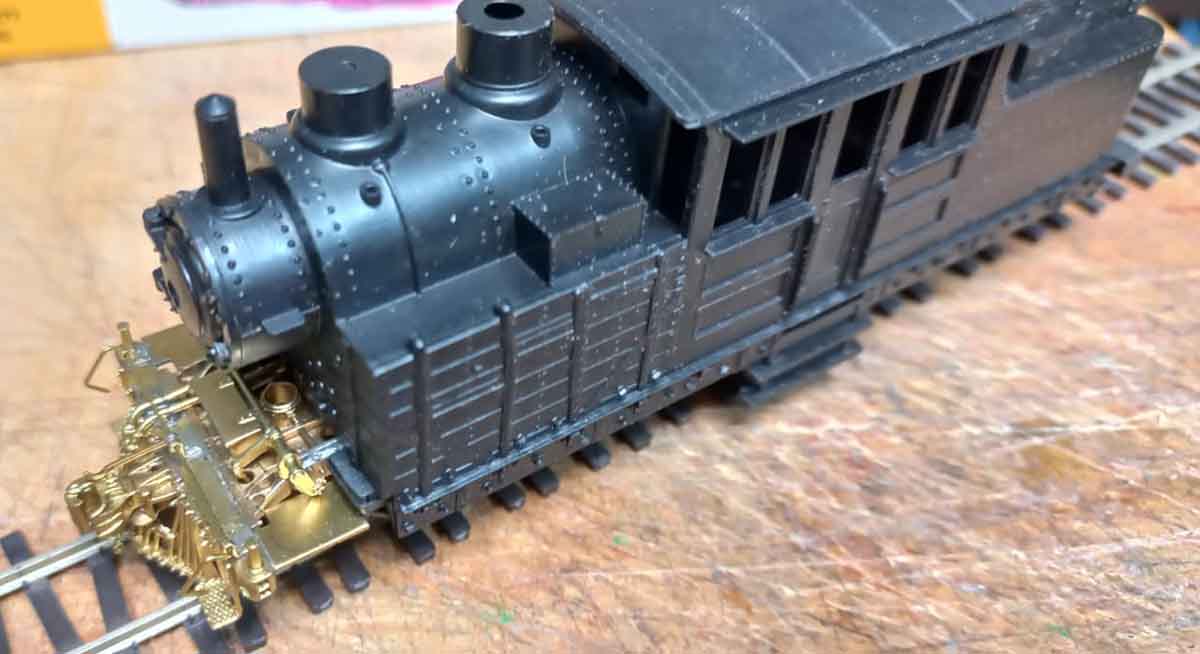
I cut out the door and well as the simulated wood pile and replaced it with real wood (skewer sticks). Added a gauze spark arrester to the top of the smoke stack.

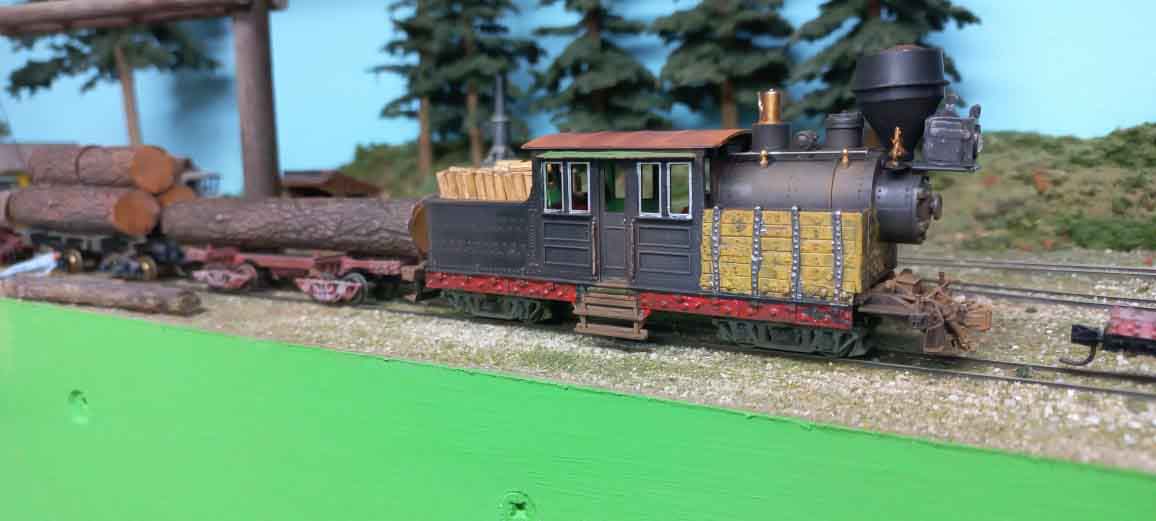
Placed temporary in the logging area until the repair shop is built and then add the final detail to it, ie: chain, barrels and the odd scrap. The Climax locos were used primarily in the logging industry.
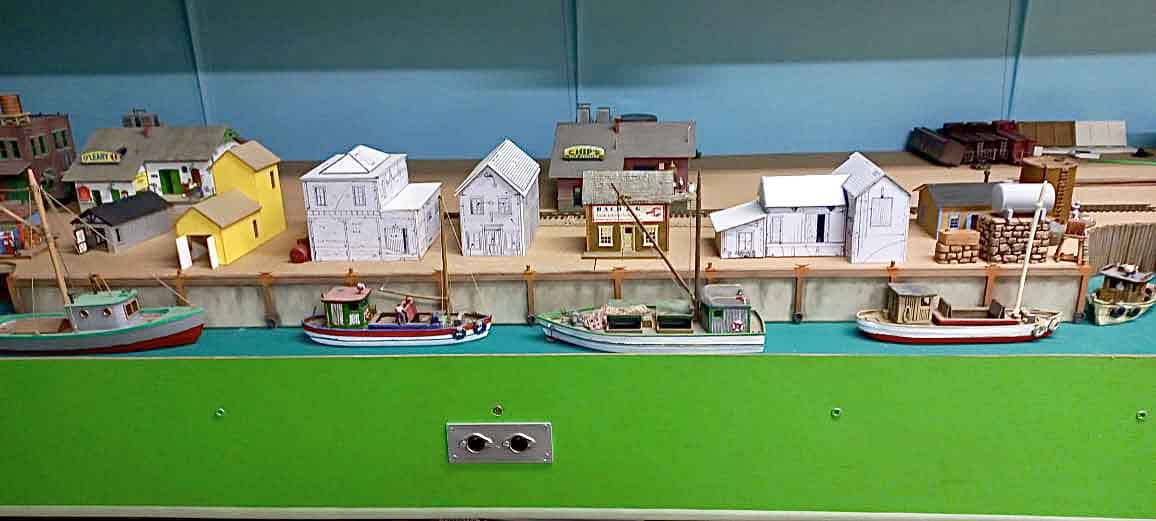
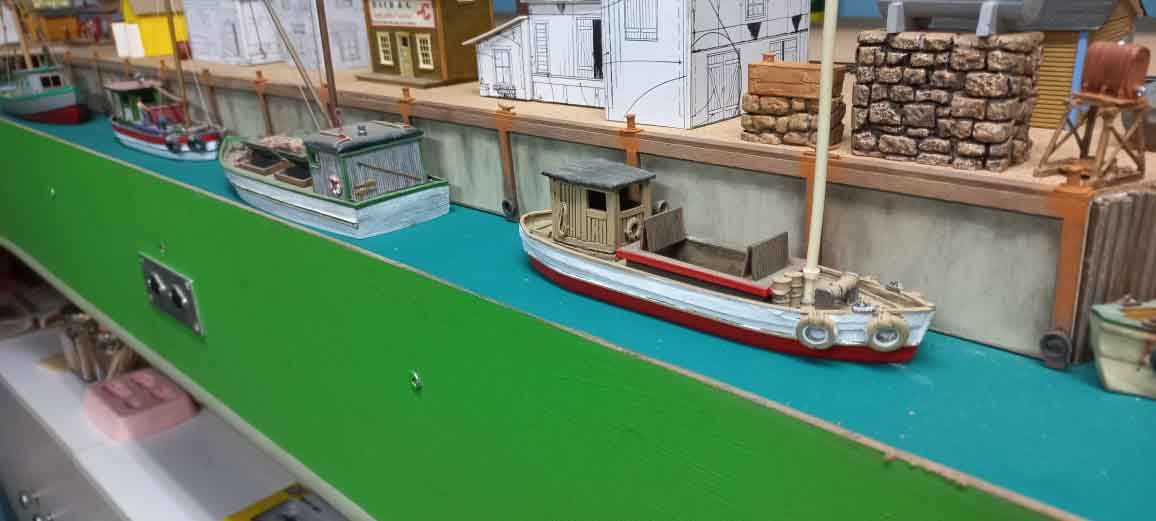
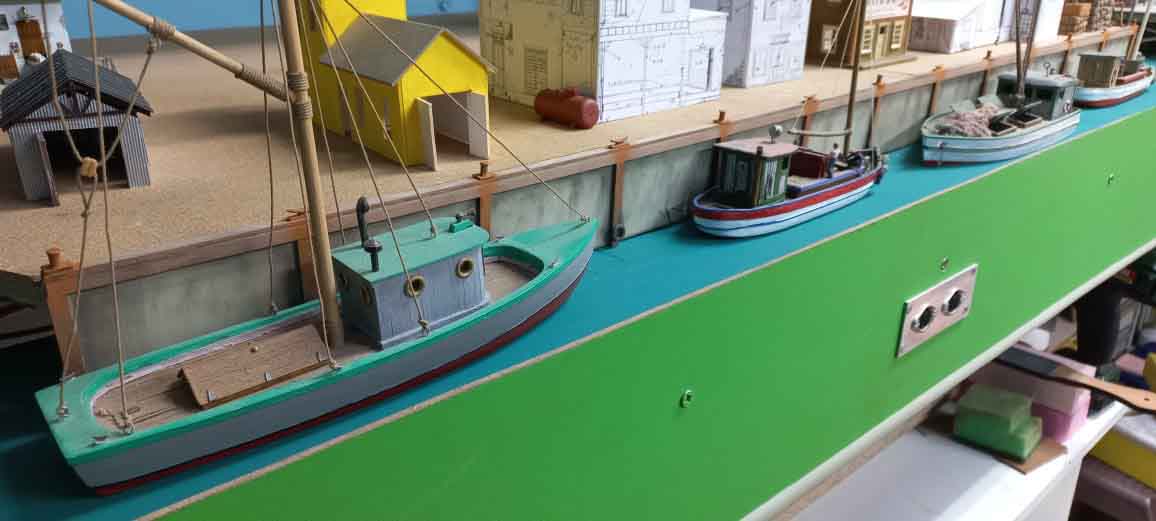
Moving to another area of the layout (Pelican Bay extension) I started finishing the harbour wall which is over three foot long.
It is a piece of Masonite cut to the height required and painted with Woodland Scenics Concrete colour, bollards,Cleats and tyre bumpers were added and weathered with the proverbial rust.

The wall is near completion and must add davits and a few dockside cranes to load and offload merchandise from the industries alongside.
Once done, it’s back to the Seafood Emporium building.
A break to do other modelling stops the boredom creeping in from doing the same thing for any length of time.
Till next time, keep modelling.
Brian – the HOn3 guy in Knysna RSA”
A big thanks to Brian for sharing his building kit bash. Impressive stuff!
You can see his last post here.
(Brian’s also in the Hall of fame.)
That’s all for today folks.
Please do keep ’em coming.
And if today is the day you spring out of your armchair and join in with the fun, the Beginner’s Guide is here.
Best
Al
PS Latest ebay cheat sheet is here.


Brian,
Very clever work. I especially enjoyed the Climax rework although the little shack with the corrugated iron roof was truly impressive as well.
John
Hi Brian,
Absolutely fantastic modeling, what do you use for the tyres in the harbor?
Pretty good layout.!!!!!!!!!!
Really impressive work for the most part.
Model structure roofs done incorrectly are the bane of my existence, being the son of a career roofer I learned how all types of roofs were properly made water tight from the time I was old enough to climb a ladder and sit on the peak to watch and help. It makes for an interesting texture and detail, but no roofer worth the name would ever top nail the bottom edge of corrugated metal roofing, might as well drill holes in it. Properly starting at the bottom, the sheet would only be nailed along the top edge and down the side so the next overlapping sheet would cover the nails. You would not see any signs of nails.
Hi Brian,
Love your workmanship and your theme. Again I have to ask…why not paint the fascia the same as the harbor or use a blue camo? Personally it seems like the scene would be more pleasing and have more depth with a blended color scheme. Same goes for other areas of any layout. Camo in the approximate colors of the scene on the layout seems like it would enhance the scenery… Just sayin’
Cheers!
Rob
Brian
Awesome work. Thanks for sharing.
As Gomer would say “ShaZam, Andy!!!”
Well done.
MN Dan
For those across the pond, Actor Jim Nabors played hapless mechanic on Andy Griffith show, and had quite an impressive singing voice.
Brain that is a very sharp building!!