Ed’s been in touch. He’s added to the N gauge track plans on the blog:
“Hi Al,
I regularly find myself glued to yours and others posts, I find the entire world of steam railways fascinating.
A year or so ago I decided to start an N gauge project as I used to have one as a young boy.
I still feel guilty to this day about trying to make that track work better by trying to take it apart as an 11 year old. Boy was I wrong!
Anyway, I wanted to share some progress of the build to see what people might suggest as I’m going to tackle a OO gauge 1st (easier to model).
Here’s the N gauge.
I bought a job lot of trains, Track and the odd building from eBay at a bargain price and as soon as I got it through the post at work I opened it up.
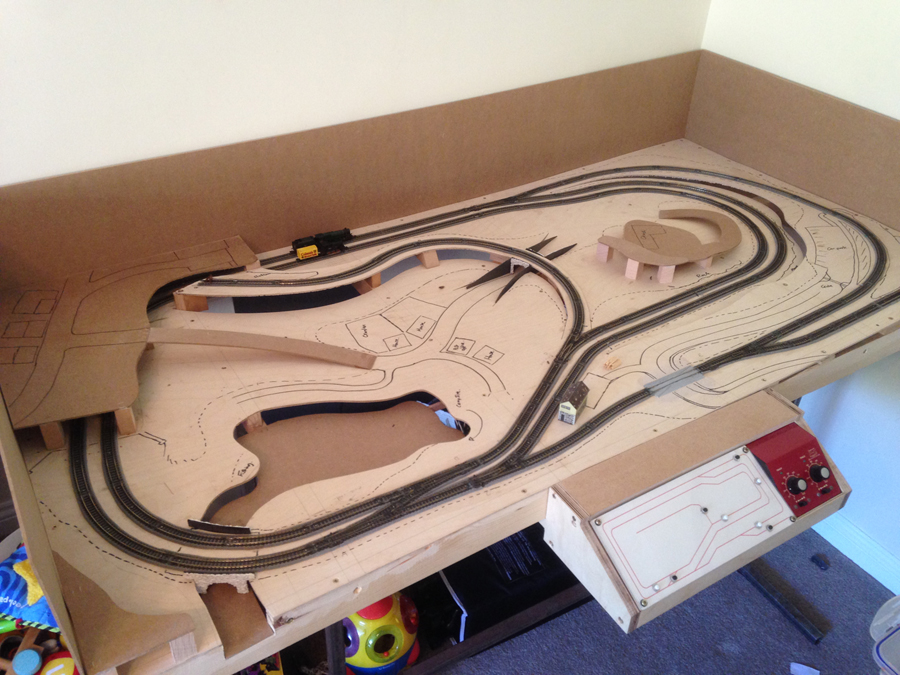
I started to play around with the idea of a single rail double loop that half of which would hide under a hillside.
Instead I decided to go for a side by side in the style of my old train set, *see previous email* I preferred this with the prospect of the trains passing each other, luckily in the box of track it allowed me to create exactly what you see.. Well plus a couple of the original points from my youth set!!
As for the layout, it’s going to be based on the Pennines as is such a beautiful old world place. I’m from Lincolnshire and it’s far too flat for my likings.
My wife is from waterfoot in rossenddale Lancashire, where they still run a Steam railway. It’s beautiful!
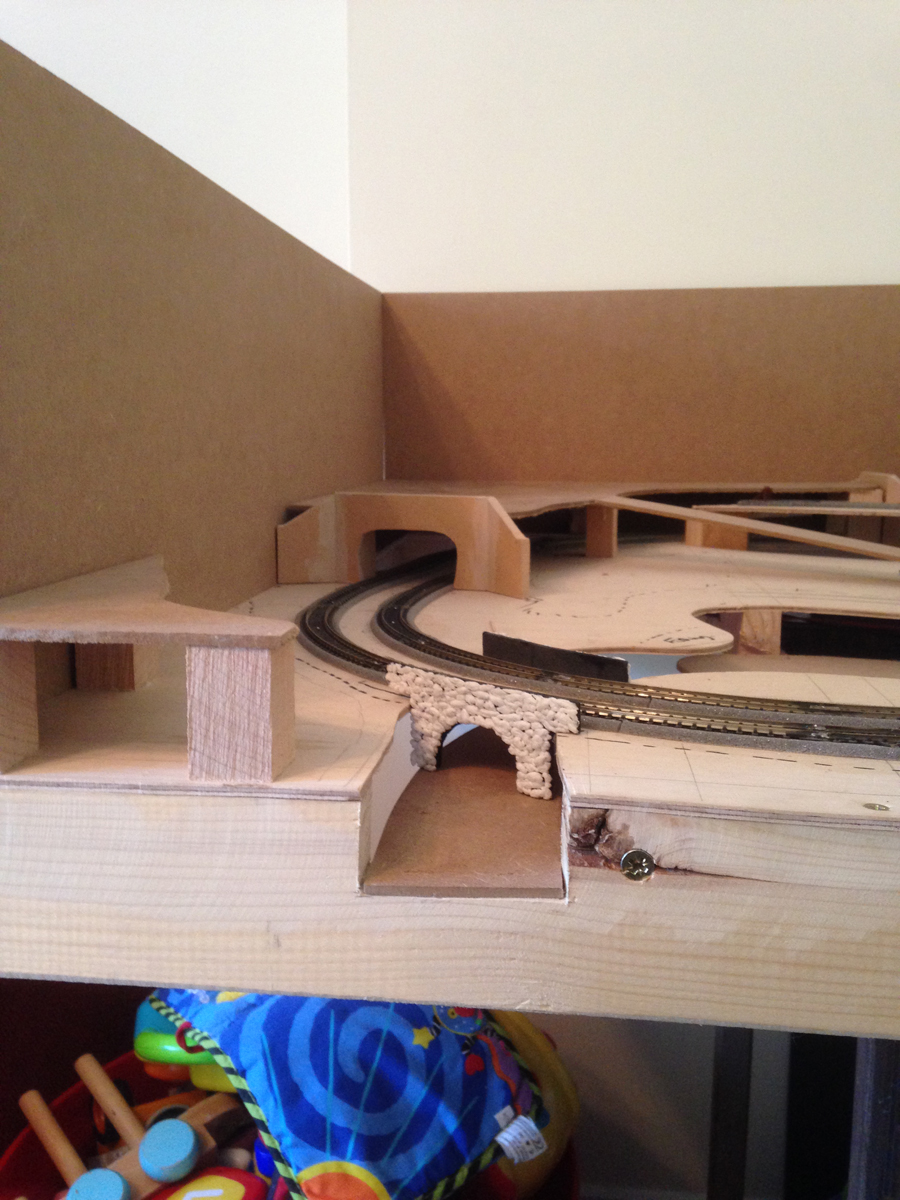
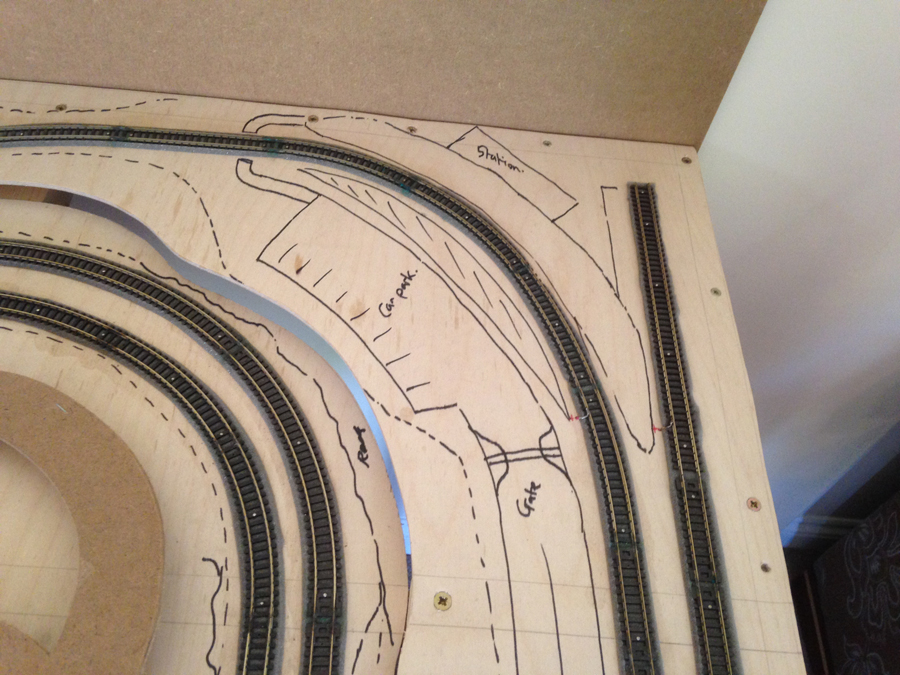
So from left to right on the picture, small village on top of the tunnel, road leading down into a hamlet, in front of that is a fishing/ boating lake with a campsite beside it.
I wanted the river leading from it to flow to the front where you could see an “under bridge scene”.
The hamlet then leads under the track to a church on a hill (Christian element) the track we just went underneath leads to the 1st station on the track on the inside circuit.. The second station on the far right with a car park on the inside of the track is on the second circuit.
The control board is wired to control a simultaneous change where needed to save the head game.. I first made the mistake of not having a discharge unit in the switch circuit. It was a nightmare! Wiring is not for me!
Well I hope this is enough info for people to see my vision, I hope that I one day get time to finish it but 5 young kids keep me busy and tired!
Ed”
N gauge track plans:

“Hi Al,
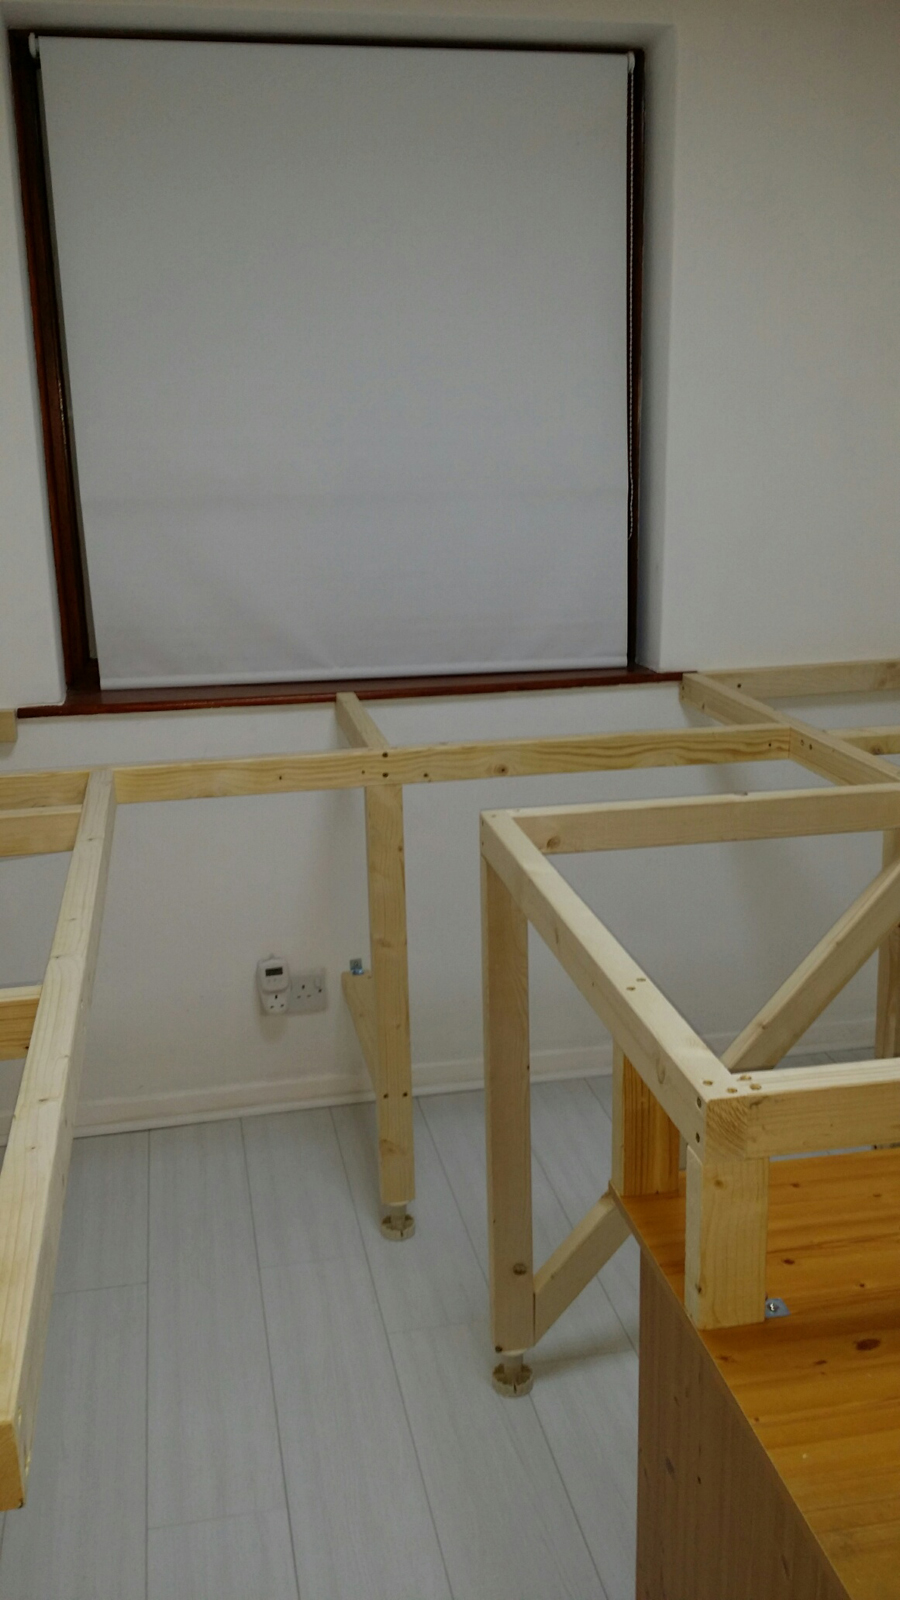
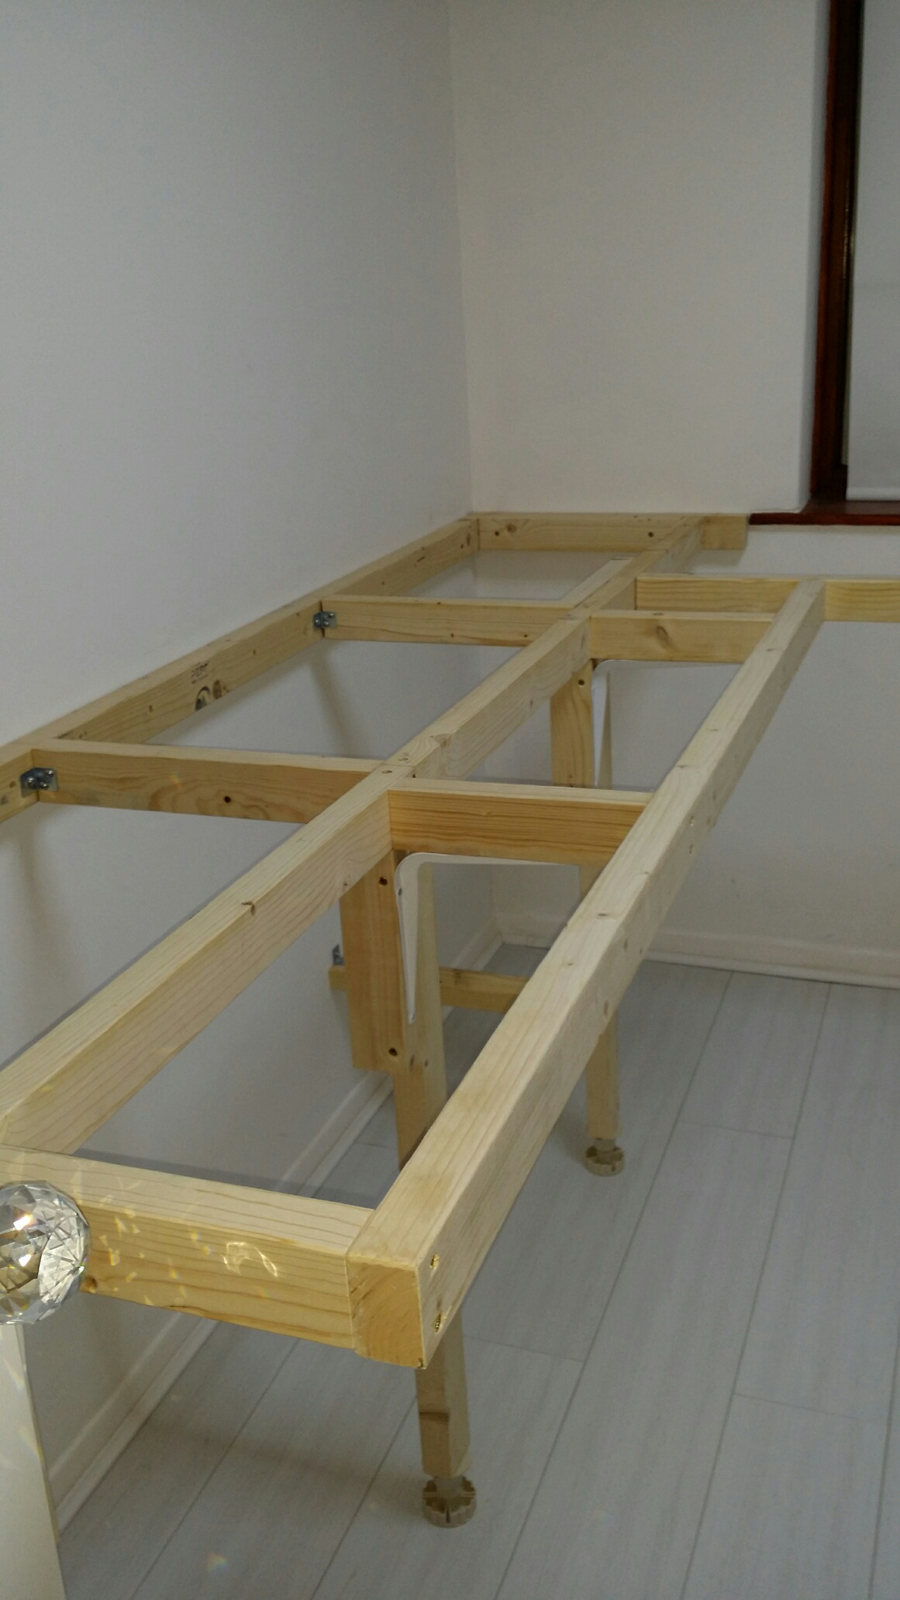
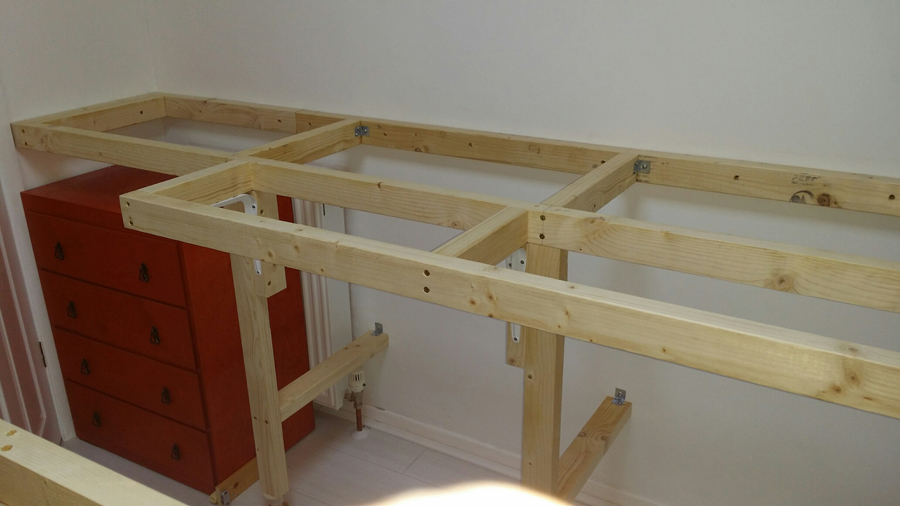
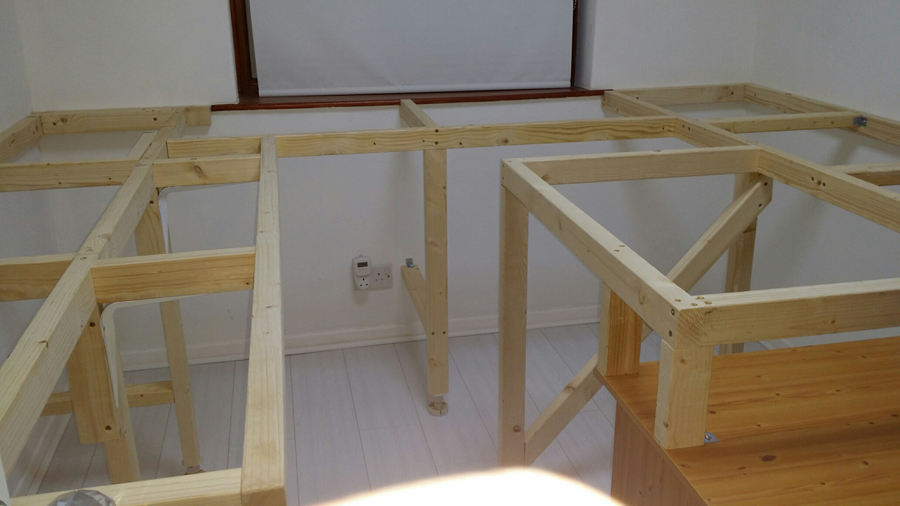
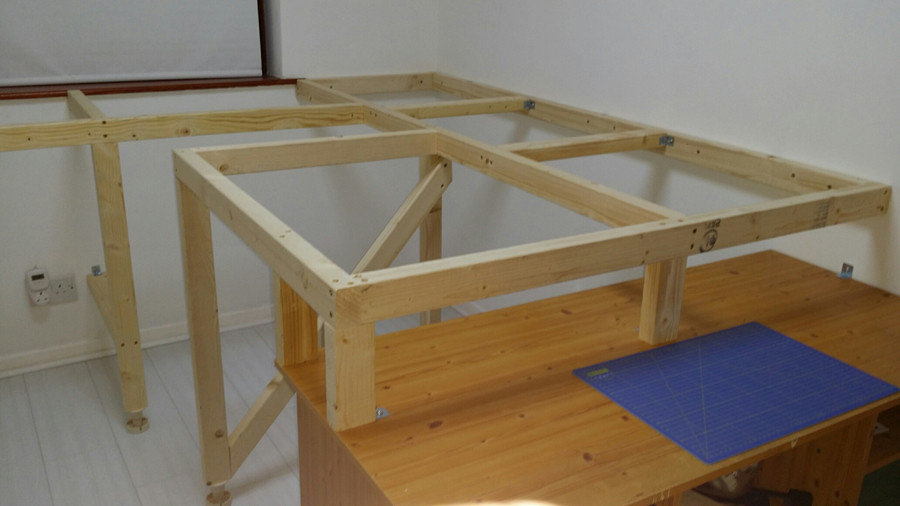
Just thought I’d drop you a line with a few pic’s, I retired last Christmas (aged 61) and was given permission from my wife to commondeer the small bedroom in the house for my layout, I’m 12 month’s in now and have just finished the baseboard framework, there’s plans for a small higher level later on.
It covers just short of 50 square feet so it should be quite a nice layout as I’m modeling in “Z” gauge…… hope my eye’s hold up!
Thanks to you and all the modelers for sending in their pic’s & videos…… keep em coming guys.
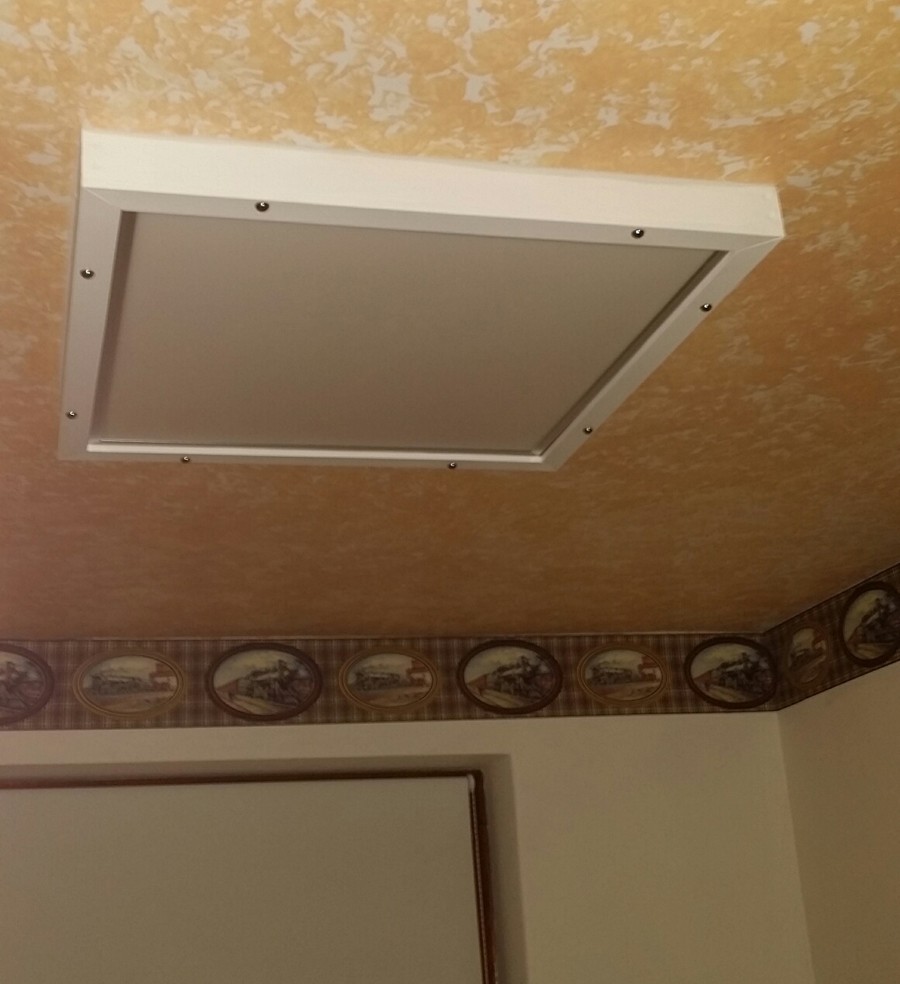
The roof light is one single LED by the way, very bright.
Keith”
A big thanks to Keith and Ed. It just goes to show how a little planning can go a long way. Having a bench to work on properly and get the most from your space, may not be the most exciting part of your layout – but it’s a sound investment in the long run.
Mind you – you don’t have to have build a bench. Remember John’s ironing board layout?
That’s all this time folks. A big thanks to Ed for adding to the N gauge track plans collection.
Please do keep ’em coming.
Don’t forget a simple way to plan your layout is with the Beginner’s Guide.
Best
Al
PS Latest ebay cheat sheet here. Rather busy at the mo.


Keith. Love being able to see the beginning bench work. To often we dont see what it all started as. Question though. In the photo showing the red chest. Behind that looks like a radiator or water room heater of some sort. Is it wise to place something up against a heat source? I’m just thinking of a possible fire location!!
Pete-Sun shiney Silicon Valley
Ed. Great looking start. What over all size are you working with? Looks from the photo to be about 4ft X 8ft, but it’s hard to get a reference for size. Love the way you have it all planned out. I also really like the control station you’ve added. Looks very well thought out and made. Keep us posted on progress
Pete-Beautiful Silicon Valley
Ed can you tell me the overall size of your layout also where can I learn about the correct wiring procedures I am using DCC and really do not have a good electrical background
Thanks
Steve
Finally, someone who builds a very nice, small, N scale layout. Mine is similar in size, just 2 1/2 feet wide and 7 ft long. One town and rwo hills, no lake or river. Hope he posts more pictures as g e orogresses.
KEITH: Wow! I am so grateful to your understanding wife for giving up a room to you for a layout. Please tell her for me that she is to be commended, and that I thank her. Why is that important to me? I am a 79-year old gal, who, after waiting 75 years, is realizing her model railroading dream. I am married for the third time to my Jr. High sweetheart, my first love. We have both been widowed not once, but twice, and are married for 12 years. We live in my home in SW Mississippi, and after he gave me my first train set, I acquired a 93 pieces (about a dozen locos) from an acquaintance. I have a large enough home, with a 19.5 x 32′ living room, but not large ENOUGH! After much discussion, I decided to forfeit my attached, brick carport for a train room. The new car now sits under a canopy to protect it from the intensity of the MS sun. We are so enjoying the building of a layout in a 16′ x 18′ room. There are lots of windows on three sides, affording us a view of the entire back and sides of our 2-acre lot. My husband built the benchwork and does the wiring for me. I’m so fortunate to have this, and especially grateful as we approach our “declining” years, and are traveling a little less these days…..I think you are doing a great job with yours, and look forward to future photos! ENJOY!…..Marion
Superb carpentry and appears to be just the right height.
Hi All,
Thank you for your comments, my wife tells me I’m a bit of a perfectionist so it’ll take me a while I guess to complete this layout…. (if ever).
I did lots of adjustments with the baseboard frame to make sure it was absolutely level…. one thing was adjustable legs, made life more easier than packing pieces, before I retired I was a development technician for a British company that designed and made (amongst other things) clutch and braking systems for Formula one racing cars, so by that, accuracy is a must… I guess it’s in your blood.
I’m starting on the baseboard itself tomorrow and am looking forward to getting that screwed down and hopefully some track laying next week.
So glad for you Marion that you’ve found happiness in both your marriage and your hobby…. long may it last.
Pete,
Thank’s for you comments, don’t worry about the radiator it’s disabled I’m going to try to maintain a constant temperature in (The fat controller’s) room if I can.
Thank’s once again to all that commented and to ‘AL’ for a great website.
More pic’s and vids later.
Keith.
Good one Ed , would love to do a ~N scale , but eyesight could be a problem for me …Dangerous dave
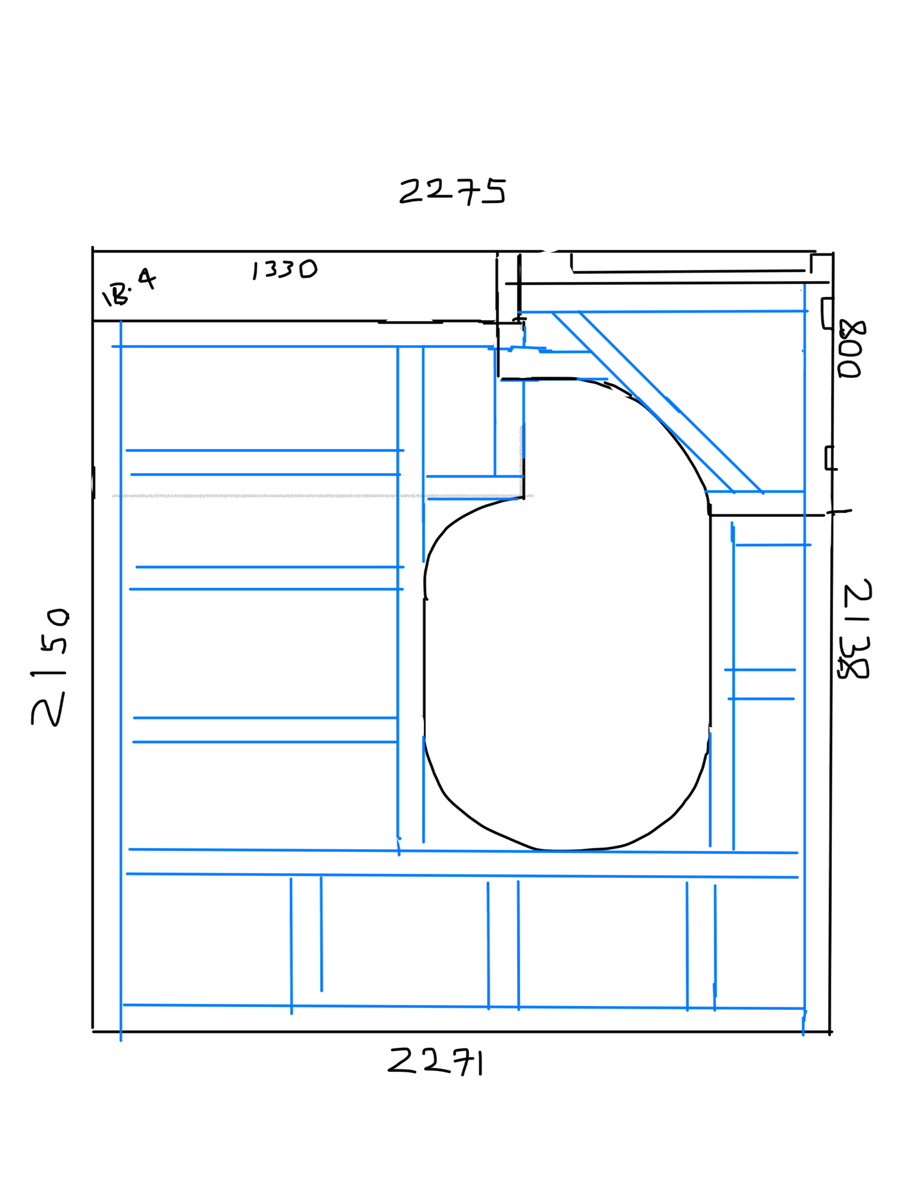
Thank you all. I’m getting more inspired to complete it now I have a space to do it. And I’m honoured that dangerous Dave himself has seen it. My layout is 1.7m x 0.8m. It’s not ever so small. The plan amongst the pictures is the OO gauge room. (Yet to start) I’ll keep people posted. Oh and as for DCC wiring. I’ve not got there yet. We’ll see how that goes when I’ve got a control unit.
A great set of pics and descriptions! Thanks for sharing!
I enjoyed the pics. I am In the process of putting in the town and roads as well as the two sets of crossing gates. They are working models that will make the lites work and the gates drop and recover to the “up position”. I have found that on DCC if you start with one side of the tracks (right or left) and wire that one and then the next it isn’t to bad. I am not an electrician but have installed two DCC systems on my layouts. The one I am working on will have two cabs and will be together with the “jumper wires” and will allow two people to operate two or the four or all four of the trains at one time.
Will send pics as soon as my wife will take the pics for me. My phone dosent do well with pics but hers does.
Keith with the attention you have given to the baseboard I’m sure you layout will be a cracker. I like your boarder along the top of the walls.
Ed impressive planning. A nice little layout. Cheers!
Al / Ed: What is the third picture/ framing diagram about? It does not seem to match the N scale layout in the rest of the pictures. Thanks, Tim
Kudos to both….Keith…Very interesting the use of levelers on your support legs rather than permanent….Mike
Awesome, I’m waiting to start an HO layout in next couple of months.
Thanks for your pics 🙂
Two great examples of meticulous planning that eliminates problems later on. Well done.
Ed, I like what you are doing and I know what it is to have the President/CEO/wife approve.
One suggestion. If run your train clock wise out of the siding to the right of your control station how do you get on the inner tracks without backing up? I suggest you think about adding a right hand crossover somewhere. It would make thinks simpler.
Dale
Hey, I like what you are doing here. I just turned 75 and cannot work with “N” gauge. Sometimes “HO” is a challenge but I still do quite well there.
Back to your layout. my only ‘negative’ observation is this: the road from the lower to the upper level appears to exceed 6%. Either way, an ‘auto/truck’ grade of greater than 2% to 2 1/2% is not desirable. A lower % of grade will keep it from standing out.
Two Thumbs up!
Great layout in a small space……
Love the precision. If you start right and you end right.
I’m sure your finished product will be great.
Nice, nice work…..
Absolutely awesome! Thanks!
Great looking layout!! Well planed, Cant wait to see the finished Railroad world you have started,, Keep the updates coming! Good Luck
Pretty neat.
Well thought out, newbies to the hobby should watch and learn from your benchwork pictures. All good things being with a foundation and it’s worth the effort.
I commend you for a well-executed layout. In an effort to get trains up and running, people tend to get sloppy with the framework. This just ends in a hodgepodge of framing that makes changes difficult. I’m no different. I wish I had spent more effort in the foundation of the layout, but too late now.