Gary’s Pennsylvania railroad HO scale is the gift that keeps giving.
His last post is here. This time though, he talks us through how he ‘sourced’ a loco he couldn’t find:
“Hi Alastair: This is my 4th time writing to you and your model railroad members about my Sunnyside Yard project in HO scale.
My project is a layout capturing the basic look of Sunnyside Yards in the late 1960’s and early 1970’s.
At that time, the most famous locomotive of the Pennsylvania Railroad was and probably still is the GG-1.
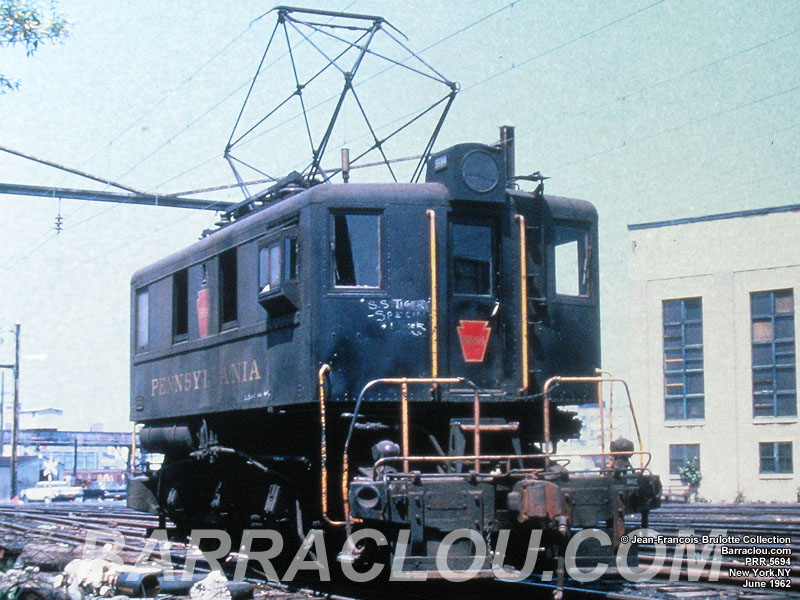
But there was another lesser known yard engine used in Sunnyside Yards to make up the passenger trains. That engine was a PRR Class B1 electric yard engine (see picture 1).
There were 42 built and mostly used in Sunnyside but also used in Philadelphia 30th Street Station and Harrisburg Station.
After the B1s were retired sometime in the 1970’s, all B1s were scrapped except for a single example preserved at the Railroad Museum of Pennsylvania.
It wasn’t a very big engine and had the nickname “The RAT” as it was called by the yard crews because of the way it shuffled around yard.
When I started my project back in January, I knew that besides the GG1s and S2 diesel locomotives, I wanted to have a Class B1 engine on my layout.
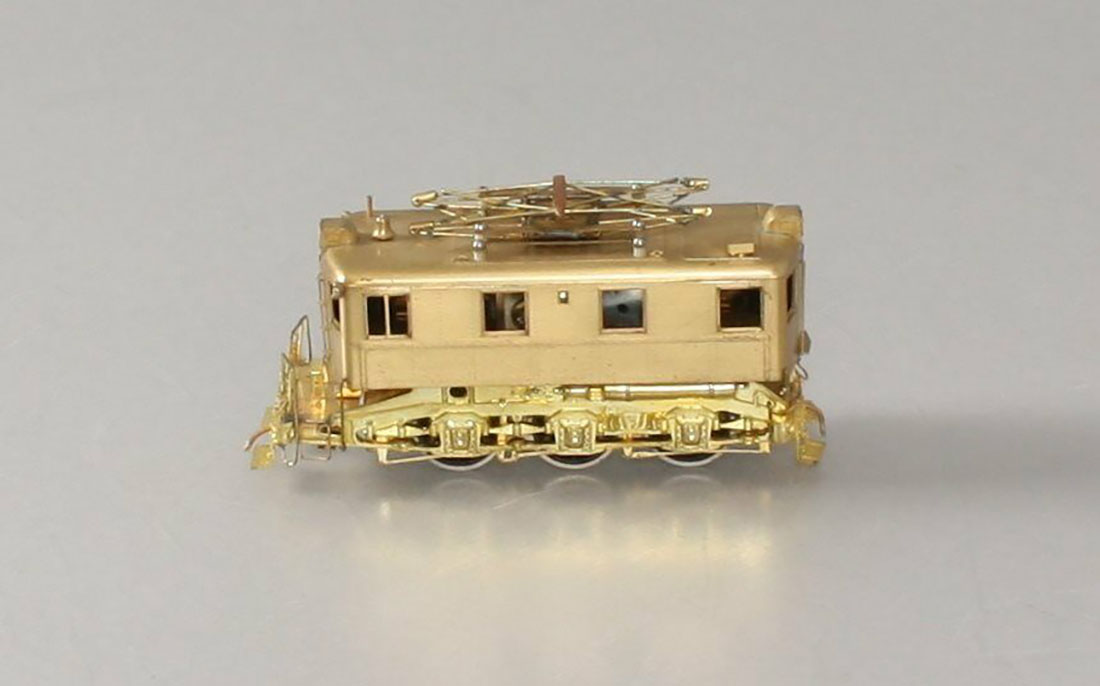
They were made in O scale, but none were ever made in HO scale except for a brass model made by ALCo Models (see picture 2). The cheapest price I have seen was $250.00 BUT I did not want to use a brass model in my layout.
For me, the Class B1 was an important piece for my layout; I had worked many midnight shifts at Sunnyside Yards with that engine.
I did not know what I would do because I could not find one in HO scale. So I decided to start with my layout which I have been working on for the past two and a half years and still working on and every chance I had, I would always do a search for the engine when I used my computer but never found one.
Not UNTIL early March of this year when I came across a company called Shapeways. Shapeways does 3D printing for your product and also will advertise it and sell it; that’s how I found it.
There was a person who had the brass model of the Class B1 and Shapeways produced a HO scale version for $50.00 and an N scale version of the engine for $20.00.
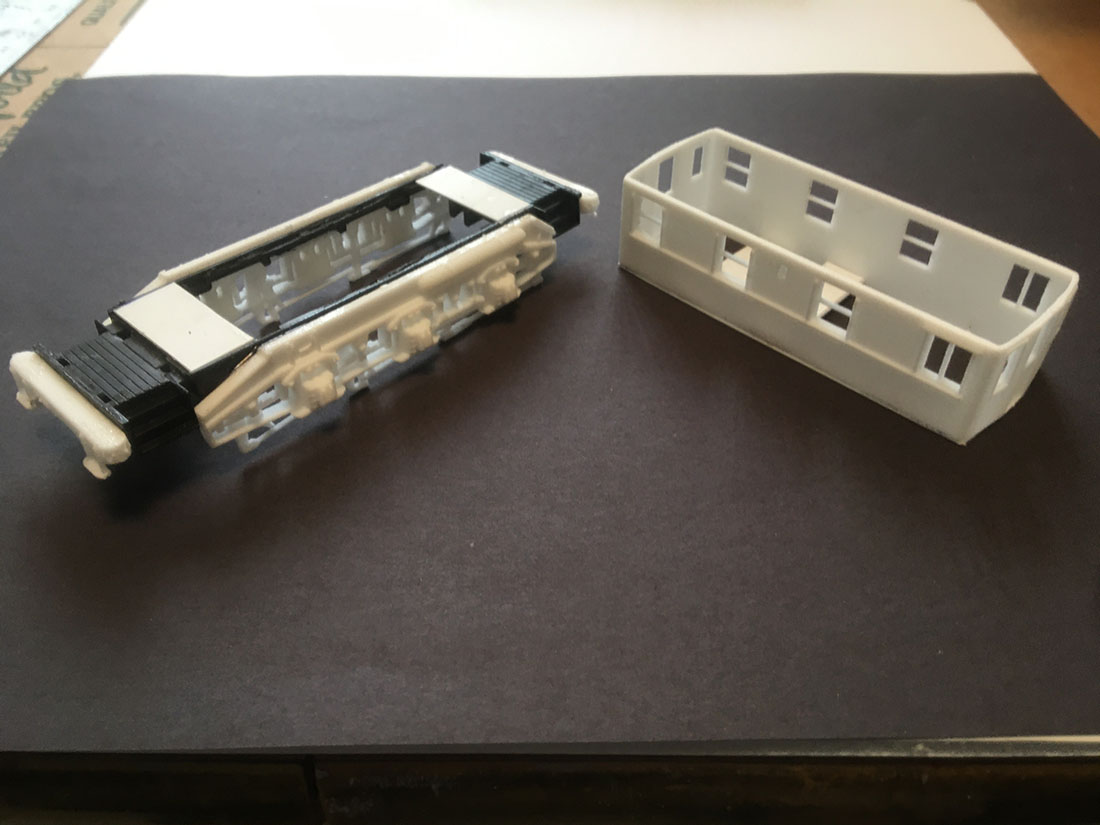
BUT, as you can see in picture 3, all they provide is the cab, roof, chassis sides and bumpers and it only comes in white plastic. You have to build the model yourself, see picture 3.
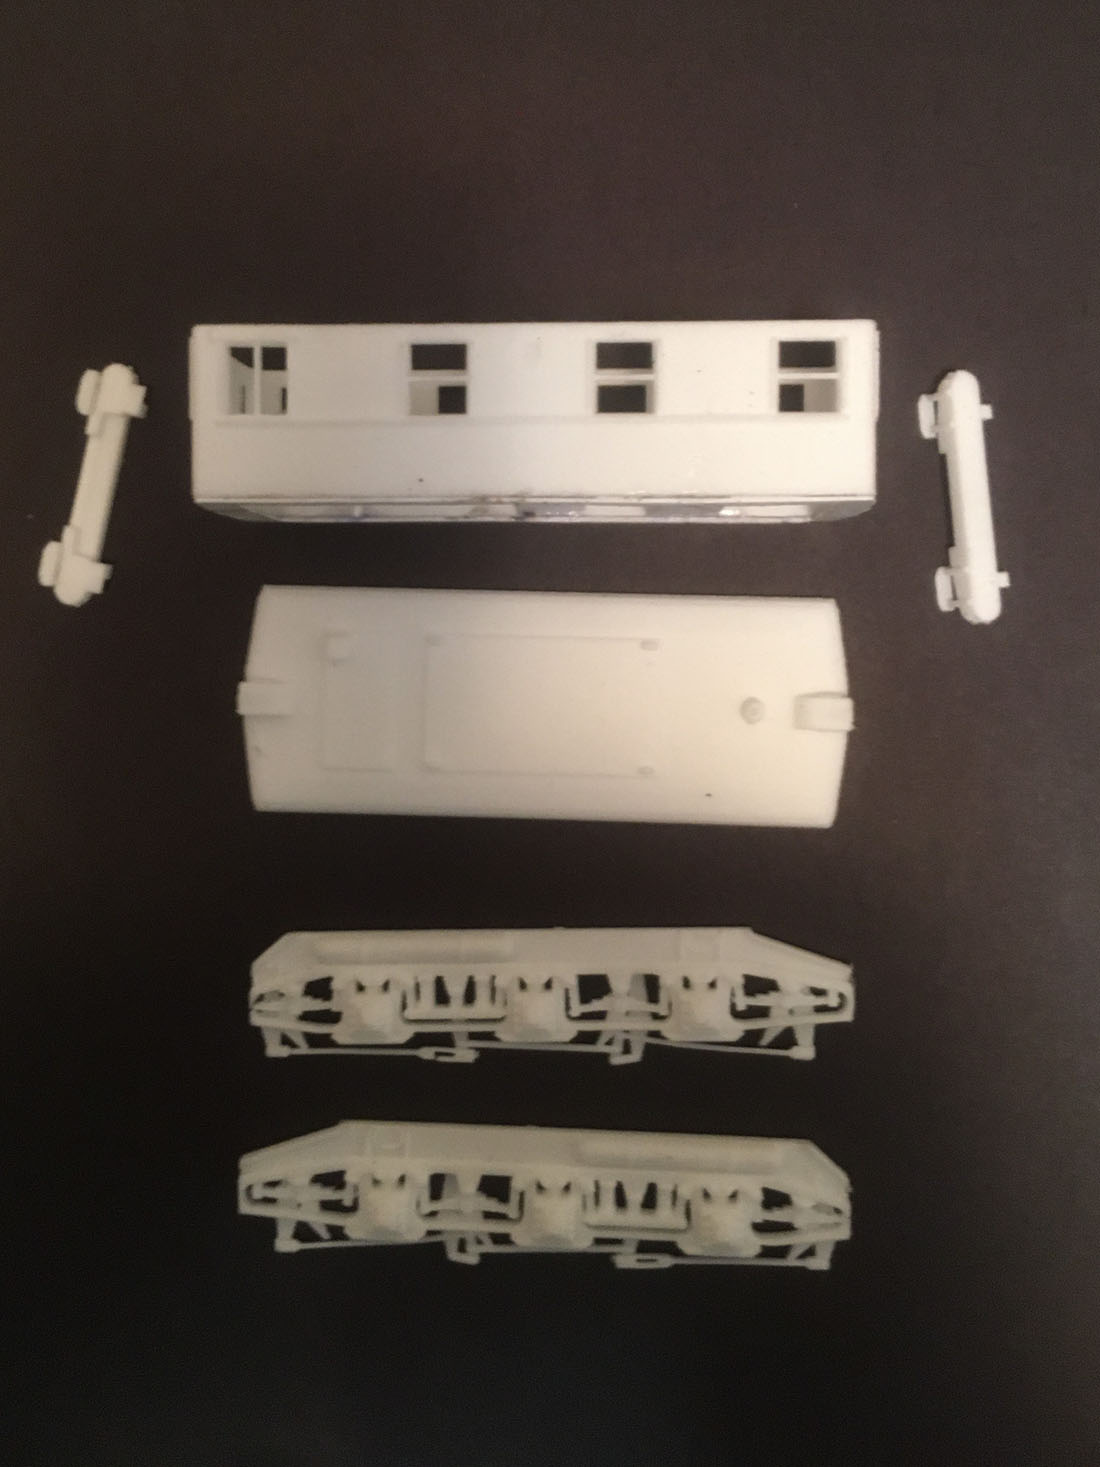
So in order for me to get a Class B1 for my layout I would have find the parts I would need to complete the building of the engine.
I needed an engine, running boards, grab irons, lights, couplers, a Pantograph and decals.
I had always thought that a caboose had a very similar cab as the B1 except for the windows and roof and as it turned out the chassis of an HO scale Pennsylvania caboose was the perfect size. So I bought 2 used Pennsy cabooses on ebay and started to cannibalize them for parts.
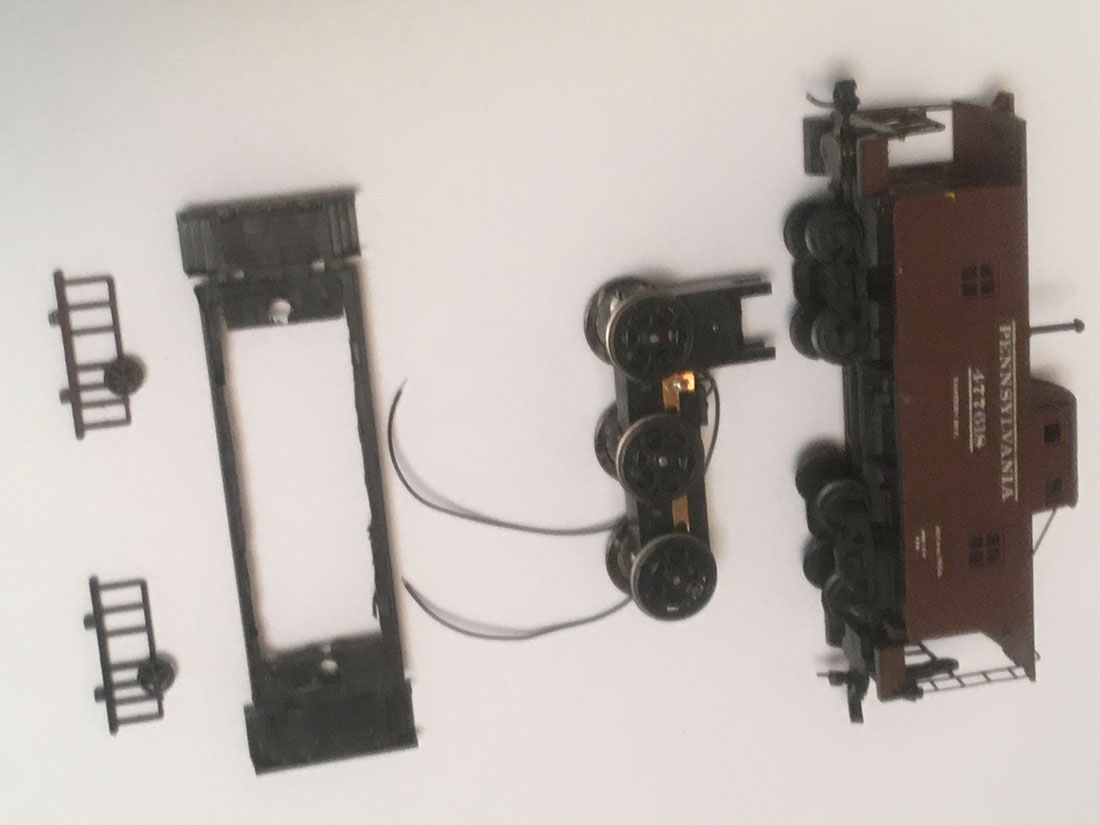
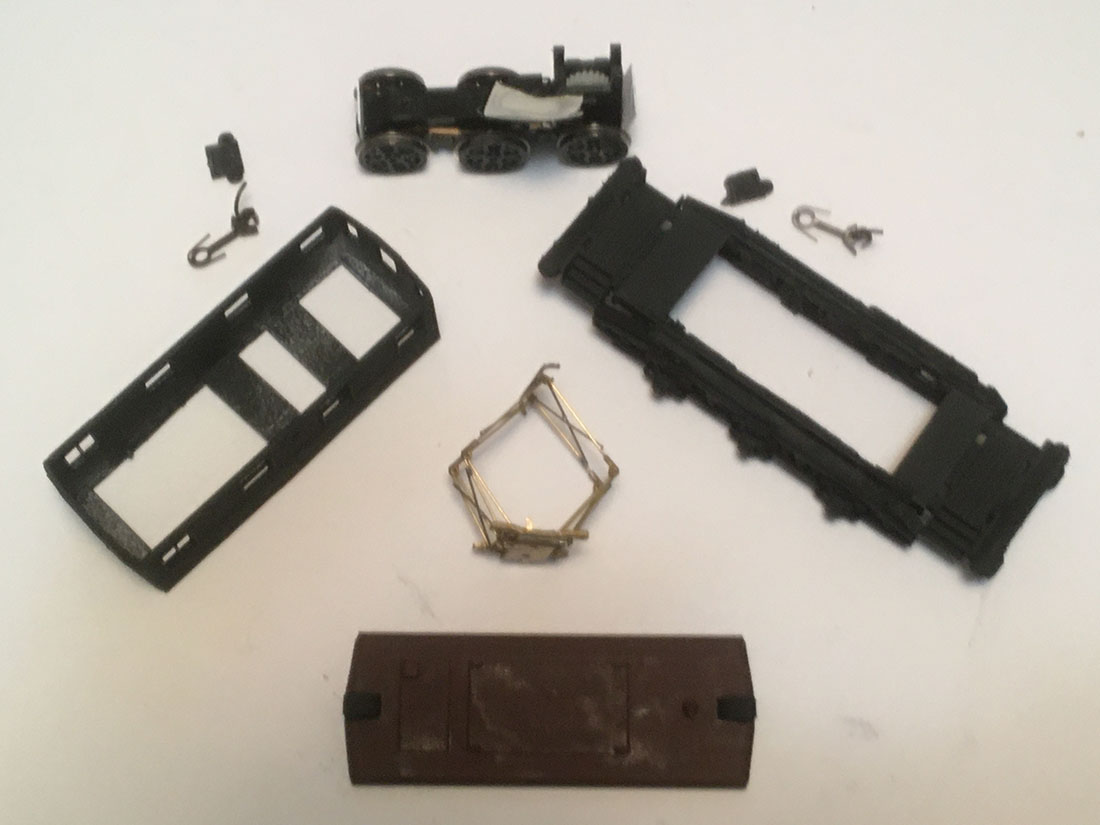
I also had part of a Bachmann GG1 engine that needs parts to run BUT what was important was that it already had the electrical pickups for the lights. I decided to use it even though it would not run and later on I could order the parts from Bachmann and see if I could get the engine to run. (See picture 4).
So I started putting all this together. I first had to hollow out the chassis of the caboose so that the engine could fit in.
I then had to add some plastic strips to the chassis so that I could support and attach the engine. I attached the front and rear bumpers. I then attached the sides of the chassis that contained the journal boxes (see picture 5).
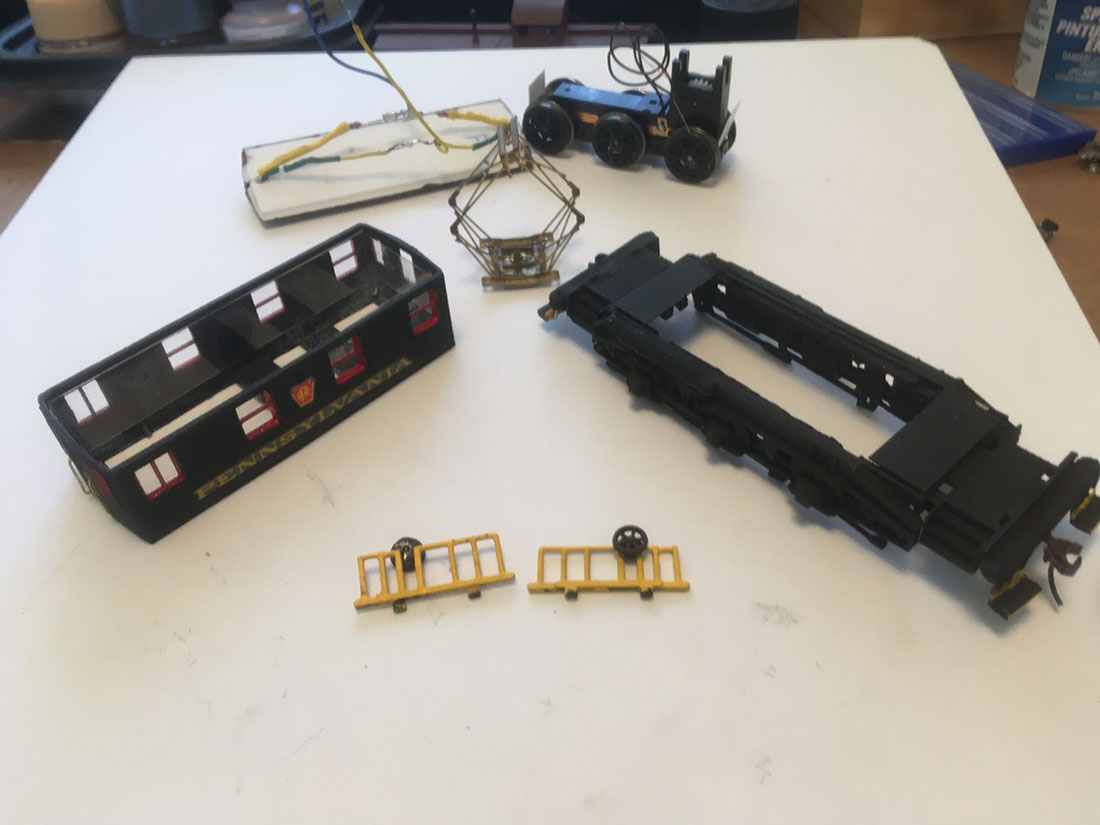
My next step was to paint the chassis and the cab and the roof. (See pictures 6).
Once the painting was done I had to apply the decays to the cab, wire the LEDs on the roof, install the couplers and scratch build and install the running boards. I also had to measure, cut and paint pieces of wire that I was going to use as grab irons (see picture 7).
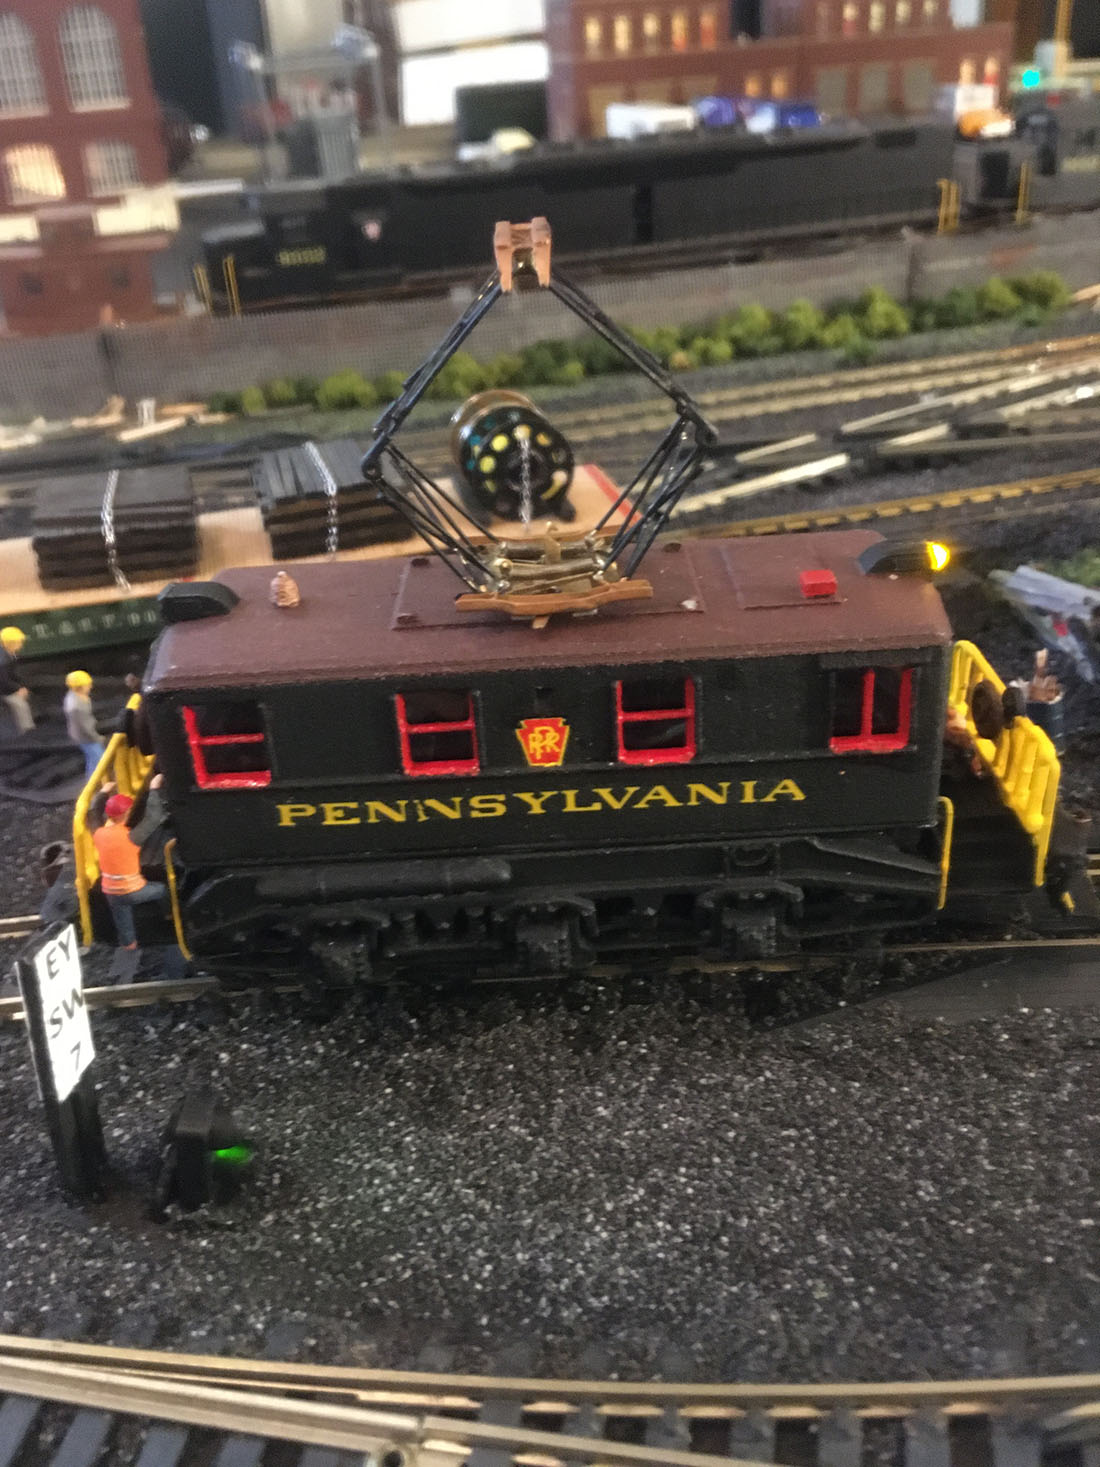
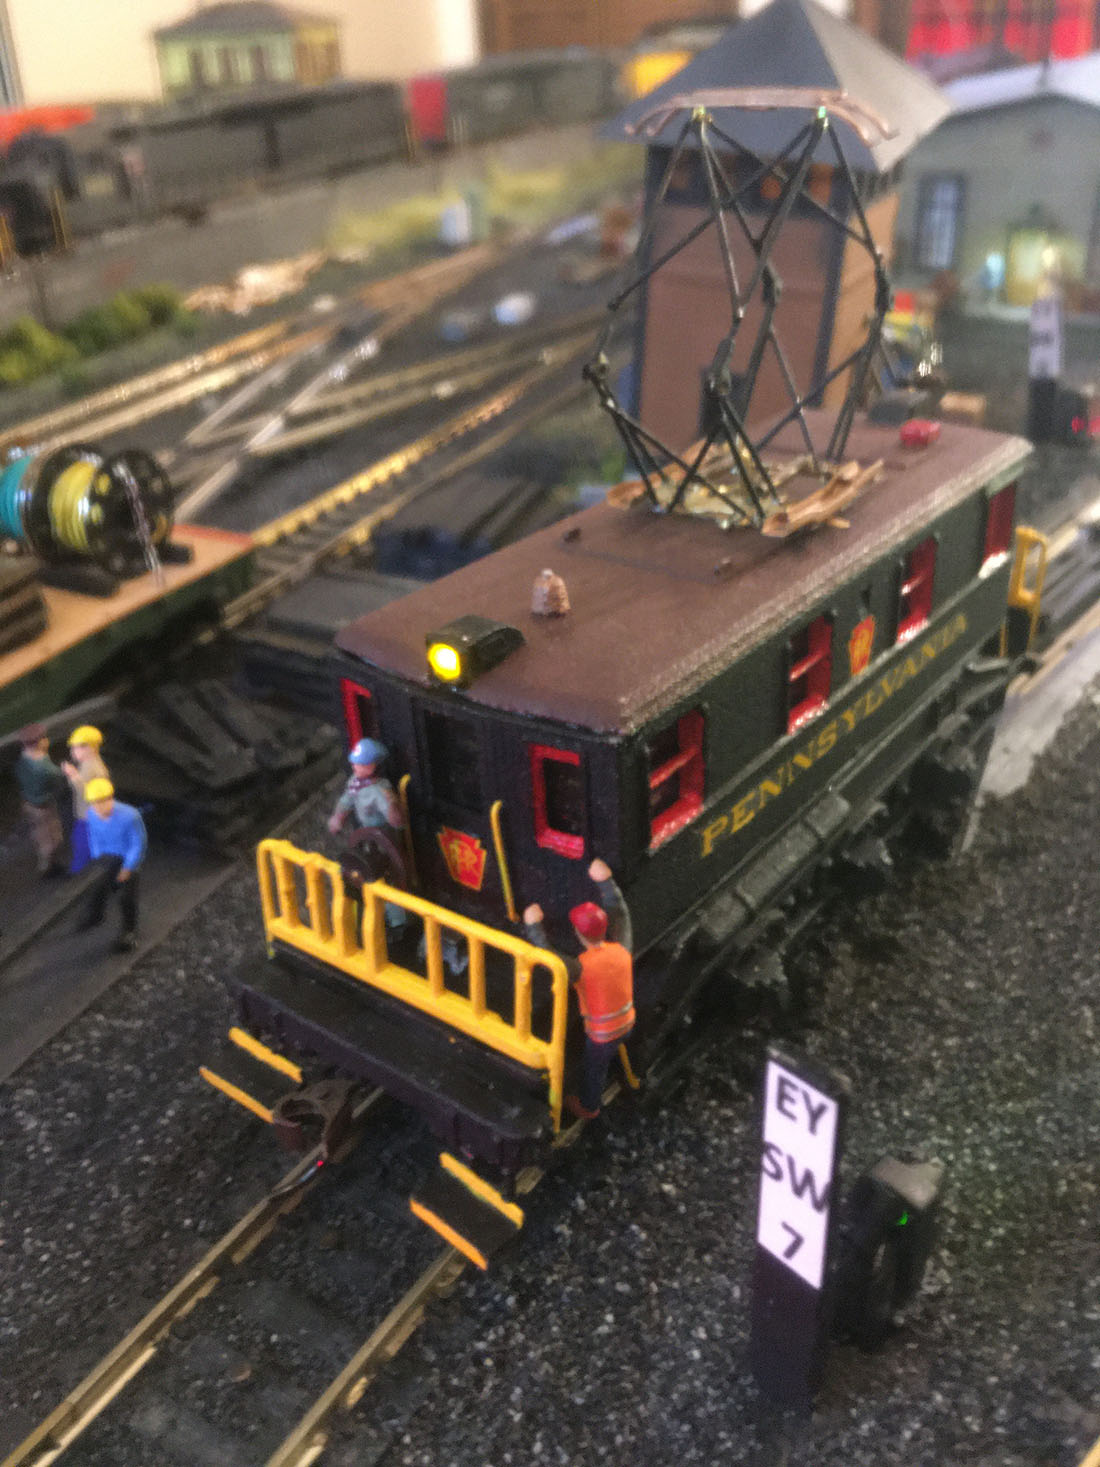
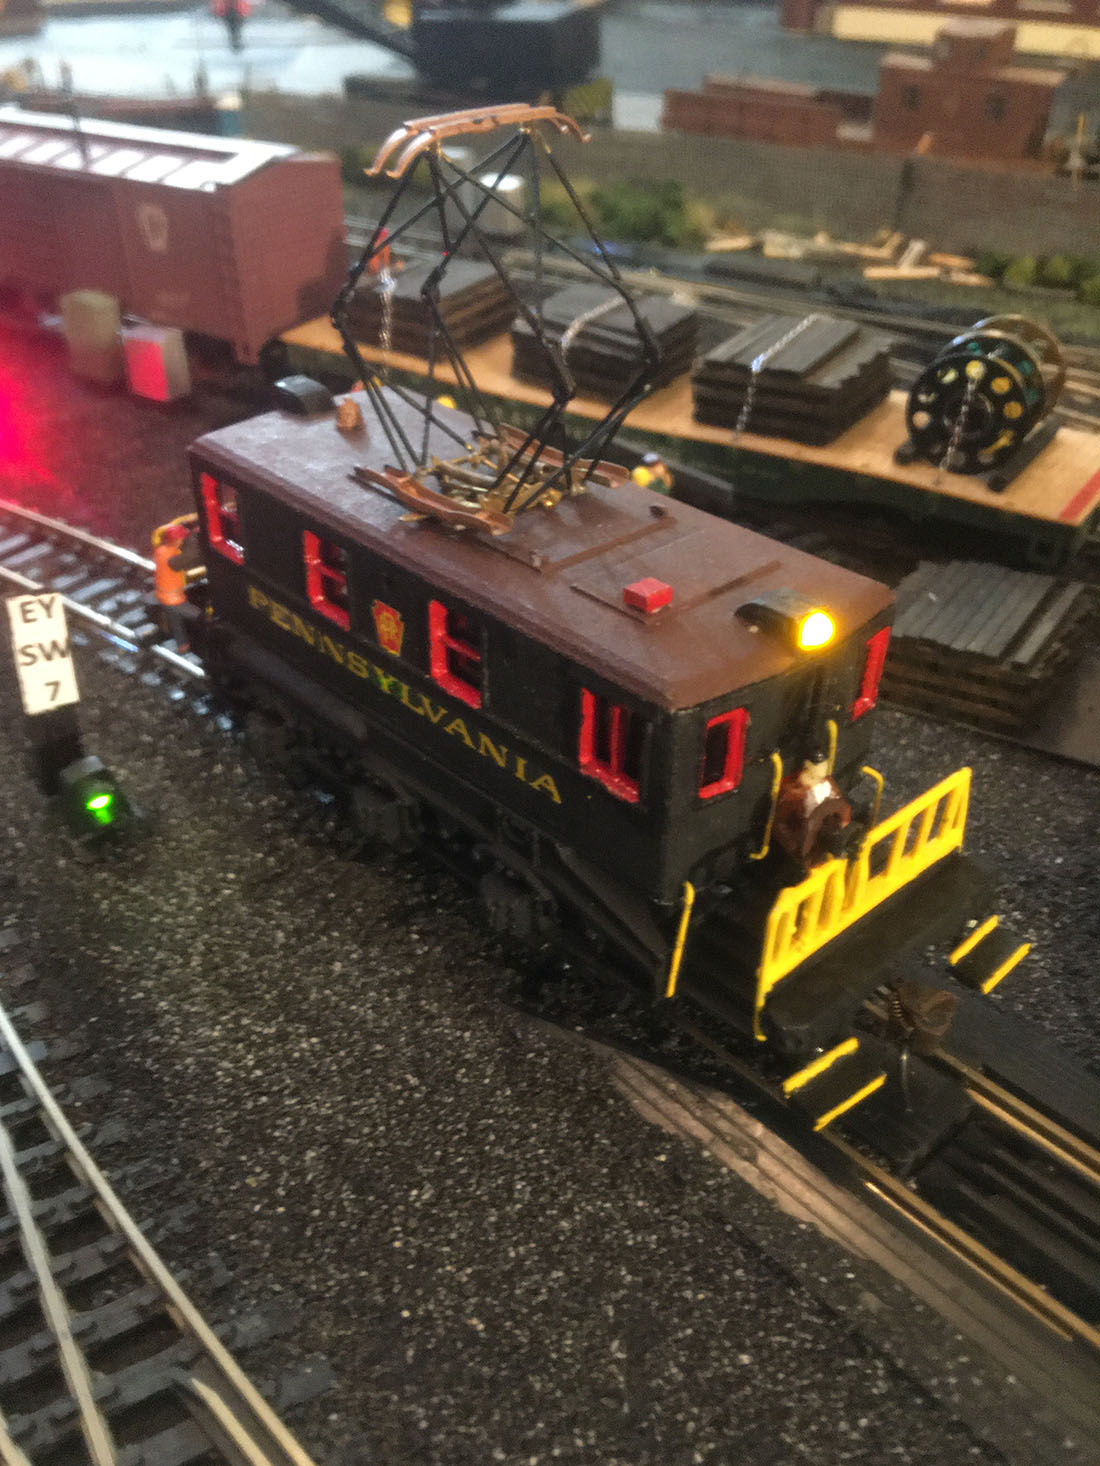
When that was complete what was left was testing the LEDs and assembling the B1. Picture 8 is the finished model.
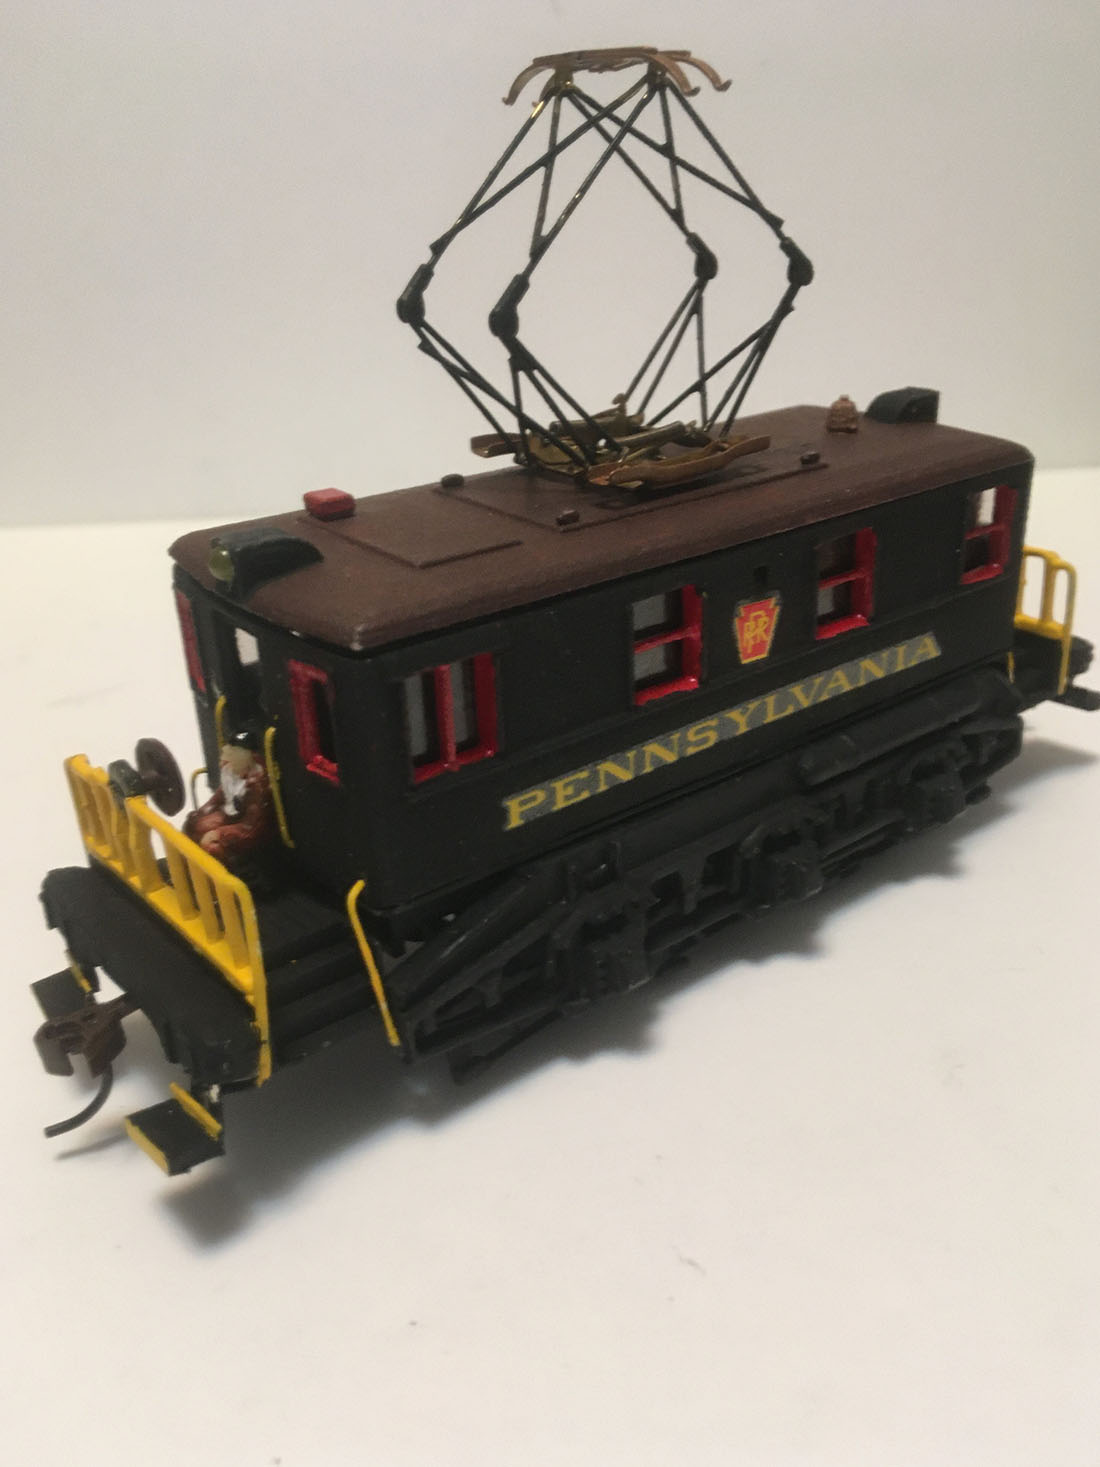
The Class B1 then was ready to put in my Pennsylvania railroad HO scale; see pictures 9, 10 & 11.
I hope you enjoyed this. I am very surprised and pleased with the way it turned out.
Now it is back to finishing up the Commissary Yard and fixing some tracks that are causing derailments.
I want to thank Al and all the modelers that have sent in their pictures, videos, ideas and scratch built projects that have helped me with my project.
I also hope that all of you are safe through the pandemic that we are going through. For now stay apart and stay safe.
Gary M from Long Island”
A huge thanks to Gary for sharing his Pennsylvania railroad HO scale – he has done a wonderful job of documenting his layout right from the very start. And I loved this post – clever stuff indeed.
It’s quite a popular theme, have a look at Andy’s: Pennsylvania model railroad.
That’s all for today folks.
Please do keep ’em coming.
And if today is the day you poke boredom in the eye, the Beginner’s Guide is here.
Best
Al
PS Latest ebay cheat sheet is here.
PPS More HO scale train layouts here if that’s your thing.


Wow GaryM, an excellent job of “sourcing” the locomotive that you wanted. Hope that it runs as good as it looks.
Brian – the HOn3 guy. RSA
The greatest thing about this site, other Al, is all the creative thinking and problem solving happening here. Always fun to read and digest.
Now, that is a fantastic littel custom locomotive! I’m getting into the 3D printing phase as well for my future Indian Rialways dioramas and layouts, and I can say for sure that 3D printing really makes it easy for those who want something original and unique. Great modeling!
Cheers!
Kaustav
Well done Garry. The loco looks very good. Being tenacious does pay off. One comment is the yellow hand rails look way over scale. Looking at the photo of the original the handrails do not look very complicated and I’m sure a chap of your talents could fabricate them from some brass rod or even more to scale plastic rod.
It would really jump your model.
Once again I would comment on derailments. Garry says he is suffering from them and needs to sort out his track. Taking the time to lay the track and testing it is so important to your long term enjoyment of your layout. Test test test as you built you layout and sort out track problems as you lay your track before doing anything else.
Wow nice job must’ve been a lot of work but ended with a great piece
Looks great ..Dangerous dave
Brilliant model Gary, who knows, a manufacturer might see this and take it on board to produce a ready to run version.
Hello Garry,
this is creative thinking and fantastic finisch, i hope to sie more of this fantastic creativiti.
Regards,
HC Treintje Belgium Herman C.
Fantastic build! Where there is a will there is a way. Do you have any video of your layout? It would be great to see it operating.
Gary: You bring back a lot of memories, I remember this locomotive because it had very distinct features. As a kid in Queens during the 1950’s and 60’s, I loved trains and my father would take me to the Sunnyside yards to watch the freight shunting and passenger train make-ups, I loved it. I also remember a huge mobile rail crane that used to sit their, it was massive and obviously constructed to do heavy lifting.
I have to look into adding the “Rat” to my N Gauge layout.
Your layout is terrific and reflects the golden age of rail in the US.
John
Fantastic piece of work, very impressive and well thought solution to a problem.
Very nice work. The B1 in HO scale was produced by Both Alpha models and Alco models. You can find them on e bay fir as low as $150. I have four on my layout and a 5th one in a box waiting to be painted and converted to dcc
Patience, patience, patience….What a wonderful project and something you can be extremely proud of Gary. Your attention to detail and unlimited patience certainly show through. Happy railroading and stay safe in these trying times.
Dick in Lexington Park, MD, USA
Great engine! A job well done!!
Very nice Gary. I live on LI too and Sunnyside is always the highlight of a trip into the City. Unfortunately the East Side Access project has blocked much of the view.
Bob
Gary
WOW! Absolutely fabulous work. Unless I missed something you still have to get parts for the motor. How did that go? Great narrative. Now you have make it DCC with a low whirring sound.
Thanks for sharing.
George from NY ( Long Island)
To Colin Edinburgh:
Thank you for your comments. Yes, you are right about the yellow handrails on the loco. They were the handrails from the caboose and I knew they were different from the actual loco but I thought they would look good on the engine but putting two coats of yellow paint on them made the look very FAT. Working on this loco took me away from working on my layout and I want to get back to that. When I get some extra time I will go back to this engine and refit the proper looking hand rails. But I think it looks good the way it is for now. Again, thank you for your comments.
Gary M from Long Island
Fantastic! Great use of a really interesting technology. Stay well. Cheers! NJ Mark
Great job.
Please send pictures of the layout.
I live one block from the yards please contact me.
Jack Clancy worked in the towers if you happen to remember hi. Who still lives in Astoria.
Excellent build. I have never seen anything like it. Wonderful imagination and desire to make what you want.
I will have to look into the 3D printers. Could be a great help in making what I need.
Thanks for the pictures and details of you project.
Don
Awesome piece of work ,well done Gary M.
Hello Gary you worked in Sunnyside yard in the 60? My cousin Jimmy Shuffler work there then and my friend Eddie K. Did you know them. Did you know Eldies coffee shop.
Gary,
What a great job recreating this locomotive! I sure hope you can get the drive parts to make it run! I can offer one detail about the light / LEDs so that they don’t stick out but are flush with the box of the cab light as in the photo of the original. This should prove no challenge for your fine modeling skills!
I learned that you can grind down the “dome” of LEDs to within about 1/32 inch of the little “cup” that produces the light. Getting any closer will destroy the nearly invisible filament that carries the current from the cathode to the anode (“cup”) of the LED.
Don’t get quite that close to the cup with the coarse grind. You can then smooth the ground surface with an ultra fine wet / dry sandpaper. Then, polish the flat surface to a high gloss by rubbing it vigorously across a piece of old flannel. If the flannel doesn’t do the trick, add a bit of auto body polishing compound to achieve the high gloss of the glass on the original.
I have reshaped upwards of 100 LEDs (with only a few trial and error ‘oops, went too close!’ mistakes) while upgrading my HO Märklin locos to DCC and this doesn’t seem to affect the life-span or function of the LEDs.
Happy model detailing!
Jerry in New Mexico.
Great job gary
Amazing work! Congrats!
Great work, I am getting into 3D printing. The options are only limited by your mind.
Great job– a little originality, searching and looking for the parts to kitbash can create not only a unique model, but an affordable one!
Really nice! It’s amazing what modelers can make!
Gary,, you did a fantastic job building your B1 engine. It is amazing how you managed to gather the parts you needed to build it. I have always heard that if there is a will there is a way. And you my friend definitely had a will. Keep up the great work.
Amazing job, Gary. You now have a one-of-a-kind engine.
Hi Gary. Congrats on the B1 scratch build. A wonderful job of creative thinking and implementation. Hope you can find an 0-6-0 drive train to give life to the “rat” and allow it scurry around the yard. I believe Bachmann made an HO 0-6-0 steam switcher that might meet the requirements of the B1 cab enclosure. Good Luck. – Arnie – Staten Island, NY
out standing! coo-dos to you!
Extraordinary loco, I never knew they existed, and a clever build. Well done.
Rod
Absolutely wonderful!
fantastic job ! very creative and well done
A great example of ingenuity! hope it runs as well as it looks.
very nice ideas. nice job.