Richard’s been back in touch with his HO logging railroad.
(If you missed his first post, it’s here:Logging and milling HO scale.
“Hi Al,
Richard from Oklahoma here again…
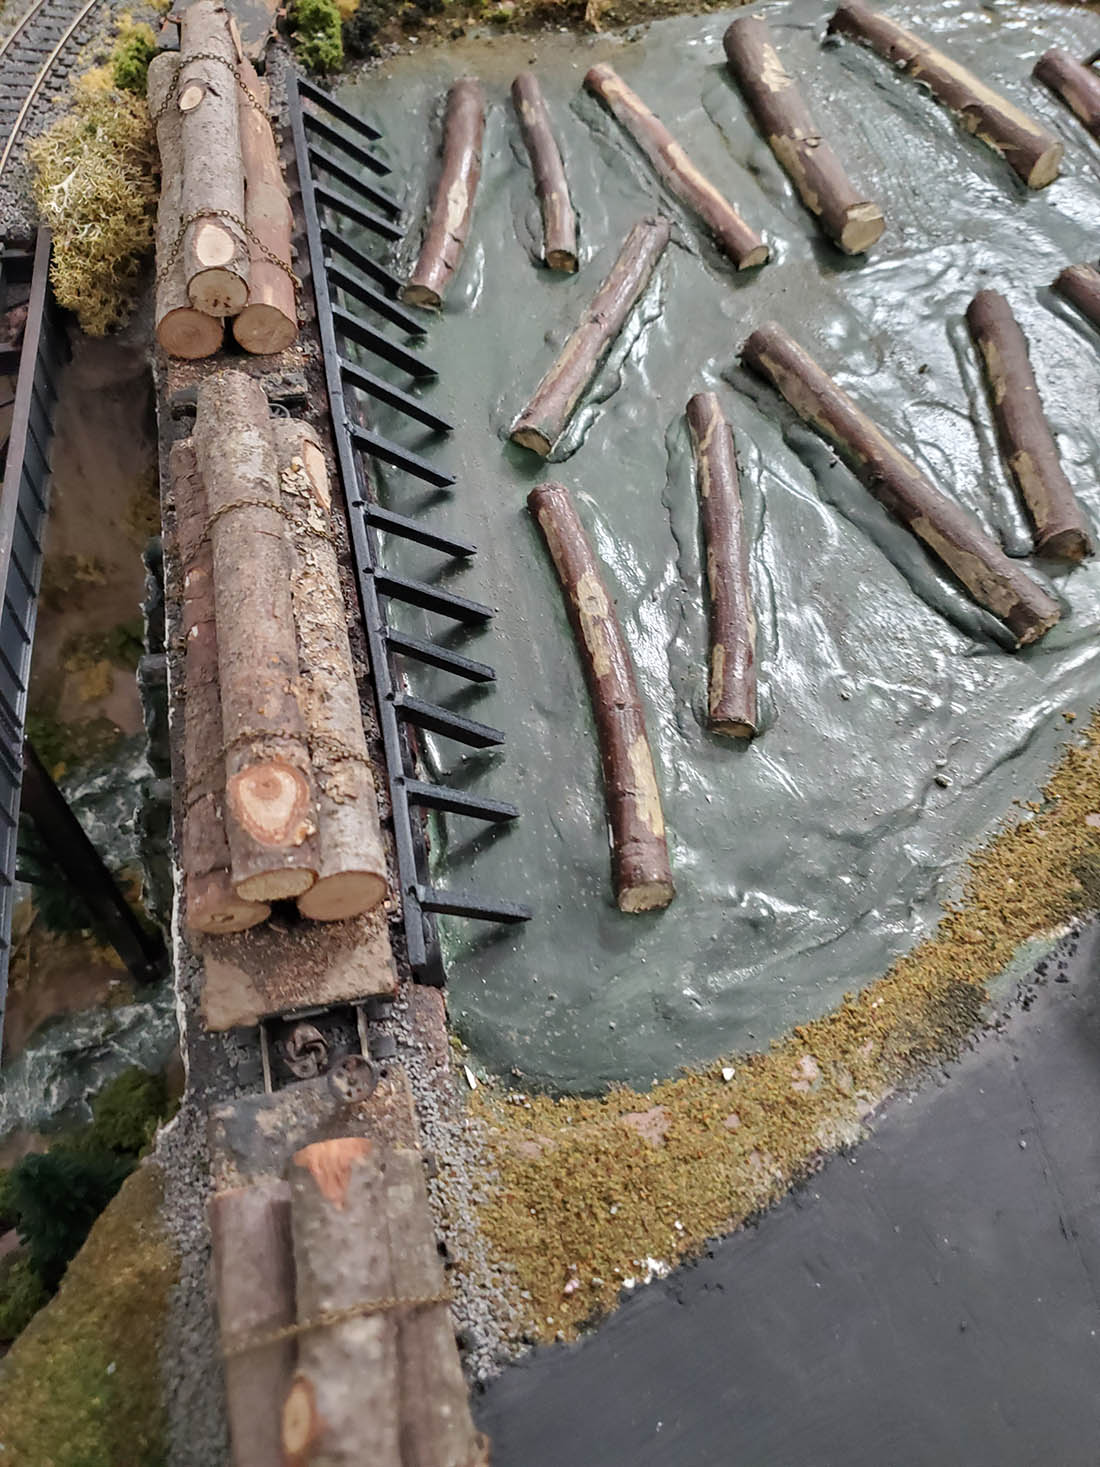
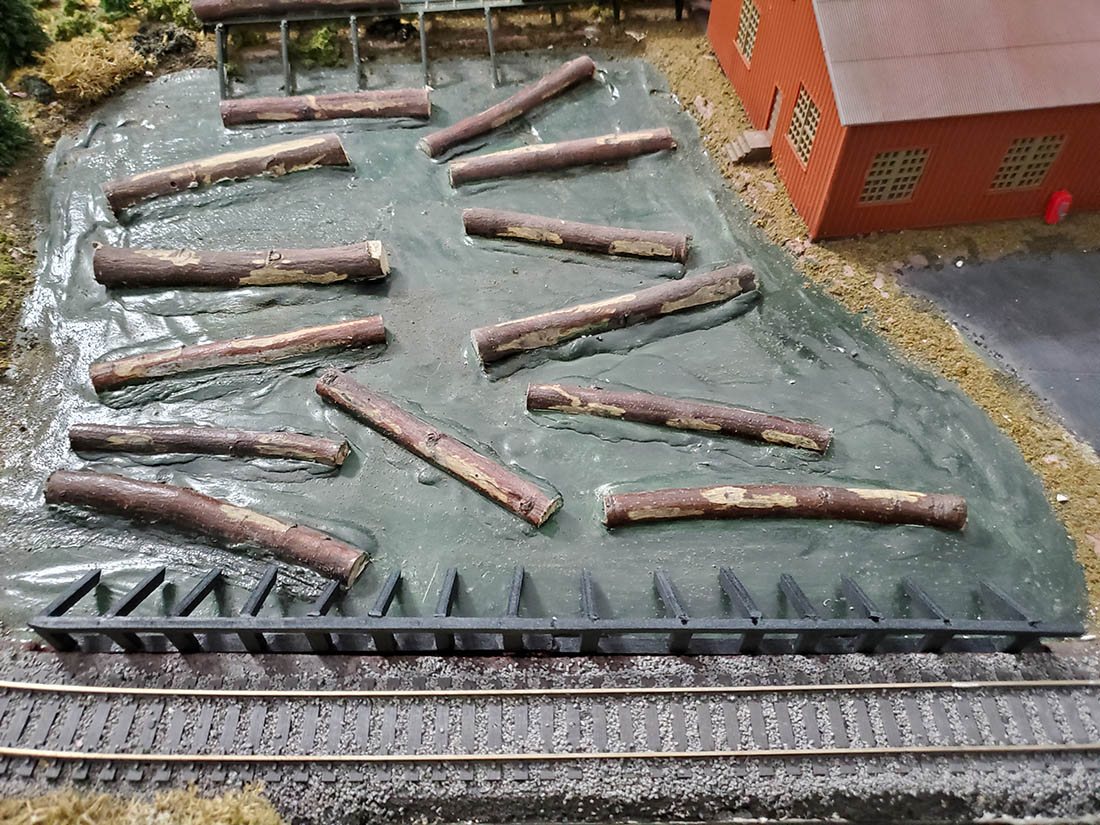
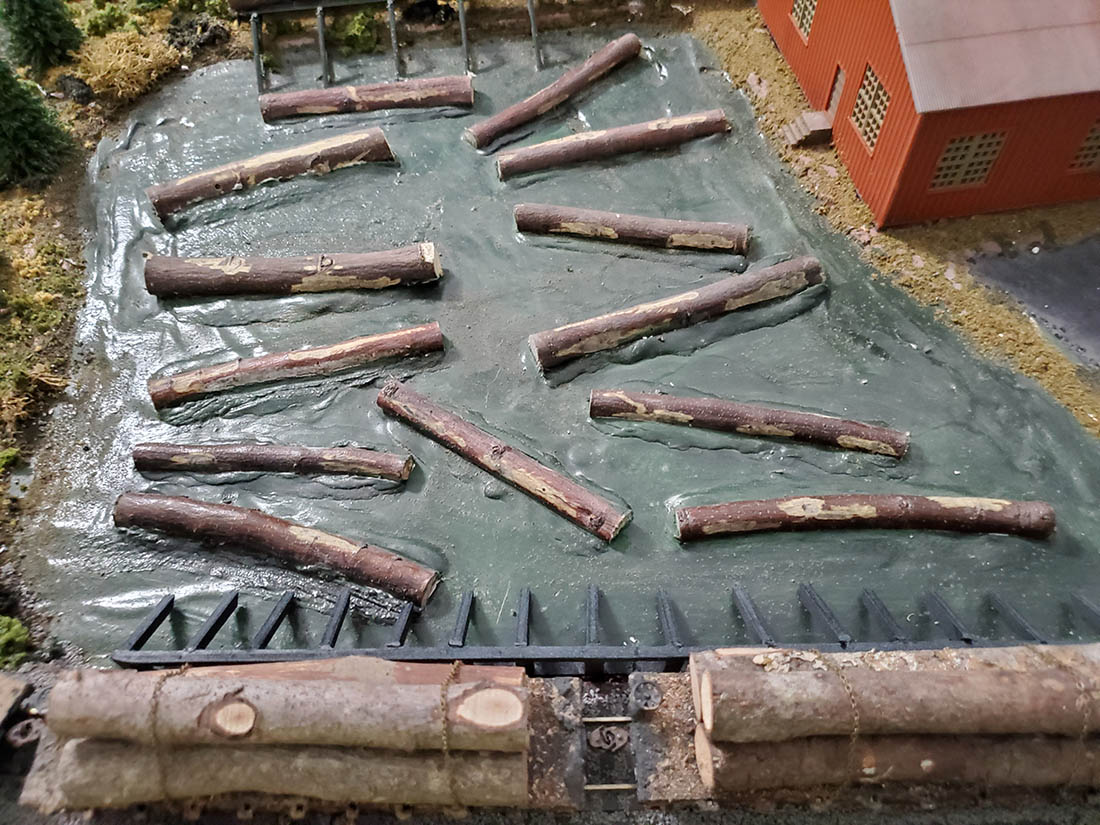
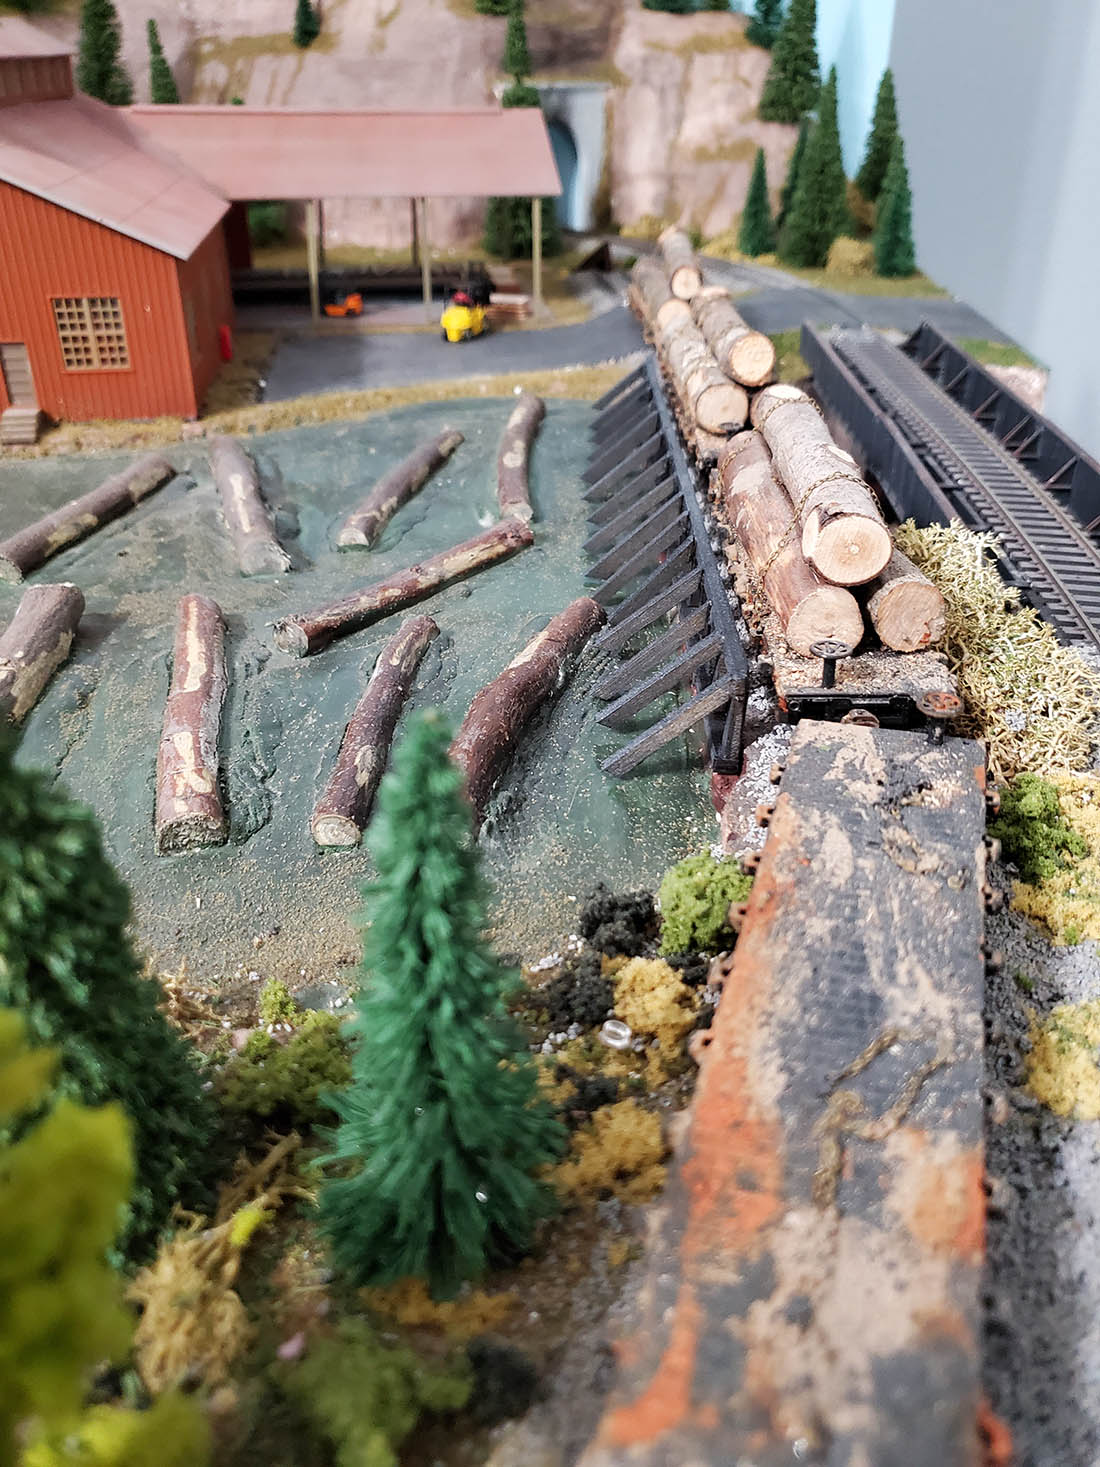
After you spotlighted my logging railroad, which by the way made me feel ecstatic…. several questions where asked about how the logs made it into the mill pond.
So, after some research, I found something similar to what I had in the back of my mind, but wanted to find out if it was actually practical and of real life…
Here is what I found and then constructed… as the loaded cars are spotted, they are then rolled over the side of the railcars and unto the ramp leading into the pond…
Some people seem to think that because something isn’t absolute, others feel it’s considered criticism, when all it is is a wonderment of how it works or should work…. which then creates curiosity for more details and realism….
Thanks Al for allowing us to share our pleasures and attempted desire to what we’re trying to accomplish…
Richard.”
A big thanks to Richard for sharing more of his HO logging railroad.
It reminded me of Jim’s: HO scale DCC layout.
Now on to Heather and Jason today:
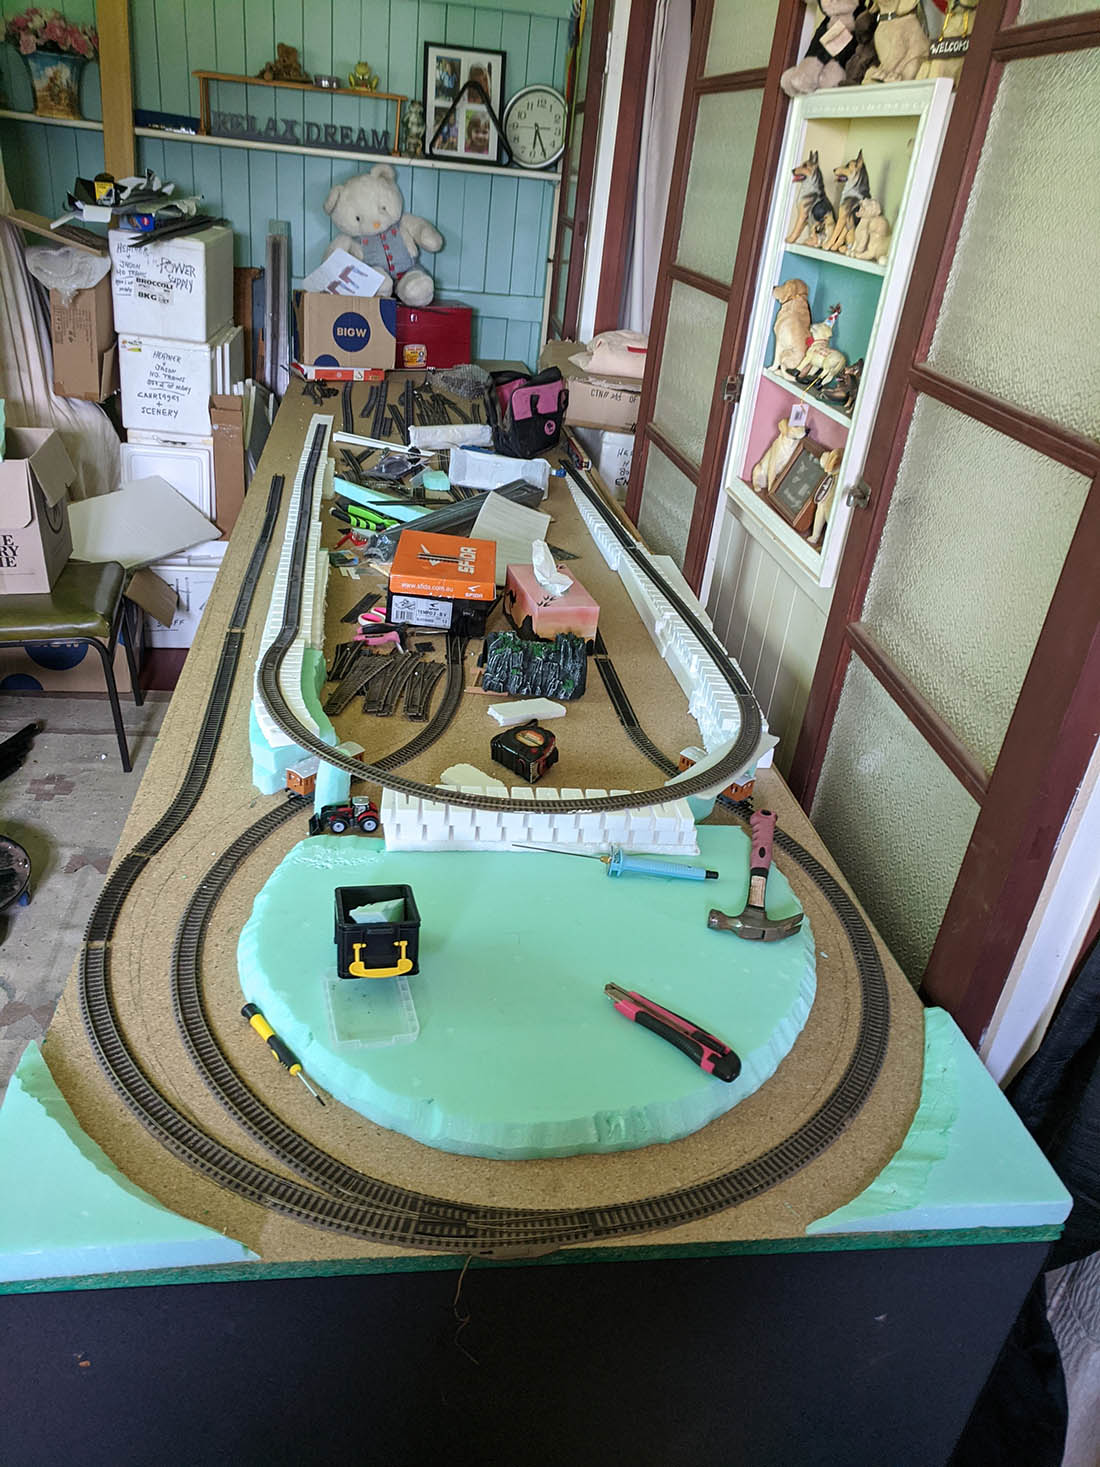
“Hi all it’s Heather & Jason here.
Jason started on the lay out with what I had stacked up for him.
He started going through the 11 boxes I had with HO gear in them over the years of collecting & sorting them into separate boxes.
Jason would like some help from some very good minds please.
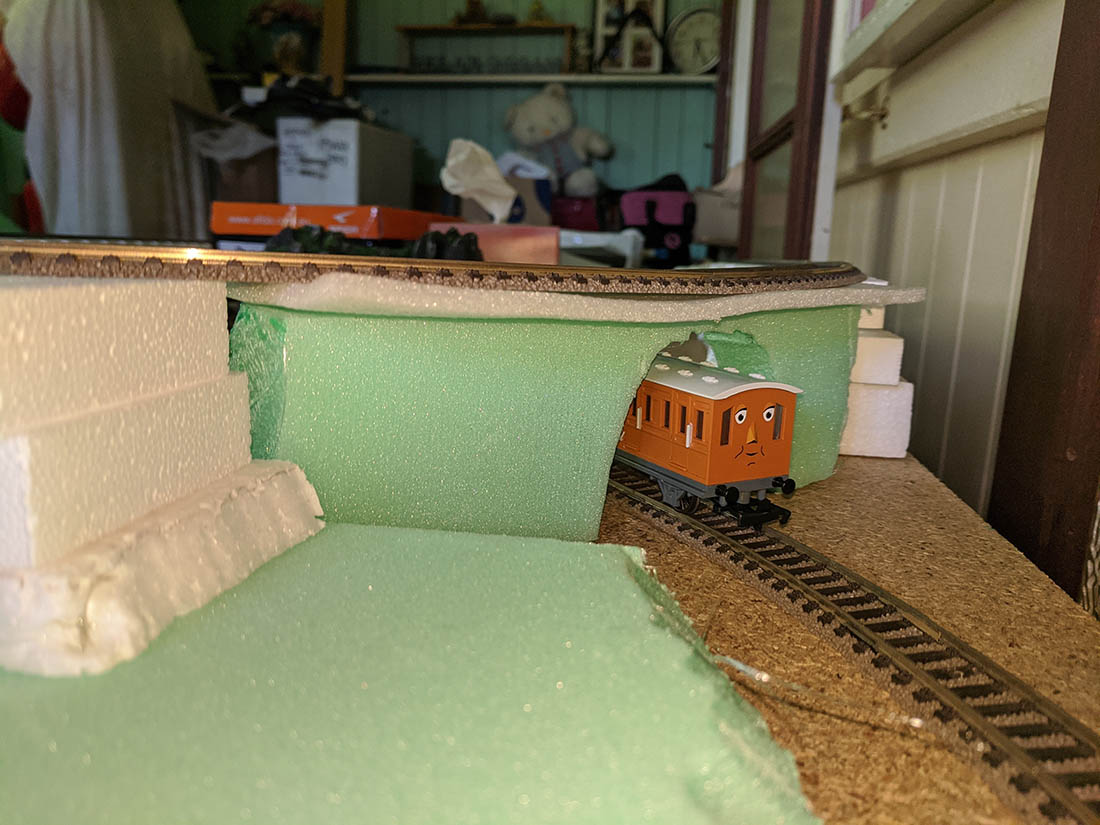
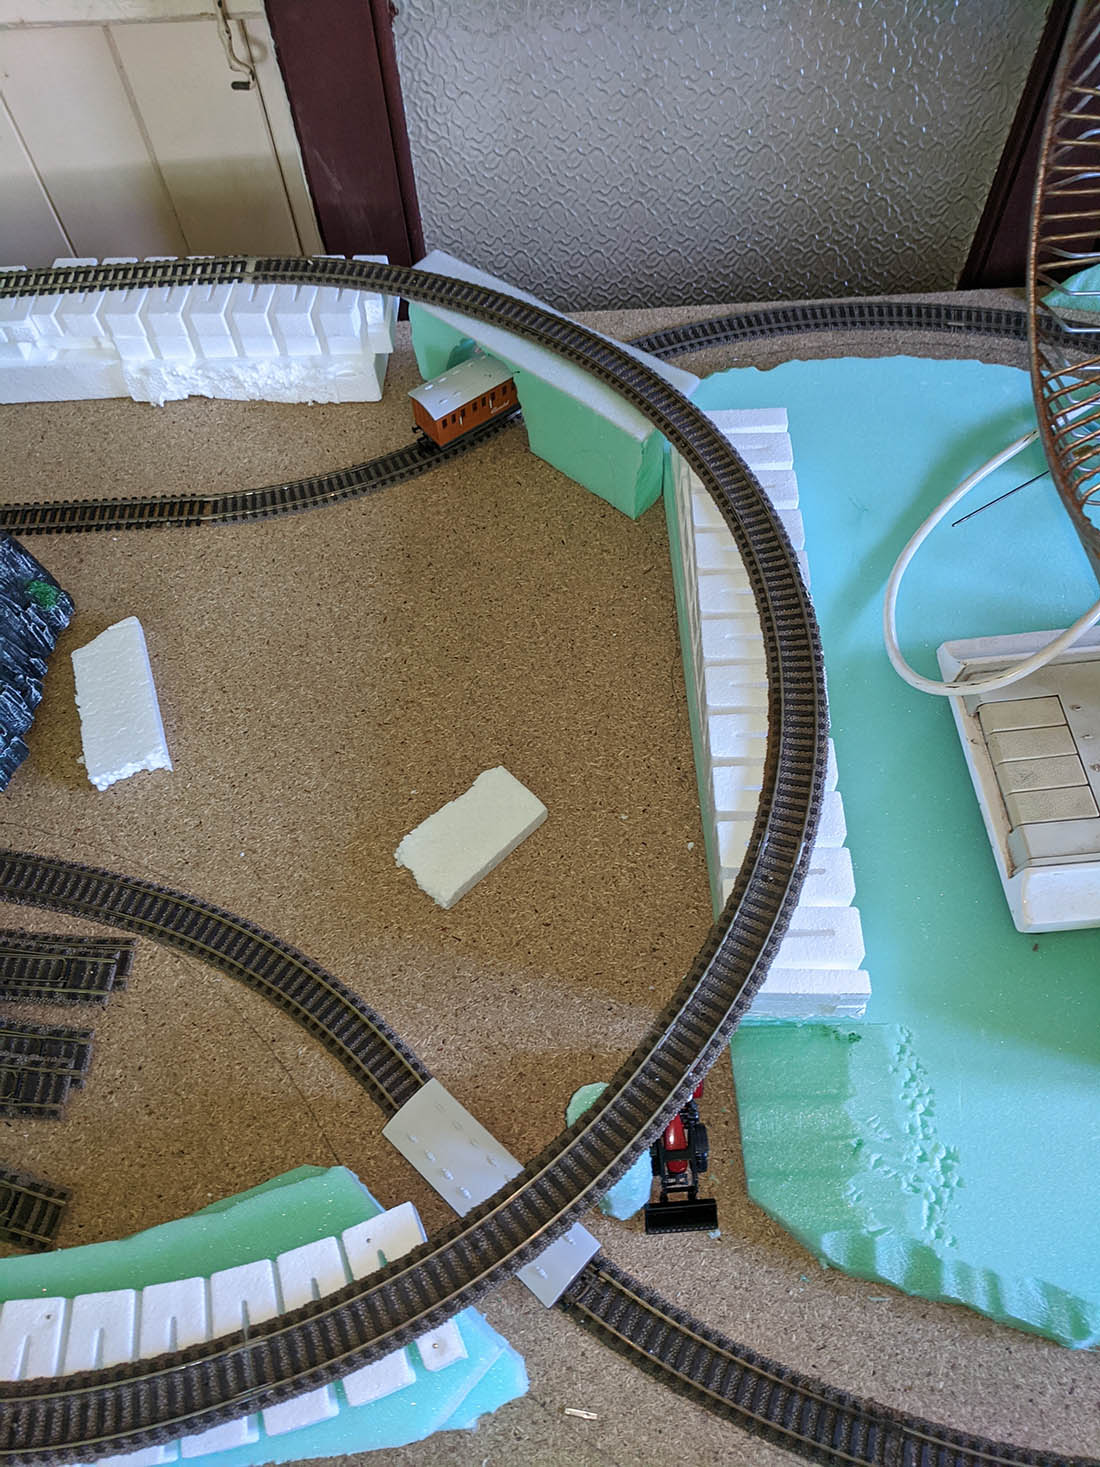
He has 36 degree curve track in 2 places & needs to put a curved bridge in them.
One of the gaps is 20cm & the other is 30cm, we don’t have any on hand so went looking on ebay can only find ones 7ins long nothing big enough for our gap?
Jason wants to do away with centre posts you will see in photos, where one side I played around with my hot wire & made a tunnel. He didn’t give me time to curve the entry & exit parts, thats why they are square. The small & large trains are passing through ok.
Now the other side, which is the 30cm gap, he had a stand under it but it was too big so I grabbed a bit of scrap & shaped a pole, as he wants the crews to be able to get past the hill where the lake is going.
He is not sure what to do & wants me to ask you if you have any ideas of how to pull it off & what to use there please.
One of the photo’s he has slipped in is where he put me in a chair with the tongs so I could help sort things out with him. Won’t let me put his photo in I took of him sorting stuff out, as he was building track.
I will add a photo of the track if I can do a days work without him changing his mind ha ha
Thanks to any one who can help him out. God bless & be safe too,
Heather & Jason.”


And who can help Heather and Jason? Please do leave a comment below if you can.
That’s all for today folks.
Please do keep ’em coming.
And if today is the day you get started on your layout, the Beginner’s Guide is here.
Best
Al
PS Latest ebay cheat sheet is here.
PPS More HO scale train layouts here if that’s your thing.


Hi Heather & Jason,
Seeing that you are handy working with styrofoam and a hot wire, why not cut an arch bridge on the curves to the length and curve that you require for the gaps? Use the track curvature as a template.
You could then carve or overlay stone or brick sheet to transform it to what you want.
Brian – the HOn3 guy, Knysna RSA 🇿🇦
Hi Richard, nice logging scene. In doing what you have done to offload the logs, it is prototypical of real offloading of logs at a log pond. Great job and I presume you will fill the “pond” with some sort of water product.
Brian – the HOn3 guy, Knysna RSA 🇿🇦
Like the logging ramps ,make a big splash …!!! but yes a great idea …Dangerous Dave
Heather / Jason take that S curve out and connect direct to last curve and the lower straight track . you have to get rid of that hook turn where that box car is. You can shuffle the ramp to meet your 18* radius. Now you might have to add a 3′ straight track in the middle of your big curve , upper level.
The Critic
Hey Dave…. actually I am constructing something in my mind that exact idea…. just figuring on how…. !!!! Lol
Thnxs for the thought though… Richard
Always like logging themes. Wished logs were cut in half lengthwise, would appear more settled in pond with a few having ends stuck up as waterlogged. Same with boats, cut half the bottom off lengthwise to give them draft/displacement appearance. My preference only…
Heather/Jason… scratch build a curved trestle bridge and make it a visual point of the layout… Richard
Heather, Jason,
Dense foam board (denser the better) can make great bridges, bridge abutments, and other details for your railroad. I use that extensively in my layout which you can see in Al’s hall of fame. My other scenery is plaster hard shell because the little foam pieces ended up all over the house and some input from the wife limited the use of foam! I like the idea of carving a foam curved arch bridge once the final track radius and position are found.
John from Baltimore
Richard
Great job and I have no comments on a fabulous scheme. I did learn that in the old days they chained the bottom 2 logs together then placed the third log on top to sit and weigh down and tighten those chains then added more chains for that 3rd log. I am into shays and climax engines that were made for logging. I am a reincarnated logging guy so you touched a button here.
Best and be safe
George from LI, NY
Pretty Kool.!!!!!
Hi you two, I too have built the Logging camp but in N scale.
As for the gap I scratch built a wooden trestle. There is a kit on Ebay that can help. Chris
Hi George… I’m still curious as to where you’re at on L.I…… I grew up in the Hamptons… Water Mill to be exact…. Richard
Heather and Jason: I agree with Richard that you should build the bridges from
scratch. I like to use balsa wood and I can get a variety pack of sizes and widths at my local hobby store. Balsa wood is easy to cut, glue, shape and paint. I had the same difficulty as you in finding suitable pre-made curved bridges.
You can also Google patterns for different scales to make it easier….Richard
I loved the pond and all the logs
I helped a friend with this very problem. He got a few straight bridges at a fleamarket. We cut the sides off with some kind of a grinder he put on a Dremel. Then heated the sides with a hair dryer and gently bent them to the shape we wanted. Then affixed the sides to the track underlayment. Got to be careful because the heated plastic bridge sides will easily distort, ruining some of the details molded into the plastic.
Your log pond looks good for a start. I think it could use 1/2 again as many logs, with 2 or 3 cut off to 1/3 their lengrh, then cut one end at about 60 deg. So they look like the rest is under water. Then add two men with pikes moving them to the mill. But this is from a guy that has metiors on his layout.
Hello all just want to say thankyou to all for the feed back you have given us it was very helpful thanks. Jason has been thinking of how to do things & has asked me to see if I can do a curve from the back track to the front one so as to cut all pillars out of the look so it can be seen all the way through on both sides, well I have done that & just waiting for his trip back up here to see where he wants it trimmed up for the plaster to go on it so till next time be safe & thankyou all again.
very nice set up