Ever wondered how to get rid of the model railroad backdrop gap?
Backdrops look great on a layout, but they can start and finish quite abruptly.
Henry’s been in touch with how he hides the transition between the two:
“Hello Alastair
I have not sent in a video or pictures in some time, as I have been rather busy working on my layout.
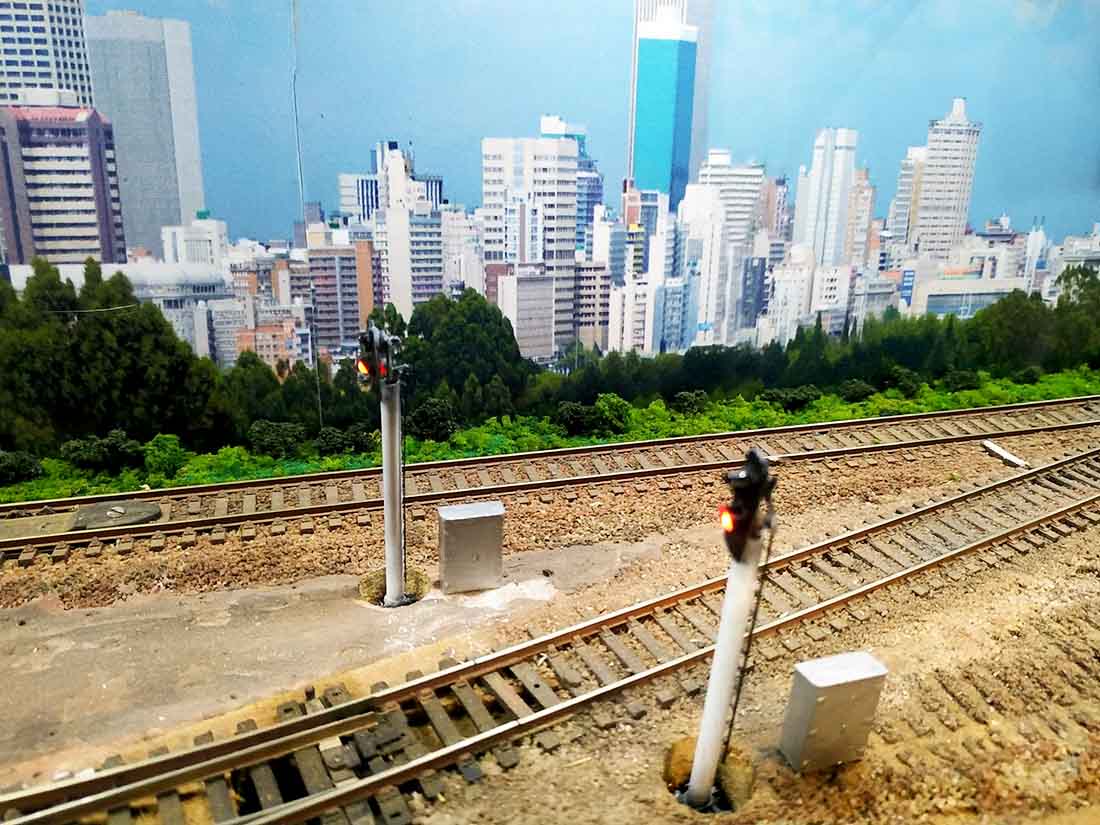
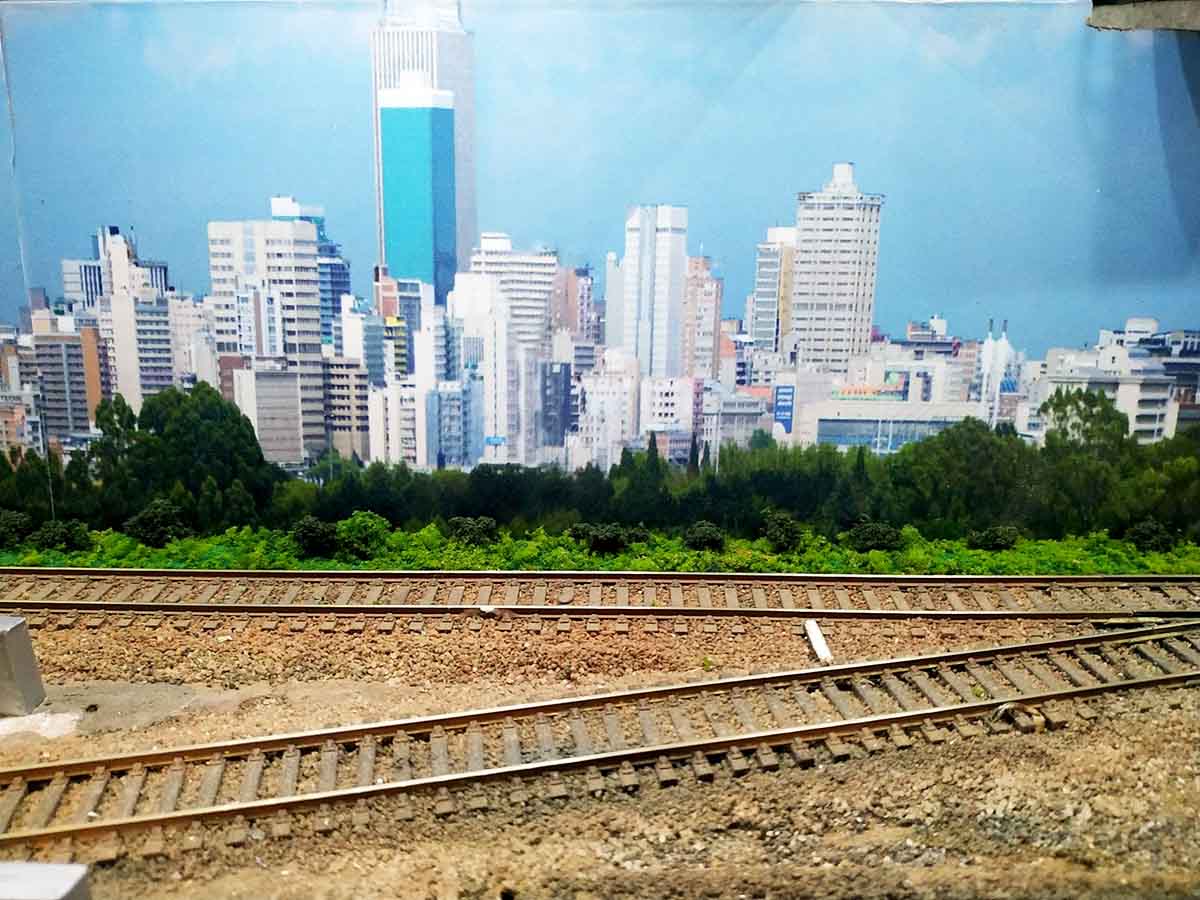
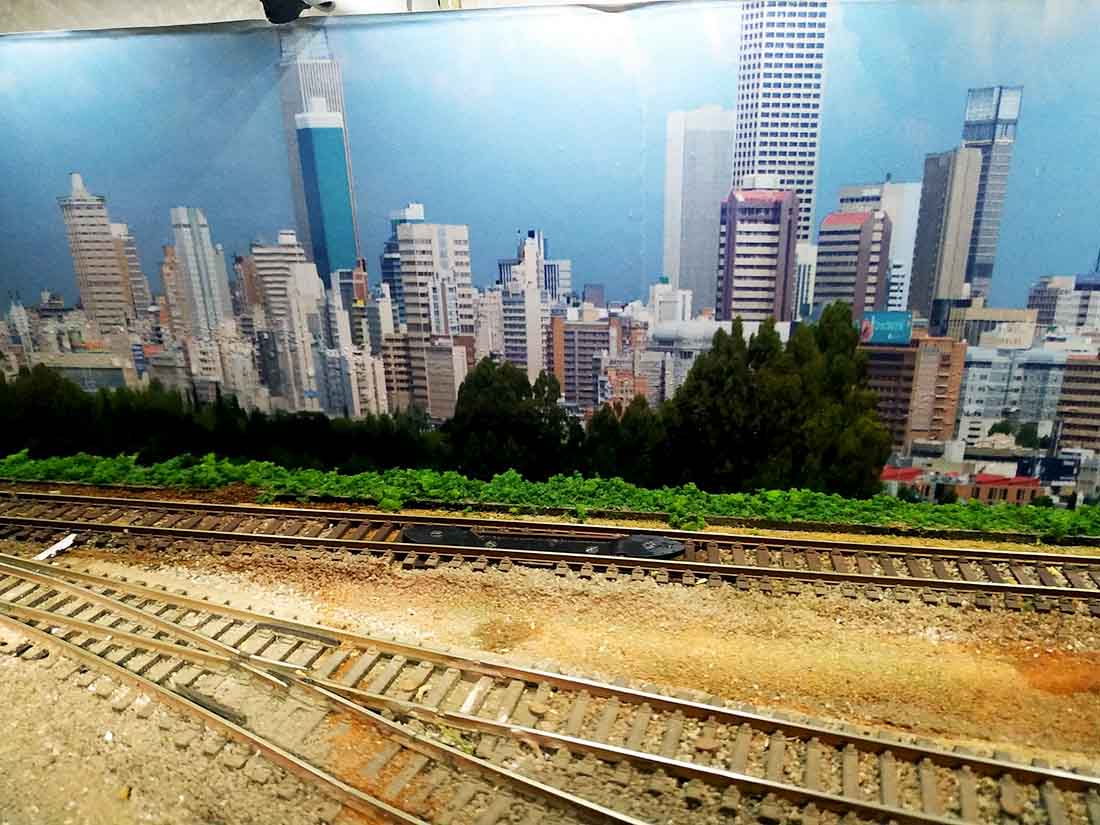
I’ve been hiding the joint between the foreground scenery and photo backdrop.
I have always been keen on using a photo backdrop for added realism, but how to make the transition between the 3d scenery and the backdrop is always a challenge.
I have found a couple of techniques that seem to help with this transition.
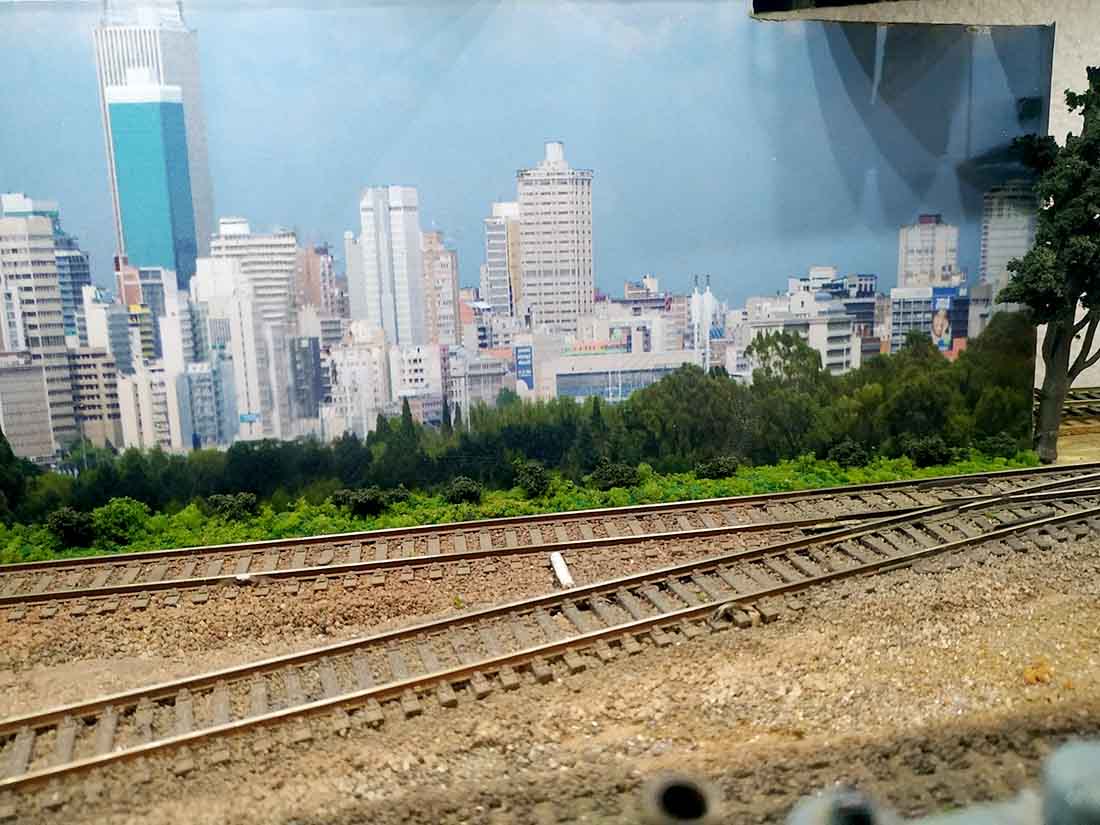
You can use a wall or a fence, or as the photos show, vegetation.
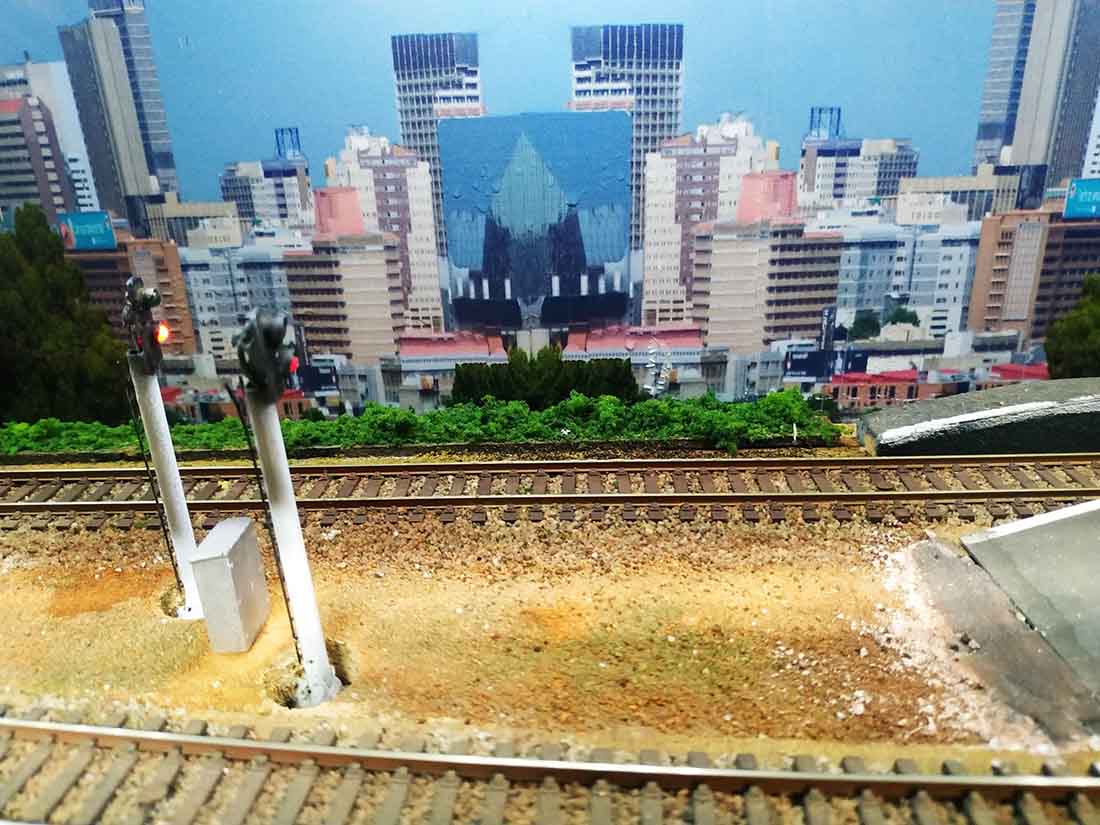
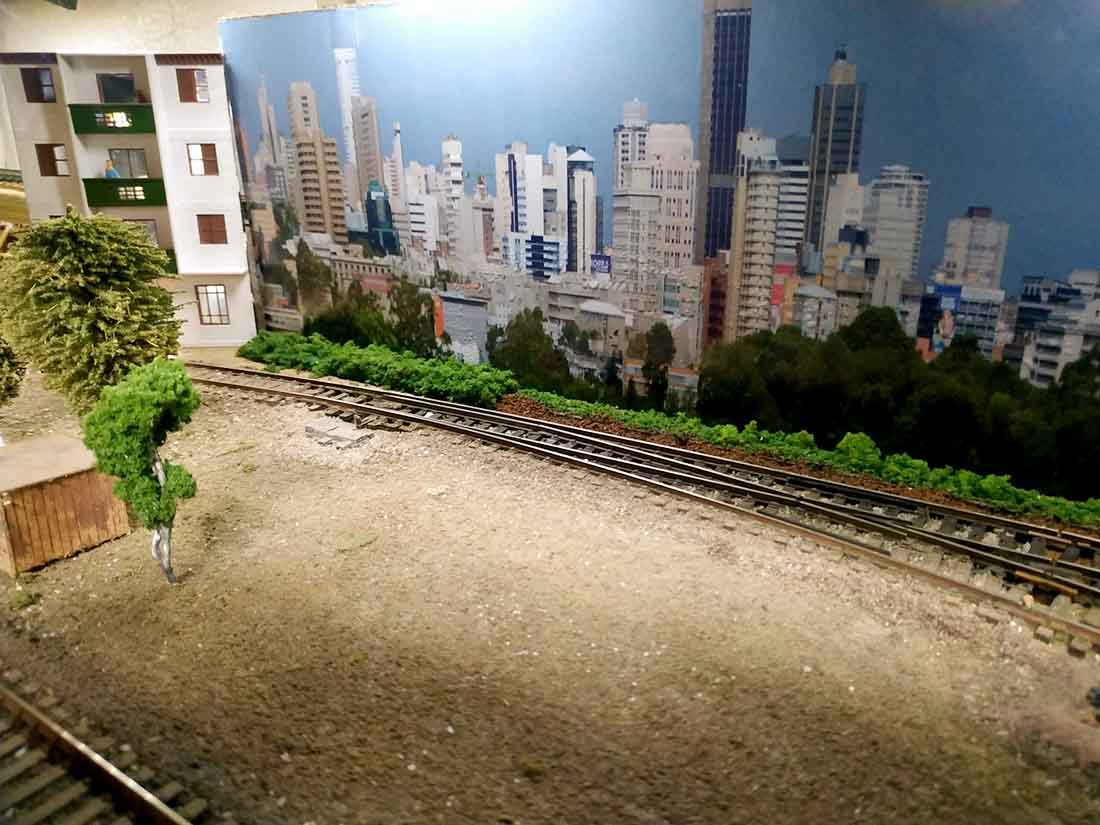
Disguising the ends of the backdrop can also be a challenge.
On one side, I have used a multi story building, and on the other side a large tree.
Regards
Henry”
A big thanks to Henry for sharing his model railroad backdrop gap solution.
Backdrops can make such a difference to a layout – but certainly there harsh endings can cause a few visual questions.
And now on to Peter, who is asking for comments before he get’s busy on his layout:
“Hello Al:
Again thanks for your continued work. Yours is the first email I open every day.
I enjoy seeing what all the RR folks around the world have been doing and what challenges they’re faced with… and how they overcome them. Quite educational and creatively inspirational actually.
It’s always a good email to open first!
You were kind enough to publish my ‘tester’ shelf layout a while back – a fictitious town called Amaranth Falls. I made the layout in about 4 months and enjoyed the process.
The feedback provided by the readers was very positive. I have since given that layout away and it became time to plan the ‘Empire Layout’… but construction could only begin once the renovations in the basement were completed.
The basement work should be done within the next 2 weeks, so I have been madly planning the empire layout (probably over 50 plans made to date actually).
I started on a 4 x 8 layout but it just became too difficult to fit everything in, especially trying to preserve a minimum 21” radius.
So its grown marginally to a 5 x 9 ft. layout with an added extension for a large marshalling yard. I think it can work.
Having more space would be lovely, but it is what it is. So I had to get creative.
The way the basement is constructed, there is a cubby space for a future gas fireplace that I’ve retained to provide a much needed inspection access point at the back side of the layout.
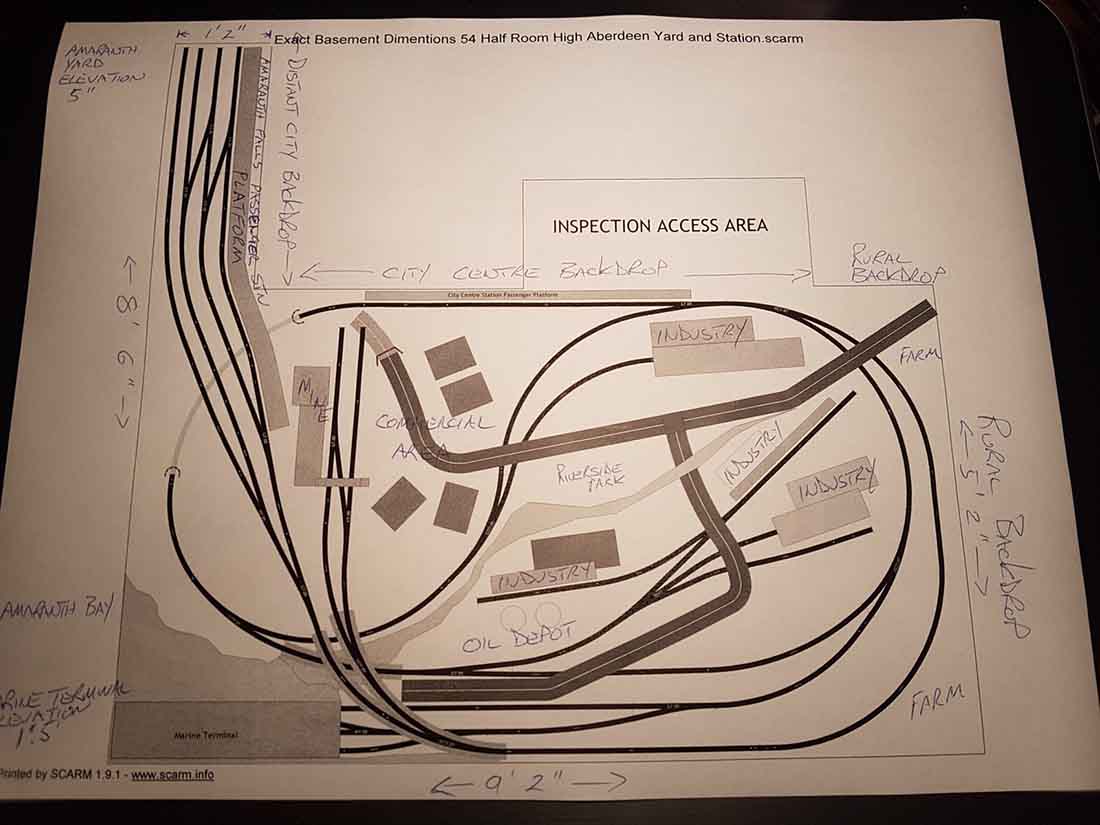
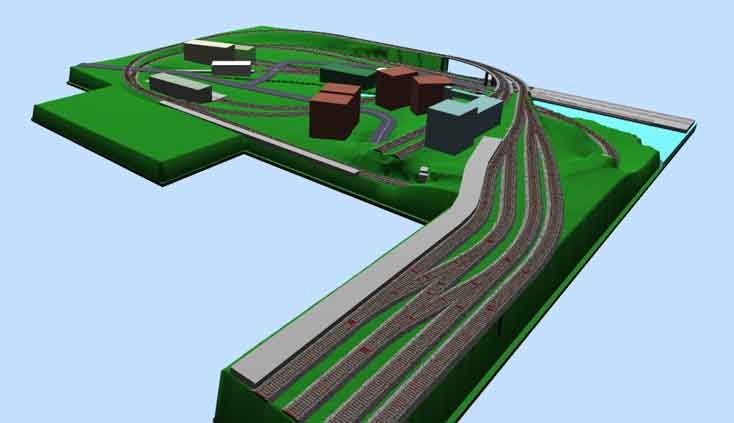
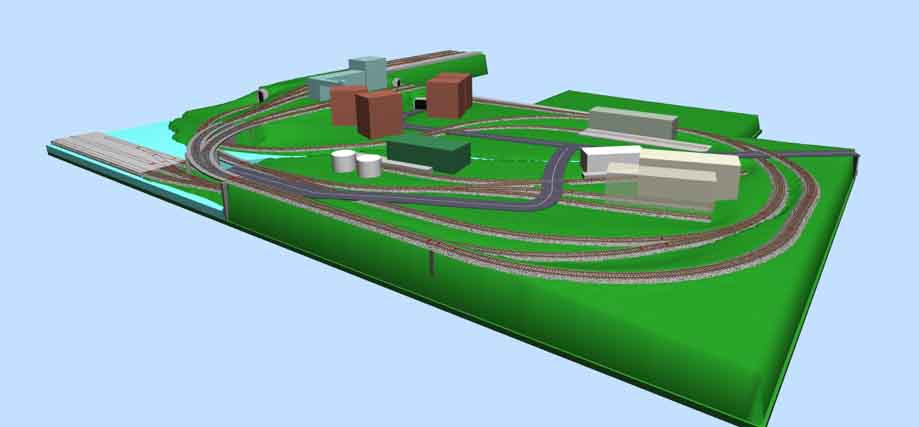
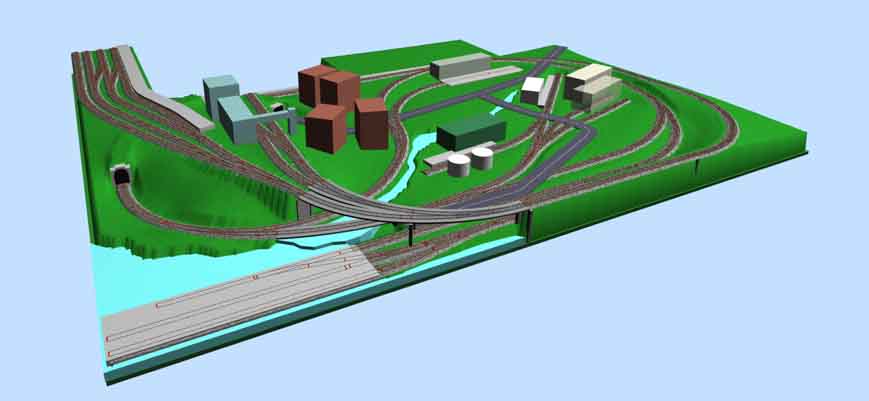
I’ve provided a layout plan, and a few CAD photos taken from the SCARM software I’m using to plan the layout. Hopefully you’ll be able to clearly see it all here.
I’ve decided to retain the “Amaranth Falls” namesake – but this time it’s bigger and much more detailed. The previously displaced town’s folk couldn’t be more pleased!
I’d love your readers to study the track plan and provide their thoughts. Keep in mind there are many more connecting roads, trees and forests, signed RR crossings etc. that were just impossible to include with these software visuals. I’ve included a hand written description of some of the layouts attributes which may help readers see the direction I’m going in.
I’m trying to create a layout that provides a continuous run loop plus opportunities for switching operations simultaneously.
Also incorporated is a reverse loop allowing trains to re-enter the marshalling yard in a forward entry fashion. The layout will be DCC.
The minimum radius is generally around 21” – 24” and all but 3 switches are #6 or more.
The other 3 are #5 and are in the small marine terminal marshalling yards preceding that terminal.
It will be modeled in the 1940’s – 1980’s era in North America.
Most rolling stock will be the 40’ variety, save for the passenger train coaches. The layout is inspired by the Toronto Hamilton & Buffalo Railway (TH&B).
I think I’ve got a solid plan here, trying to maximize the space but ensure things aren’t too compressed. A 2nd, 3rd, 4th… etc. set of eyes may come up with a blinding flash of the obvious that I’ve missed.
And that’s where your good readership group comes in.
I look forward to the feedback.
Thanks Al!”

Thanks to Peter for sharing. But who can help?
Please do leave a comment below if you can share any advice, because after all, it’s always better if we don’t have to find out the hard way…
That’s all for today folks.
Please do keep ’em coming.
And if today is the day you say no to boredom, jump out of your chair and join in the fun, the Beginner’s Guide is here.
Best
Al
PS More HO scale train layouts here if that’s your thing.
Need buildings for your layout? Have a look at the store.
They are great fun to make and great value too.

For Henry, I think you took thd most difficult background and integrated into you layout. I like it and you’ve done great work.
For Peter, consider your switch placement at the platform and at the mine. Can you really move a train between tracks with so little length after your double switches. I had the same problem on my sidings…not enough useful distance…and I’ve moved track once and I still need to move it more. About all you can switch are two passenger cars or 1 engine & tender/A-B-A units. Good luck.
Bill
I see one reverse loop. Once you run an engine through that loop, how will you reverse the engine when it goes on its next run? I had a similar problem on my layout, and I put in a simple wye section, as a part of an industrial siding.
I’m no expert and I may very well be mistaken but it appears with the layout , which is awesome , however it appears that once you’ve reversed loop you’ll be stuck in that direction without ability to reverse the direction again to original and back again . ??? Perhaps I’m not seeing it fully , I do hope I’m wrong snd you can progress .
For Peter, did you consider the reversing loop in your wiring. Make sure you tracks are insulated properly or you will have shorts. oterwise nice layour
Peter is going to have headaches with the rail polarity because of the loop which originates and returns to the main rail adjacent to the inspection access. Also the spur which comes off the loop to service the oil depot and other industrial areas. All solveable, but needs careful thought.
Looks great.!!!!!!!!!!!!!!!! keep up the work.
A potentially smashing layout, Peter!
I am curious to know just where in the TH&B is the layout placed?
A Toronto Born would very much like to know!
Best wishes on developing your layout 🙂
Chris
I have only one reversing loop on my current layout originally designed to create an Up and a Down line in a small space. It would be good to have two loops if space permits. 5 X 9 ft is not a very large area if working in OO scale. David’s suggestion of a wye at one of the industrial plants has merit, but as Arnold says these require careful wiring and insolation to avoid short circuits. I’m DC so DPDT switching can be frustrating.
Best wishes to Alistair and all his subscribers – Andrew in Oz
Thanks for the responses on my initial Amaranth Falls track plan. You guys have really studied the plan and have come up with great suggestions and considerations. As for the reversing loop, yes I’m totally aware of it (and ensuing wiring requirements). I had thought after leaving the main marshalling yard and conducting business in a counter clockwise direction, youvthen had the option of using the reverse loop and going around the layout in a clockwise direction eventually ending back at the main yard … onlybto start the whole procedure over again. So lots of things to review and plan. Thanks.
Henry. I love your idea and I’ll use it myself when I get my electrical system all working and I get stuck into the scenery.
Great layout Peter, lots of operational scope.
Is your point placement just for running engines around trains? If not, I agree with William Orton.
Have you tested your engines on the gradient with the trains you want them to pull? I had a merry dance with three layout redesigns and lots of engine overhauls before before I could get the gradient from my hidden loops up to the main layout level to work at all.
Good luck and please post us some pics when you have the construction under way
Sending you a quick suggestion through Al/ I can’t seem to find a way to append it here!
NOTE: It’s worth what I charged you, the trash is a useful receptacle for it.
Charlie
I like your track plan. An out and back with the option of continuous running. As set up, one train can take the reverse loop first and switch the industrial area and another can switch the port area and then do the reverse. Looks like you can get a lot of operations in on the layout.
nice job, keep it up.