Ned’s been back in touch with his take on realistic rock models for model railroad:
“Alastair,
Some folks asked for the process I use for creating my rock ledges. Here is the process I use. Comments and recommendations are welcome – I am always looking for ways to improve the process.
1. Using 1” insulating foam board create a vertical wall for gluing layers of foam board.

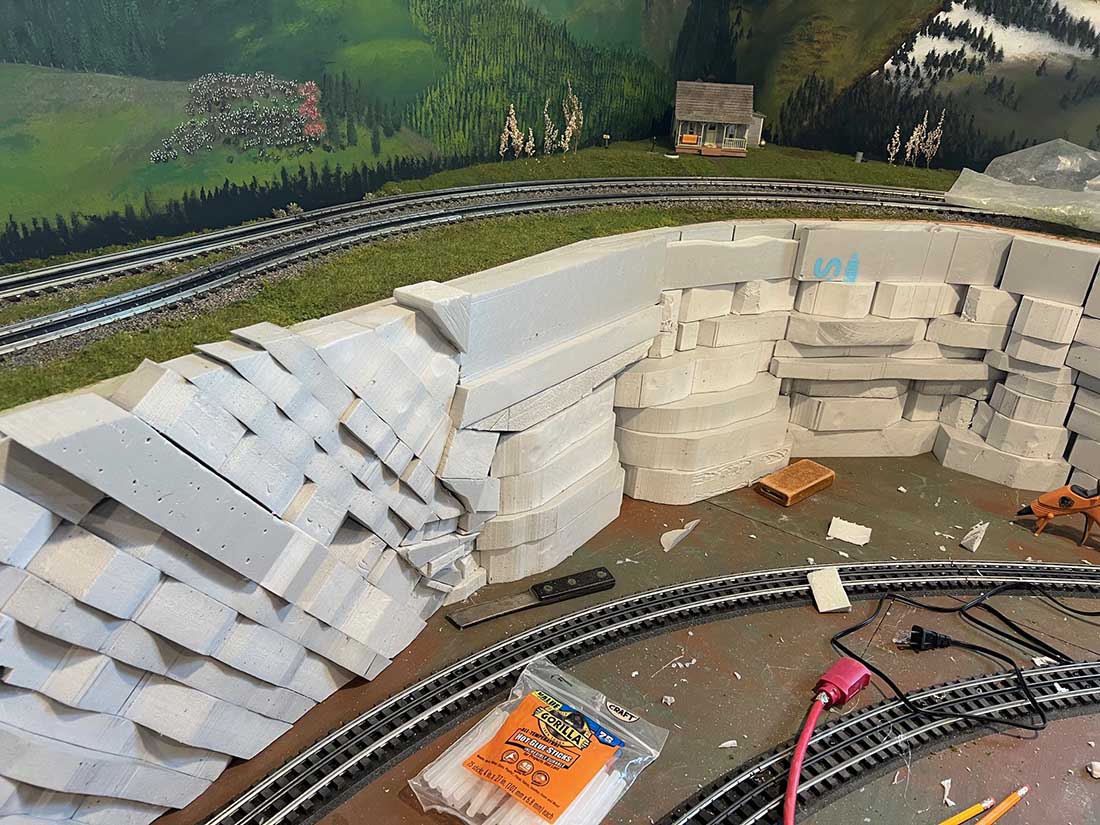
2. Create layers of foam board utilizing 1”, 1.5” and 2” foam board roughly shaped using my table saw and band saw. I use a combination of hot glue and Elmers White glue to glue the foam board.
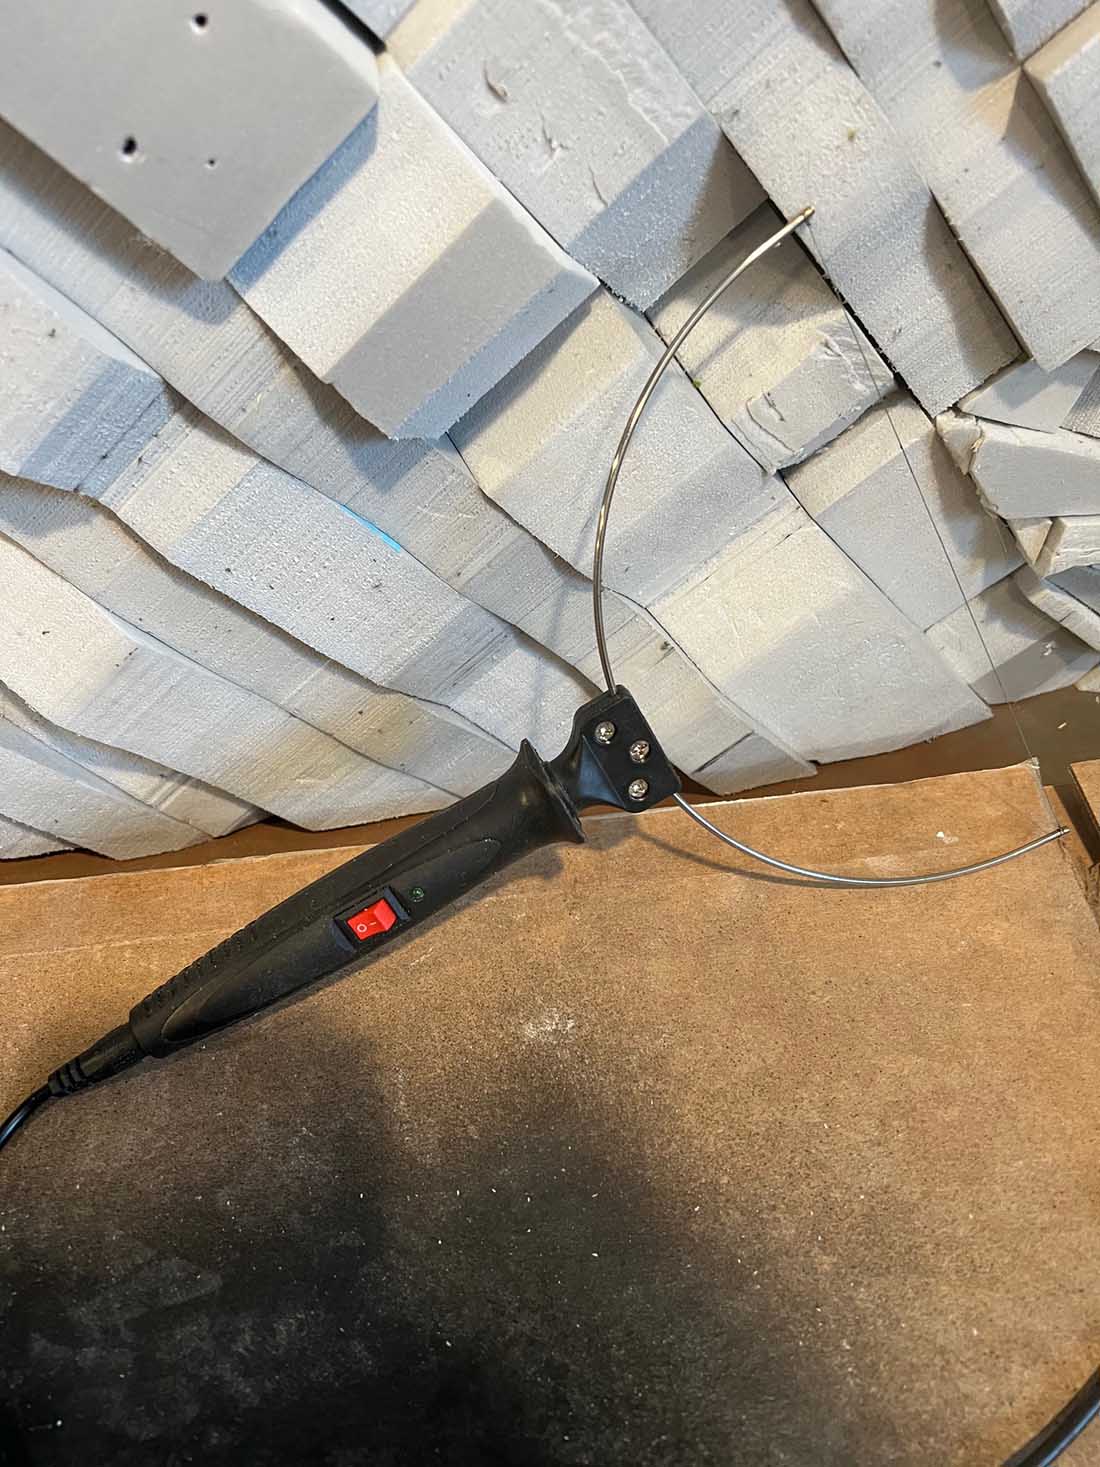
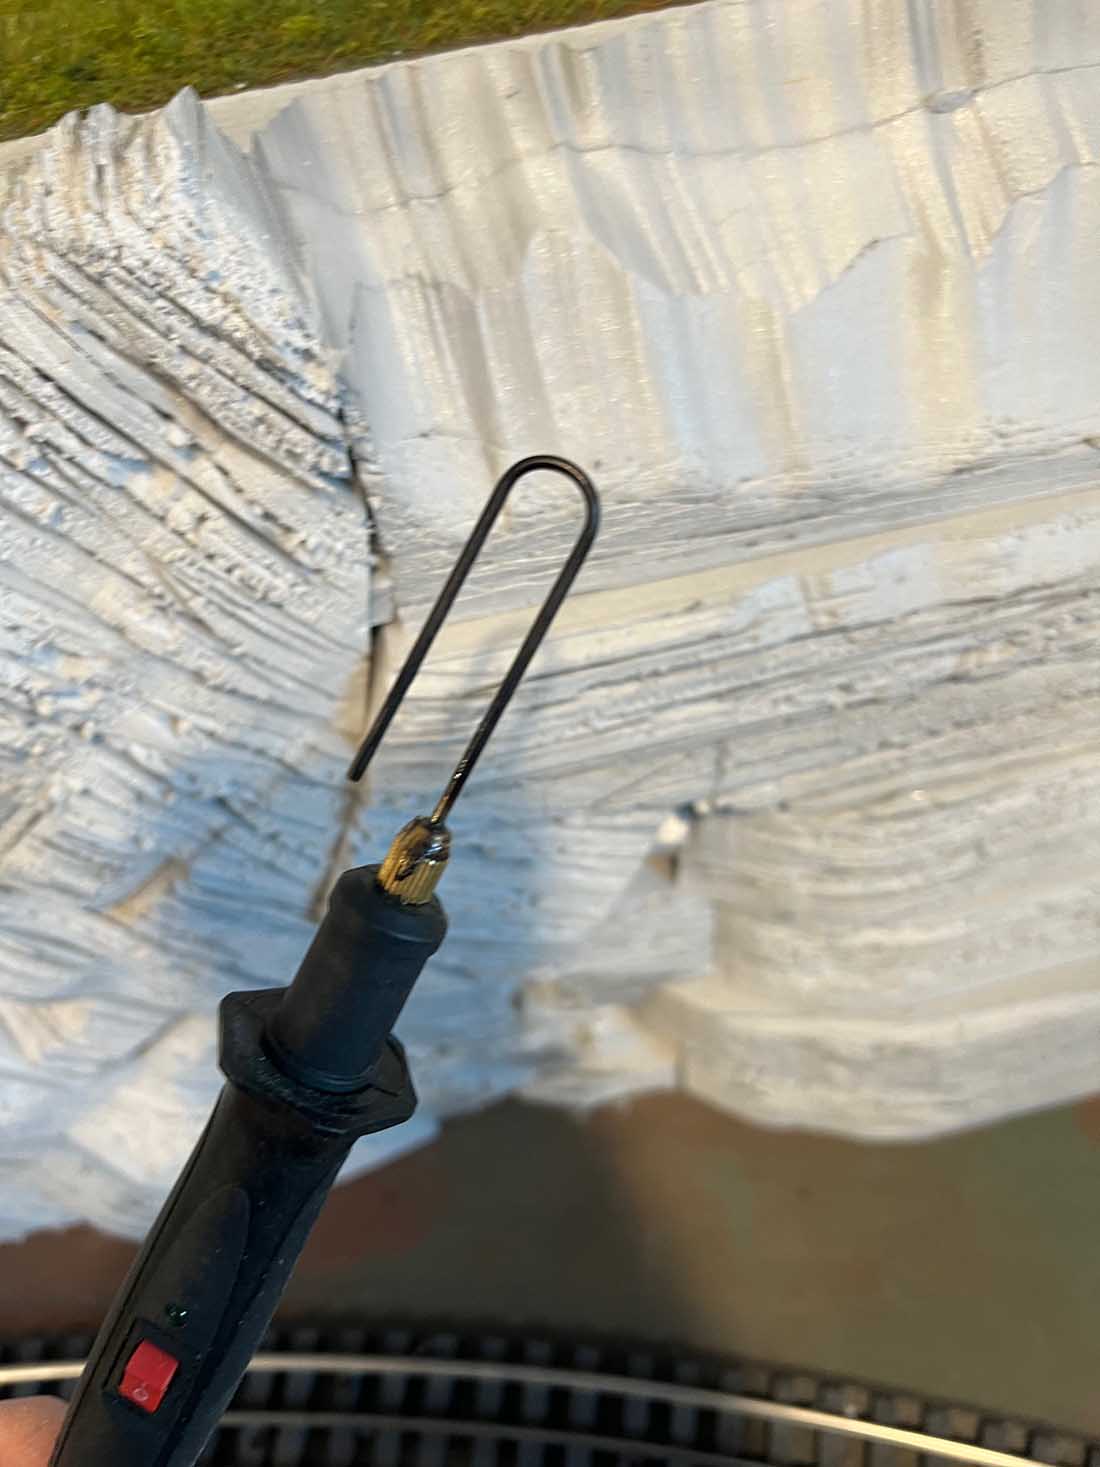
3. Start creating layered rock with a wire bow hot foam cutter. I make striated layers, about 1/4” deep of non- parallel lines.
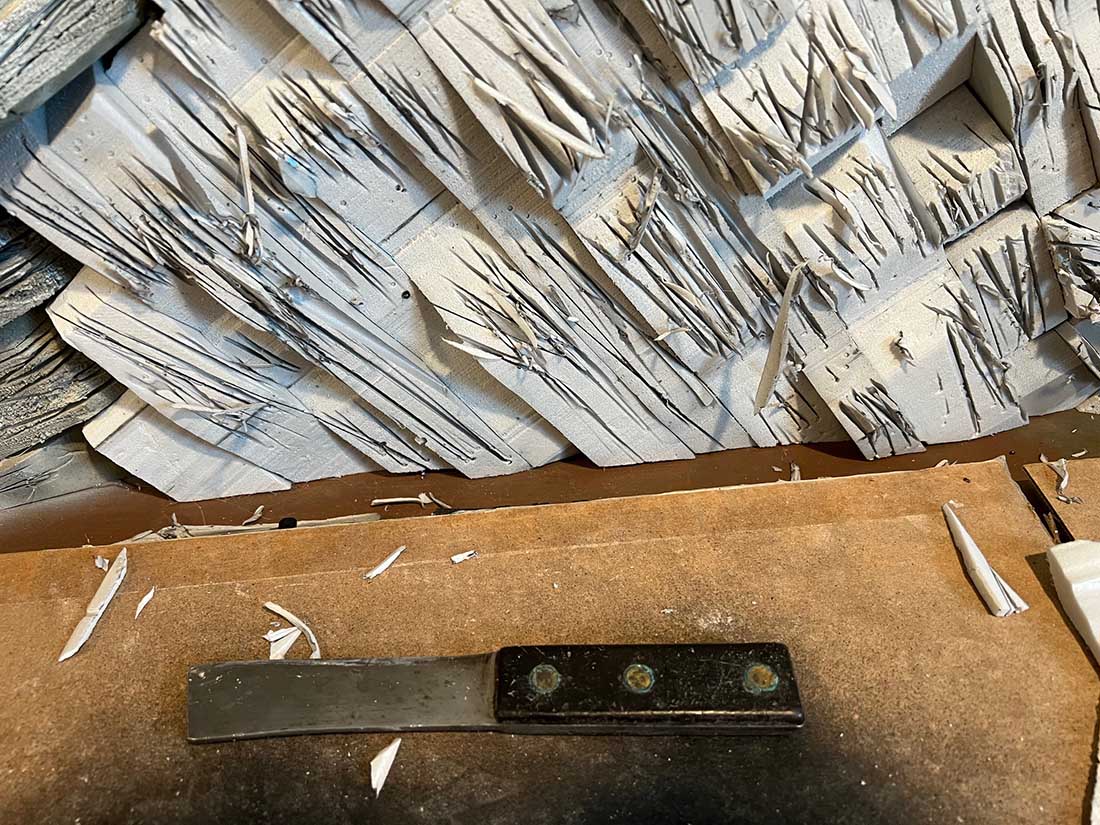
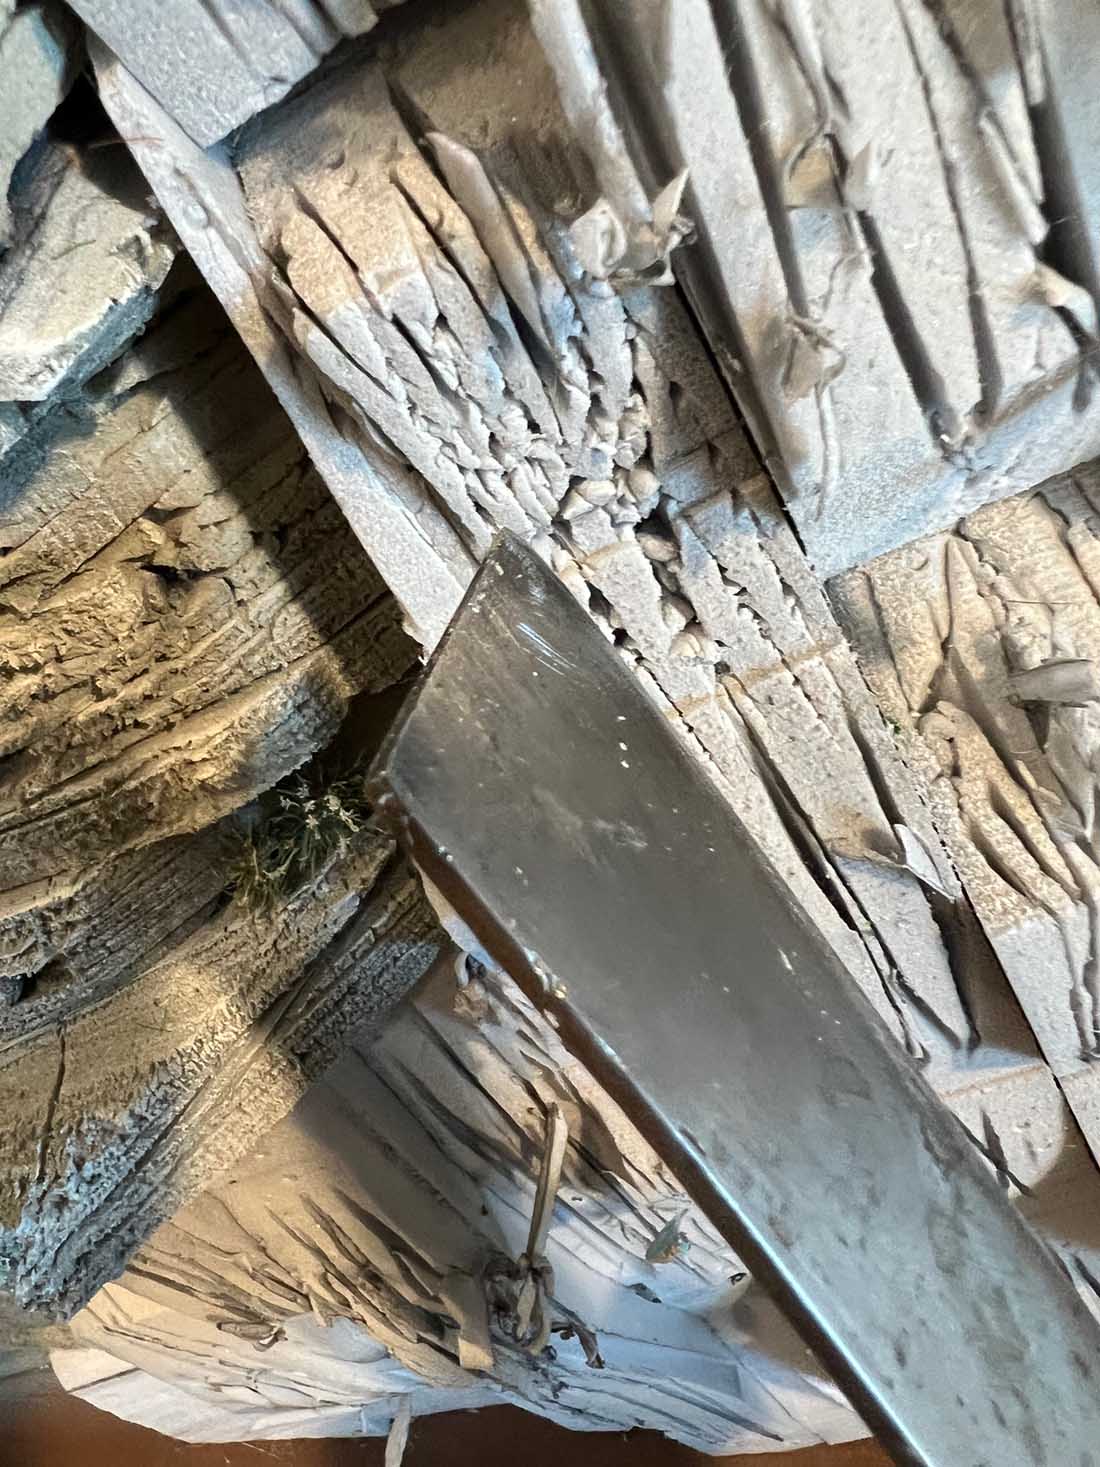
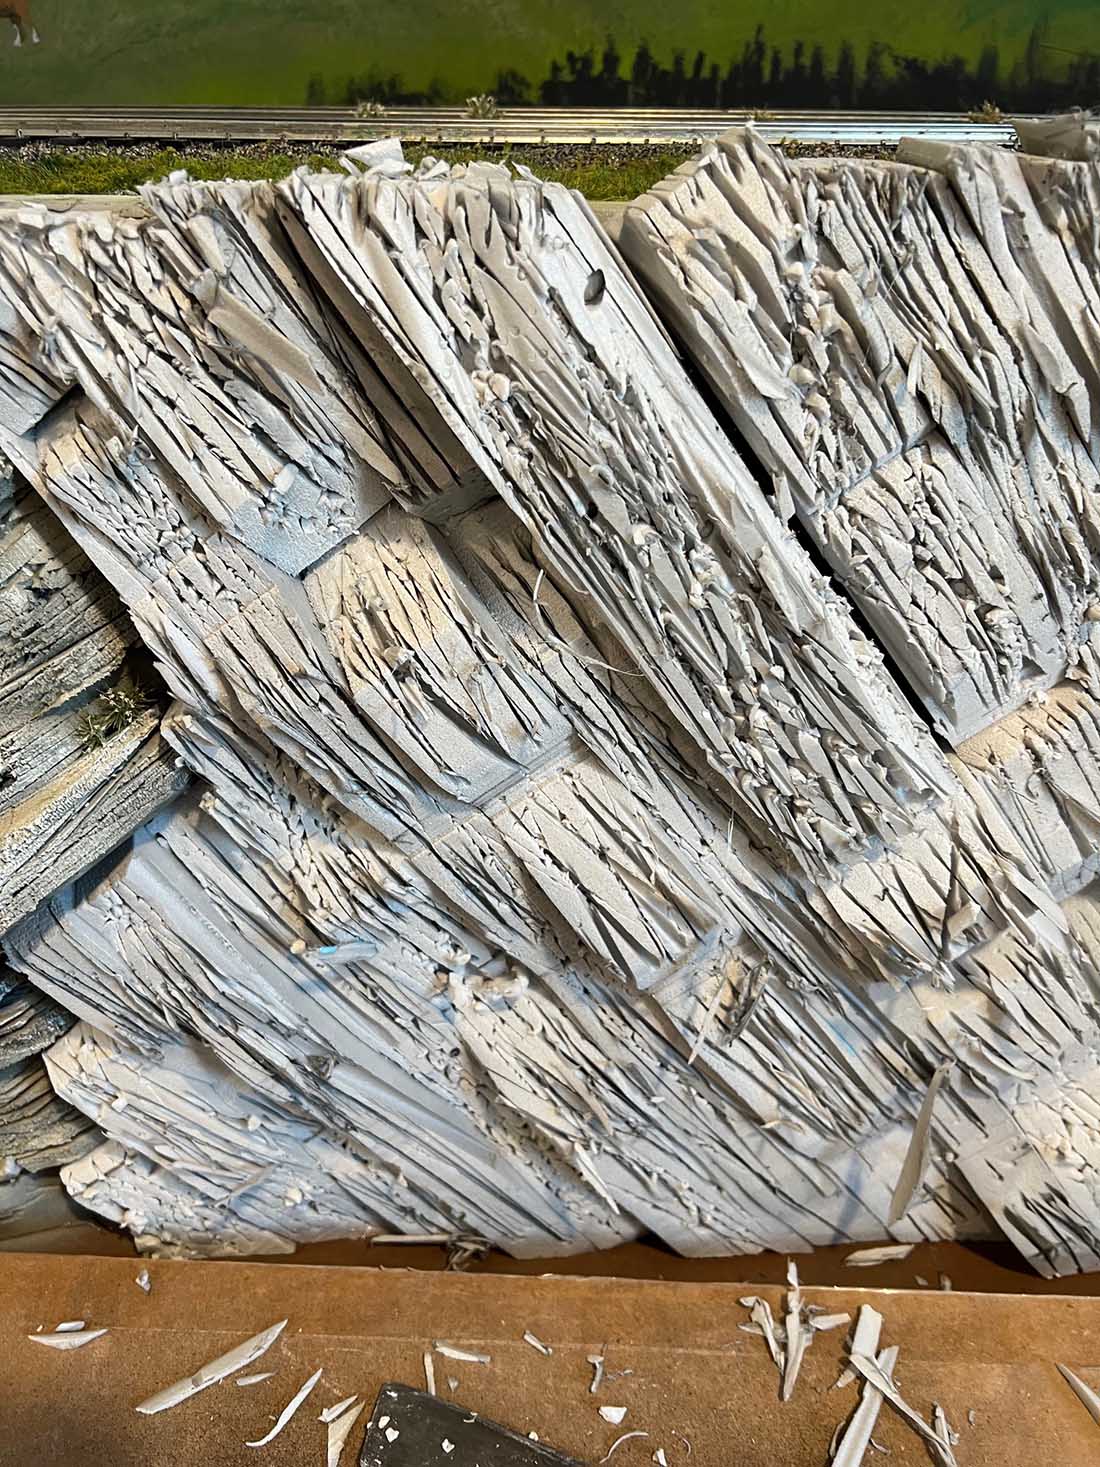
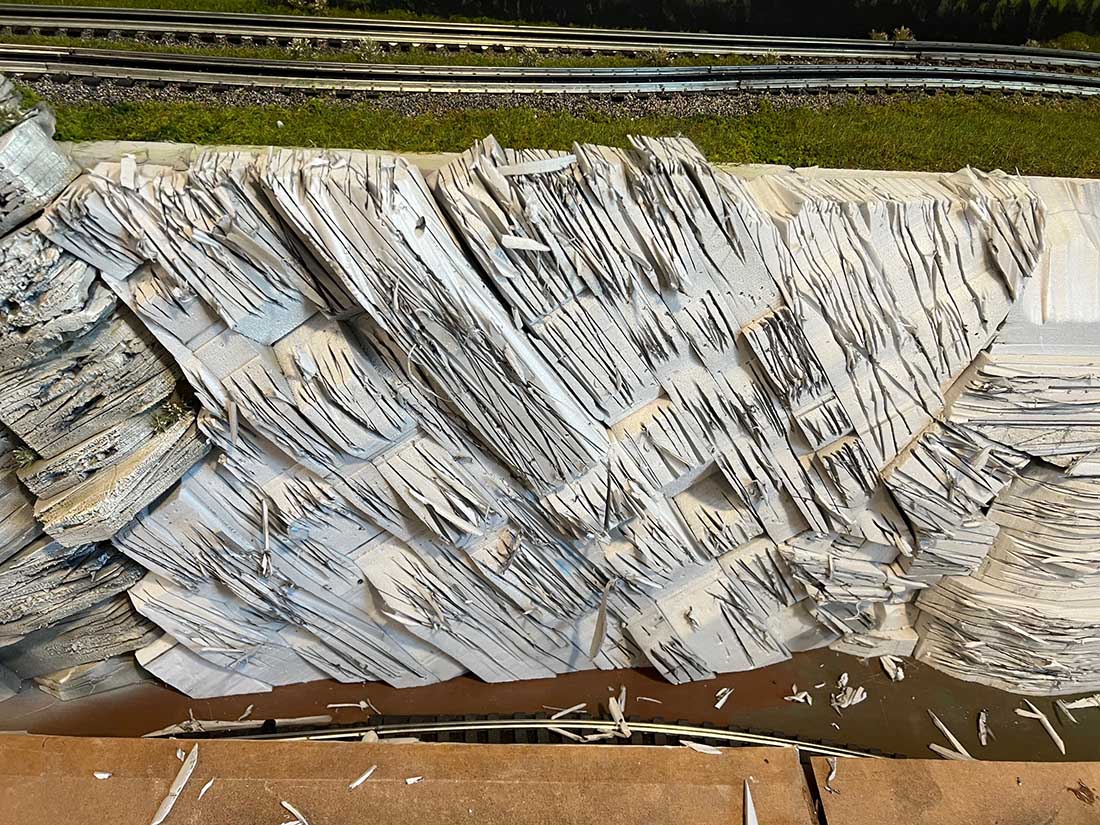
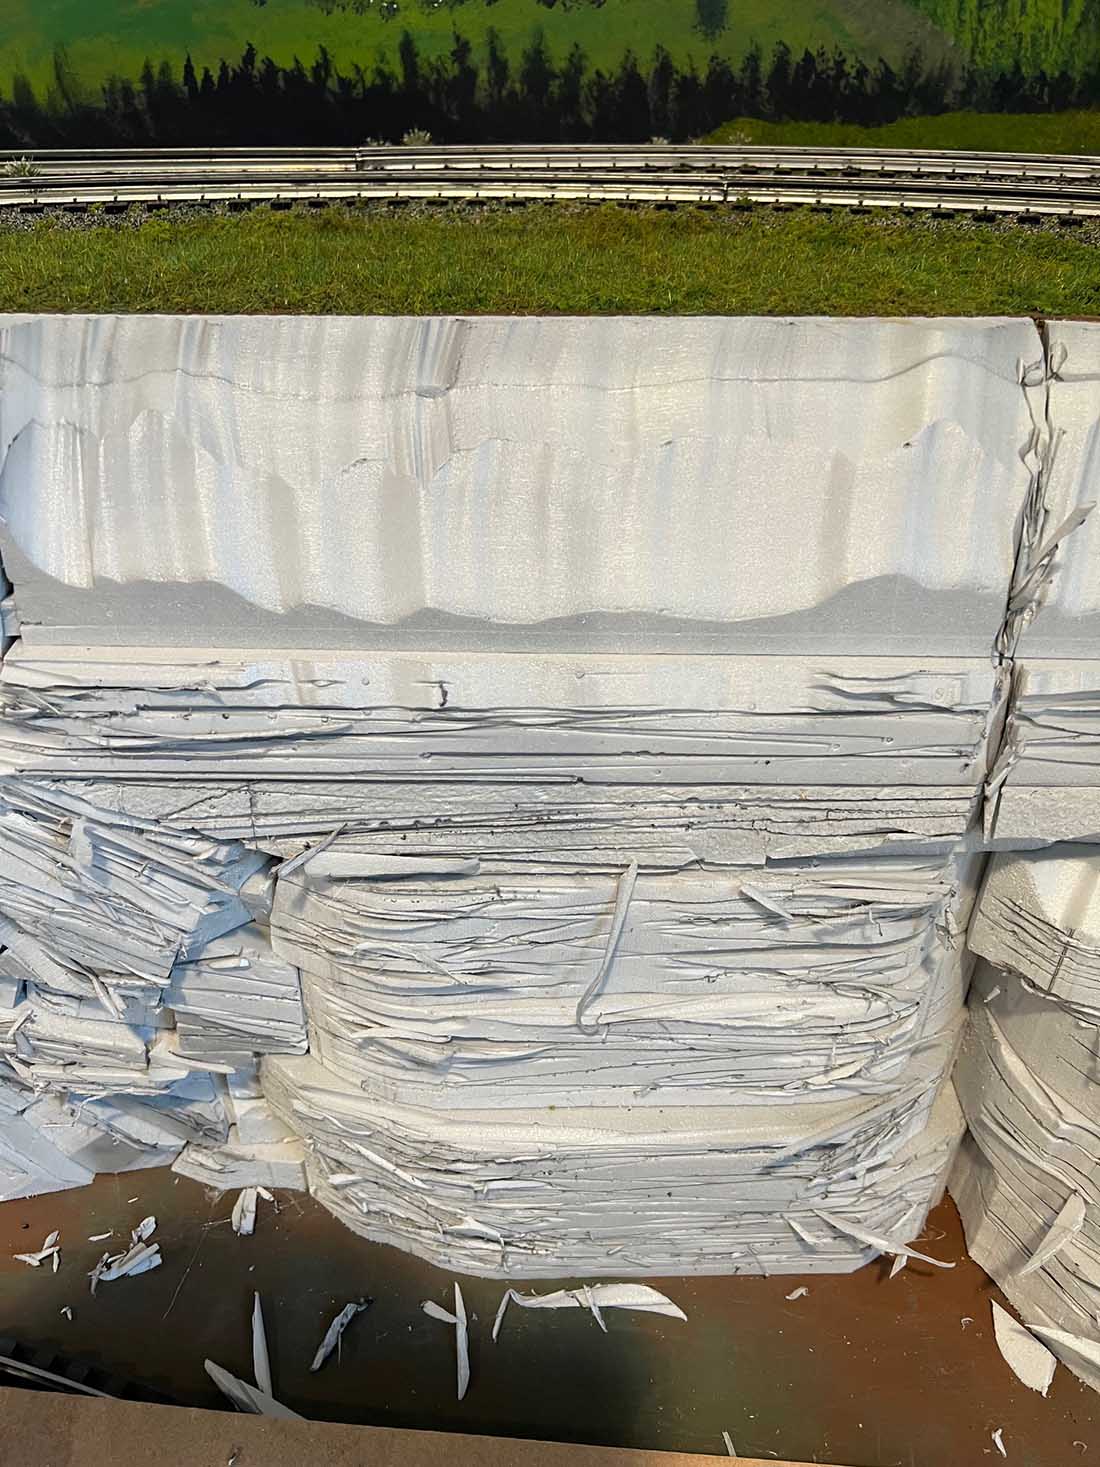
4. Make additional striations with a carpet knife. The carpet knife is very sharp but creates a much rougher cut than the hot wire cutter. I also use the carpet knife to texture areas of the foam that could not be reached with the hot knife.
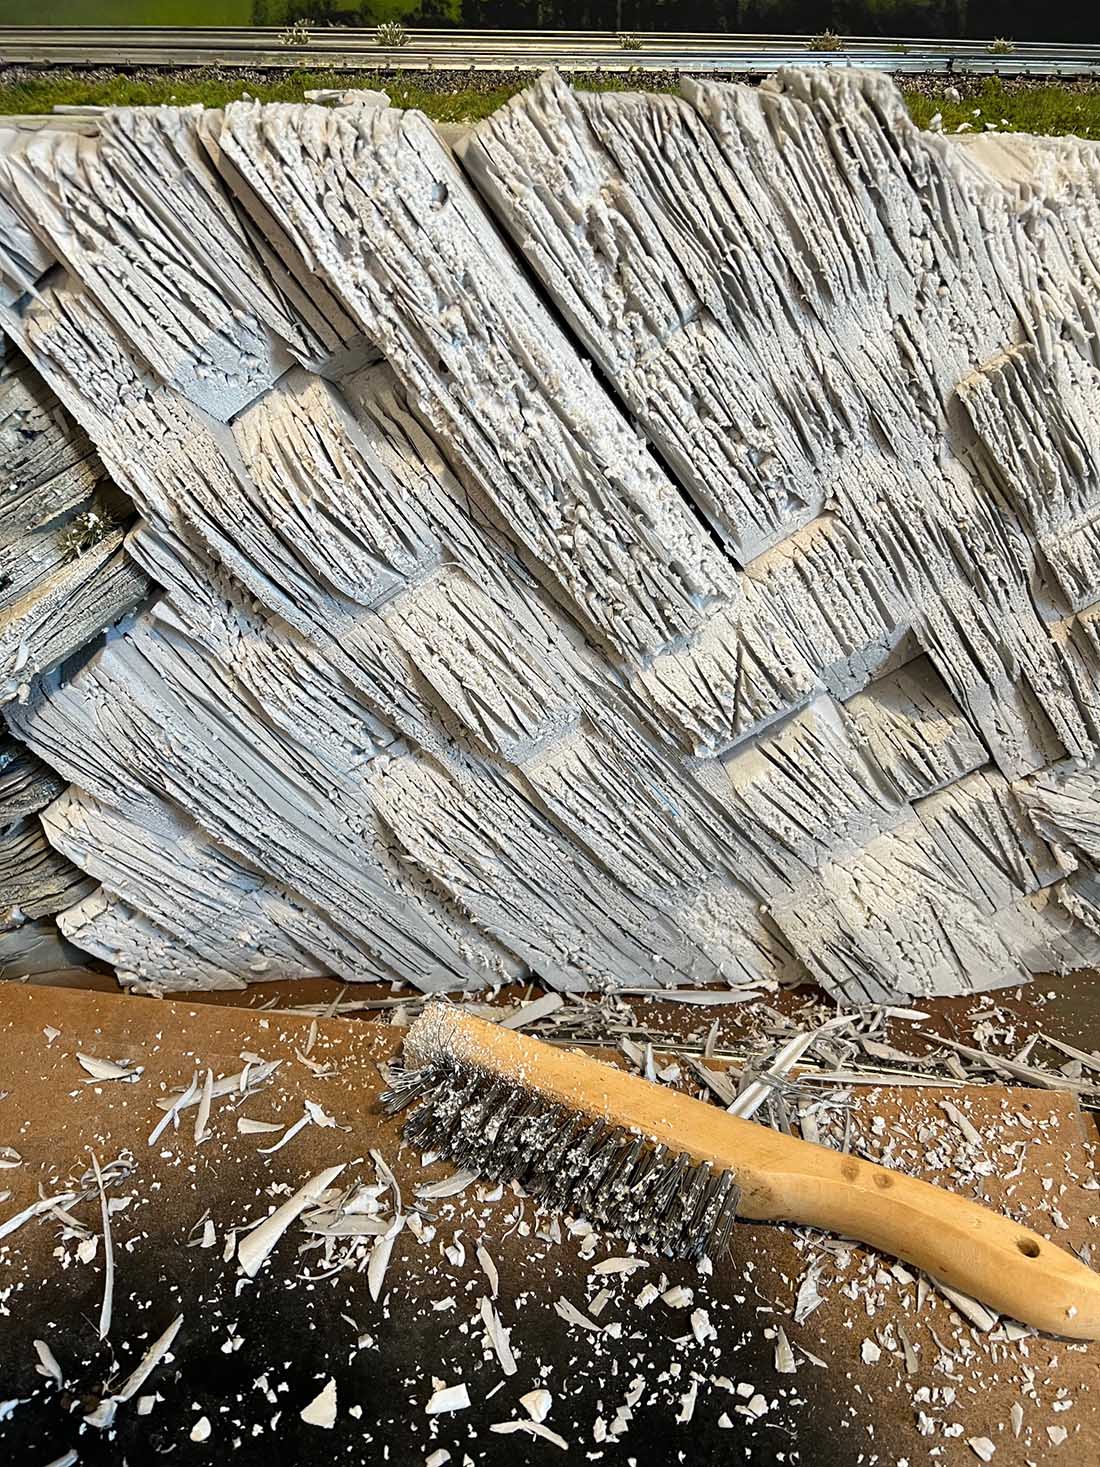
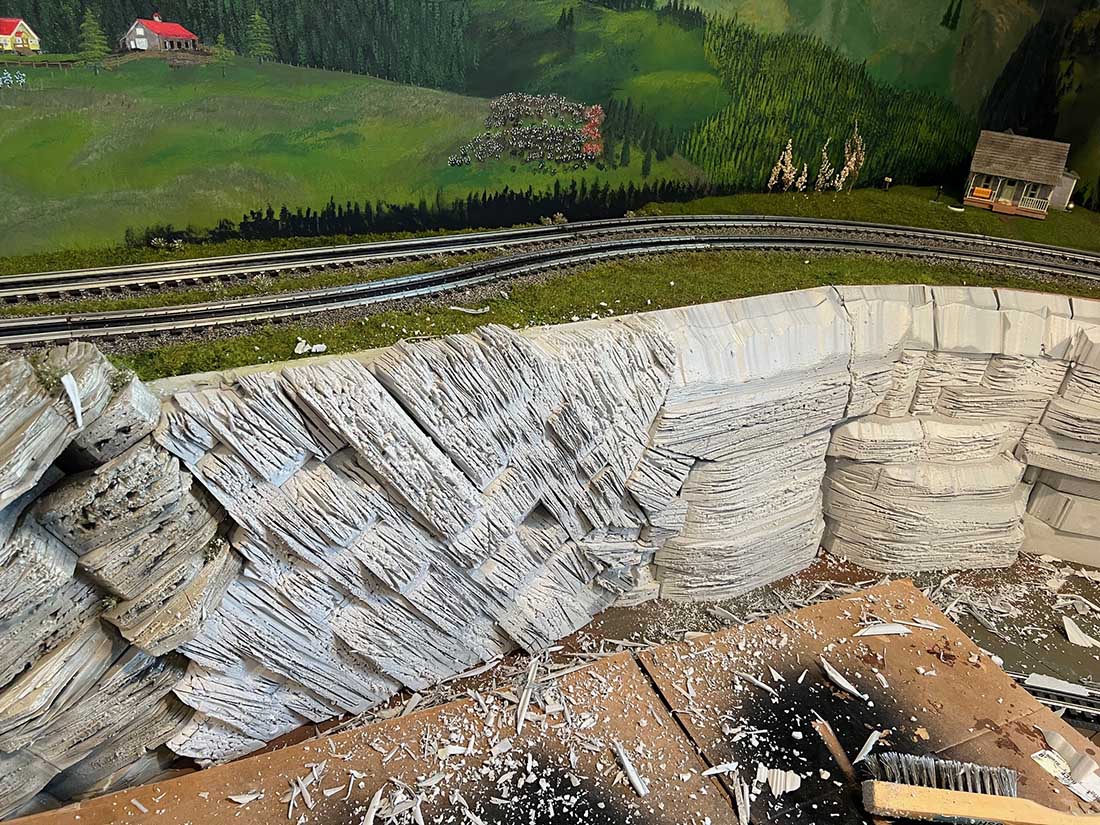
5. Rough/age the rock ledges with a wire brush. This softens the edges and pulls out some of the foam loosened by cutting.
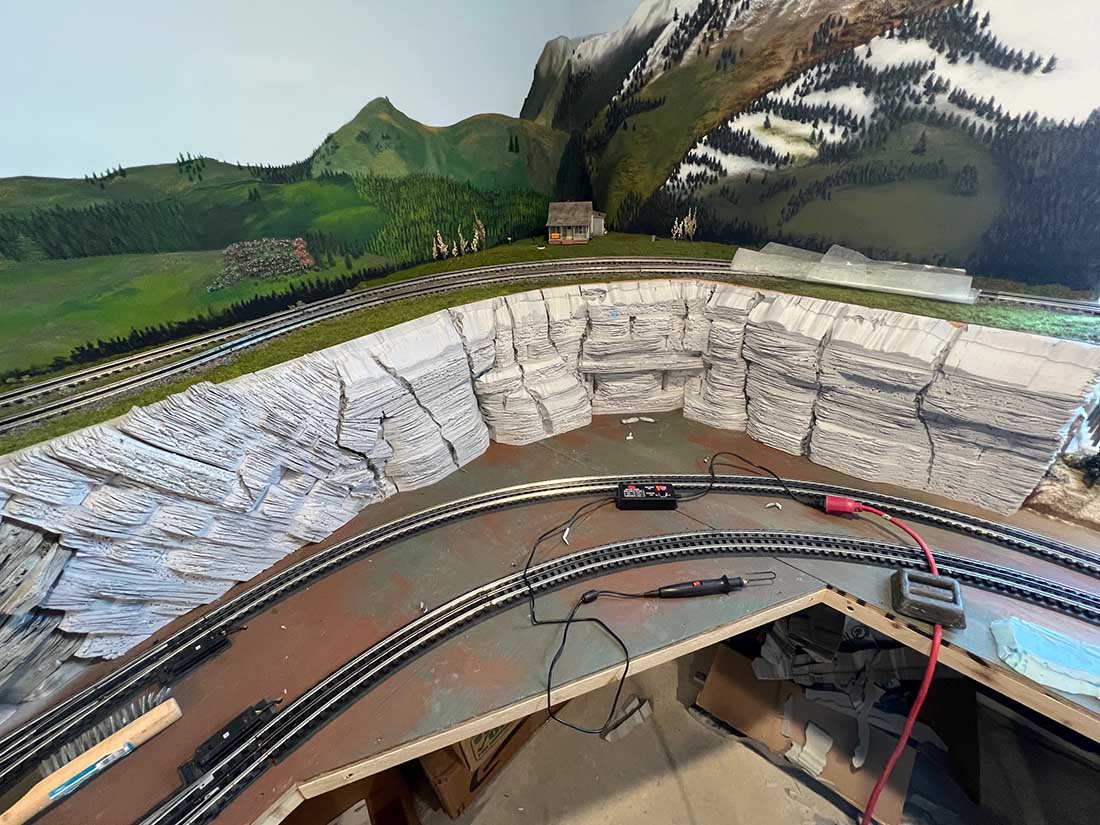
6. Create water flow paths down through the foam to break up some of the horizontal runs and show erosion.
7. Vacuum out as much of the loose foam as possible.
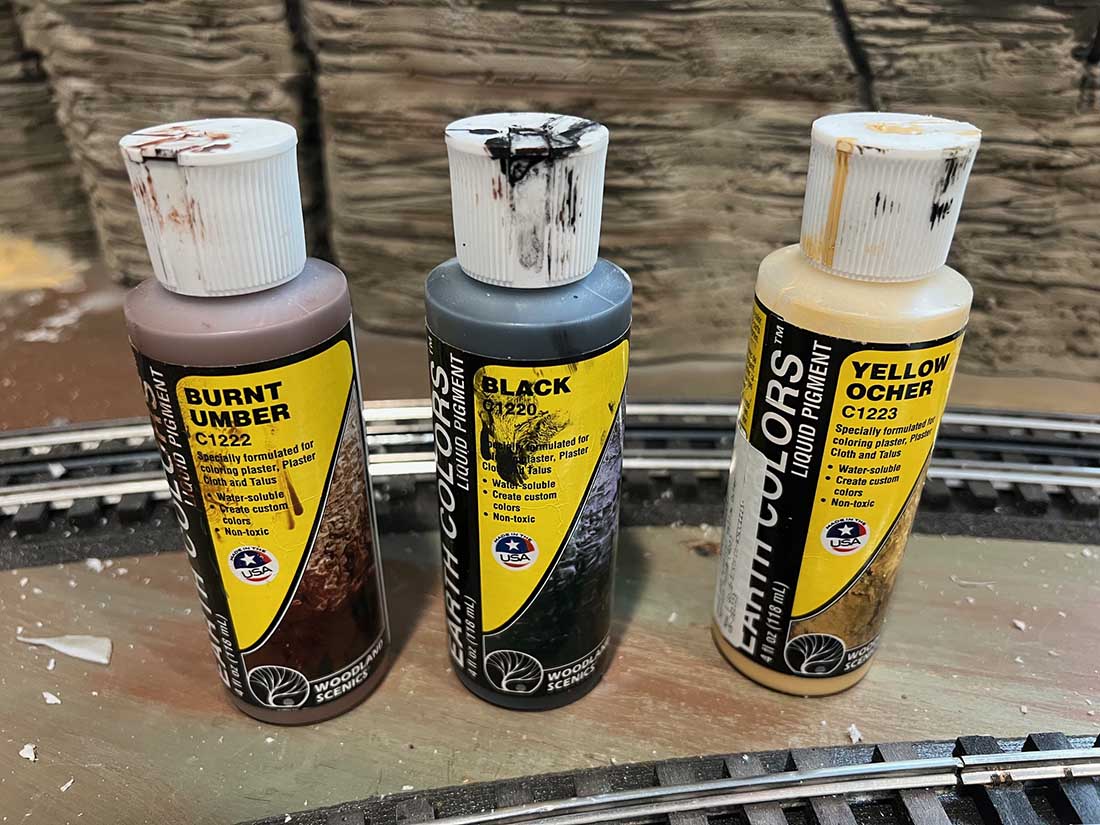
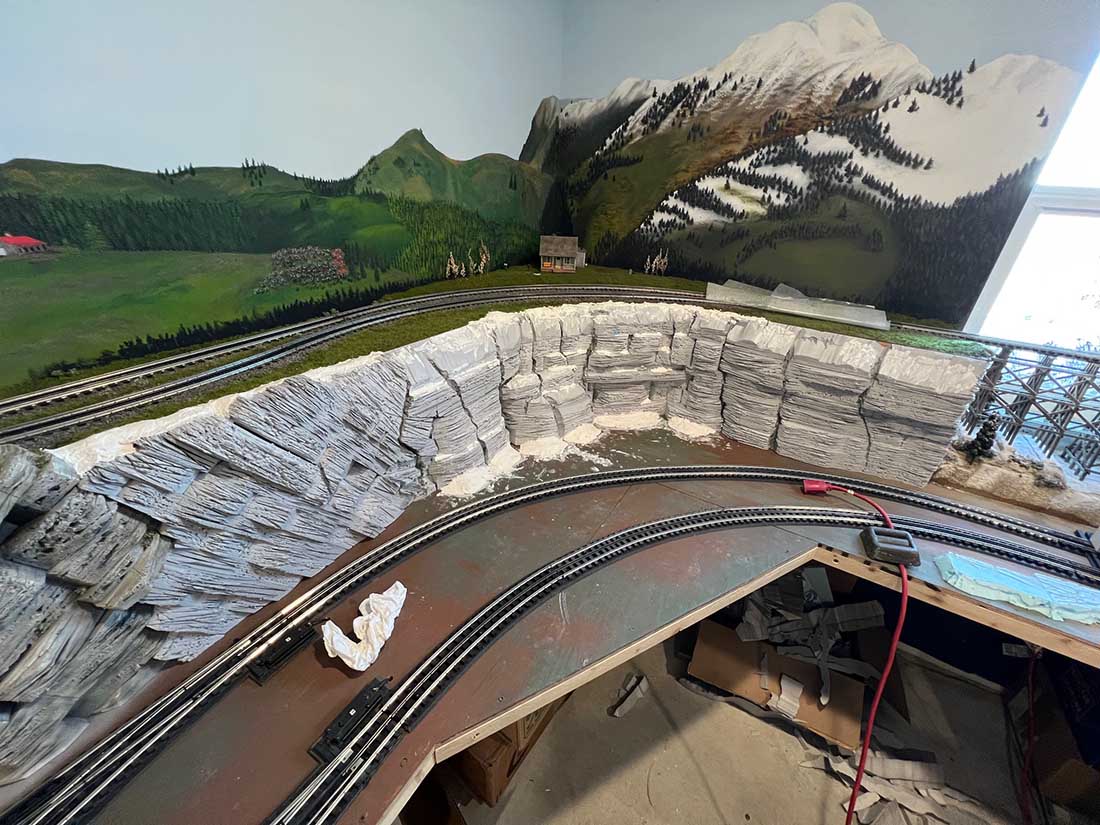
8. Paint a base color with an airbrush. In this case I used a Stone color for the base layer. Note that my local hardware store sells gray foam insulation so a primer coat has not been necessary.
9. Add accent colors, again with the air brush, using Black, Burnt Umber and Yellow Ocher. I often mix some white with the Yellow Ocher and a touch of Black with the Burnt Umber to achieve the tones I desire. The black is applied in the deeper crevices, the Burnt Umber in areas I believe would have soil and the Yellow Ocher as a very light tone in the stone and as a base color with the Burnt Umber as a base for grass and bushes. Dry brush with white and very light grey to accent the sun exposed rock edges.
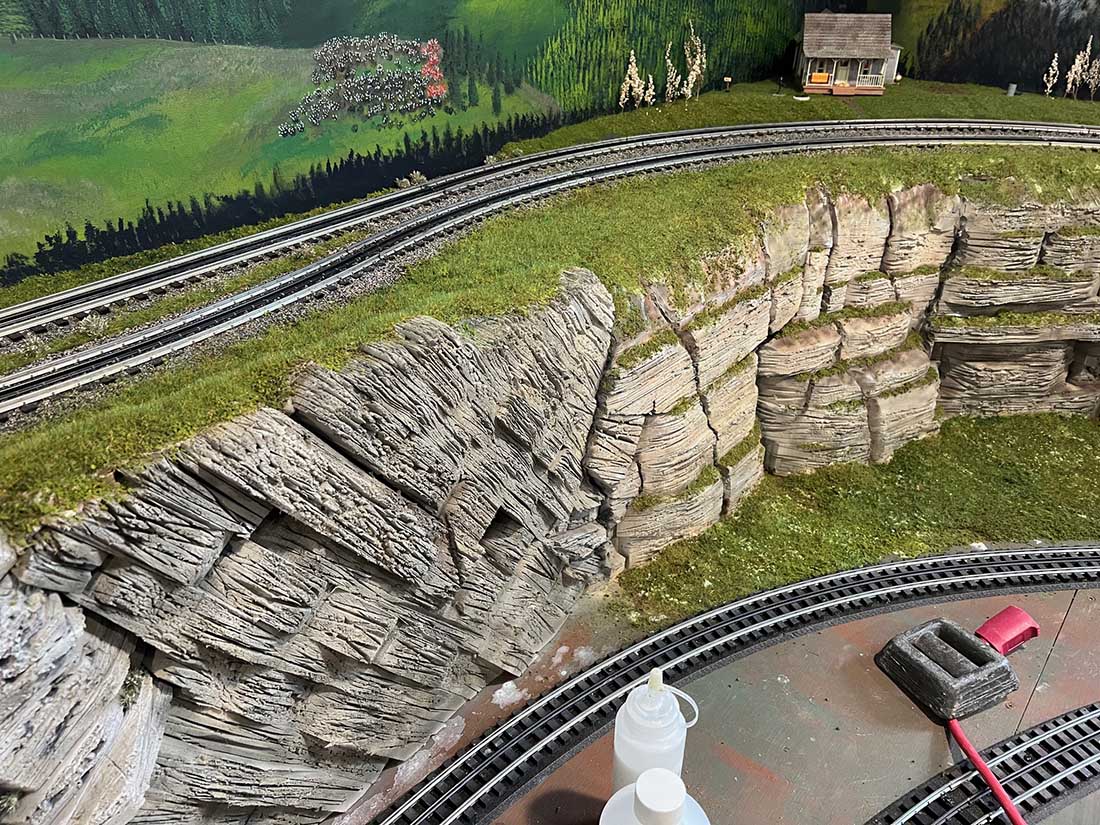
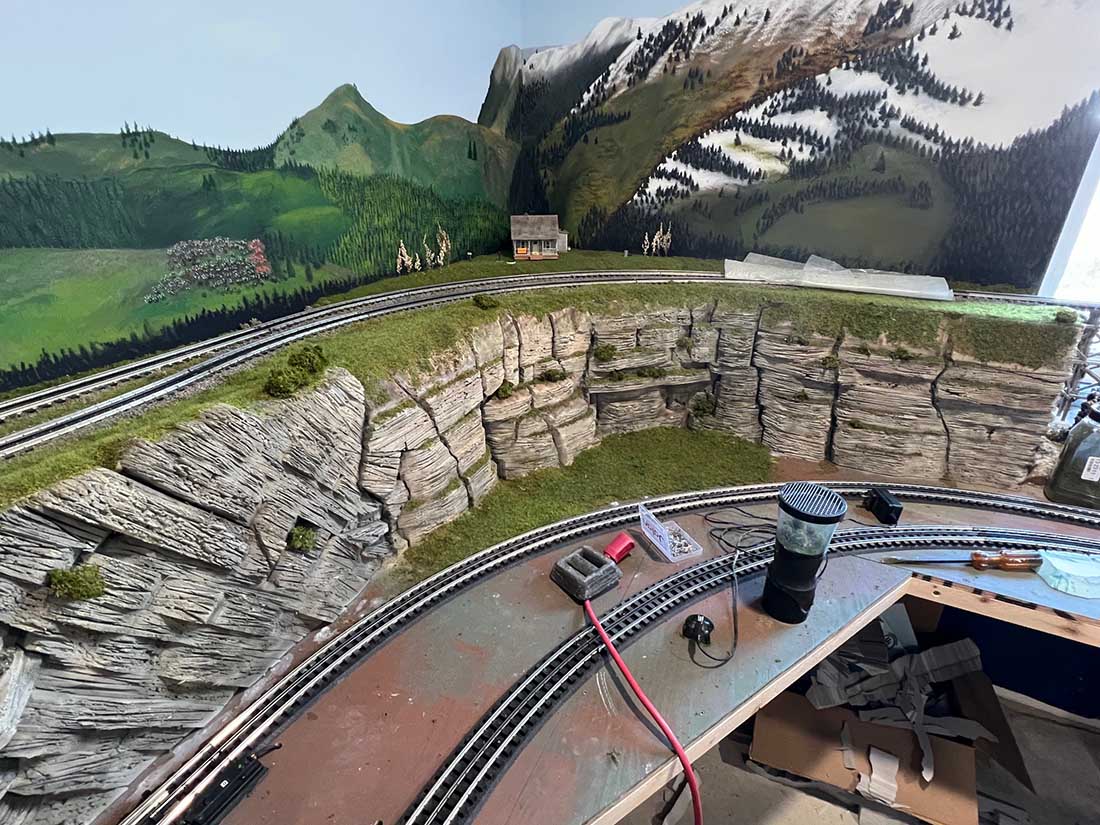
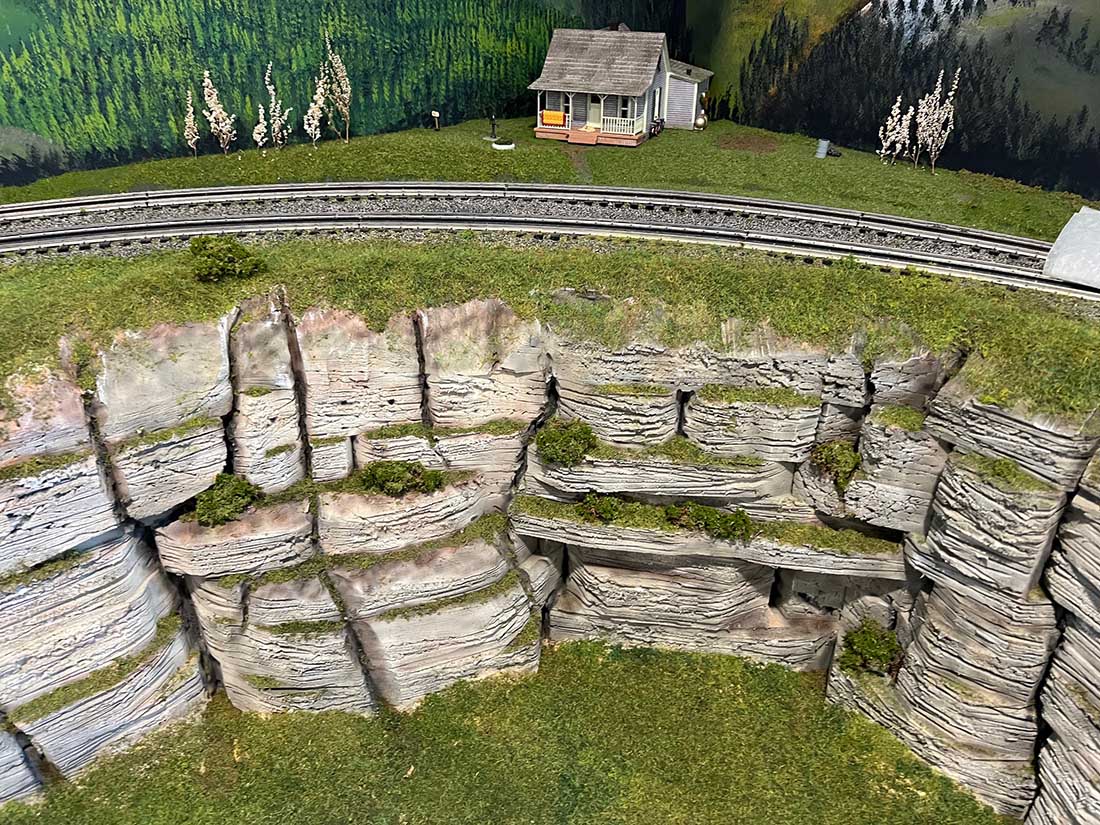
10. Plant grass and bushes.
Enjoy!
Ned”
A huge big thanks to Ned for sharing his realistic rock models for model railroad technique.
Ned’s previous post is here: Model railroad backdrops.
And some other posts that may help:
How to build realistic rock formations.
That’s all for this time folks.
Please do keep ’em coming.
And if today is the day you get started on your layout, the Beginner’s Guide is here.
Best
Al
PS More HO scale train layouts here if that’s your thing.
Need buildings for your layout? Have a look at the Silly Discount bundle.

Interesting scenery method Ned. Seems a bit messy to carve all that foamboard. I think Bill in Virginia’s method of applying Sculptamold and plaster rock molds over the foamboard yields equally good results. He uses a similar method of painting and staining the rocks. Thanks for sharing your ideas.
Good foam carving. I think your technique will yield excellent results for most people. You can always vacuum up the crumbs. Most landscaping is pretty messy anyway. Carved plaster is messy too. Great work on your layout. Rob
This is fun to see how you do this!
I watch Thunder Mesa Studio channel on Youtube (Dave Meeks channel out of Arizona who does On30 / On18 scale western motifs) and have does the same technique. He also uses other materials as well.
Very interesting method of placing different sizes of foam and carving the rocks. Thank you for sharing
Love how you use scuba weights on your layout.
Ned:
Your technique for sculpting rocks results in a great result, nice work. Did you have a particular natural rock formation in mind or something you created? I really looks great. Thanks for sharing.
To answer some of the questions and comments.
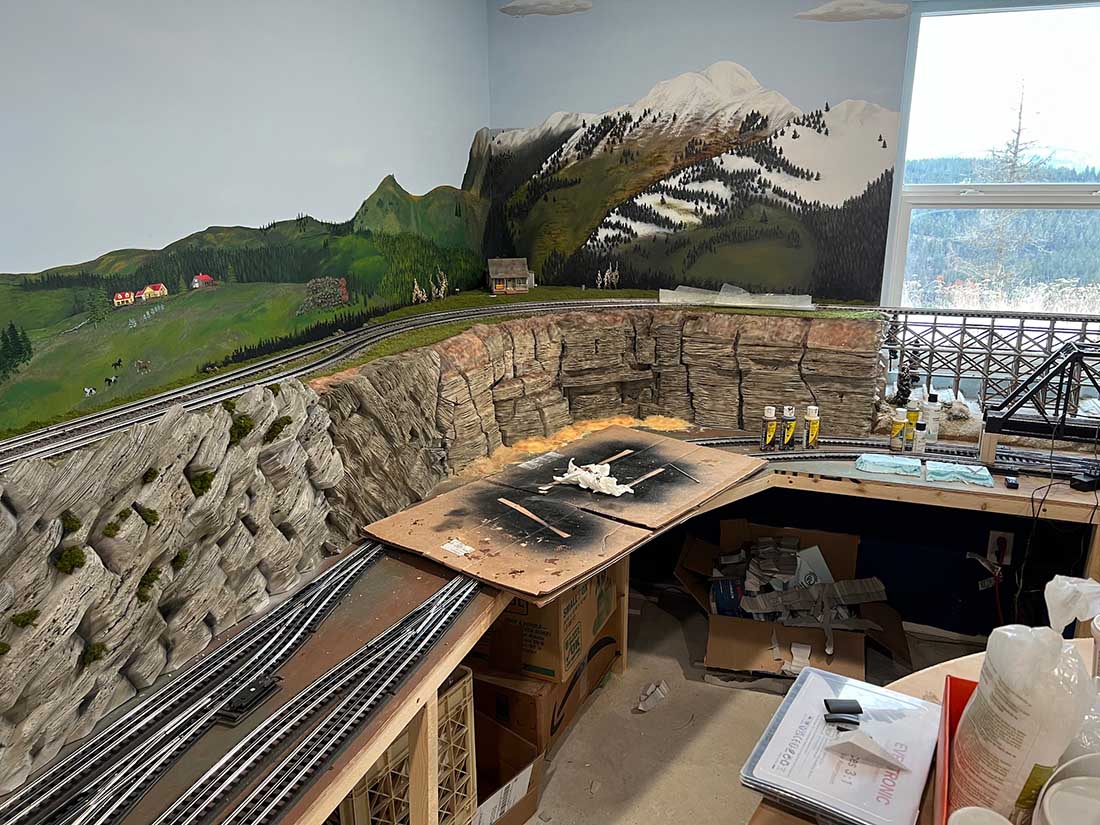
I have used sculptamold and some plaster molded rock formations in my rock ledges. Since the track layout has about 60 feet of vertical rock ledge 14” high I decided the foam provided the best method of expeditiously creating the layout.
I did not use any particular rock formations as a model for this. My effort has been to create realistic rock ledges and to vary the look to keep my interest on the project. I am not good at doing the same thing over and over again. Variety keeps me energized.
I have used my old scuba weights for a many different things in the construction process. They have proved useful in holding down foam as the glue sets.
Thanks for the comments and thanks to Alastair for keeping this a great inspiration and learning site.
OUTSTANDING step by step write up! This will definitely guide me to where I want to go with my scenery.
Great tutorial , very helpful and insightful . There are many ways to go about rock formations and mountains . For most I imagine it’s a matter of skill set , resources, funds, equipment , accessibility.. etc. Nonetheless less this approach seems very practical and doable . I’m venturing out and trying new effects and modeling applications , it’s great challenges and great fun , very rewarding g to achieve something that passes muster .
Thank you for sharing your process .
Those are some interesting and original techniques for carving rocks. I like this. Rob
The 1st few pics seemed so-so but the finished product? WOW! I’ve seen similar changes in rock (the slant, “lines”, crevasses, etc coming along US #20 in Eastern Iowa.
Bravo!
I wonder what the track plan looks like.
WOW!