Peter’s been in touch with his suspended train track:
“Hi Alistair.
Starting a new venture with HO scale trains. Had plenty of room in NJ basement for the O gauge, but when I moved to FL, alas, no basement. So, I had to sell all of my O gauge trains.
Having seller’s remorse, I decided to go with HO having a smaller footprint but the problem was where to put it? What room could I use to have a 12′ x 8′ layout?
The garage of course, but the motorcycle and car needed housing also.
Solution: Build a platform and raise it to the ceiling when not needed. I built a 12′ x 8 foot frame out of aluminum to keep the weight down instead of using wood.
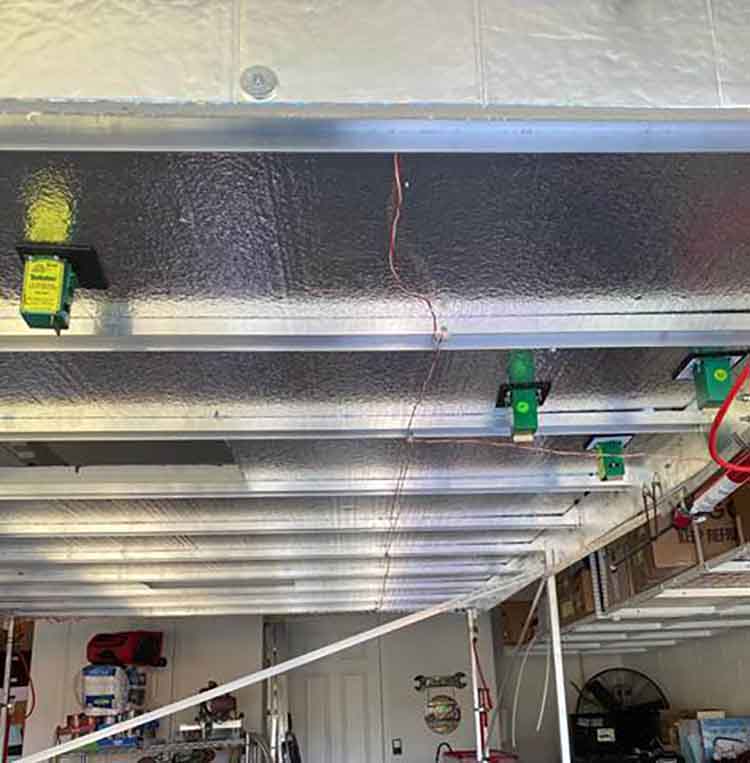
The base used was 2″ Styrofoam 4′ x 8′ sheets. Glued them to the aluminum and painted them green to start.

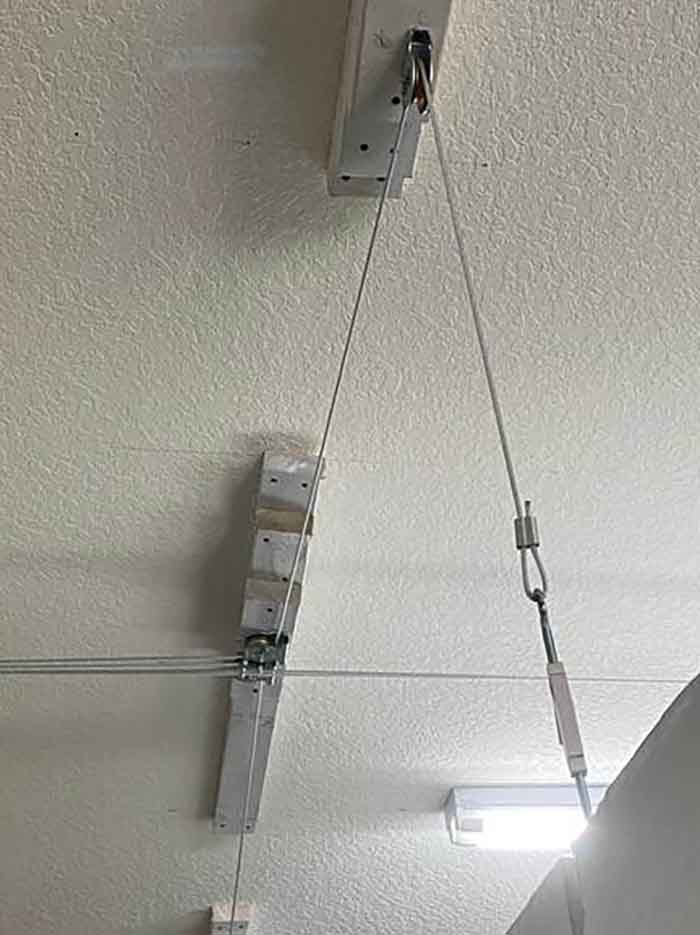
I used a 110v electric winch and pulleys to raise and lower the platform. Bolted to the concrete side wall and used twisted cable rated at 600 lbs. to make sure the load would be carried.

However, the winch lifting this light a load moved very fast and would hit the garage floor with a vigorous thump moving the cars and accessories all over the place. I needed to slow it down.
Solution: Hydraulic shocks. But car shocks were designed for heavy weight. Found the answer at Ace hardware; bicycle pumps. Removing the handles, I attached them upside down to the 4 legs of the table.
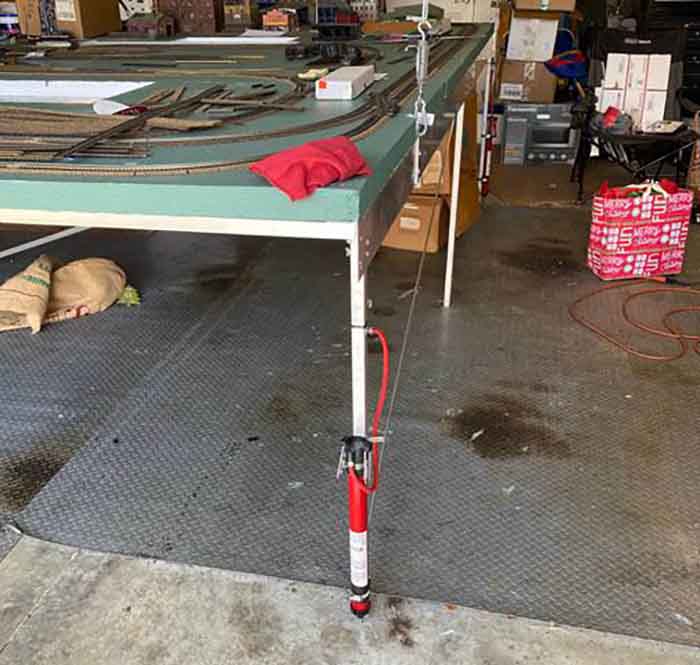
I inserted a valve system that I could adjust to limit the amount of air being released thus slowing the touchdown. It now takes about 57 seconds to travel the final 6 inches or so and saving the location of the trains components.
Now starting to lay tracks and building a subway system in the center.
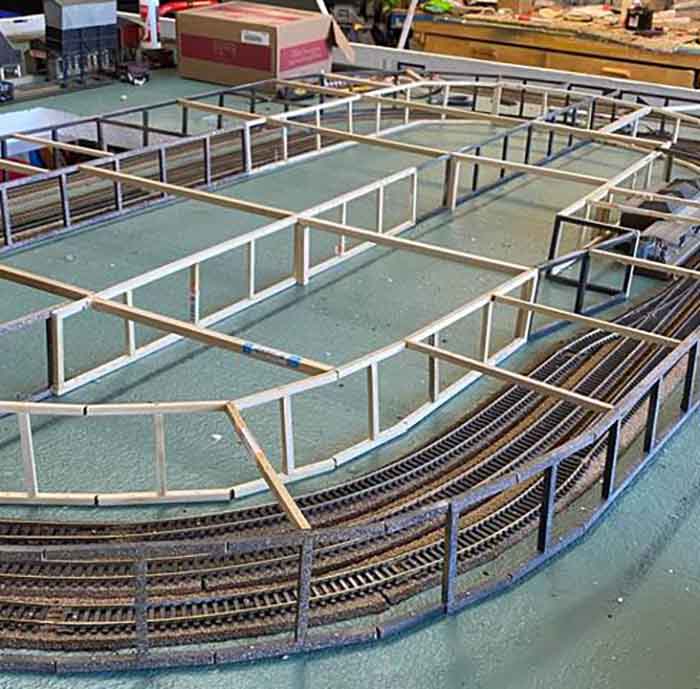
I easily cut out access points in the styro to get to the middle of the layout when needed. Will plan a farm or something that can be easily moved from under the table without disturbing the diorama. Pictures will be sent as I continue further.
Peter”
A big thanks to Peter for sharing his suspended train track – there’s been quite a few over the years:
Now on to Hall of Fame member, Rob:
“Hi Al,
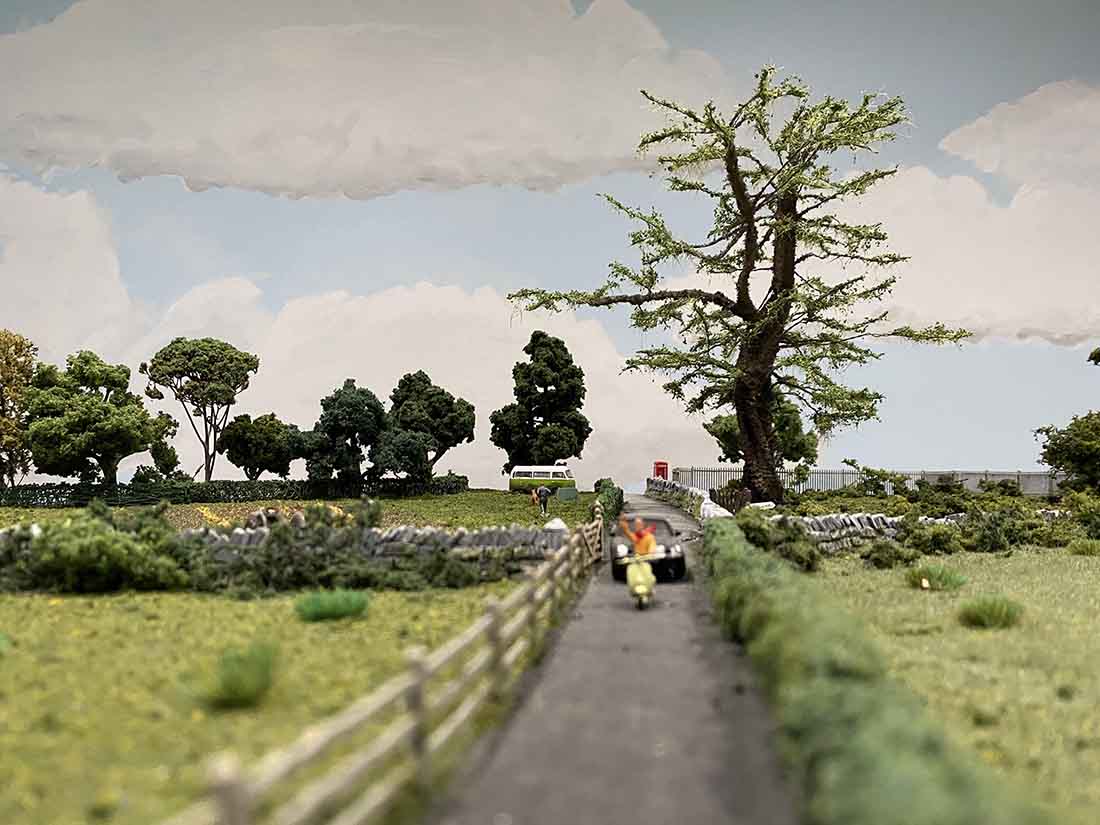
I have a new style tree for your audience today. It is more of a deciduous design this time.
I put the foliage on in a different way so the structure of the tree is more visible.
I am fairly pleased with the result. Because it was the first one built this way it took a bit longer than really needed.
It looks pretty good on the layout overhanging the road.
Rob”

(You can see Rob’s last post on making trees for your layout here.)
That’s all for today folks.
Please do keep ’em coming.
And if today is the day you pick the hobby back up, the Beginner’s Guide is here.
Best
Al
PS More HO scale train layouts here if that’s your thing.
Need buildings for your layout? Have a look at the Silly Discount bundle.

Picture #4 shows a loop of cable attached to a turnbuckle… that connector which the wire loops in and out of needs to be crimped, also an inner cable retainer is used so wire won’t distort (may break strands eventually otherwise) where it loops through the turnbuckle. Otherwise the cable lugs with the 2 nuts for different dia. cable you snug up works well.
No, not by trade a cable or weight rigger/mover but have done enough of it to know. Picture there for comments maybe🙄 Also a small piece of shrink tubing can be placed and heated on cable ends… keeps them from unraveling. Only maybe 1/4” of cable need stick through crimp too for proof of connection.
Regards, Rich
HO The way to go ! Make us proud fellow modeler. Don’t forget to show us
your progress.
The Critic
How ingenious! And great posts too
Good workmanship. Keep up the good work. I hope come out as goods as yours
Good morning Peter,
Thanks for sharing your suspended RR.
I did the same thing on a 8’x10′. I used steel studs for strength and weight. Finding a 110v. winch was a little tougher. Went to Harbor Freight and found just what I was looking for.
My unit utilizes 2 1″x6′ steel shafts for axles. The next part was using garage door drums for the cable winds, they are grooved and make for a neat wind. The rise to ceiling from floor takes about 12 seconds.
To set the whole table on, I use light weight square 1 1/2″ steel fence posts which will hold several hundred pounds of weight as they are made into saw horses. No need for shock absorbers.
Hello Alistair, I live in Florida and have been looking for ways to suspend a layout in my garage. Haven’t found much on the internet. I think Peter may have the right idea with aluminum for framing and styrofoam as the base to keep it light. Could you please ask Peter to post more details regarding the construction of the frame? Thanks for having this great website.
I appreciate your willingness to embrace “down-sizing” and I think you made a wise decision to go with HO. I’ve recently gone through the same phase of life and I considered going from HO to N scale but a fellow model railroader here at “the home”, told me that the eyes will be going in the near future so stay with HO. The storage of your layout in an elevated manner appears to be very well done and you can raise it to allow the storm surge to pass under. I’m just jealous.
OkieBiker in Tulsa
Very nice! I’m planning on doing something similar in my garage with 9 x 11 “Murphy Bed” style base running HO scale trains. Glad to see I’m not the only one who thought of using that type of winch system. Hoping to get started here in a month or two. Thanks for posting this.
I did something similar for a different purpose (lifting a truck topper off the p/u) as I used a boat trlr winch, hand crank type. Used the wide strap with the snap hook to which I attached cloth’s line and then over pulley’s as needed to eyebolts on the train board. Worked great with minimal cost and no speed issues to remedy.
Would love to know the cable routing picture as I’m in same boat. Need to raise layout to ceiling when not in use. Please post
Note that there is a difference between a winch and a hoist.
A winch is used primarily for pulling, The cable comes out the front through a pair of rollers. The cable extension is pretty much just freewheeling the drum, (may have a rudimentary friction brake meant to just keeping the drum from over rotating, snarling the cable) hence the hard drop.
A hoist is used to raise and lower a load from above. The cable comes out the center of the side facing the ground. A hoist works the same and is equally controllable in both directions.
Wow that’s a great idea and space saver!!!
Fantastic idea combined with lightweight aluminium and at this stage really lookinjg good.
One caution in suspending layouts in a garage is that they attract an enormous amount of dust caused by the vehicles entering/leaving or just idling underneath. Not sure what the solution would be!
lots of work. shows you really want to do a good job. keep going.
Rob, excellent job on the “new” trees, they look so realistic. Well done.
Brian – the HOn3 guy in Knysna RSA