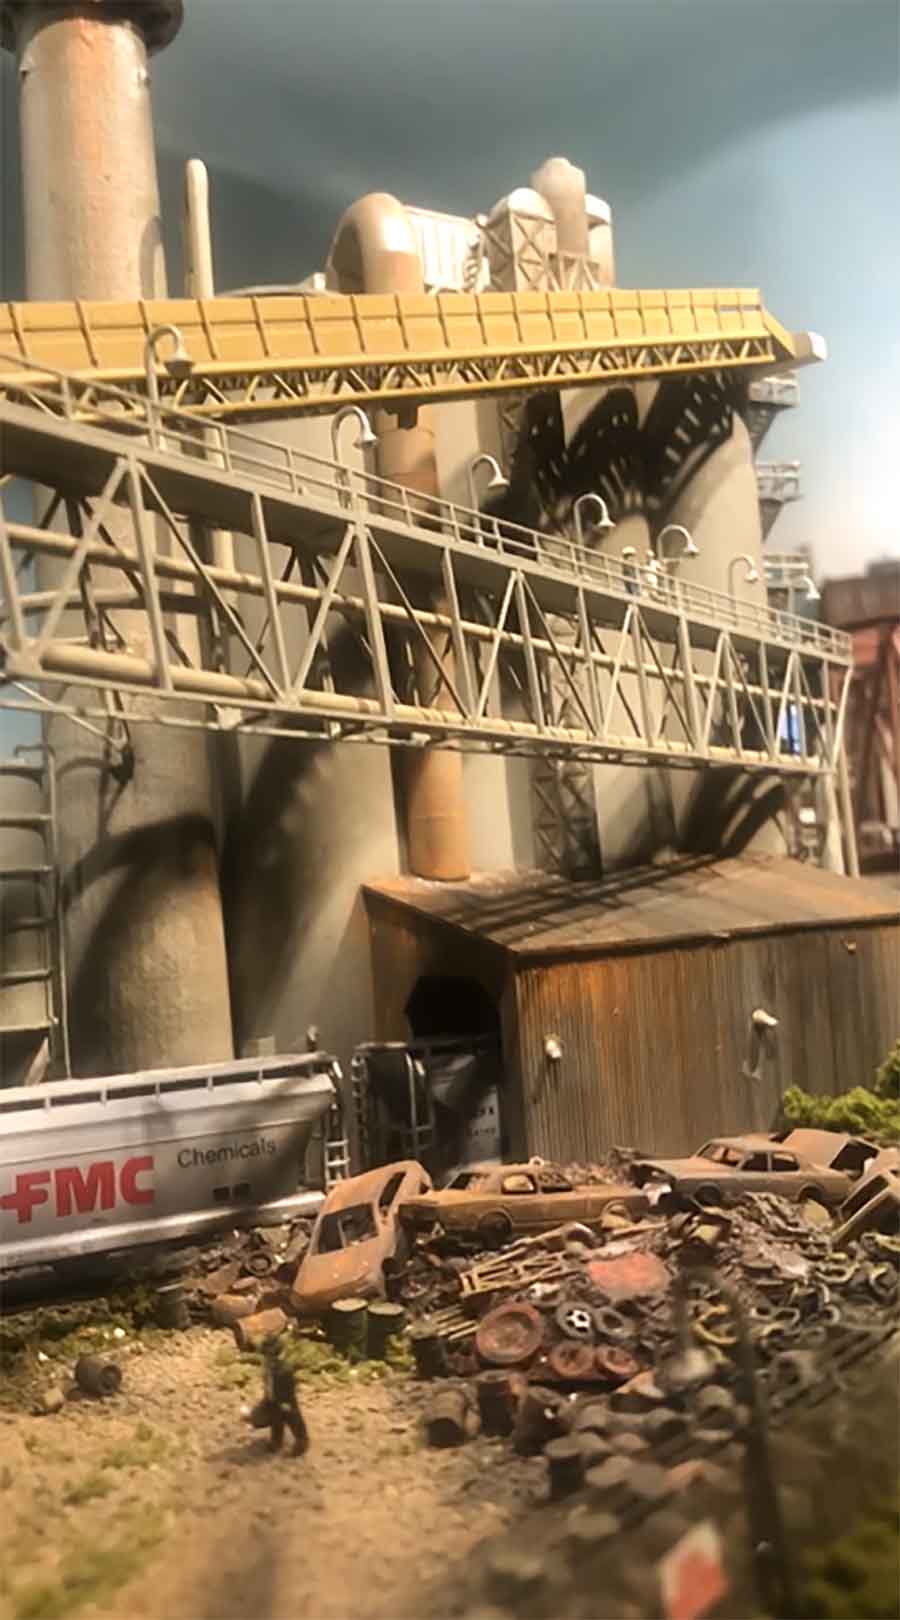
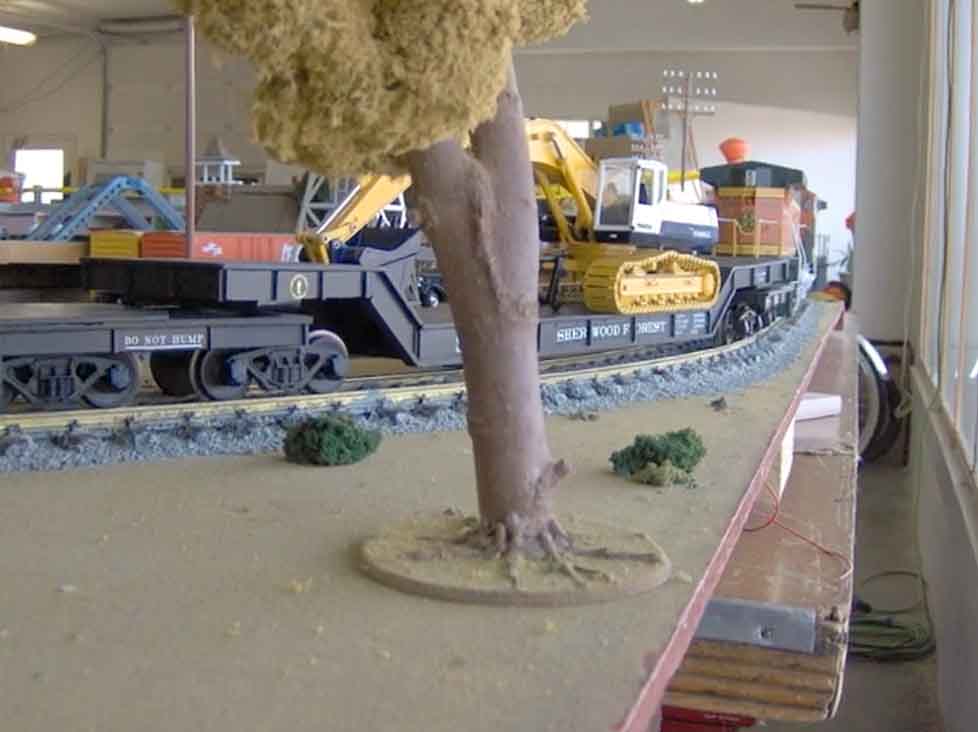
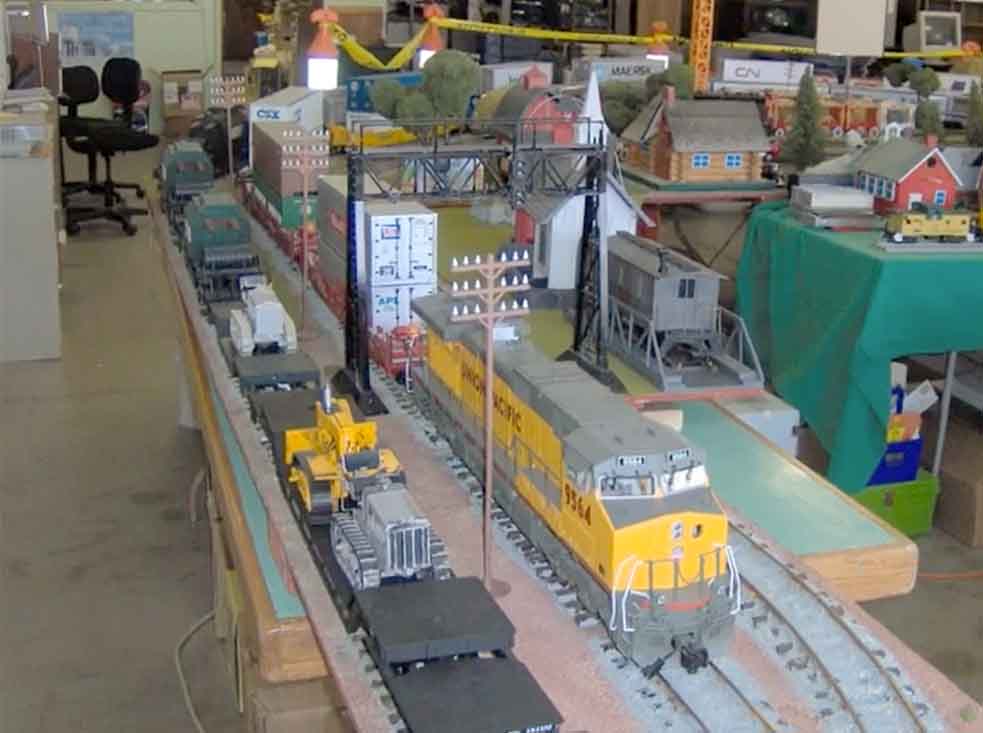
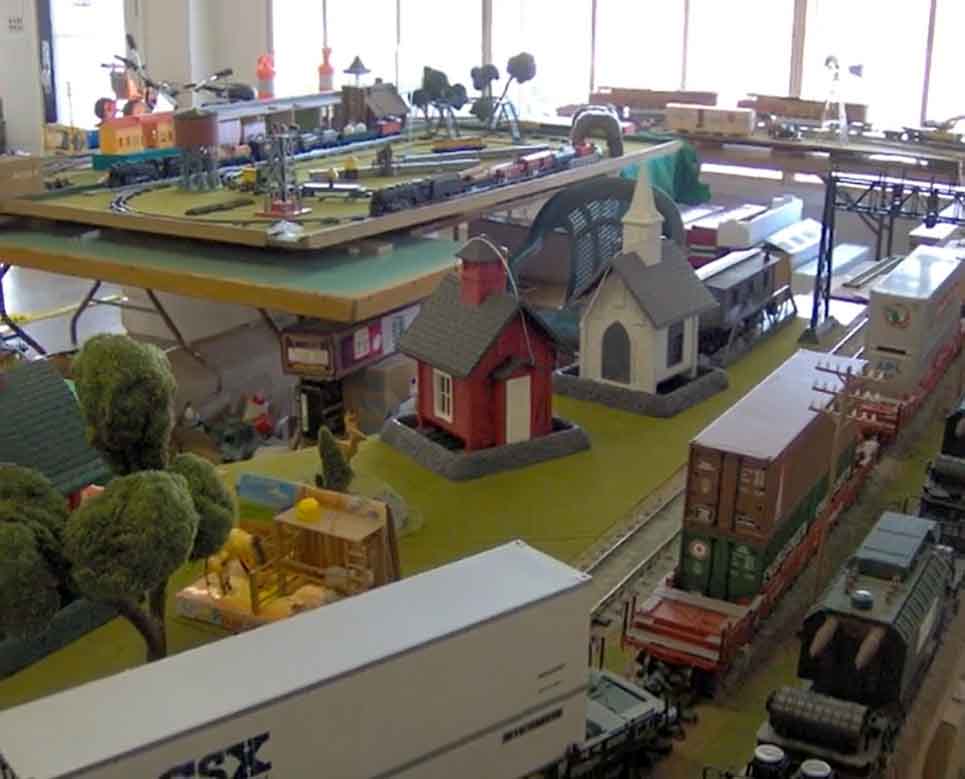
Fred’s been in touch with his N scale factory scene – a stunning cement plant.
Have a look at what he’s done:
“Al –
I know it’s been a while since my last submission to your website.
I’m in the process of redoing a painted backdrop in the center of my layout because during the last two years of work in the urban section of my layout, I’ve learned how to use “backlit” plexiglass as a base upon which to paint city landscapes with complex lighting.
(More on that later, though wouldn’t it be great to revisit times in your past to renovate what you did as a young man with what you had learned by 76? In essence, that’s what I’m now doing with my layout.)
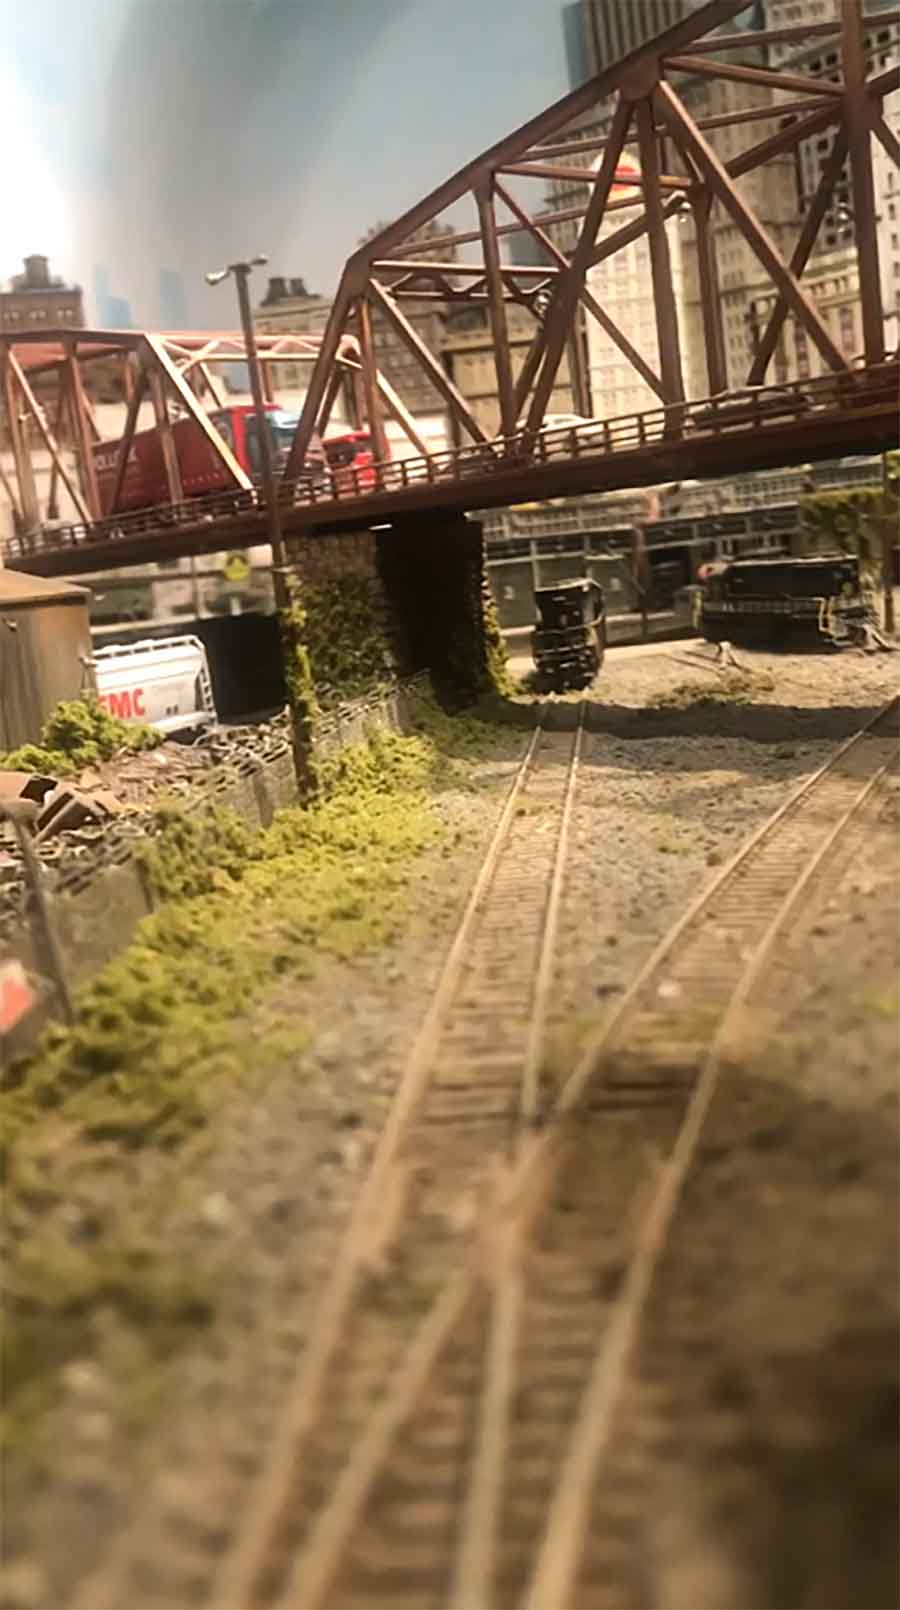
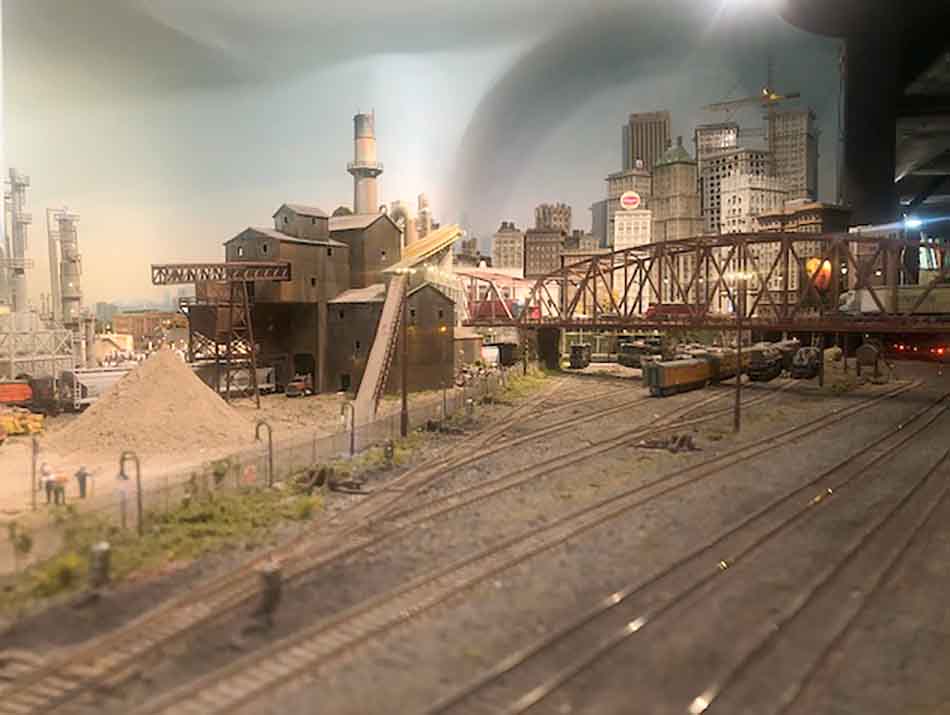
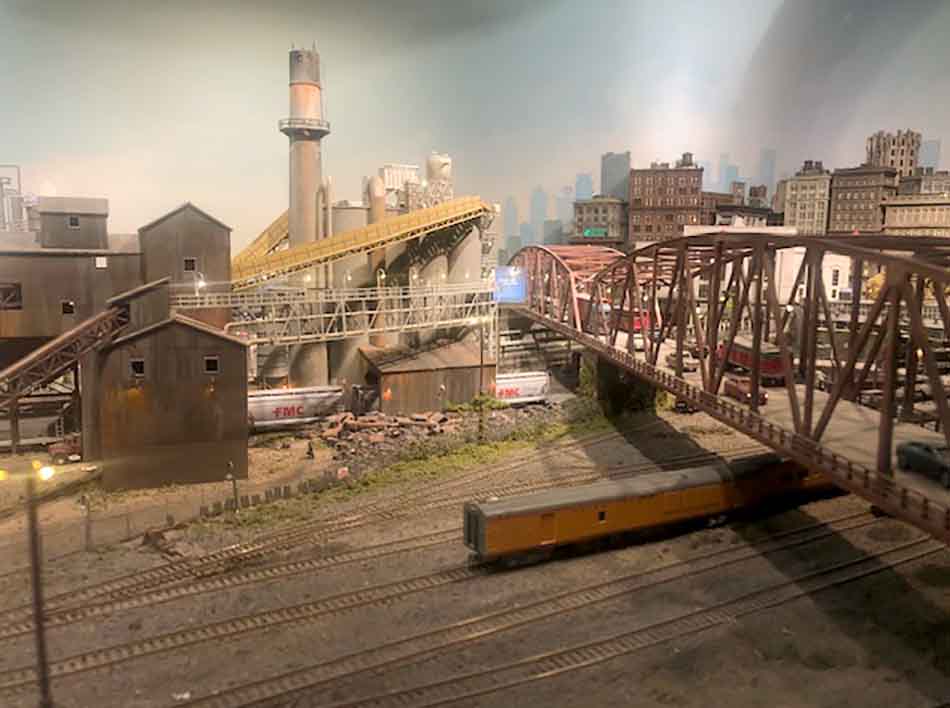
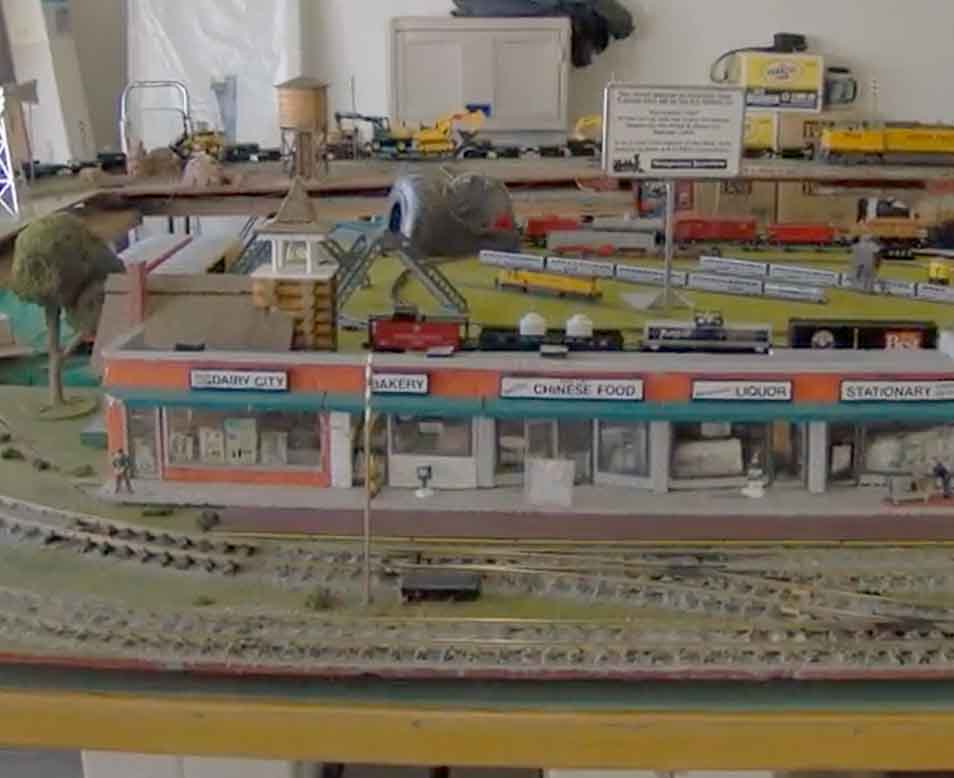
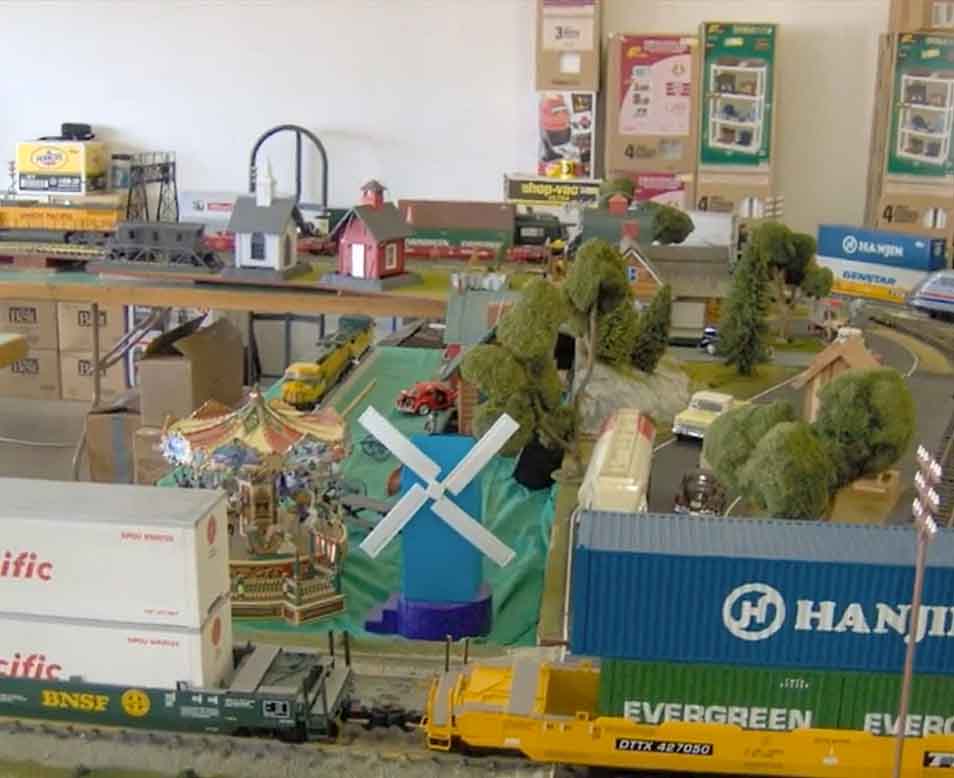
Anyhow, the previous sand and gravel plant, with recently added cement factory is situated at a crucial place in my layout – between the oil refinery and harbor and another long stretch of coastline that leads to the rural part of my model.
What is a diorama dilemma is the fact that the heigt of two separate horizon lines on the water are dictated by different physical measurements of the depth of the layout at these points, with a certain visual confusion upon seeing them together. (One horizon appears 8” to 10” higher.) So the solution became to visually separate them.
The enlargement of the cement plant helps to do this, sitting at the juncture of the two backdrops as it does.
So more than a piece of detailed industrial modeling, the new sand and gravel and cement plant is designed to distract, to allow the viewer to separate the two sections of the model, without actually doing that with a more obvious physical divider.
But the plant itself is an entertaining exercise in “kit- bashing” and unique design with 3d bits and pieces from Shapeways, other kits, and an N scale model of a cement plant from Walthers:
Fred”
A huge big thanks to Fred for sharing his stunning update – his N scale factory layout and pics are amazing.
What’s more, I think it’s a wonderful example of how this hobby is so much more than making models and laying tracks.
Here’s Old Taz’s fab back story:
“Hi AL
I live down the street from the Zephyr. Dick and I met several years ago and have been close friends ever since.
I was restoring cars at that time. My health went south and I had to quit and sell everything that had a stick shift.
I’m no spring chicken either Al. Some new parts some rebuilt, some added, some removed and some we are watching.
My dad and my wife’s dad both worked as switchmen dowering the WW2. One in Minnesota and in Montana.
When my dad was building the trains longer, to come across the plains, her Dad was taking them Apart to make up shorter trains over the divides. Then vice a versa.
I have been following Al and the rest of you for about five years or more trying to absorb what I can.
The first train I can Remember having, Dad and I had to save five box tops off a chocolate drink mix and send them in with a Dollar. You could order a “A” unit (no motor). Then five box tops and a dollar baggage car and so on. I drank a lot of chocolate that summer. I got the motor for my birthday! No track! That came At Christmas.
That was it for trains till I went to work at The Toy Chest (age 22). Engines passenger cars, box cars, Buildings, track, all N GAGE. My first wife said I was nuts. It all got packed away.
Around 70 I decided I could not restore cars any more. When you can’t feel with your fingers you need to see what your touching.
I met Dick down the block and seen what he had as a hobby. Dick is a close friend we bounce ideas off each other all the time. Mine are better!
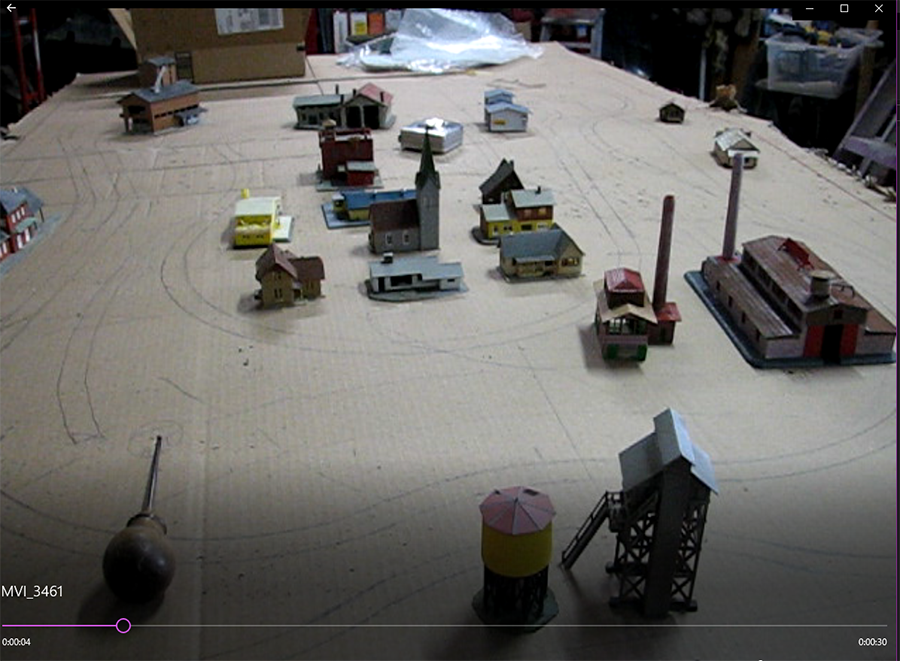
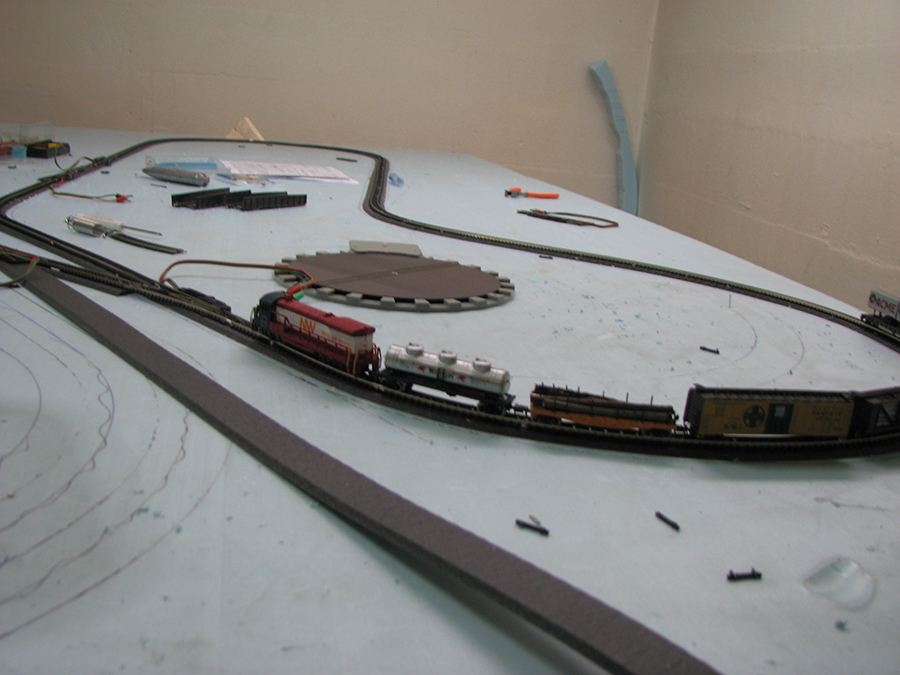
Here are some pix of my start.
It started in the garage on a pace of cardboard.
Then to the basement, gluing down my first piece of blue board I dislocated my new right hip.
It all went down hill from there!
Richard from Montana (Old Taz)”
You know how I’m always banging on about making a start?
I think Dick’s pictures above show in spades all layouts start with a single step. Look at how his finished. Amazing.
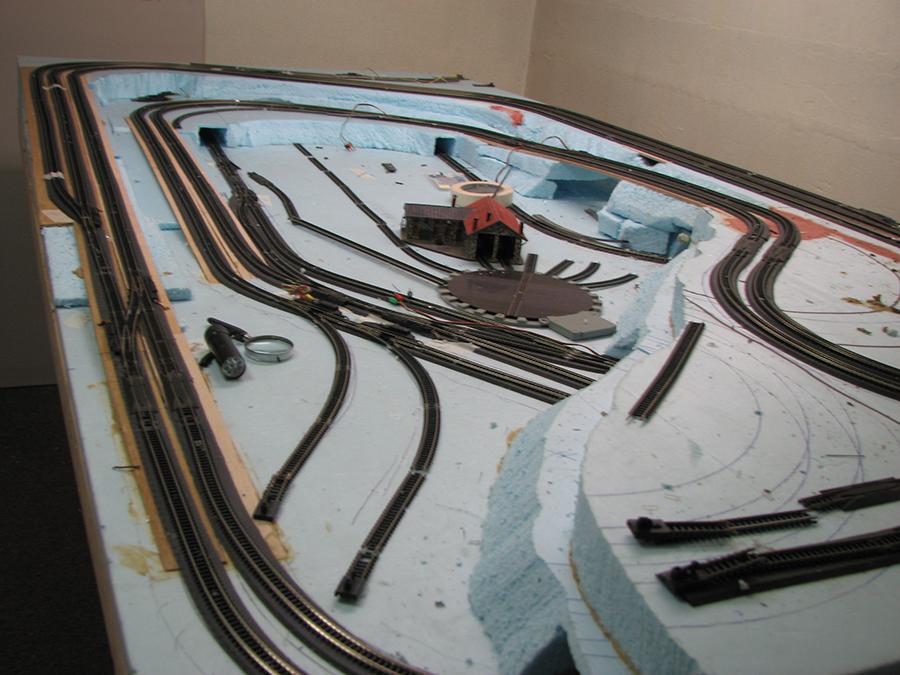
this is my you tube video link of the portable layout I set up with the help of my neighbor friend Dick Stern (oldtaz) who has sent you wonderful pixs of his N scale layout.
The video is just over 7 minutes long, all taken by oldtaz’s cell phone.
We had over four hundred visitors who enjoyed our efforts.
Many were intrigued by the track plan. It was a folded dogbone double track mainline with 4 sidings and two crossovers, but large enough to confuse people as to where the trains were headed. all the time. The music quits early on the video and I can’t seem to fix it, Earlier I had good music on there which was a problem for you tube so had to change to the music on it now.
Neither of us are healthy enough to do this public display work anymore which is why we both have N scale layouts to work on now.
I have spent a lot of time on my large California Zephyr Route N scale layout the past 2 months.
With 3 weeks left to work on it before I have extensive back surgery, progress may slow to a crawl for the next 3 months.
So I will be sending updates of the California Zephyr Route again very soon. It is a huge layout and I am the chief cook and bottle washer with no helpers.
Anyway I hope there are some that will enjoy the video.
To all of our model train friends on your site.please be well and safe and you too Al..
Thank you so much for this site for us to connect with each other and share our enjoyment with the hobby.
Sincerely
Dick Chapple Sr
Hardin Mt USA”
A huge thanks to Dick for sharing his ‘portable’ G scale.
I was going to add some links to Dick’s previous posts, but then I thought there was no point. He’s contributed so much to the site over the years, I thought it would be be best to put a page of his links together.
And then it hit me. There’s a place on the blog for folks like Dick.
He really has contributed so much. What’s more, there are not many folk that model in TT scale right up to minature gauge, ride on railroads.
Anyhow, have a look at his page, I’m very happy to add Dick to the Hall of Fame members.
That’s all for this time folks, except for the glaringly obvious – there’s still time to grab the Beginner’s Guide with it’s all bonuses, and 22 printable buildings for just $9.
Of course, I’m biased, but it’s an absolute giveaway: A a crazy $216 saving.
It’s not a ‘made up’ saving either – you can seee how much the buildings sell for in the store.
What’s more the The Beginner’s Guide has been the same price ever since I started the blog in 2011, so sadly, it will be going up this year.
I know some of you buy it just for the printable buildings because you already have the guide. That’s fine – thank you for supporting the blog. Pat yourself on the back for helping the blog to chug along.
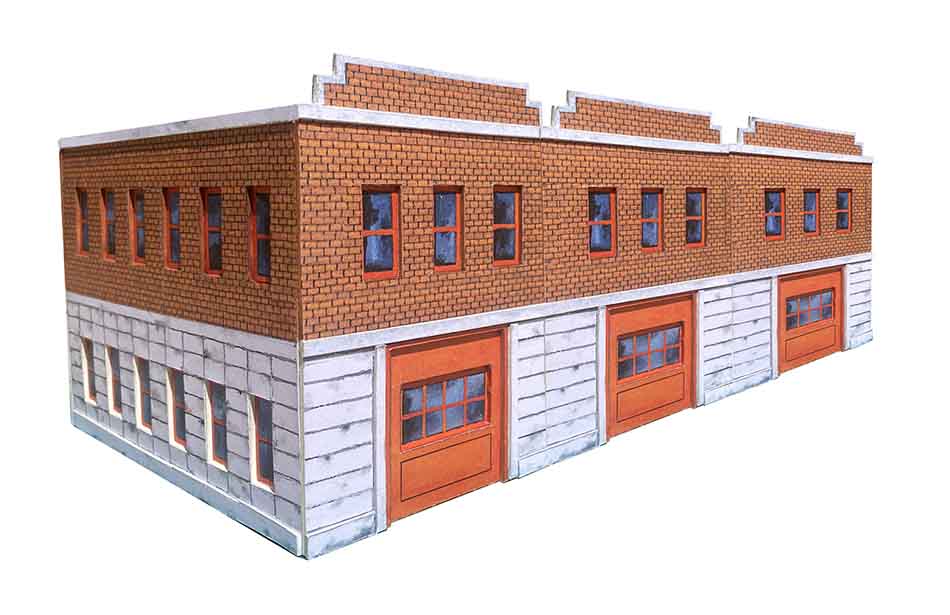
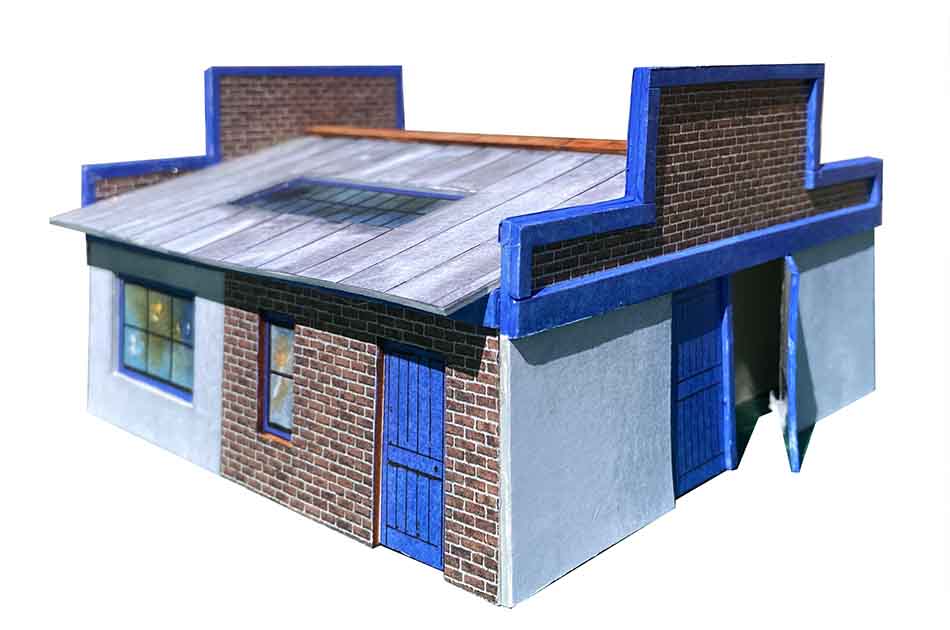
There are 5 brand new buildings to be had, in addition to the 17 others which are bundled with this deal.
As I said, I know many of you already have the Beginner’s Guide and are just buying it for the new buildings and that’s absolutely fine.
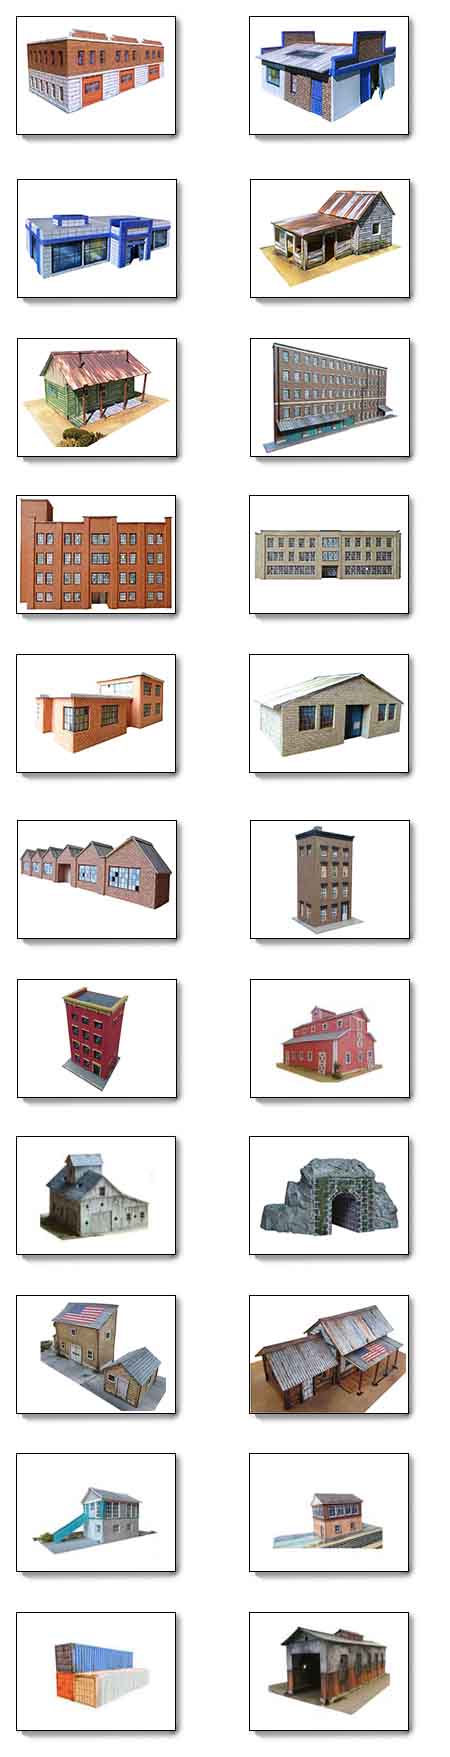
So here’s what you get for just $9. I’ve called it the Mega Bundle:
For $9, you get the Beginner’s Guide – and all of its usual bonuses – plus 22 printable buildings.
Five of the printable buildings are brand new:
The fire station
.
Garage lock-up
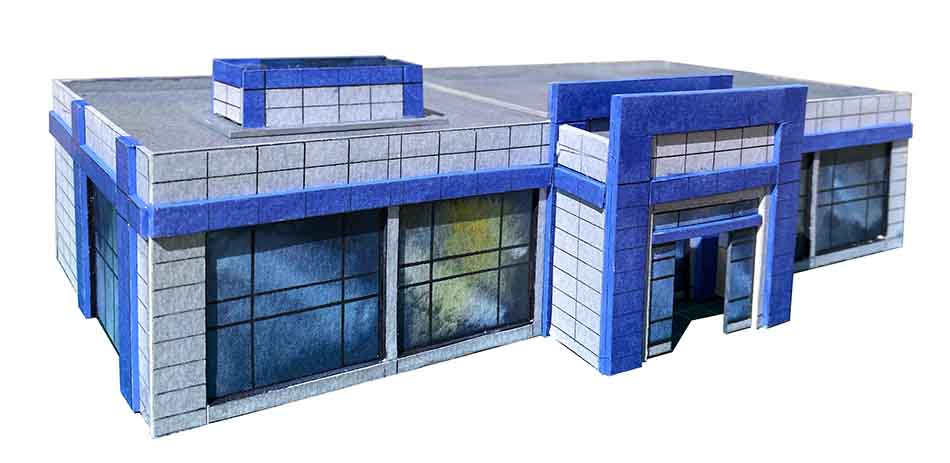
Store / showroom
Sidings store building
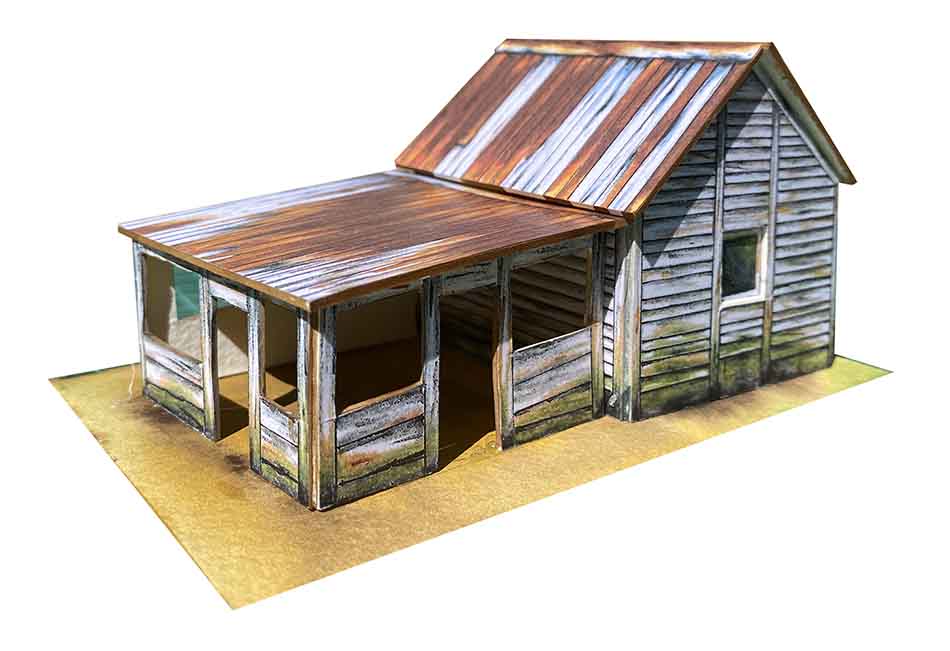
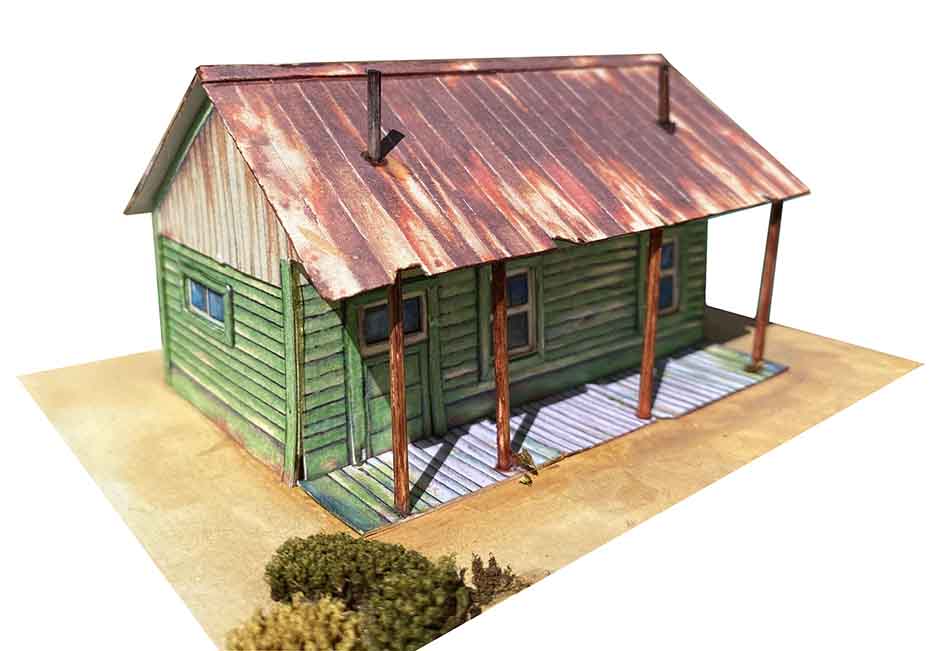
Green shack
And here’s the crazy bit. I’m also throwing in another 17 printable buildings too, so you get all these:
(Click on the pics to see larger versions)
The buildings can be printed out at any scale. For HO scale, you don’t need to anything, just print.
But for N scale, for example, just reduce the print 54%. Easy peasy.
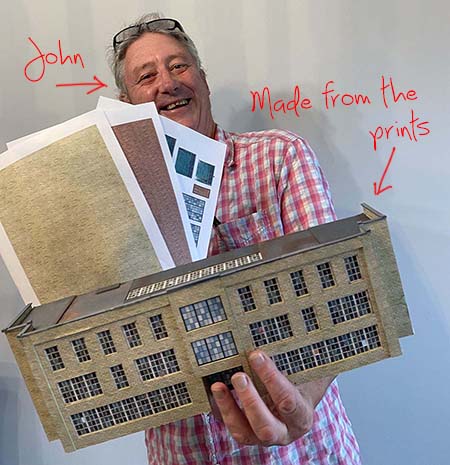
And here’s the very talented John with a quick youtube on making the new buildings.
It could just be me, but I think he had ‘lunched’ rather well before he recorded:
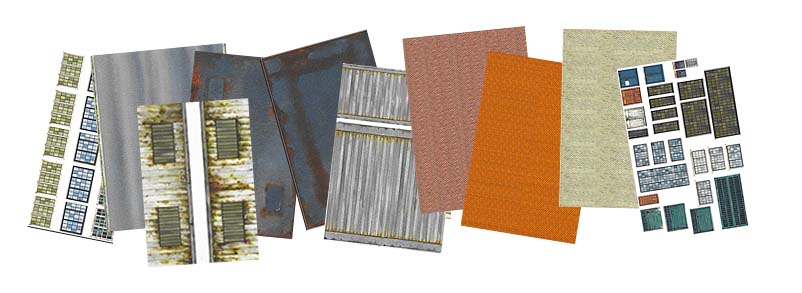
Here’s a few of the prints so you can see what they look like:
As I said, I want the sale to be sincere and knock out value to give something back to you lovely people.
And even with this $216 saving, you still get my 60 day, no quibble, money back guarantee.
If you are not utterly delighted with your purchase – for any reason or no reason at all – let me know and I’ll refund you in full.
Of course, I’m biased, but the Beginner’s Guide, is a treasure chest of info, whether you want to get started, get going, or just decide whether you want to build a layout.
Some of you will already have the Beginner’s Guide and just be grabbing it for the new buildings, and that’s absolutely fine.
But each and everyone of you will be directly supporting the site and be helping it to keep chugging along.
What’s more, it things are tight, you can help just by leaving a comment below if you’ve enjoyed the blog, the Beginner’s Guide or the printable buildings.
As you’ve probably worked out, with the printable buildings you’re only restricted by your imagination, you can make as many buildings as you like with this bundle or any of the bundles, to whatever design you like.
And to those who aleady have the Beginner’s Guide and are buying it just for the prints or to support the blog, thank you: without you there would be no blog.
Please remember though – it’s for this weekend only – then everything goes back to how it was.
PS The Beginner’s Guide has been $27 since I started the blog, way back in 2011. Sadly, it will be going up later this year, so this $9 bundle really is a great deal.