Bill’s been back in touch with his N scale track layout:
“Hi al.
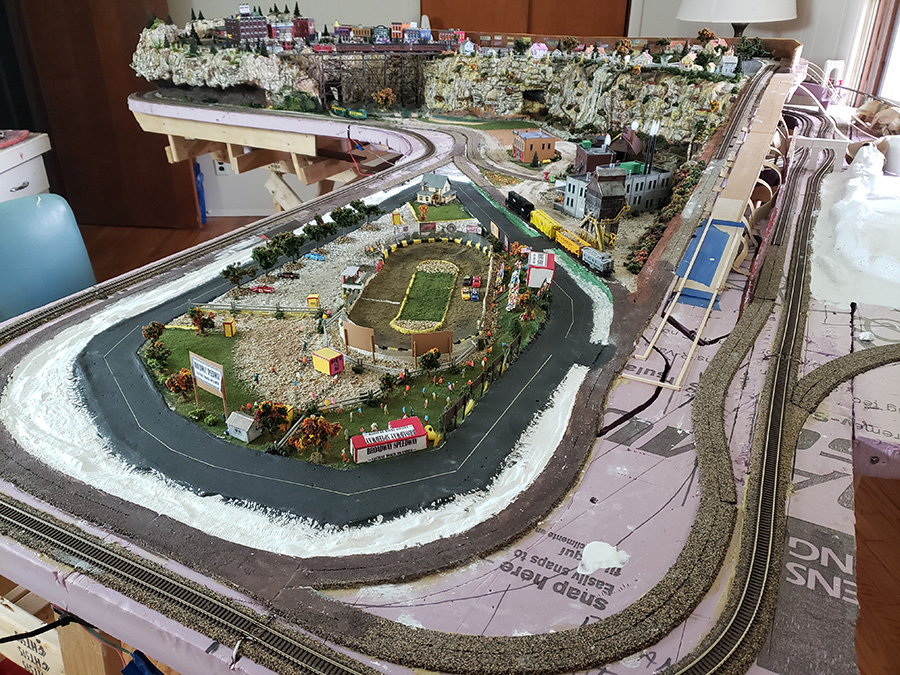
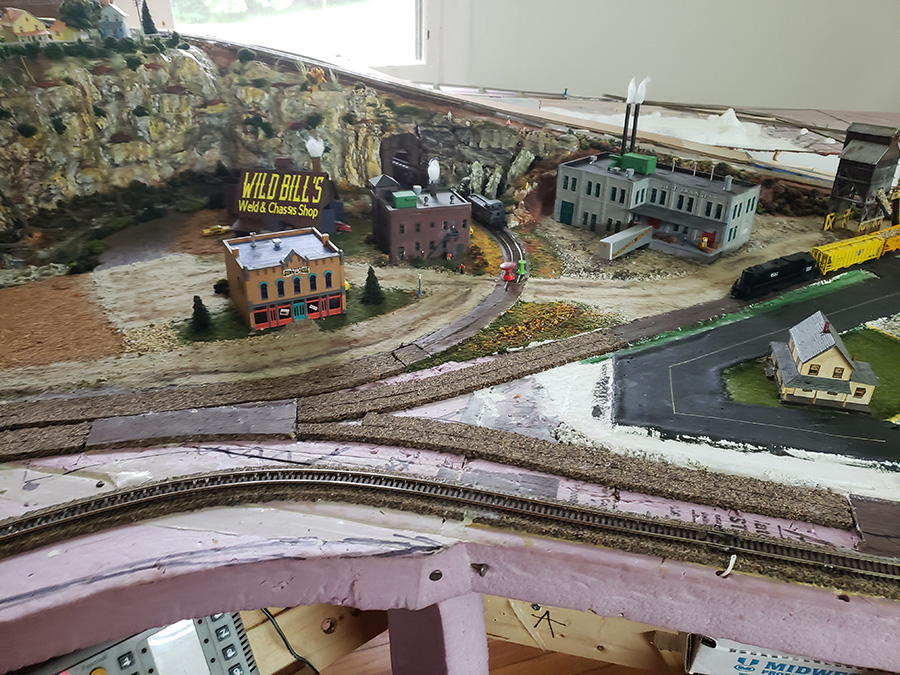
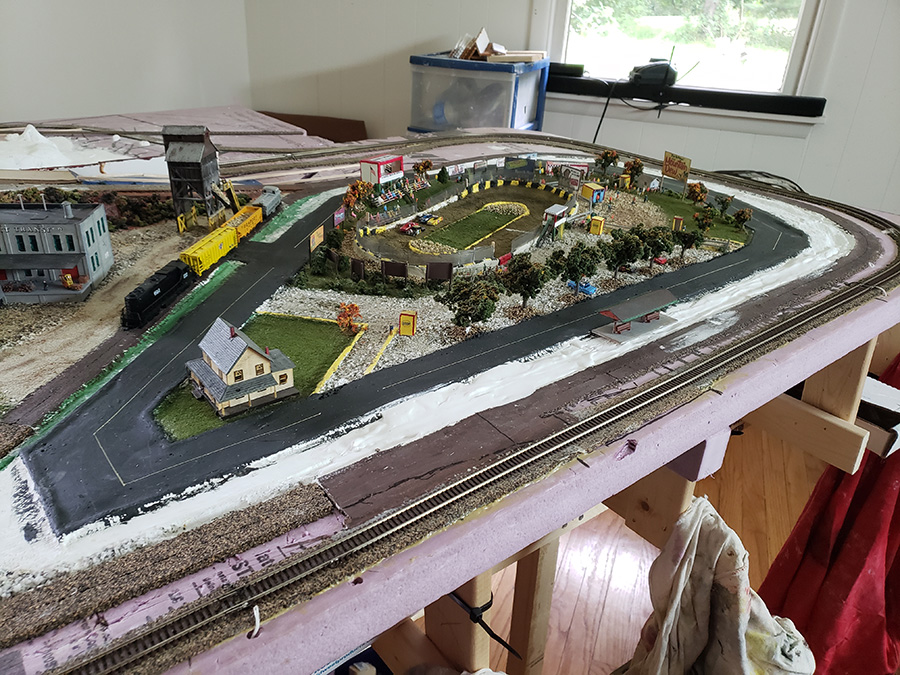
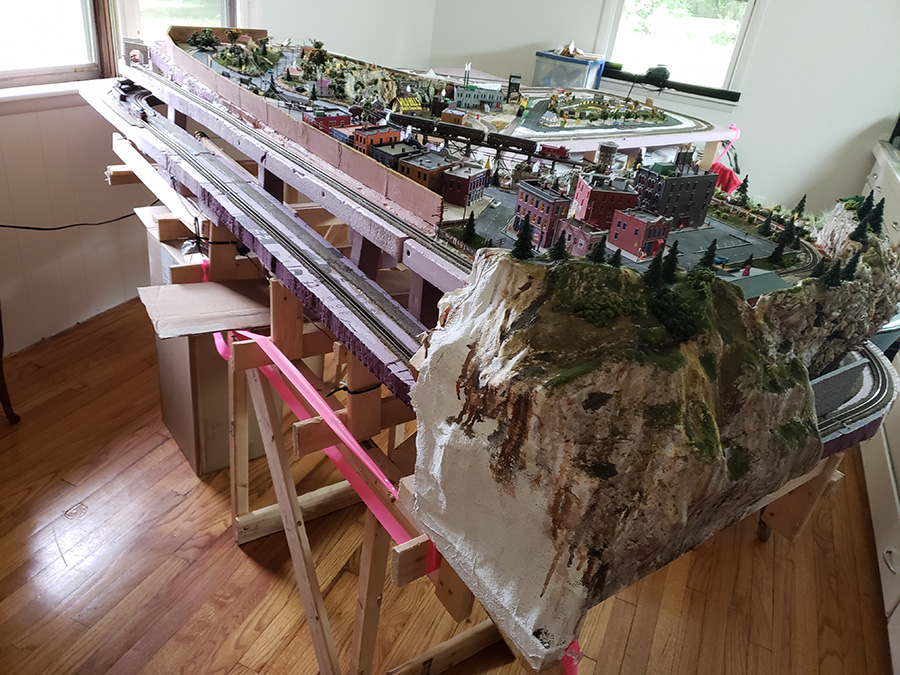
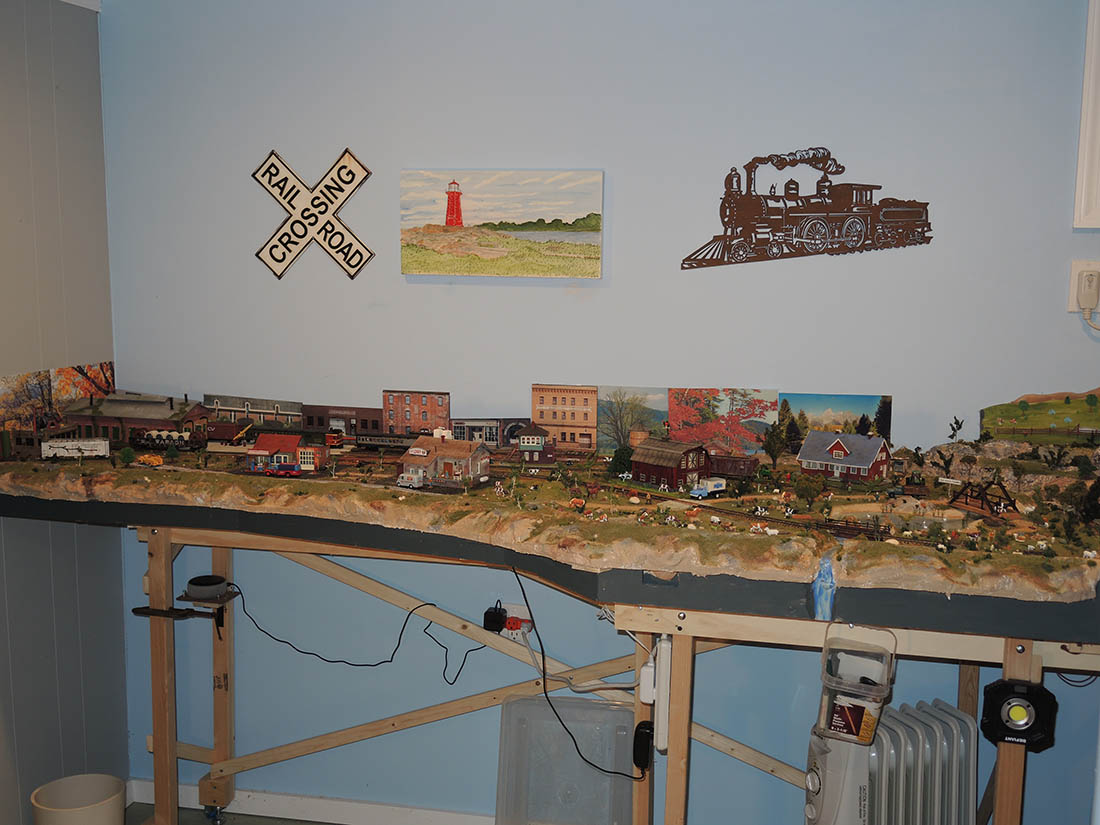
It’s been about a year since you heard from me about my n gauge layout. If you’ll remember it’s called Gerskyville. Its come a long way of just would and styrofoam.
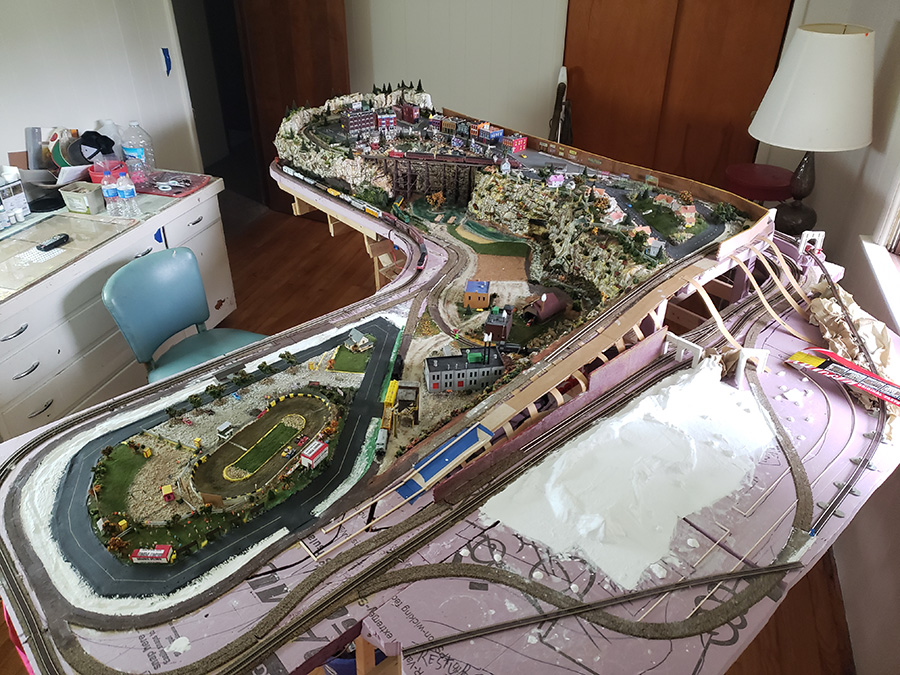
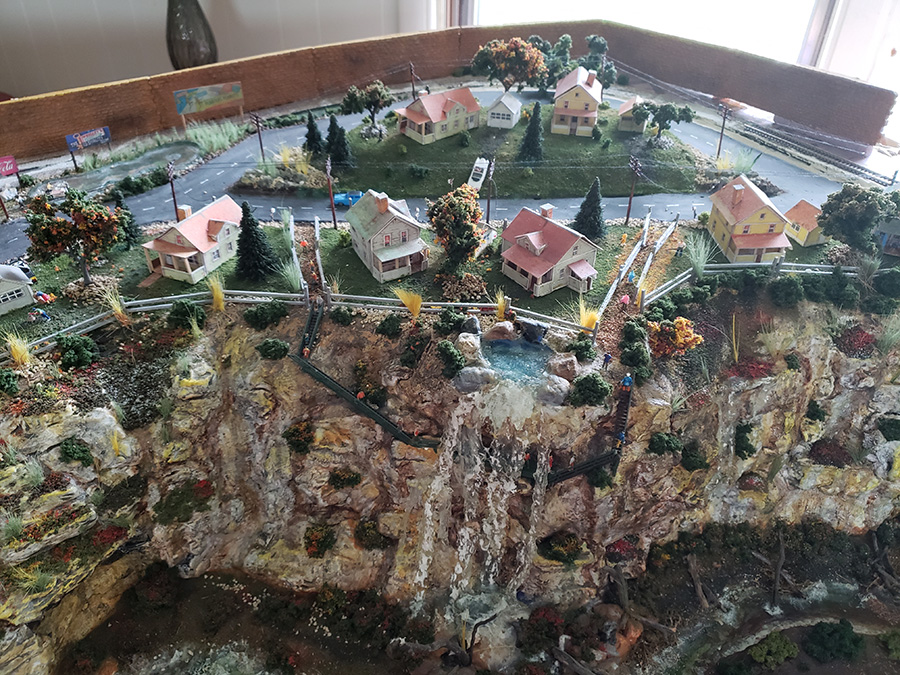
Theres shots of unfinished areas yet.
Along the long backside will be two arched bridges on each end leading to a 3 foot by 4 foot yard.
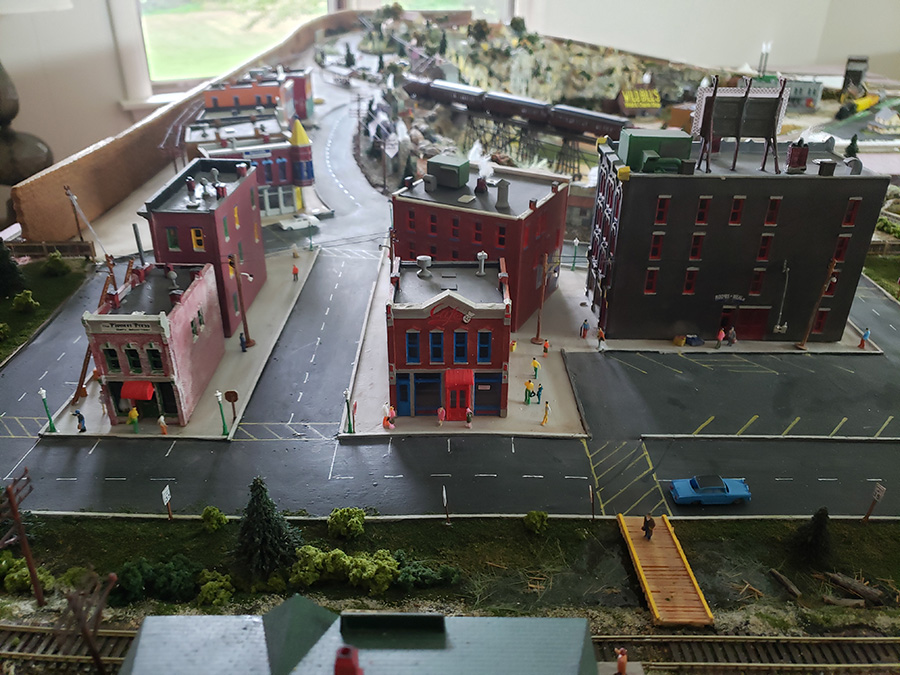
I’m not good at story telling so that’s up to you. All the layout was built, painted and assembled by myself , I purchased no already finished biuldings.
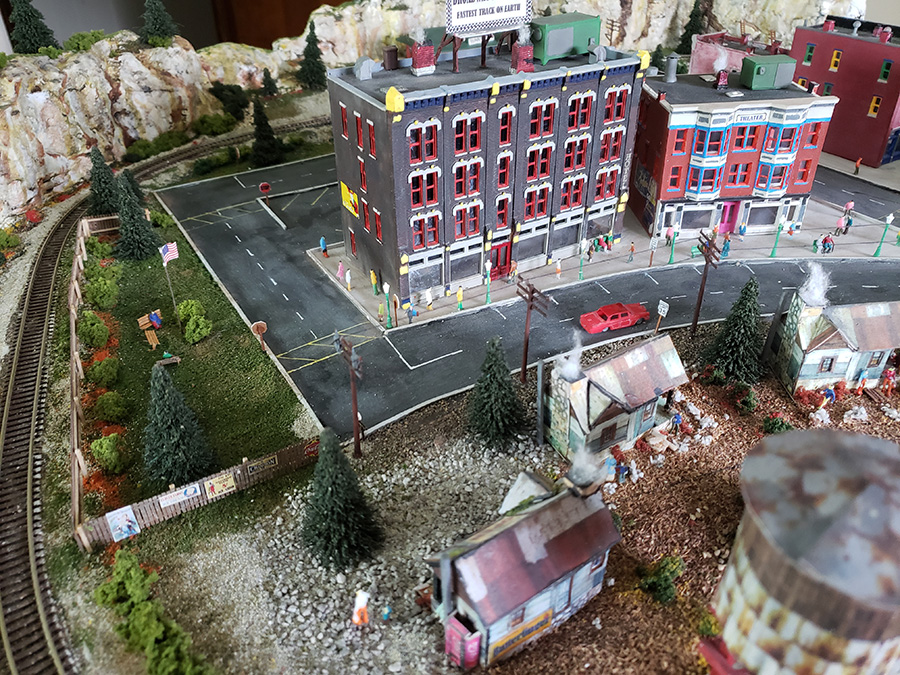
The race track on the layout is built after a track in indiana that my whole family raced at, up untill they closed down. Broadway speedway, the fastest track on earth.
How you all enjoy.
Thanks
Bill G”
A big thanks to Bill for sharing his N scale track layout.
I do love it when I see some of the printable buildings too. Bill’s done a fab job with his printable building houses.
And if you want to see just how much Bill’s layout has come along, his last post is here.
“Hi Alastair,
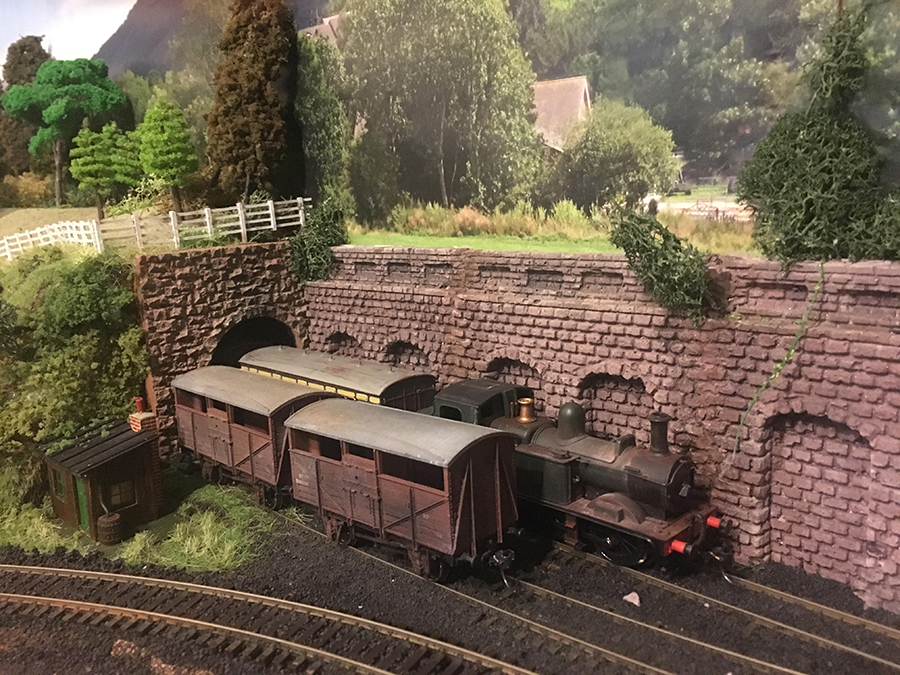
I’ve been lurking on your emails for a while, and thought I should send you a taste of what I’ve been working on – a fictional layout in a much-too-small space that sorta represents the railway line between Barchester and Winter Overcotes in the Angela Thirkell novels.
It is set in the late 40’s, probably, so there might be some BR stuff along with GWR and even some LSWR and Southern stuff with varying degrees of run-down-ness.
I’m located in California so that I have to get all the stock from eBay or the various mail-order stores. This picture is of an ancient Hornby 14xx pulling a couple of 4-wheel kit coaches with the interior roughly modeled and painted and with an assortment of figures sitting in it.
If you are interested I’ll send some other pics.
Roland”
Yes, Roland. We’d love to see some more.
Now on to some behind the scenes news:
Pretty much, every week, I get emails asking, “Why do you show so many American layouts?”
And I get just as many saying, “Why do you show so many British layouts?”
Well, the truth is, I’m not fussy – I don’t give a jot where they come from, what their theme is, or their era.
If there’s something to learn from them, or marvel at, I publish.
But I know what folk mean – have a look at these two for example. Polar opposites when it comes each side of the Atlantic:
So there you go – oh, and one last thing. I also get mails everyday asking why I don’t publish the scale / gauge / track plan of some layouts. It’s all very simple: I publish everything I get. If I don’t have it, I can’t publish it.
Paul’s been back in touch with his HO scale model train layout:
“Hi Al,
These pics show my newly named existing railroad and the addition I have been working on since last September.
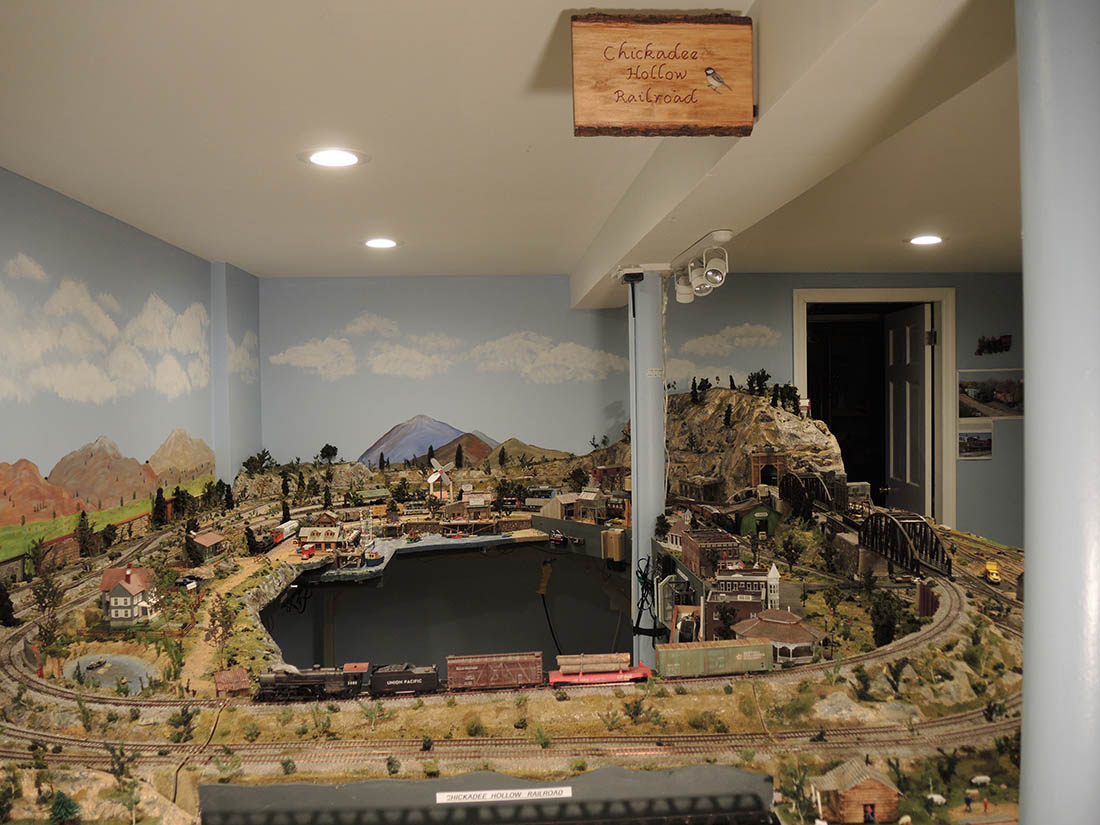
The name is “CHICKADEE HOLLOW RAILROAD” this was inspired by our recently installed bird feeding station that we enjoyed observing all winter. We would often be visited by Carolina Chickadees and it was fun watching their energetic flights.
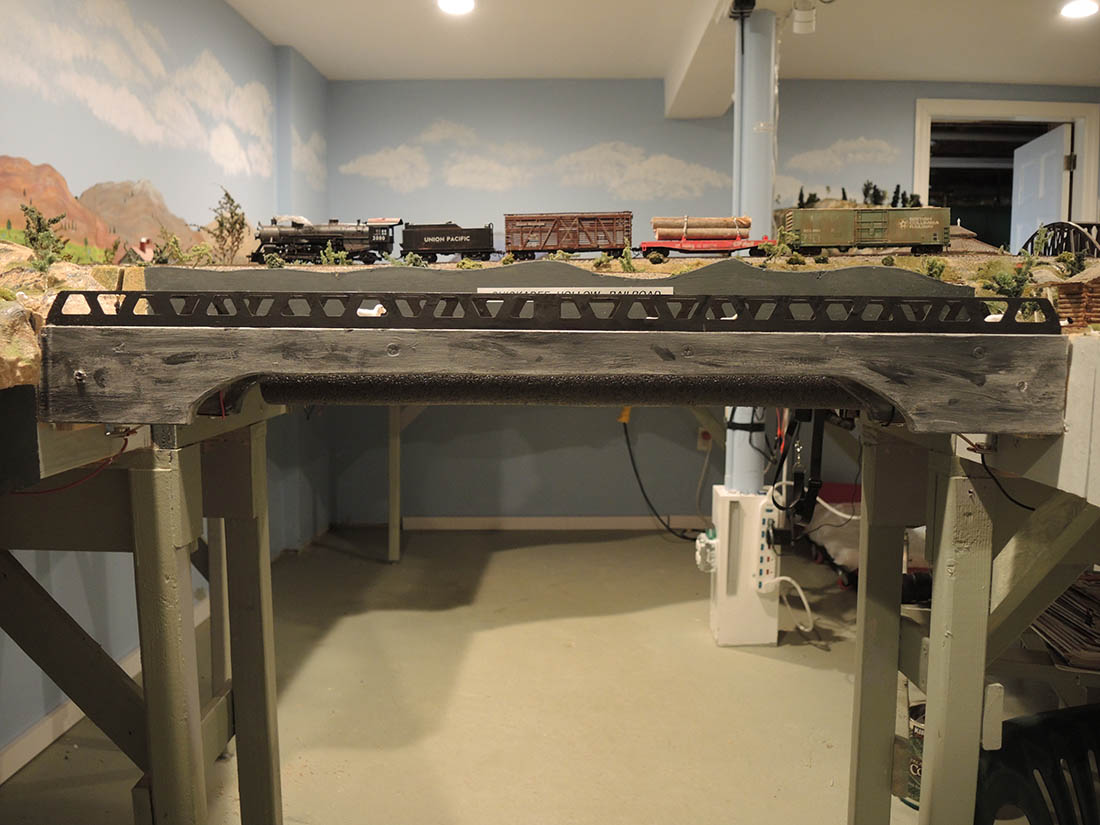
The first photo shows the sign my wife painted that I hung over the RR.
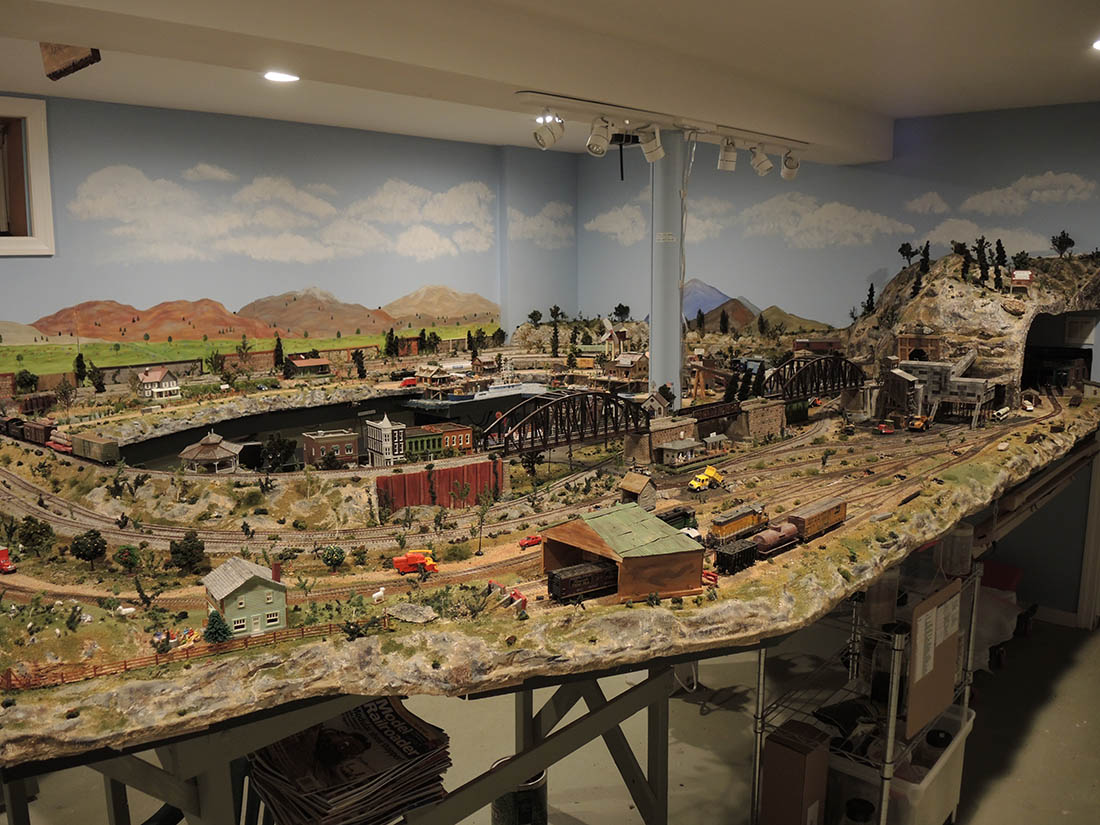
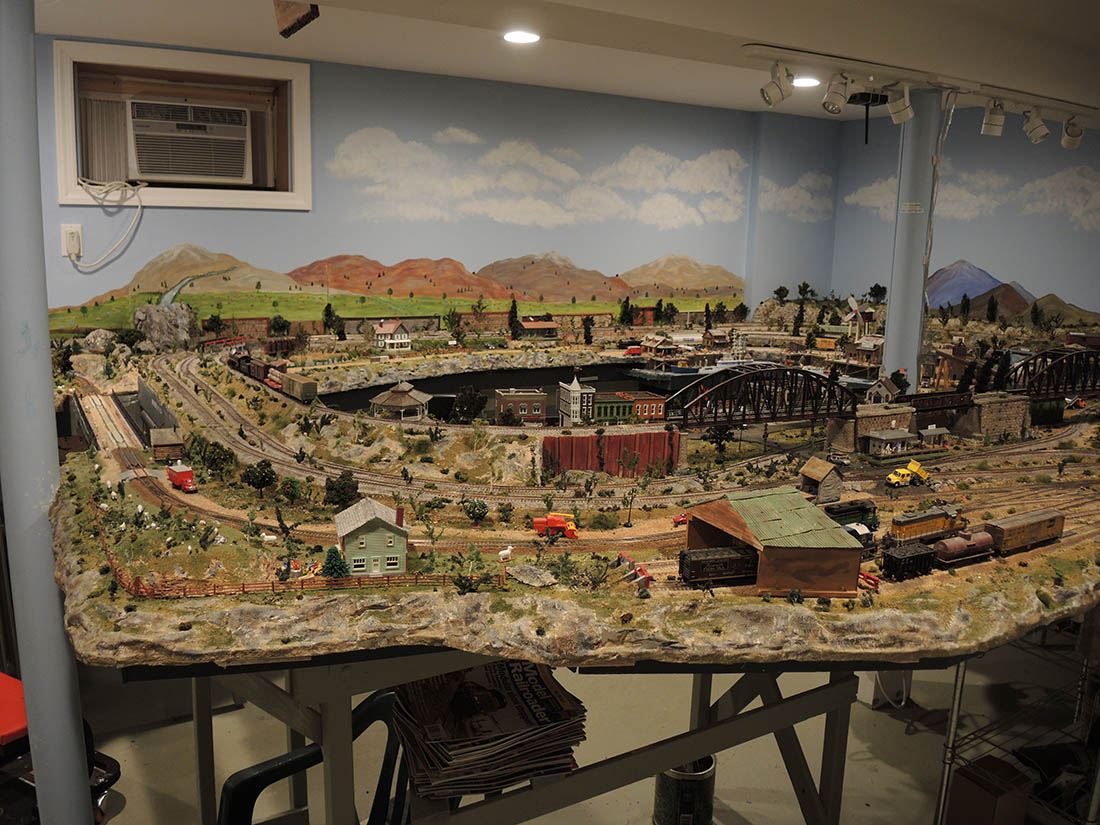
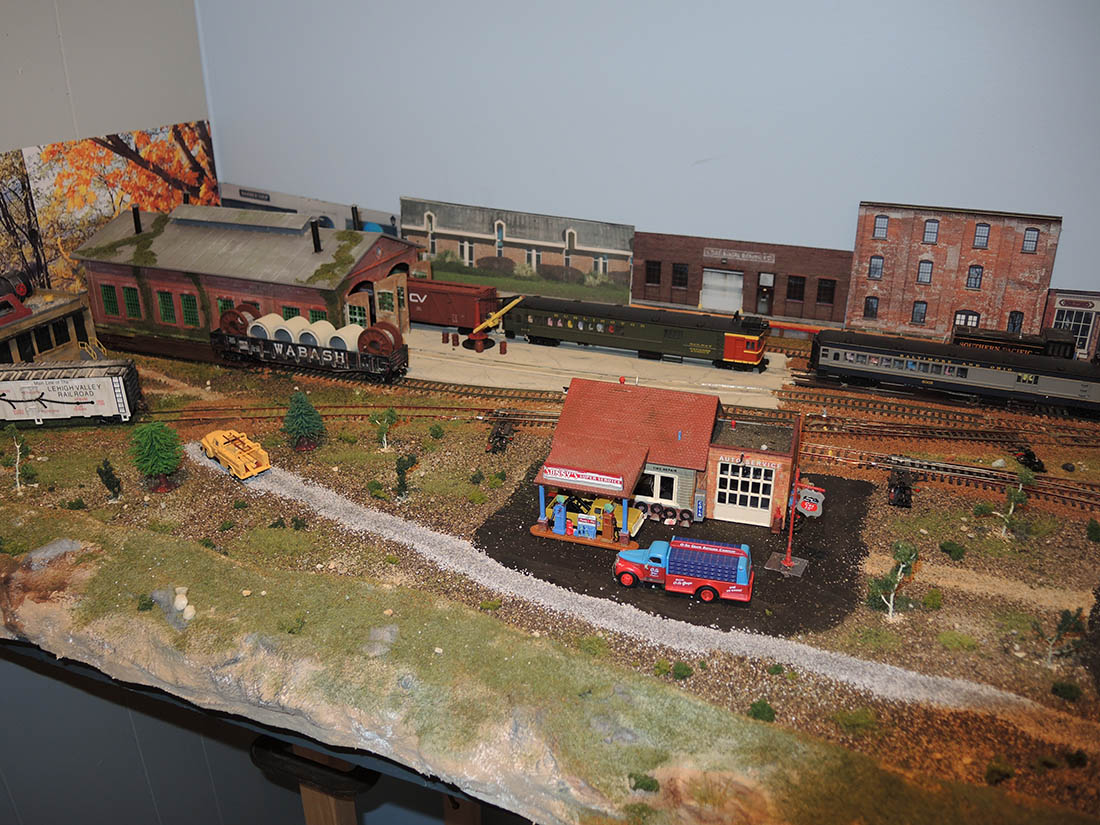
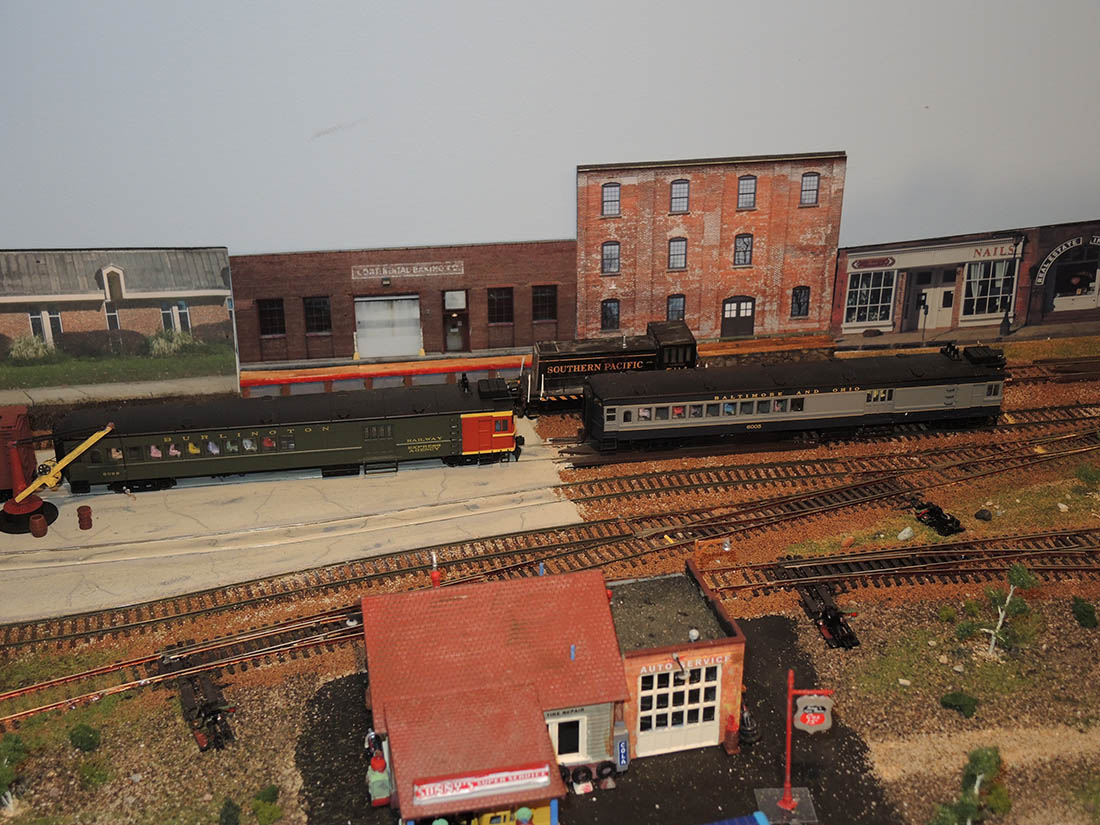
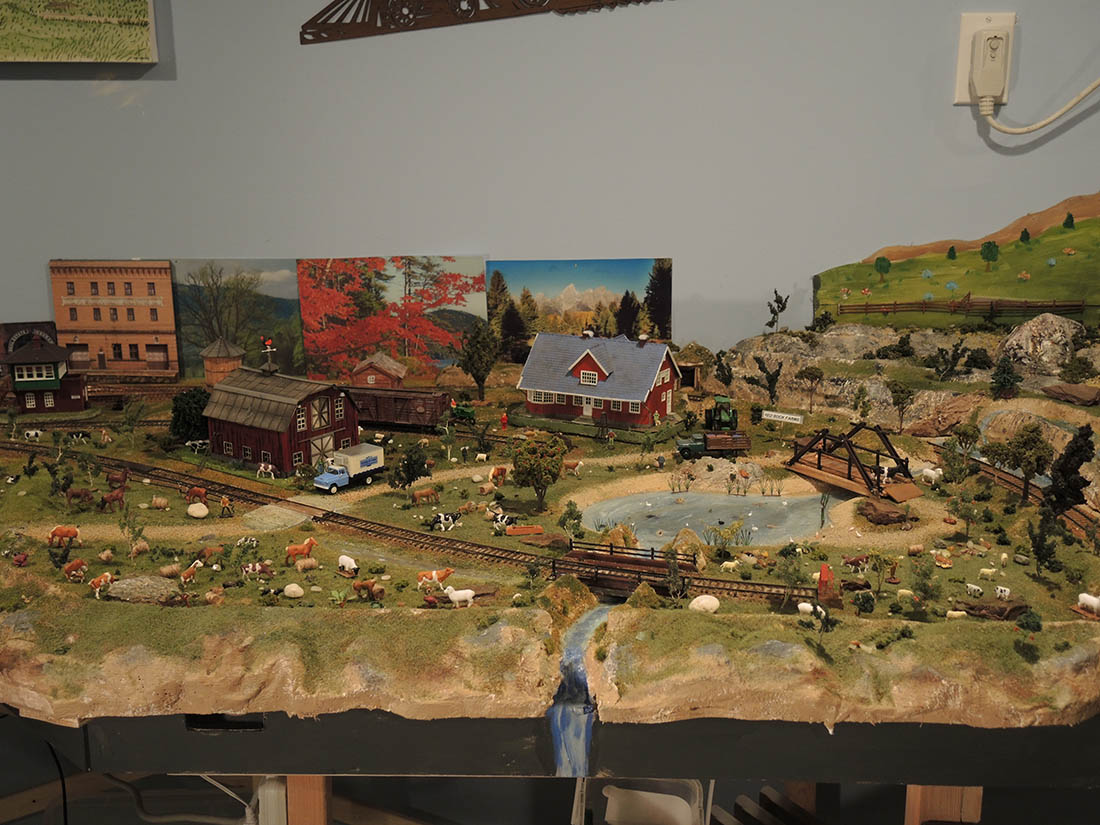
The second, third & fourth photos are an overview of the RR.
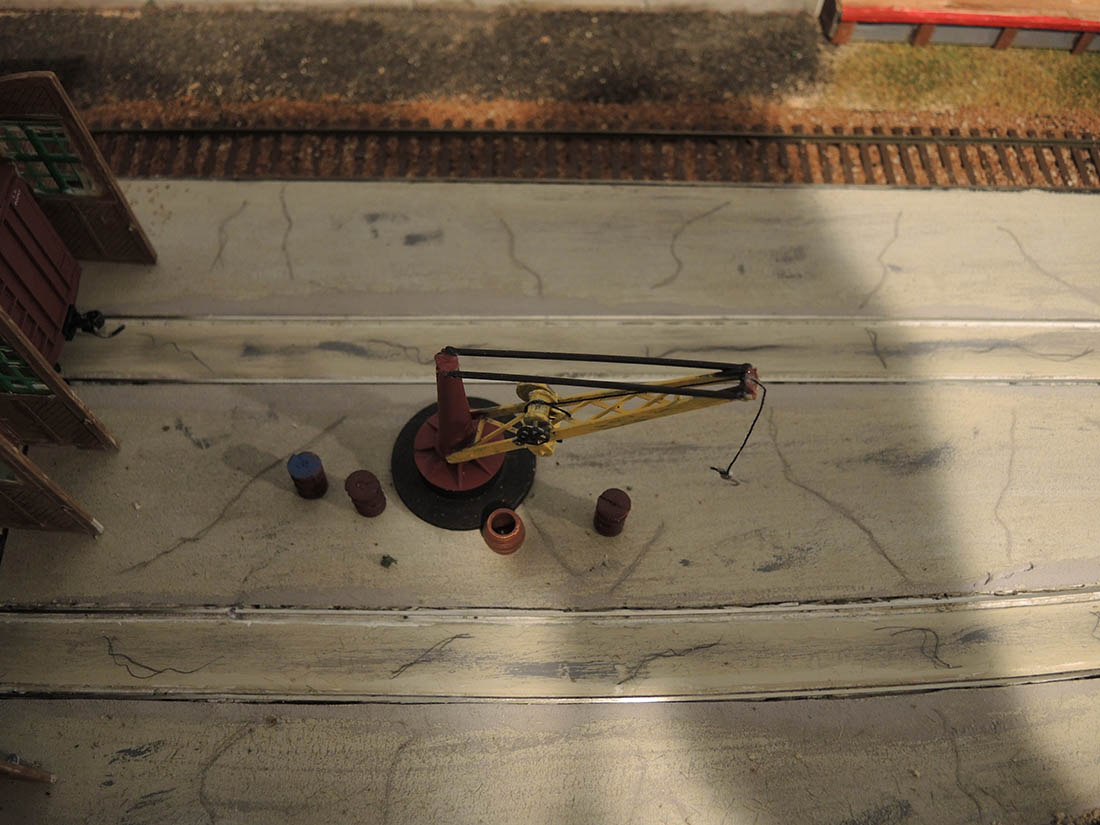
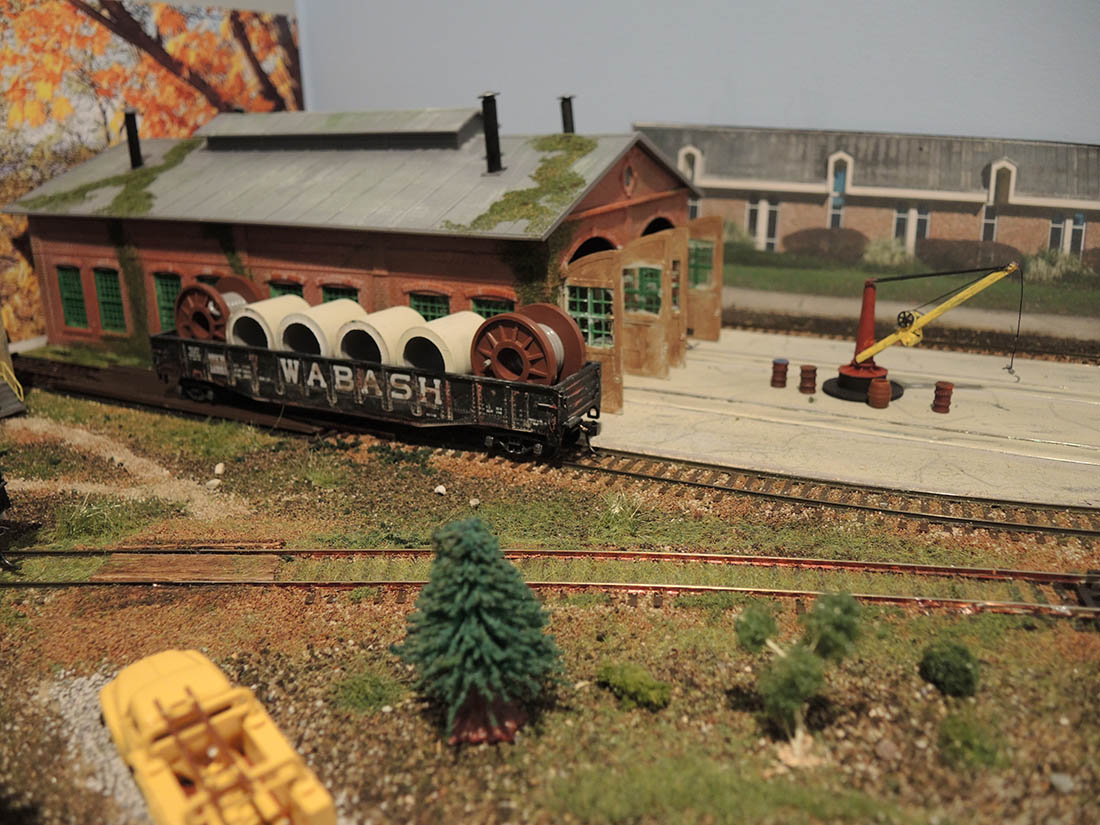
This is a closeup view of the engine shed & repair area showing the concrete paved work site.
This is a closer view of the concrete pad & my Doodlebugs
Closeup of concrete pad made from 2 mm foam sheets from craft store that I painted with concrete color paint and used a pencil to simulate cracks.
View of engine shed — note the grass growing between the rails of the little used siding. I put that there with the use of a static grass applicator
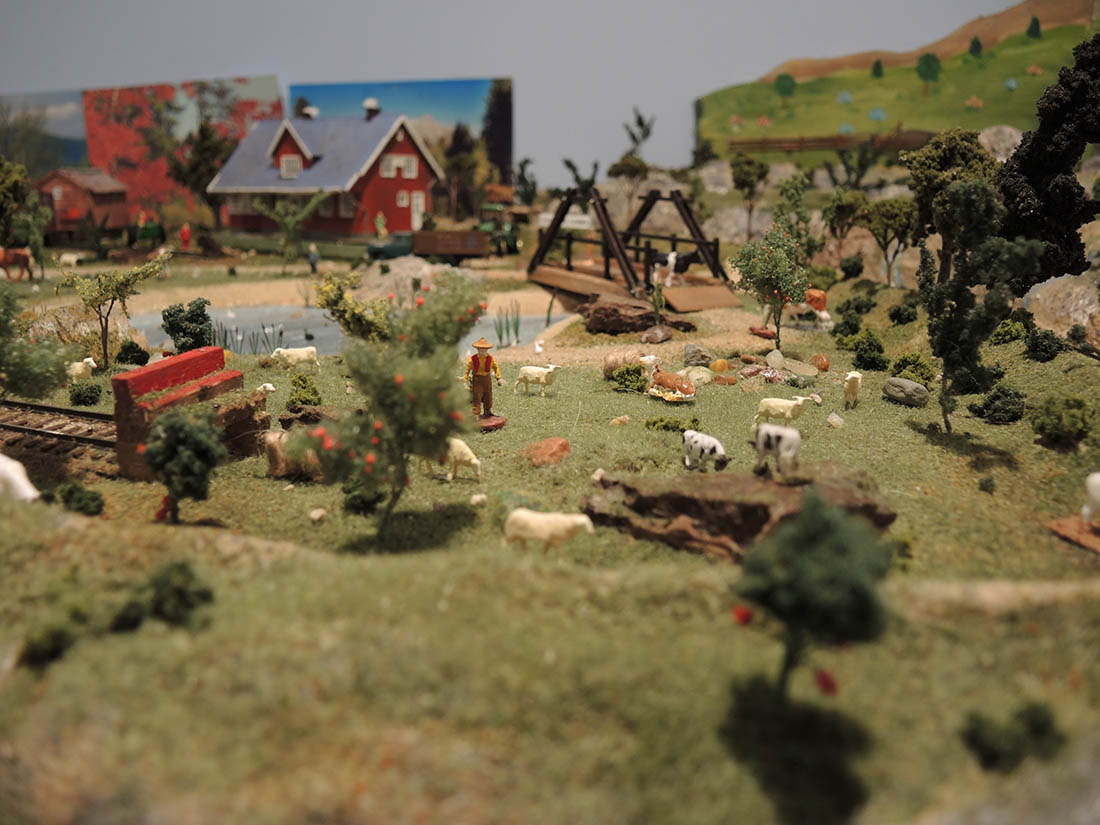
Overall view of Red Rock Farms
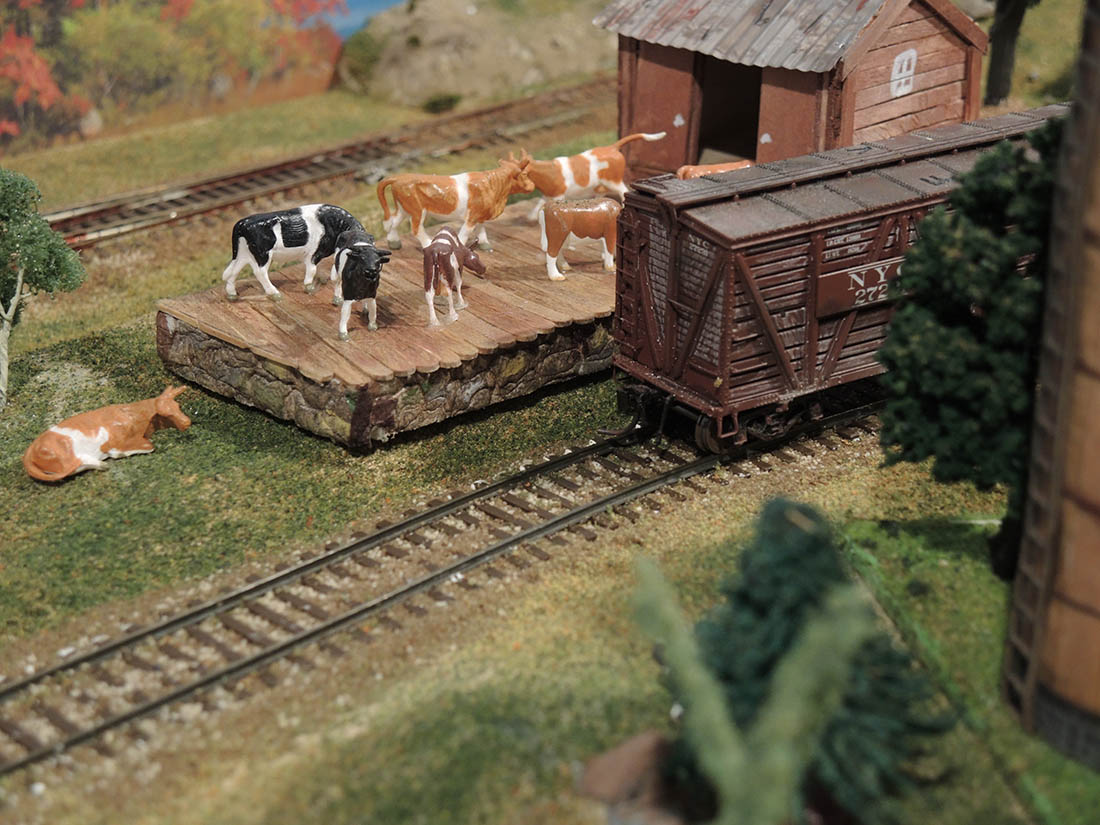
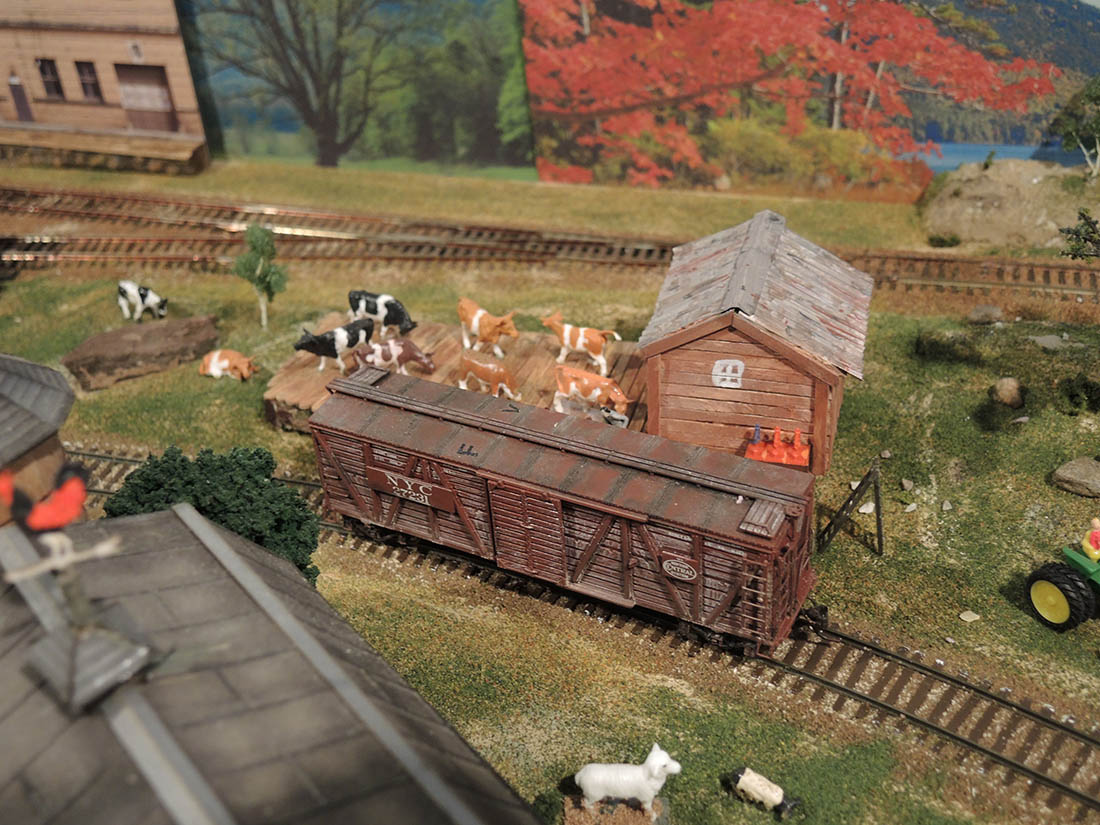
Loading cattle in cattle car ( the car actually moos when moved)
Side view of bridge connecting original layout to new section. In the near future I will submit details and photos of the mechanical and electrical workings of this bridge. This bridge is both removable and mechanically adjustable.
View of Red Rock Farms showing the various buildings, animals, and the sidings leased by the RR.
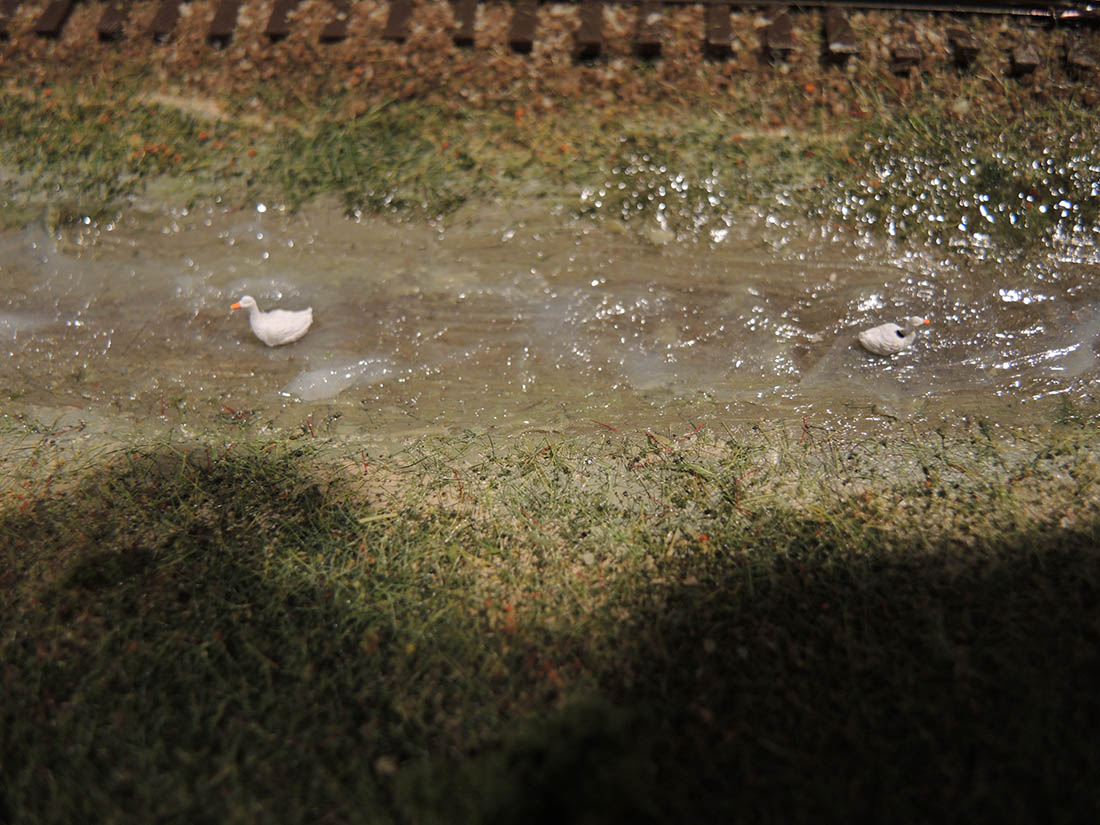
Ducks swimming in puddle beside the RR track.
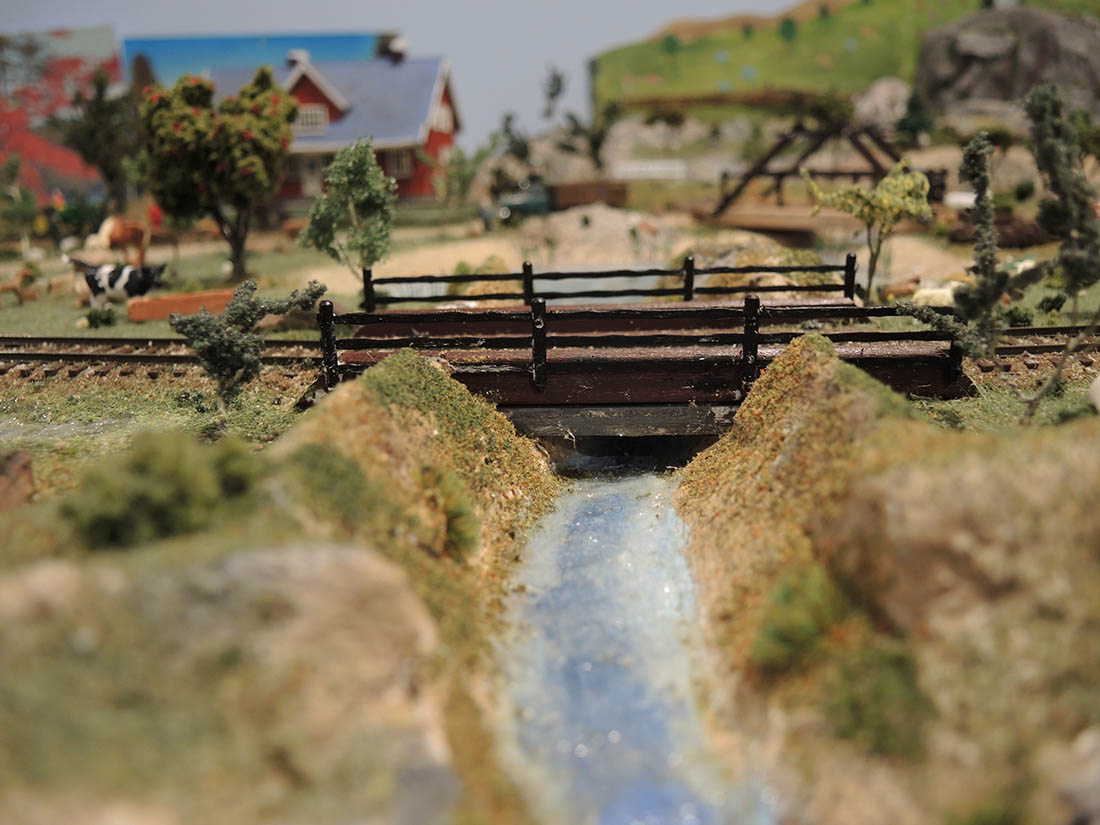
Stream with small bridge
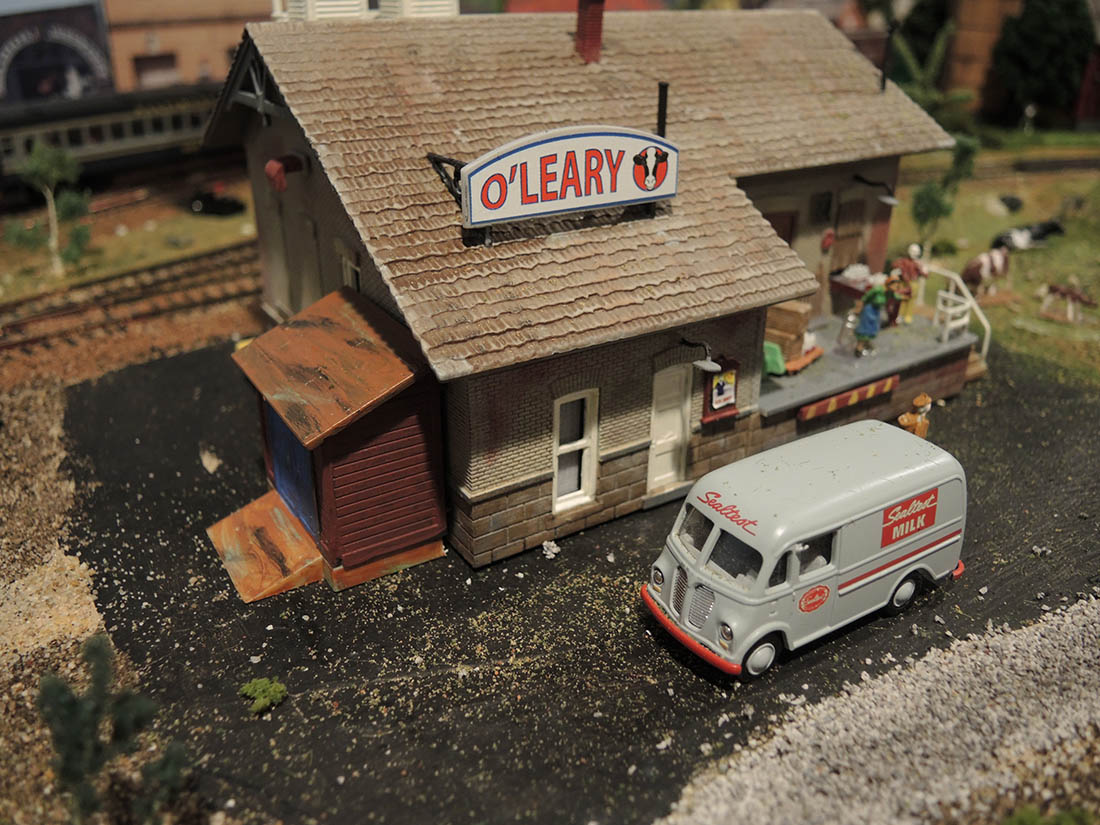
Dairy processing plant
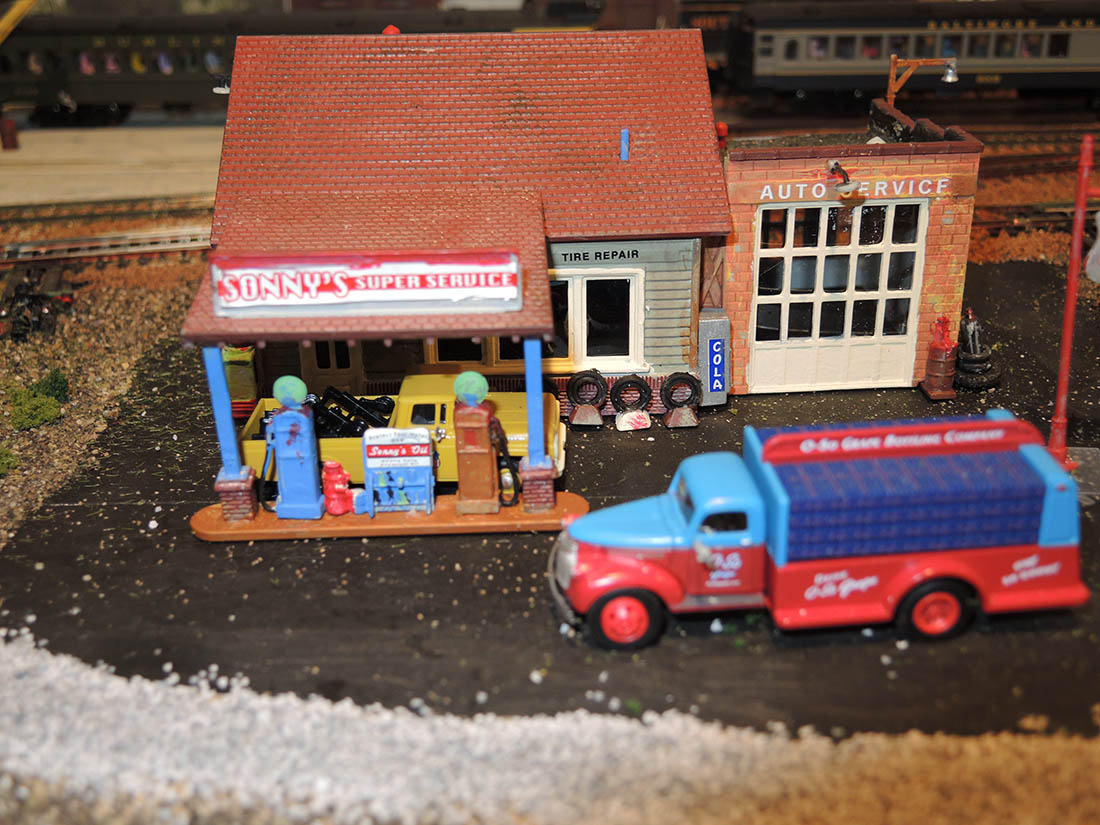
Gas Station
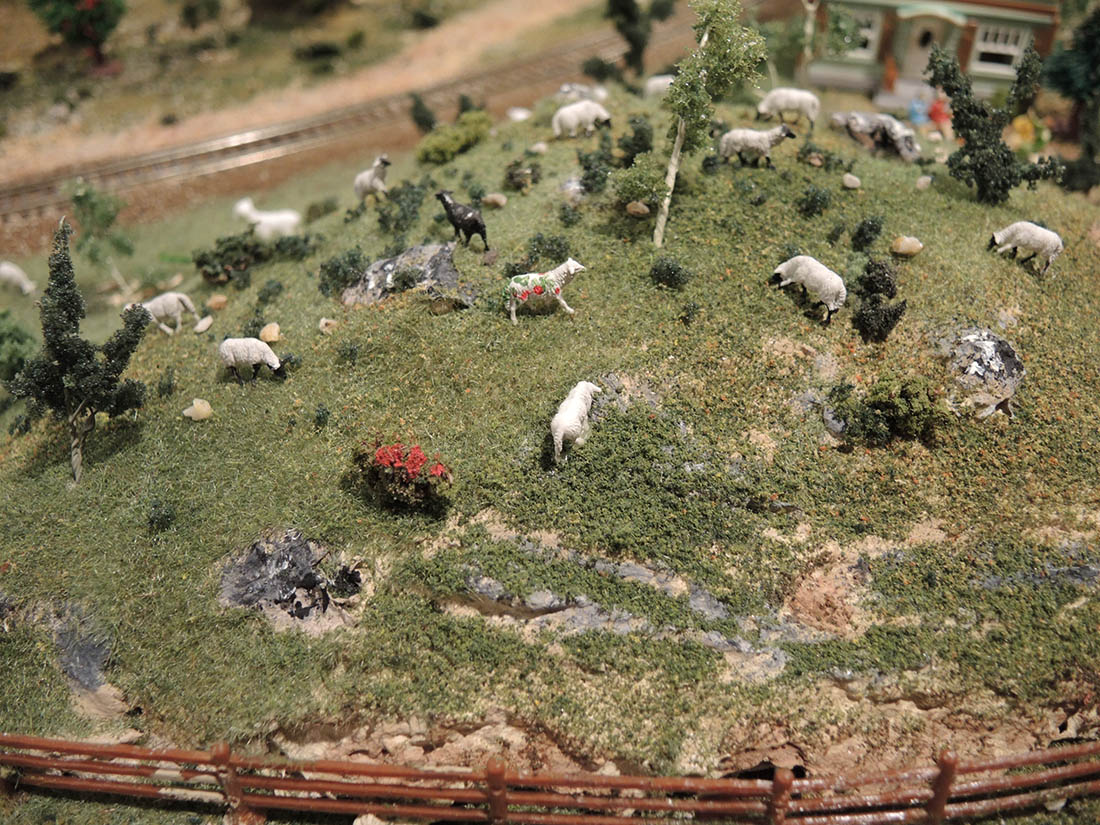
Sheep grazing on the hill —see if you can spot the special sheep. If you are trying to guess the significance of that sheep well that is where plaid comes from.
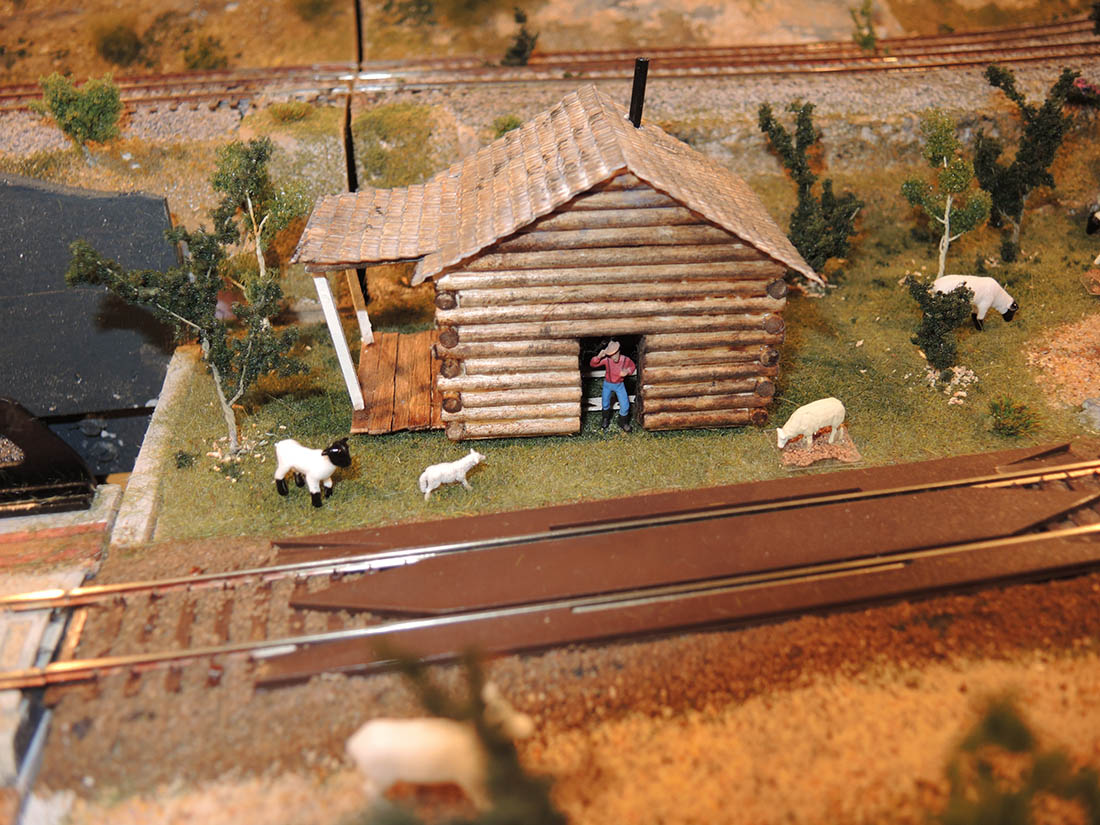
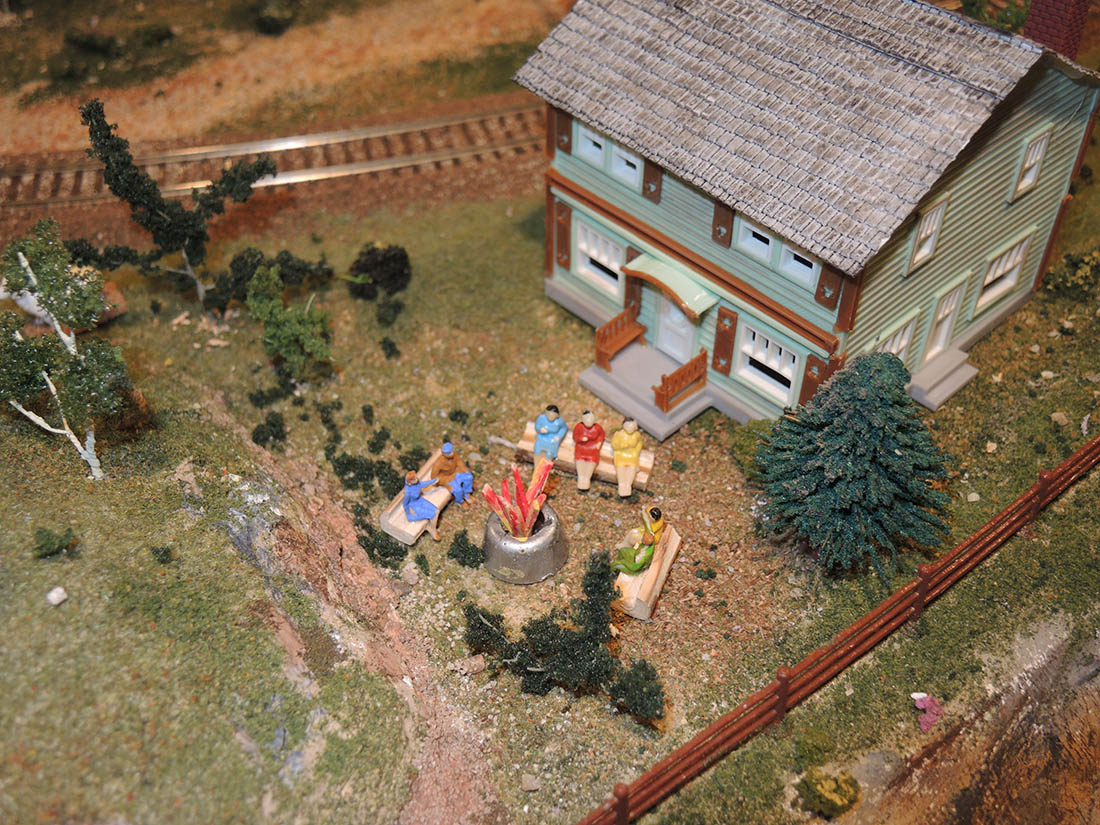
Shepards log cabin
People sitting behind house around fire pit.
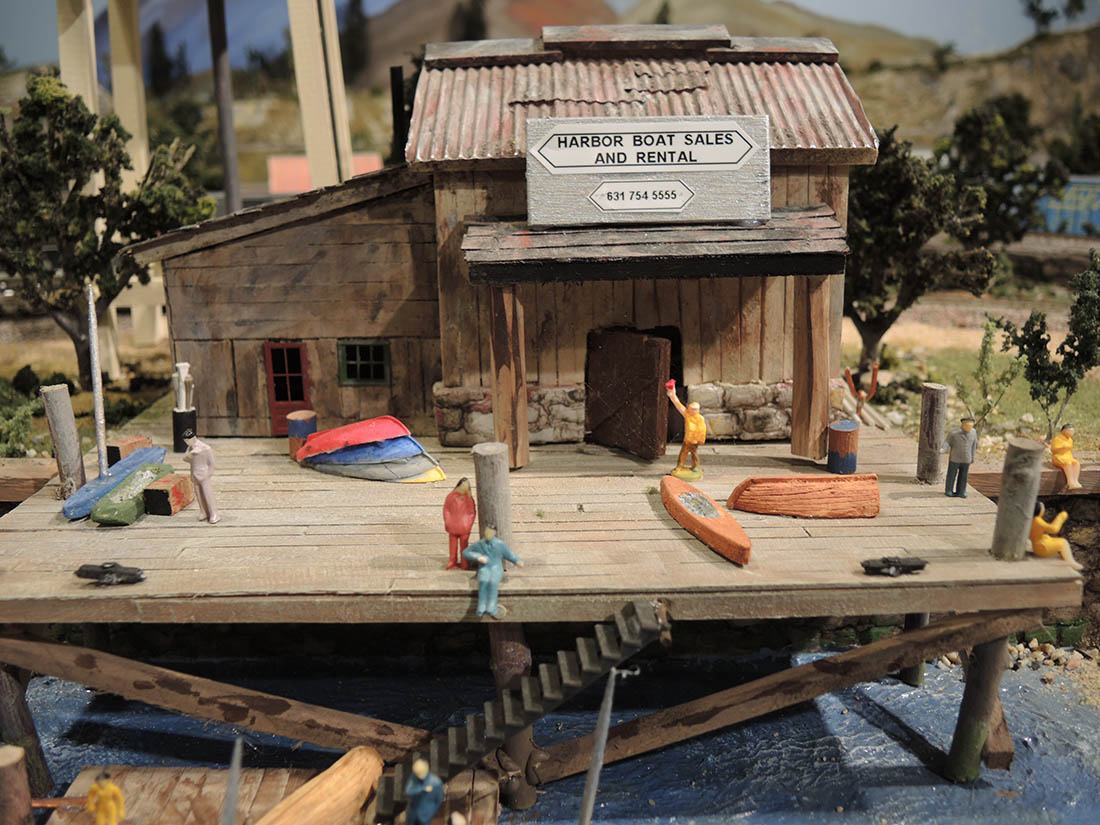
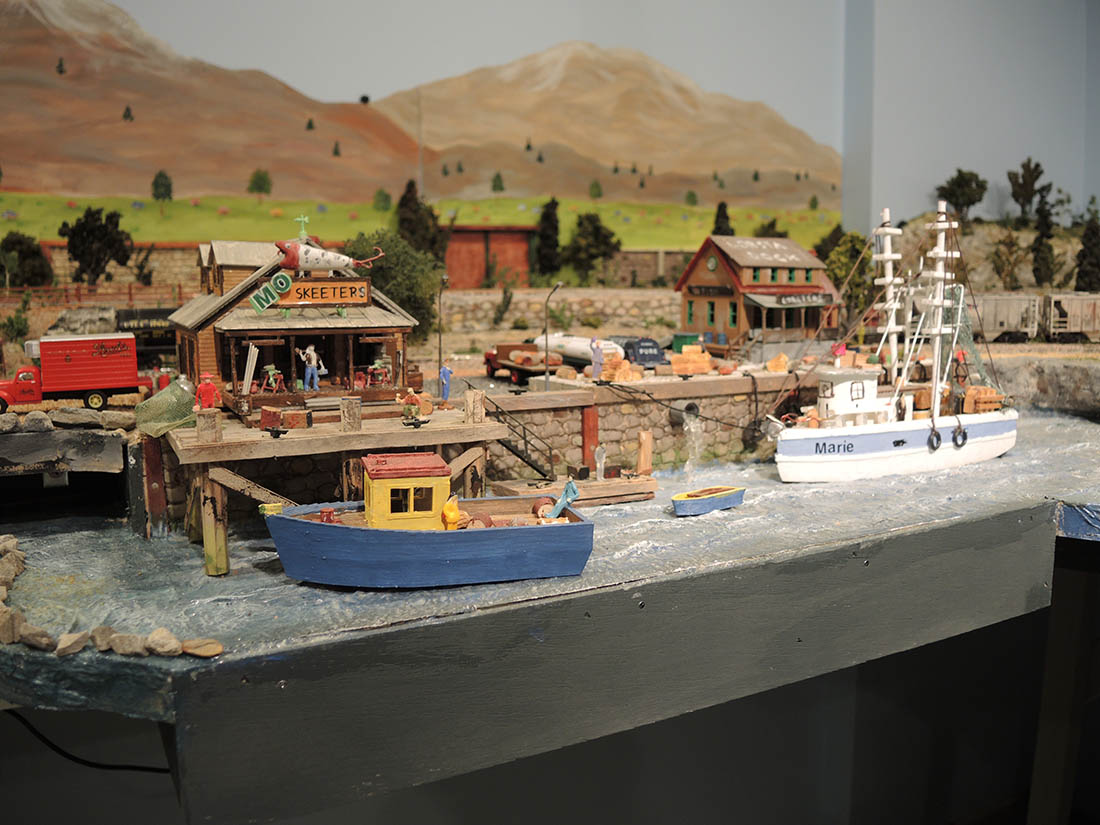
Various photos around the harbor scene Al showed recently in his blog.
A huge thanks to Paul for sharing his HO scale model train layout – I hope you enjoyed it as much as I did.
Brian’s been in touch with his shelf model railway:
“Hi Al,
I built a simple 00 gauge model railway for my two sons in the early 1980’s.
At the time I was photographing and writing about the colourful and interesting freight movements in the north east of England which culminated in a book published in 1989 ‘Railfreight Today’.
At the same time as building a railway for the children, I was buying odd freight wagons that interested me, with a view to one day having a layout of my own.
With other interests, that never happened, they languished in boxes, surviving a number of house moves for 30 years.
I had decided that due to space restrictions, my layout would go in the garage partly along one wall. But with all the usual garage paraphernalia, it was not going to work. Then I hit upon an idea.
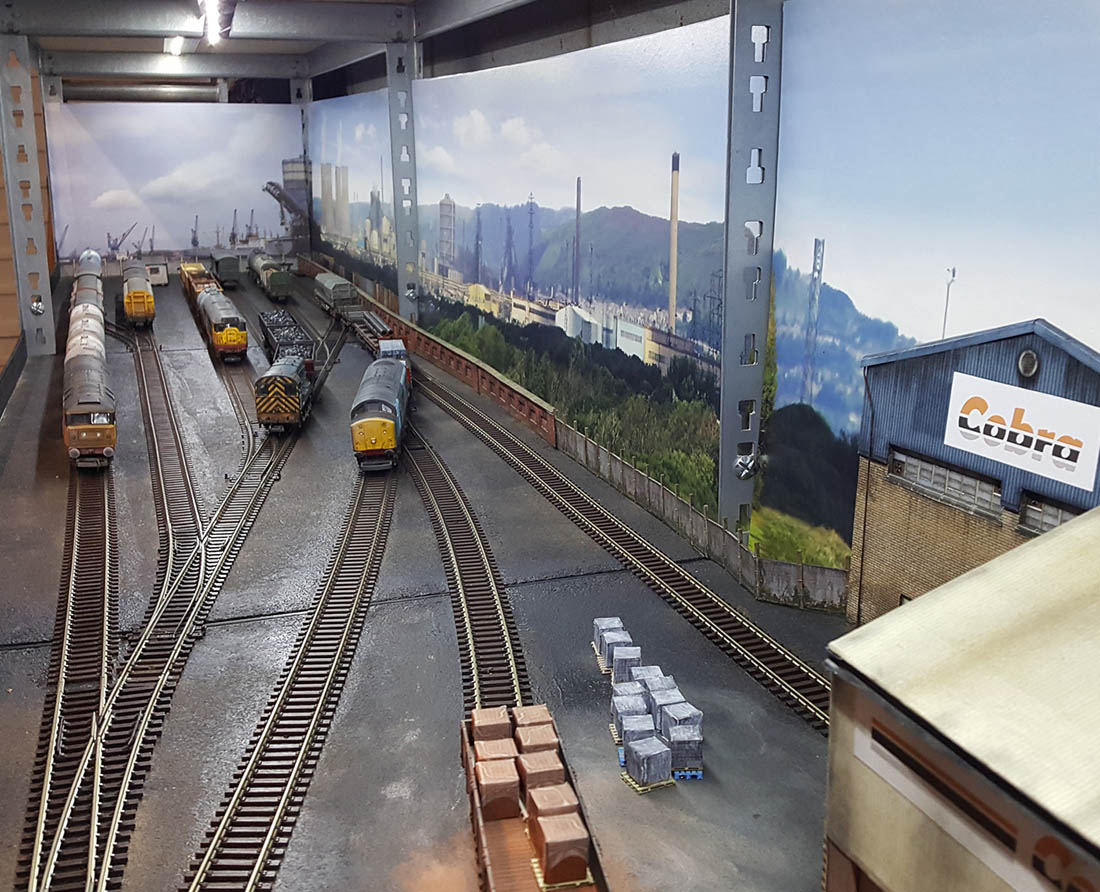
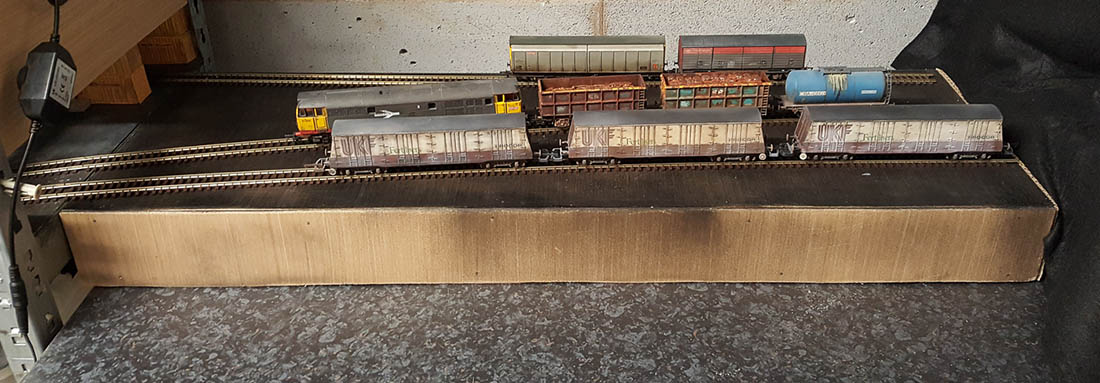
The layout would be built within my sturdy metal shelving system.
This meant a layout 3 metres long and 0.5 metres wide, with an additional temporary, one metre length of hidden sidings on the adjacent worktop!
Naturally, for me, I wanted a layout to be freight only, no passenger trains in sight! I wanted to run longish freight trains (limited space), but more important, I wanted shunting to be done.
I didn’t want the hassle (and cost) of moving to DCC. My wagons and locos were from the 1980’s ‘Speedlink’, Railfreight era. I looked at plans of end to end layouts, played about with SCARM and eventually came up with a basic layout, which inevitably was altered multiple times.
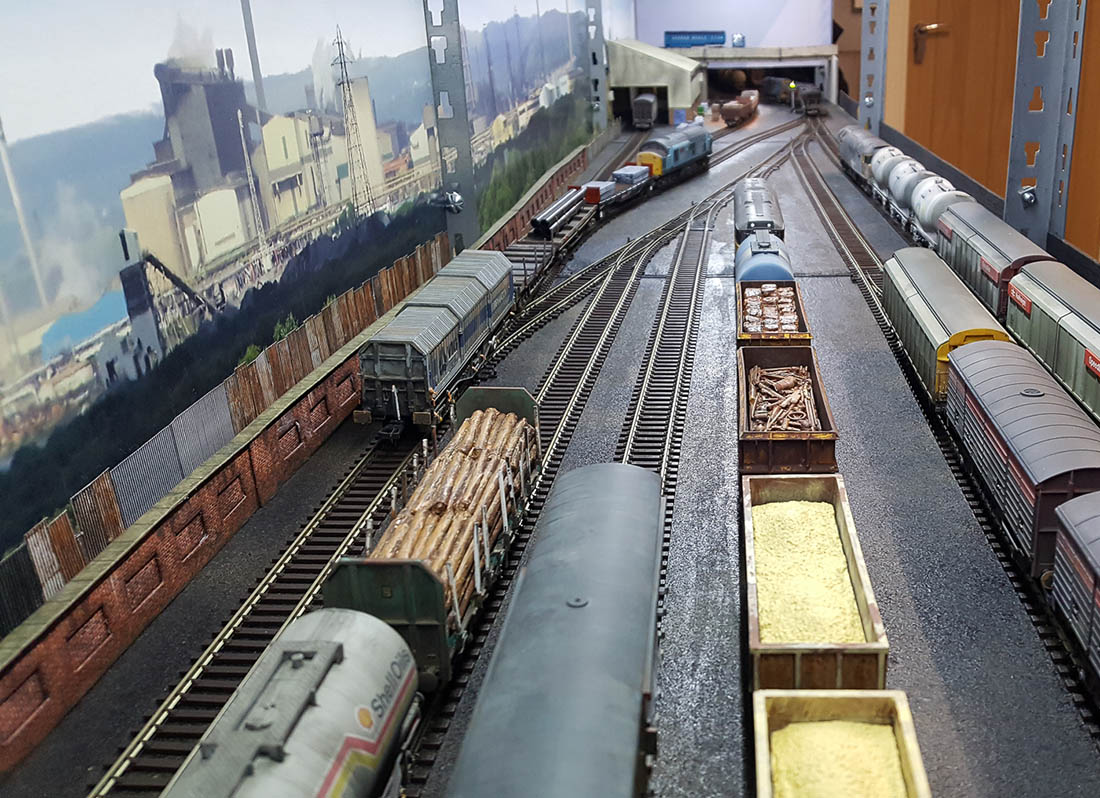
Then the penny dropped. I would create a very, very scaled down version of Tees Marshalling Yard at Middlesbrough!
The Speedlink trains would enter and leave as longish trains. These would be split and marshalled in the yard and small ‘trip’ trains would take and collect wagons from the various private sidings etc. (hidden from view), where I could load and unload commodities. This offered me plenty of different shunting puzzles – ideal.
Problem with ‘Lockdown’, the model railway shops were closed. But, I found that some online shops were open for business. I wanted the layout to work electrically and with as few joints as possible so settled on all Peco flexi streamline code 100 and kept the postman busy.
Having walked around many industrial railway settings, the track was never pristine ballast. I decided I would spray paint the baseboards (shelves) black and would not lay down any ballast. The black paint would give it the grimy conditions I wanted.
The track was glued down with dilute PVA glue and additionally pinned near the pointwork. There are just two electrical feeds and I can control two locos from my ageing late 1960’s H&M ‘Duette controller. I have included two loops, which allow for engines/wagons running around.
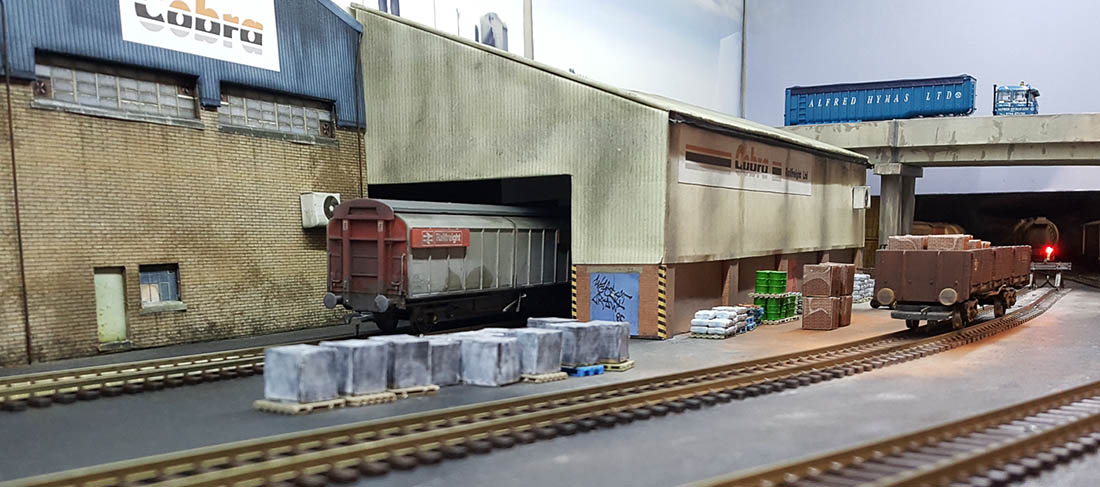
I was fortunate in seeing a Gaugemaster industrial backdrop that had the appearance of Teesside. One of my ‘better buys’ which work a treat are ‘Train Tech’ buffer stop lights. I have one fitted behind every buffer stop on the layout. They draw very little current. Although not authentic for my era, they let me know which track is live and where I am shunting to, particularly at night! – brilliant.
Being on a shelving system, where ‘garage items’ are stored, above and below, was going to make the layout dark. I found on the internet a string of low voltage LED strip lights with a rheostat, which I mounted under the shelf above. I can have the short trip workings operating to and from the yard in daylight and by turning the lights down, the long ‘Speedlink Services’ depart and arrive overnight, very authentic!
The hidden sidings (three) are built onto a box construction that sits on top of the adjacent work unit, I can quickly connect ‘when playing’!
These sidings are ‘hidden’ from the main layout by a modern road overbridge and a freelance through goods shed, giving access to more docks/sidings beyond. The only other building on the layout is a ‘Portakabin’ (mess room) at the opposite end of ‘the yard’.
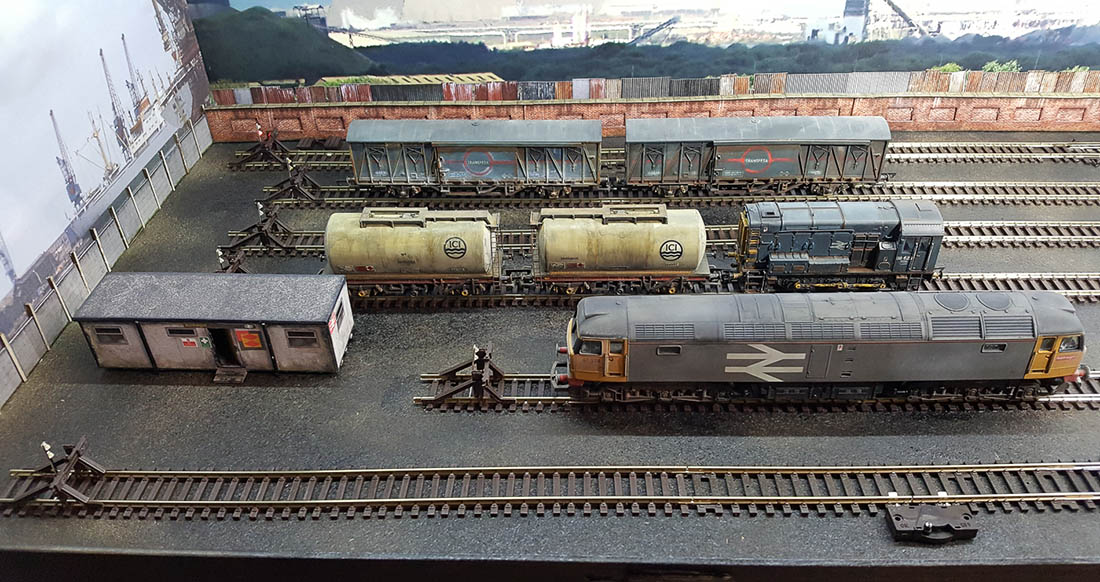
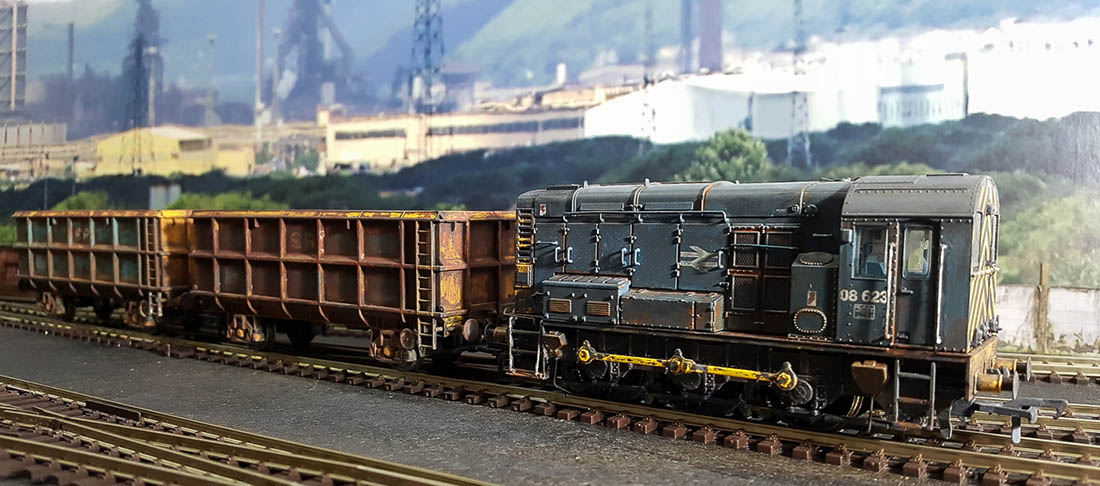
My mint condition wagons and locos (I bought a few extra) needed an upgrade to what a working railway should look like. I set about ’destroying’ the out of the box immaculate look, by weathering them all, to something resembling Teesside in the 1980’s! Something I really enjoyed doing.
I even varied the weathering on each side of the wagons/locos to double the size of the fleet, as viewing is from one side only! Of course, it could be any fictitious place and I can run almost any freight wagons and locos I want – joy?
So now, thanks to ‘lockdown’ and after thirty years, I can now enjoy amusing myself looking back in miniature, to an era of wagon load freight.
Brian”
Absolutley loved Brian’s weathering. A big thanks to Brian for sharing his shelf model railway.
Whenever a shelf layout comes in, I always think of John’s: Shelf layouts
I am back and have a few short movies others can view. These are from different locations on the lower layout and yes had to bring the fire helmet home to use the camera.
I put a short description on each movie..
Also the lift out portion used to gain access to the West area with the shooting range that was on top of the cliff has been taken out and a new piece has been put in its place with a new town being built. The funeral home is in the town with a railfan camera mounted on it.
Well it is late here a need to be at Fire House in the morning so I will sign out.
This is a shot of North bound trains coming out of a double tunnel and they are heading toward a small town that has a active Haz-mat spill in to the Wide Mouth Creek.
East bound trains heading toward the entrance of the double tunnel. The view is from atop the portal.
Coming from the west, rail workers are insight. They are waiting the passing of the two trains to check conditions of the rails that had been repaired months ago. They will continue to monitor.
Railfan camera East view from the top of the funeral home, this is the small town that is being added to the layout.
Thanks Al and thanks to all the wonderful ideas and layouts all over the world from all the viewers.