N Scale Northern Pacific Freight cars

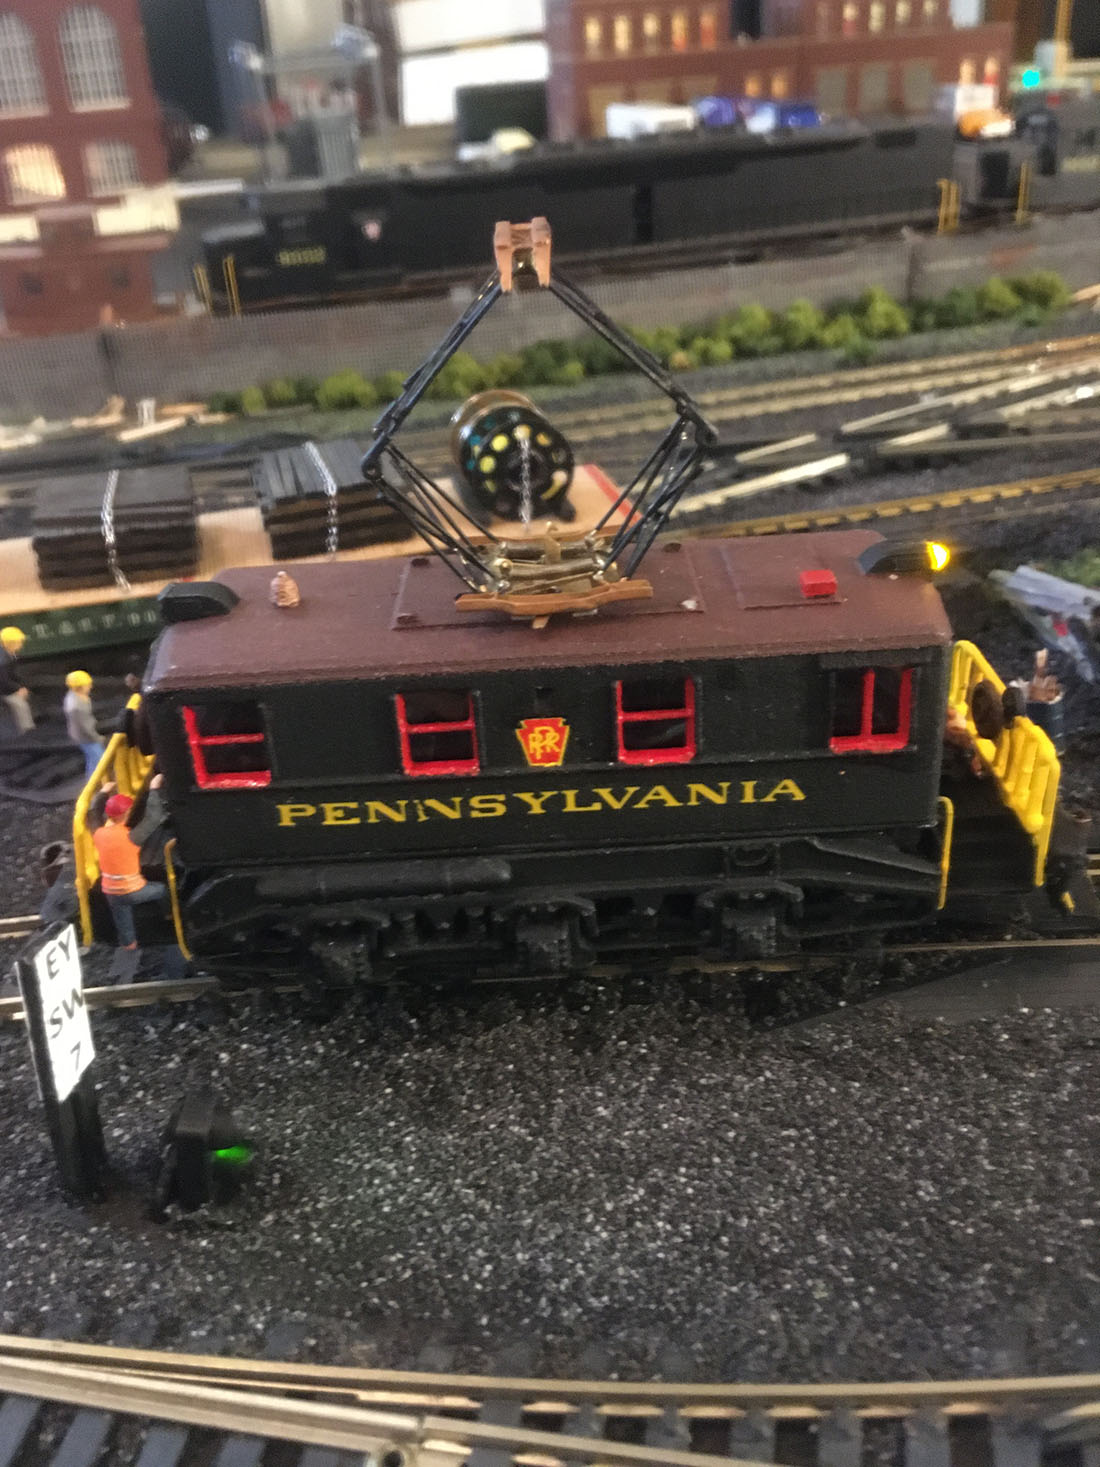
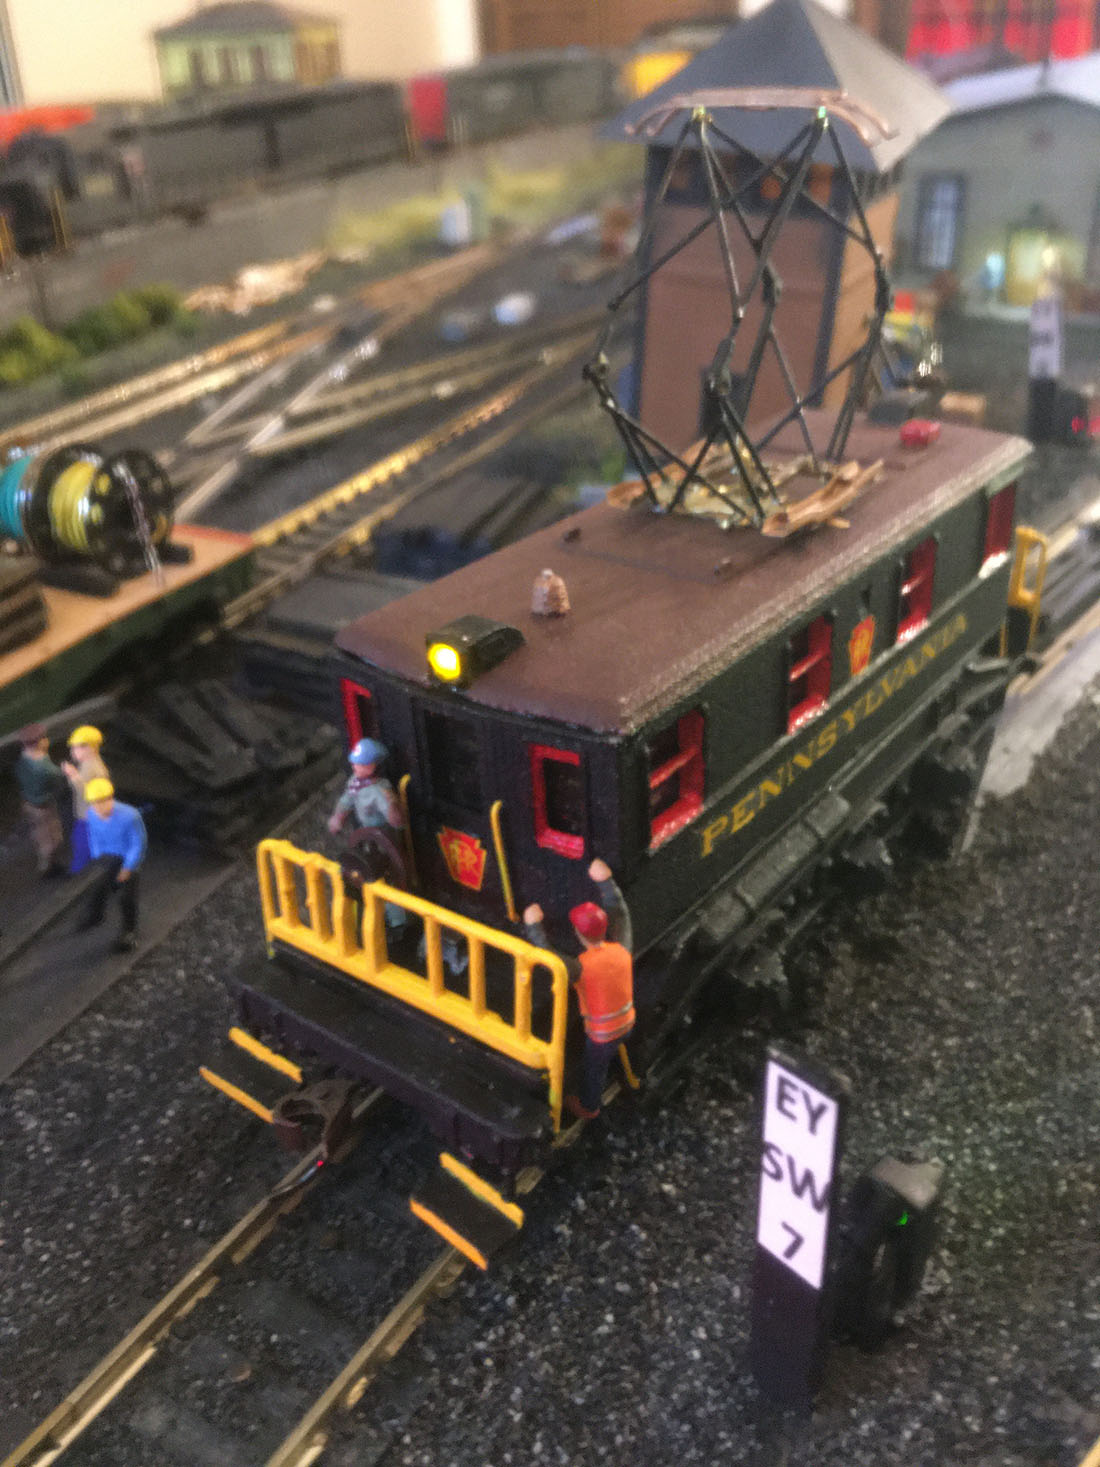
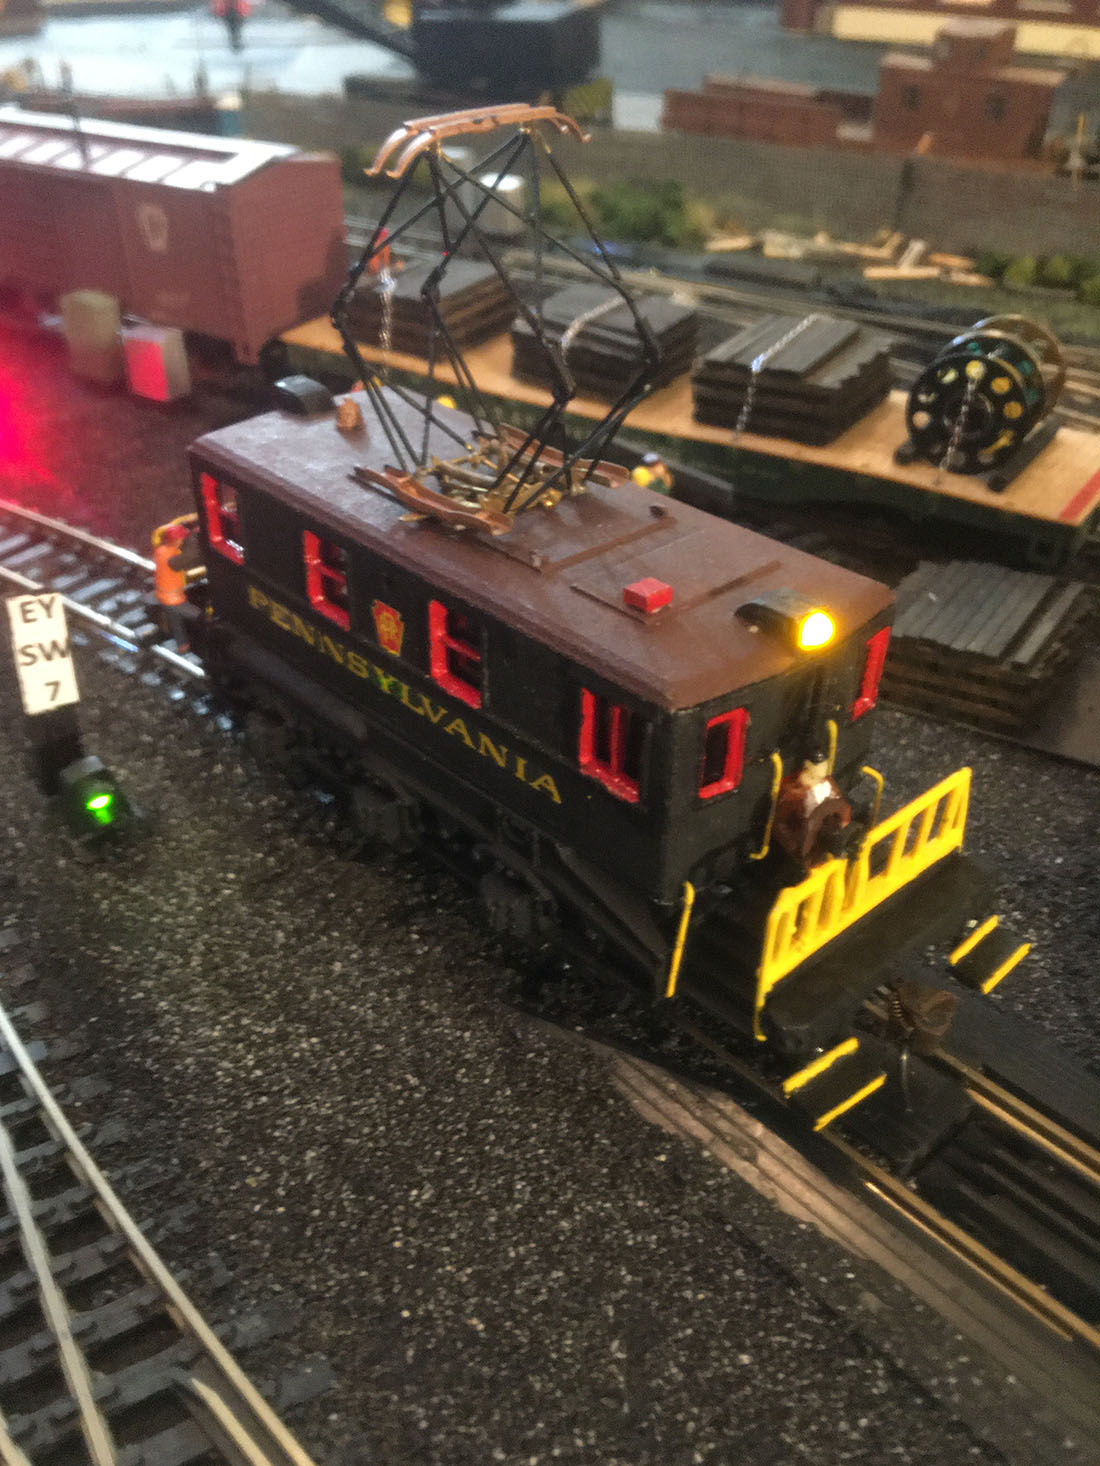
John’s been in touch – he’s shared pics of his N Scale Northern Pacific Freight cars:

“Al,

Like many things in life, my interest in model railroading started at a very young age. I built 14 different layouts over the years; this is number 14.

As I got further in life after college and getting settled in a career (Industrial Arts teacher) with a steady income, I began building more.

Problem was that after I got a layout built, I’d get transferred or changed jobs, it was a curse. It happened 13 time from my very first HO layout while in middle school.

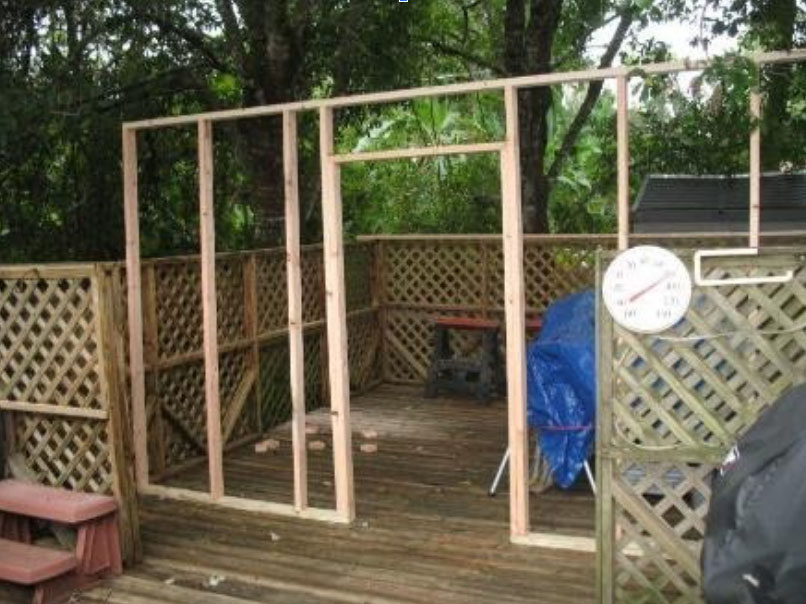
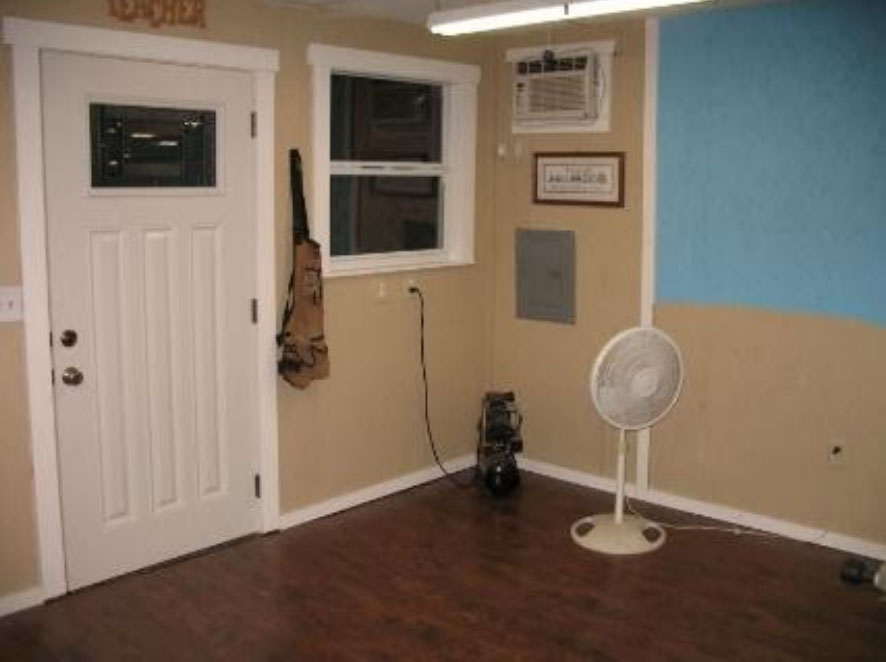
The current layout was built with my planned retirement in mind. We had a hot tub on our back deck that quit working and it was not worth replacing so we took it out. That left a large open space to the side of the extended deck I built when the hot tub was there.

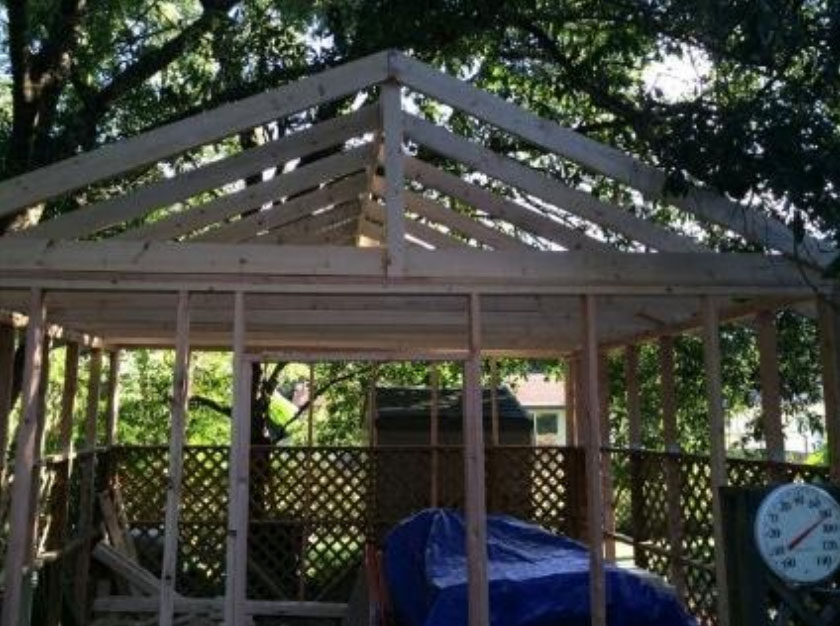
AS I looked at all the open space now, the extended deck had a three sided five-foot-high privacy fence. I saw if I extended the fence up another 3 feet, close off the front, put a roof on it, instant railroad room!

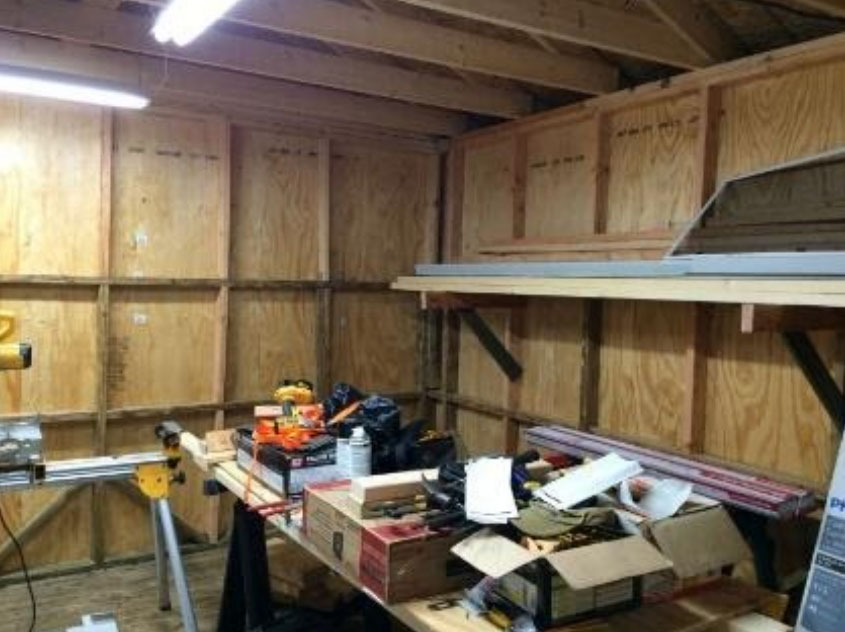
That’s what I did, closed it in, wired it, insulated it and added air-conditioning (a must have in Florida).

The inspiration came when my wife and I were in Colorado chasing trains and we found ourselves at the west portal of the Moffat Tunnel. We heard a roar in the valley and soon a 110-car coal drag with 3 Denver and Rio Grade SD50s on the front three in the middle, and two at the rear.

Soon the doors to the tunnel opened and the train roared by us at about 8 MPH. It was inspiring, so years later I decided to model the D&RG.

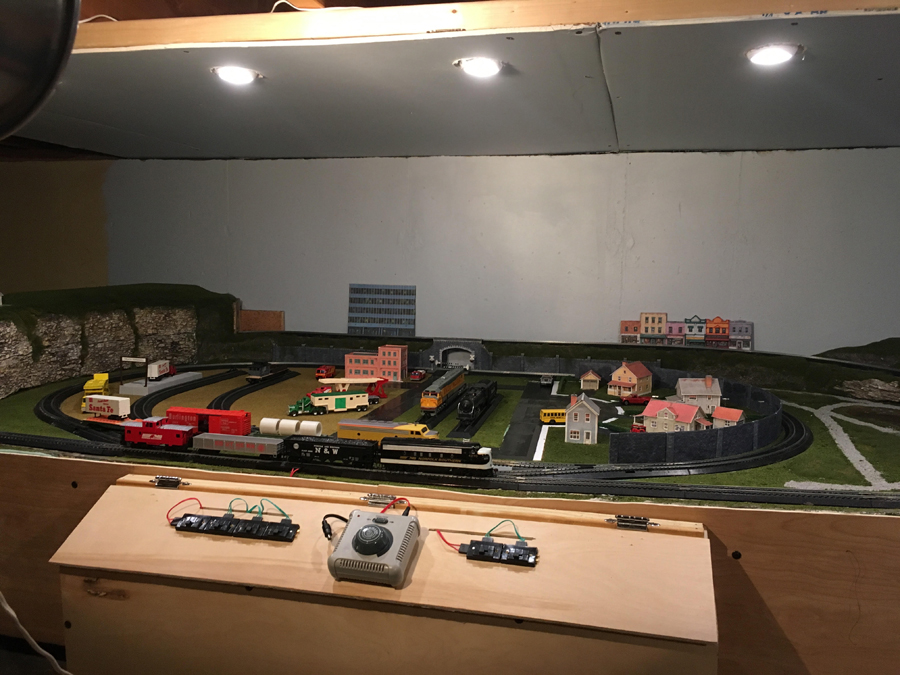
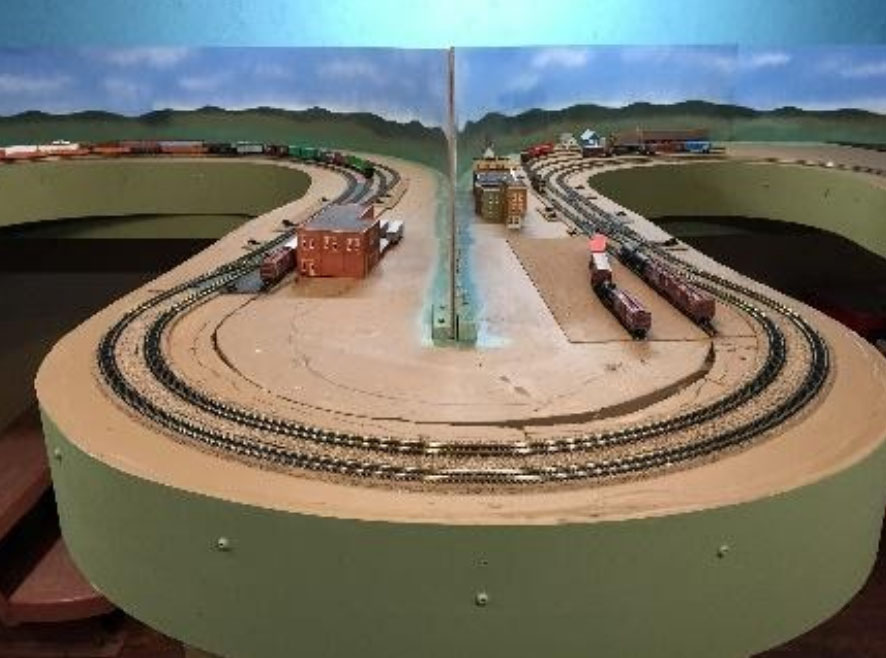
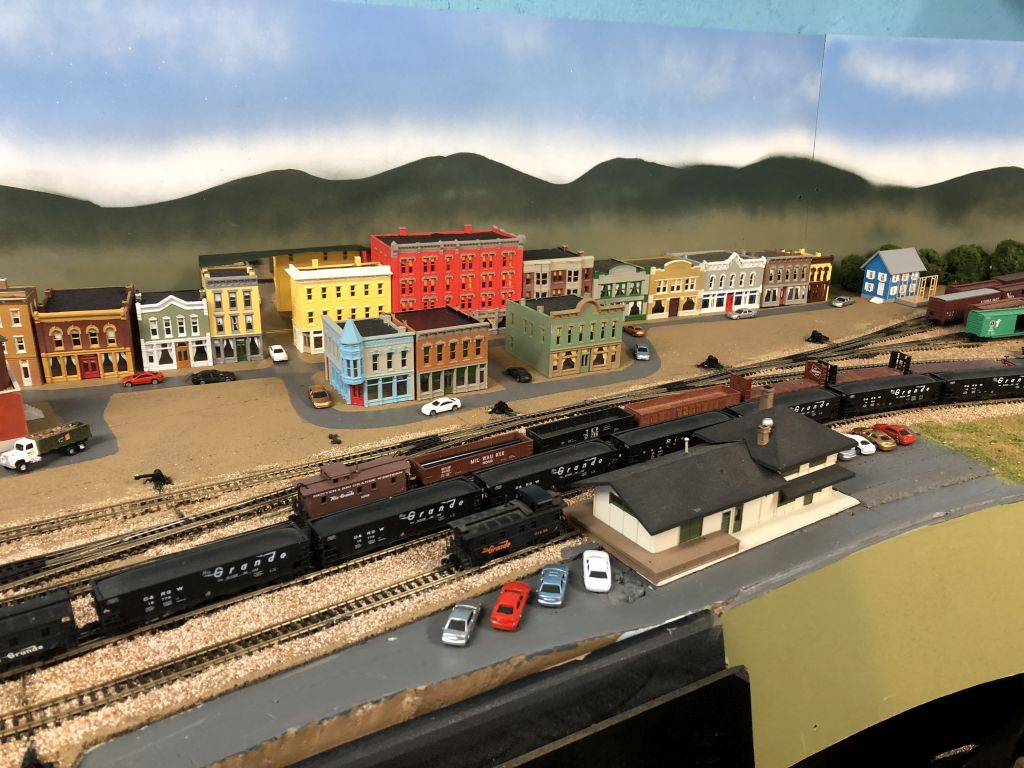
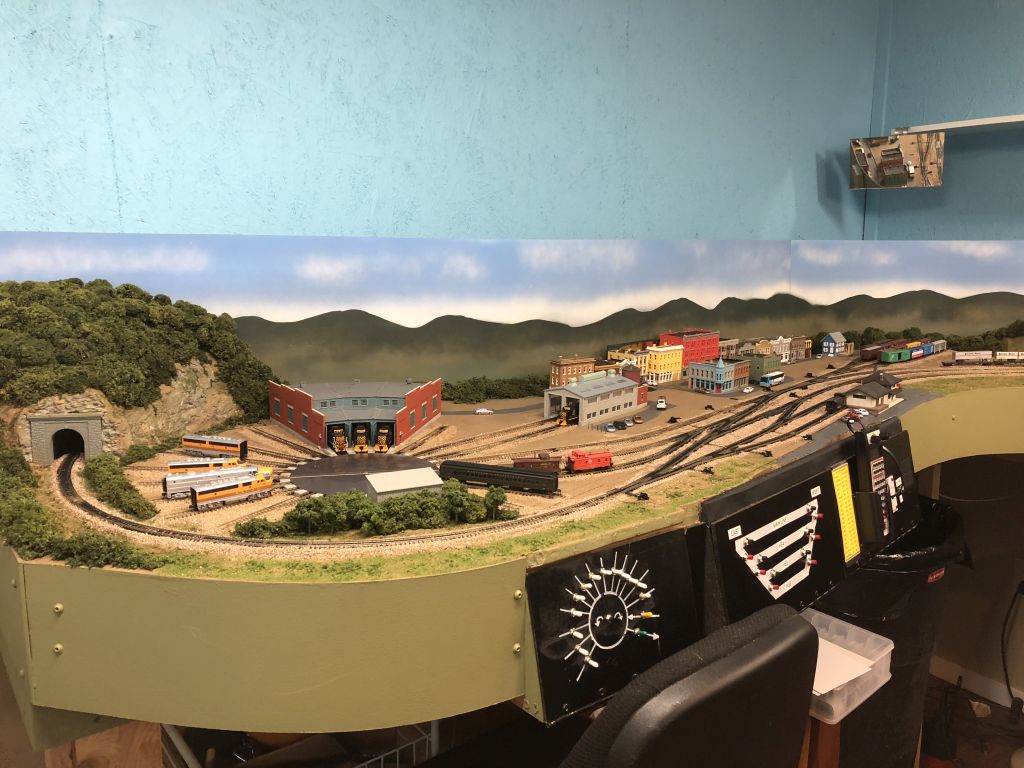
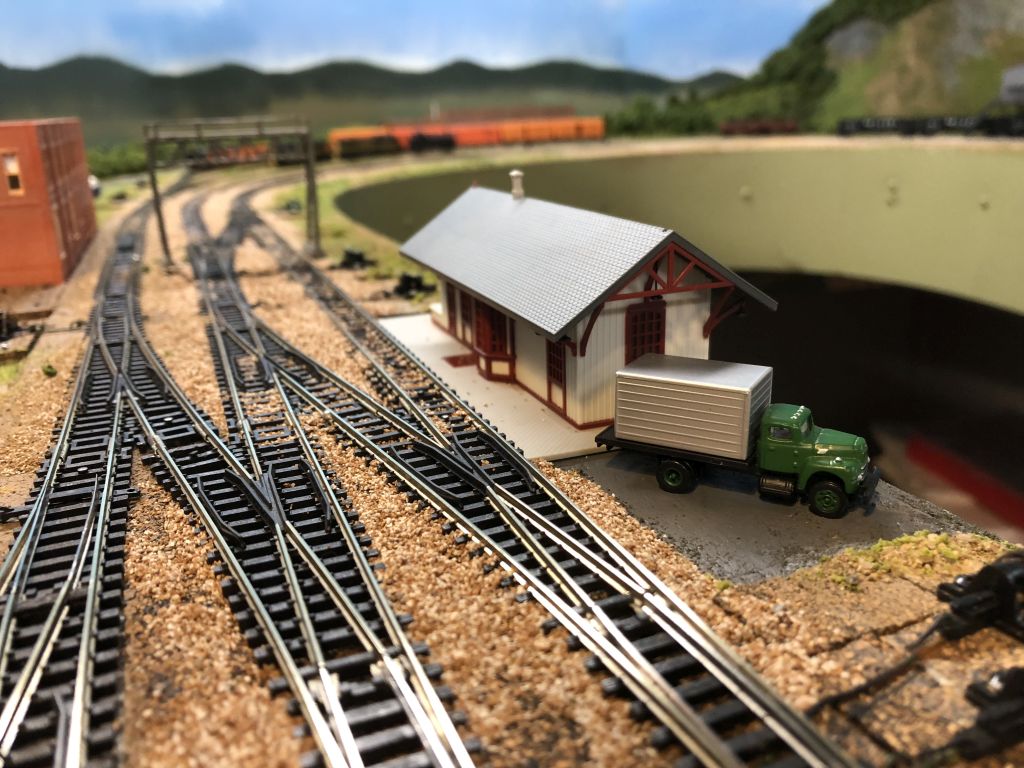
The layout is N-scale and free lanced, with an interchange with the Northern Pacific, no specific years modeled.

I have added a card system (Not in the pictures) for planned scheduled operation and car forwarding.

I use Digitrax DCC. It cost more in the beginning but it is the only way to go. Most of the engines have sound. I have been modeling N-scale since 1970, and some very early Micro-Trains cars are still in service.

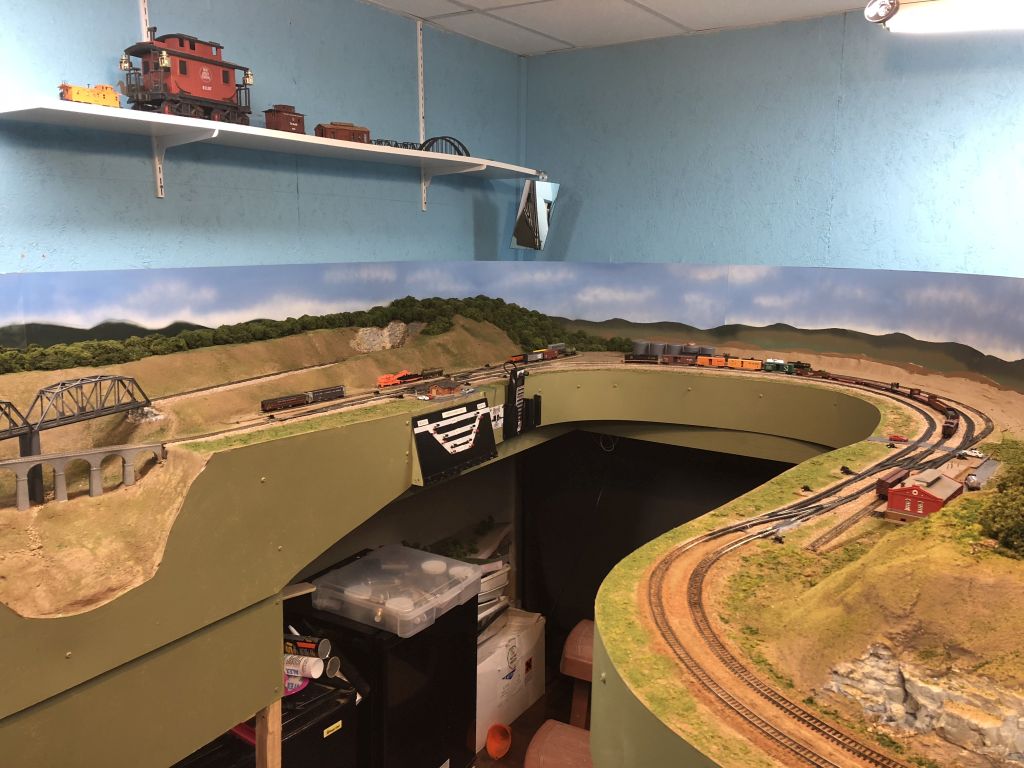
I have 6 staging tracks behind the backdrops. I use mirrors in the corners to view the hidden tracks.

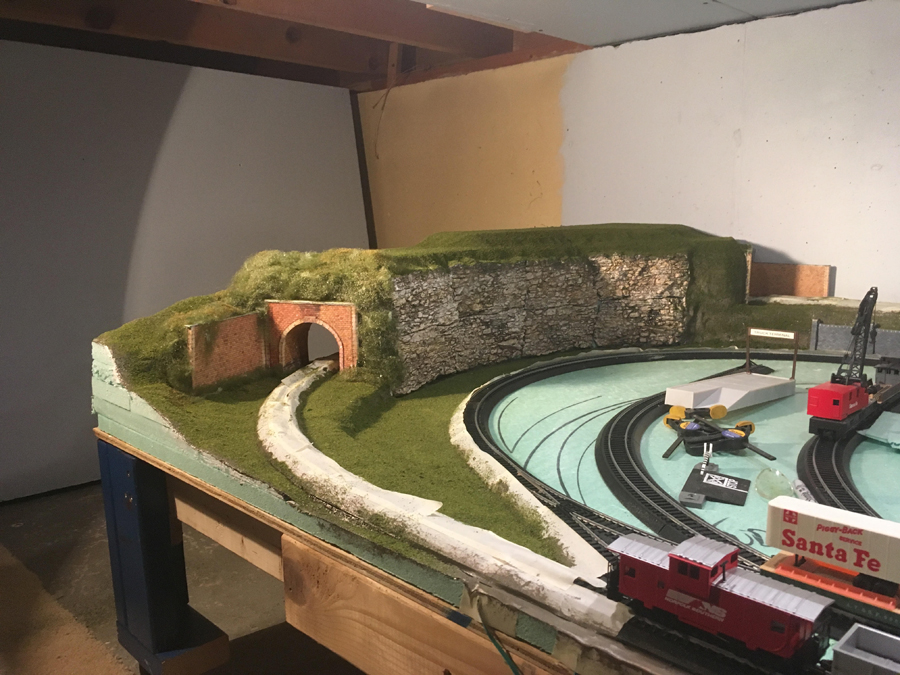
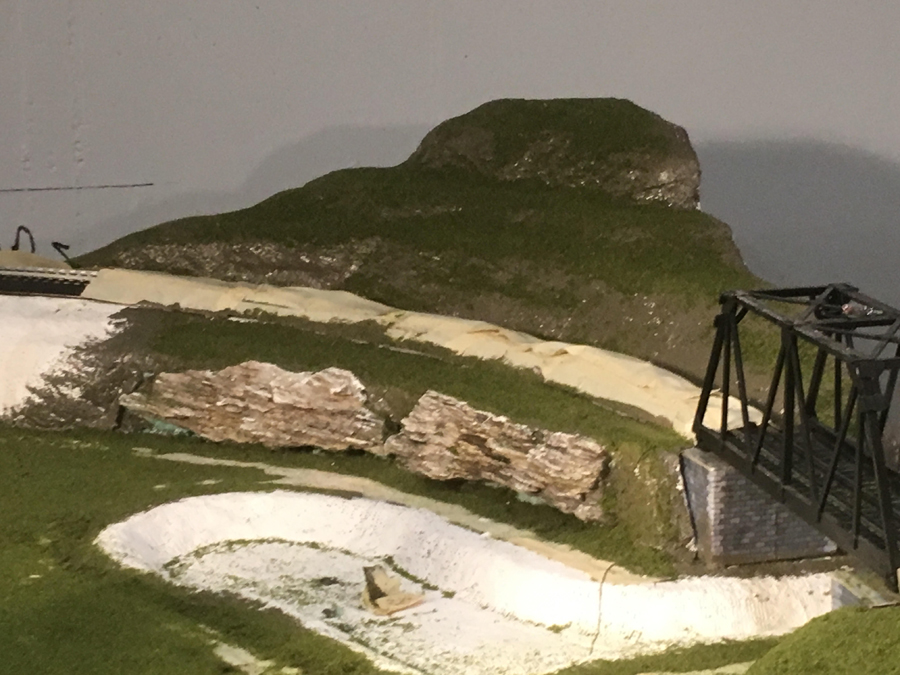
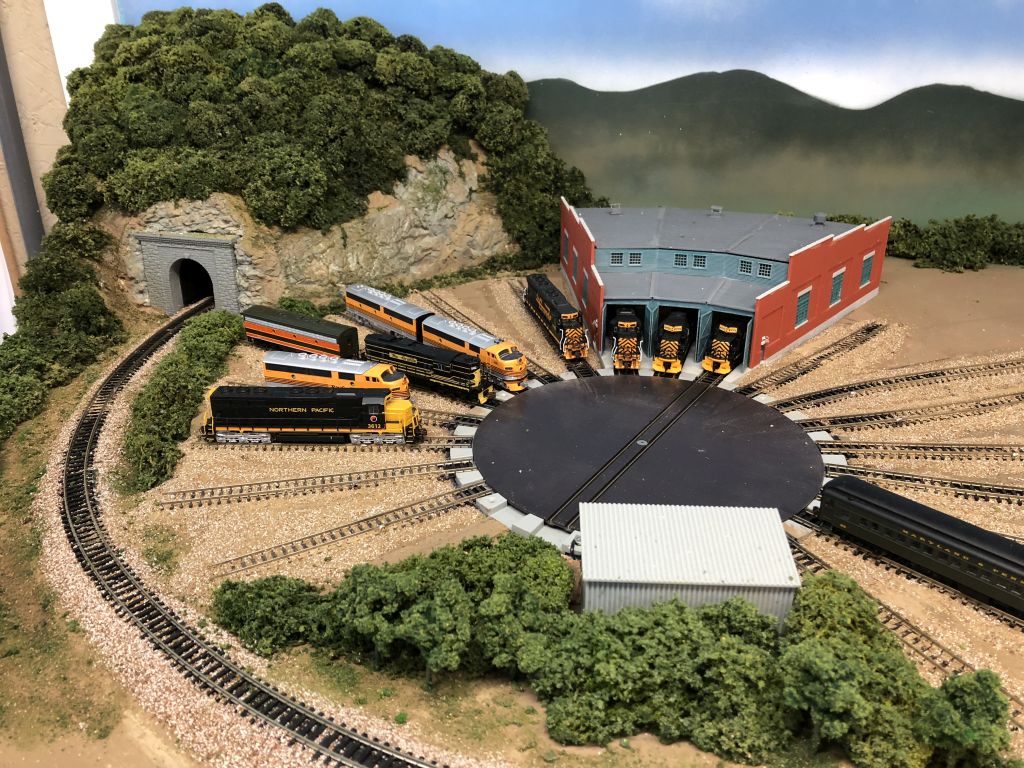
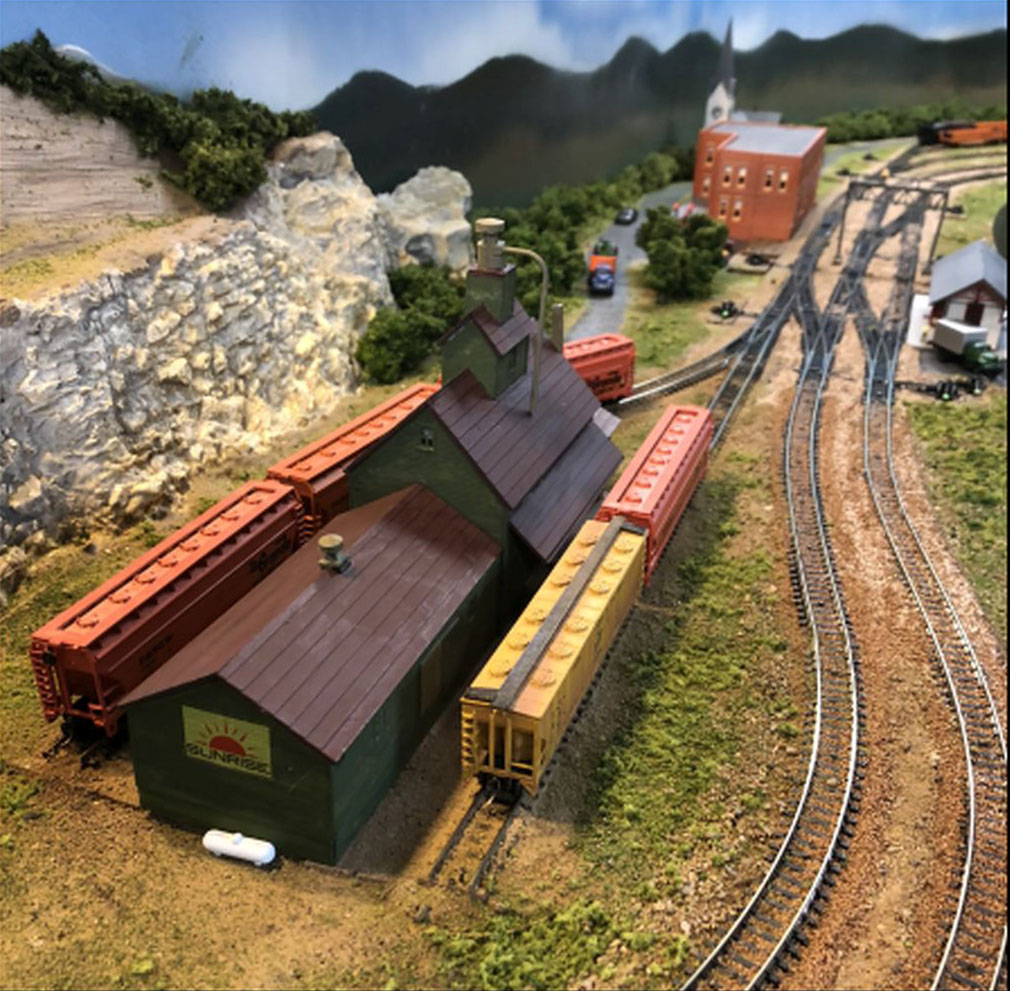
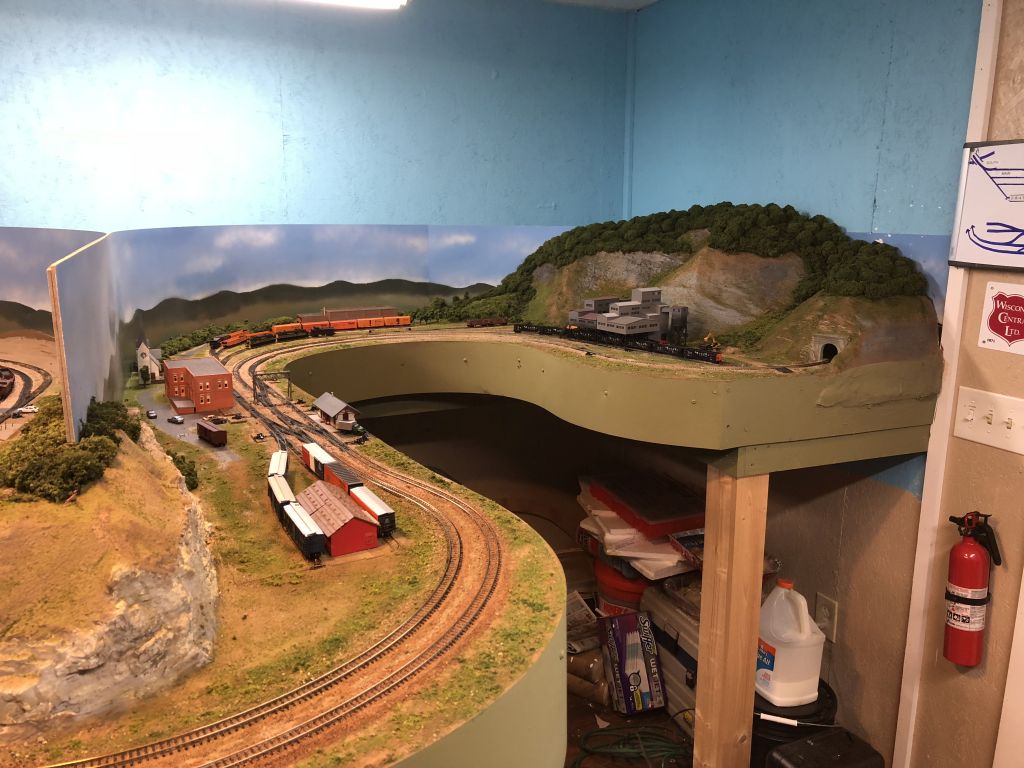
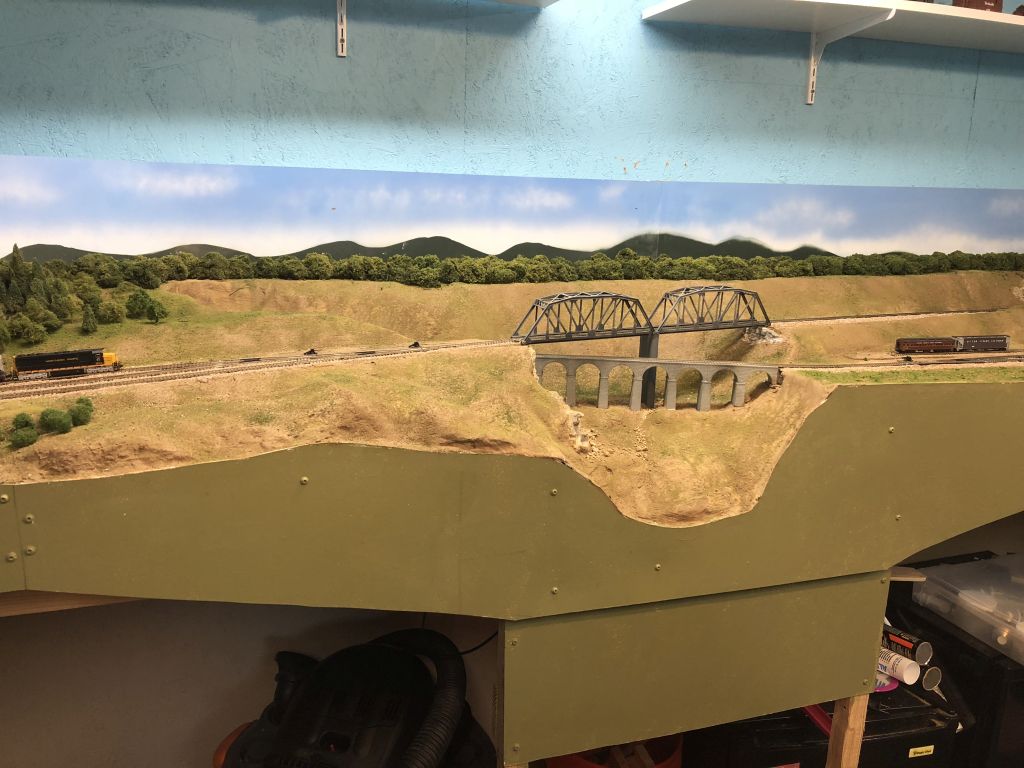
Scenery is carved foam with plaster cloth over the forms with rock castings.

I made many of the castings by pouring plaster into crumpled aluminum foil.

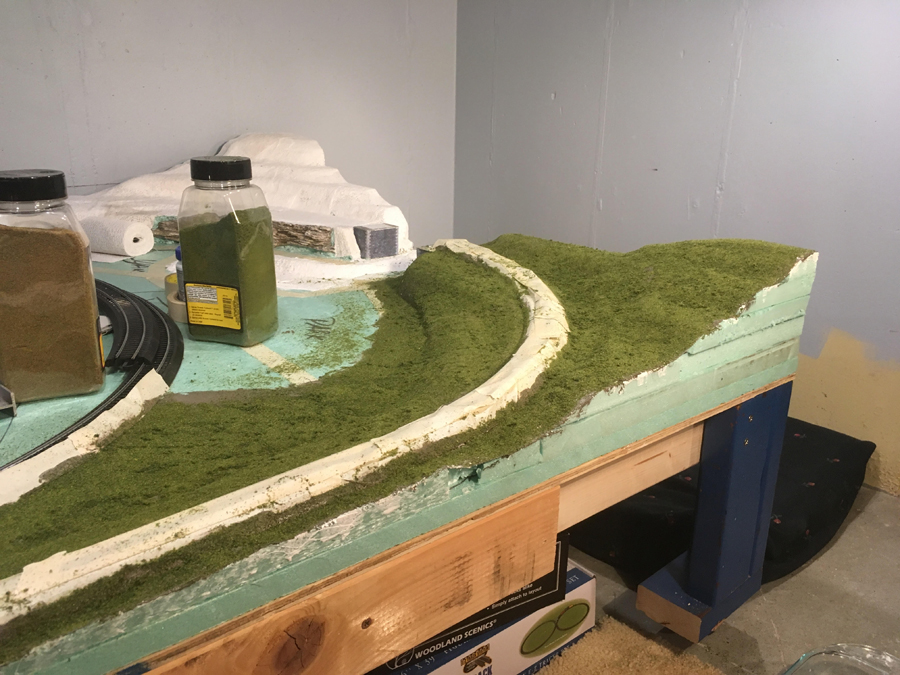
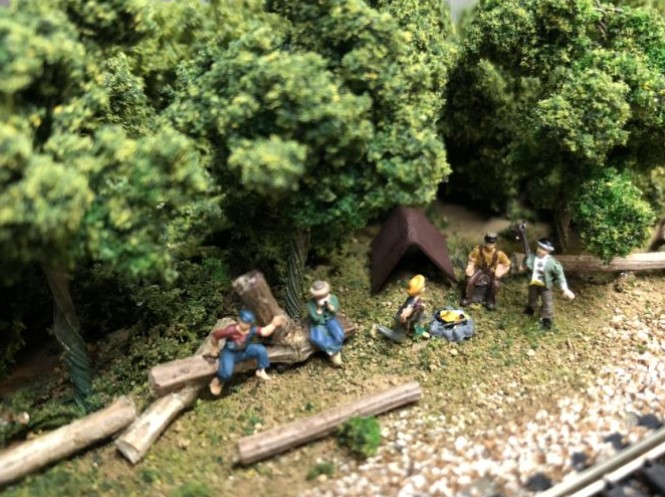
The mass of trees was done by taking fiber-fill material, rolling small balls, soaking in diluted white glue, then rolling in different shades of ground foam. A very fast way to cover large areas.

Edges of the forest was accomplished by taking strips of lichen and soaking and applying ground foam.

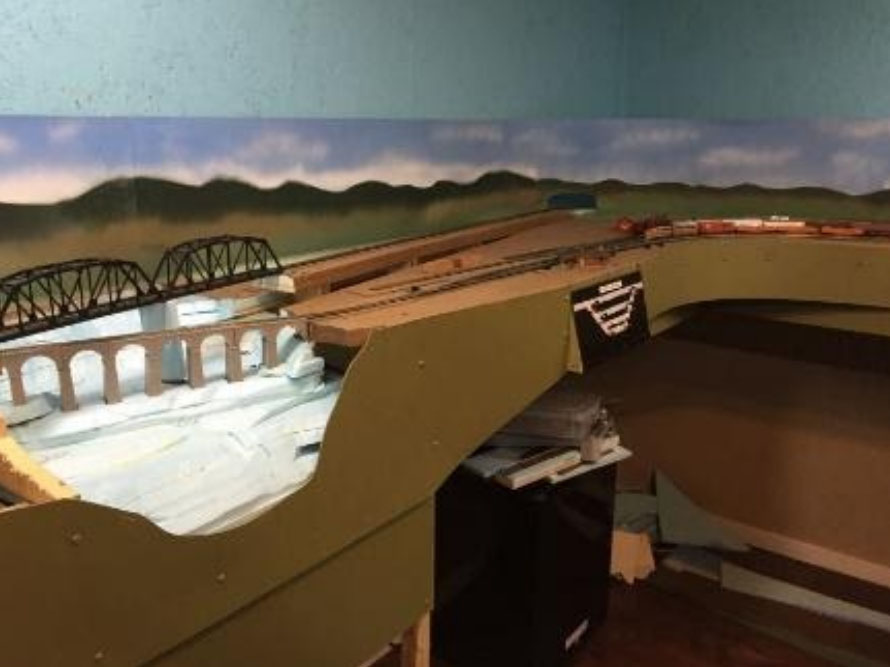
Still lots to do, but one step at a time.

I tried not to make the layout a bowl of spaghetti tracks and separate the scenes so you focus on one part at a time. The concept of less is more.

As it turns out, I retired but came back as a contractor with the school district to direct an Aerospace/Aviation program. I am a pilot and started a high school program 20 years ago.

The school district wanted to expand the program and wanted me to head it up. So, my railroading time is limited.

What is nice is that the room is tight and sealed, so I can close the door, run the dehumidifier and not worry about anything. It stays dry and clean.
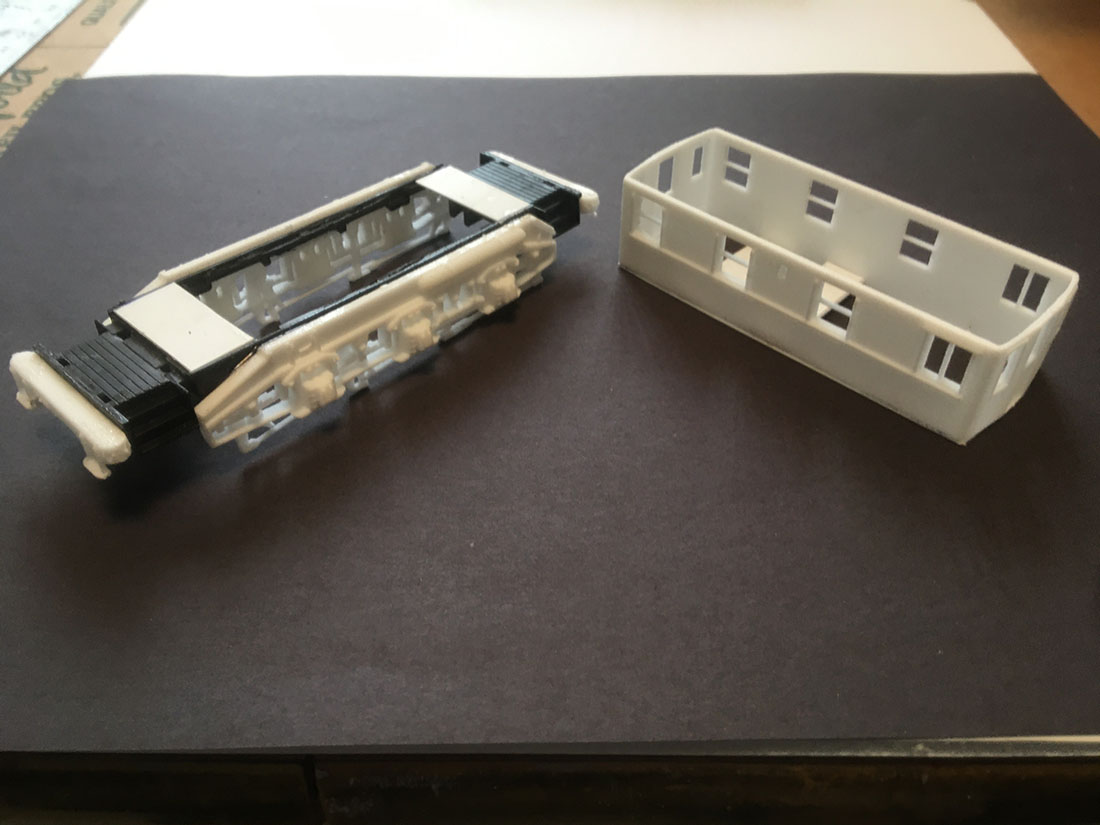
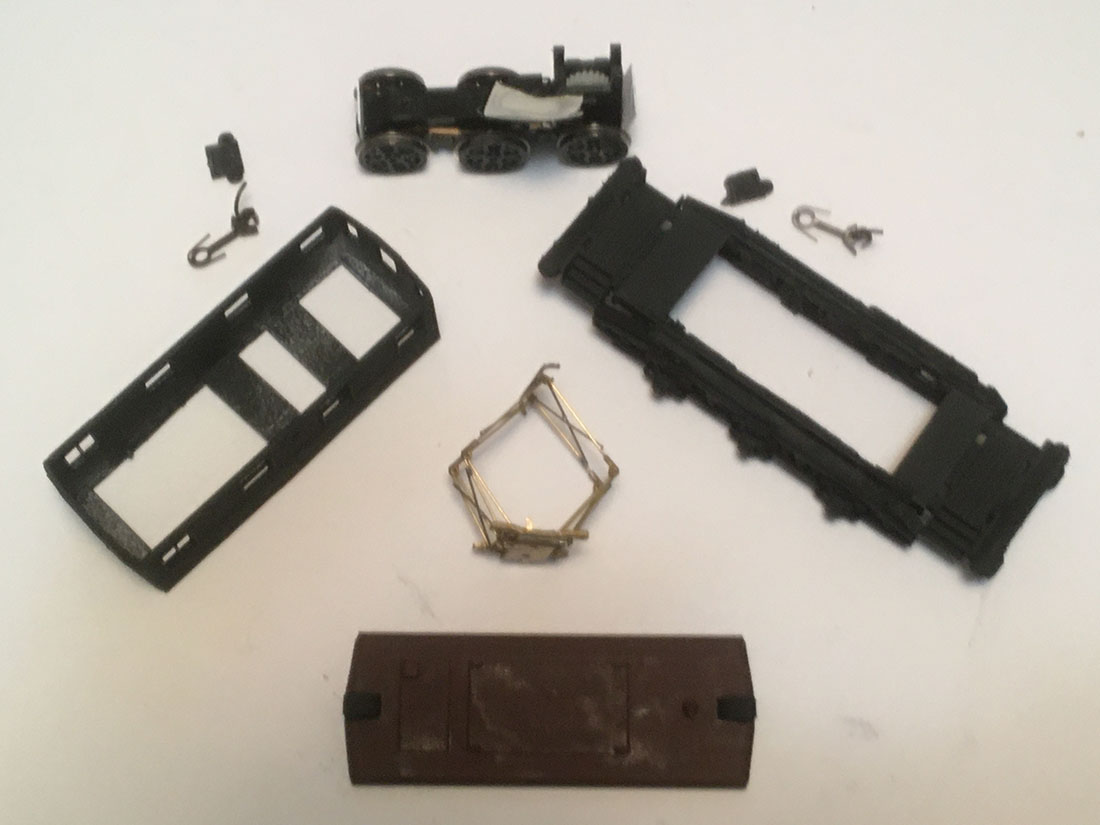
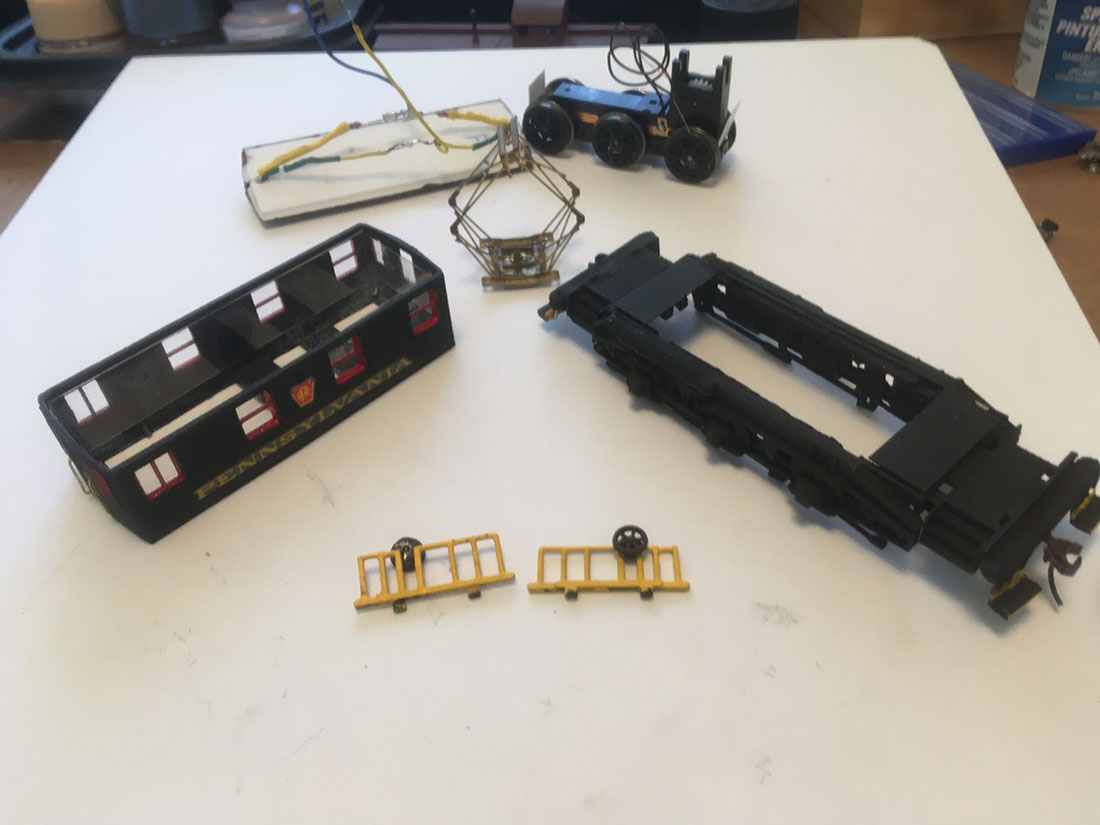
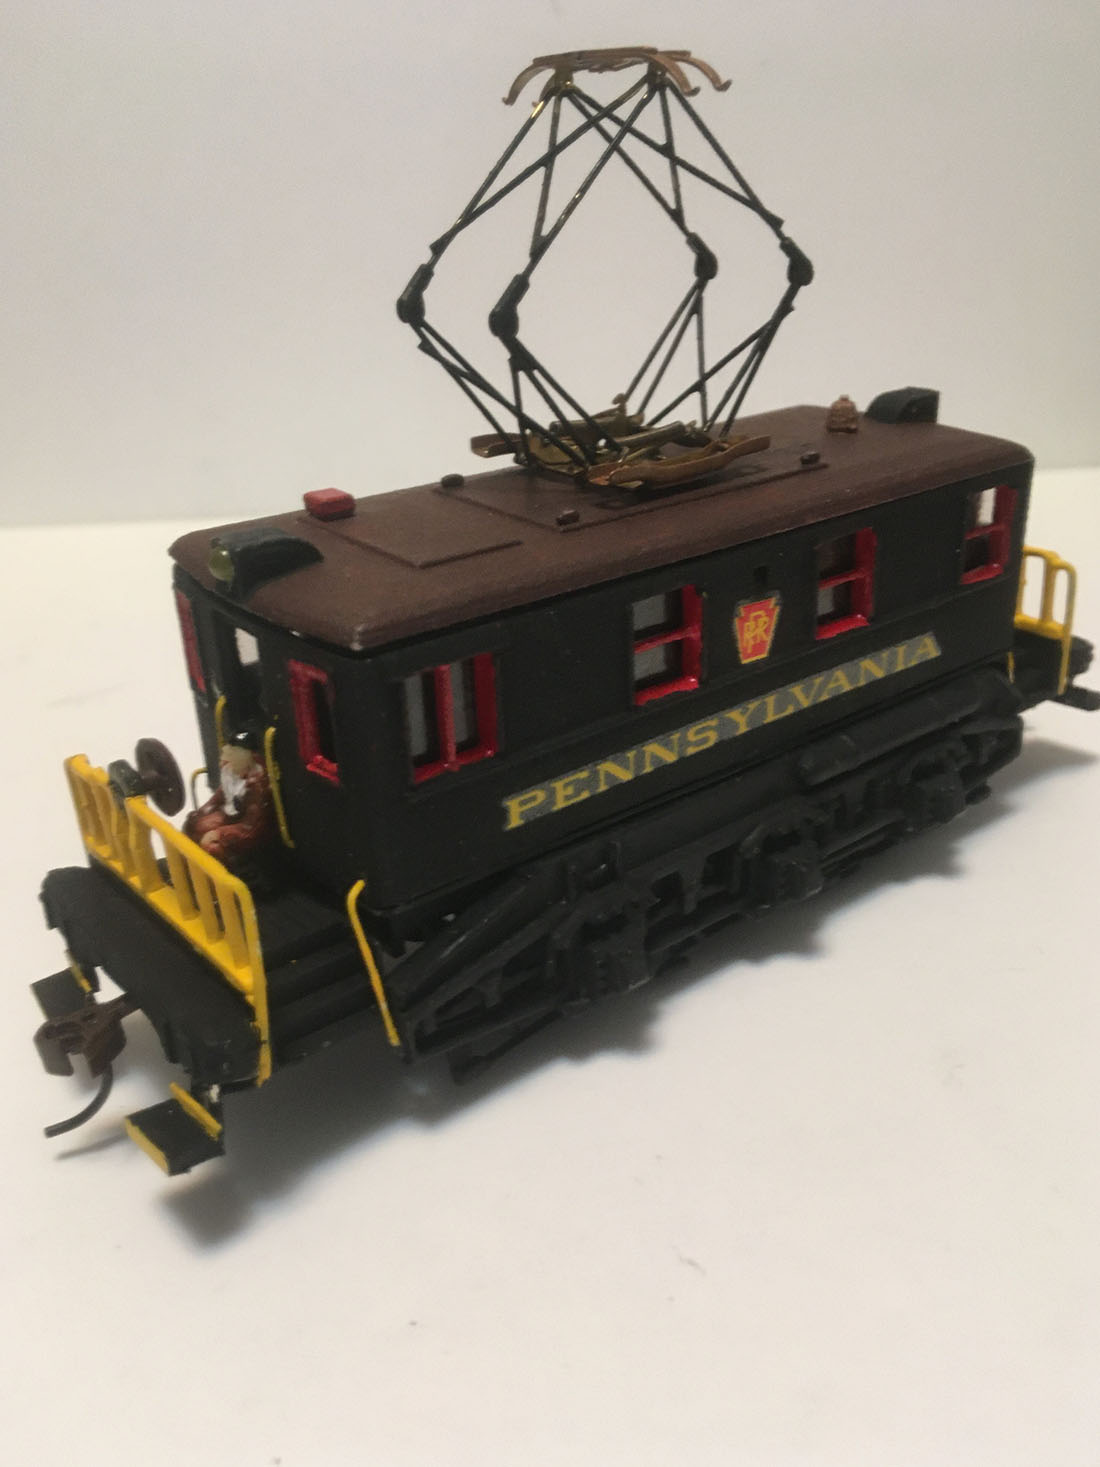
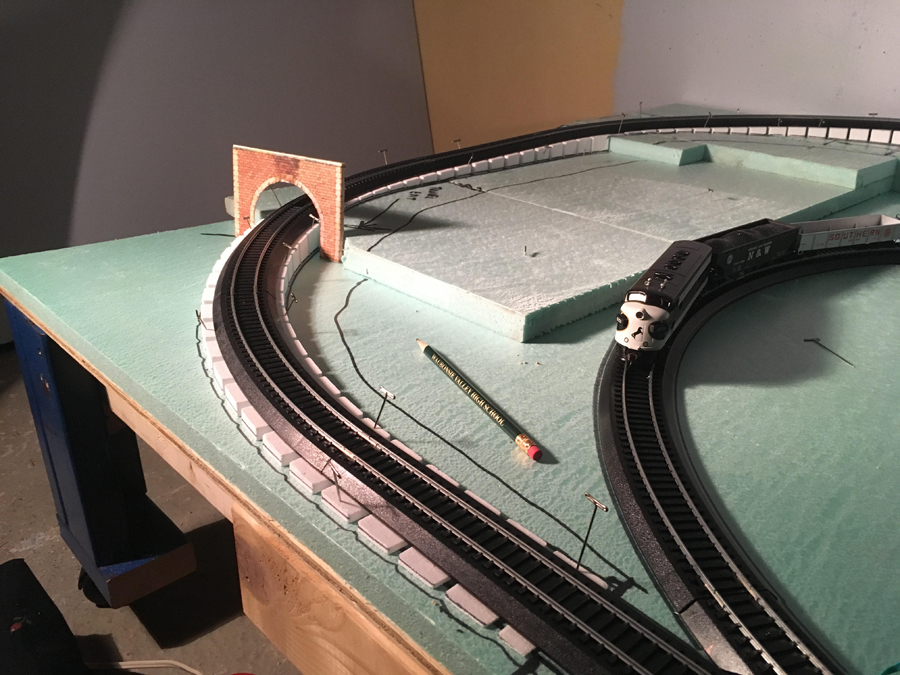
Build sequence:

building N scale room

building N scale room

building N scale room

building N scale room


n scale track

n scale turntable

n scale bridge

model railroad trees

N Scale Northern Pacific Freight cars

N scale coal factory

N Scale Northern Pacific Freight cars

N scale hobo camp

n scale track layout

N Scale Northern Pacific Freight cars

n scale bridge

n scale track

N Scale Northern Pacific Freight cars

I have enjoyed monitoring your e-mail ideas.

Enjoy,

John
Sebring, Florida, USA”

A huge thanks to John for sharing his N Scale Northern Pacific Freight cars, they are fabulous pics.

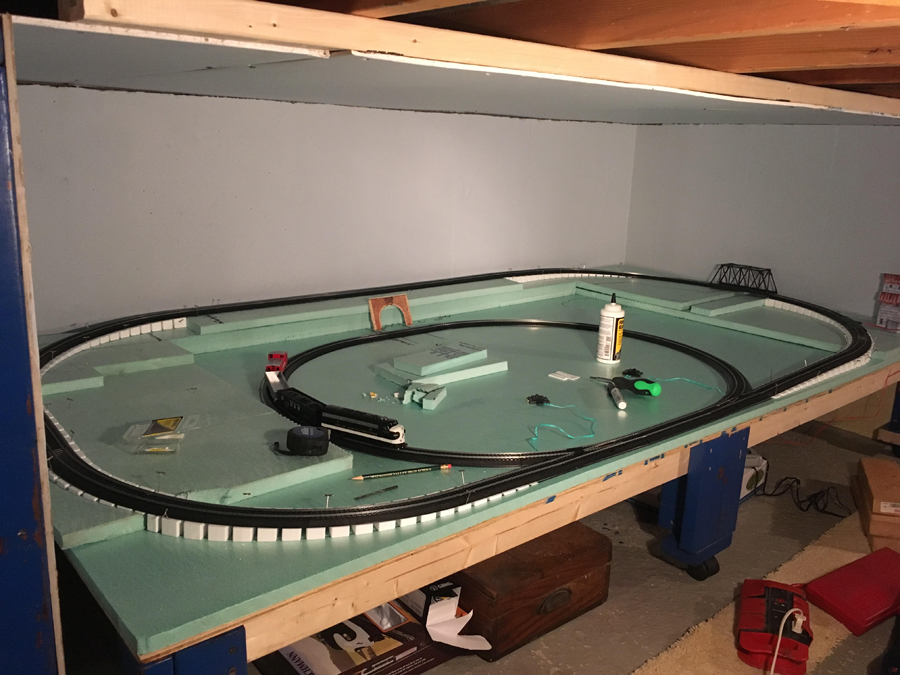
It really reminded me of Bill’s stunning layout:

HO scale speed.

There is something very satisfying about seeing a layout right from the very start – and what a train room too.

That’s all for today folks.

Please do keep ’em coming.

And please don’t forget the The Beginner’s Guide if you are tired of dreaming and want to start doing.

Best

Al

PS More HO scale train layouts here if that’s your thing.


Need buildings for your layout? Have a look at the Silly Discount bundle.

Pennsylvania railroad HO scale

Gary’s Pennsylvania railroad HO scale is the gift that keeps giving.

His last post is here. This time though, he talks us through how he ‘sourced’ a loco he couldn’t find:

“Hi Alastair: This is my 4th time writing to you and your model railroad members about my Sunnyside Yard project in HO scale.

My project is a layout capturing the basic look of Sunnyside Yards in the late 1960’s and early 1970’s.

At that time, the most famous locomotive of the Pennsylvania Railroad was and probably still is the GG-1.

But there was another lesser known yard engine used in Sunnyside Yards to make up the passenger trains. That engine was a PRR Class B1 electric yard engine (see picture 1).

There were 42 built and mostly used in Sunnyside but also used in Philadelphia 30th Street Station and Harrisburg Station.

After the B1s were retired sometime in the 1970’s, all B1s were scrapped except for a single example preserved at the Railroad Museum of Pennsylvania.

It wasn’t a very big engine and had the nickname “The RAT” as it was called by the yard crews because of the way it shuffled around yard.

the rat shunting train

When I started my project back in January, I knew that besides the GG1s and S2 diesel locomotives, I wanted to have a Class B1 engine on my layout.

They were made in O scale, but none were ever made in HO scale except for a brass model made by ALCo Models (see picture 2). The cheapest price I have seen was $250.00 BUT I did not want to use a brass model in my layout.

the rat shunting train

For me, the Class B1 was an important piece for my layout; I had worked many midnight shifts at Sunnyside Yards with that engine.

I did not know what I would do because I could not find one in HO scale. So I decided to start with my layout which I have been working on for the past two and a half years and still working on and every chance I had, I would always do a search for the engine when I used my computer but never found one.

Not UNTIL early March of this year when I came across a company called Shapeways. Shapeways does 3D printing for your product and also will advertise it and sell it; that’s how I found it.

There was a person who had the brass model of the Class B1 and Shapeways produced a HO scale version for $50.00 and an N scale version of the engine for $20.00.

BUT, as you can see in picture 3, all they provide is the cab, roof, chassis sides and bumpers and it only comes in white plastic. You have to build the model yourself, see picture 3.

3d printed model train

So in order for me to get a Class B1 for my layout I would have find the parts I would need to complete the building of the engine.

I needed an engine, running boards, grab irons, lights, couplers, a Pantograph and decals.

I had always thought that a caboose had a very similar cab as the B1 except for the windows and roof and as it turned out the chassis of an HO scale Pennsylvania caboose was the perfect size. So I bought 2 used Pennsy cabooses on ebay and started to cannibalize them for parts.

I also had part of a Bachmann GG1 engine that needs parts to run BUT what was important was that it already had the electrical pickups for the lights. I decided to use it even though it would not run and later on I could order the parts from Bachmann and see if I could get the engine to run. (See picture 4).

Bachmann GG1 engine


So I started putting all this together. I first had to hollow out the chassis of the caboose so that the engine could fit in.

I then had to add some plastic strips to the chassis so that I could support and attach the engine. I attached the front and rear bumpers. I then attached the sides of the chassis that contained the journal boxes (see picture 5).

3d printed train for Pennsylvania railroad HO scale

My next step was to paint the chassis and the cab and the roof. (See pictures 6).

3d printed train for Pennsylvania railroad HO scale

Once the painting was done I had to apply the decays to the cab, wire the LEDs on the roof, install the couplers and scratch build and install the running boards. I also had to measure, cut and paint pieces of wire that I was going to use as grab irons (see picture 7).

3d printed train for Pennsylvania railroad HO scale

When that was complete what was left was testing the LEDs and assembling the B1. Picture 8 is the finished model.

Pennsylvania railroad HO scale

The Class B1 then was ready to put in my Pennsylvania railroad HO scale; see pictures 9, 10 & 11.

pennsylvania railroad ho scale Class B1 electric

pennsylvania railroad ho scale Class B1 electric

pennsylvania railroad ho scale Class B1 electric

I hope you enjoyed this. I am very surprised and pleased with the way it turned out.

Now it is back to finishing up the Commissary Yard and fixing some tracks that are causing derailments.

I want to thank Al and all the modelers that have sent in their pictures, videos, ideas and scratch built projects that have helped me with my project.

I also hope that all of you are safe through the pandemic that we are going through. For now stay apart and stay safe.

Gary M from Long Island”

A huge thanks to Gary for sharing his Pennsylvania railroad HO scale – he has done a wonderful job of documenting his layout right from the very start. And I loved this post – clever stuff indeed.

It’s quite a popular theme, have a look at Andy’s: Pennsylvania model railroad.

That’s all for today folks.

Please do keep ’em coming.

And if today is the day you poke boredom in the eye, the Beginner’s Guide is here.

Best

Al

PS Latest ebay cheat sheet is here.

PPS More HO scale train layouts here if that’s your thing.


model train answers

HO scale layouts for small spaces

I often get asked about HO scale layouts for small spaces – this one is very small indeed, it’s actually in the ‘crawl space’ in Rick’s house.

“Al,

Thank you for your always engaging posts and emails which have been a great support in getting back into model railroading once again.

I set up an HO set when the boys were very young while we were in the military. But with a lot of moving around and kids getting older, the trains sat in storage for over 30 years until this past Christmas.

Having grown up with a Lionel O Scale train set around the Christmas tree every year, we finally purchased a Polar Express set for our tree this past Christmas.

Seeing the reaction of our young grandkids finally got the fire going again to set up our own set that the kids of all ages could enjoy.

Unfortunately, the only space we have left for year round use is in the crawl space that only has a 40” clearance from floor to ceiling. After spending last winter clearing out the space, I took a corner and began building.

The entire setup is literally assembled on my hands and knees! I first built a 4×8 HO layout’ table on 6 sets of casters so I could move it around while building and for maintenance.

I used foam board for nearly all the foundation and hills which I find is easy to work with and mold. I forwarded a few pictures of the progress leading up to the finished (for now) setting. The left wall behind the tunnel is temporary so I can expand beyond the tunnel.

The train yard represents the rich train history here in the Chicago, Illinois area here in the states.

The two engines in the middle are both over 35 years old and do not work so I set up an homage to the Illinois Train Museum in nearby Union, Illinois that has quite a collection of engines and cars from many different eras.

You can see I made good use of your print-outs for the residential area including the sound wall between it and the park to the right of the table.

The park represents several areas where I run and bike to stay in shape to keep up with active grandkids!

You tips and ideas along with the downloaded printouts made it easy to stay motivated based on what others have shared with your community.

I am now working on the landscaping, ballasting the tracks and expanding the yard to include container cranes and additional construction as well as an overhead walkway to get from the residential area to the park. As many have said, it is really never finished.

Thanks again for what you do for this community of enthusiasts!

Rick”

HO scale layouts for small spaces

HO scale layouts for small spaces

HO 4x8

4x8 HO scale

HO scale layouts for small spaces


4x8 HO mountains

A big thanks to Ricks because HO scale layouts for small spaces is something that a fair few ask about. Having a small space shouldn’t put you off, you’ll still enjoy it.

And now on to a question that keep popping up im my inbox – so I thought it a good idea to publish. Please post your answers in the form at the bottom of the page:

“Hi Alastair. I have problem which one of your contributers may be able to help with.

My layout is not digital but has three separate tracks each one having its own power supply, all goes well apart from one track which will run for about half it’s distance then it runs out of power, switch it off for a few minutes and off it will run, again for a short time, very annoying.

I have checked all connections, all flitch plates, made sure all track is clean and that my locomotive wheels are clean.

The other two tracks continue to run fine no problems at all and yes they are all fed from the same supply. I have also changed the transformer to no avail.

Help please

Ray”

A huge thanks to Rick. It’s great to see a 4×8 HO layout – it takes a lot of determination to make a layout like that in a 40″ space too. Good to see he’s using the print out scenery for his tunnel too.

And who can help Ray?

That’s all for this time, folks.

Please do keep ’em coming.

Don’t forget the Beginner’s Guide is here if you want to join in rather just lurk.

Best

Al


PS Latest ebay cheat sheet is here