Below Roger shows us how to make the slide. What I liked about it is you could use this technique for lots of things.
“Hello Al
Here’s the children’s slide for Paperclip Park, rather more complicated than its predecessors and doubly fiddlesome. Not that it’s any more difficult to make – just requires a little precision and attention to detail. And all you need is a few paperclips and a little chilled food packaging so you can have as many failures as you like! If you tinkered away at the swings and roundabout, you have to have a crack at this one.
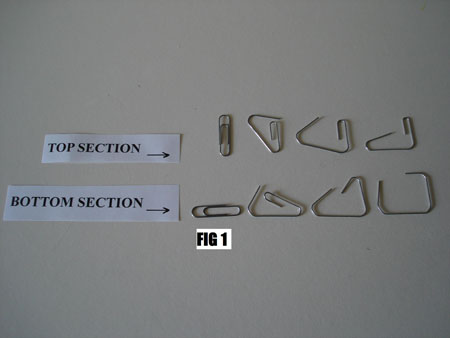
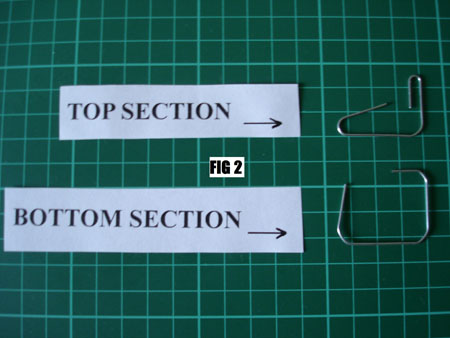
1) You make the main structure in two sections, TOP and BOTTOM. You’ll make the sides first, then join them with cross-members, a base and a top platform. Bend two paperclips to form the TWO sections which make up ONE side of the structure (FIG 1). It’s quite important (but not essential) to work on one of those self healing cutting mats with squared marking guides (FIG 2). This enables you to get your right angles spot on – important for this one – and they make a superb cutting surface. Only a few pounds new on eBay and you’ll get a lot of use out of it.
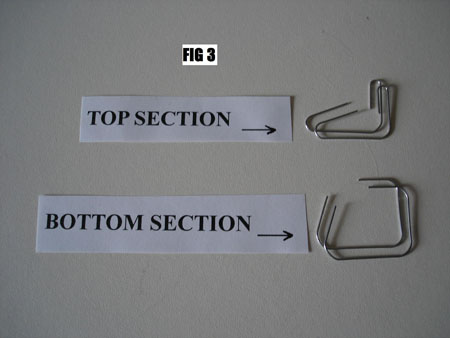
2) Make up another two identical sections, TOP and BOTTOM, for the other side of the structure. Your paperclips must be identical – there are variations even in clips of the same size. For OO scale mine were 3 cm, top to bottom. Lay them one on top of the other to check that they’re identical – and make sure the right angles square up (FIG 3).
3) To make the first side, lay a bottom section OVER a top section exactly as pictured in the photo (FIG 4). The arrows represent the gluing points. Practice positioning several times before gluing. I mixed up a tiny amount of two tube epoxy glue. You could use superglue, but epoxy sets like rock. I used both – but always reinforced the joints by touching in some superglue around them after they had hardened. Alex wrote in to the site with a useful tip. Superglue need to be starved of oxygen to bond – so spray the added glue with a mist of water – or dunk the model! Haven’t tried it yet. Scratch all surfaces to be glued with a craft knife and apply glue to both top and bottom sections.
4) To make the second side, TURN OVER the top and bottom sections. You now have a reverse image (FIG 5 – with glued sections in a clamp). But again – lay the bottom section OVER the top section and glue. Leave overnight to harden.
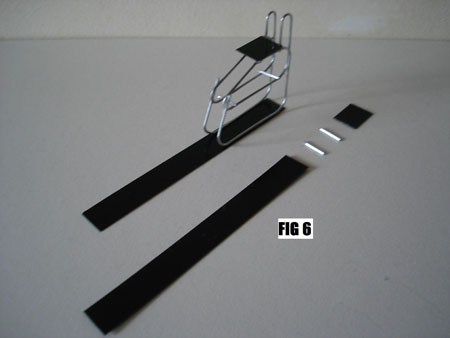
5) To join the two sides, first cut out a top platform and a base from the free chilled food packaging that I often use (from this point on I shall call it ‘FP’). Also four joining cross members from paperclips (FIG 6). All of these should be around .75 cm wide.
Length of the base – 9 cm. Length of the top platform – 1.5 cm.
I used that clever two-tube epoxy which gives you additional time before beginning to set. Bit slippery when first applied, but you can gently move pieces around if they fall off the vertical – for quite a while. Glue the side sections along the base first. Support them either side with matchboxes or suchlike. Then add the top platform. Then drop in the metal cross members.
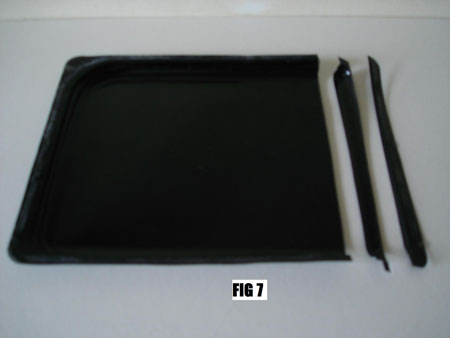
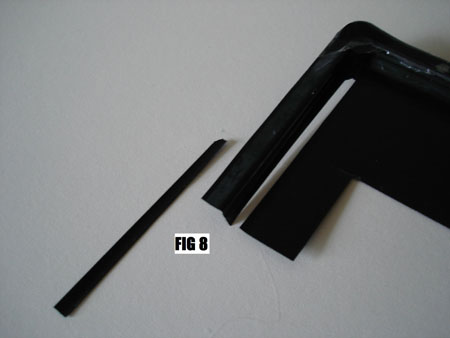
6) To make the chute (the slide itself) cut a strip of FP. It’s flexible, bends and holds creases. But if you choose a curved piece, you virtually have the slide without the need to bend it (FIGs 7 and 8). It must slot between the supports on the downward slope so it needs to be around .75 cm wide.
– You need a bend at the foot of slide. To achieve this, mark off 6cm from the top platform to the bend and cut two TINY nicks at the mark on both sides of the chute. These will promote the bend.
– Boil an electric kettle and allow it to go off the boil. Grip the chute between the fingers of both hands, either side of the proposed bend. For ONE SECOND ONLY (perhaps less) pass the chute through steam while bending it a little AFTER THE KETTLE HAS BOILED (FIG 9).
DO NOT HOLD IT OVER A BOILING KETTLE. IT WILL SCALD YOU AND IT IS NOT NECESSARY. The material will wilt and melt if you do so and and you will be burned. The slightest increase in heat will accomplish the task – and it will bend at the point where you made your nicks. Cut the chute 1 cm AFTER the bend at the foot of the chute.
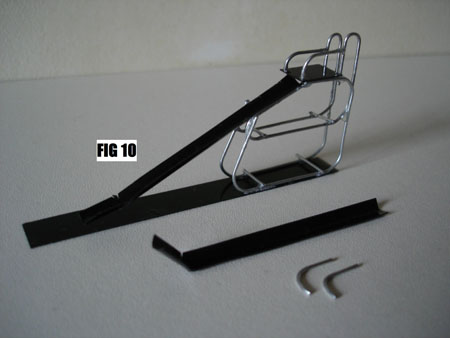
6) You need a pair of handrails at the top platform. Measure up and cut from two bent sections of paperclip. The rail should be around .5 cm high (FIG 10). Glue in place.
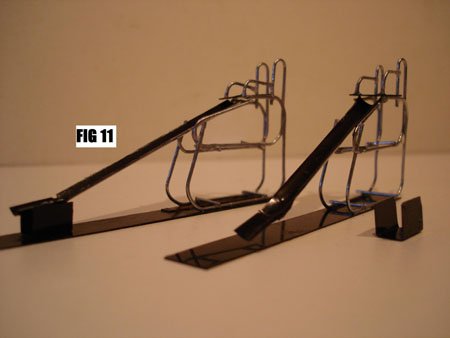
7) To make the support for the horizontal END of the chute, cut a piece of FP – 2.25 cm x 1 cm. Shape it (as in FIG 11). Score lightly along the bends with a craft knife to achieve sharp right angles. Glue to the base and to the sides of the chute.
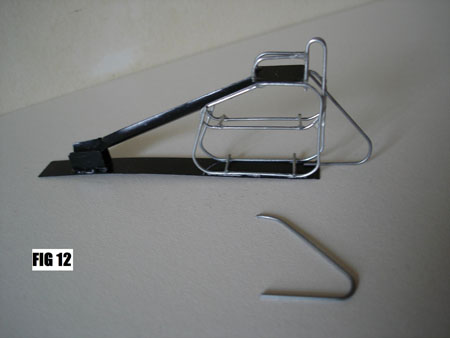
8) To make the ladder, first cut, bend and shape two sections of paperclip (FIG 12). Can’t give precise measurements because of the bend – just bear in mind that the ladder must incline at a comfortable angle, the bottom section must extend over the base and the top of it should slot in beneath the top platform. A little trial and error, snipping and fitting to the model will get the correct shape. When you’ve made one, make an identical copy. Check by laying one over the other.
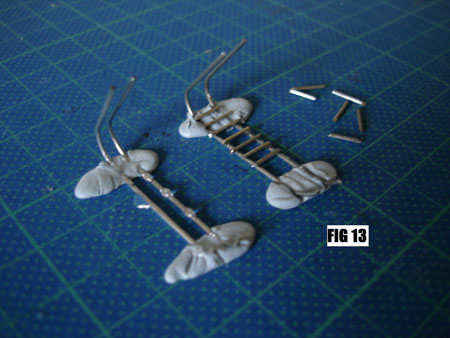
– The ladder slots between the uprights. It passes through them at the top to meet the top platform. Measure the distance between the uprights on your main structure. This will be the width of your ladder. Lay your ladder sides inverted on a squared craft mat if you have one (FIG 13) – make sure they are perfectly parallel if you don’t. Secure them at each end with plasticine or bluetack.
– Snip off plenty of ladder rungs from paperclips. Length? The width of your ladder. Make more than you need. They get everywhere.
– Glueing was a problem – had lots of failures. In the end I used superglue and dropped the rungs in one by one – to make a TEMPORARY fix (see photo). Once dry I removed the ladder carefully from the plasticine and touched in the joints with superglue to strengthen, handling carefully because the first application is fragile. Gave the joints a third application. Try Alex’s tip – or read the discussion in the comments on glue sent in after my SWINGS article. Distance between rungs? Half the distance between knee and foot (on an OO gauge chappie). If you’re good with a mini soldering iron (which I’m not), this model would be a doddle (which rhymes).
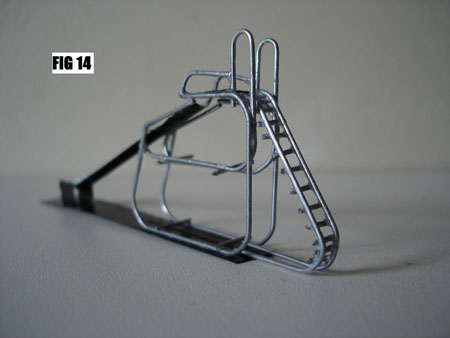
(9) Glue the ladder into the main structure (FIG 14).
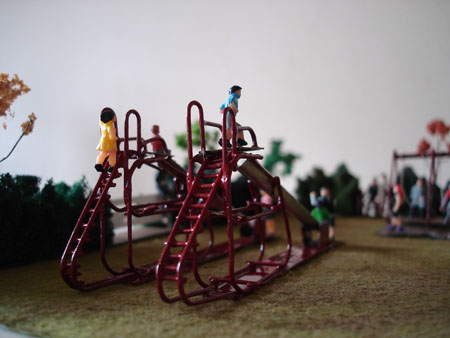
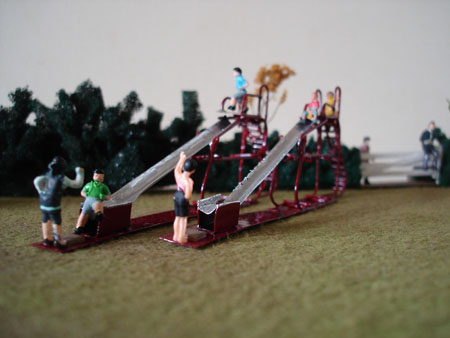
(10) Allow plenty of time for everything to set then gently scrape off any excess glue with a knife blade. Paint to match your swings and roundabout (FIG 15). Add children if you like. I think they make the model. Notice that the two boys in blue and green jumpers on one of the slides are in fact the same model! By thinking carefully before positioning your little people you can make them do things. The two boys at the foot of the slide appear to be preparing for a punch-up. And two identical model characters, cleverly placed can look completely different. The little girl in the yellow dress on the other slide should in fact be waving to her mum – but I glued her hand to the handrail! She is the same model as the two girls on the ROUNDABOUT in my last ‘how to’.
I made two slides so that could chuck away the least successful one – but in the end kept them both.
Don’t throw away failures and offcut paperclips because: –
FROM THIS MOMENT ON PAPERCLIPS SHALL NO MORE BE PAPERCLIPS – BUT OO SCALE PREFORMED TUBULAR STEEL.
Best wishes to everyone.
Roger.”
Any one can see how much time and trouble Roger has gone to with this ‘how to’. A big thanks to the talented Roger.
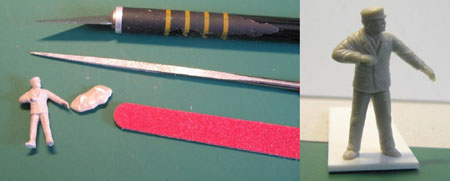
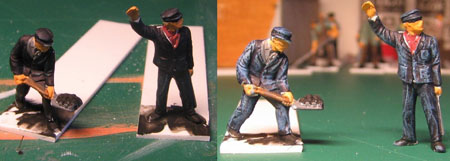
Now that the locomotive is done, we can devote ourselves to the weathering and detailing of the Marklin coaches. The first step would be to paint the OO scale figures (here from Dapol’s range). I first remove the plastic base, then trim the imperfections with a small file. After this, I glue them on a small strip of plasticard to handle them easily while painting them.
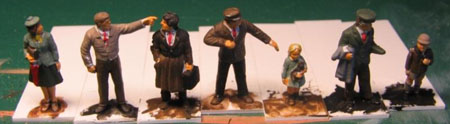
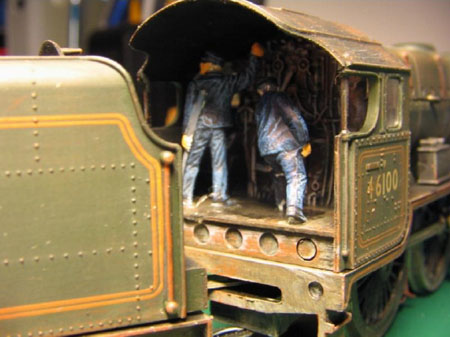
I first brush a liberal coat of « Foundation White » before painting them in order to detect any defect on the figure. Then I paint them with the darker tones first before drybrushing lighter ones afterwards in successive and lighter drybrushes till obtaining the wished result. For the Steam engine team, very visible in the cab, I decided to push the detailing level higher with more highlighting drybrushed to make them more realistic and more “like moving”.
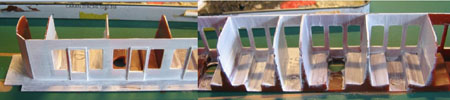
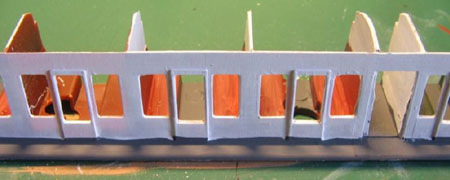
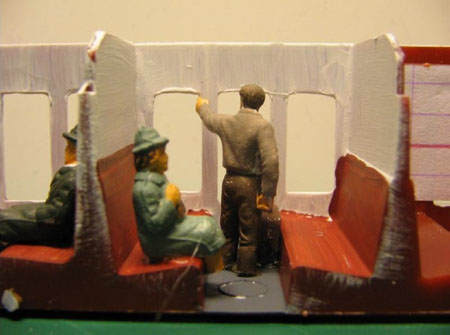
The interiors of the coaches are first painted with « Foundation White » as a Primer. The interior walls being white, I had not to work anymore on them…
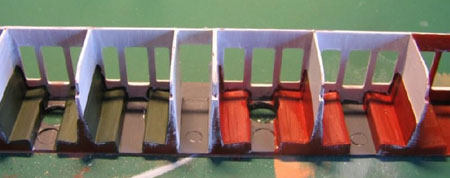
I then painted the seats in red or in green (depending if it was first or second class). The correct red color for the first class seats is a mix of “Red” with a bit of “Burnt Umber” or “Chocolate Brown”, and the one for the second class seats is a mix of “Dark Green” with a bit of “Foundation White”). An easy way to make the difference between First and Second class compartments on the Marklin interiors is that the space between the seats is larger in the first class compartments than in the second class ones.
Next step : Brushing a mix of four parts of « German Grey » for one of « Foundation White » on the floors.
Now, we can place the figures, but first we’ll need to cut away the feet as they will be too tall for the interiors to be realistic. We also put some blinds on the windows of the compartments that are not detailed or will house the wires for the interior lightning (to be installed later from a Dutch DIGIRAILS coach lightning strip).
The Locomotive driving team is also glued inside the cab of the « Royal Scot » steamer. Before gluing them in place with some Scotch universal glue (the green tubes) we test-fit them in the cab to find the most appropriate disposition before gluing them definitely there.
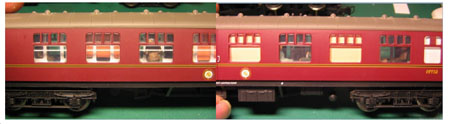
And after looking at the coaches with the interior put back inside them (relatively easy to do on the Marklin models), you can see this through the windows.
Now we can start the main weathering process. I prepare a mix of “Dirt” that I drybrush on the bogies and the chassis of the coaches.
I then dilute this mix (1 part paint for three to four parts of water) and brush this wash over the coaches bodies. I do not apply masking tape on the windows as I have my own cleaning method to use afterwards. The first wash is dried with a clean tissue in a light up to down movement on the flanks of the coach. The second and third are brush dried with the filbert brush. After applying those washes, I clean the windows this way : I brush some medical alcohol with a small round brush on the window glazing, and then scrape the paint with an old shortened flat or a cotton swab. The result will be cleaned window with a really light coat of dirt on it and dirt agglomerated near the edges.
I then prepare a wash of « Black (3 parts paint for one part water and a drop of alcohol). I apply this with a small round brush in the recessed lines and crannies to darken them.
I then can start weathering the roofs. I prepare first a mix of Black Glaze and Smoke (10/1) and I brush it on the roof. I then immediately wipe it with a sponge, leaving a light coat on the roof and darkening around the structure lines. The second and third coats are wiped dry with a large flat brush in transversal movements, perpendicular to the sides of the coach, starting from one end to the other end of the roof. I finish with a wash of the mix, highly diluted, and directly wiped dry with a clean tissue. When dry, I then brush some lightly diluted “Black” on the centre of the roof and then blur it to represent the soot deposits from the locomotive’s exhaust.
We’ll now start with the rust. I prepare first a mix of “Old Rust” (2 parts of Cavalry brown, one of Burnt Umber and a bit of my black wash to darken it). I drybrush this mix on the bogies, the chassis and the roofs.
Then I prepare a mix of « Fresh Rust » lightly diluted (3 parts of cavalry brown for one of water) and brush it near the roof vents and then blur it with the sponge to simulate rust. I do not forget to drybrush a bit of this mix on the chassis and bogies to represent some fresh rust there.
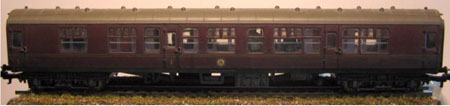
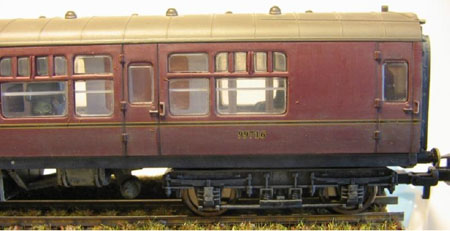
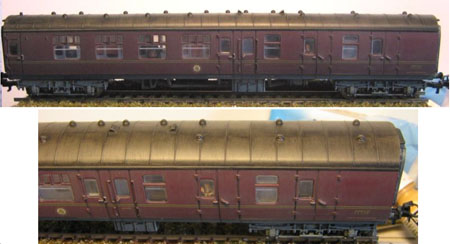
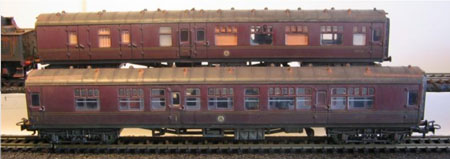
And here is the final result of this work : the 2-3-0 « Royal Scot » BR steam locomotive from Airfix with the two Marklin Ex-LMS coaches. The pictures clearly speak for themselves and are a true and real plea in favour of the Weathering of Scale Model Trains !