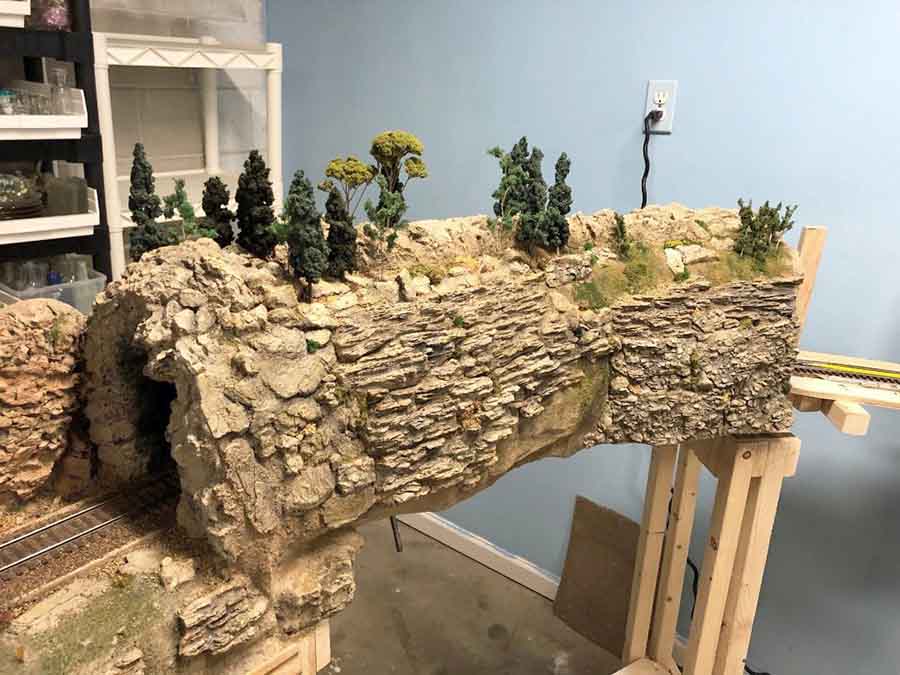
Here are some interim picture updates just to show you the progress but I’ve still got a couple of days left. Hope you like the looks of it. I’m planning my next projects already and it will be HO scale and entirely layers of 2″ foam to achieve an extremely light weight layout with several levels of track and tunnels and bridges.
I’m also going to start my own personal project that will be an HO scale and have a double track 48″ helix at each end and the lower level will stage an additional 6-8 complete trains.
Regards,
Barry”
Seeing Barry’ layout spring to life makes me realize how much I have to learn!
Anyhow, if you’re like me, there’s always here for more step by steps.
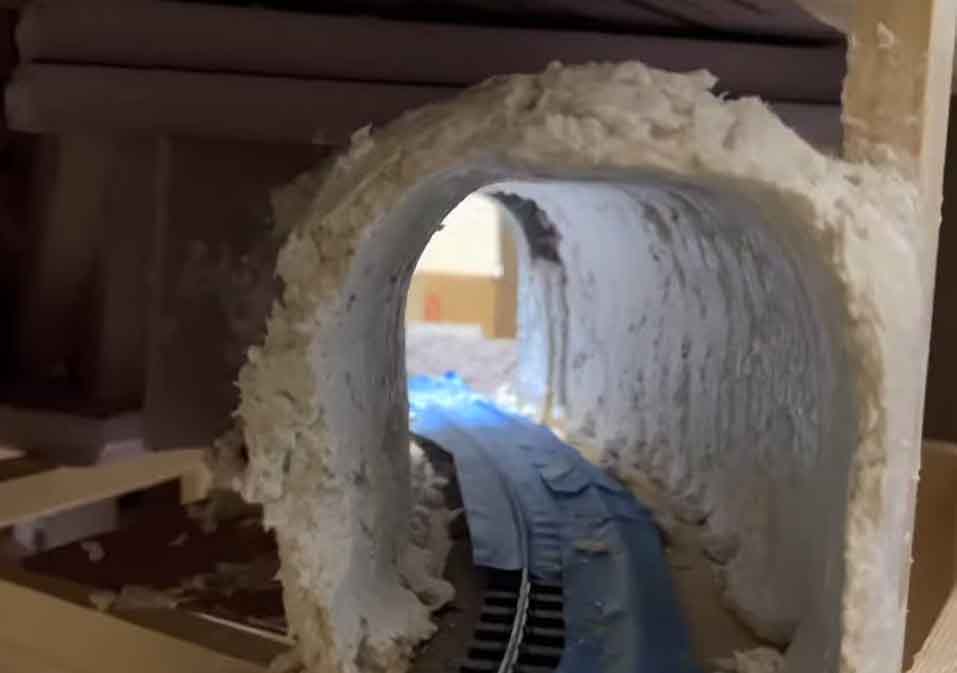
The very talented Martin has sent in this superb ‘how to’ on making a train tunnel out of styrofoam:
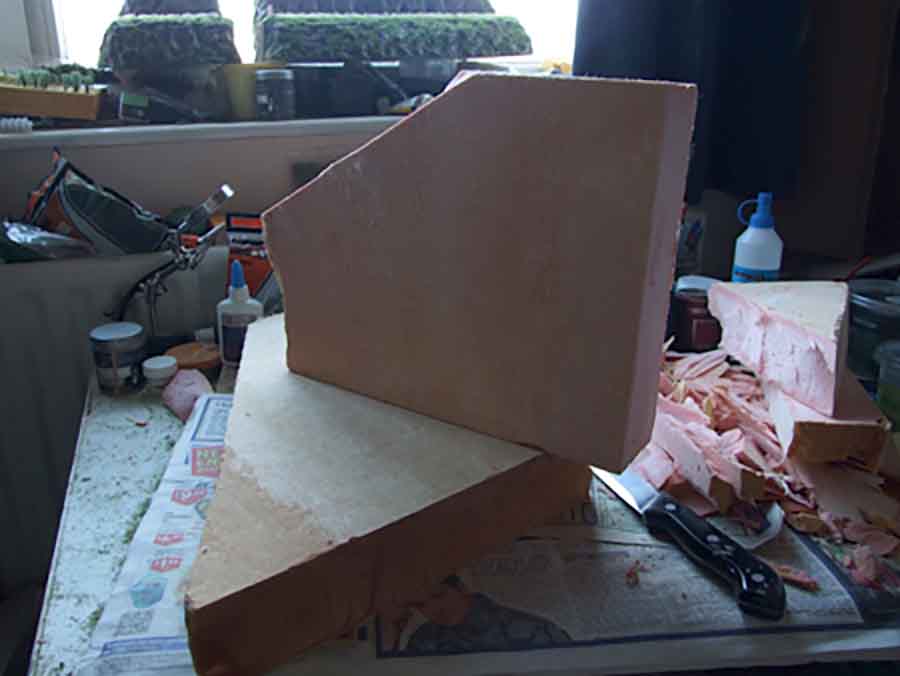
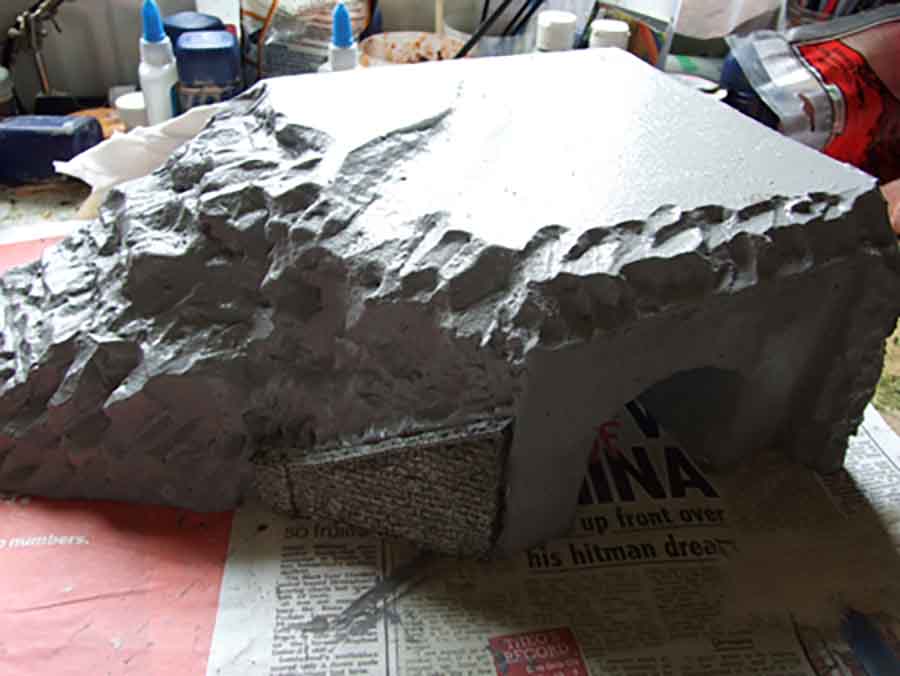
“Here’s ‘My way’ of making scenic items to place on model railroad tunnels. I produce many different models usually which have some form or rock face, but not all are landscaped the same although I do tend to put plenty of grasses & many bushes on my models.
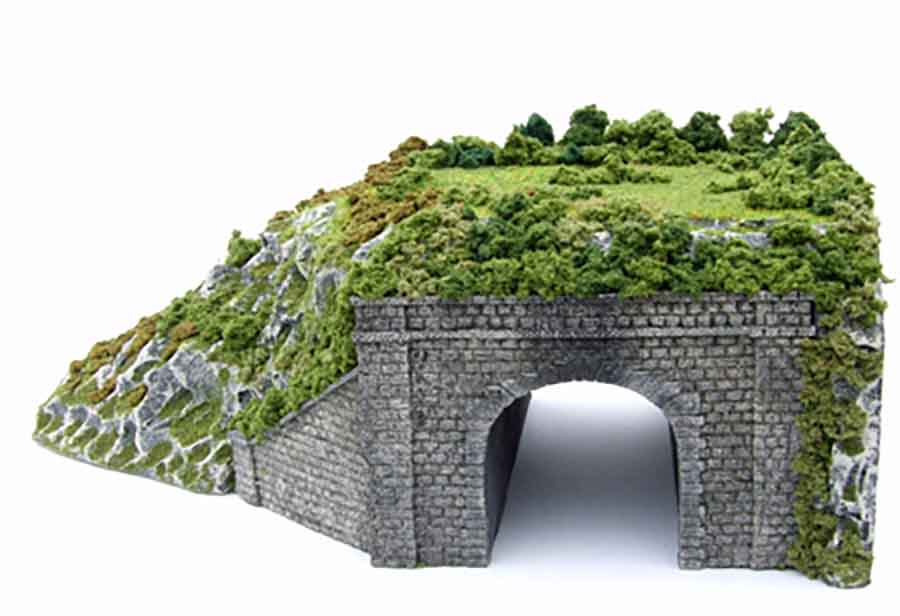
This project is a single track tunnel entrance designed to fit in the corner of a layout with the track running behind the back scène to a ‘fiddle yard’.
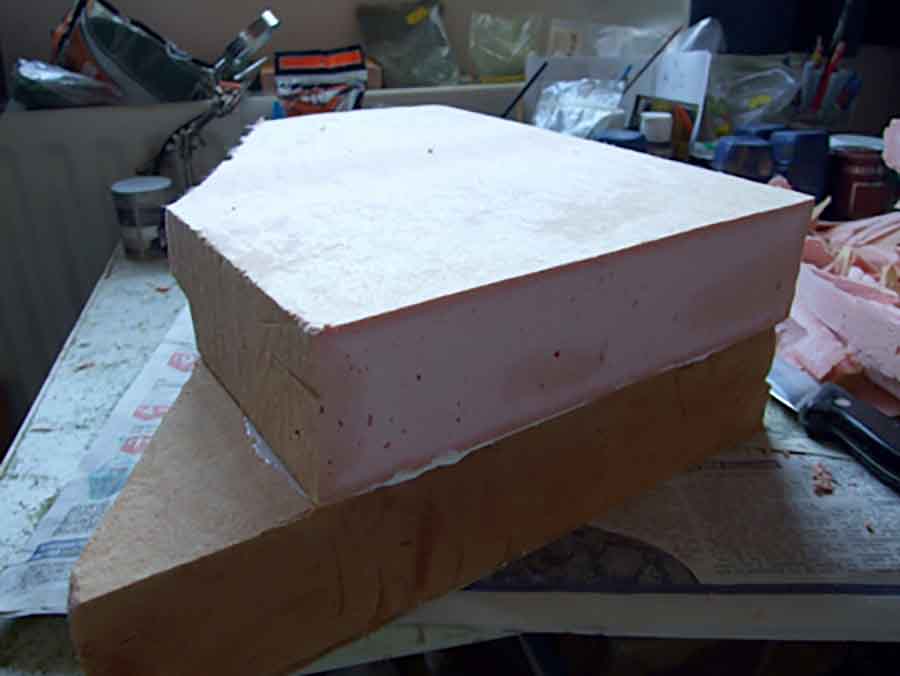
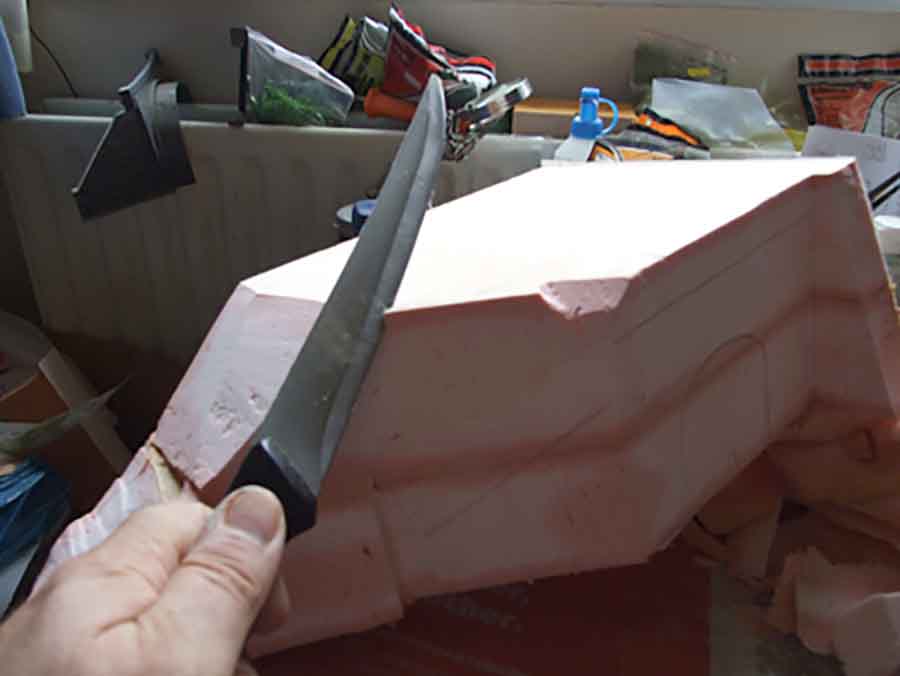
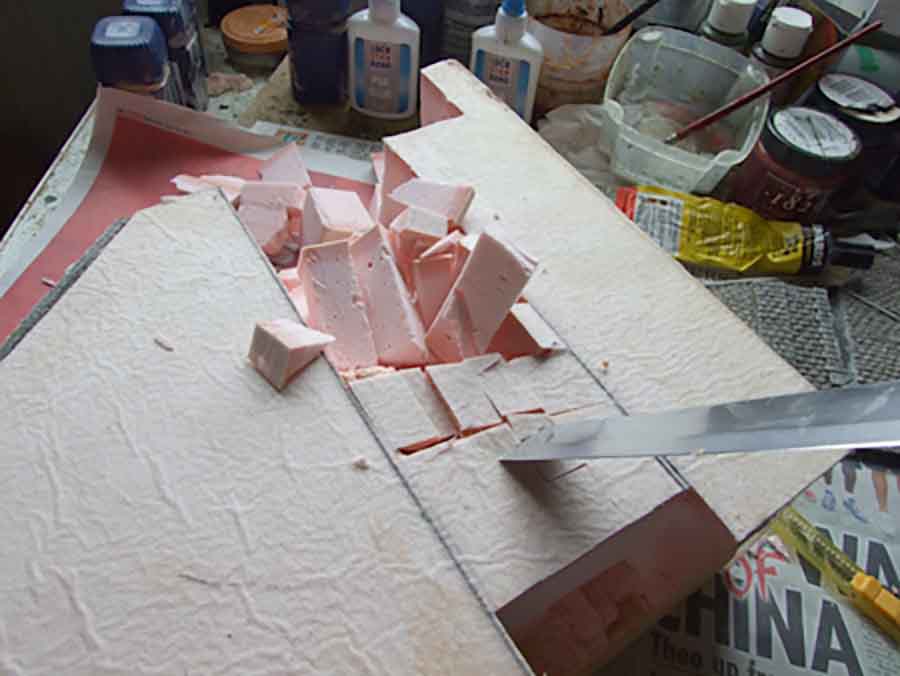
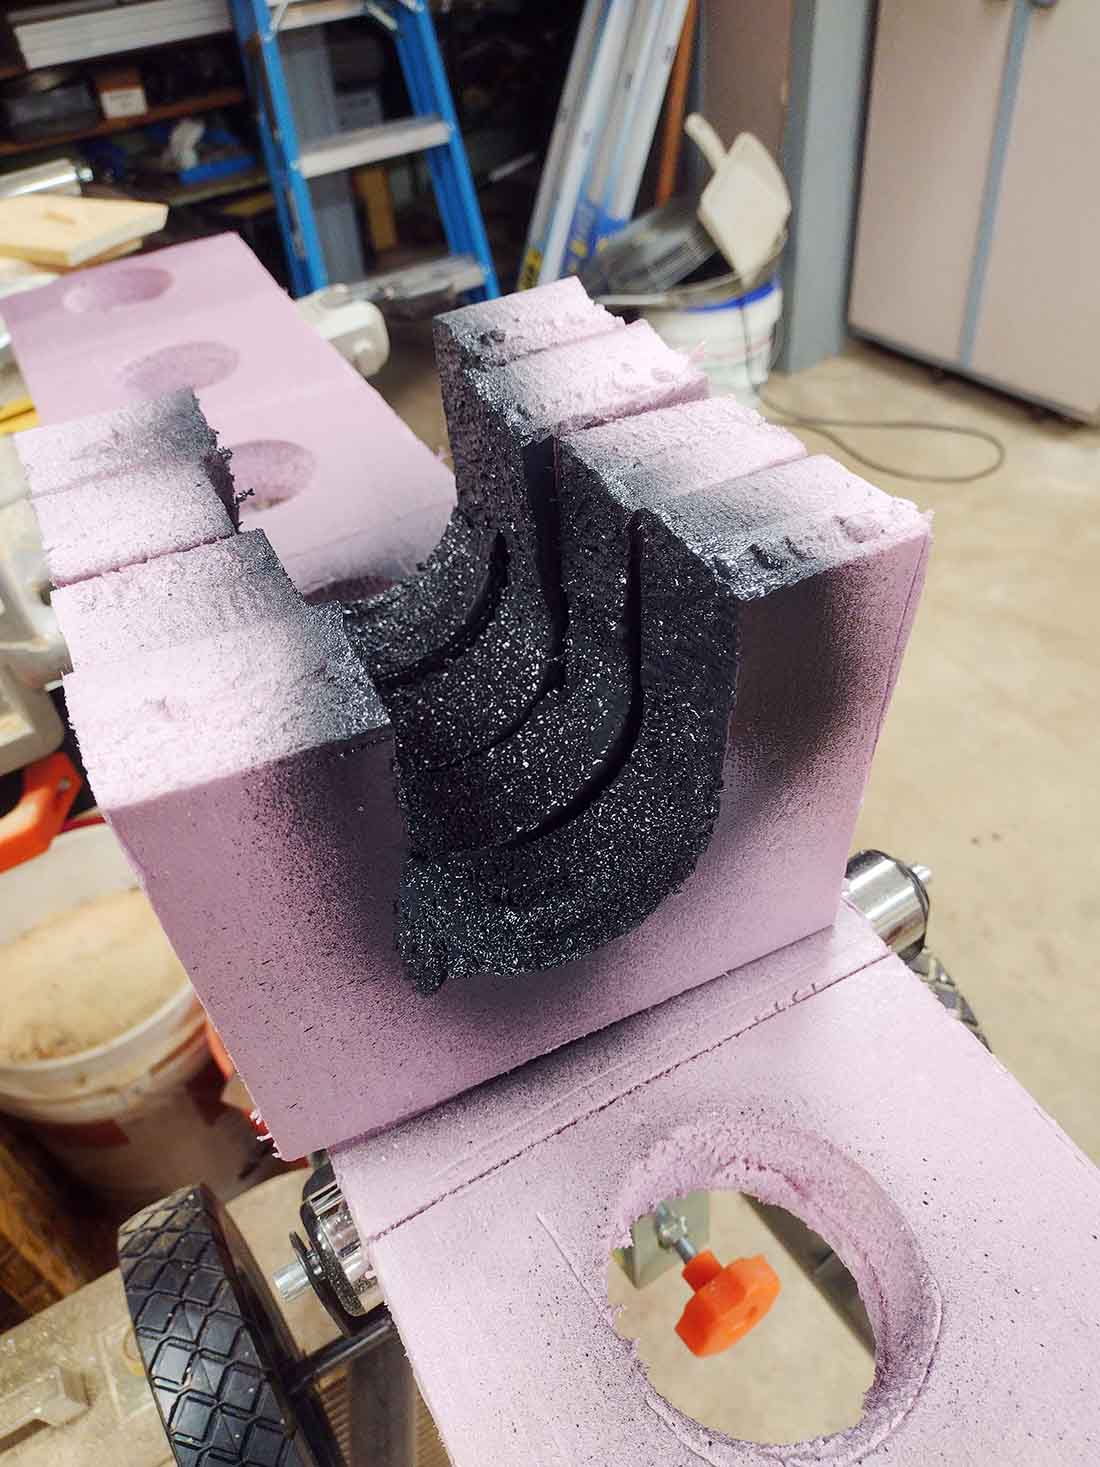
First I use a type of insulation foam which is used to insulate houses, the off cut’s are ideal to make models. (Please excuse my untidy workspace).
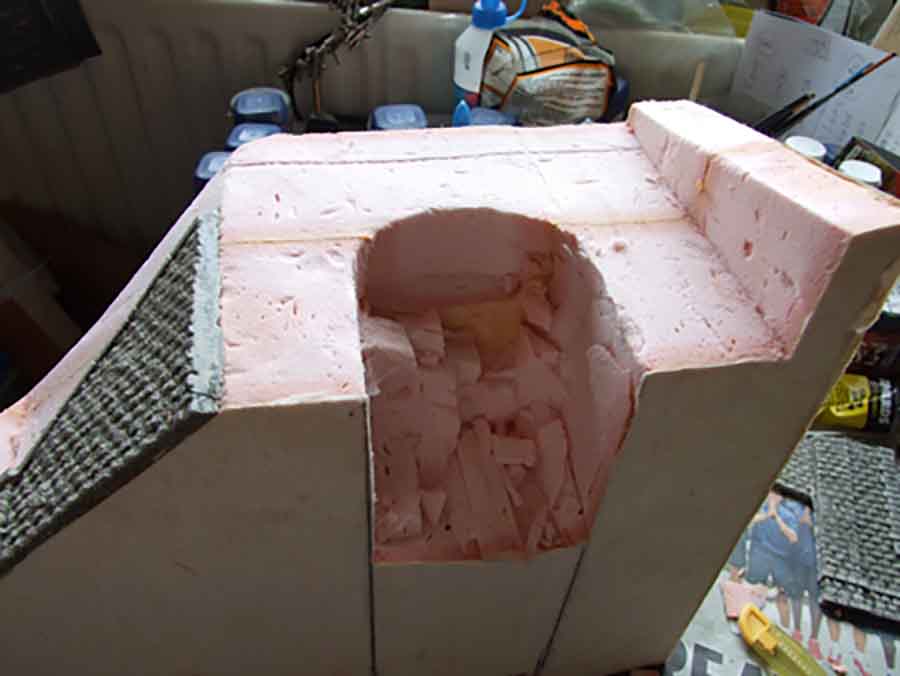
On many occasions I do not use a portal for the train tunnel, but carve my own into the foam, this model I decided to paint a resin postal to use.
The roof of the tunnel was shaped by using a desert spoon.
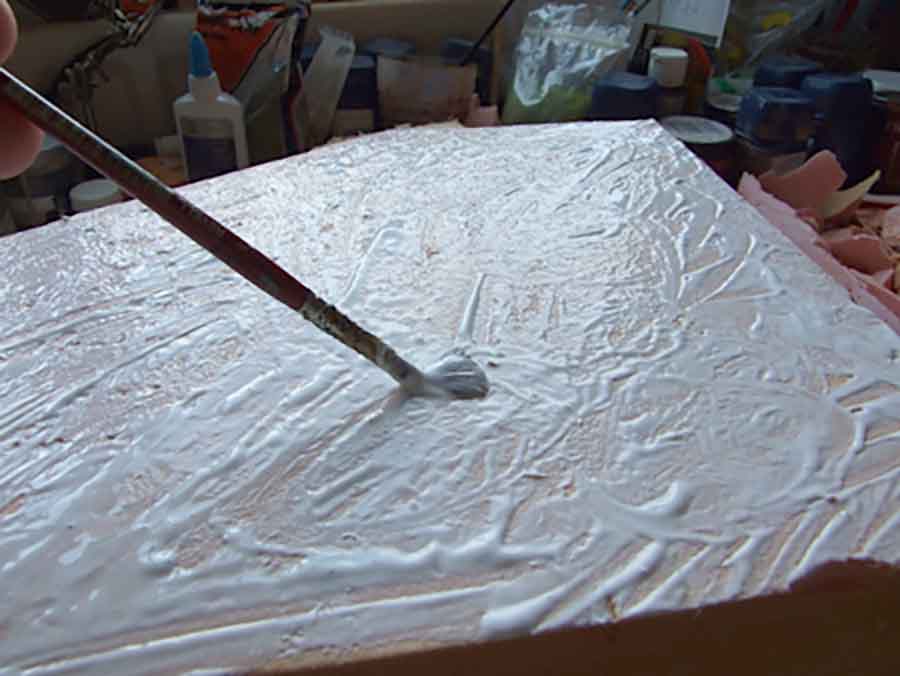
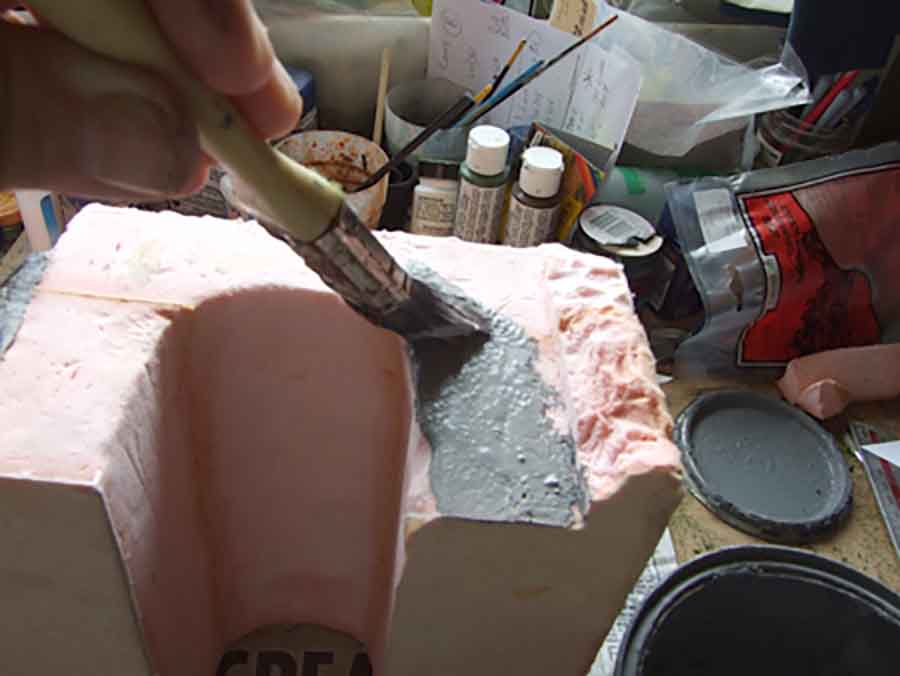
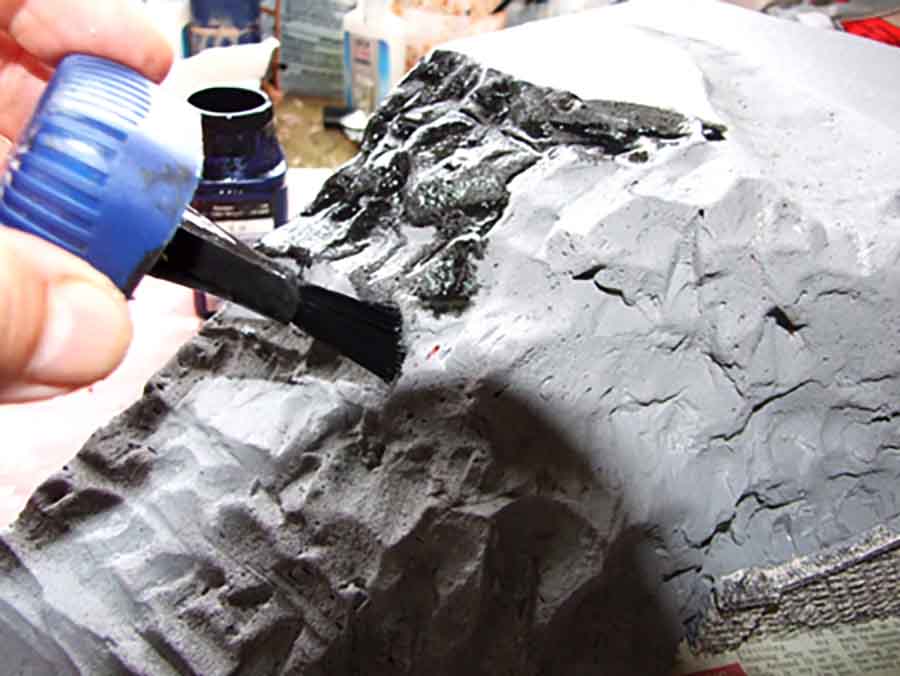
Once dry, I paint the rocks with a very watery black into the cracks.
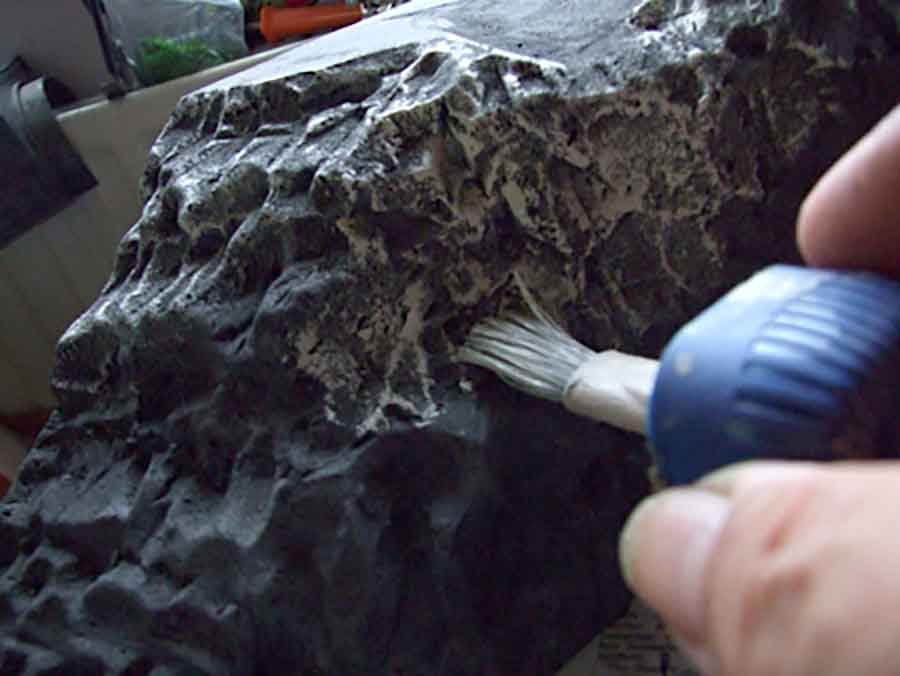
Then I use a light emulsion on an almost dry brush to bring out the highlights
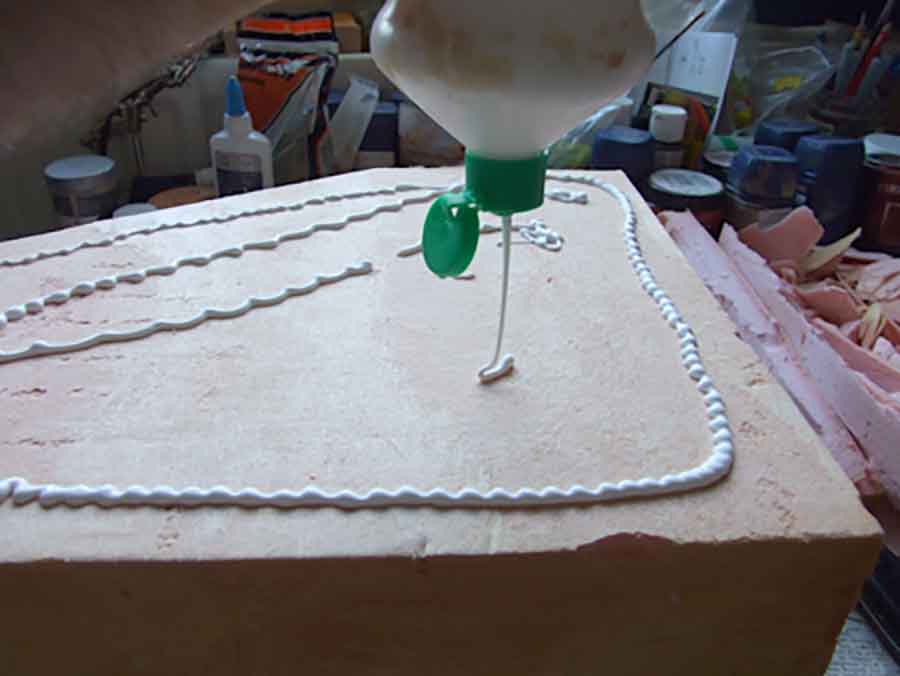
The tunnel portal can be then glued onto the foam by using a strong contact adhesive bought from the Poundland shop in the town centre. The model is now ready to
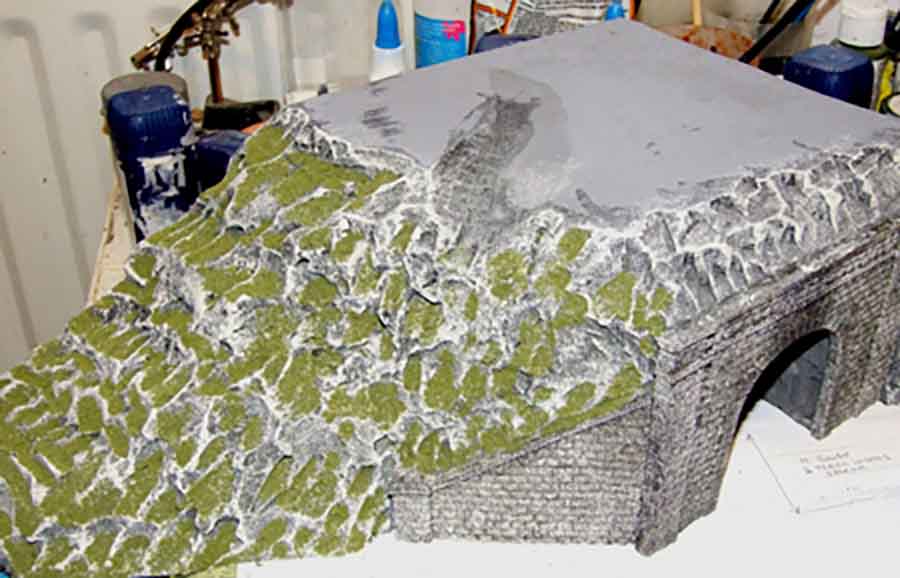
Start applying the landscaping. This is a matter of taste and I vary my models by the use of a variety of types of grasses & bushes. Most of my materials are Woodland Scenics,
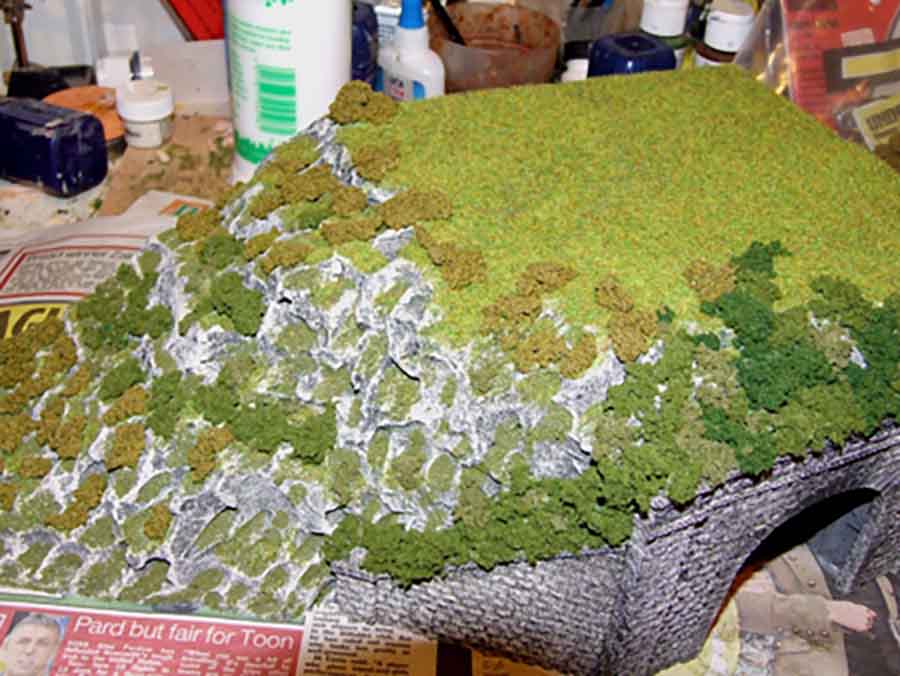
Although I do sometimes use other makes. On this model I have chosen to first apply an olive coloured grass onto the rock embankment.
Then I applied a summer ‘Static grass’ by the use of an electric applicator
With short static grass, the static effect of making the grass stand up is not very effective. But when I use 4.5mm & 6mm grass the effect is very lifelike.
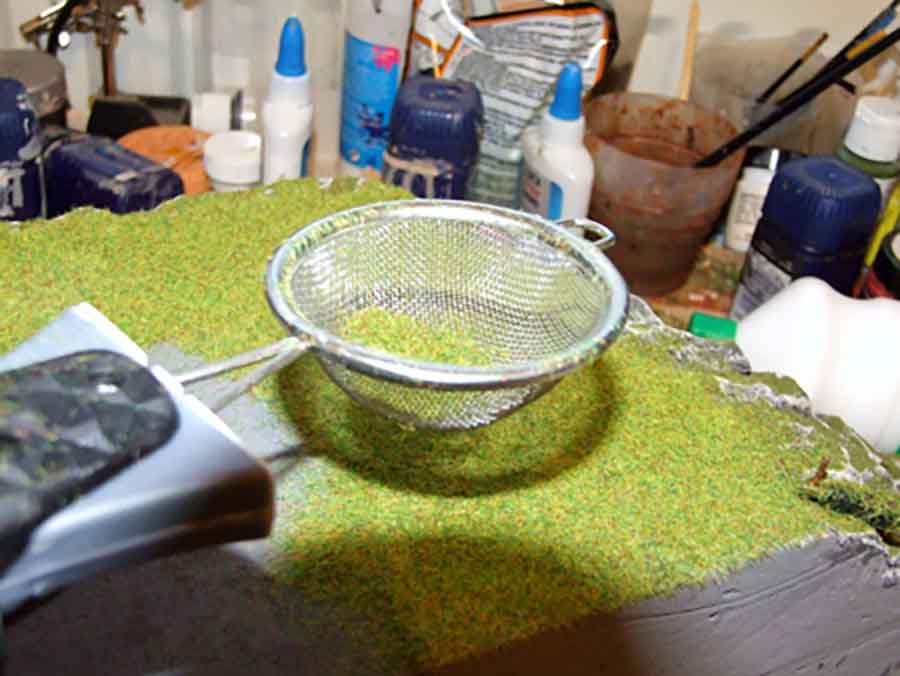
The next job is to apply a variety of bushes onto the model, again by PVA glue
All that is left to do then is to give the model a spray of watered down PVA glue (always remember to run some clear water through the spray when you have finished as it can set in the nozzle & ruin the spray for future use). I then sprinkled some Woodland scenics coarse turf onto the summer static grass and a little on the rocks.
I usually add a row of various bushes along the back edge of the model.
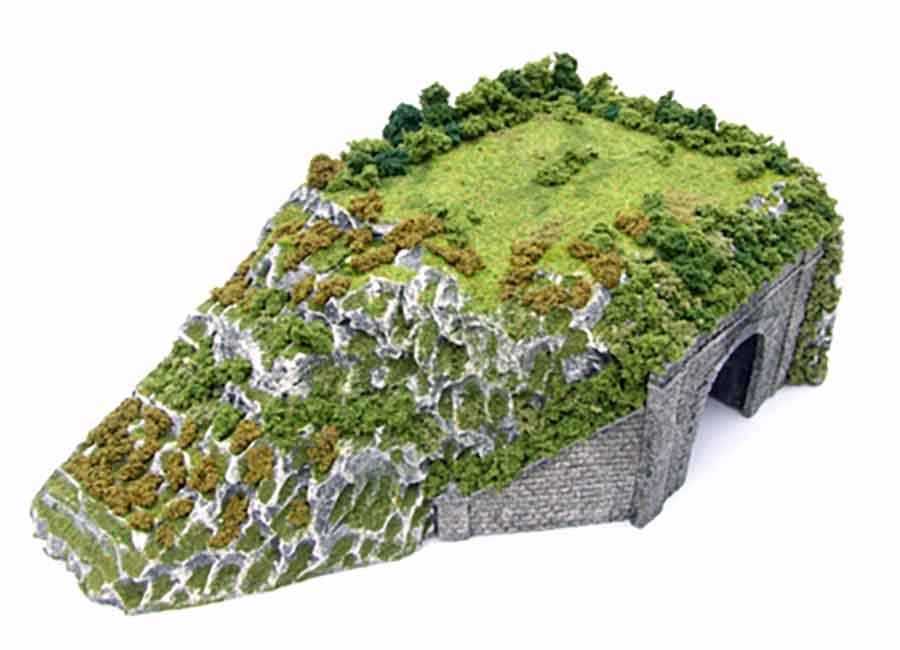
That is how I make a train tunnel out of styrofoam, I hope that it gives you some ideas? Whilst this is drying – Here’s one I made earlier where I carved the portal myself.
Martin – I think it’s a suberb model railroad tunnel ‘how to’. Thank you from all of us.
And for those of us not as talented as Martin, don’t forget the Beginner’s Guide where there is lots more stuff like this.
If you’re new to the blog, there are hundreds and hundreds of posts that will help you – but you really do need to jump on the newsletter to see them all.
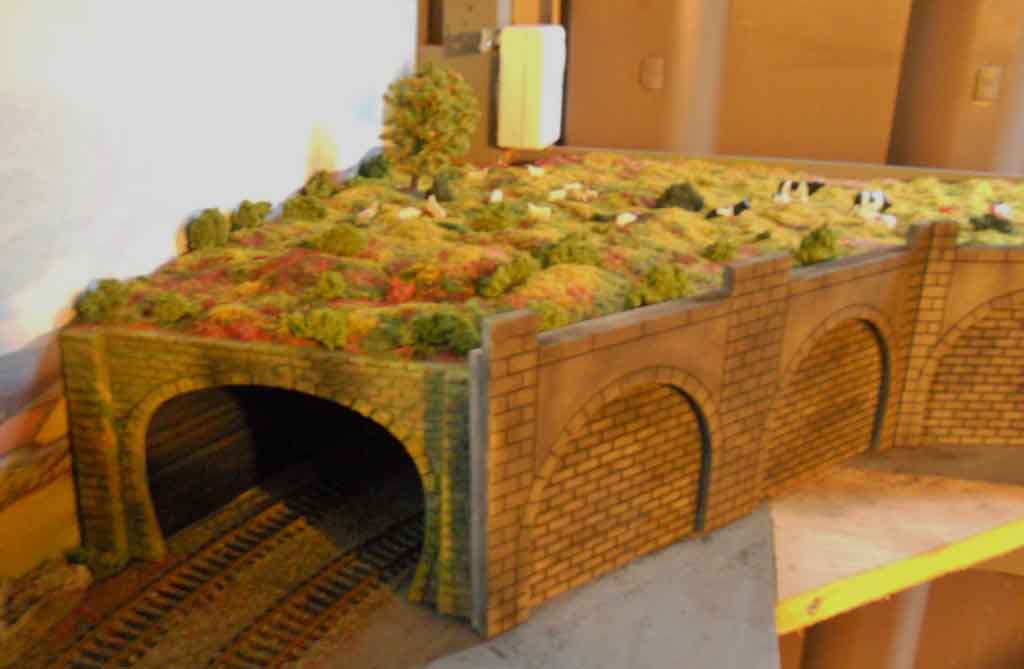
His tunnel is made from plaster rather than styrofoam, but the effect is the same, have a look at his pics:
Whatever method you use to make a tunnel for your layout, there is always something very important you should consider.
I see it come up time and time again on the blog – and knowing it can save you a lot of blood, sweat and tears.
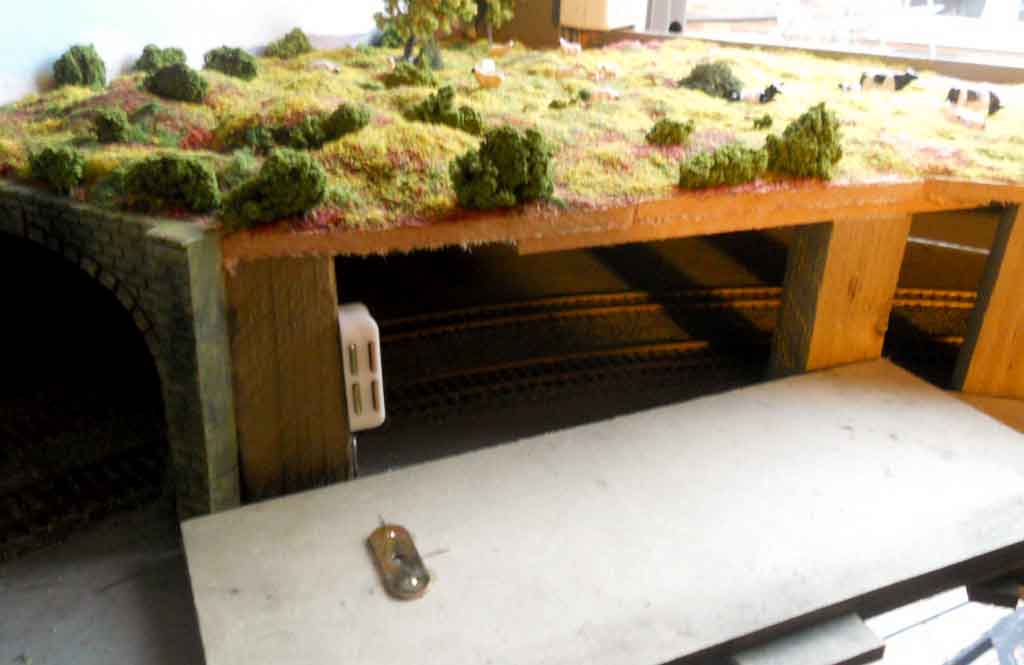
It’s this: always make sure you have access to the inside of your tunnel.
You will get derailments in there. You will need to clean the track in there. And somehow, stuff that shouldn’t be in there gets there.
Here’s Ron to elaborate:
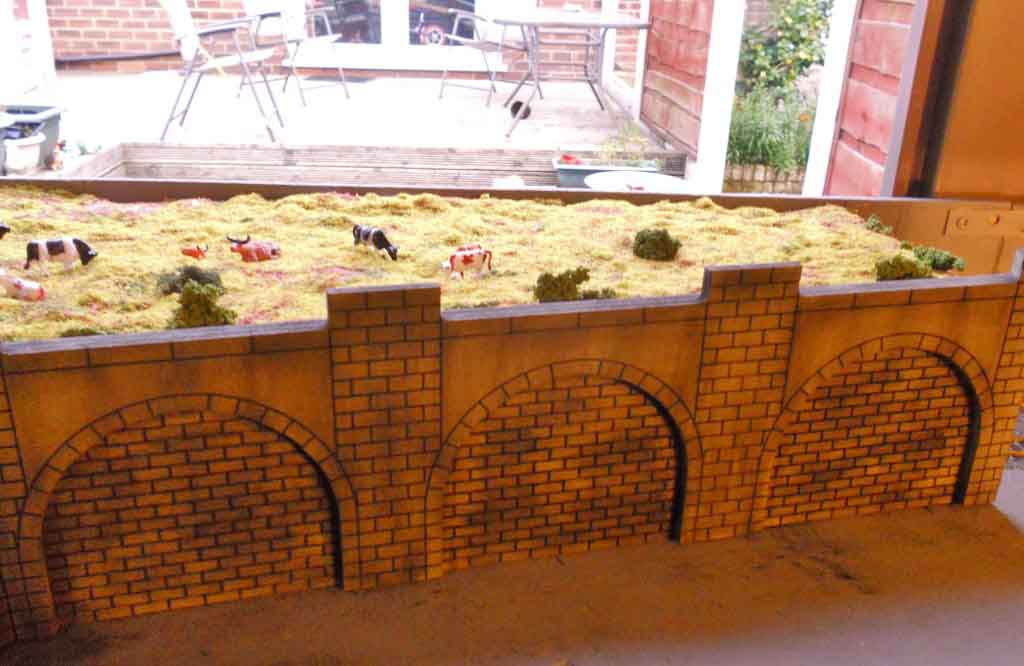
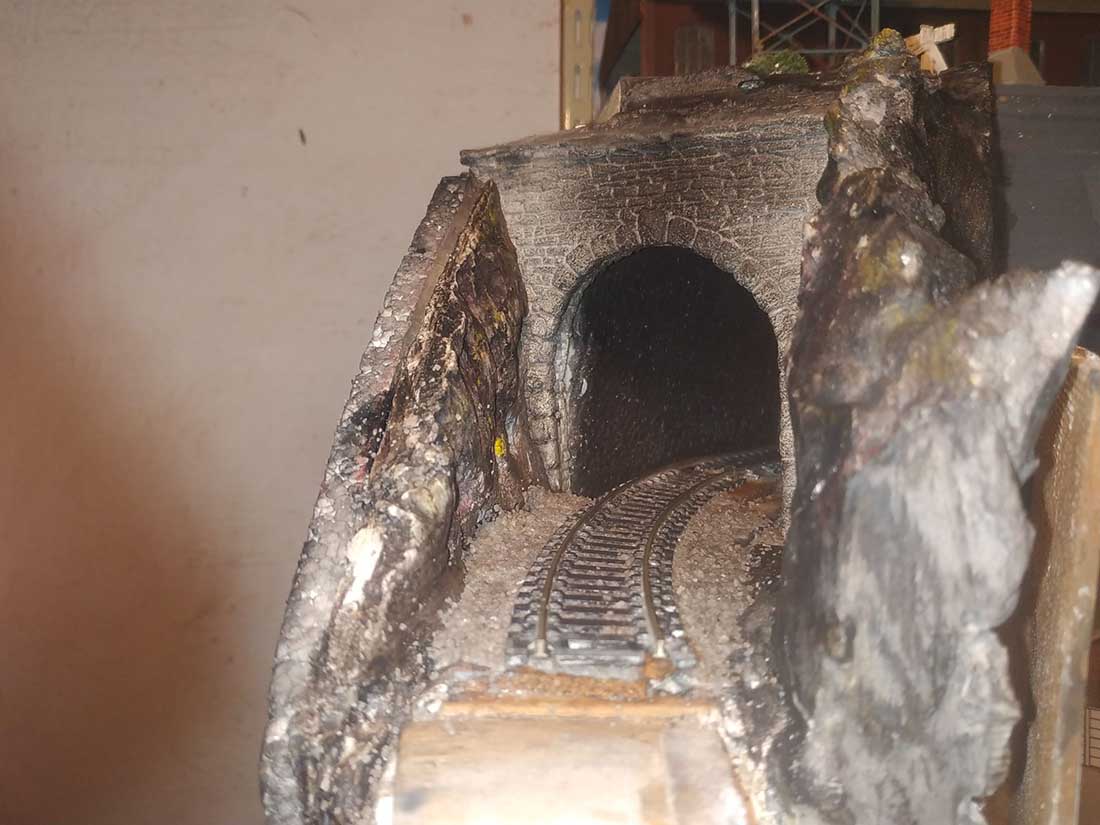
“Hi Al, just a couple of pics of the corner tunnel I made on my shed layout, I got the retaining walls on ebay.
I weathered them with my weathering powders in about an hour, really easy to do.
I wanted access to my track for cleaning and maintenance so I bought a couple of those magnetic latches you get for wardrobe doors etc, which works great.
I hope the tip is useful to somebody out there, by the way the whole train tunnel and scenery cost me about $20.00 using scrap timber and scatter etc from my bits box.
Thanks for all the brilliant tips and information from some really great modelers on here.
Cheers Al,
Regards Ron”
Of course, with a styrofoam tunnel, you may need to get your thinking cap on.
But however you make your train tunnel, access is really, really important – it doesn’t matter how good your landscaping and scenery is, if your layout doesn’t let you run your trains because of a troublesome tunnel, it will become a real thorn in your side.
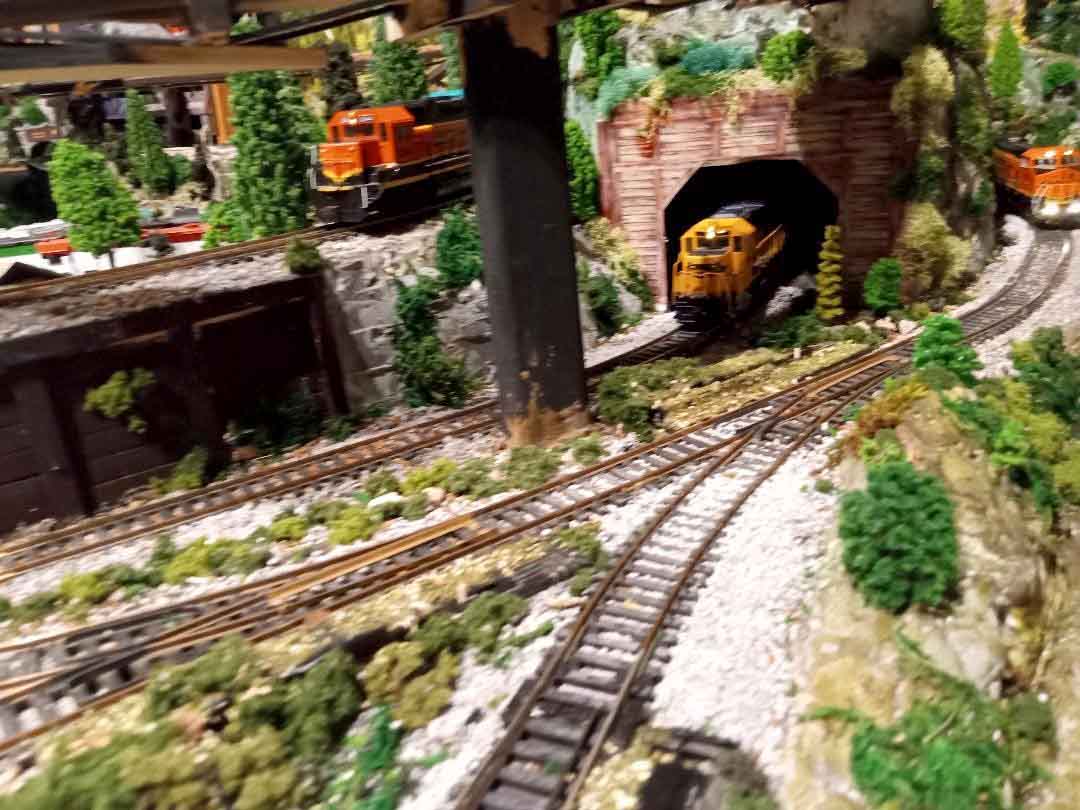
If you look at how Gary built his layout up with styrofoam, he made sure he could get inside his tunnels and he really enjoys running his trains. Here’s a pic: