The very talented Martin has sent in this superb ‘how to’ on making a train tunnel out of styrofoam:
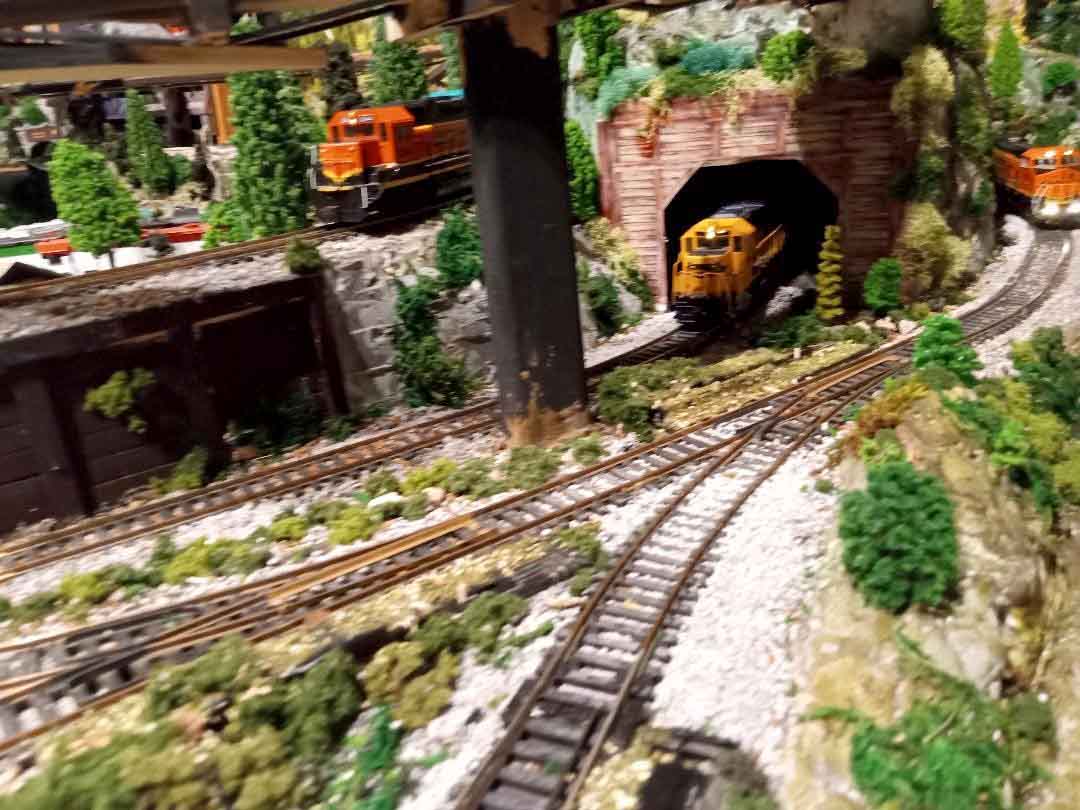
“Here’s ‘My way’ of making scenic items to place on model railroad tunnels. I produce many different models usually which have some form or rock face, but not all are landscaped the same although I do tend to put plenty of grasses & many bushes on my models.
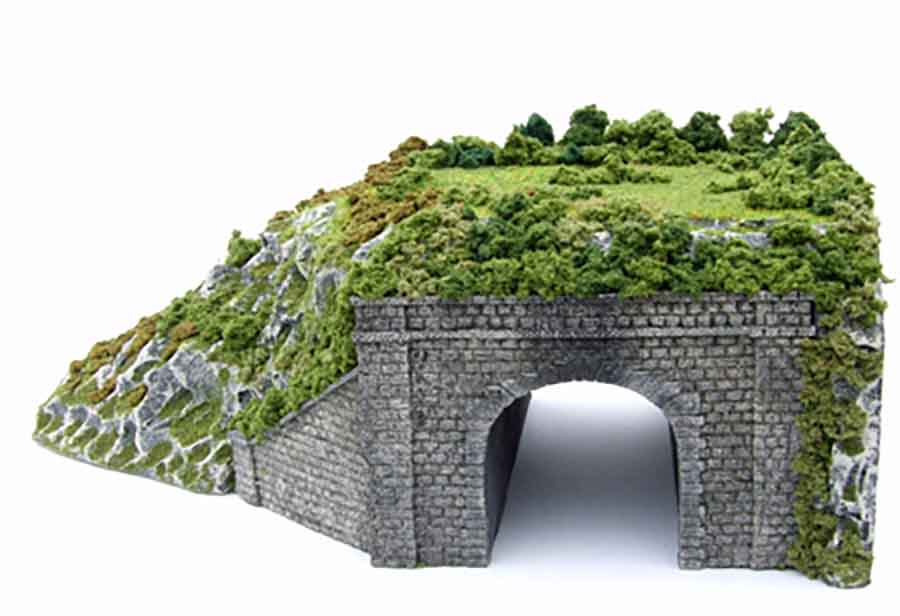
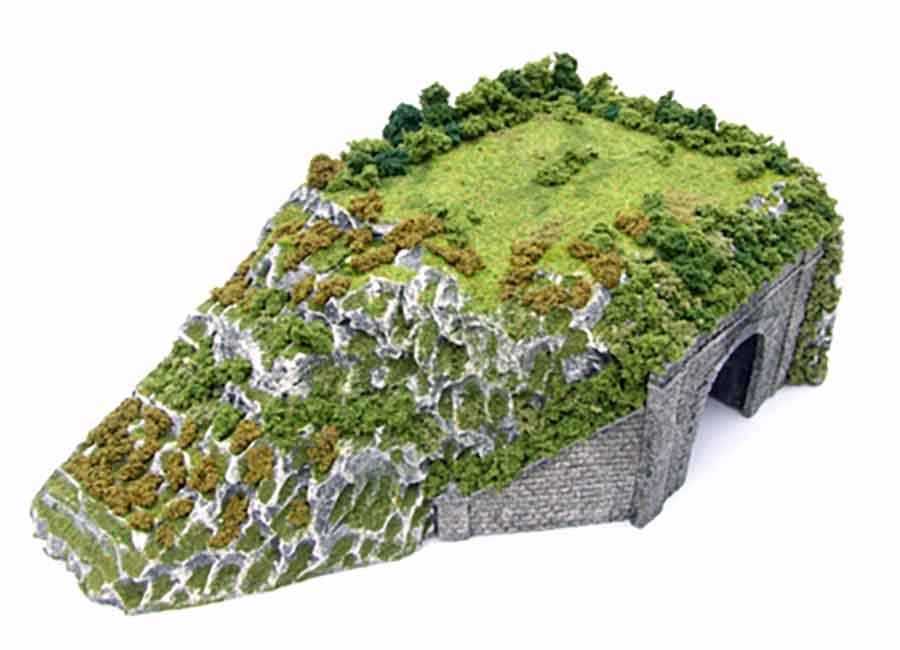
This project is a single track tunnel entrance designed to fit in the corner of a layout with the track running behind the back scène to a ‘fiddle yard’.
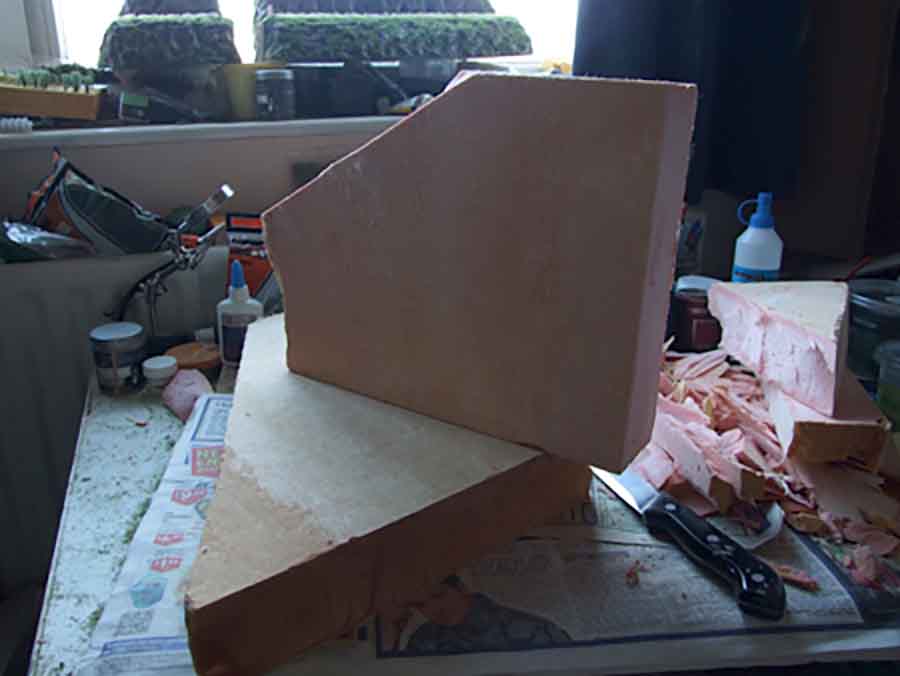
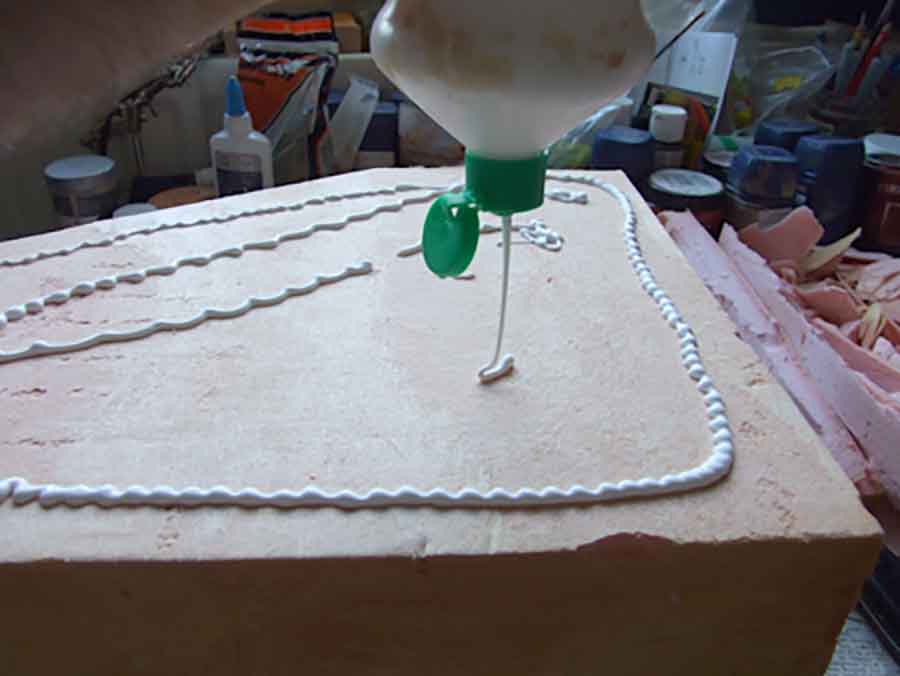
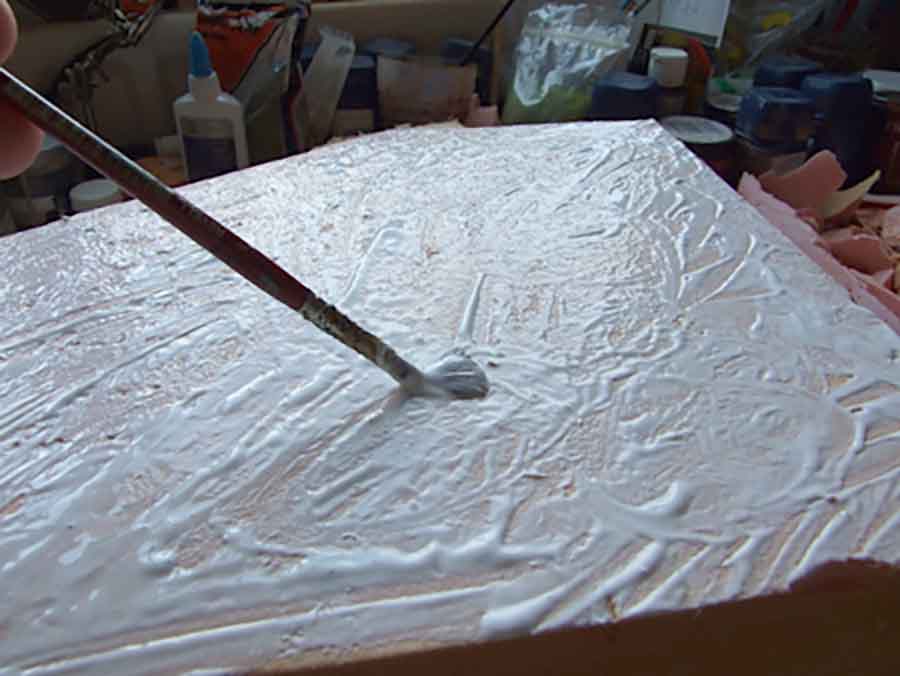
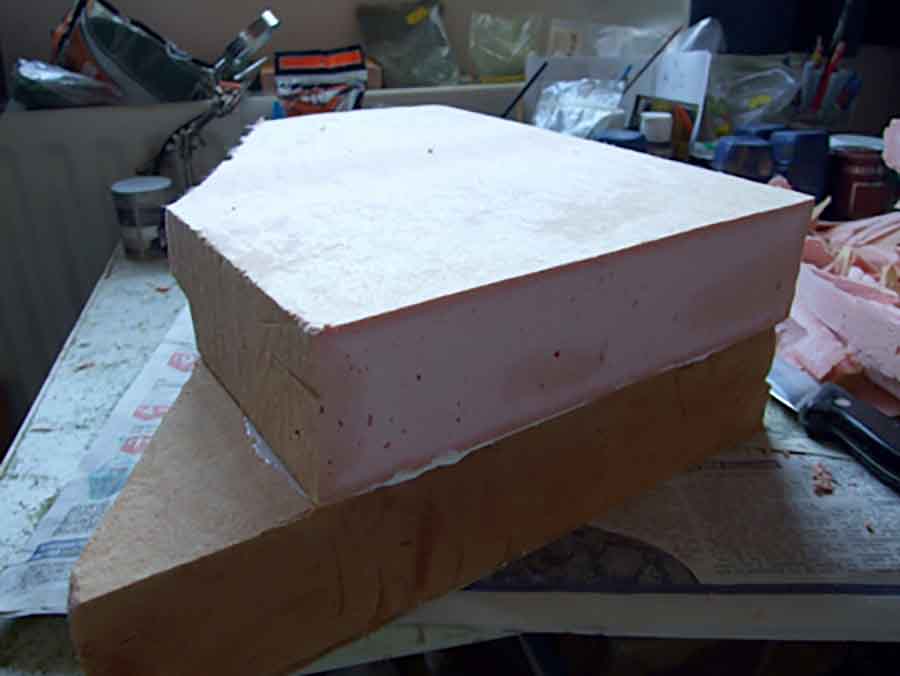
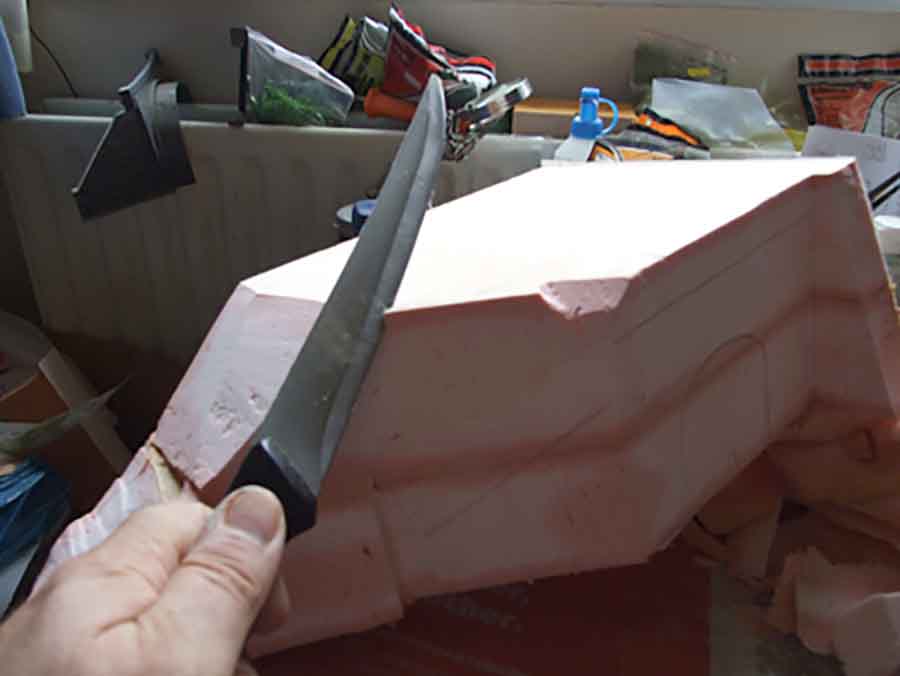
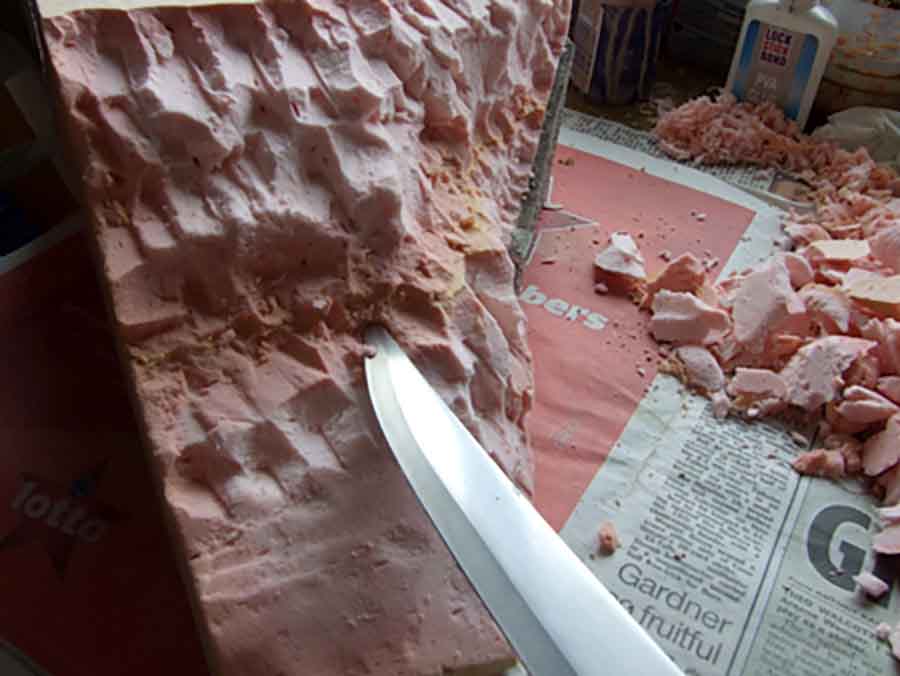
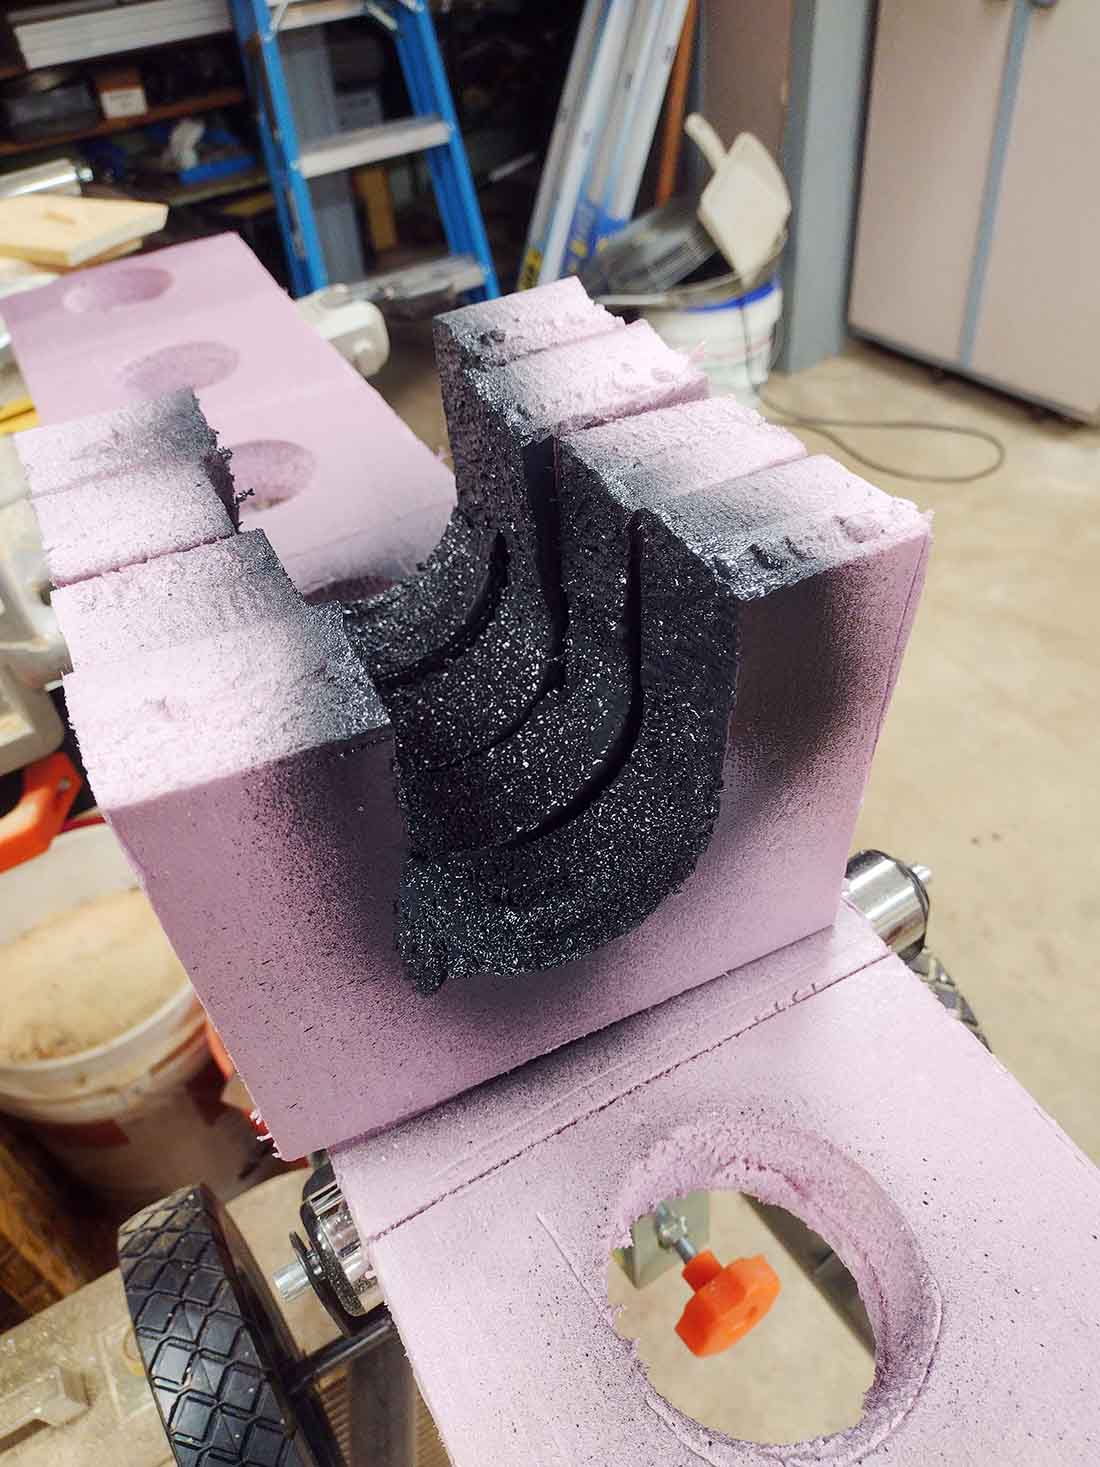
First I use a type of insulation foam which is used to insulate houses, the off cut’s are ideal to make models. (Please excuse my untidy workspace).
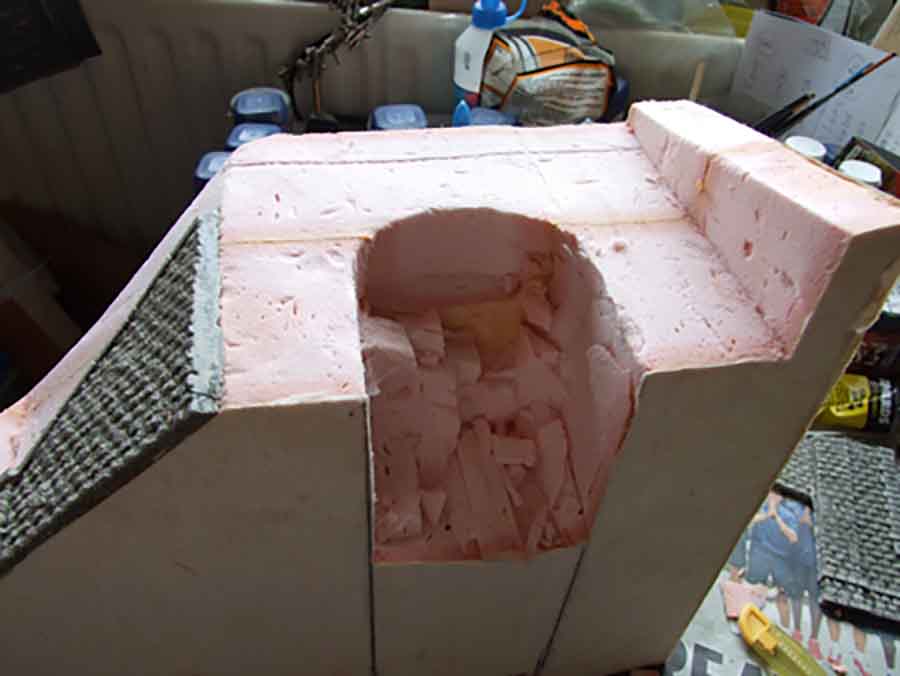
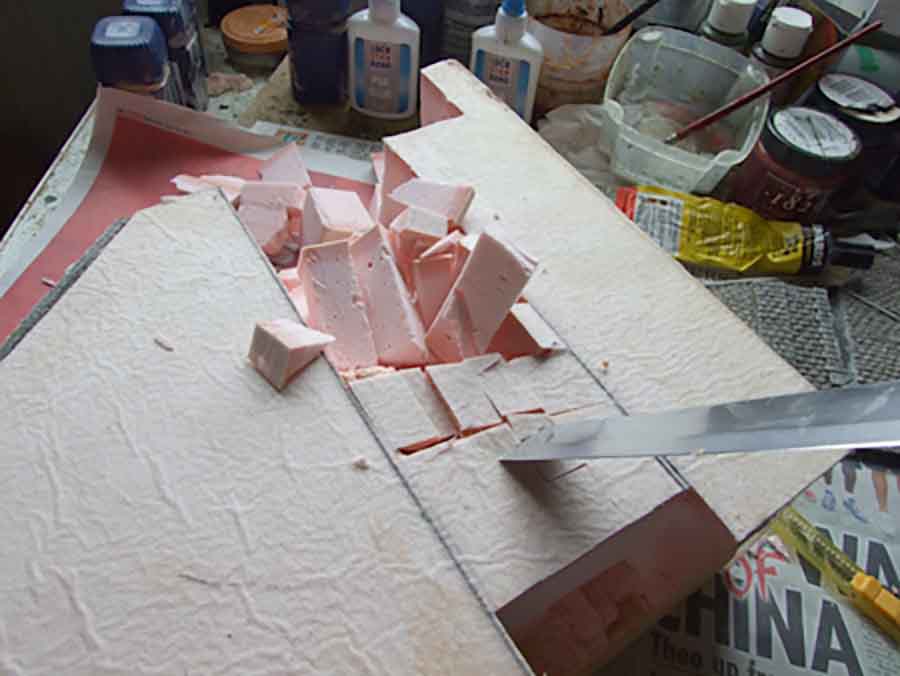
On many occasions I do not use a portal for the train tunnel, but carve my own into the foam, this model I decided to paint a resin postal to use.
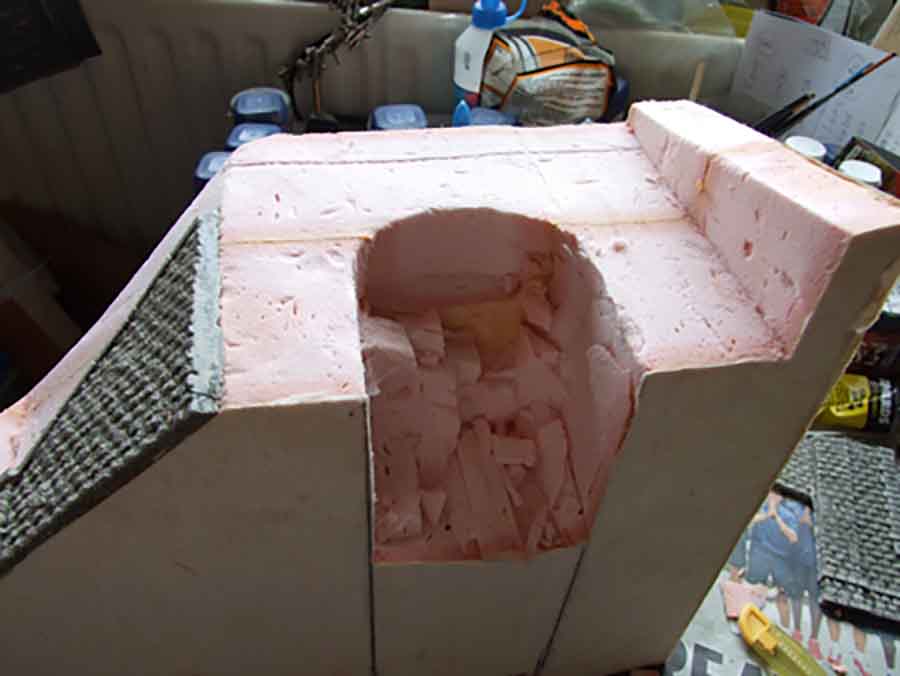
The roof of the tunnel was shaped by using a desert spoon.
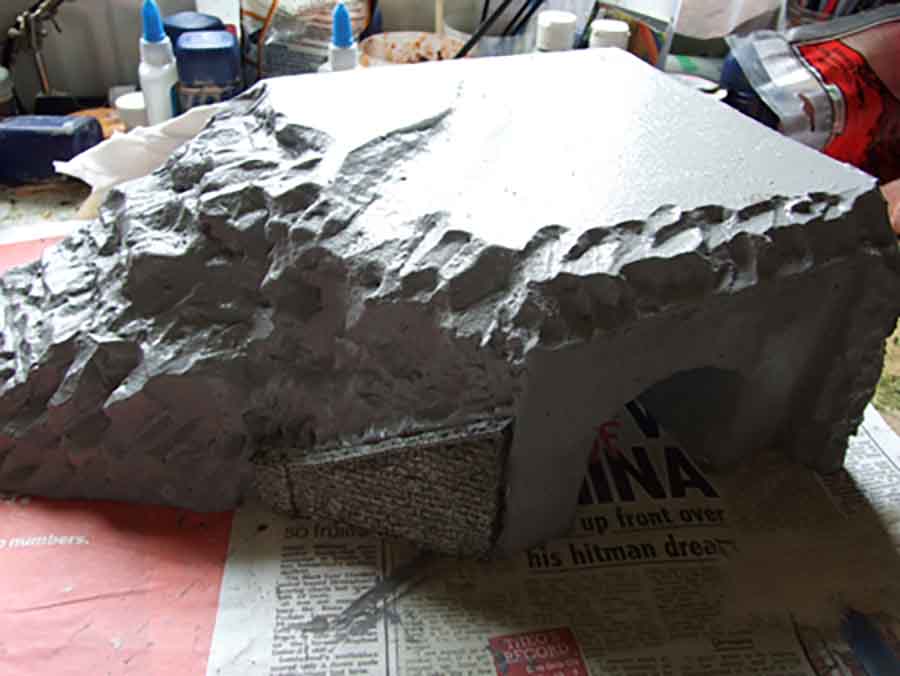
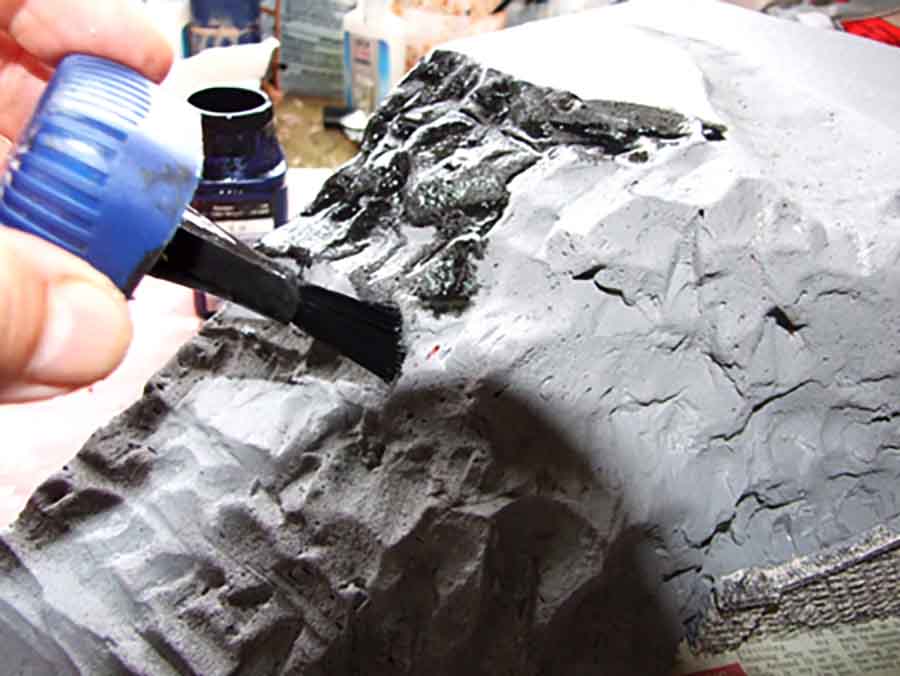
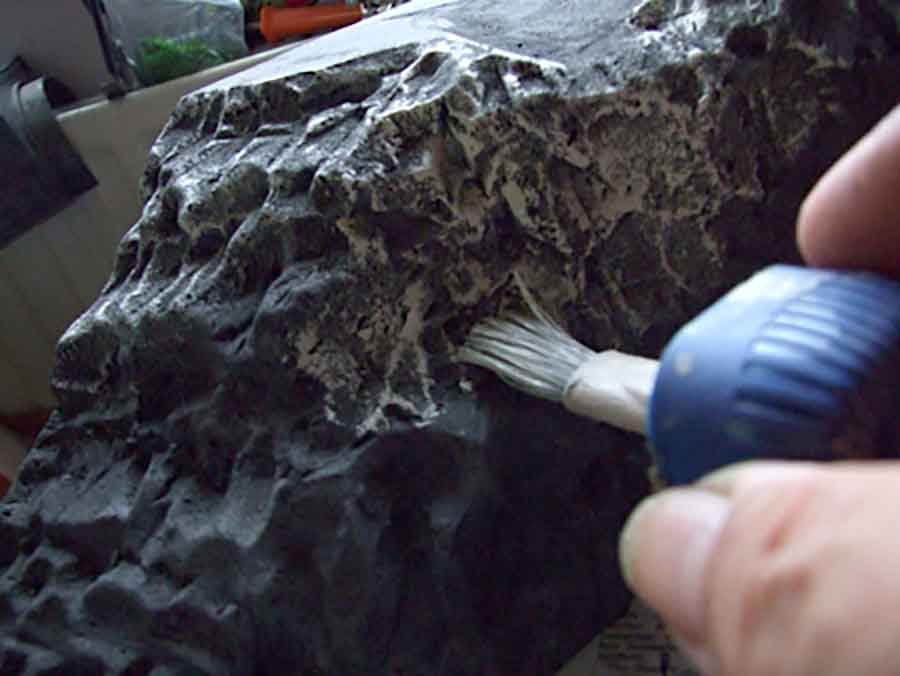
Once dry, I paint the rocks with a very watery black into the cracks.
Then I use a light emulsion on an almost dry brush to bring out the highlights
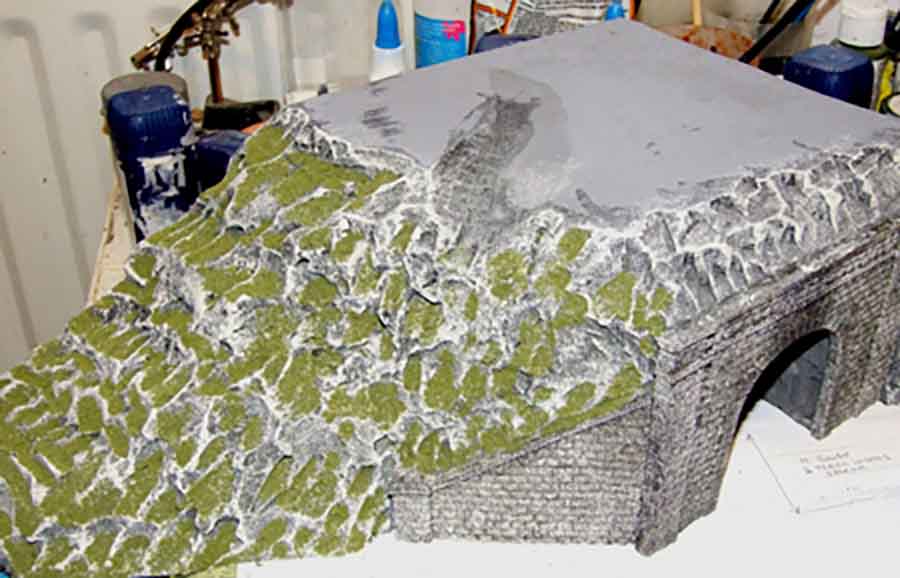
The tunnel portal can be then glued onto the foam by using a strong contact adhesive bought from the Poundland shop in the town centre. The model is now ready to
Start applying the landscaping. This is a matter of taste and I vary my models by the use of a variety of types of grasses & bushes. Most of my materials are Woodland Scenics,
Although I do sometimes use other makes. On this model I have chosen to first apply an olive coloured grass onto the rock embankment.
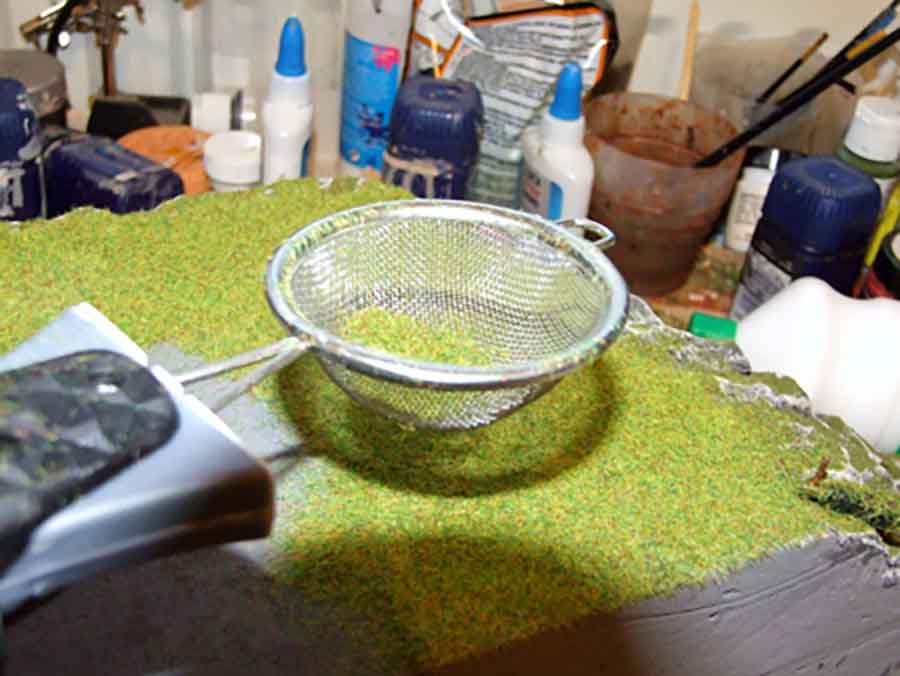
Then I applied a summer ‘Static grass’ by the use of an electric applicator
With short static grass, the static effect of making the grass stand up is not very effective. But when I use 4.5mm & 6mm grass the effect is very lifelike.
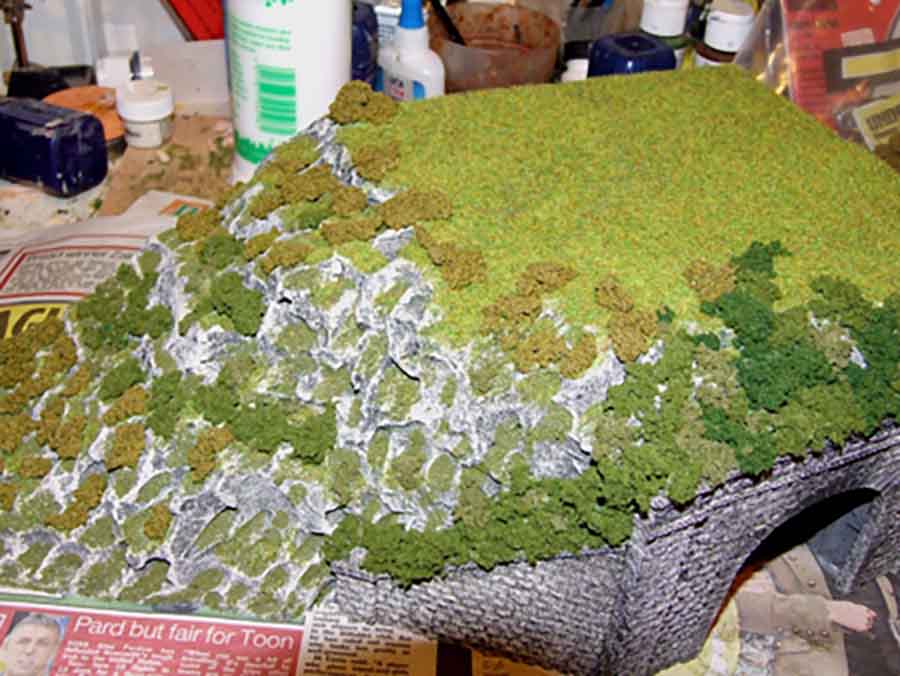
The next job is to apply a variety of bushes onto the model, again by PVA glue
All that is left to do then is to give the model a spray of watered down PVA glue (always remember to run some clear water through the spray when you have finished as it can set in the nozzle & ruin the spray for future use). I then sprinkled some Woodland scenics coarse turf onto the summer static grass and a little on the rocks.
I usually add a row of various bushes along the back edge of the model.
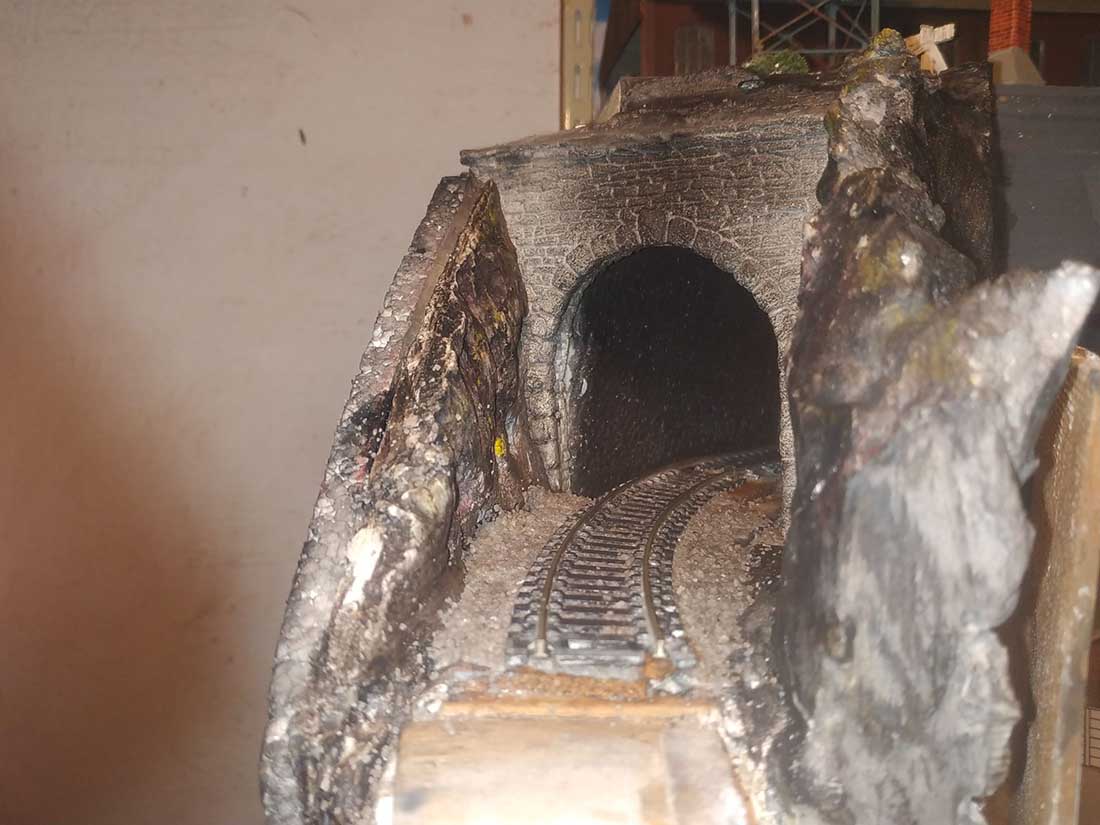
That is how I make a train tunnel out of styrofoam, I hope that it gives you some ideas? Whilst this is drying – Here’s one I made earlier where I carved the portal myself.
Martin – I think it’s a suberb model railroad tunnel ‘how to’. Thank you from all of us.
And for those of us not as talented as Martin, don’t forget the Beginner’s Guide where there is lots more stuff like this.
If you’re new to the blog, there are hundreds and hundreds of posts that will help you – but you really do need to jump on the newsletter to see them all.
Here’s a few that may help:
Rob adds a tunnel to his layout.
Both of these use tunnel downloads from the printable buildings.
Others, just freestyle all the way – like Peter. You can see how he made his model railroad tunnel here.
Mark also has a very simple and effective way of adding scenery to his tunnels.
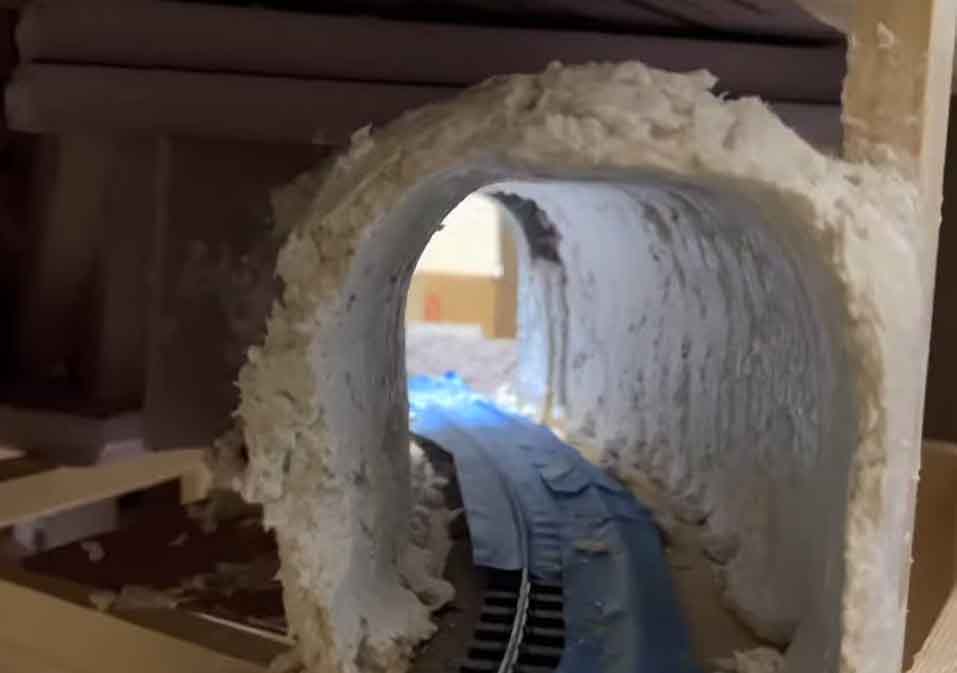
His tunnel is made from plaster rather than styrofoam, but the effect is the same, have a look at his pics:
Whatever method you use to make a tunnel for your layout, there is always something very important you should consider.
I see it come up time and time again on the blog – and knowing it can save you a lot of blood, sweat and tears.
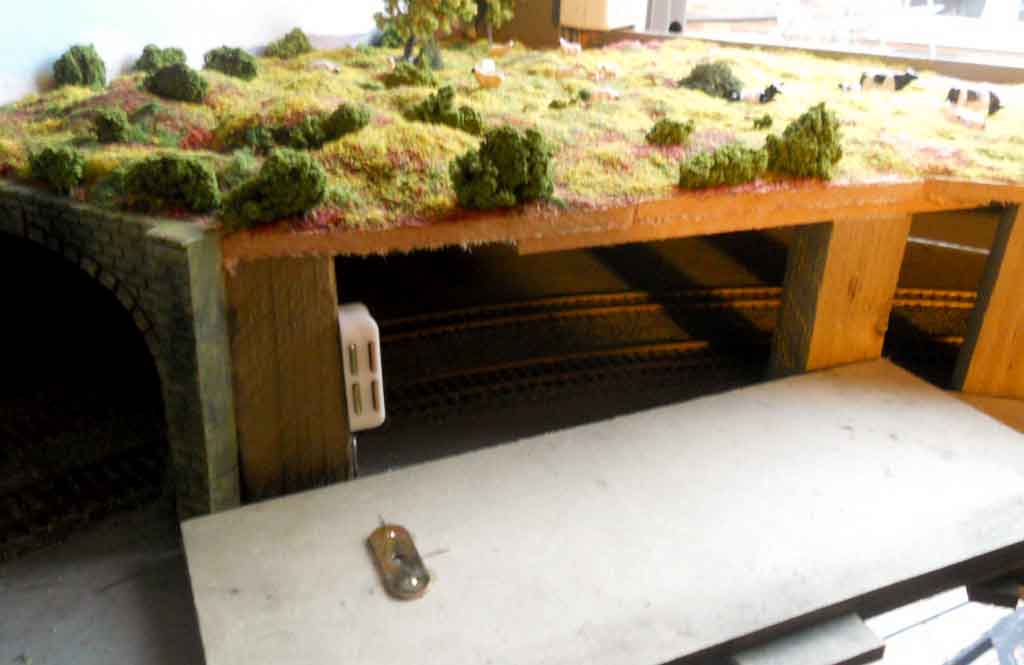
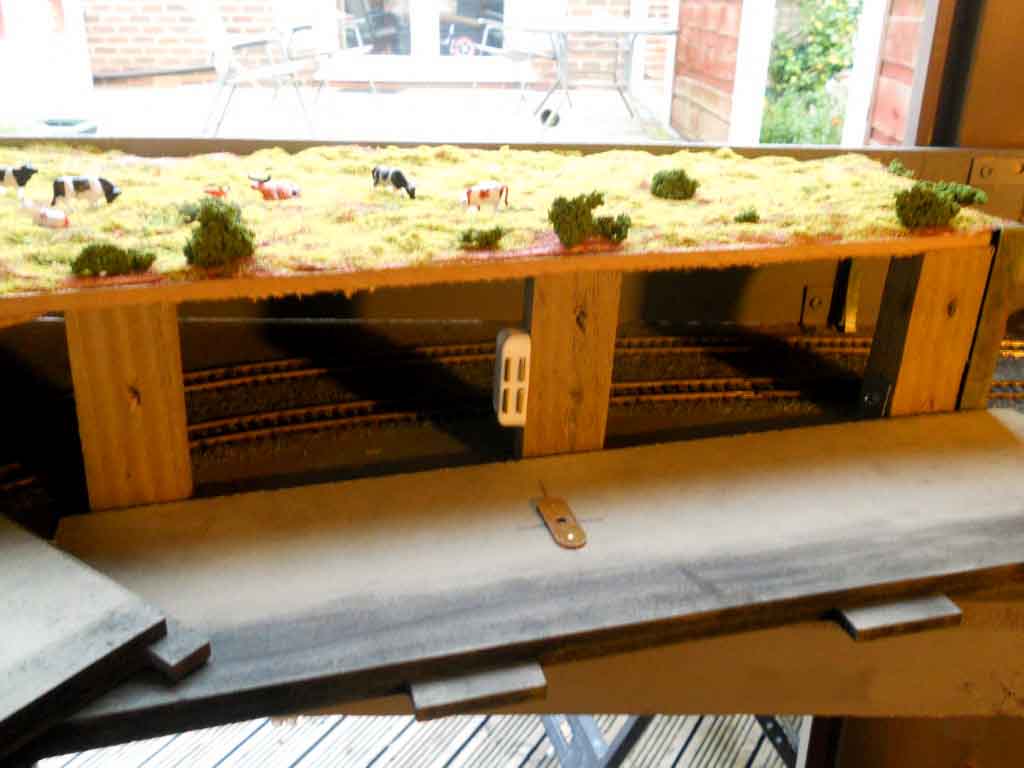
It’s this: always make sure you have access to the inside of your tunnel.
You will get derailments in there. You will need to clean the track in there. And somehow, stuff that shouldn’t be in there gets there.
Here’s Ron to elaborate:
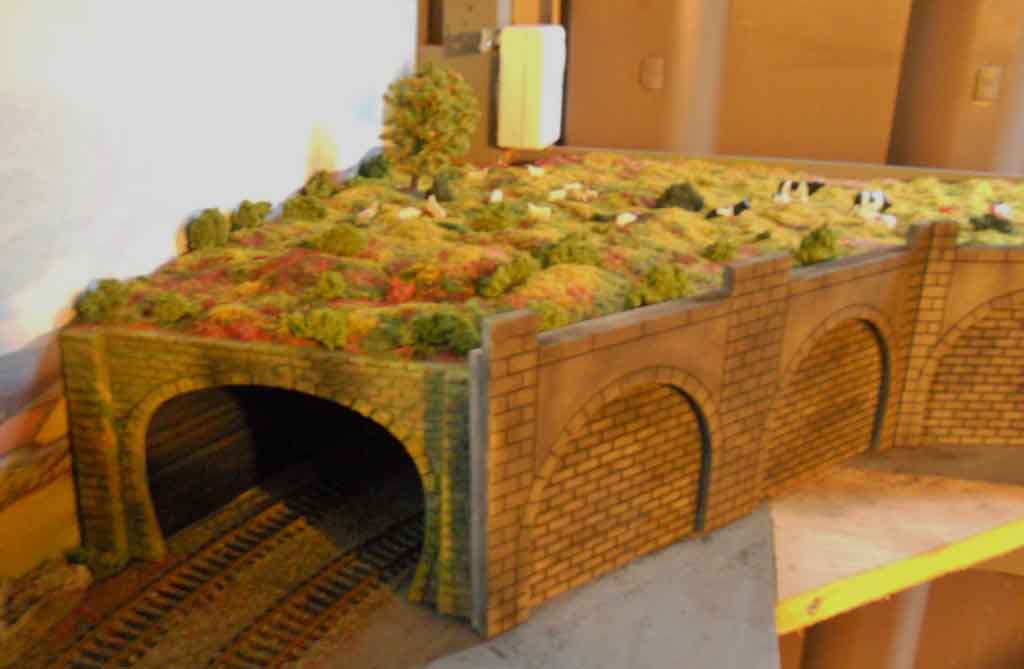
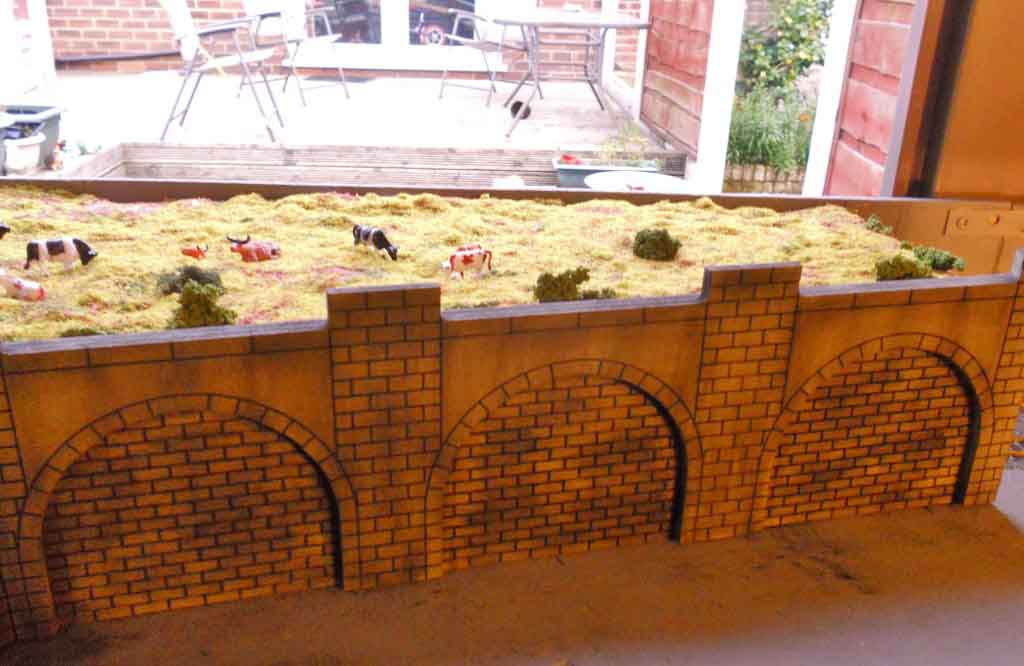
“Hi Al, just a couple of pics of the corner tunnel I made on my shed layout, I got the retaining walls on ebay.
I weathered them with my weathering powders in about an hour, really easy to do.
I wanted access to my track for cleaning and maintenance so I bought a couple of those magnetic latches you get for wardrobe doors etc, which works great.
I hope the tip is useful to somebody out there, by the way the whole train tunnel and scenery cost me about $20.00 using scrap timber and scatter etc from my bits box.
Thanks for all the brilliant tips and information from some really great modelers on here.
Cheers Al,
Regards Ron”
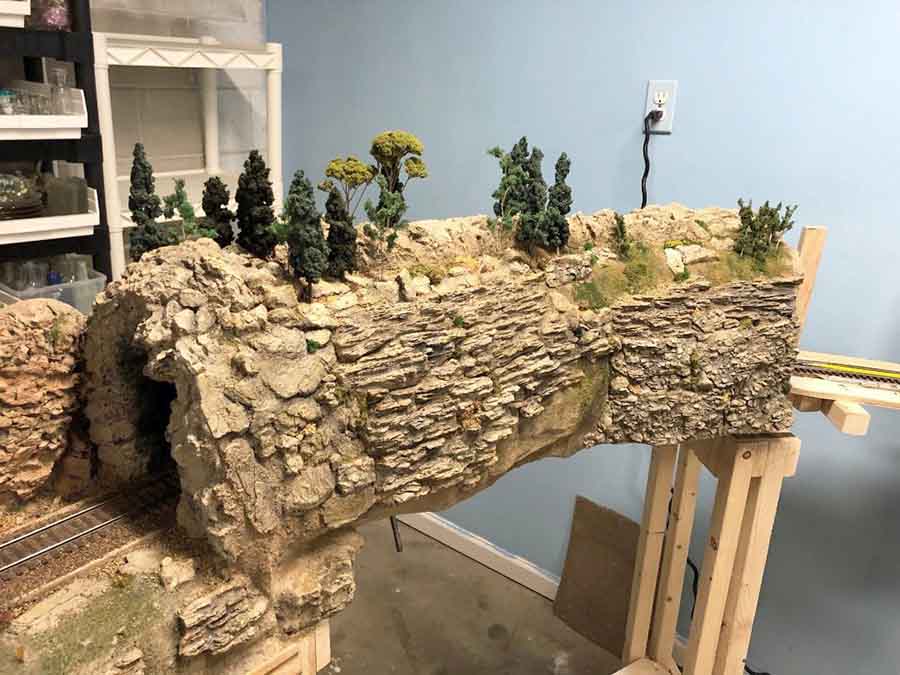
Of course, with a styrofoam tunnel, you may need to get your thinking cap on.
But however you make your train tunnel, access is really, really important – it doesn’t matter how good your landscaping and scenery is, if your layout doesn’t let you run your trains because of a troublesome tunnel, it will become a real thorn in your side.
If you look at how Gary built his layout up with styrofoam, he made sure he could get inside his tunnels and he really enjoys running his trains. Here’s a pic:
Henry also has a good technique which he shows in his post: Building model railroad tunnels.
John, who is a regular contributor to the blog, has a fantastic model railroad tip for the inside of tunnels:
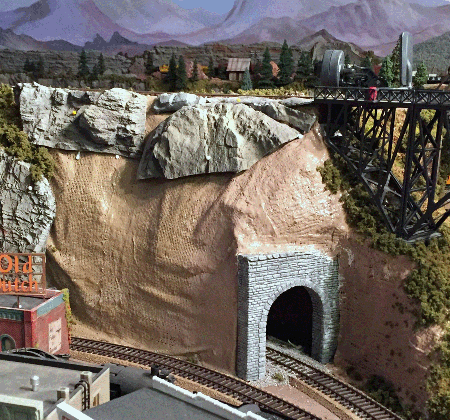
Bill – also a regular contributor to the blog – has an excellent way to make tunnels too:
That’s all for today folks.
Please do keep ’em coming.
And if today is the day you get going on your layout, the Beginner’s Guide is here.
Best
Al

Exellent job you have done there Martin…well done
Beautifully detailed explanation and a lovely final result. Very inspiring, and something to look forward to in the coming winter months when we can`t get outside to try other tasks in our incredibly fulfilling hobby. Thanks Martin, and everybody else who contributes, especially Alistair for his untiring efforts.
This look better then the finish product you bay from Heki or Bush.
Thank you,
Robert Isberg
Martin, thanks for sharing your handywork. I have not yet gotten into scenery myself but I will remember your excellant details.
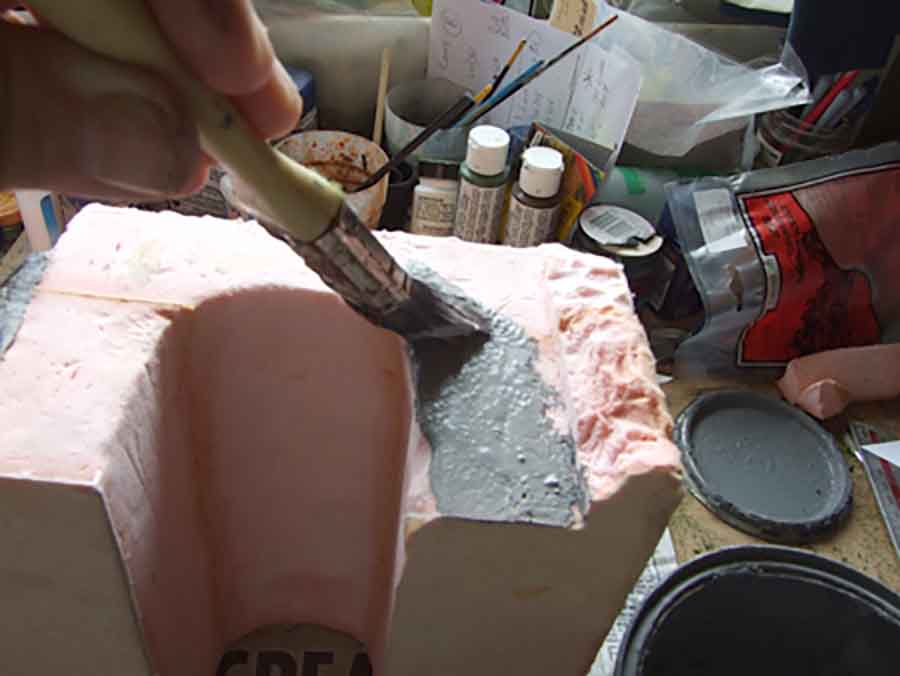
Mmm looks ok but a couple of points to mention, you forgot to add that I paint the models with a grey water based emulsion paint. You put 2 pictures of the static grass applicater & at the end where I commented “heres one I made earlier where I carved the tunnel portal” you did not show that pic. but went straight to the actual model.
People maybe wont notice. hope you didn’t mind me passing comment?
Martin
Great way to make a tunnel. I will save this with the other tips in my personal model railroad file.
Thanks
John R
Martin you have done an excellent job. In the past working with foam didn’t appeal to me as I saw it as unrealistic. However, you have now converted me. Could you please send some more of your’e great work.
Sorry Martin – I’m always in too much of a hurry! I shall add them.
Hey Al,
It is a great job one heck of a lot of work too even with foam. I like it.
LEWIS A. COOK
Wonderful effect Martin,foam is such a good core material for model railroads,thank you for the detailed explanation.
Barry.
well done , a very good tunnel,excellent, please show us some more things that you have made for your models thanks.
A few people asking for some more pictures, Al did already kindly show some pictures of items that I made. I am making a stock of items to hold a stall at Rochdale Model Rail Fair on 5th/6th November in UK. It is a new venture now that I am in my retired years. If anyone wishes to keep up with my additions you can see them on this site;
http://www.flickr.com/groups/1722219@N24/
Thank you Al for sharing my hobby with others, you have a great site.
By the way just a bit of advice for anyone wishing to try the foam modelling – DO NOT USE expanded poystyrene for this type of modelling, it is the pink type. And when carving the rocks, do not just cut pieces out, prise pieces off and it will look more natural.
Martin
Martin very well done. I’ve always preferred working with plaster and cloth for the mountains but I’m going to do my next layout in foam because I like the results of your work.
Barry
YA KNOW READING HOW TO AND SHOWING HOW TO IS TOTALLY GREAT. I WOULD MUCH RATHER LOOK AT PICS LIKE YOU SHOWED WITH LITTLE COMMENTS BENEATH THAN TO READ PARAGRAPH AFTER PARAGRAPH AND THEN TRY TO UNDERSTAND WHAT THEY SAID TO DO. REMEMBER WE ARE TRYING TO TEACH FOR THE MOST PART, ROOKIES IN MODEL TRAINS, AND SOMETIME THE PROS.
THANK YOU A BUNCH.
BOB
Working on a layout here in S. Carolina. I am also making great use of extruded foam for mountains. Love your tunnel idea and I will defintely be trying this one out.
Since I like to use foam insulation on my layouts…this was very informative. Great tutorial and instructions.
Very creative – can probably be adapted to any scale – I’ll use N scale when and if I get a RR. I’m very short on space! Thanks for a great How-To Article!
a very nice realistic effect foam of most types make excellent scenic good job Martin
Most model railroaders build tunnels over track that has already been laid. Then it is difficult to get an detailed interior. It would seem you could use the carving technique to do a blasted rock interior. You could also incorporate a wood line tunnel too. I can see how this method of carving the tunnel to go in place after the track is laid would be helpful to get realistic details inside the tunnel. Then you could build your foam mountain by incorporating the completed foam tunnel into the layers of foam that make up the mountain side.
Hi, I too am using foam for my mountains and tunnels. The foam I am using though is the foam from an old couch and chair that I found sitting out for the garbageman to take. I figured it is not only a free way to design, but it is also recycleing. I am taking pictures as I go along and I am looking forward to posting themk here and on the other model sites I am on.
ED says
thank you for showing me how to build asenic tunnel great job.
I have plastic building kits to glue together what gulue is best ED
In answer to Edward McDonald; For glueing plastic model kits I use ‘Contacta’ polystyrene cement marketed by Revell. No doubt there are plenty of choice in US.
I totally agree with Bob when he said that a lot of pics showing the actual, and not paragraphs, makes it a whole lot better when you try to build or model something! KEEP UP THE GOOD WORK!!
creative and makes the help easier when approaching such fit and finish!
Hi
Great creativity. I think you should sell these on eBay as they look superb.
I would definitely buy one.
KEEP IT UP!!!!
They say a picture is worth a thousand words. WOW!
This is a masterpiece to be proud of.
GOOD WORK!
Great work from my namesake! Particularly the way to highlight the carved rock formations.
One or two points to add, if you don’t mind: this type of insulation foam is very cheap to buy here in the UK, and is cut by builders with fine saws and doesn’t break up, I have used a fine blade in a jigsaw for a fast cut, using a kitchen knife looks like an accident waiting to happen!
Also always use a solvent FREE adhesive as other types WILL eventually melt it! As another contributor mentioned for small areas “Oasis” florist blocks are ideal and from time to time can be found in discount stores at a cheap price in the UK.
Keep up the good work Martin, and also Alistair for passing these tips on.
Sir, I am new to railway modelling. However in Aldi yesterday I noticed bags of crushed granite I think.Anyway not too expensive , a fair sized bag which could be shared ,and glued under track as a very realistic ballast. Forgive me interrupting in what may be a stupid idea.
Secondly I have a number of locomotives belonging to my adult sons that have jamming piston rods and slip of plastic guides , and others with twisted and or missing valve gear. What is the best to do with these.Just sell on E Bay as broken and buy something other.
What type ov paint do u use on foam and plastics mate
I am confused as to “expanded” and “extruded” foam. Depending on the company, the extruded comes in pink, blue or yellow. That is what I plan to use for my base, as it is less likely to melt under the glue and paint, and is great to carve. You tell us not to use the pink foam, but in your pictures, the foam is pink, or is it my computer? What kind of foam did you use for the tunnel?
Your modeling techniques are wonderful, and I will certainly use your tunnel idea. My husband and I are beginning at ages 76 and 77, and are very excited to get going on the scenery. He is painting our new room just now, then he’ll begin the fun of building the benchwork while I continue with putting together structures, experimenting with rock-moulding, making trees to go with the ones I’ve purchased, and learning to work with water effects…Thanks so much for sharing your ideas!
Very clever and exciting work! I hope I can do that. TN
Brilliant work, well done, The photo’s are clear and easy to follow too as is the explanation, Well done !!.
Sid
Great job…
Martin very well DONE…
Beautiful
Great job, Martin! A real keeper for future reference! Thanks.
I really like the way the finished tunnel looks. The photos and explanation of the way you created it are excellent. Thanks!
I have made my hills and mountains in the past using hydrocal and newspaper, which can be a messy process. You also dont have a long time to work with the hydrocal before it “sets up”.
I really liked your demonstration of using carved foam to form mountains and hills. This is an excellent idea giving the modeler plenty of time to work the foam to satisfaction. And with proper painting and landscaping your finished product looked really great. Thanks for all of your time and tips, this opened my eyes to other possibilities.
some really artful sculpting there Martin….yer good…bookmarked your paga and I am going to finally try this just because you showed us how….
and I agree with Luke above…these would make BIG $$$$ on ebay. you should defo look into that….shipping ‘light weight’ stuff is cheap…
Martin: I, too, would like to know why not to use the pink foam as that is the only type I can find in CA. Love your carving and the ideas I picked up from your photos and very curious if you live near Rochdale as that is where my great grandfather, Robert Schofield, was born. He came to America in 1848 and I’ve always wanted to go to Rochdale…maybe won’t get there now (I’m 77) and have to content myself with working on my first model railroad layout!
What a great srtep by step guide to constructing a tunnel. Thankyou and well done!
Rossco
nice work you made it look easy.
nice work
Great work, wish i was that artistic.
Superb
Excellent, Great tip. Thanks
Marin,
I just have to ask this. In the next to last picture … it look like someone is lying down in the tunnel. Maybe my eyes are not as good as I thought.
The tunnel is truly a work of art. A Masterpiece! I surely like the use of the foam. Or maybe better, your use of the foam.
Martin, would have some video you could share of your railroad? Sure would like to see it.
Martin thanks for the pictures and of course Al thanks for the archive.
Best regards,
Tom
Martin,
( I took keyboard 101 you would never guess it … oh well LOL)
YOU ARE BUILDING A VERY NICE LAYOUT. CANT WAIT TO SEE IT FINISHED.
I read the post that said the person was using foam from a couch? I tried that once but found I had to soak it in Elmers glue then let it sit to dry in order to shape it and have it stand stiff.
Excellent stuff, good tips too.
Excellent job and superb tips; Thank you
Martian, you are very gifted
Semus, regarding your problems with loco valve gear, you don’t say what manufacturer’s trains these are, but there are dealers in spares for Hornby, such as Blackwells of Hawkwell, who do a large range of spares and you can also find blown-up diagrams of most Hornby locos on their website so you can identify the damaged parts. Quite often the damage is simply caused by kids picking models up by the gear and bending it in, compare one side with the other to identify any parts that may have been damaged or pushed out of shape. Worth a try to restore before resorting to e-Bay. Good luck!
Rod
Hi Martin,creating tunnel, as you have done is simply excellent. Very economical & realistic. Thanks for your illustration. It’s very very inspiring and save lot of money, if you buy branded stuff. Pl keep it up. Regards,GOPAL DAGA!KOLKATA , INDIA
Martin, I want to thank you for this information, I’m going to put this in my files for later use, this will be very helpful.
Again, thank you
Sublime. Truly. Keep up the great work sir.
Very nicely done and a well presented, easy to follow tutorial!
Thank you.
Being a rookie at this I thank you for the detail of your work. It looks fantastic when finished and really don’t look all that difficult for even us beginners. I too would love some pics of your layout. I would be very interested in how you build you city streets and sidewalks as well as your country roads if you have any. please keep up your detail workings, ya know they have to be good to have Dave comment. I have used a lot of his DIY ideas too.
bob
Hi again Al,
Wow what a surprise seeing my ‘How to’ popping up on your very informative pages. Thank you.
Reading through the many messages, can I say thank you to all the nice comments.
Many ask to see my layout? I at the moment do not have one! I lived in a rented bungalow and thought it would be until I ended my days. I started to make a fair sized layout up in the loft (never considered it should be sectional to fit through the roof trapdoor)
One day my landlord informed me that he had gone bankrupt & we had to move home. The layout is still in the loft!
Since then my plans are to build an N scale layout that would fit in my bedroom. Alas it is still waiting to happen.
I have since occupied my retirement days in creating models and offer them to other modellers at small model rail exhibitions in the north of England UK.
I felt most trade stalls were very expensive for many model rail pensioners, so I only cover my costs to help other benefit, I enjoy meeting people.
I do have a Facebook page that can be viewed if anyone is interested? https://www.facebook.com/CountryScenes
Many thanks Al for your dedication in keeping all our ideas passed to help others.
Martin
great how to martin i am just about to put a tunnel on my layout but a 2 track tunnel this will help thankyou.
This is good and and just as useful the second time around.
love your scenery
Oh wow. I am so stealing (using, borrowing etc) this technique!!!!! Looks fantastic!
BEAUTIFUL TUNNEL!
Just don’t use a good kitchen knife as the foam will dull the blade! Try using a small Japanese pull-saw, I think it will be much easier.
Hi again, many people seem worried at my use of a kitchen knife. I use this (and have developed a technic) since the demo, of not carving the foam. But instead I put the edge of the blade into the foam and ‘flick’ off the pieces to allow the foam to break and develop a more natural looking break. This looks more like natural rock faces rather than being cut or sawn. As far as blunting the blade? It is better if it is very blunt as straight cuts just do not look natural. Anyway all the flat ledges are eventually covered with grasses and foliage.
That is excellent, I’m going to have a go at that for my z gauge.
Martin, you came up just in time. I have been working on my lay out for over 30 yes 30 years! Collecting track and rolling stock and finally retirement hit and I now have a decated room for my hobby. The tunnel is just what I needed to finish off my 4×8 HO scale lay out. I am going to use your direction to do three of the four corners. Thanks and keep the info coming
Incredible
THAT IS A BEAUTIFUL TUNNEL
You made my mountain problem so easy…
Been looking for a simple solution for this for 2 years.
Wow Thanks for sharing this is brilliant………
I am so borrowing your instructions and I will certainly
give you credit if anyone asks me……
More pictures Please and more tips soon…………….
Thanks Again
Ed
USA
Good job on the tunnel, built easily and don’t cost much. Think I may make one.
Thanks
John
Martin:
Job well done in depicting your “How To”—– FREE. So many folks want to charge you for information they have formulated over the years in trial & error but you give better guidance freely. Thx for being around to do so and good luck in your venture to find a new home. I too model HO trains and when you have to move to and fro being military-the lighter the material the cheaper the cost. Insulation foam is the way to go as many items are made from it. Keep up the good works and again thx for sharing-FREE-ly.
Harold Jr.
Does anyone know what type of foam Martin used to make the tunnel?
As an avid reader of these ‘how to’ tutorials – my layout is so far only existing in my mind – this is one of those ones that has me deciding to have a go with a scenery module even before the track is being put in place! Thanks, Martin, for a really clear and illustrated contribution. Long may your layout ideas flourish – in public too! Steve (NZ)
What a great ‘How to’
Many thanks Martin
Best wishes
Where do you get the thick pink foam? I live in Phoenix Az, I can only find 1 inch.
A beautiful job Martin!! I wish I had your talent.
Thanks ,truly amazing!!!!!!!!!!!
Outstanding pics and beautiful end results! Gathering resources to build my 35 x 40 ft. railroad layout. Finishing up the drawings now.
How to build a tunnel ? Martin as a tunnel builder you are great but why build a tunnel , I once read an article and one reason for having a tunnel was so that trains could be held there and it would allow a belief that it was on a longer trip than could otherwise be explained, this stopped me in my tracks why would anyone want to hide there most expensive purchase!! for a bit more realism ?.I don’t allow full tunnels on my model but I do allow half tunnels ,I have a double track line four or five feet long going through a hill,but in width it is only half a tunnel it is a lot more work because you have to detail inside side and out when it’s finished I perhaps show on your site we will see .What I would like to see is Martin give it a go because he is just superb best Regards john a
Does the construction appear on U tube regarding making this tunnel?
Ace scenery & detail mate i wish my godson was older
So he could help me with these sort of jobs. I would love
to know how to make this as I’ve promised my godson a
train set when he gets older
This is a grrreat addition for my HO folder of your TIPs… I am planning an HO layout for my Great Grandson, and these tips are a great help to me after many years away from an very rewarding hobby….
Thanks….
Great job on the tunnel. It really looks great and what color did you use on the second wash, it looks like a silver or white wash. I agree on the knife, it is great to use but you need to be careful and do not let the knife lay around if you got kids or grand kids there. I also used a Hotwire Foam Cutter and they work great too. If you can find some foam from a mattress company or similiar foam, then buy a blender at the local Salvation Army or DAV store or at a yard sale and cut it up with the blender, it makes great scenery bushes etc. You can put it back in the blender, add paint and you are good to go. Cleanup can be a little messy. Good luck witht he rest of your layout.
How did you make the brick-like appearance on the entrance of the tunnel?
Very good! I am just starting out, this will help a lot. Thanks
Larry
Nice job. Very good article. Thanks for sharing.
First I have to ask, what is a “desert spoon”? 🙂 But really, this is a great tutorial, and here I just bought a heavy-duty hot foam knife. I love the textures you’ve achieved with just foam and a kitchen knife. The painting techniques are excellent.
Ken in the States
As for the question of “why build a tunnel?”, my first pet peeve is when modelers build a tunnel with only about as much real estate above it as the height of the tunnel itself. It isn’t like they’re boring through the Alps. In real life I believe builders would blast a cut in the rock, instead of boring through solid rock for a scale 100′. It would most likely be cheaper and safer. And for the modeler, it could be even more interesting than a portal.
Ii was having trouble finding foam thicker then 1″, until I when to the roofing company across the street from my work, and asked where to buy it. I was told a roofing supply vendor. Then the shop Forman said he was going to throw some out if I wanted I could have it. He gave me 6, 2’x8′ sheets. About a week later he drove the forklift over with 30 sheets of 3″, 2’x8′ sheets that they were going to throw out.
Hi Martin,Thank you for an excellent tutorial on creating realistic scenery from foam. However, why did your railway engineers aim the track straight for the high ground when realistically the track alignment should be to the left where only a shallow cutting would be required?
Trevor LL
Excellent tips I was wondering how to build a lifelike tunnel as the shop ones are so damned expensive. I’ll be copying your ideas this bank holiday weekend on the N scale I am building.
Cheers for the tips
Gary
good day sir this foam do u have to hardened it all over and get dried and then cutting your tunnel out and making rocks?
This step by step article by Martin on building a model railroad tunnel is absolutely first class and allows any modeler to make a similar structure. However a structure like this is fine for a toy-train type layout but has no place on a model railroad that is supposed to represent a piece of real railroad practice. Martin’s modeling skills are really top-notch and his model rock work looks very realistic, but the overall model looks wrong because no railroad would lay track straight into a vertical rock face when, in the example shown, it could swing the track to the left by about a hundred scale feet and only a shallow cutting would be required.
Tunneling through rock is incredibly expensive in real life and is only done when there really is no alternative and cheaper solution. When finished, model scenery should look as if the landscape existed before the railway arrived. To do this it is necessary to include basic scenery details into the layout planing stage. Model scenery should look as though it was there first even if it was actually build after the track is laid. To achieve this, the scenery requirements must be carefully considered at the track planning stage.
Have fun.
Trevor LL.
Love the tunnel I have been kicking around the Idea of using foam, you made it look easy, I like easy. NICE JOB
Hello,
Excellent tunnel making job. Your description is too good to be taken as TUNNEL TUTURIAL ! After going thru this, I am going to copy the same and follow your instructions, step by step. Let’s see, how it come thru.
Very well appreciated.
Regards,
GOPAL DAGA / KOLKATA / INDIA
Hi Martin
Love the idea of using foam, I have just started an n gauge layout here in Spain but using mostly GWR / LMS rolling stock hmmmm not that easy but thanks to UK suppliers shipping to Europe it is possible. I am right at the basics stage so I would like toknow how you fix the scatter material ( Grass ect.) so that it doesnt fall off with the slightest nudge
Thanks
Exellent work,will keep this for the future.Thanks for showing.
Specifically, what foam are you using? You don’t say, and that’s not what houses are insulated with here.
Much appreciate the help.
That looks fantastic.. I will try to replicate.. Thank you..
Is it high. If you can put your camera device on a tripod. We can view your layout. What you think?🚆woo hoo!!!!
very good information simplified
thanks a million
Looks great!!! I’m new to the community here and this is an awesome start!
Very nice. Well done.
Very nicely made tunnel. Now I have an idea of how to construct one of my very own. Thanks for posting; pictures are required as I gain knowledge through visual aid while some get knowledge through audio. Cheers from eastern TN