Jim’s been in touch with a fine example of how important it is to get the HO scale tunnel clearance right.
It’s also wholesome reading as you’ll see.
If you missed his first post and want to get up to speed, it’s here:
“Hi Al
And all of my fellow model railroaders, this is Jim from across the big pond in Buffalo NY, USA.
It has been a long time since I posted anything to the forum so here we go.
It has been a hard year for me and my son, with health issues that I have and my son who is in recovery. He has been clean of any issues now for over a year and I am very proud of him. Since I have not been able to work on the layout for so long, I was anxious to get back to it.
For starters, the mountain had to be rebuilt. All of the engines, steam and diesel kept hitting the rear wall of the mountains tunnel and either stalling there or derailing. So a real issue with HO scale tunnel clearance.
The upper section of the mountain track also had to be repaired. So I removed 90% of the mountain to rebuild it to eliminate the issues. The only section of the mountain that was not touched was the front face of the mountain. A picture of the front of the mountain is below.
The structure of the mountain was very flimsy, so that is another reason for the rebuild. Now in the picture of the webbing below, illustrates not a very good job, however it is very sturdy, and when I say sturdy, our cat Mango who is 7 lbs. decided to take a short walk on it, after I lifted her up to the top and it did not falter.
The mountain size is 4 feet wide and 2 ½ feet deep. There are two sets of tracks in the mountain, the lower track travels to the train station that will sit outside of the mountain, and the second track that will climb inside the mountain to the six foot bridge that crosses to the other side of the layout over the lake, over the main tracks, pass the steam engine facility ( still under construction ) and back to a container yard, cement factory, freight station, and for passenger service, a second passenger station.
Now for the plaster cloth application! Now I know many of the modelers have used Woodland Scenic’s plaster cloth, which is a little expensive. So, I went to Amazon and found a 5 pound roll of Plaster Cloth that is 16 yards long, 11 inches wide for $16.00 with free shipping. What a huge savings. I cut each piece to 4 inches by 11 inches for ease of application.
I am doing three layers, the first going horizontal, the second going vertical, and the last horizontal. I let each application dry for 24 hours before applying the next layer.
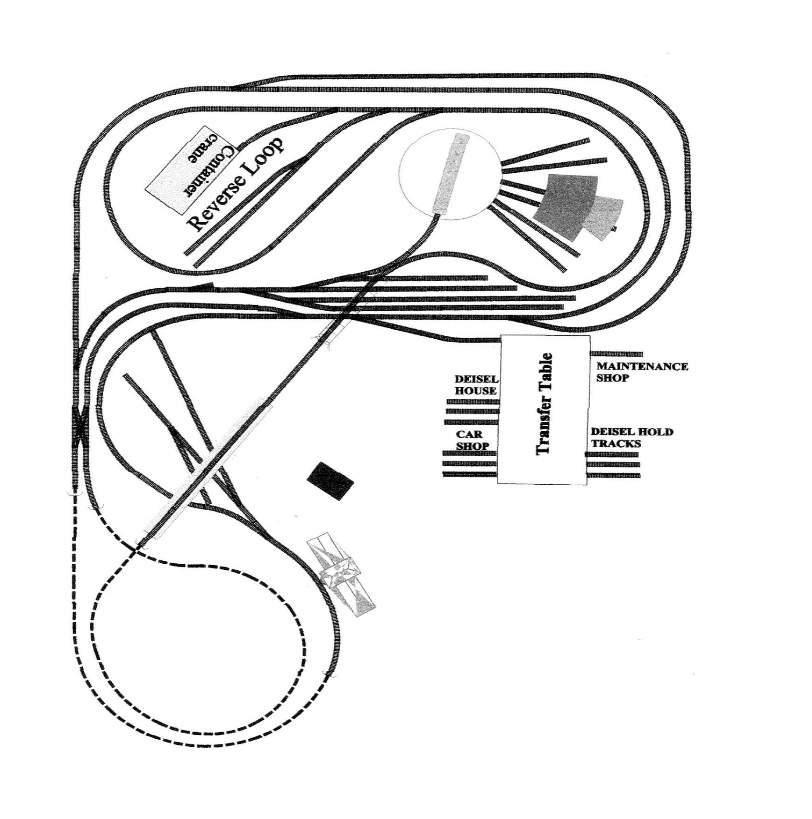
Below are pictures of the work that has been done to the mountain, including a drawing of the entire layout
I have a lot more to accomplish before I can even think about running the trains again. I will keep everyone up to date on the progress.
Here is a drawing of Starrpoint Railroad I sent this in some time ago. I thought you might want to see how the layout looks in real life.
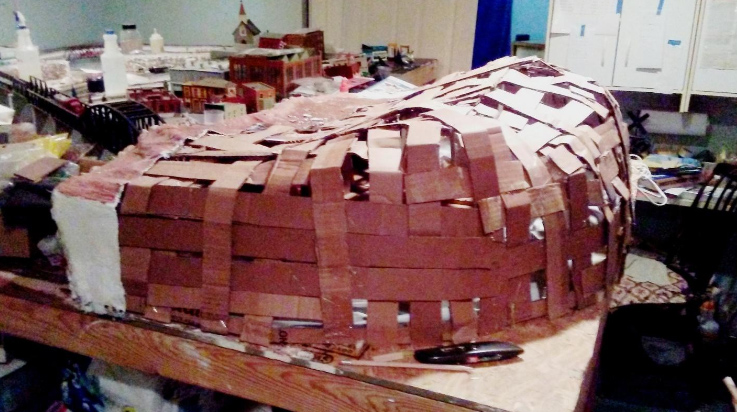
As I mentioned, it is not the most beautiful webbing ever seen, but it is sturdy.
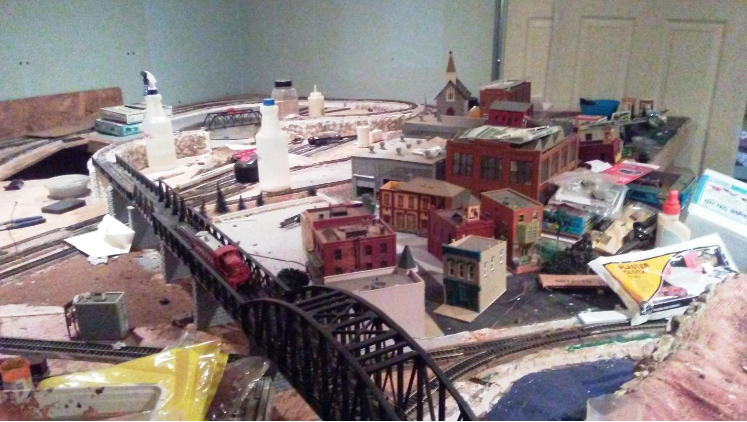
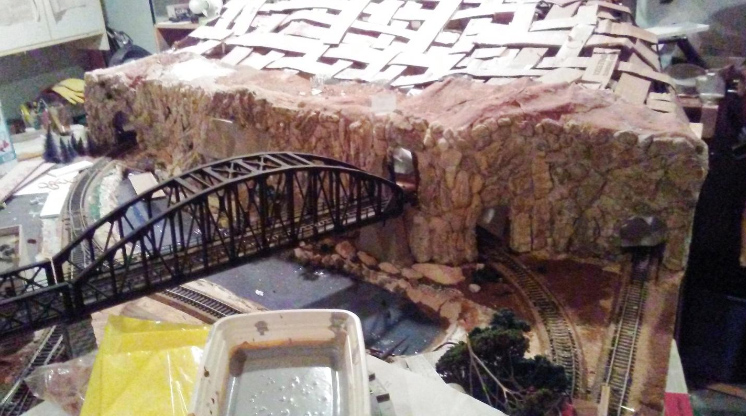
Here is the six foot bridge that leaves the mountain to the back of the layout.
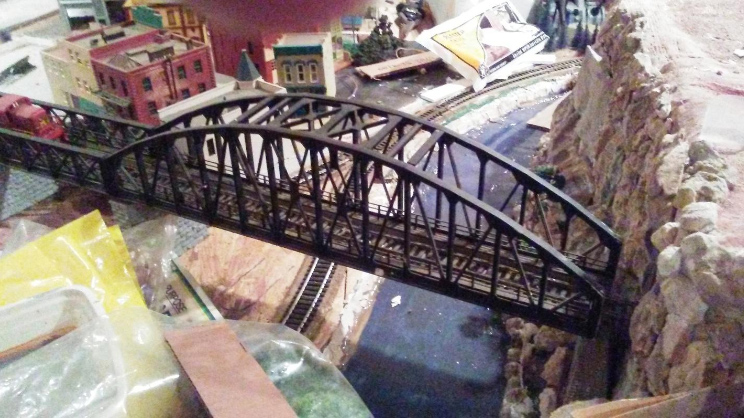
Here is another view of the bridge as it leaves the mountain portal over the lake in front of the mountain.
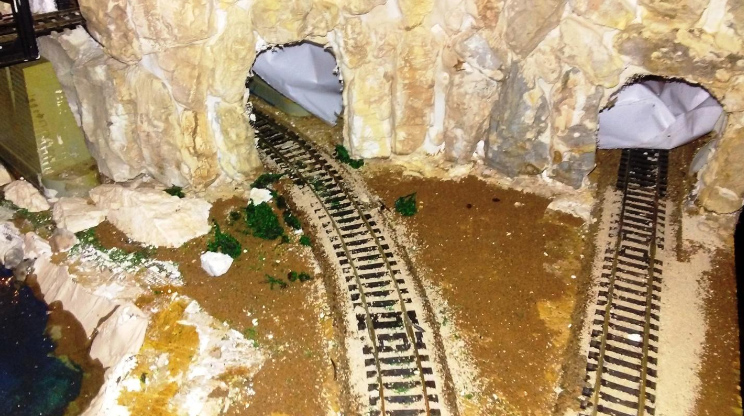
Here are two of the entrances to the interior of the mountain. The right one is for the lower level to the train station, while the one of the left leads to the six foot bridge crossing over to the back part of the layout. The tracks are covered until the plaster cloth is applied to protect them.
HO scale tunnel clearance:
This is the front of the mountain, the part that I wanted to save during reconstruction. As you can see the top portal that leads to the bridge .
This mountain is four feet wide and 2 and 1/2 feet deep. I saw a video of the Alaskan Railroad crossing through mountainous tunnels, where the portals were of natural rock. They looked unique and so I decided to keep mine the same way. The portal on the far left of the mountains lower level leads to the train station that will be placed there.
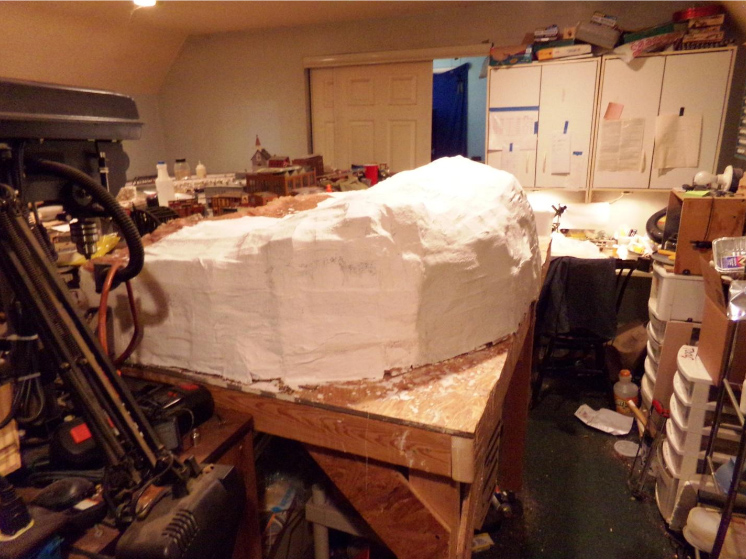
As you can see I have started to cover the mountain with the plaster cloth. It is going to take some time to complete. I am letting each layer dry for 24 hours before applying the next layer. I plan on using three layers for the mountain. Once all of the layers are applied, I will then cover the entire mountain with a coat of dry wall compound diluted with water to make a sort of paint solution. This will further stiffen the mountain structure.
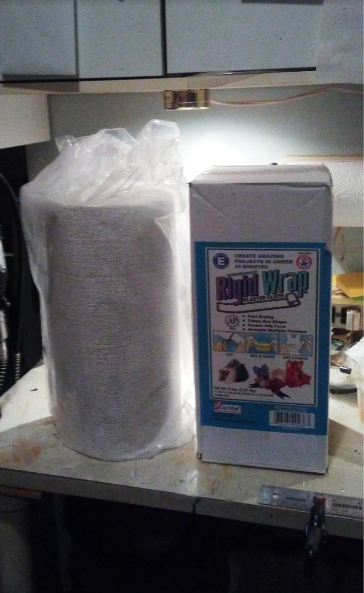
I mentioned before, this is the plaster cloth that I purchased from Amazon for $16.00. There is more than enough to complete the mountain and for any other projects for the Starrpoint Rail Road that may come up
I have some other projects in the works for the layout, and I will share them as I proceed with them.
Hope you enjoy.
Jim”
A huge thank to Jim for sharing the danger of not getting your HO scale tunnel clearance spot on – a wonderful narrative and pics too.
Jim’s narrative reminded me of Malcolm’s excellent post on derailments:
Also, once you have your clearance dimension sorted, Bill’s “tunnel jig” will save you hours of heartache:
It just goes to show, a layout is never really finished…
That’s all for today folks.
Please do keep ’em coming.
And if today is the day you get started on your layout, the Beginner’s Guide is here.
Best
Al
PS Latest ebay cheat sheet is here.
PPS More HO scale train layouts here if that’s your thing.

Jim, best wishes to you and your son for continued health and enjoyed your posting
model railroading is a great ‘reliever’ of concerns and a true enjoyment.
Jim,
I could not find this plaster cloth quantity on Amazon. But wallmart has it in your size and price. Woodland scenics is just simply way to expensive – – -in all that they sell – – in my opinion. Their ground foam prices are insane. I make my own for pennies.
Bob – Cleveland
Great work Jim. More importantly I am proud of your son. Not everyone knows how difficult it is to get the one year chip! I, too, work feverishly on my layout only to let it set for a few months. Especially when I hit a snag. Just keep putting one foot in front of the other and the top of the mountain you will surely reach. Nice layout by-the-way.
Well done for percevering, nice looking layout
Jim,
Best wishes to you and your son, and the progress both of you are making and have made. I read an article about pets in the wood shop, and how it is really the cat’s place, they just let you occupy it. Looks like it might be the same for the train room, haha. A timely episode on building the mountain, as I am just about at that stage myself, and I wanted an option to Woodland Scenics cloth, and now I have it.
Keep up the good work and keep us posted.
MN Dan
Jim, it’s going to be a really nice mountain when you’re done. I do hope things continue to be smooth with your son’s recovery. I know from personal experience how devastating it can be. All the best!
I don’t know if personal contacts are allowed on this site, but if they are, this one is to Jim and the layout drawing shown above. I am in the process (fourth go-around) of trying to get a layout built that has many of the elements that are shown in Jim’s drawing. My question to Jim is : what are the dimensions of the overall layout, length , width and elevation from floor to the approximate highest point of elevation. There are many features shown here that I may be able to incorporate into the framework of the track plan I am trying to work with that may may make my task easier. Thanks for the information and keep your hand upon the throttle and eye upon the rail. Happy Railroading
i remember having to “adjust” my mountain after my dad gave me a vista dome car for the Lionel layout I had then
Best wishes to you and your son for continued health. ood tip. Be very interested in the brand of bridge you have. Been looking at picking up a few tht dont cost an arm and a leg. I may need 4 or 2 double track ones or combination in the future.
Interesting track layout. From the photos it looks like access to the middle of the layout would be tough. Are there paths/cutouts for accessing inner parts of the yards.
BC Bob
Jim–nice work….I’ve never seen a commercial 6′ bridge so I am assuming you made it yourself. I’m wondering about the materials, construction techniques and the time it took to complete it.
Thanks Jim I am about to start my mountain. Your tips will be invaluable.
AWESOME!!!!! Really impressed.
Hats off to you Jim and your son, anything that is healing and going in the right direction is always a plus in my book. Your lay out is an plus also. Keep up the good work.
SDG St.Petersburg Florida U.S.A.
Jim I love your work, I’m going through the same with my son. KUDOS to your son give him a lot of support. I have been clean for a long time. I got back into railroading to keep myself busy. Loved it as a young boy. Now it’s my new drug. I have a N scale and HO. I’m still working on both. I will post when ready. GOD BLESS TO YOU AND YOUR SON!!!!
I would love to see more of your turn table and engine house. I have been waiting to move into a new house in SC with a single attic-type room so I can start building a 15′ x 20′ layout. It is a big wish on my part, but why not wish big and hope I can get my kids & grandkids involved so I can sit back and supervise 🙂
Great that you could continue your efforts in the face of your son’s health problems. Kudos and congratulations to you and your family.
CF Sharp MD
Hugo Budzien, That’s the reason dome cars are restricted on the prototype. It’s a lot more expensive and time consuming to open up a prototype tunnel.
Best wishes to you and your son Jim.
Model railway building is always a challenge and tests the best of us. But, when it all comes together after all the blood, sweat and tears, it just makes one feel great. Keep at that mountain – look forward to seeing it completed.
Best to all.
Brian, Wokingham, UK
Model train layouts are never done. They just keep getting refined.
Rob
Jim…. Best wishes for you and your son. Great work in your layout.
Excellent work Jim & Son! Working on your layout provides a kind of therapeutic aura to all things in this crazy world. I believe many of us find this to be true. Continued success on all fronts!
Jim Rocco from New Jersey here. Is there any way you can tell us what your Minimum and Maximum radius is. It would be appreciated. Thank you. Rocco, Haskell NJ.
I’ve used cheesecloth from Home Depot to cover mountains and other scenery and then applied plaster. Works well and is also inexpensive.
Hi Jim,
Best wishes for ongoing improvement to the health of your family.
Awesome mountain rebuild. May I presume you have retained access under the mountain to recover locos and trains should a derailment occur.
Andrew in Oz
Looking good so far! One piece of advice: Make sure you have access to all your trackage that is covered by landscaping (Make a “lift-off” panel, or, or …) so you can repair any track problems. Ask me how I know!
I know first hand about clearances , I had to cut back on stone wall because my big boy ‘o’ scale did not clear the structure. You should be proud of your layout . Hope you and your son recover soon.
Hello Jim, I say that is a mountain, the size and the workmanship you put into it is incredible, great job.
Great find on the plaster cloth, what would we do without Amazon.
Eric the retired firefighter St. Louis, Missouri area.
love the bridge & city & whole layout is well done
gotta love cardboard and styrofoam, cheap and light weight.
A great article Jim and i really like your layout. Hopefully in the not too distant future you can send a video of your railway operating. Well done! Cheers Rossco, Adelaide, South Australia.