Rob’s been in touch with a very helpful video on his N scale curve radius.
Have a look at how much time and effort he’s spent on getting his curves just right. It’s clever stuff too:
“Hi Al,
When I sold my n scale layout, I retained a very considerable collection of cars and engines.
I let my California Zephyr cars and my Kato EMD E5 engine go with the layout, but I retained other Burlington (CB&Q) cars and engines.
All this has been sitting in drawers since the CONW was sold. I have had no way to run this stock. I decided I wanted a small compact layout so that I was able to run my n scale trains on it occasionally.
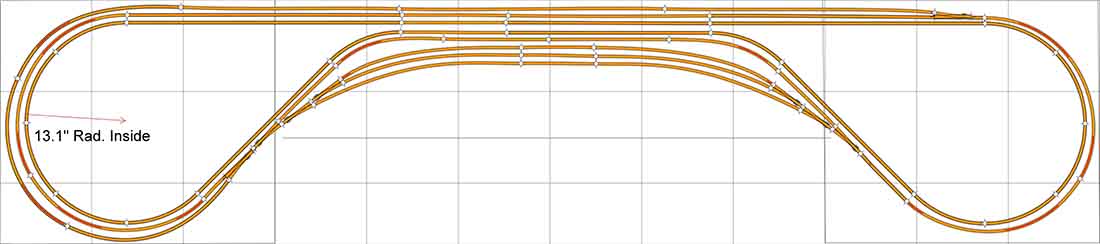
I got to work on the program AnyRail and created a simple compact layout for running with some sidings that I can add in the future when I feel like it. I will include a graphic of this layout.
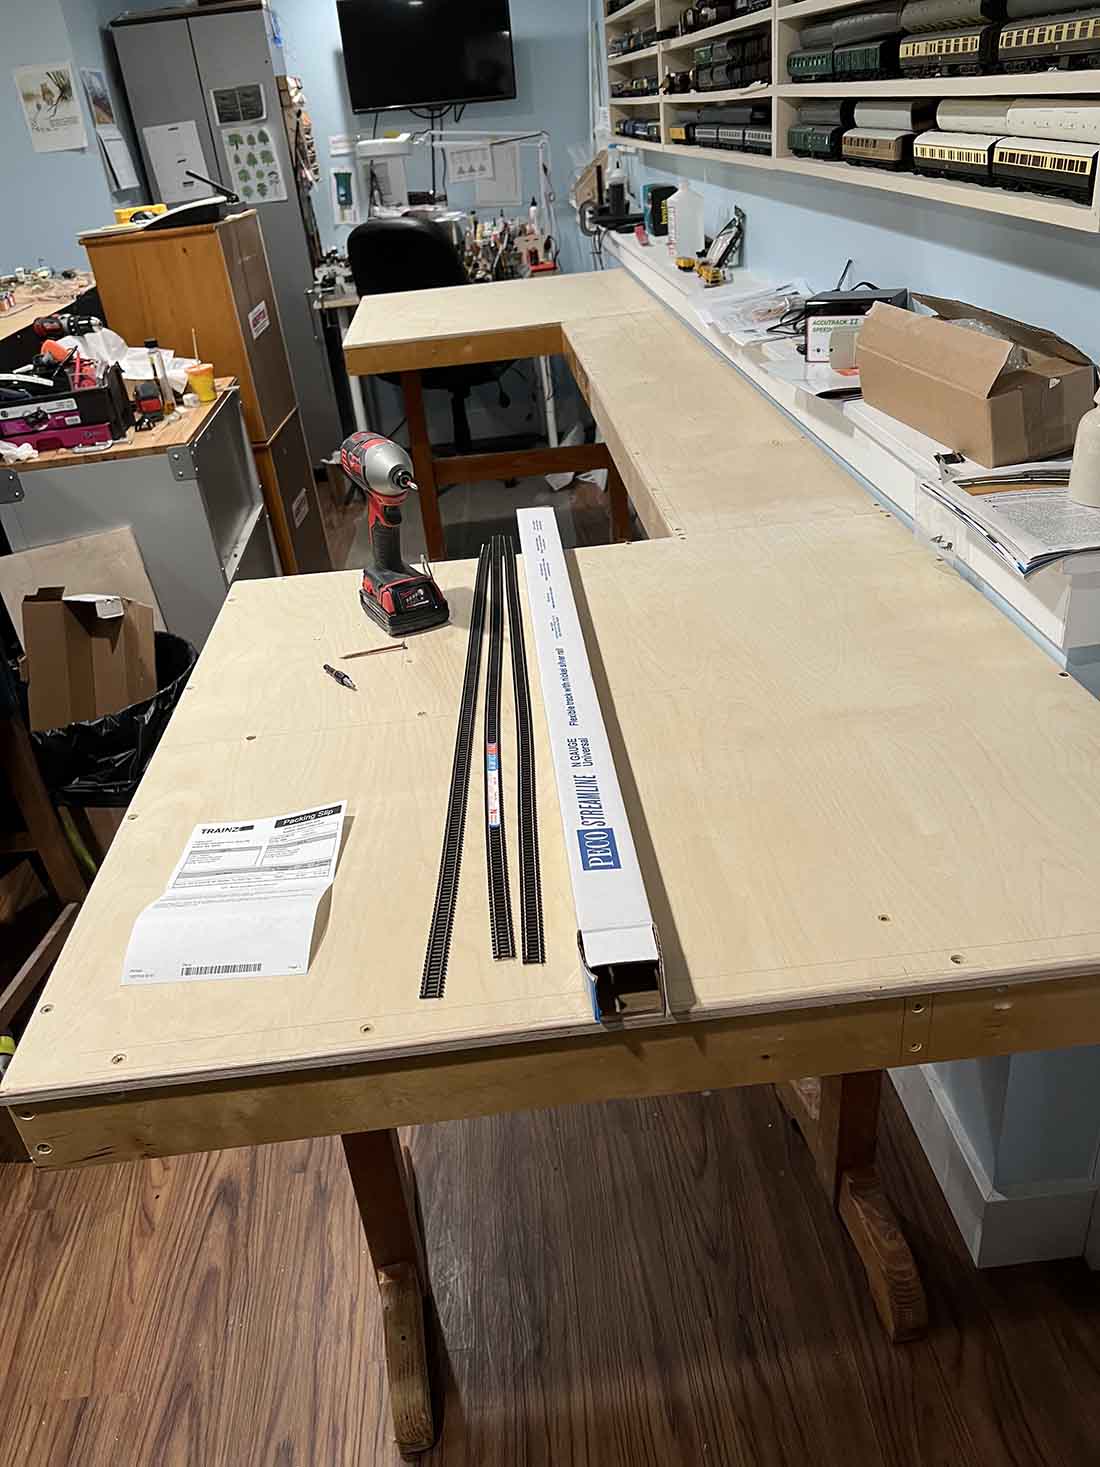
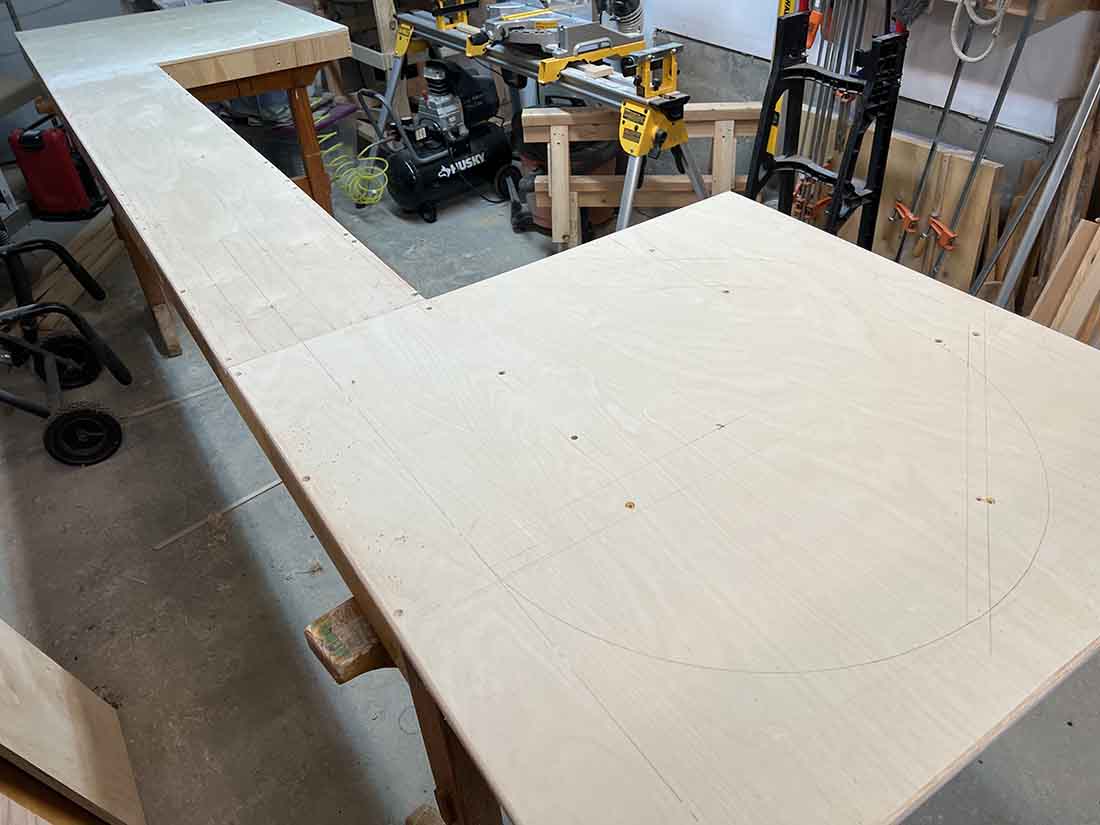
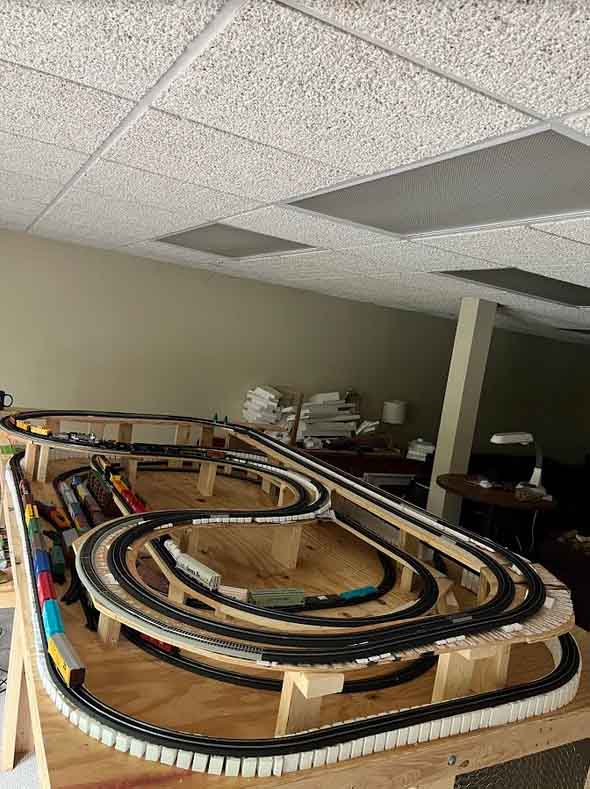
About a week ago, I started putting the benchwork together for the running layout and recently completed the benchwork on which to lay the track.
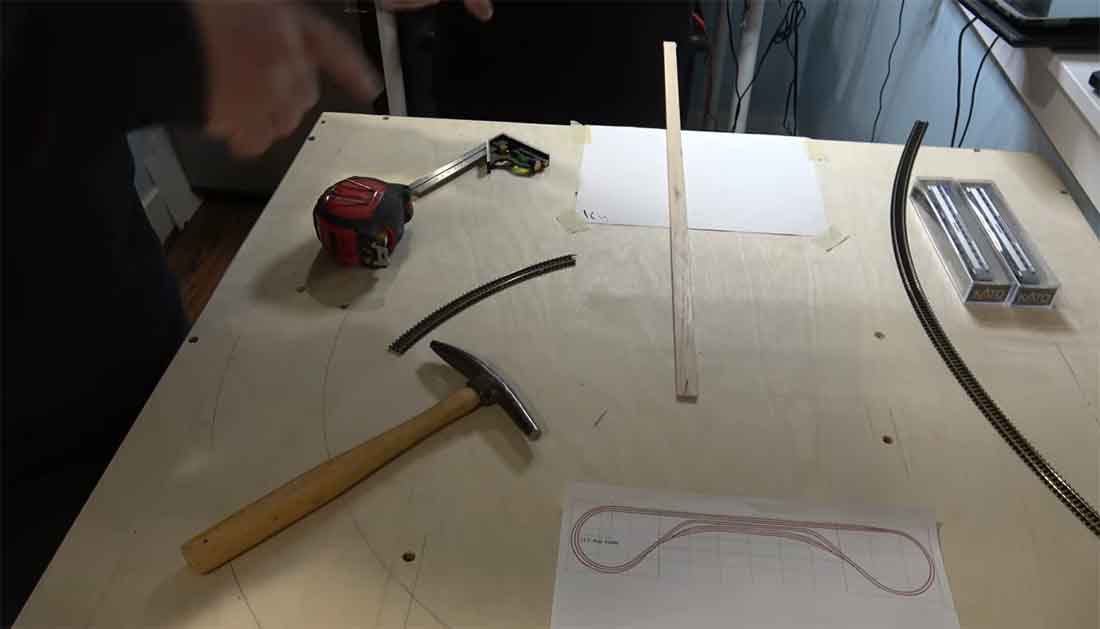
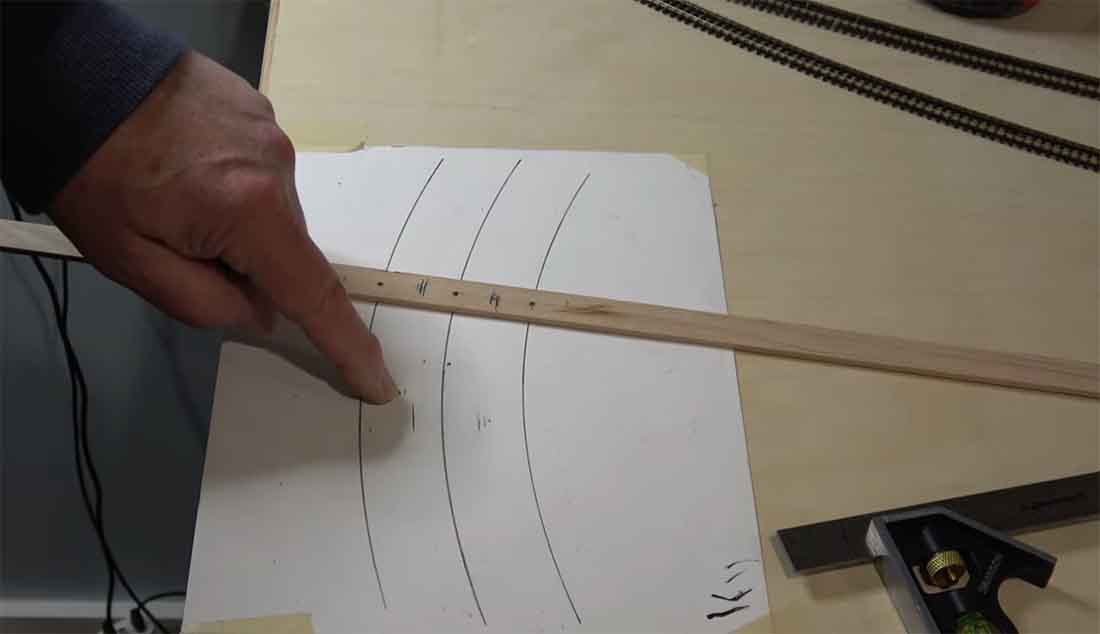
The next challenge was to transfer, full scale, the track plan to the boards. That is what I demonstrate in this video. Before I could do this layout work, however, I realized I needed to know exactly how far apart I need to keep the curves.
This is important so that two trains running on adjacent tracks will not rub or touch each other.
In the first part of the video, I determine this spacing and then go on to draw the entire track plan on the boards as a guide for laying the actual track. Track laying and roadbed setup will come in a subsequent video.
Rob – Farland Howe”
When it comes to planning a layout, have a look at what Wayne has done: N scale layouts
You can see more of Rob’s layouts in the Hall of Fame.
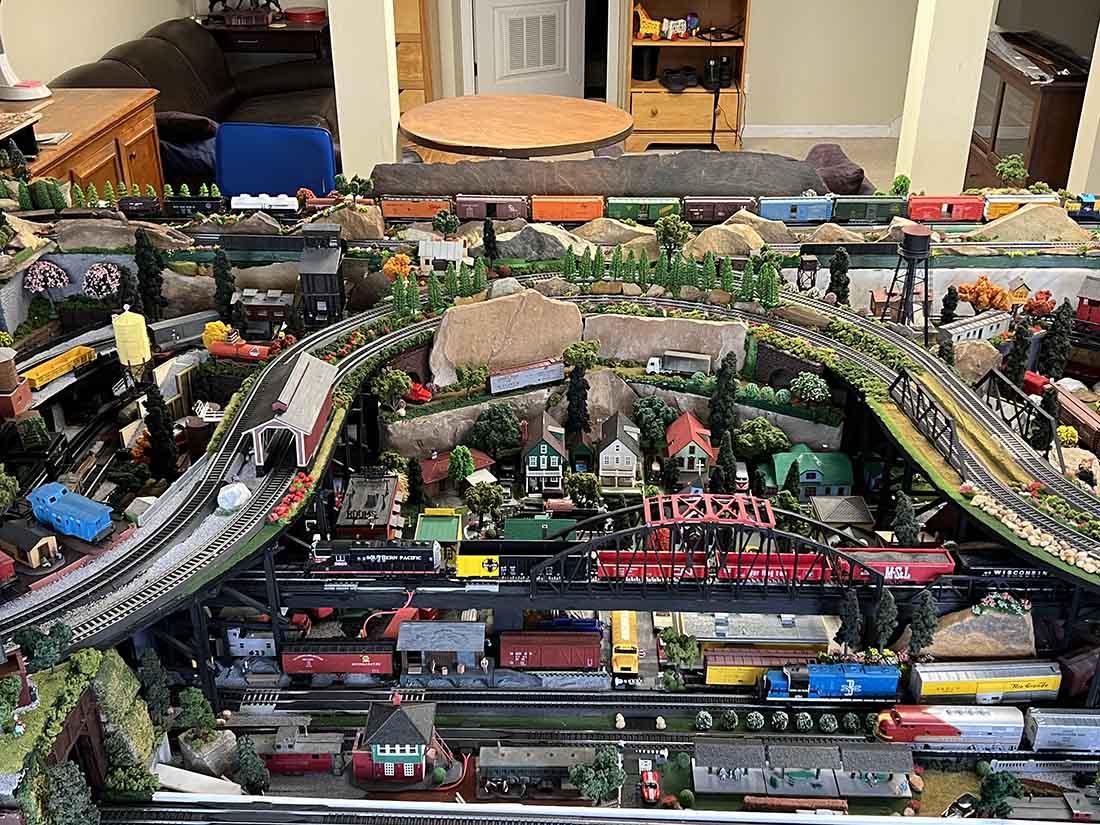
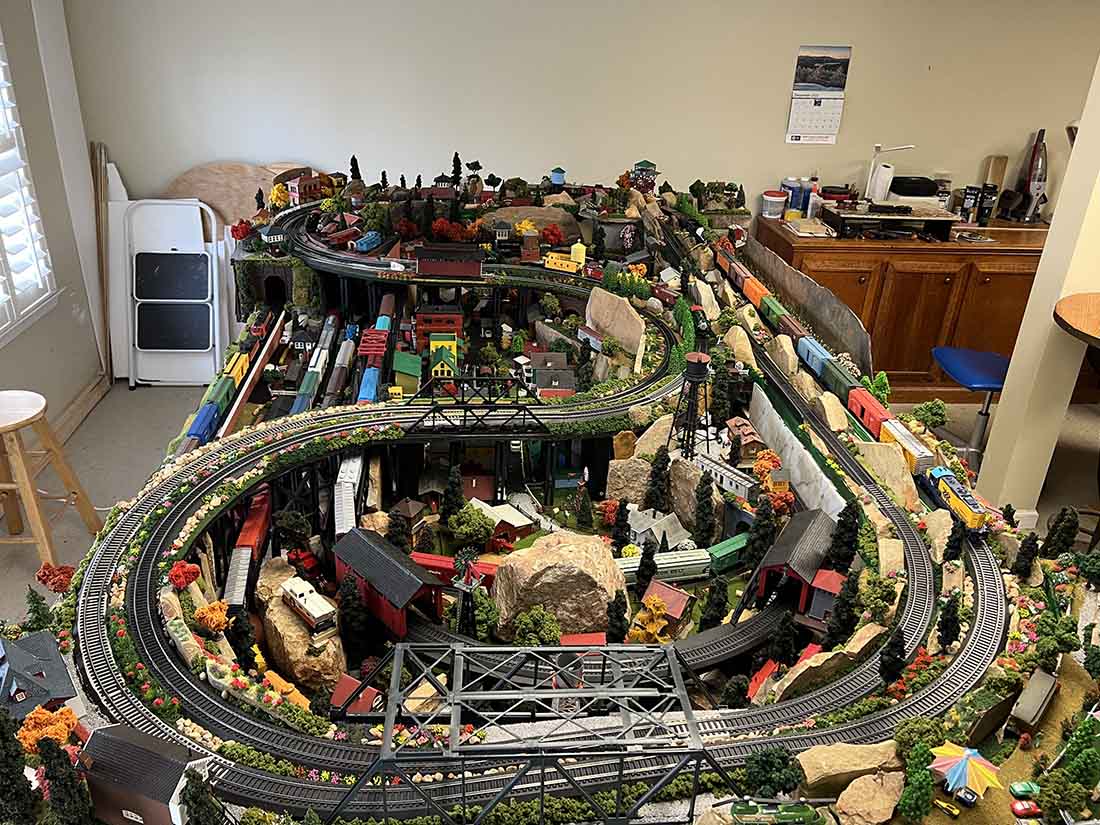
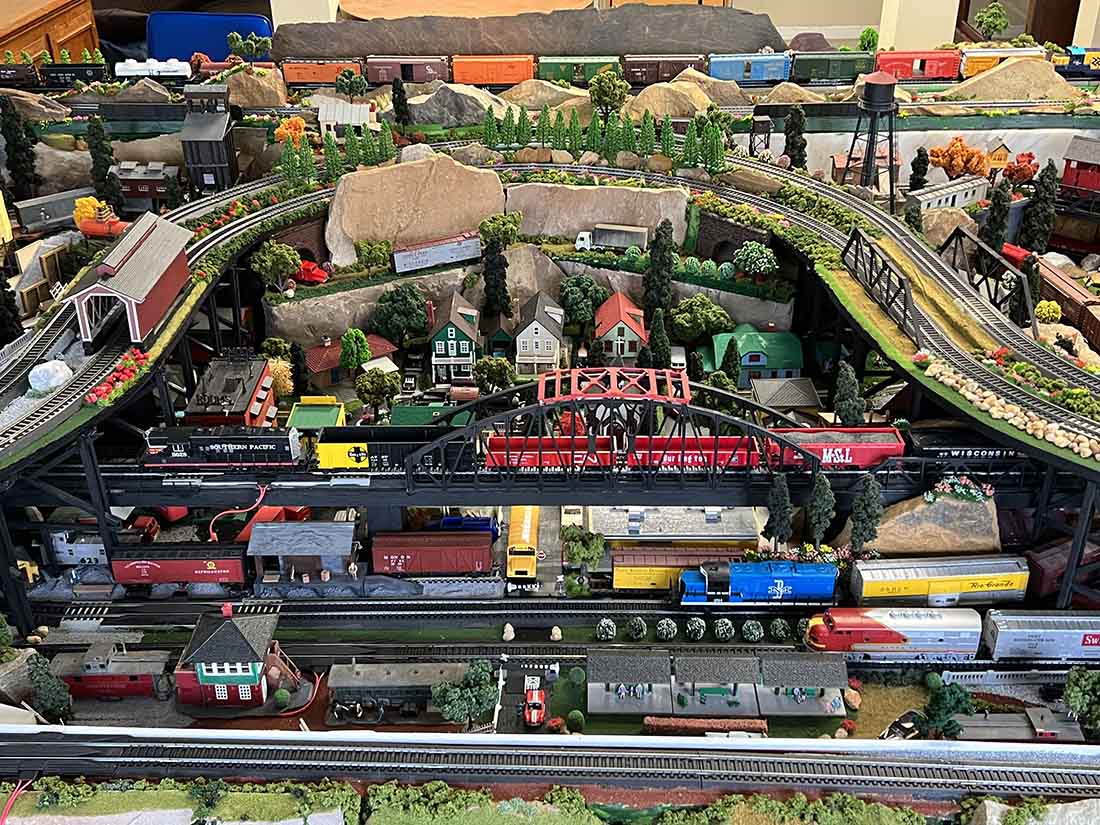
Stephen has been in touch with just how much fun he’s had with his Tyco HO trains
“Mr Lee,
Thank you for all you do for this amazing hobby. Your dedication and effort are without compare and we all greatly appreciate all you do sir
Growing up our parents always had the old Lionel trains under the Christmas Tree with the plasticville town lit up. Was a joy to see and always anticipated.
Eventually they gifted me an HO Tyco train in the early seventies. I played with that train every chance I had, ultimately my dad built an 8’x4’ table and I was off.
Fate intervened as my grandparents required care and the basement was converted into living quarters thus putting my trains in a box where they stayed for forty five years.
I didn’t realize how fond I was of trains until my children and I would set up Thomas the Tank Engine throughout the house on a regular basis . They’re grown now and have urged me to revisit my enthusiasm for trains .
In collaboration my wife and daughter each gifted me with a Bauchmann train this past Christmas, as well as my brother discovered my box of trains going through stuff , my old train still runs and is part of my display .
The New year began at the lumber yard and soon enough i constructed a 10×6 table to house my display . Keep in mind I hadn’t discovered this website or come to understand the current fervor the hobby inspires . I thought I was just reliving my childhood .
These trains weren’t sufficient so one by one I kept adding . I’ve got six trains, analog, there again a hadn’t yet realized the DCC and so forth . Didn’t set out with high hopes , mostly just wanted to have fun and have trains.
Had no experience with scenery, very little electronics or electrical background… on / off was about it. So I remained simplified in my approach , after all I didn’t want to complicate things and not be able to just enjoy watching the trains .
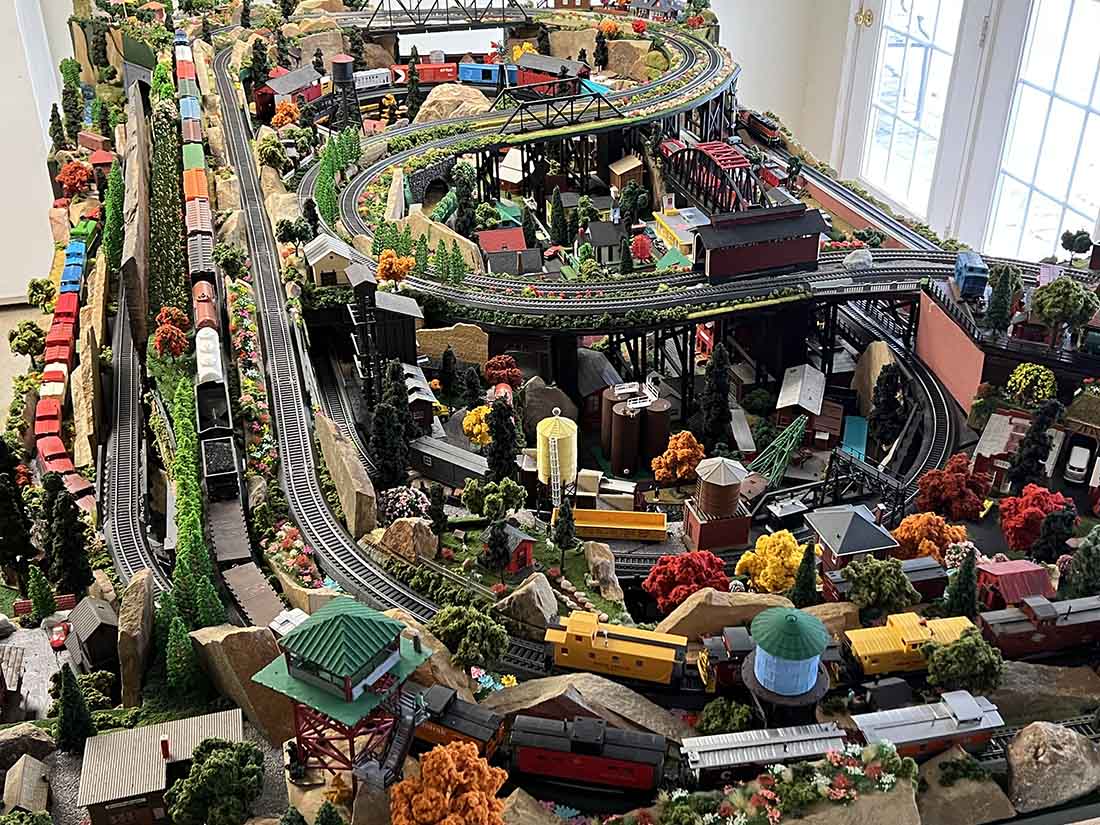
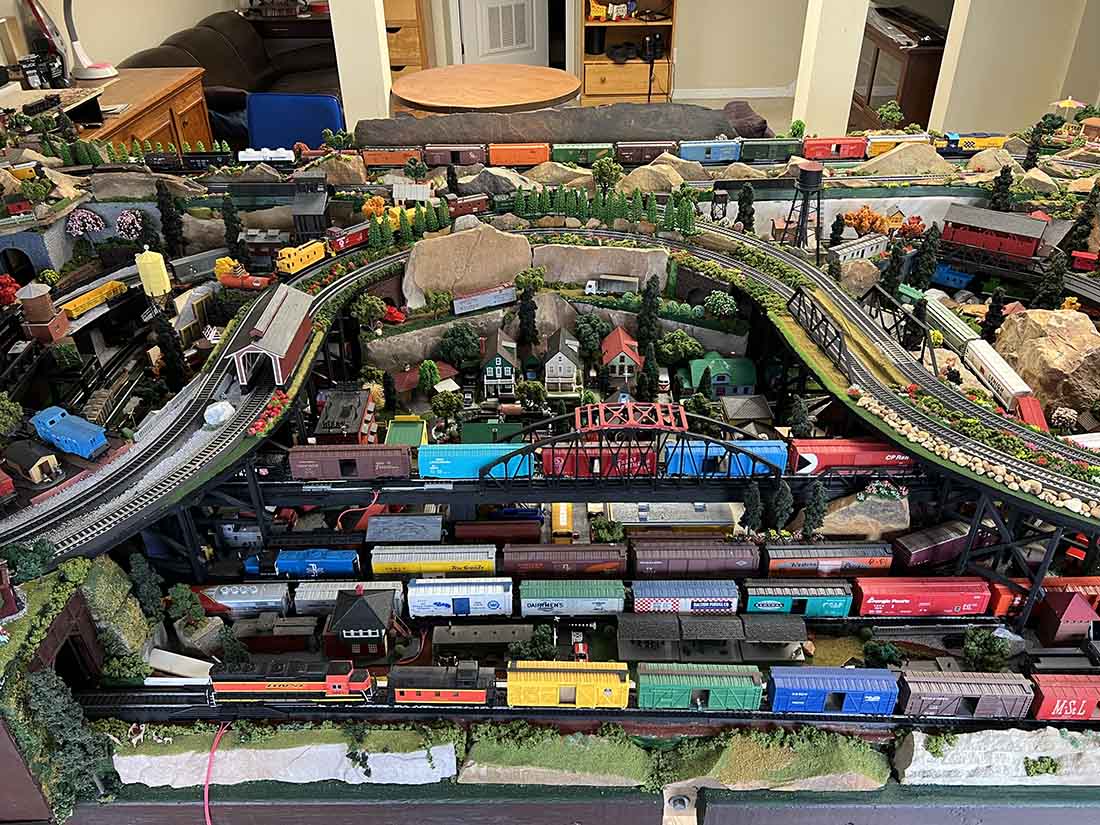
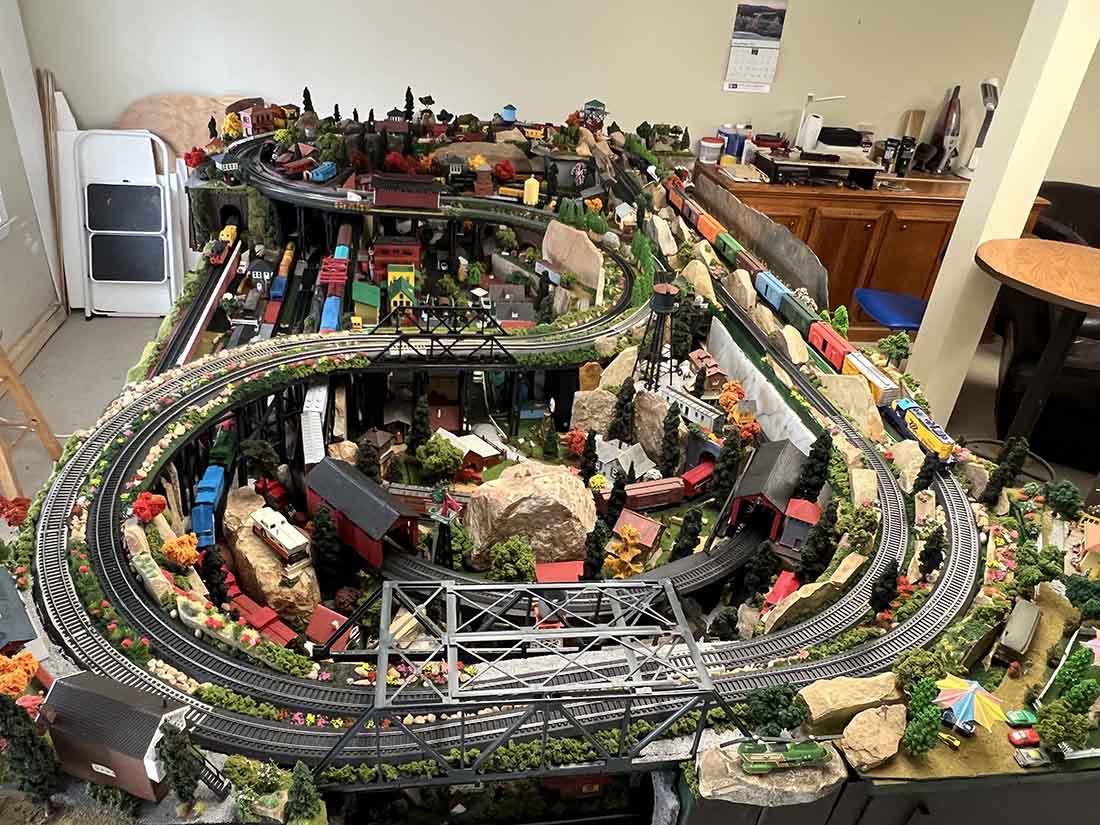
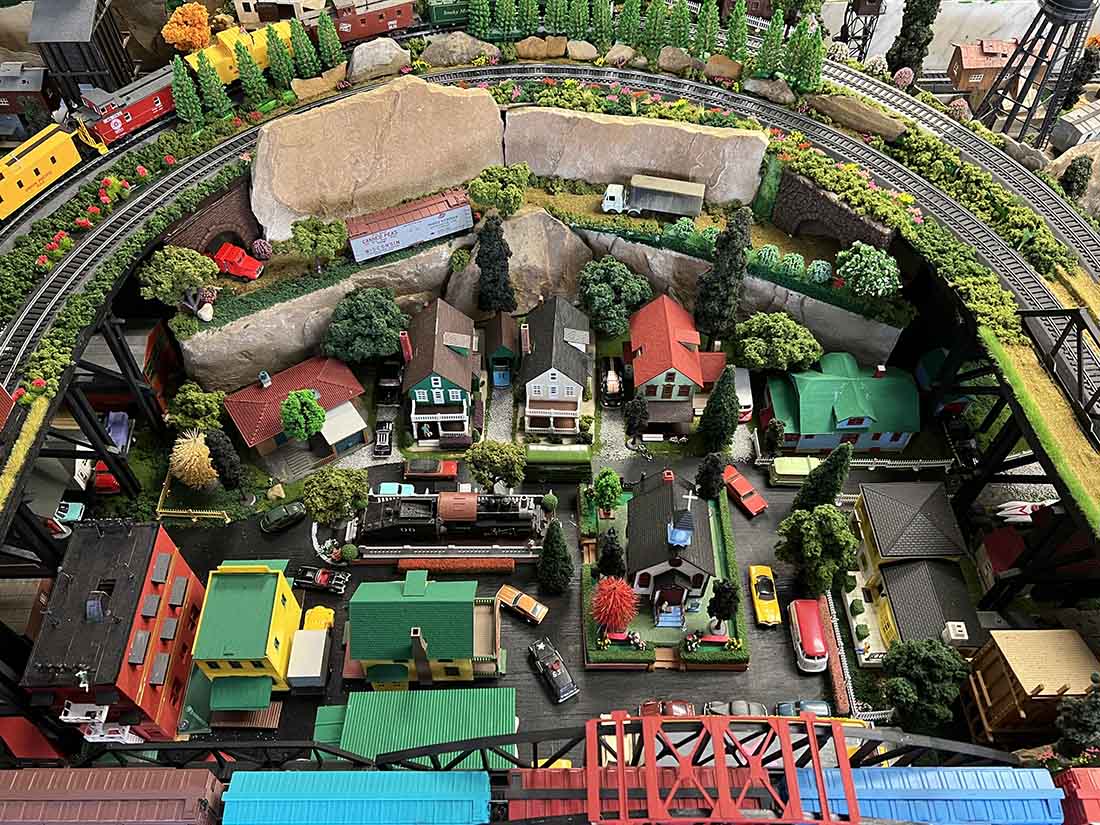
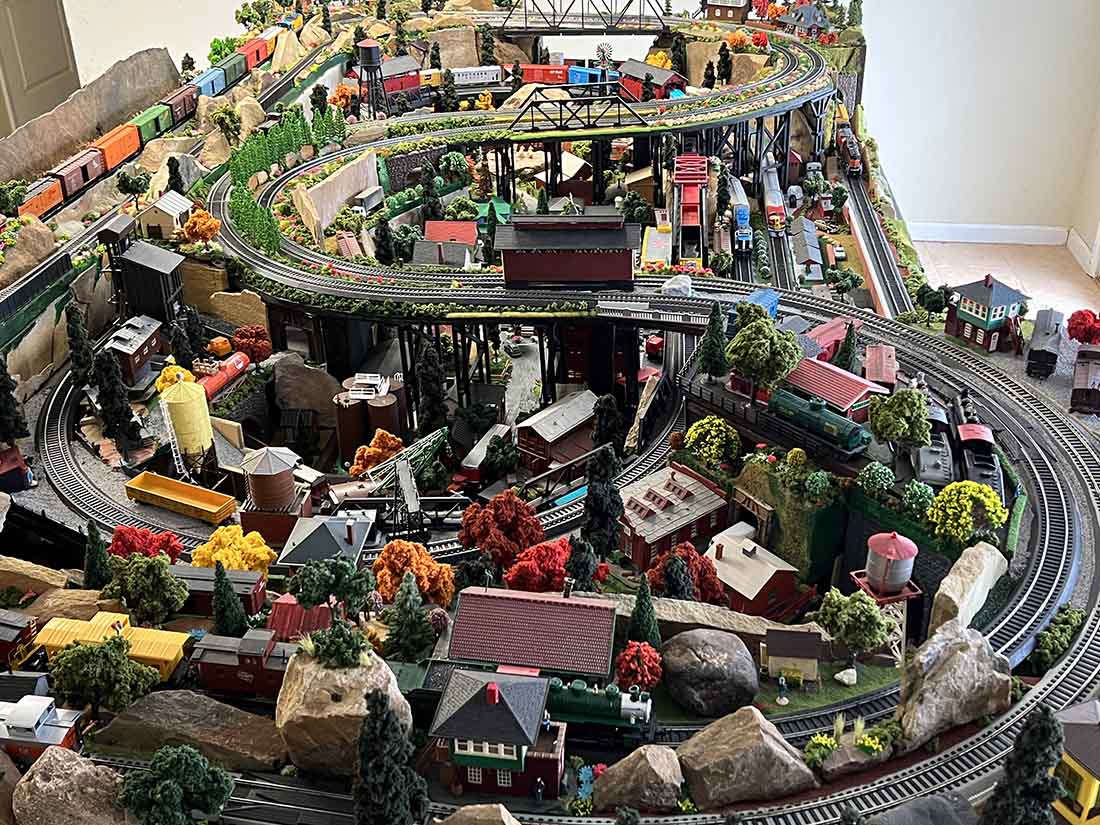
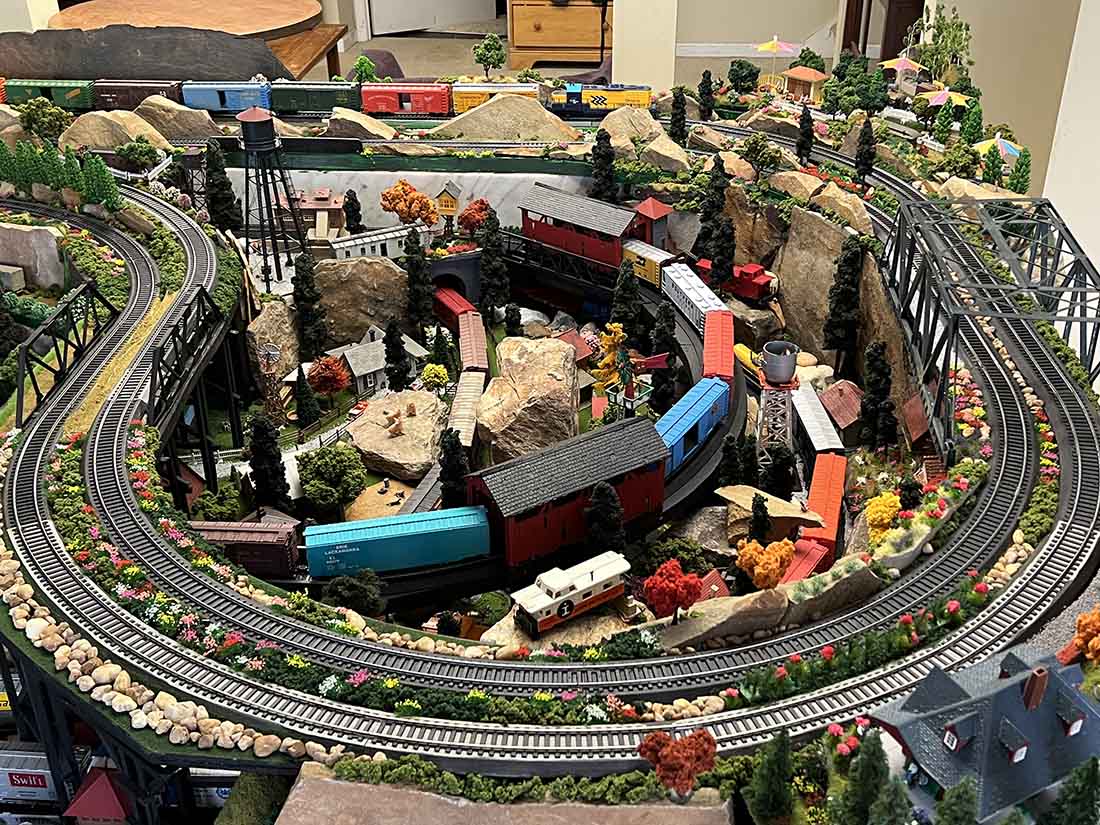
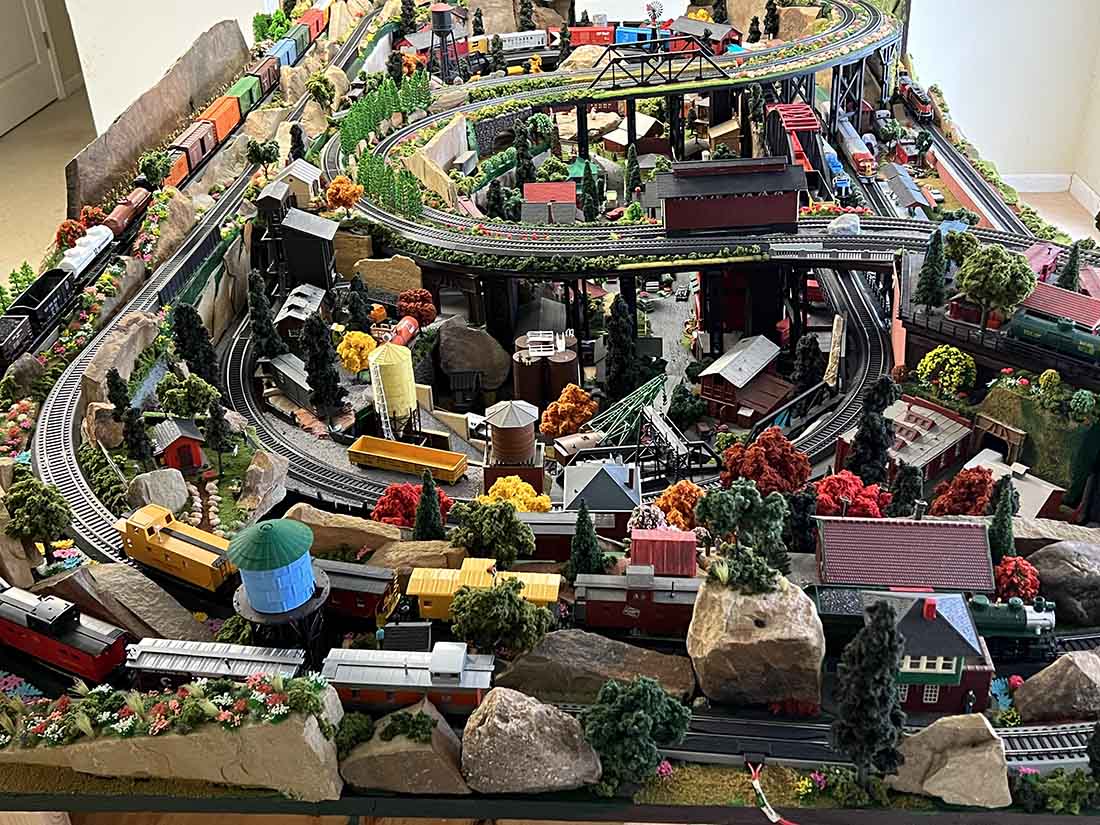
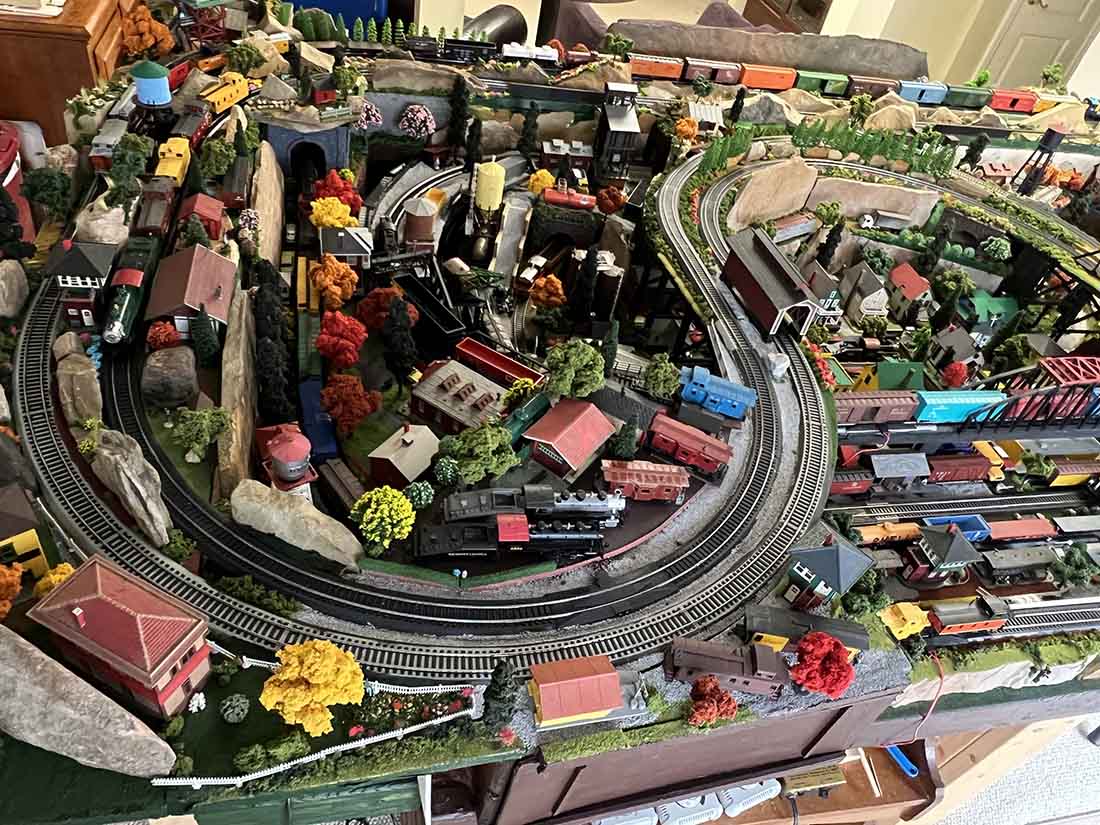
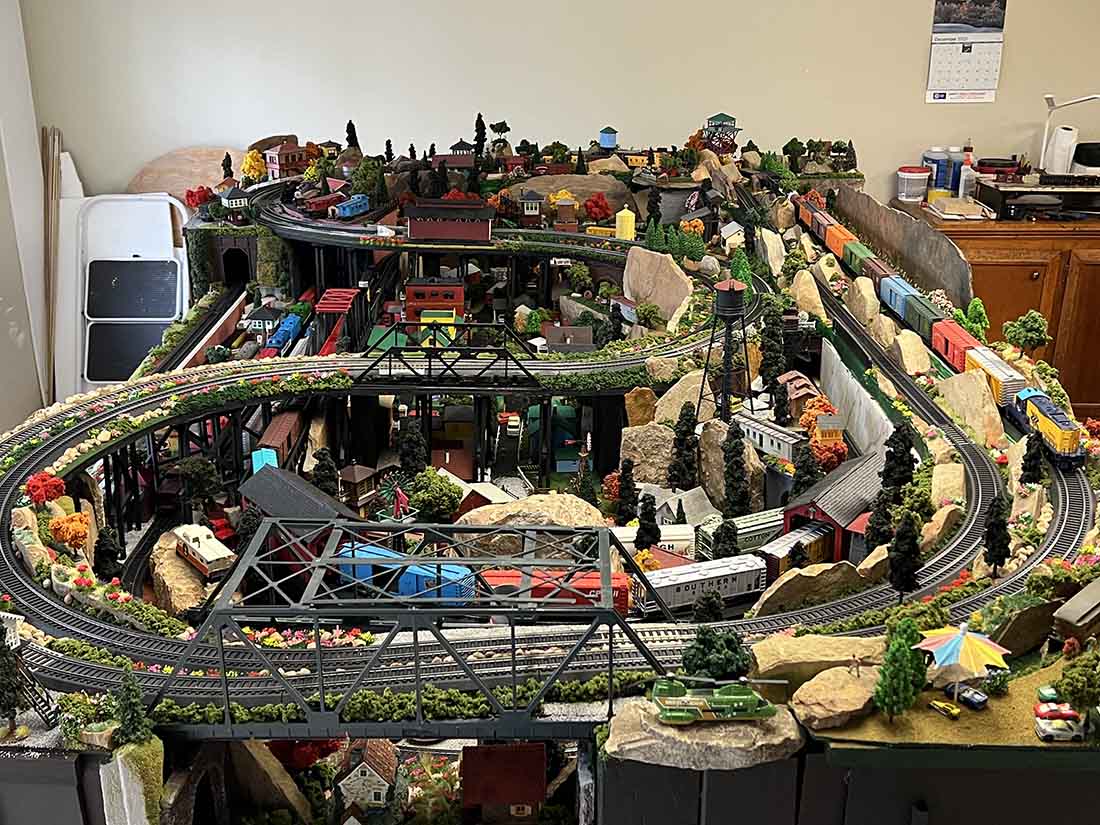
My goal was to create as much effect as I could and have trains coming and going in and out of tunnels and over and under passes and several tiers of track.
I’ve allowed total access to all the track with removable panels for maintenance which I do regularly.
The trestles are hand made and most of the rocks are real.
Some kits are as designed, some I “bashed”. A lot of stuff was altered to make it work .
Enough said , I used my resources and my imagination and in the spirit of Frank Sinatra, I did it my way .
Thank all of you for your tips and posts and kind comments and compliments. One more kind thank you to Mr. Lee for all you do .
Please enjoy , thank you ,
Stephen”
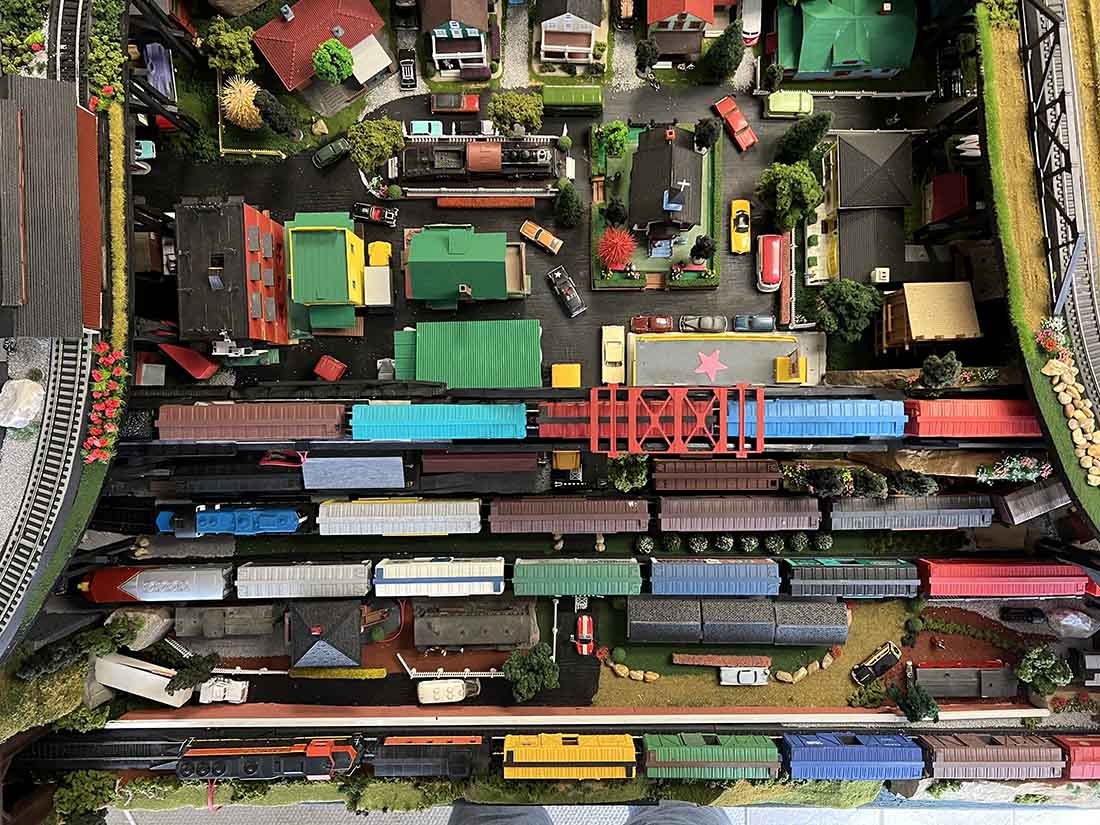
Now on to Dave, who has been having fun running 8 trains at the same time:
“Hi Al…
I have just uploaded a video showing why most of us now run our layouts on DCC , as I show you can run multiples of trains at the same time.
I have 4 main circuits so I ran 2 to each circuit giving a total of 8 trains running at the same time , and do say on here though its not advisable , as unless they were all running with the same CV settings and on Consist you will get accidents.
Its not really possible to keep your eyes on 8 running and control them all at the same time, bit of fun though.
I will admit it took a good few shots with the camera to try and capture without showing a few accidents…as they do in Film studios ..scene 2 take 10. LOL..
Also like to say to You and all the members A Very Happy And Healthy New Year for 2023
Dave”
A huge big thanks to Dave and Stephen – I did enjoy his narrative on his Tyco HO trains.
John’s been back in touch again with a very detailed narrative on how his layout has taken shape:
“Many years ago when most would say that they did not have any room for a layout I built my first small layout.
I was newly married and we lived in a small apartment. The only room that I had was the secretarial return of my desk which was in the bedroom.
A few years later I was in college and nothing had changed: No time, no money, no space but I still had my desk and I built my third small layout in that space.
I did not know about the traditions in the UK and the only small design I knew was John Allen’s Time Saver.
The layout I built then lasted for many years. While other layouts have followed, the pattern for my modeling was pretty much set.
About 20 years ago or a little more I discovered Carl Arndt’s blog which was entirely devoted to what he called small and micro layouts. While he defined a micro layout as being four square feet or smaller, he was not as dogmatic about that size as some others have been since.
Carl focused on an idea, a principle, the idea was the smallest possible layout that still retained a defined purpose for existence. It was through Carl’s site that I first became aware of the Inglenook shunting layout (and several other plans suitable for the modeler with “no space” to build a layout.
A short time later I discovered (a little too late) a delightful magazine known as Model Trains International, While I have collected several issues of that magazine I would very much like to collect all of them.
MTI and some other chance encounters with Railroad Modeller, Continental Modeller, and Model Rail broadened my horizons and interests. In all casas these offerings were far better, far more consistently suited to the space I had available than any of the major domestic magazines were.
While looking for certain trackplans I was introduced to this blog. In short order I found myself needing an enginehouse for one of my layouts — The only model that would fit the space was one of Al’s print out kits.
It was not long after that when almost every structure model I built would begin as a print out kit.
Then I started scratch building using the techniques I had learned from the Print-Out kits and John’s (not me) instructional videos.
Note: If you are ever feeling depressed, John’s tutorials on building Al’s kits is the absolute best and healthiest cure!
Now about my latest project.
I have been subscribing to Model Rail for about four years now or a little more. About six or seven years ago Model Rail included a little booklet that featured about six or seven very small layouts; one of the layouts featured was an N scale layout called “Clark’s Yard”.
I have wanted to build an H0 scale version for a long time now. When Model Rail had Bachmann build a bespoke version of the World War II USA 0-6-0 tank locomotive about four years ago I had to have one.
Of course a locomotive means that one needs something to display it on. The best display is a layout! Uh Oh… A layout means more equipment and more locomotives. And down the rabbit hole I went chasing Alice!
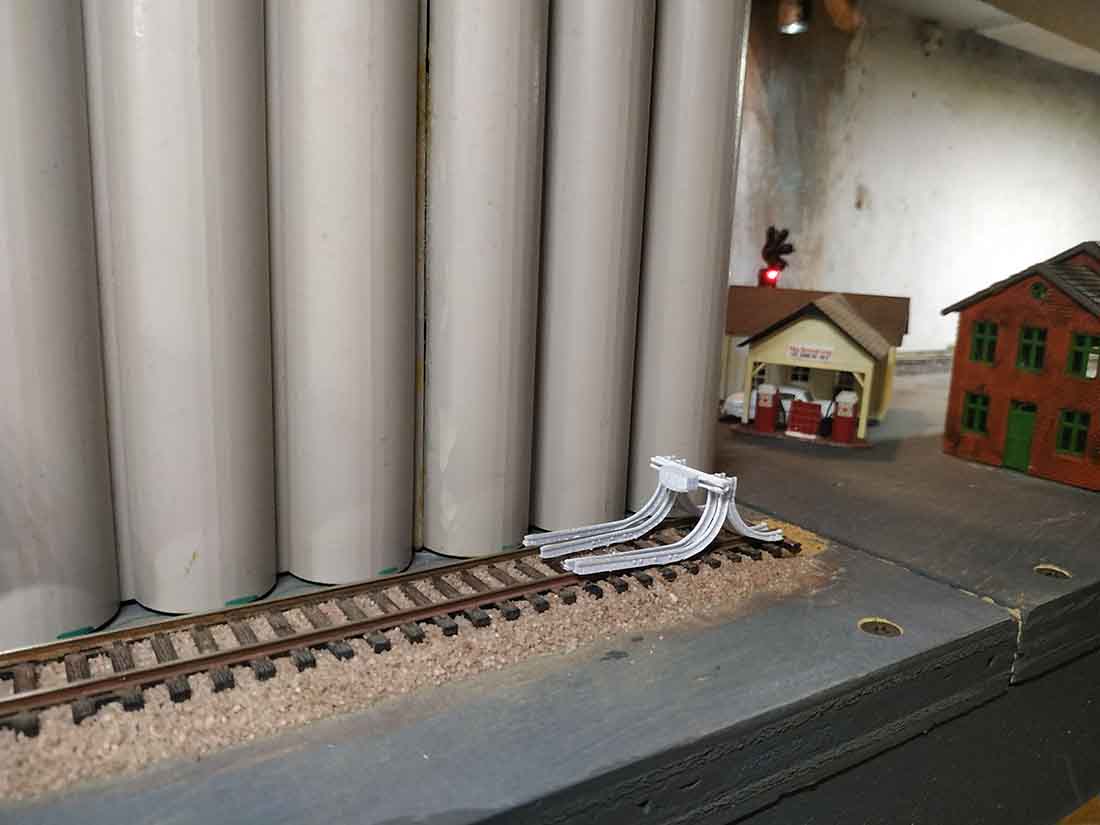
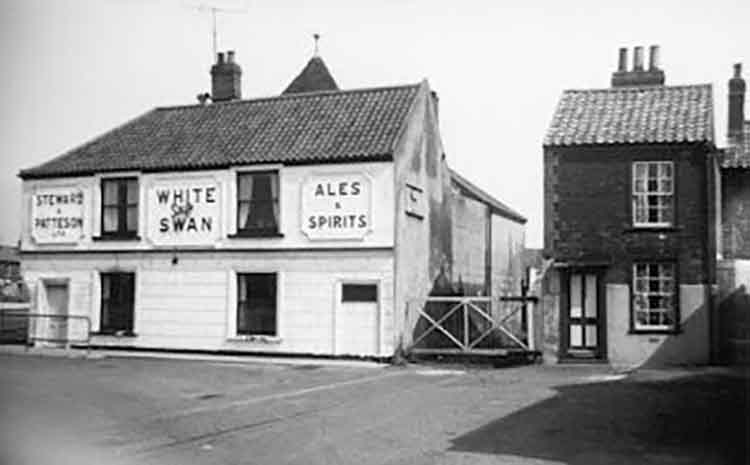
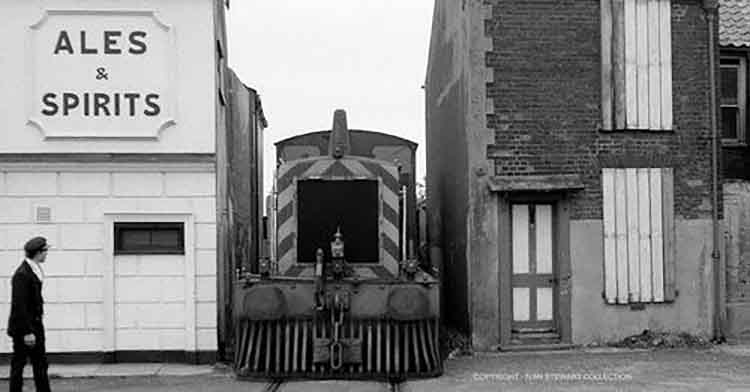
A layout? Yes! But now what? Clark’s yard was the obvious choice but even then something was missing. What was missing was a good way to hide the mouse hole that allows the train to leave the scene. That answer came with a picture that I saw on a Facebook page.
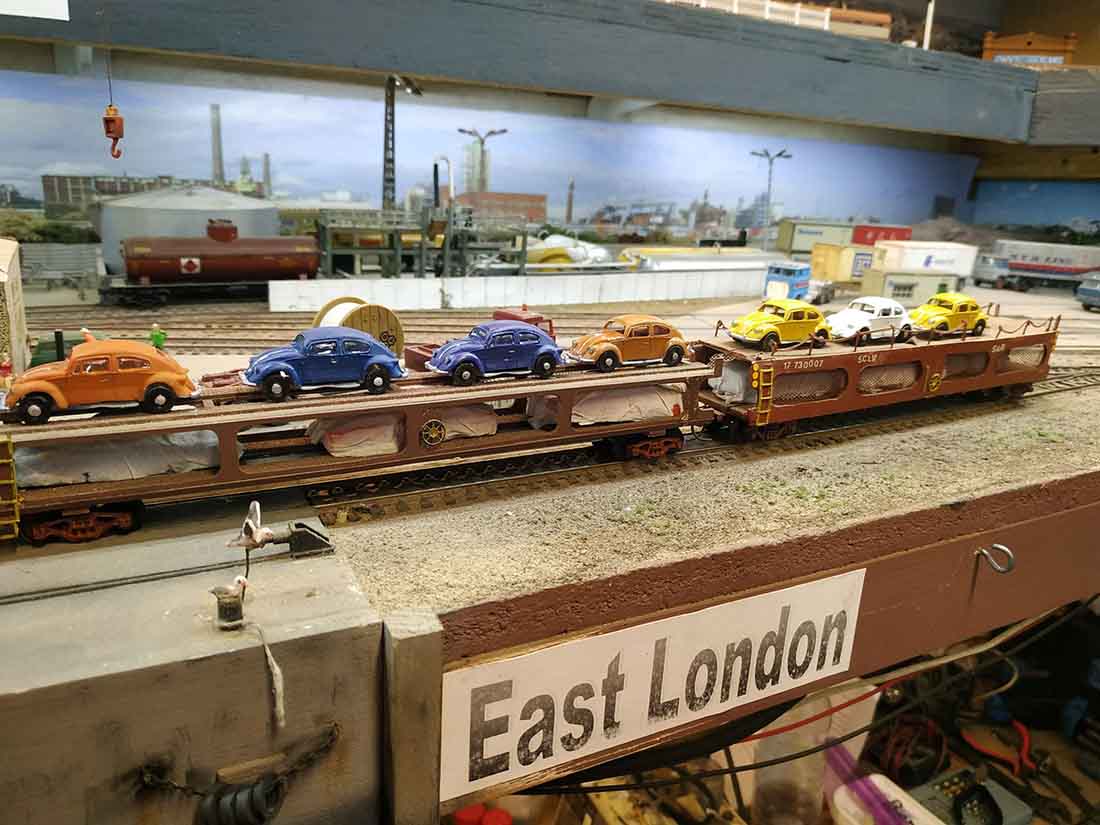
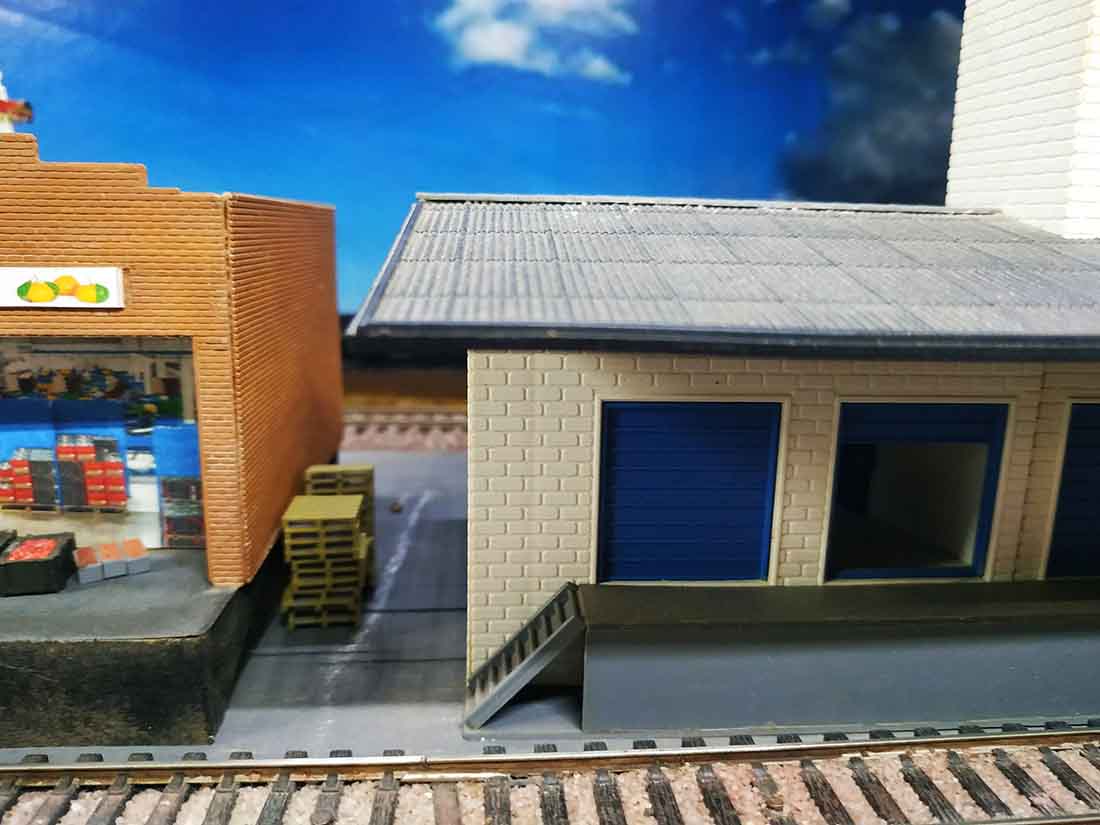
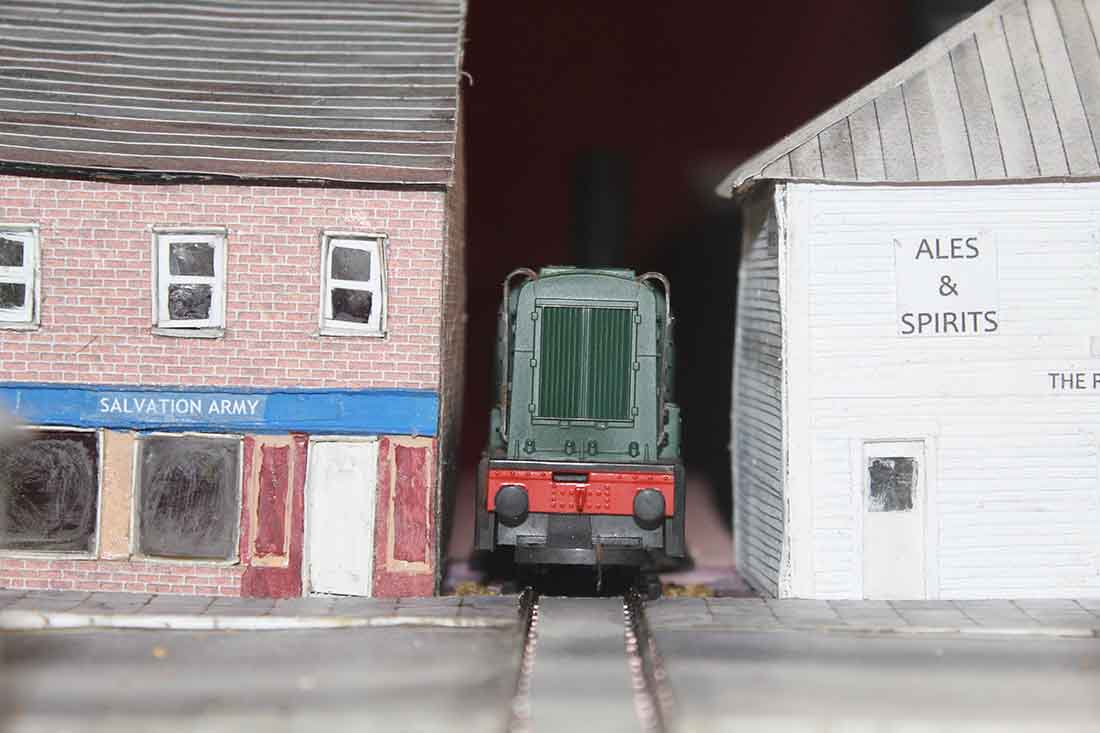
While I wish I had a photo of Clark’s Yard, here are two photographs that crystalized my vision. (The third photo is my version of the scene.)
Once I had the track plan decided and how I would enter the scene, then other things began to fall into place.
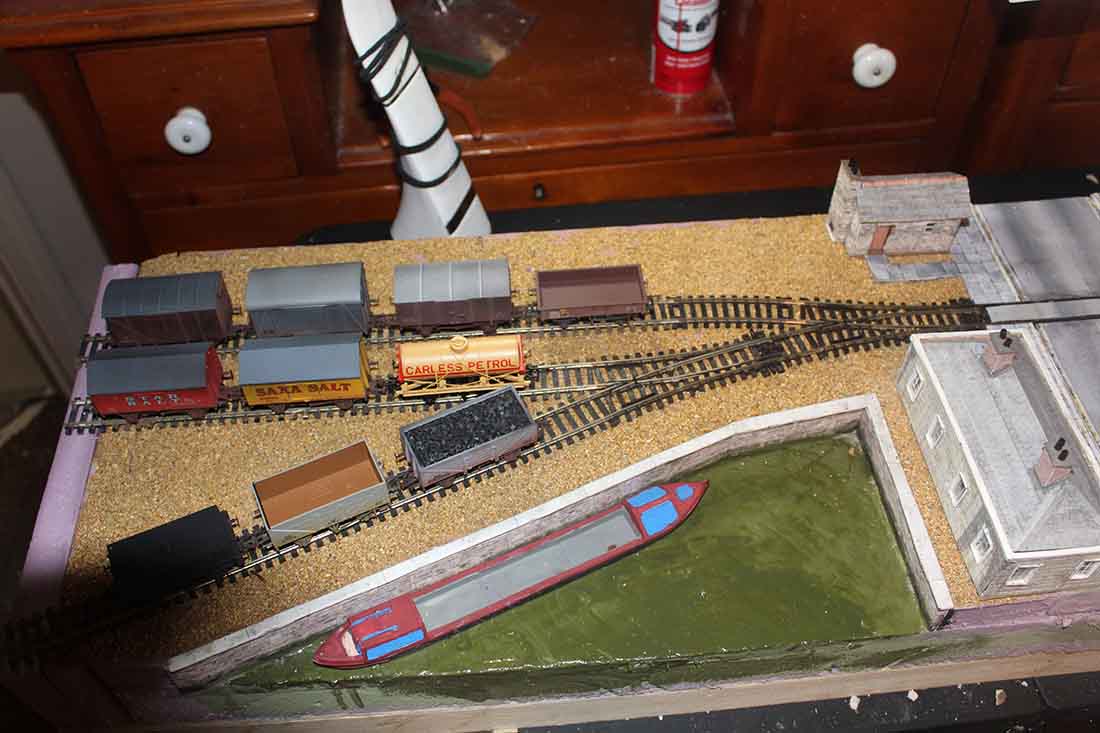
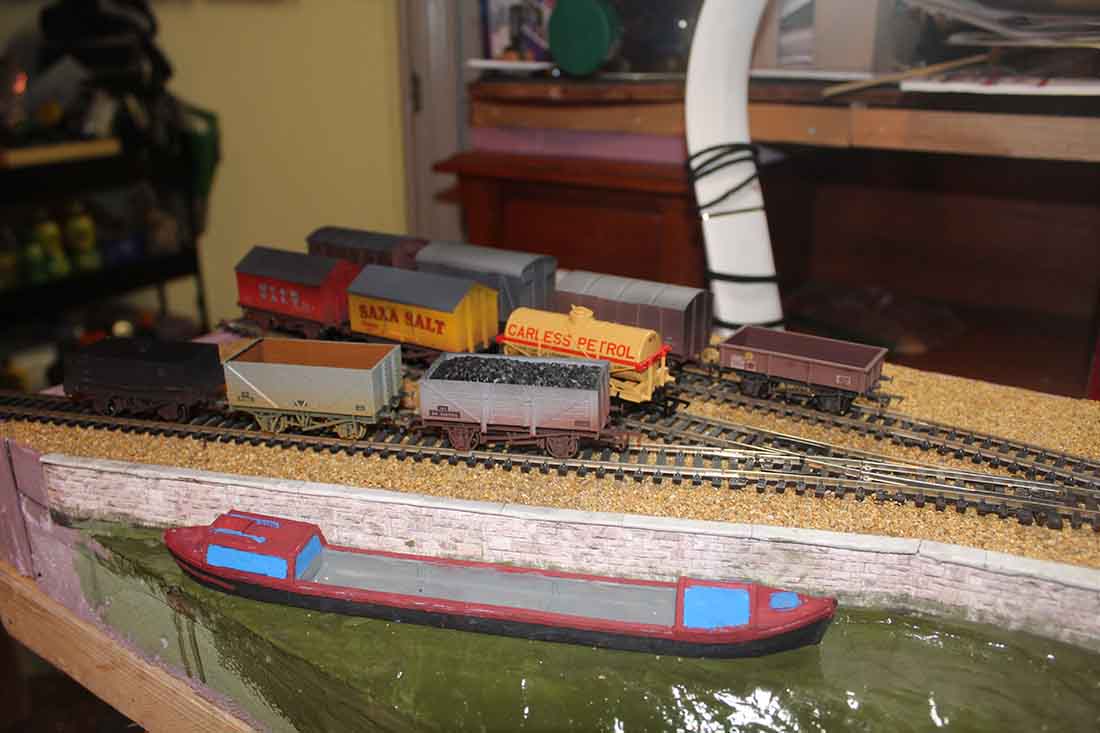
On thing I knew I wanted was a dockside scene. I have wanted to try my hand at one of these for a while and seeing a scene with a canal narrow boat taking on coal was very much on my mind.
About two years ago I purchased a resin casting for such a boat (actually three such castings because it was almost the same price for three as it was for one once shipping was included.) this layout would be the perfect chance to put one of those castings to good use.
Clark’s yard had a coal dump for a power plant where I have put my little dock (quay) scene.
One day I want to get a Clyde Puffer (which I will name Maude Lynn) for another small shunting layout featuring a dock scene. I have the ScaleScenes print out kit but I want to finish this project and a couple of others first!
Here is the dock area as it stands right now.
I painted the foam a dirty green and then used Gloss Mod Podge to give both texture and a watery look for this portion of the scene.
The paint is cheap acrylic (actually a combination of three colors) and the Mod Podge is a curiously thick type of clear drying PVA that textures well.
Mod Podge is also available in several finishes from matte to a very high gloss.
I am going to practice making cobblestones from DAS air dry clay to add more detail to the area where the wagons with coal are unloaded for the the coal to be transferred to the canal boat. We will see how that all works out in good time.
While I am firming up my canal dock scene, I am also trying to visualize the rest of the scene which will include a warehouse and other structures. I have noticed that the loading areas tend to be different on layouts set in Britain than those set here in the United States.
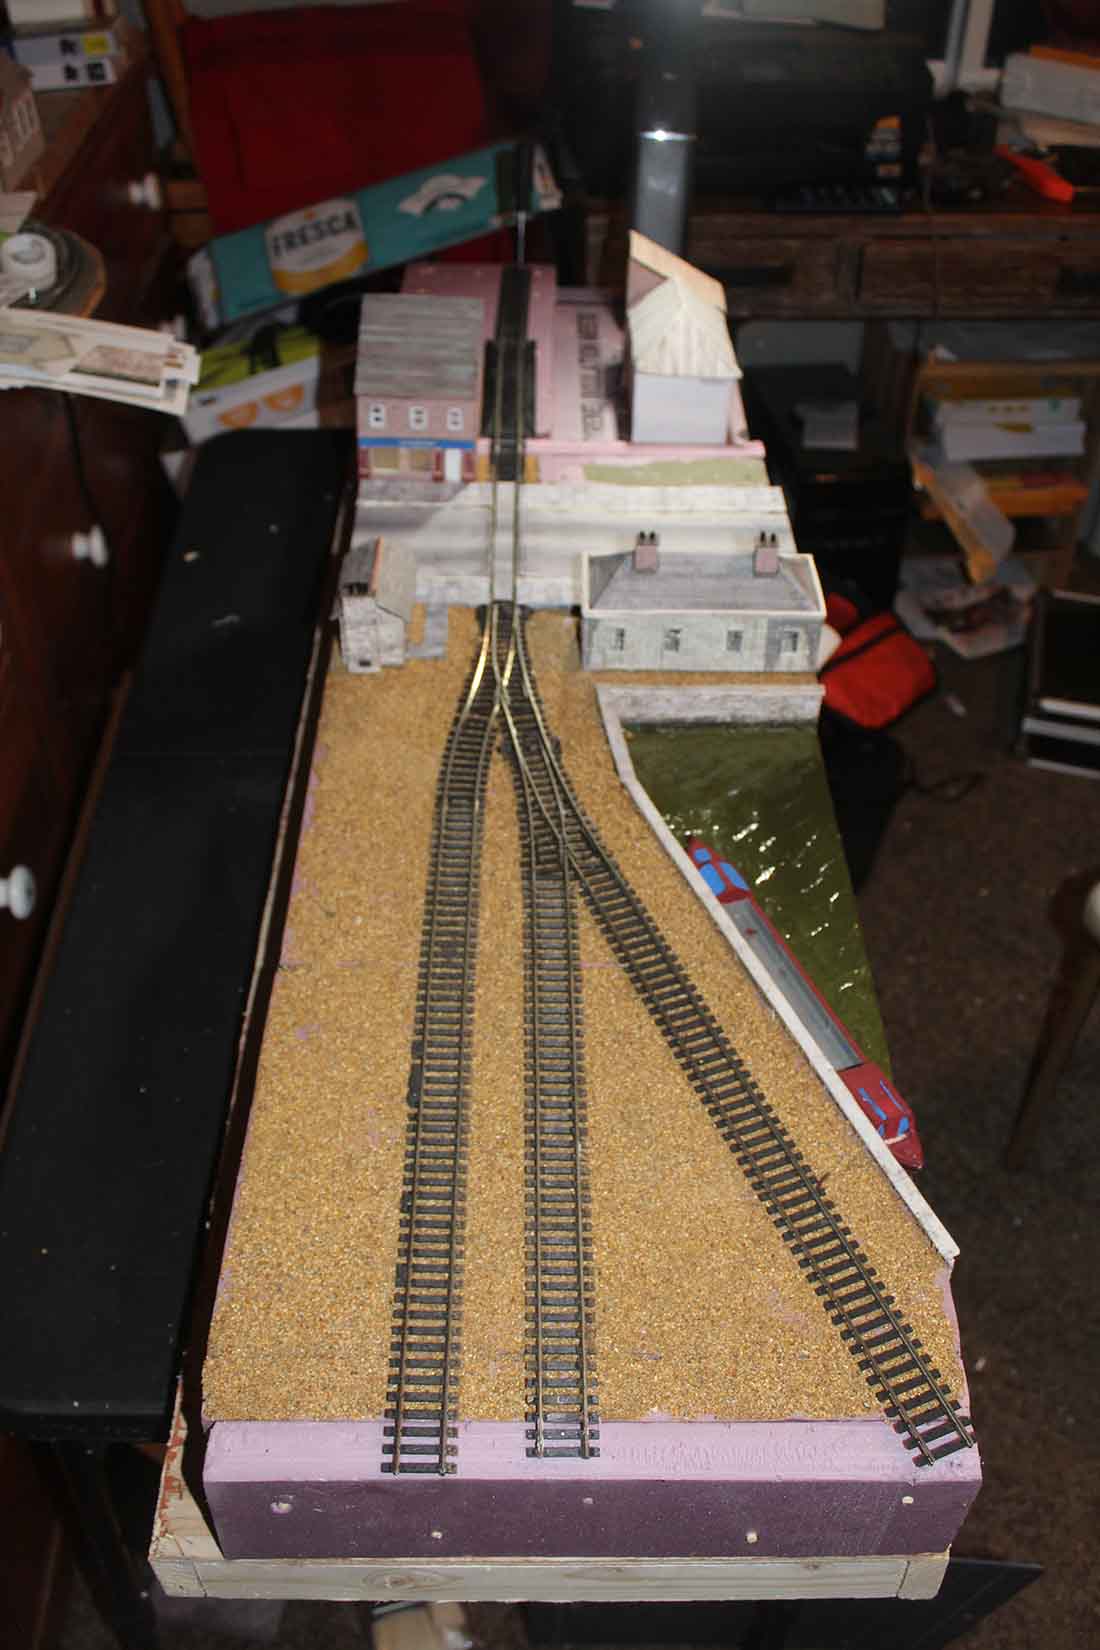
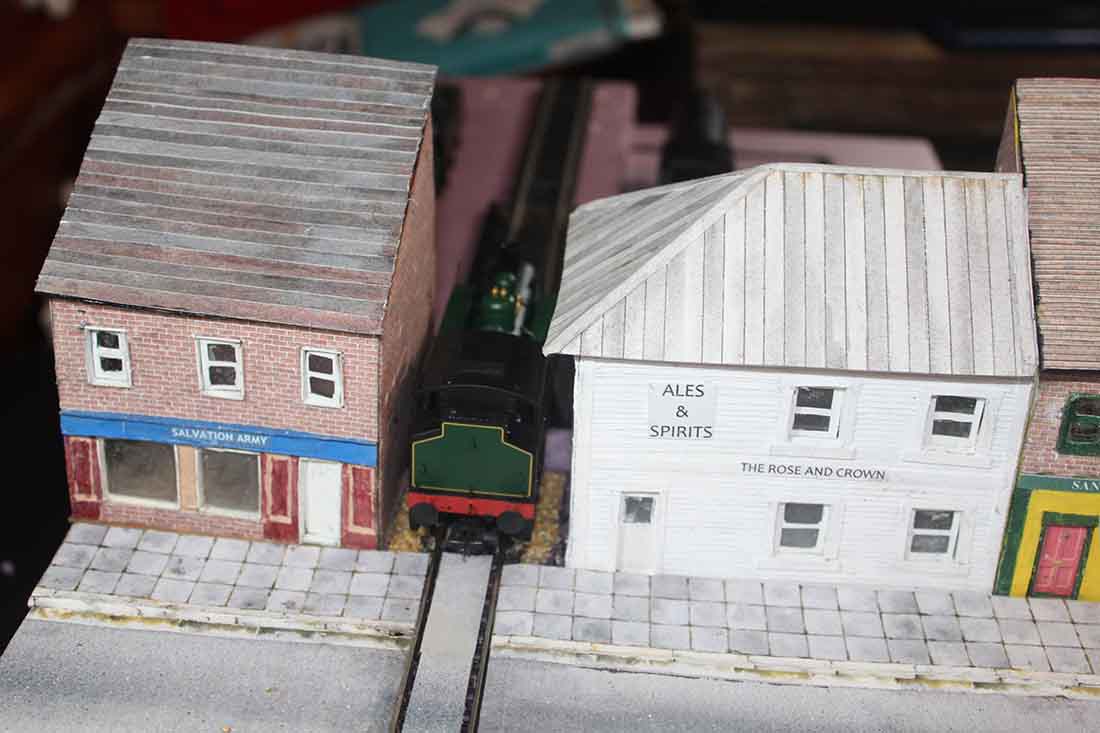
The Street Scene:
Right now the most developed part of this little layout is the street scene.
The roadway and sidewalks are from Al’s print out collection.
When I add automobiles the had part will be to remember to put them one the correct side of the street rather than the right side. (Yes, there is a bad pun here) While I am trying for a 1950’s -1960’s theme, a Morris Minor and a Ford Anglica are must haves.
I realize they might be as out of era as my private owner wagons but — What can I say, sometimes there is no accounting for taste.
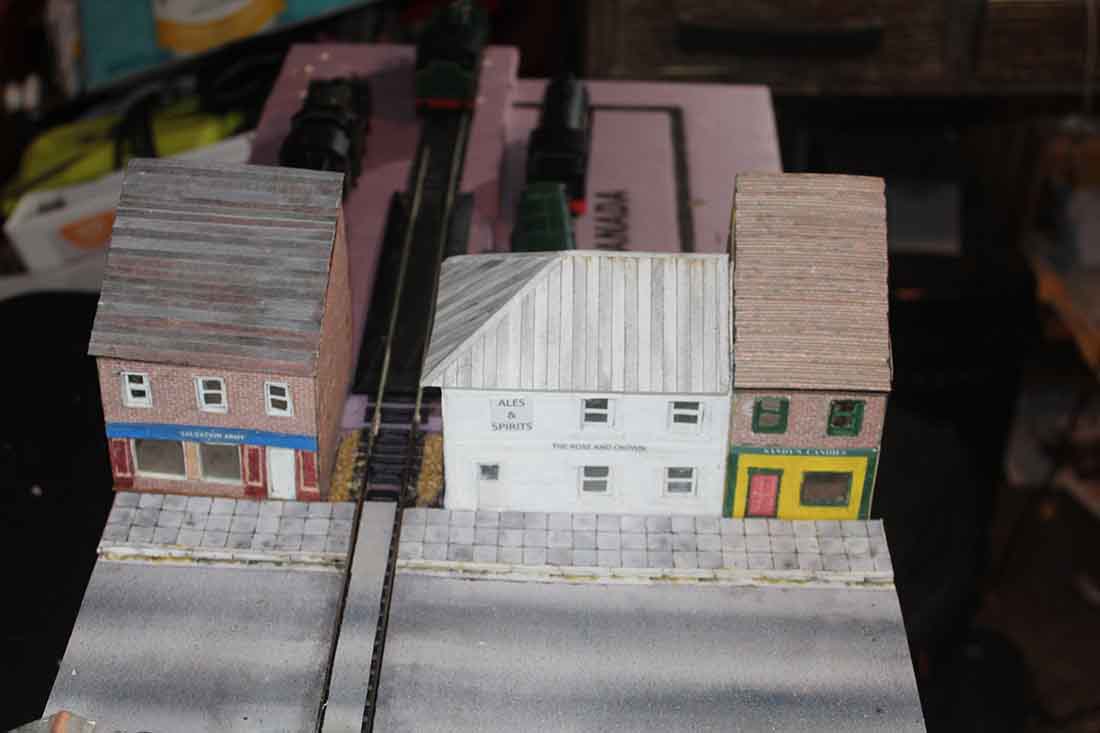
As to the five structures that I have currently built:
The small office is a much modified Scalescenes free print out kit. It is the office from their coal yard but I have expanded it and added detail.
The large stone building is from one of Al’s print out kits (one of the low relief buildings). I believe this one is called canal and it is one of my favourites. I have modified this kit two or three times now and it is very fun to work with. The roof is from Scalescenes and it is from their low relief houses and shops kit if I remember.
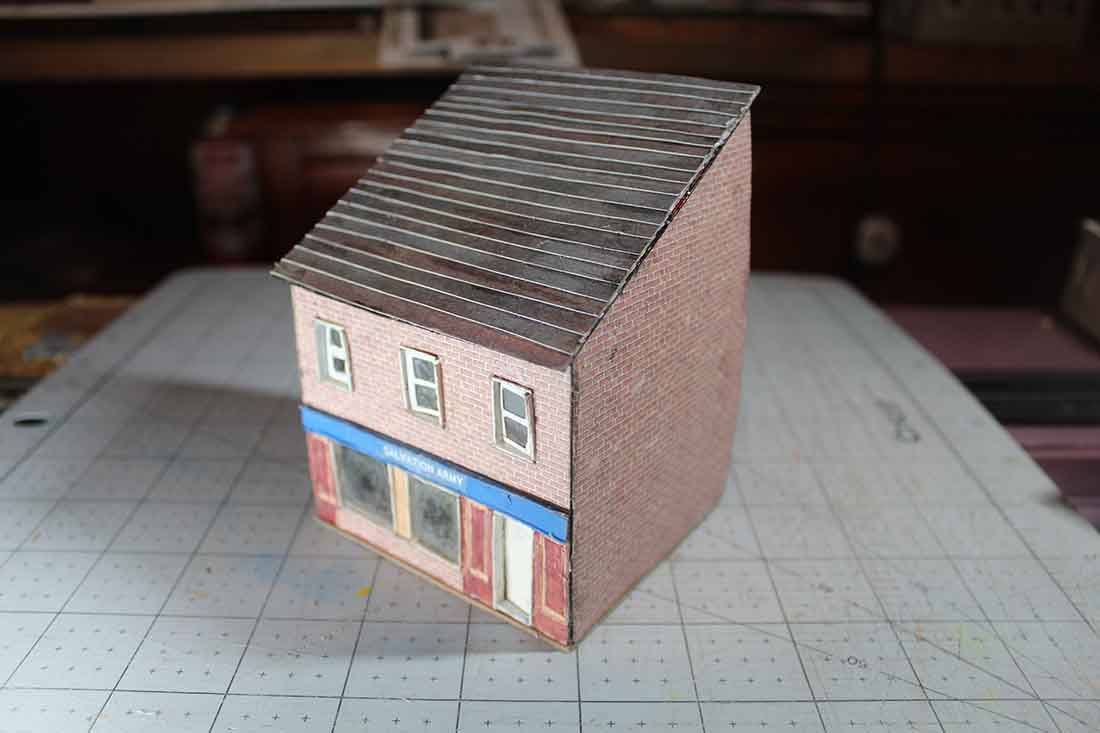
The building on the right side behind the track started out as a Scalescenes print but has Al’s brick walls, my own windows, and enough other changes that I do not know if anyone would catch how it started! I have lettered it for the Salvation Army as I know they used to offer some lodging services at some of their locations.
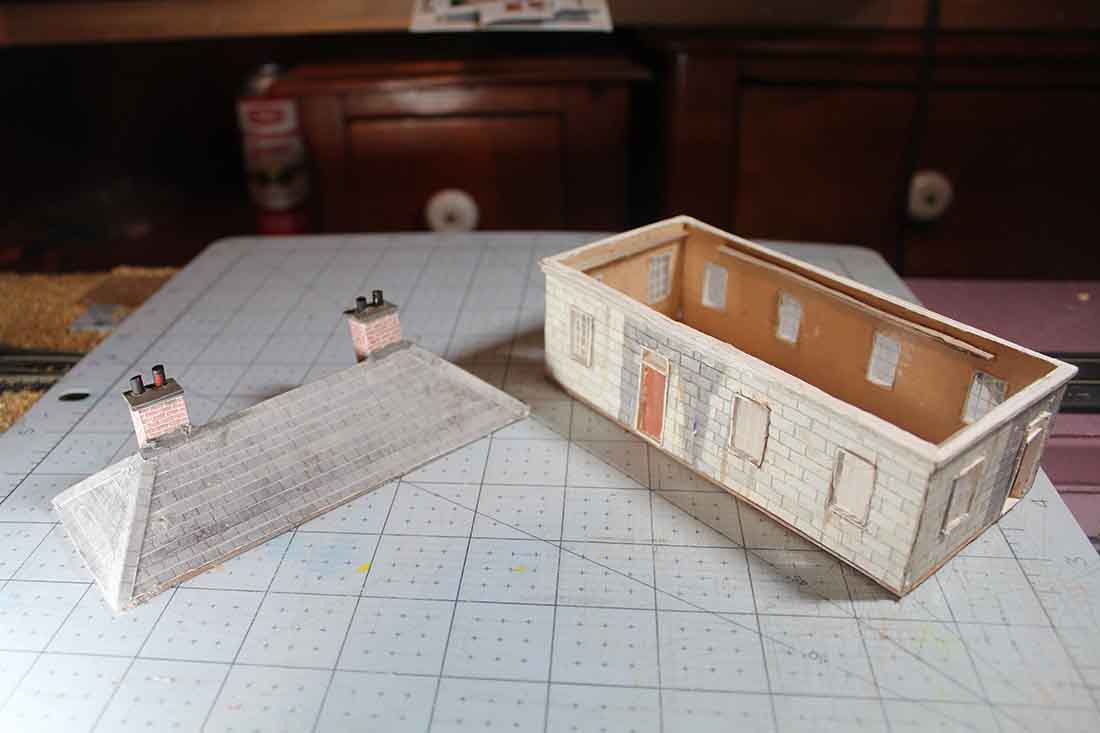
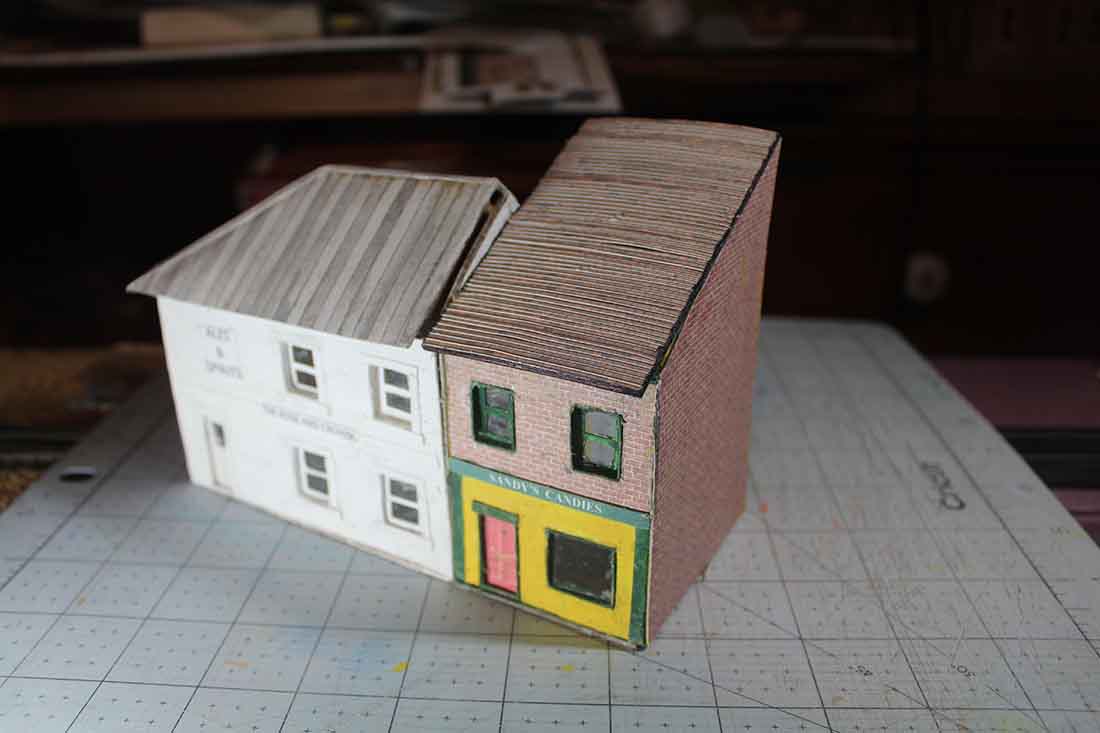
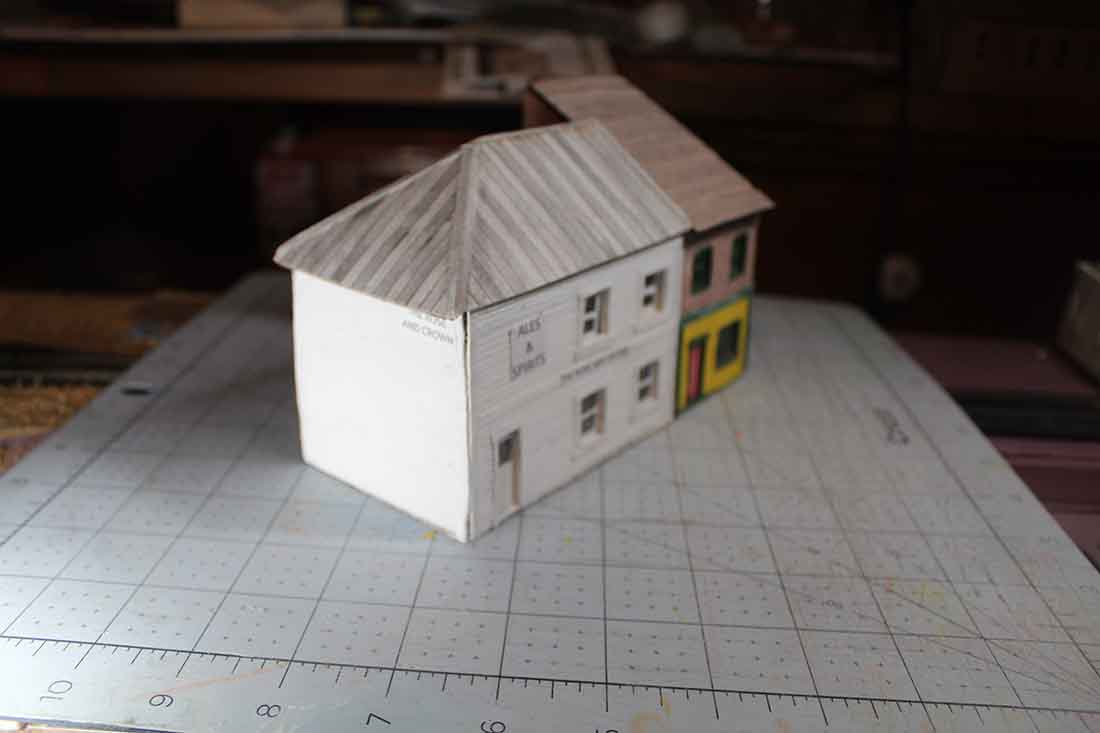
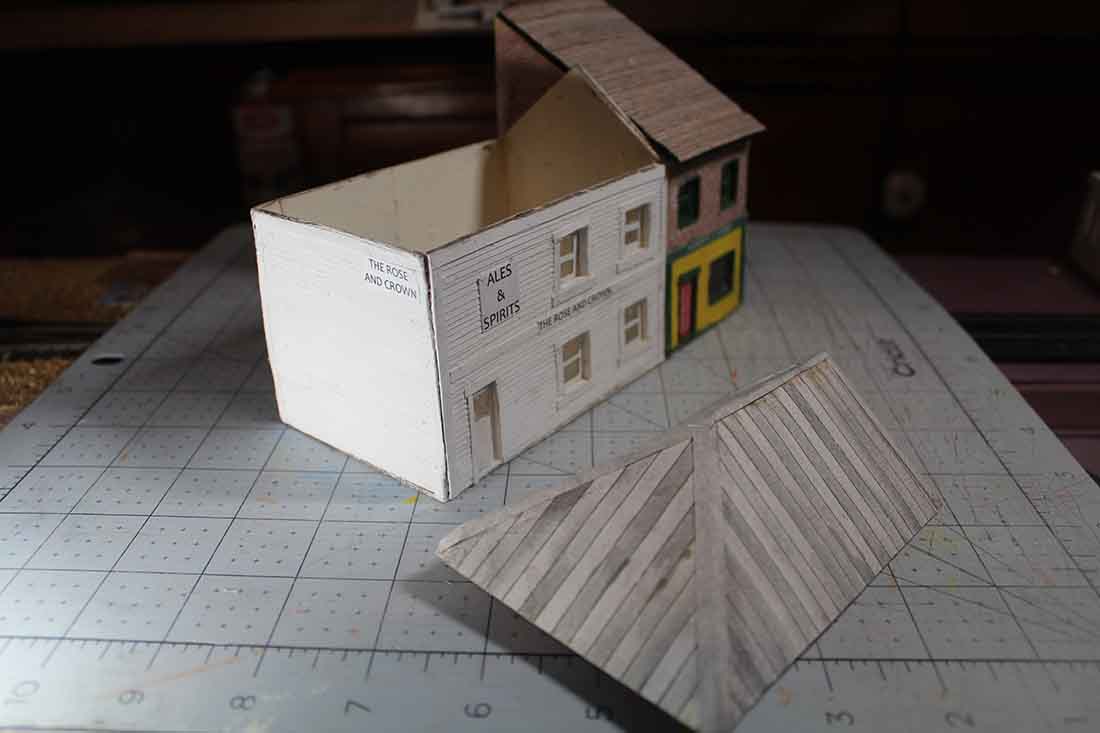
Across the track from the Salvation Army is a pub, the Rose and Crown. This is a scratchbuilt building based on the White Swan as mentioned at the outset of this story. The roof is from Al’s textures and walls but everything else is my own work.
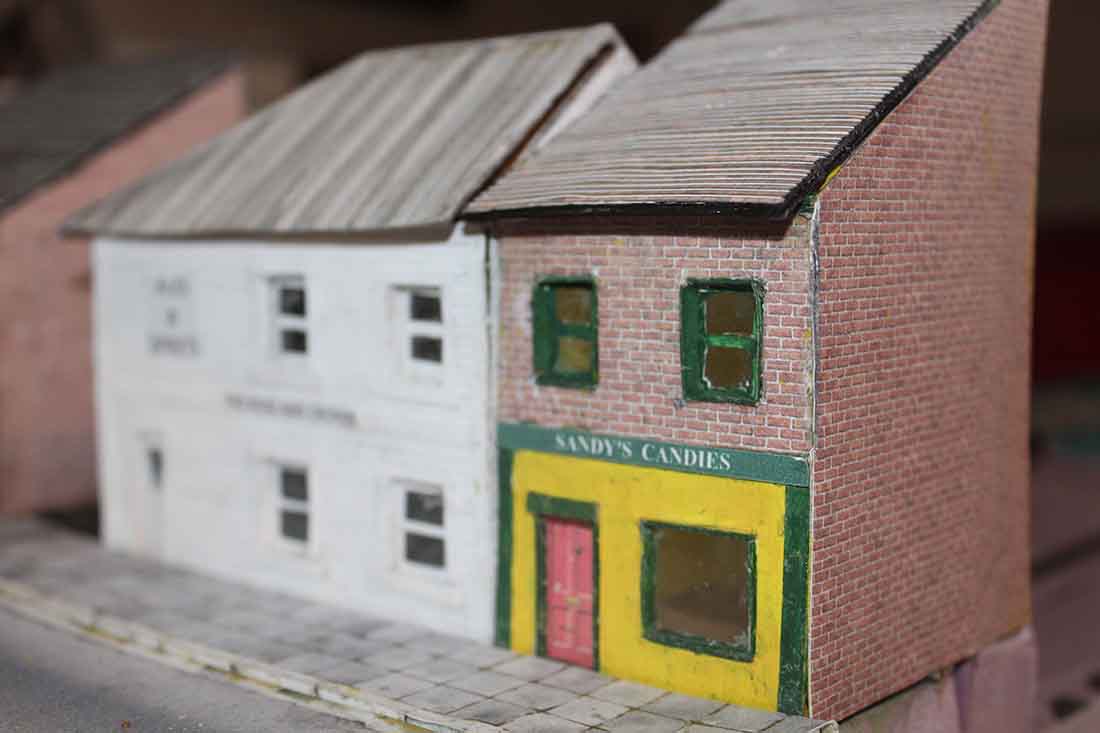
The last building is Sandy’s Candies. Sandy’s Sweets was also a possibility but I thought about that just a little too late. It, like the Salvation Army building began as a Scalescenes shop but I do not know how much of that is left under the paint and other textures.
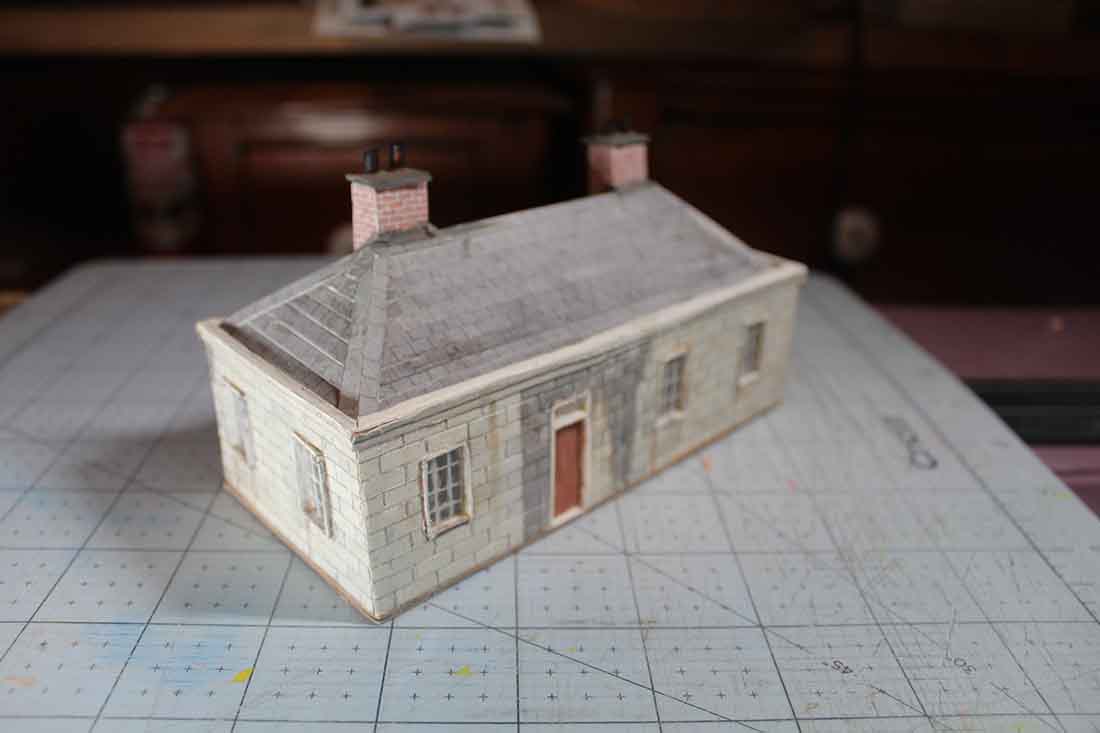
The first structure that I built was this little office from Scalescenes.
As I share that I will also share the larger building that I built from Al’s low relief buildings kit.
The kit I chose is a three story building. I used that kit for a pair of two story buildings on another layout.
Here it is a one story building with a roof where I used Scalescenes textures for a slate roof.
I used the straws from a couple of “adult beverages” for the chimney flues on these structures.
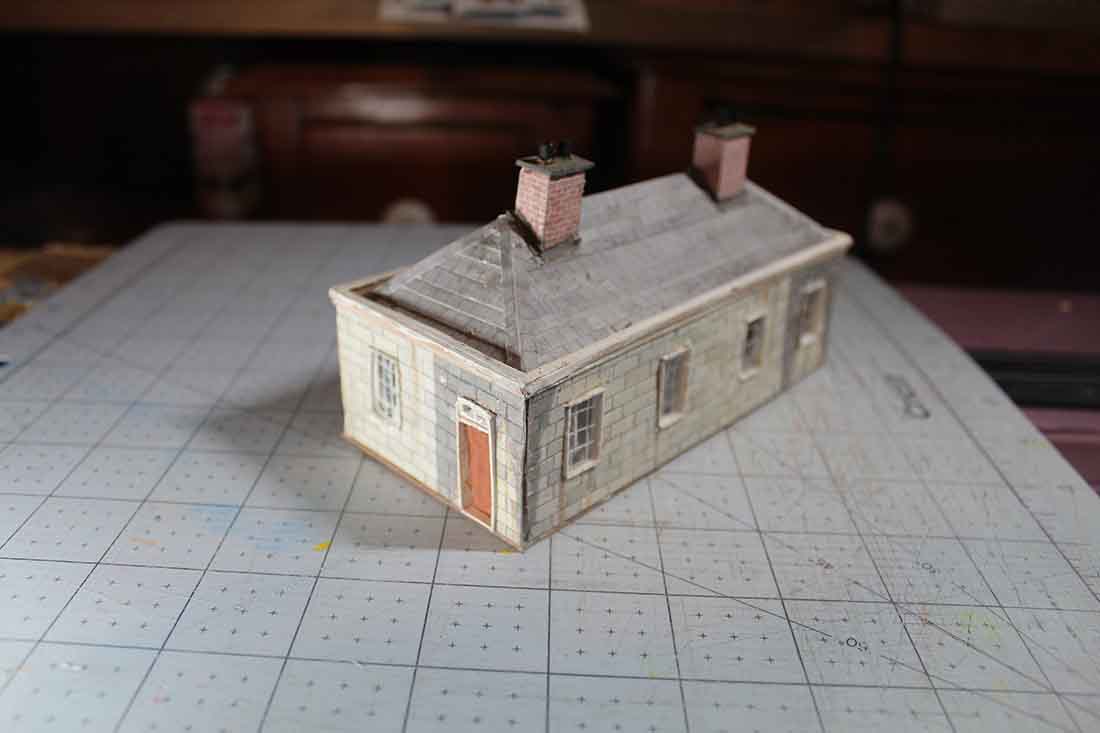
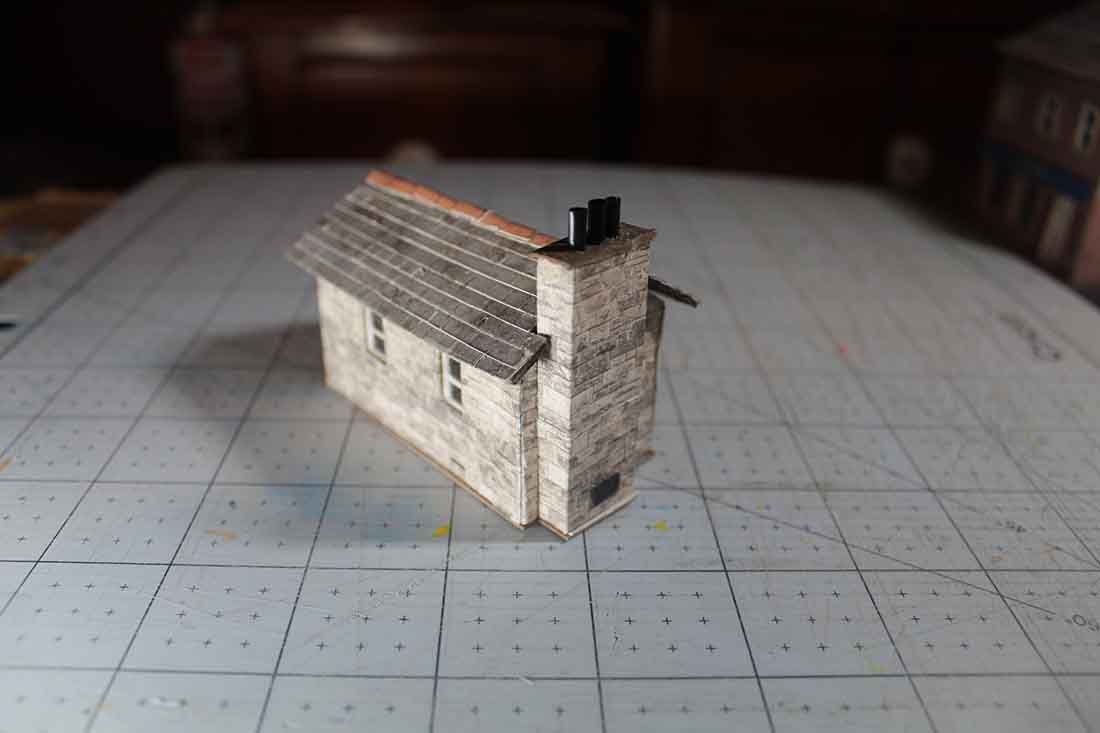
The roof of this building is removable and I wanted to show how i made that happen.
While it is a nondescript industrial type building without a name (yet) I wanted it to catch the eye and draw it into the total scene.
I build my structures so they are removable.
Once I figured out how to put “glass” in my windows all my new builds have “glass” in the windows.
The key is a product that I learned about called “canopy glue”. It is a relatively thin PVA type glue that dries clear and holds plastic to plastic and other materials very well.
Besides “glass” in the windows, where I can I try and make the roofs removable as well.
The Salvation Army building sits on its own base while the pub and Sandy’s Candies share a base.
All three of these buildings are awaiting chimneys with flue pipes as well.
I still have a lot more to do to the layout but this tells the story to this point.
Best,
John”
A huge big thank you to John for taking the time to expand on the narrative of his layout.
Of course, I’m biased, but I do enjoy it when I see some of the printable buildings on a layout.
And there also good news on that.
I have had a handful of mails asking about the bundle deals.
I did hope to have all the printable buildings in the store by now (It’s been on my to-do list forever), but seeing as I haven’t found the time, I thought why not?
What a great way to bring in the New Year by letting the Silly Discount sale see the light of day again.
It is a ridiculous deal: $199 of printable buildings for just $29.