If you’ve ever pondered over making a helix for your layout, Lawrence has shared some good advice:
“Hi Al
I love to wake up each morning and receive an email that you pass on with some ones special layout, Thanks.
This email is basically about building my dual helix. I have added my track plan below showing the DCC section of my layout.
I have completed and tested all the runs (each run is at 4”, 7” and 10” off the table top) except for the two helixes and the bridge between them.
The idea is that all three tracks will enter one helix, cross the bridge and exit the other helix.
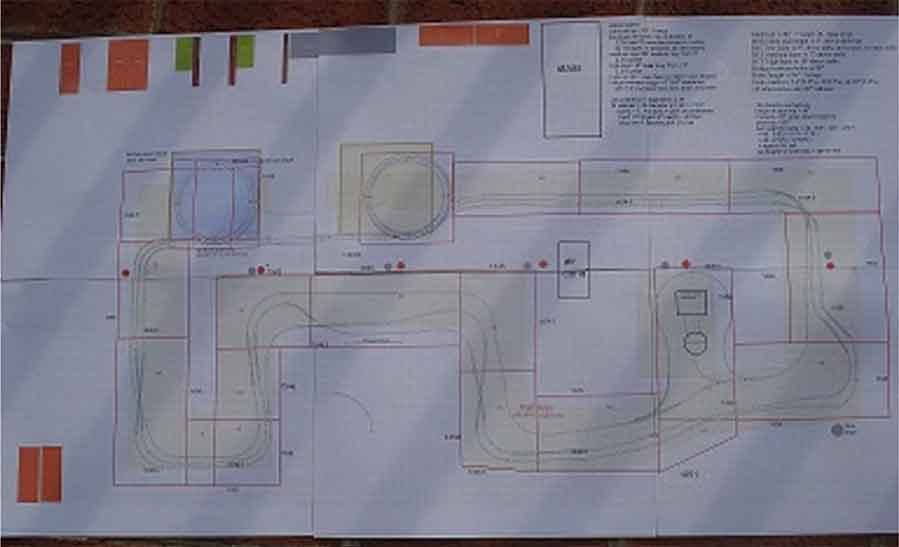
The helix will connect to the three separate levels the trains run on.
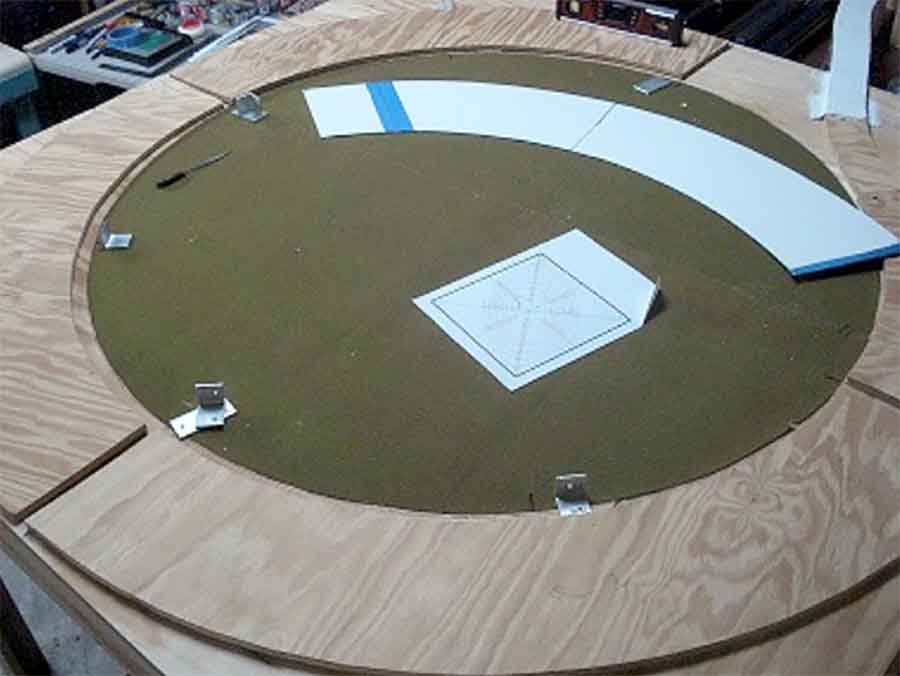
I built the helix platform four inches above the rest of the HO layout to match the first DCC height run. My HO layout is directly above the O scale layout so I was not able to put a center hole in the helix platform.
On the platform I drew line corner to corner and side to side on card stock that covered the platform. With a ruler from the center (one inch on the ruler) I drew two circles.
The other holes on the ruler were one inch less than the 24” radius and one inch more then the 28” radius. Cutting out the one quarter of the circle on the card stock I have my pattern for making all the one quarter pieces for all the rings.
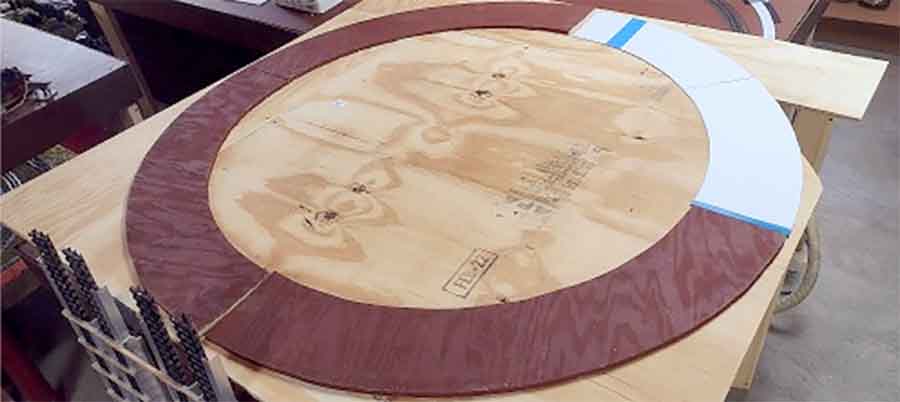
Displayed below in the next two pictures is the pattern and the first ring of wood cut out (P.S. the second picture shows the top of the O scale lift bridge). I was able to cut out eight, one quarter pieces from each one-half inch sheet of plywood, or two rings.
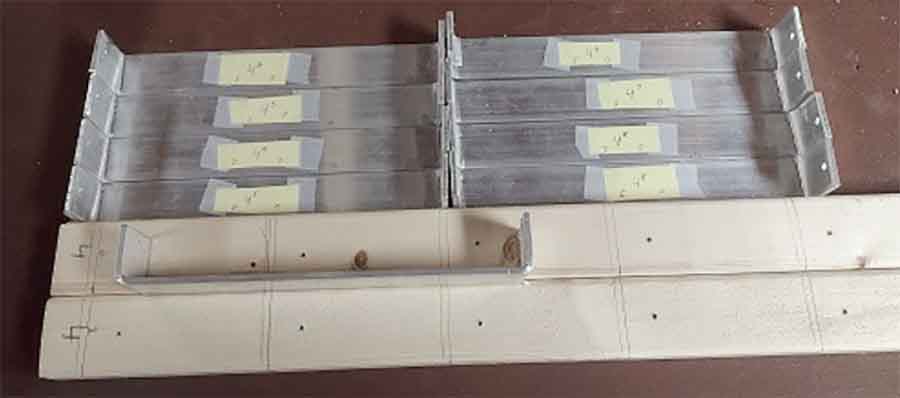
To make the helix I decided to use upright stanchions with aluminum bases for the ring plywood.
From my ring diagram I labeled each stanchion and marked off how high the top of the bent one eight inch (just a hammer in a vice, easy) was to be. I used a seven inch inside width on the aluminum to ensure train clearance.
As I have stated in a previous email all my DCC tracks run at three different levels. The DC track runs on the main base. This is displayed in the next picture.
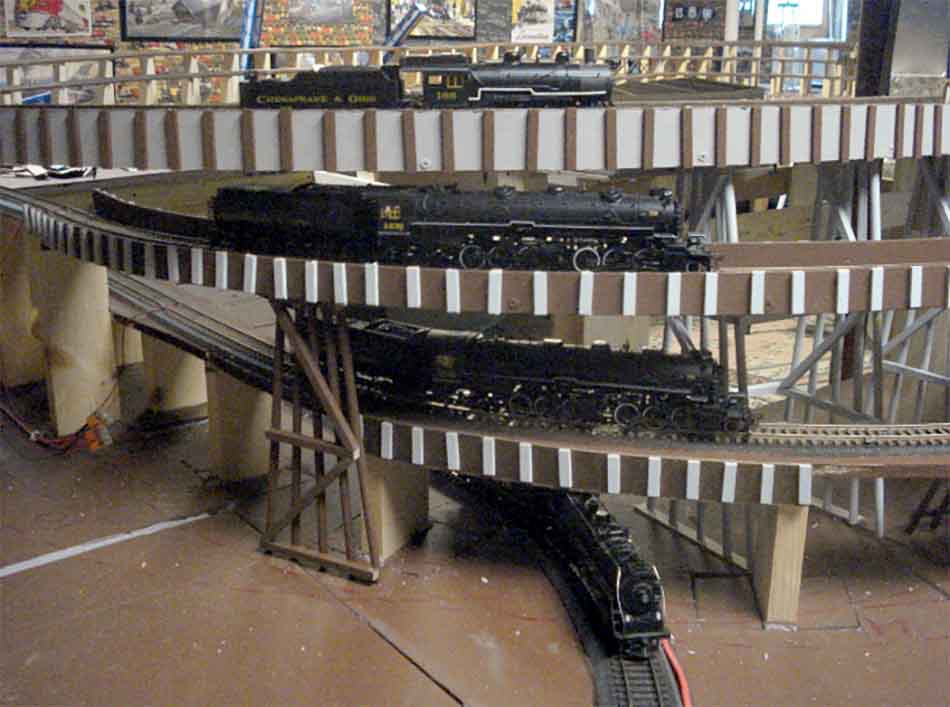
There are eight stanchion pairs per helix. The stanchion pairs assembled and mounted on the platforms are displayed in the next picture. The first ring and most of the second ring is also displayed.
Notice two tracks entering the helix. Because of that the 4-inch track enters the helix at the base of the platform.
The 7-inch track enters the helix enters at the second ring.
The 10-inch track enters the helix on the third ring.
The first ring only has one track so the extra space is treated as part of the layout and receives grass and trees.
The second ring has two tracks and had a small space that will receive grass and bushes.
The next picture displays the trains from the three levels entering one helix.
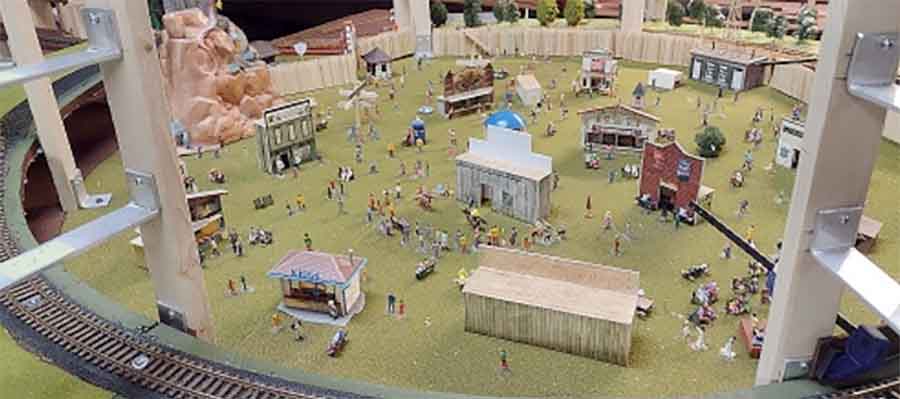
I am not able to put a center hole in either helix as they are directly above the O scale track. What to do?
One helix center has a Ren Faire in progress with jousting. The other helix has two farms, one for cattle and one for crops.

The next picture shows how I move the bus wire around the layout. The connectors displayed are called Lever Nuts.
Three position lift up levers to accept wires from 14 to 26 awg. One lever nut for positive and one for negative.
When possible the bus wire is run between the uprights to where ever needed for connection to the tracks. Thus, all my wiring is on the table top and bending or crawling beneath the layout.
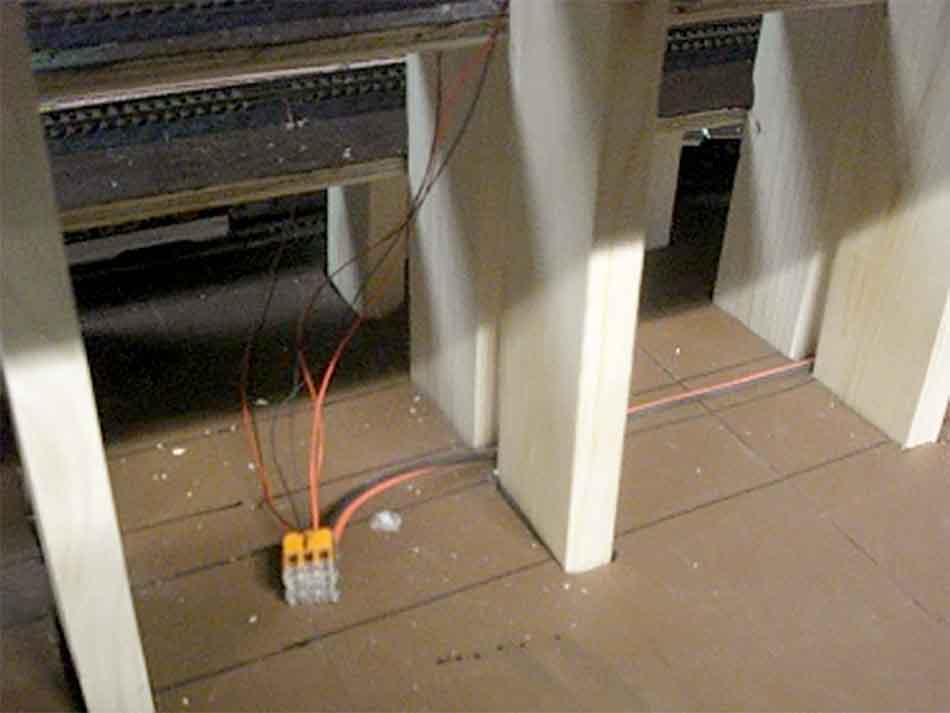
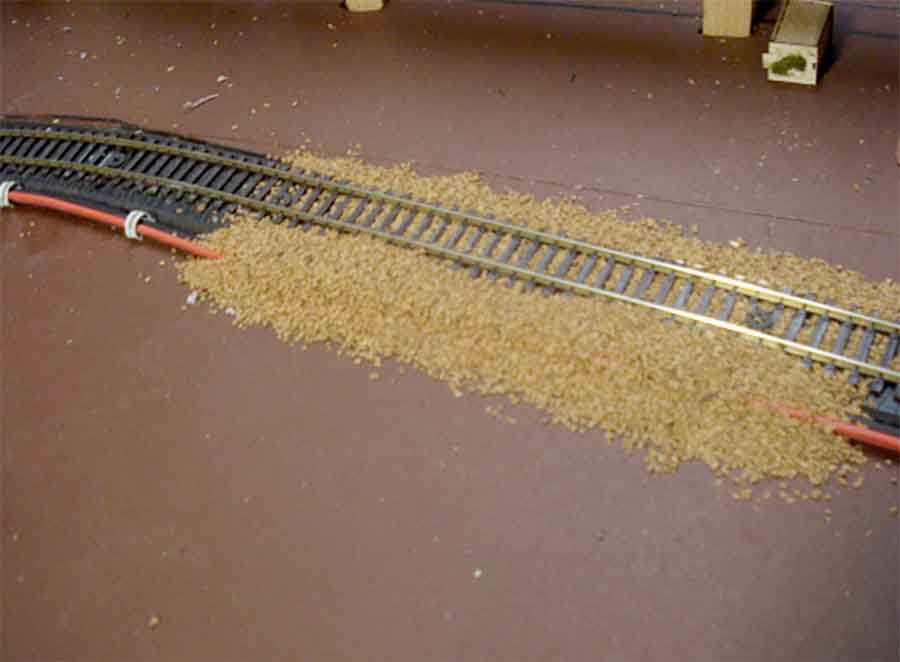
Where I have to run the bus wire where it is not between standup, it is run next to a train track and covered with ballast.
The ballast I use is crushed walnut shells, it is course and has a brown color (I like the looks when it is in place and dried after the alcohol and Mode Podge (one to three mix with water).
I bought a 25-pound box walnut shells at Harbor Freight for $27 and have filled 30 of the standard size ballast containers and have not reached the bottom of the box yet.
The Mode Podge goes a lot further then the Scenic Cement and works just as well.
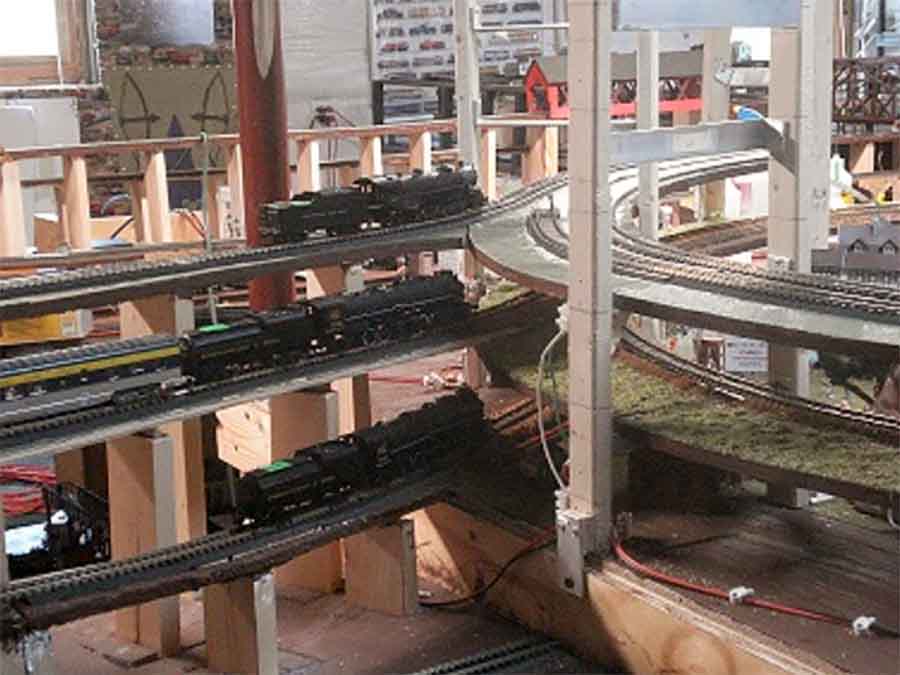
At the present I am working on the third ring. The next picture displays the three rings with one track, two tracks, and three tracks.
The third ring through the seventh ring uses the complete width for the three tracks.
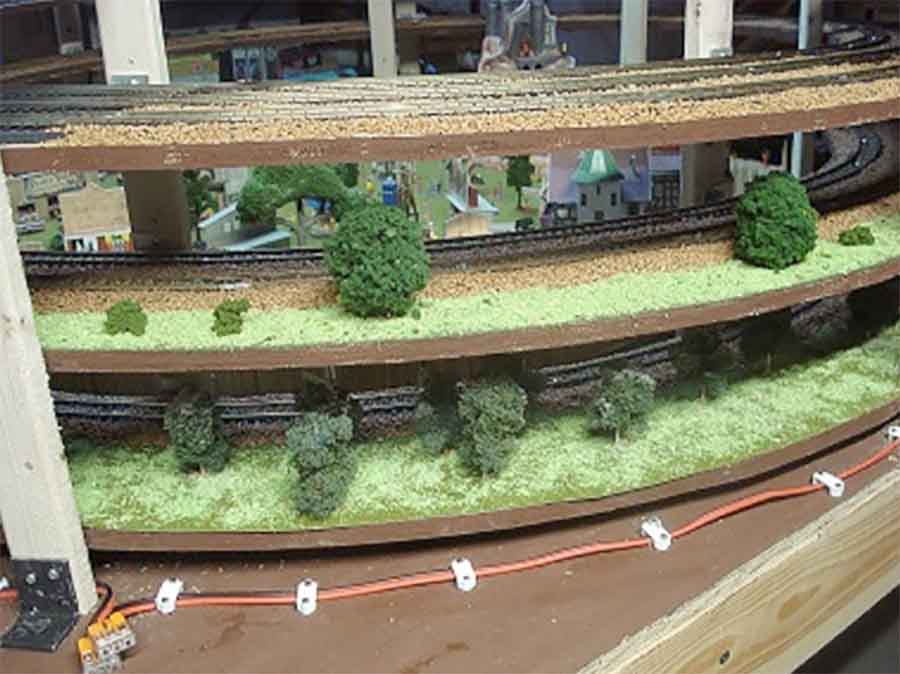
The last picture further displays the three rings and where I have gotten at this point.
On the far left of the picture the bus wires are raised up to the next ring for the feeder wire connection to the track.
As each ring is added track the trains are run back and forth. This is repeated a number of times after the ballasting.
Thanks
Lawrence of Madison Virginia”
A big thanks to Lawrence for sharing his experiences for making a helix.
There’s been a quite a few posts on the subject over the years.
That’s all for today folks.
Please do keep ’em coming.
And if today is the day you get started on your layout, the Beginner’s Guide is here.
Best
Al
PS Latest ebay cheat sheet is here.


I’ll never build one but sure admire people who do!
Fantastic, looks great. Your skills are amazing!
You’re approaching double helix DNA status!
Looks awesome. I hope mine turns out that goods.
I have never seen a landscaped helix before. It really look great. Much better than hiding the helix somewhere and all that work goes to waste unseen. Good job.
JUST WOW
With the helix, times 3, you are working at the GENIUS level. Thanks for sharing your work!
i’ll never build one but don’t admire people that do.