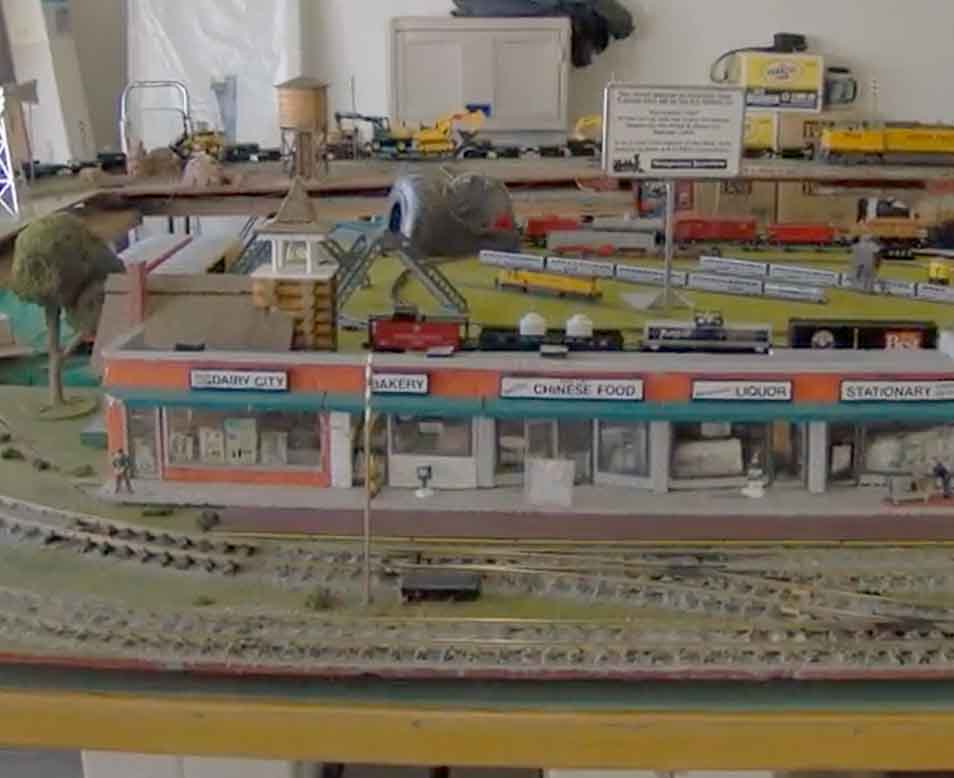
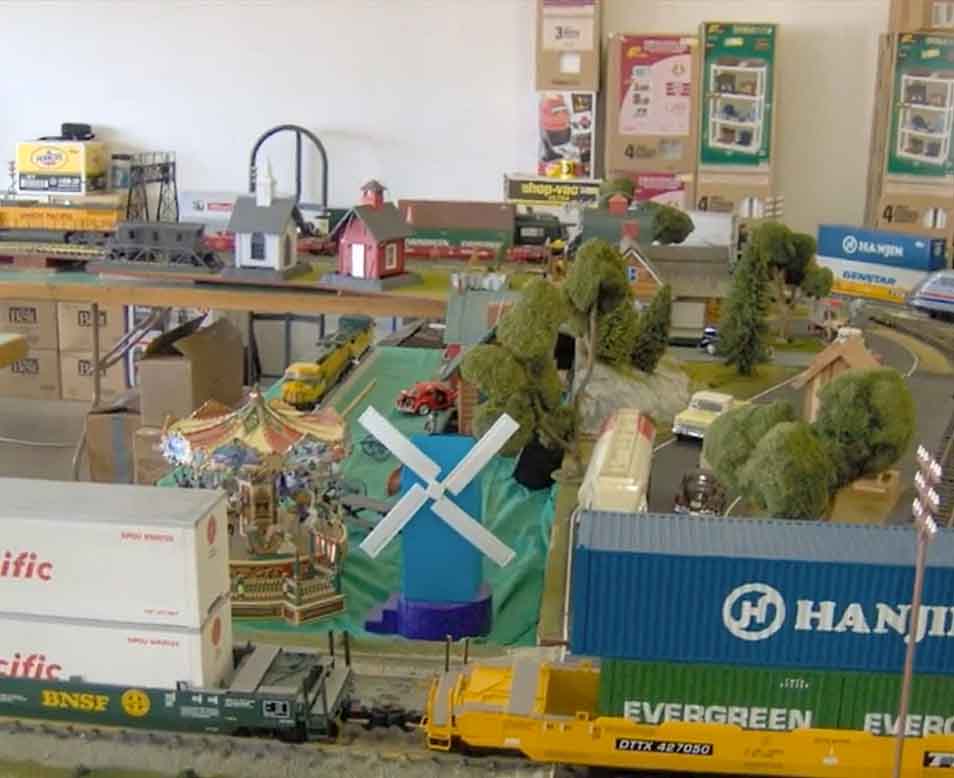
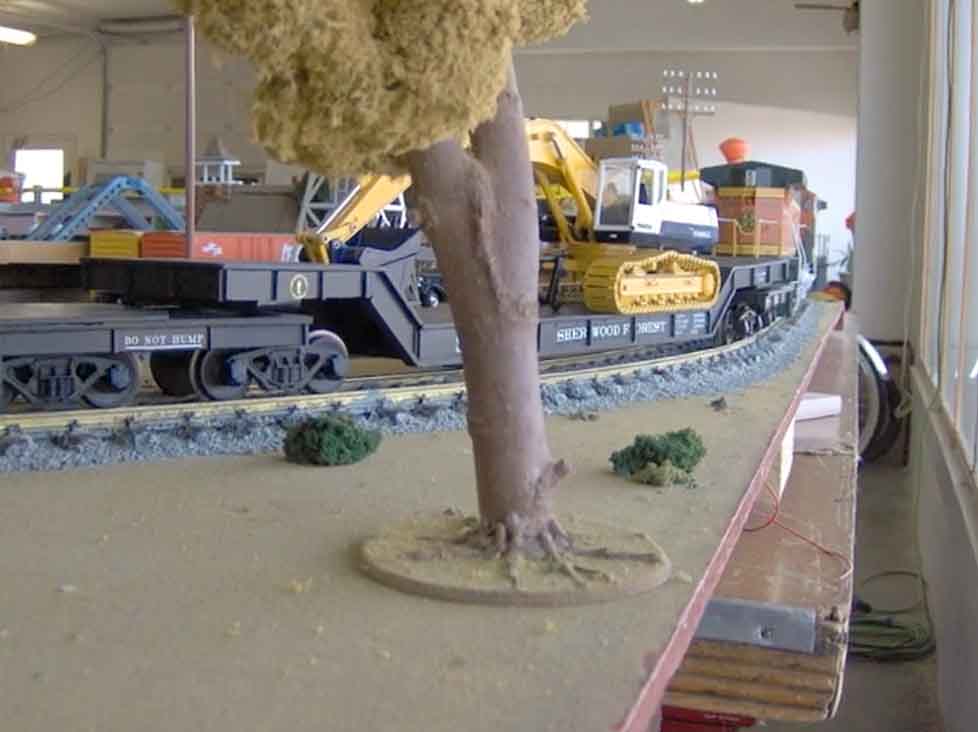
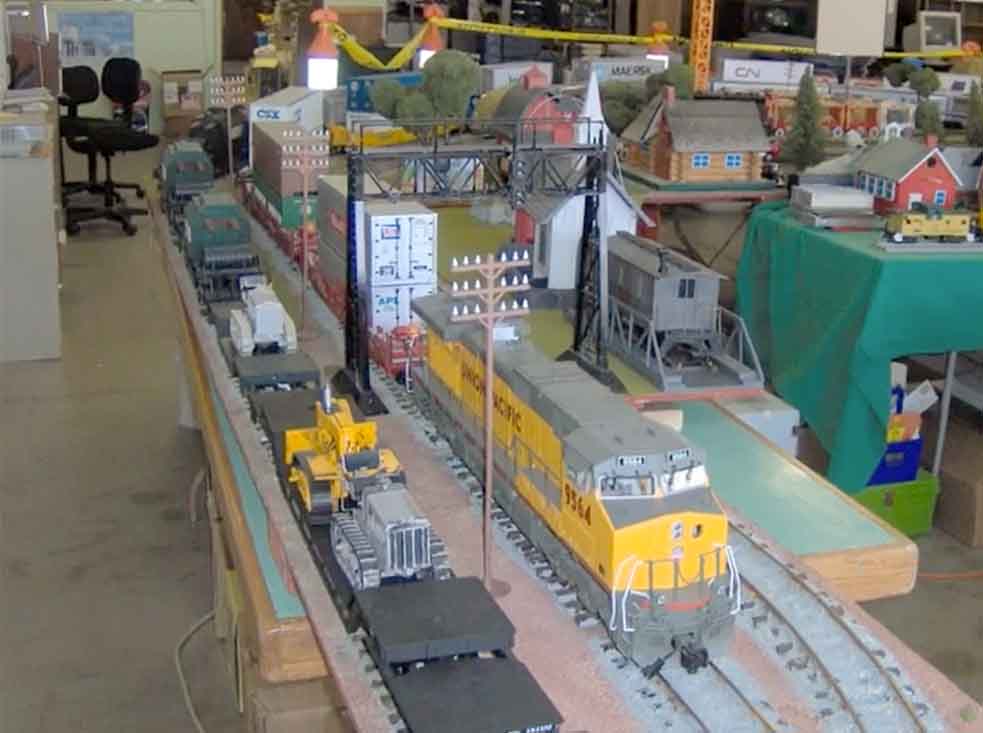
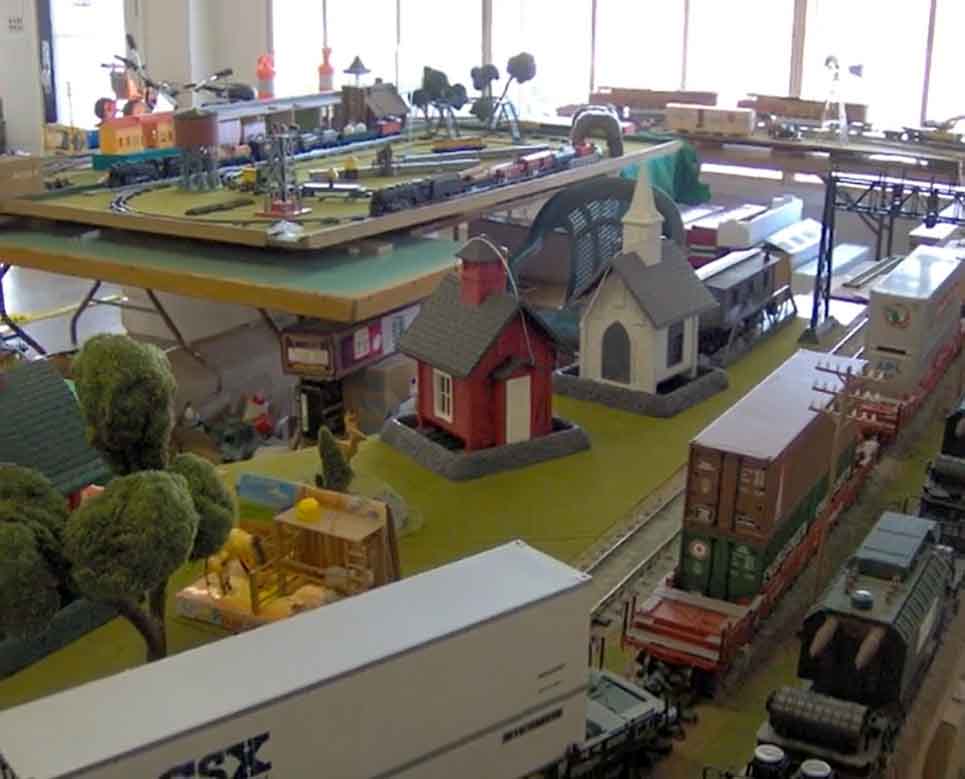
Dick’s folded dogbone double track mainline G scale

“Hi Al,

this is my you tube video link of the portable layout I set up with the help of my neighbor friend Dick Stern (oldtaz) who has sent you wonderful pixs of his N scale layout.

The video is just over 7 minutes long, all taken by oldtaz’s cell phone.

We had over four hundred visitors who enjoyed our efforts.

Many were intrigued by the track plan. It was a folded dogbone double track mainline with 4 sidings and two crossovers, but large enough to confuse people as to where the trains were headed. all the time. The music quits early on the video and I can’t seem to fix it, Earlier I had good music on there which was a problem for you tube so had to change to the music on it now.

Neither of us are healthy enough to do this public display work anymore which is why we both have N scale layouts to work on now.

I have spent a lot of time on my large California Zephyr Route N scale layout the past 2 months.

With 3 weeks left to work on it before I have extensive back surgery, progress may slow to a crawl for the next 3 months.

So I will be sending updates of the California Zephyr Route again very soon. It is a huge layout and I am the chief cook and bottle washer with no helpers.

Anyway I hope there are some that will enjoy the video.

To all of our model train friends on your site.please be well and safe and you too Al..

Thank you so much for this site for us to connect with each other and share our enjoyment with the hobby.

Sincerely

Dick Chapple Sr
Hardin Mt USA”

g scale freight train

g scale freight train

g scale freight train

g scale freight train

g scale freight train


A huge thanks to Dick for sharing his ‘portable’ G scale.

I was going to add some links to Dick’s previous posts, but then I thought there was no point. He’s contributed so much to the site over the years, I thought it would be be best to put a page of his links together.

And then it hit me. There’s a place on the blog for folks like Dick.

So please welcome our newest Hall of Fame member, Dick!

He really has contributed so much. What’s more, there are not many folk that model in TT scale right up to minature gauge, ride on railroads.

Anyhow, have a look at his page, I’m very happy to add Dick to the Hall of Fame members.

That’s all for this time folks, except for the glaringly obvious – there’s still time to grab the Beginner’s Guide with it’s all bonuses, and 22 printable buildings for just $9.

Of course, I’m biased, but it’s an absolute giveaway: A a crazy $216 saving.

It’s not a ‘made up’ saving either – you can seee how much the buildings sell for in the store.

What’s more the The Beginner’s Guide has been the same price ever since I started the blog in 2011, so sadly, it will be going up this year.

So now is a doubly good time to grab it.

If you are two minds to whether to take the plunge or not, please have a look at the comments at the bottom of yesterday’s post.

I know some of you buy it just for the printable buildings because you already have the guide. That’s fine – thank you for supporting the blog. Pat yourself on the back for helping the blog to chug along.

There are 5 brand new buildings to be had, in addition to the 17 others which are bundled with this deal.

As I said, I know many of you already have the Beginner’s Guide and are just buying it for the new buildings and that’s absolutely fine.

So here’s what you get for just $9. I’ve called it the Mega Bundle:

For $9, you get the Beginner’s Guide – and all of its usual bonuses – plus 22 printable buildings.

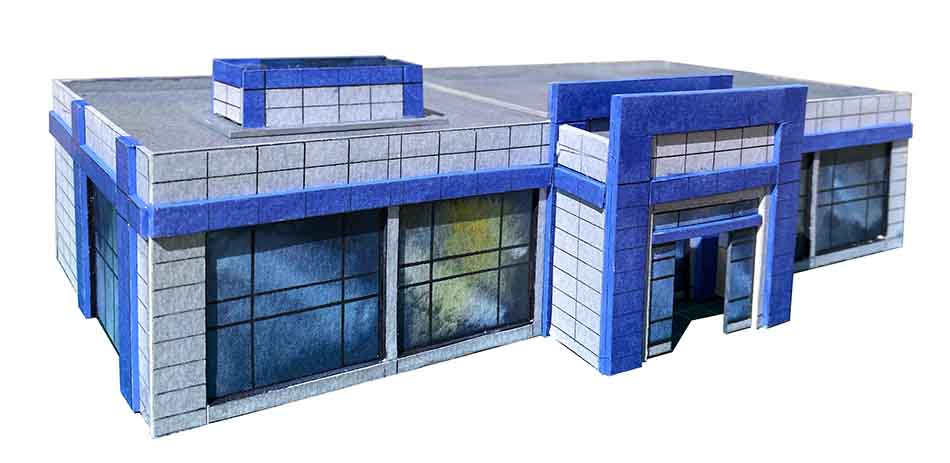
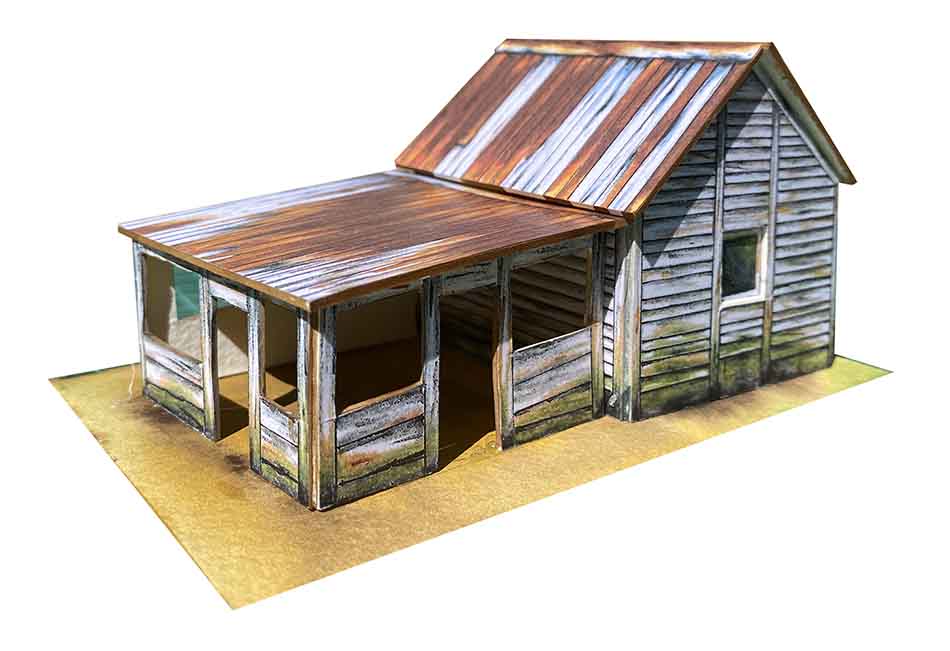
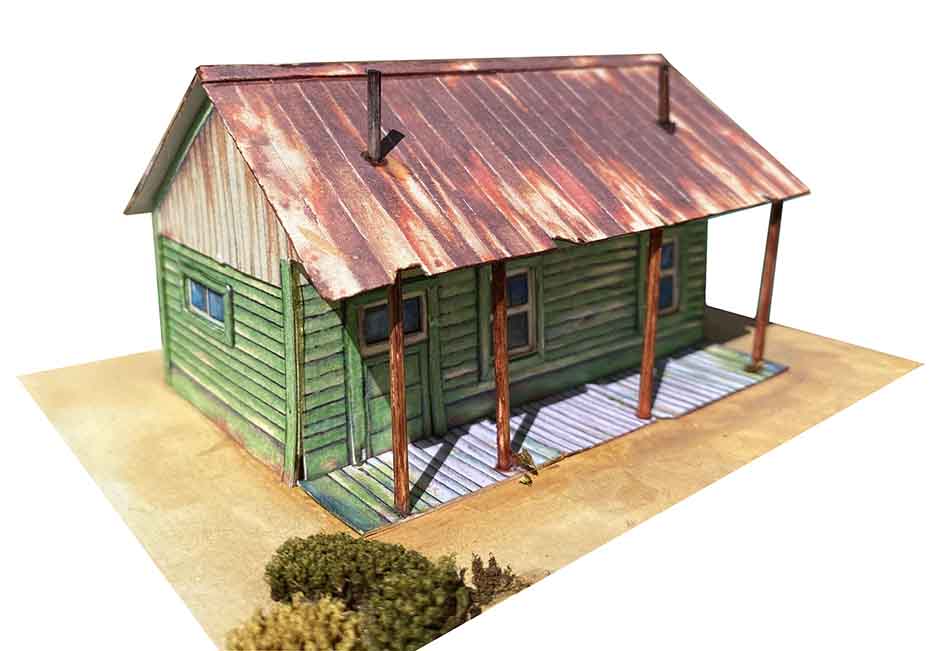
Five of the printable buildings are brand new:


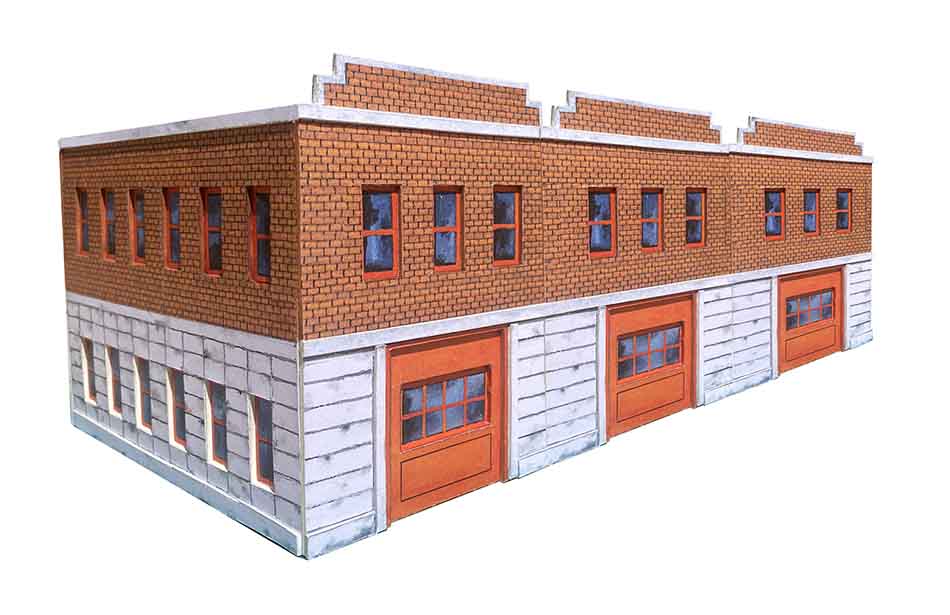
The fire station
.


Garage lock-up


Store / showroom


Sidings store building


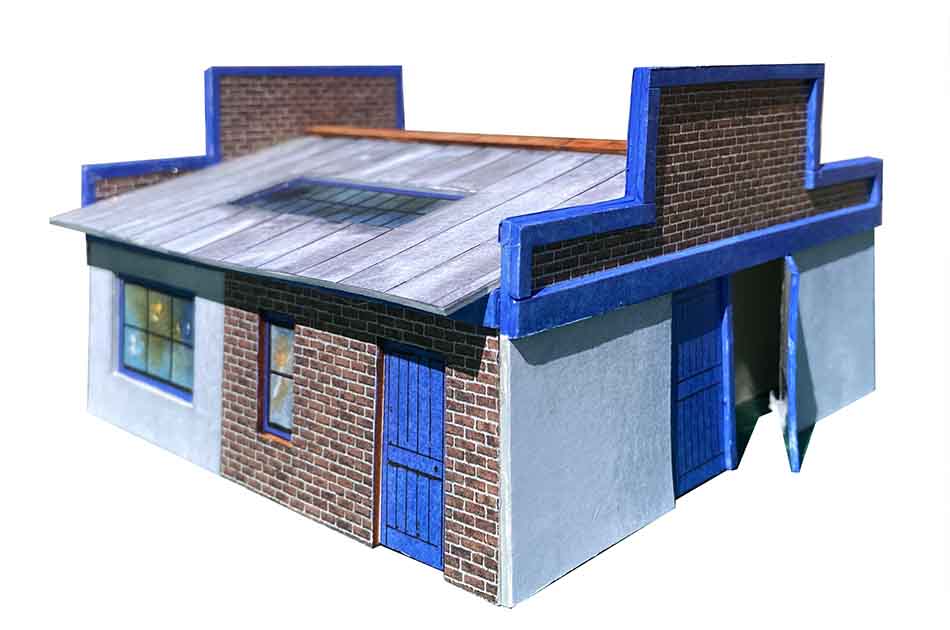
Green shack

And here’s the crazy bit. I’m also throwing in another 17 printable buildings too, so you get all these:

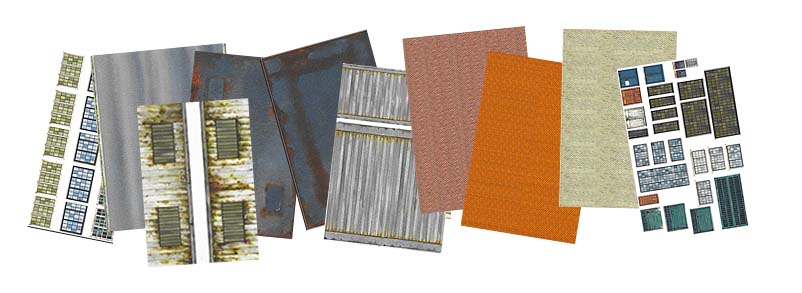
(Click on the pics to see larger versions)

The buildings can be printed out at any scale. For HO scale, you don’t need to anything, just print.

But for N scale, for example, just reduce the print 54%. Easy peasy.

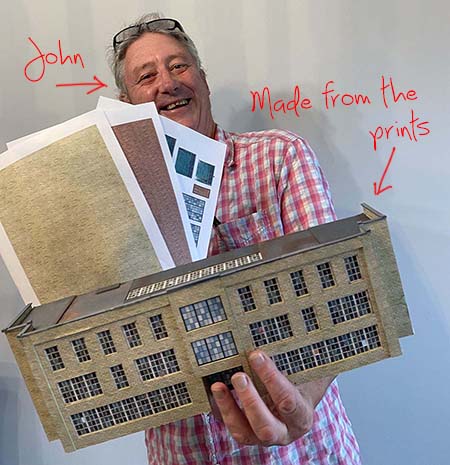
And here’s the very talented John with a quick youtube on making the new buildings.

It could just be me, but I think he had ‘lunched’ rather well before he recorded:


Here’s a few of the prints so you can see what they look like:

So here’s the Mega Bundle deal:

You get 22 free printable buildings, in addition to all the usual bonuses that come with the Beginner’s Guide.

The buildings sell for $9 each in the store, so that’s $198 worth of printable buildings.

In addition to this, the Beginner’s Guide normally sells for $27.

But today, just $9 gets the guide, it’s usual bonuses and $198 worth of printable buildings.

That’s a crazy $216 saving.

As I said, I want the sale to be sincere and knock out value to give something back to you lovely people.

And even with this $216 saving, you still get my 60 day, no quibble, money back guarantee.

If you are not utterly delighted with your purchase – for any reason or no reason at all – let me know and I’ll refund you in full.

Of course, I’m biased, but the Beginner’s Guide, is a treasure chest of info, whether you want to get started, get going, or just decide whether you want to build a layout.

Some of you will already have the Beginner’s Guide and just be grabbing it for the new buildings, and that’s absolutely fine.

But each and everyone of you will be directly supporting the site and be helping it to keep chugging along.

What’s more, it things are tight, you can help just by leaving a comment below if you’ve enjoyed the blog, the Beginner’s Guide or the printable buildings.

As you’ve probably worked out, with the printable buildings you’re only restricted by your imagination, you can make as many buildings as you like with this bundle or any of the bundles, to whatever design you like.

It’s a crazy deal and I hope you like it.

And to those who aleady have the Beginner’s Guide and are buying it just for the prints or to support the blog, thank you: without you there would be no blog.

Please remember though – it’s for this weekend only – then everything goes back to how it was.

So if you’d like to grab over $216 worth of Guide and prints for just $9, grab it here, right now.

Best

Al

PS The Beginner’s Guide has been $27 since I started the blog, way back in 2011. Sadly, it will be going up later this year, so this $9 bundle really is a great deal.
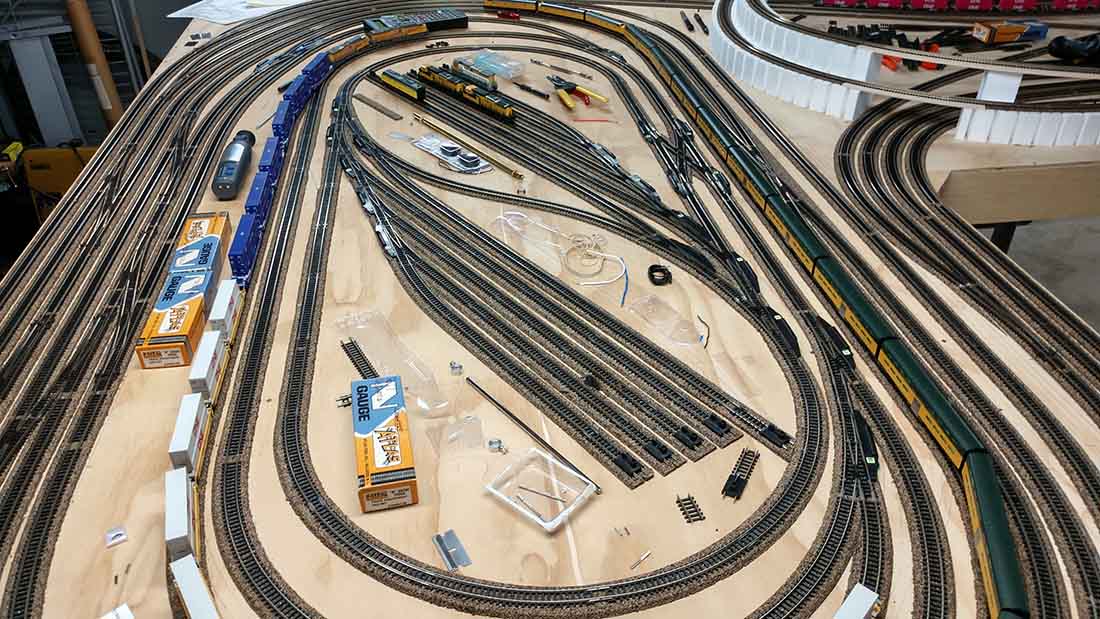
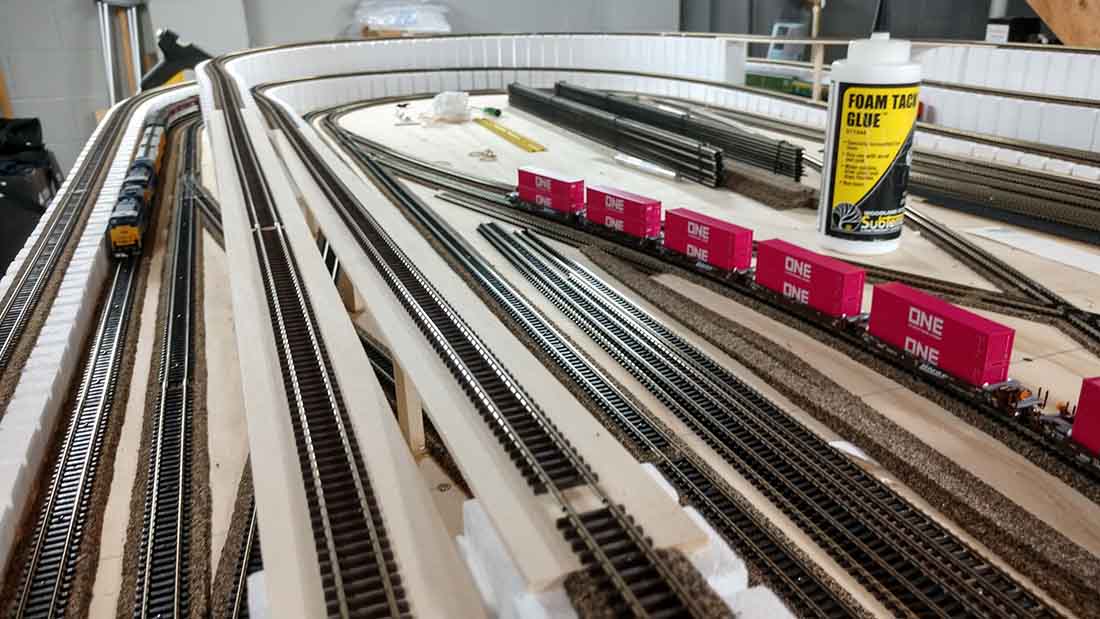
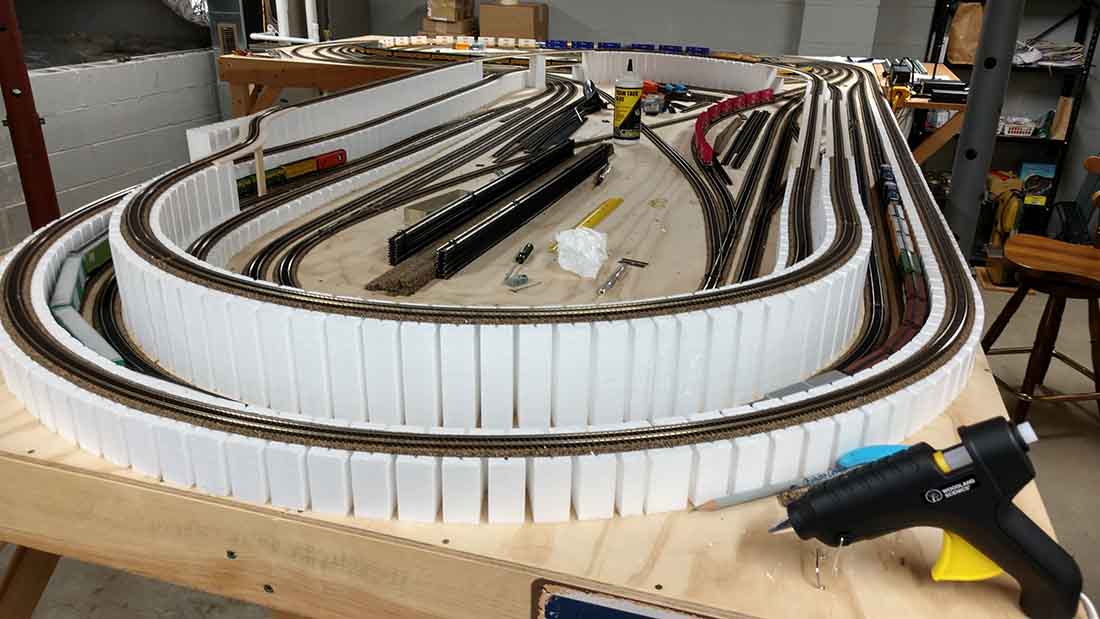
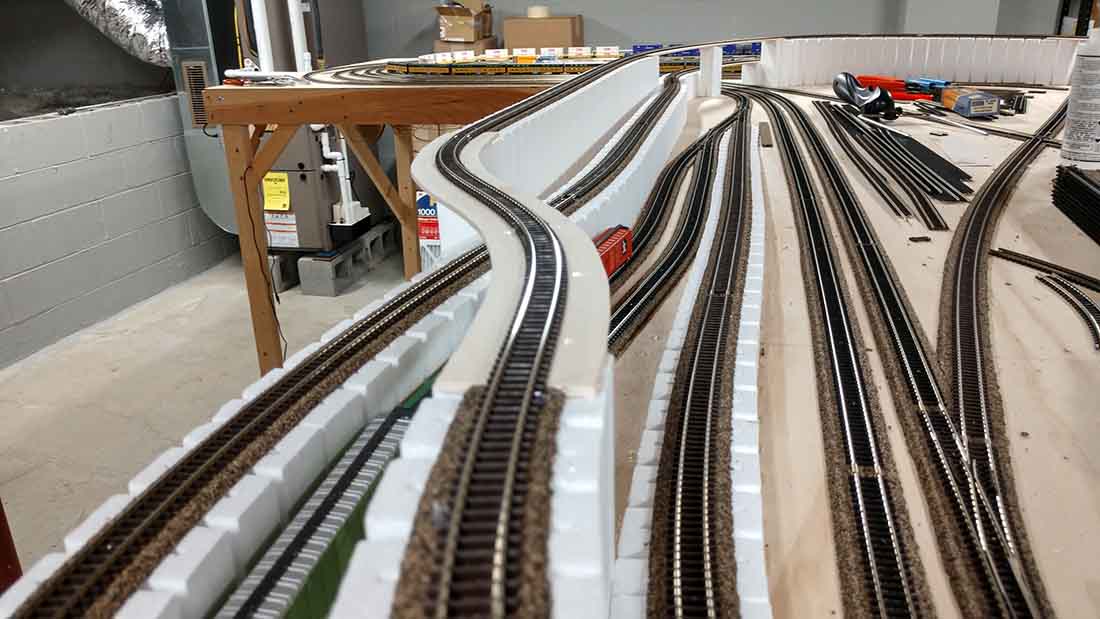
4×8 N scale train layout

Scott’s been in touch with his 4×8 N scale train layout.

Well, I say 4×8, it’s two 4×8 tables together to create an L shale layout.

“Hi Al,

I’ve got round to sending in some pics of that track plan come to life.

Already seen that you’ve posted the track plan layout, that elicited a comment about ‘cluttered-with-track’ layouts. Well, that’s fine, and doubtless many will cringe at my ‘clutter’, but I don’t care, I just want to have fun running trains!

My interest in trains probably started when my dad would take me for train rides on Chicago’s Elevated, which spun around the city’s Loop.

I was just a young lad, and was google-eyed most of the time, taking in all the advertisements inside the train car.

Later, after the family moved to the suburb of Arlington Heights, I would ride the Chicago and North Western commuter train (which I’ve got a replica of on my layout) into the city to meet my dad for lunch in the city.

Still later, when I went off to college in Norman, Oklahoma (I was a meteorology major at the time), and I had almost door to door rail transportation to get there from our house.

It was less than a mile walk to the North Western train station in Arlington Heights, I rode into Chicago, walked a block and a half to the Union Station and got on Santa Fe’s Texas Chief, to Norman. That line ran from Chicago to Houston, Texas, with a stop in Norman along the way. Another mile walk to the college dorm.

I started my first layout when I was in high school back in the early 70’s, N-scale, on a 4×8 table my dad helped me build.

After my wife and I retired from our respective careers in Tucson, Arizona, where we met, mine in television engineering and hers hospital IT, we bought a place in the Finger Lakes region of Upstate New York.

My wife is originally from the Utica area, and her sister lives in the little village of Dundee, where our summer place is. I have been working during the summers on the layout in the basement, and added the second 4×8 table to form an L-shaped arrangement.

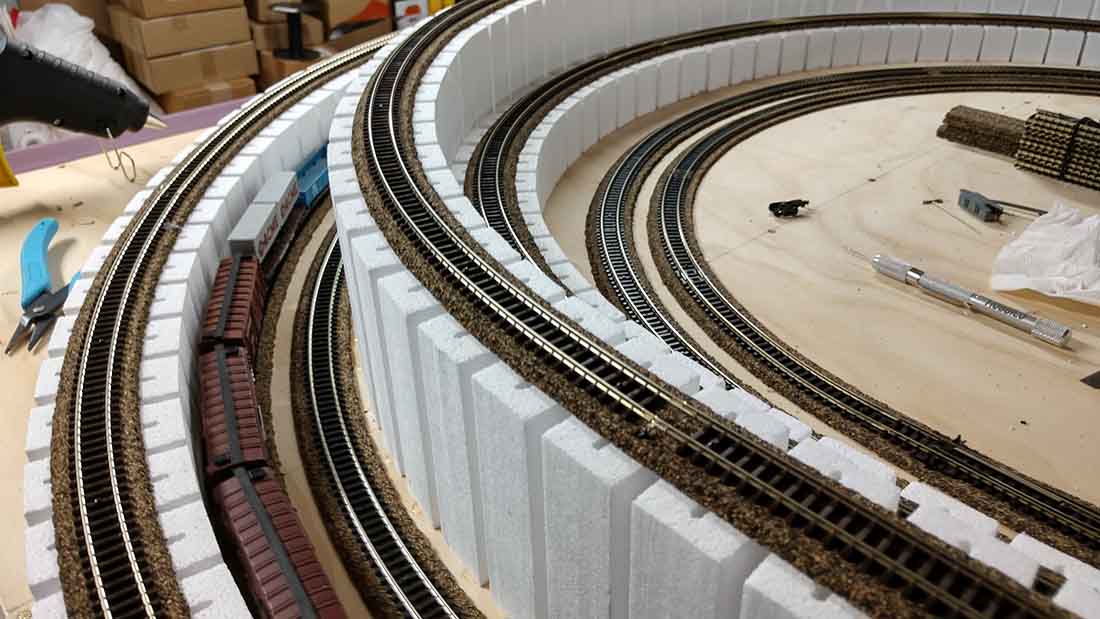
The pictures show the result of many trials and errors, and when I found SCARM I rejoiced, because my first efforts were done without a plan, and getting track runs to match up properly was quite the headache.

One feature of SCARM that really proved valuable was its Model Trains Simulator, which one can use to determine the needed length of a reversing loop to accommodate lengthy illuminated passenger trains, like my C&NW.

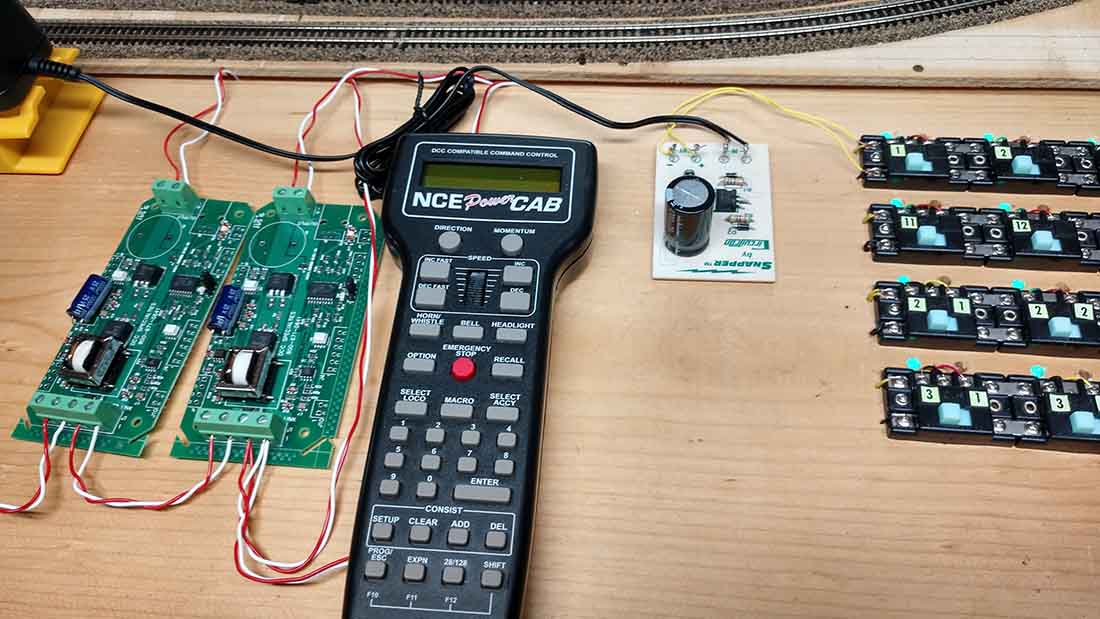
I use NCE’s Power Cab with a radio built in so I can work wireless.

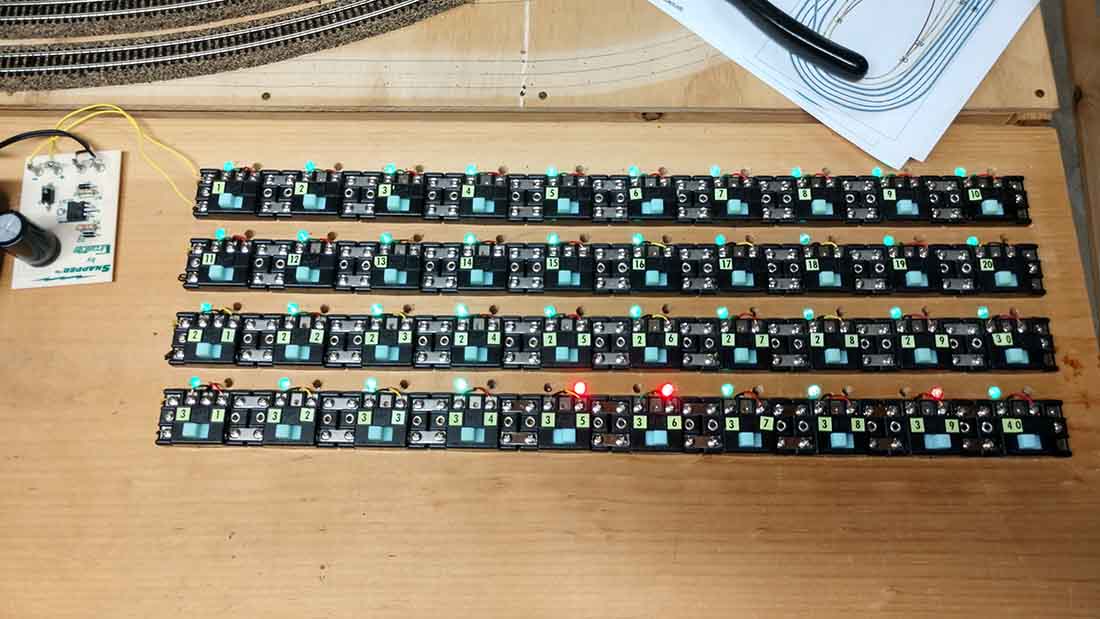
I have used the old Atlas switches to control the turnouts, which are a mixture of Atlas and Peco.

The Peco turnouts have under table PL-1000 twin coil motors which work quite well.

I avoid coil burnouts with the use of a Snapper capacitive discharge unit. I found that in order to throw over more than two machines at a time, I needed a higher voltage to provide enough of a punch to do so. I use Atlas Snap relays to provide LED status for each switch, some of them being tandem arrangements, so I went with a cheap 24v AC wall wart irrigation transformer.

The bridge spans I cut from 1/8″ basswood, which is the perfect thickness for cork roadbed to match up to.

One aside is that after I built the fiddle yard, I was amazed that a real-life example exists in southwestern Evanston, Illinois, CTA’s (Chicago Transit Authority) Howard Yard.

As can be seen, I’ve just recently finished laying the track and am still working on little niggly issues with some of my more temperamental locos.

I thinks I’ve ironed out most of them, and will soon start with landscaping, and adding buildings, etc. Keep in mind that my main objective was to run at least five trains simultaneously, and I wanted a challenge to do that!

Scott J.”

4x8 N scale train layout

4x8 N scale fiddle yard

4x8 N scale train layout

n scale 3 layer layout

n scale 4x8 layout 3 levels

n scale control panel


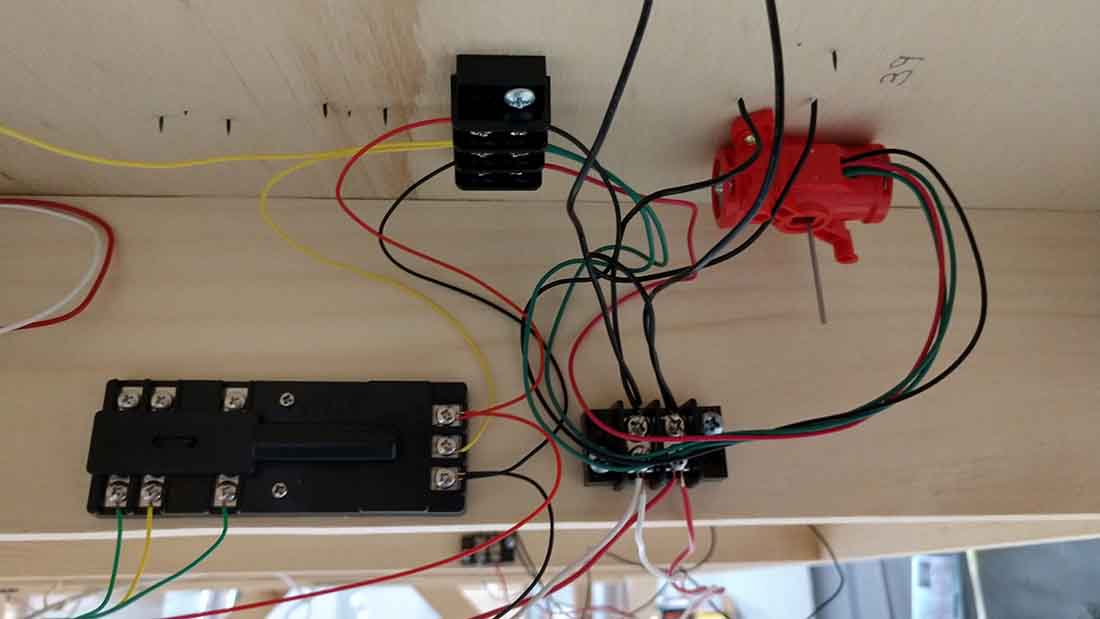
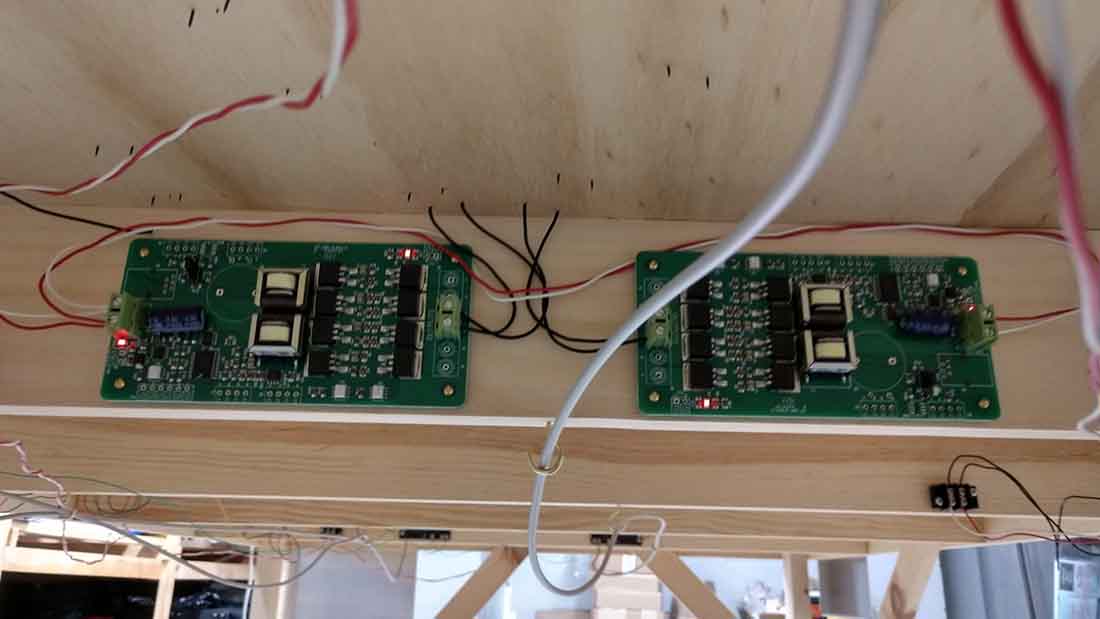
n scale wiring

N scale wiring

N scale wiring

A big thanks to Scott for sharing his 4×8 N scale train layout – I’m really looking forward to seeing this one evolve.

When I see a N scale with multiple levels, I always think of Bob’s N scale layout.

That’s all for today folks.

Please do keep ’em coming.

And if today is the day you get started on your layout, the Beginner’s Guide is here.

Best

Al

PS Latest ebay cheat sheet is here.


model train answers

HOn3 log train

Brian’s been in touch with how he creates his HOn3 log train:

“Hi Alastair,

One person asked on your blog about how and where did I get the logs that are shown on my logging train.

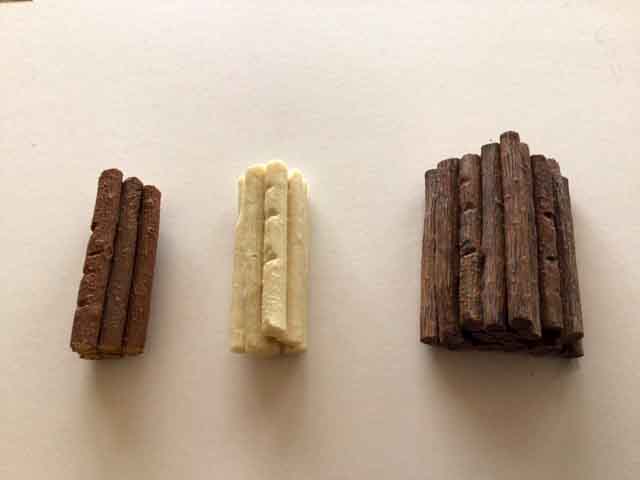
The first two photos below shows the logs purchased from Walthers in the USA that come twice the length shown here. I cut them to be able to fit on my HOn3 log cars. (My layout is all HOn3)

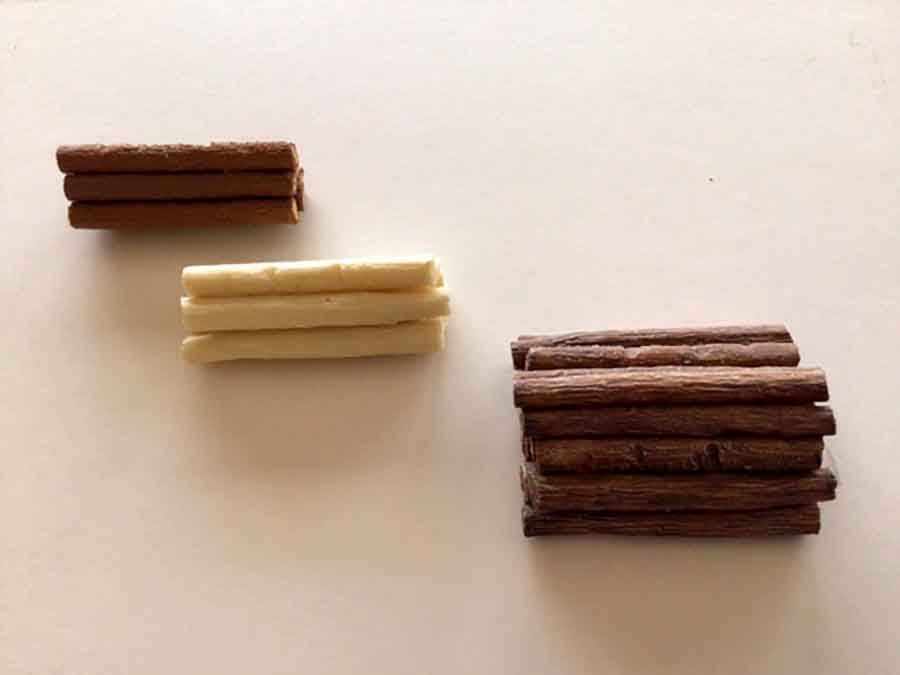
Below, top left is the master, middle is the raw resin casting out of the mould and the third is two and a half castings glued together to form a log pile at my sawmill.

HOn3 log train

HOn3 log train

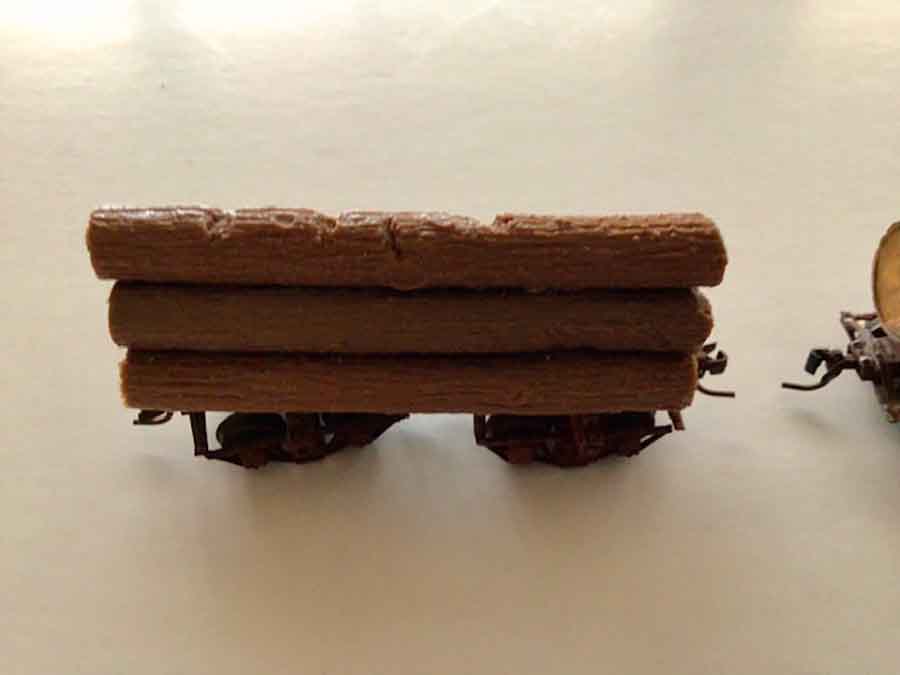
The photo below shows how I mount the log load onto disconnect log trucks.

HOn3 log train

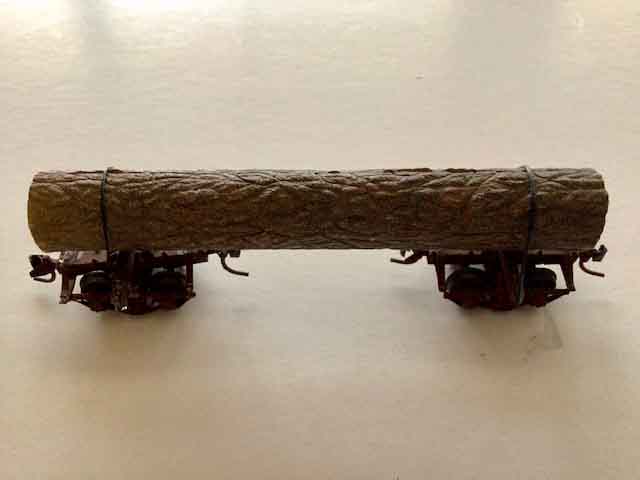
This is another longer different log that I cast in resin and painted and weathered it. Also mounted on disconnect log trucks. Disconnect log trucks can be adjusted to fit any length of log.

logging train

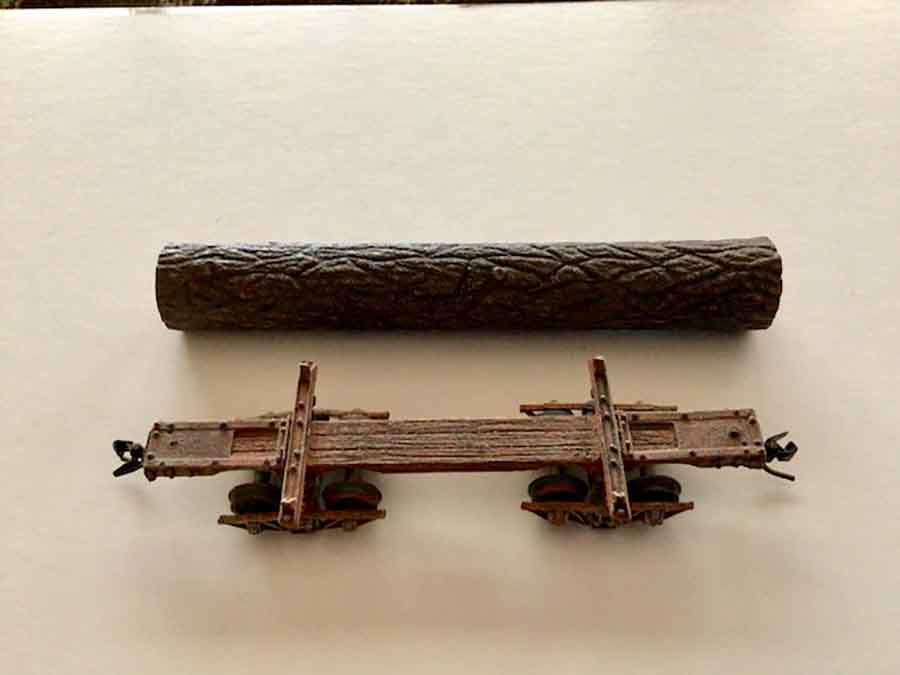
The photo below shows a different log car called a skeleton log car with a cast resin log.

trucks for logging train

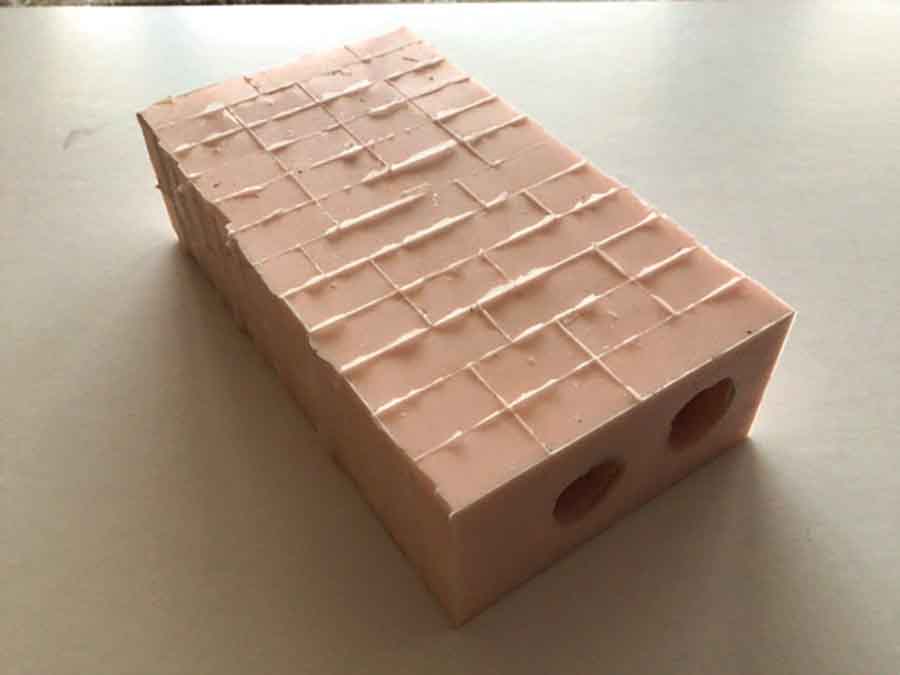
This is the silicone mould that I made to cast the resin logs. To get the height (length) that I needed, I used Lego blocks to make the box needed to pour the silicone into.

model railroad logging train

I have explained in a previous write up on how to do silicone casting.

I hope this explains how I make my logs for my log train.

Brian – the HOn3 guy in Knysna RSA”


Brian also sent in the below, and I thought I may as well post it as well:

“Hi Alastair.

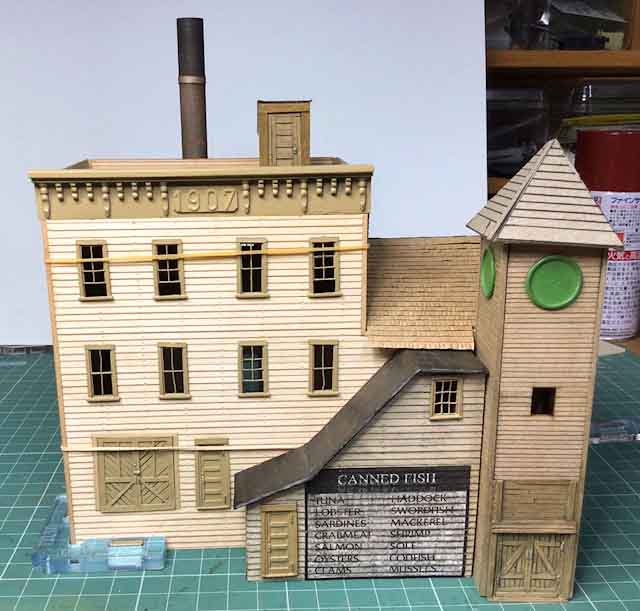
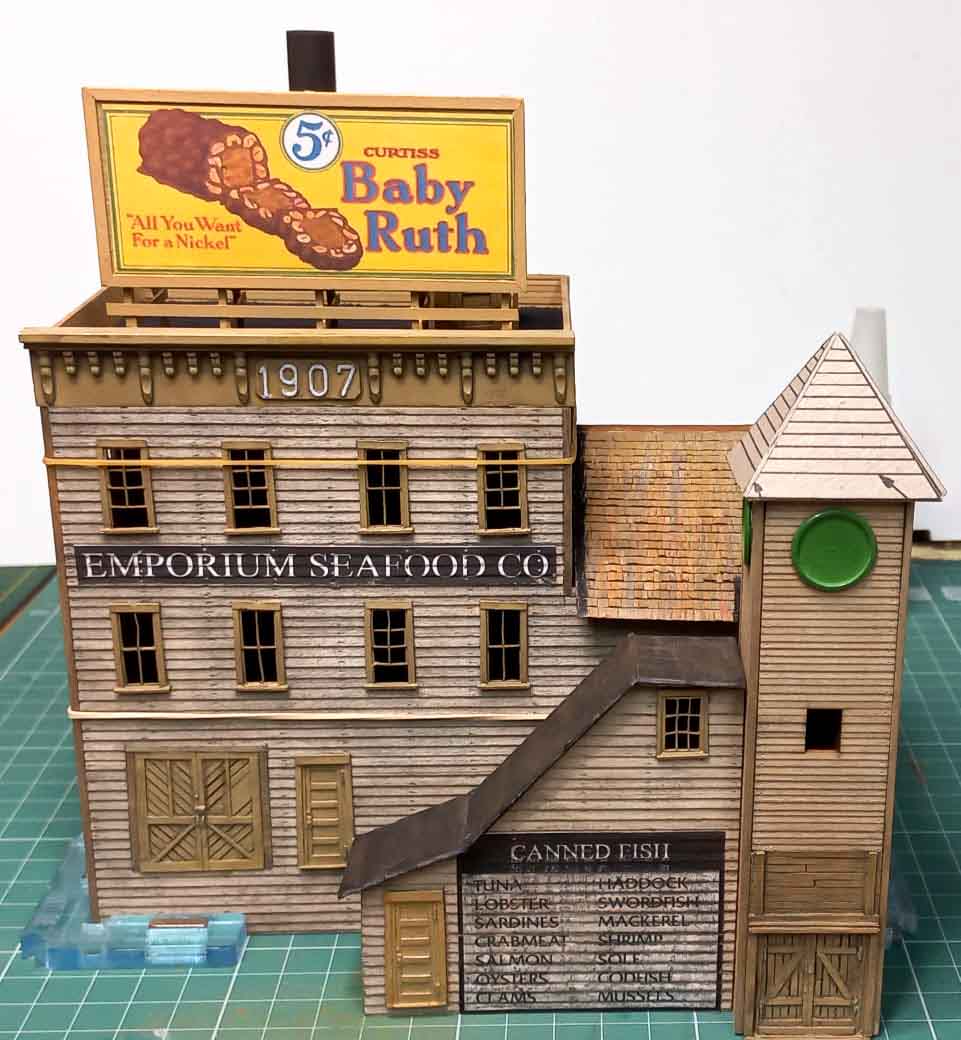
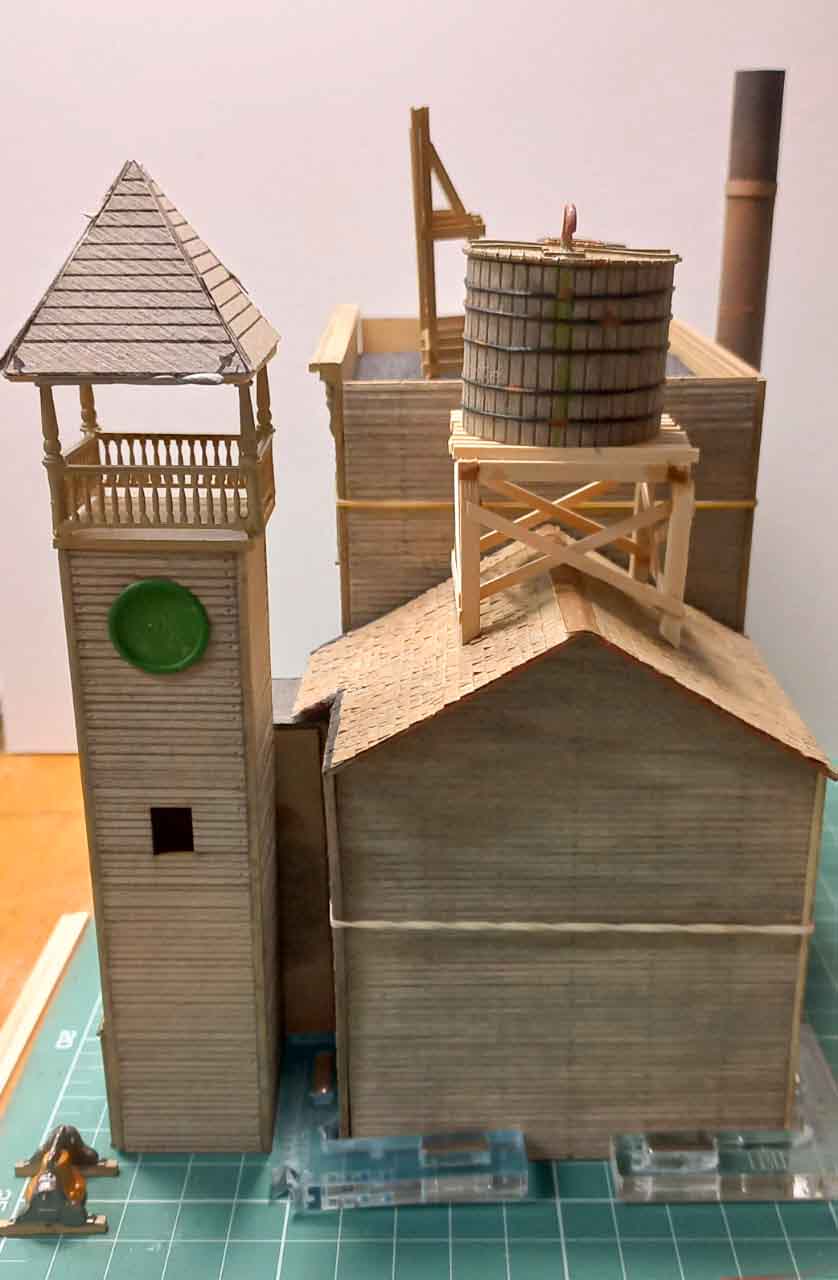
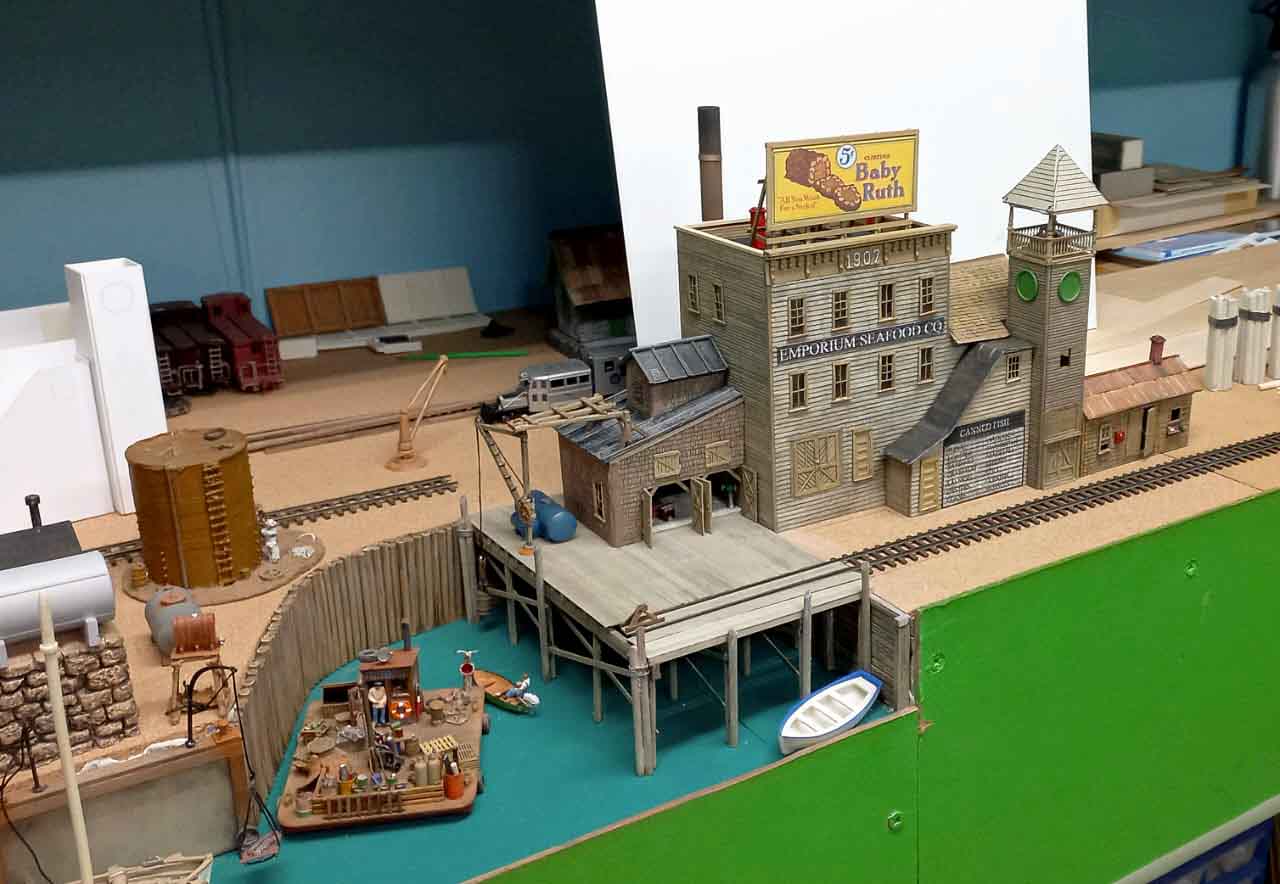
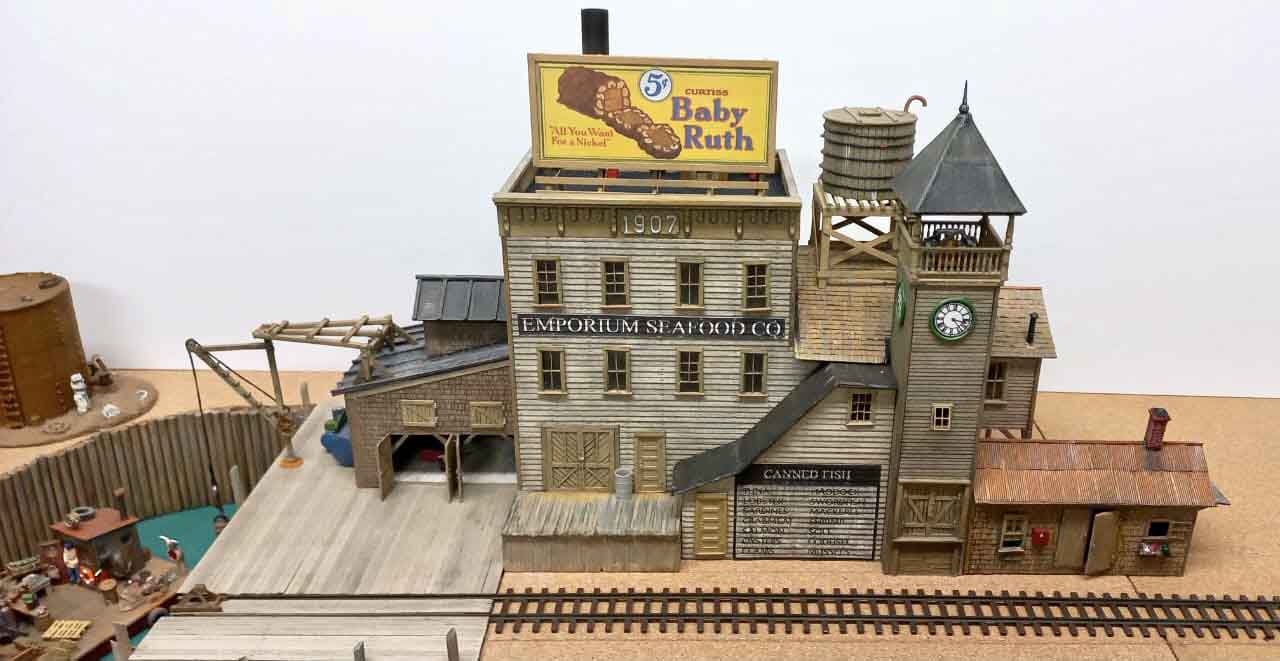
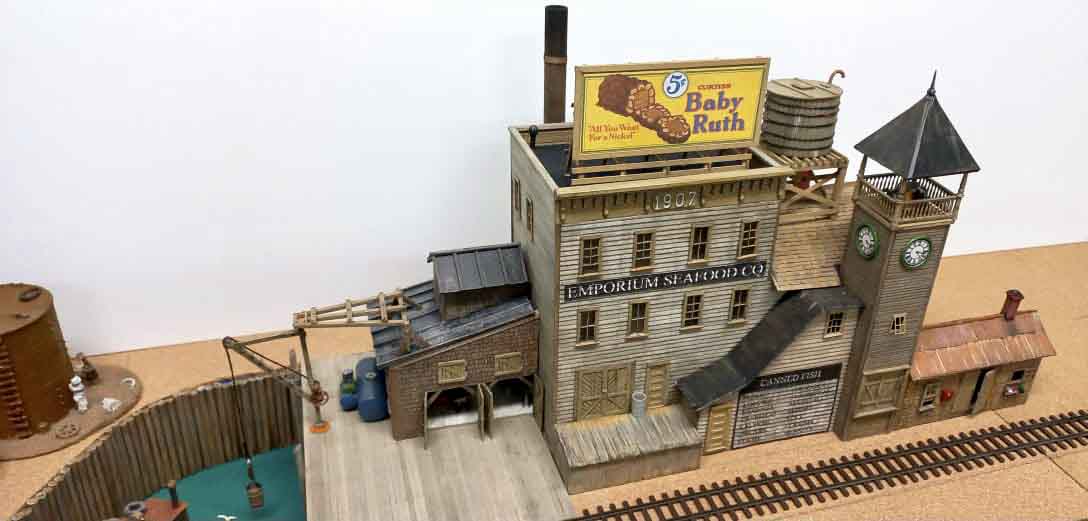
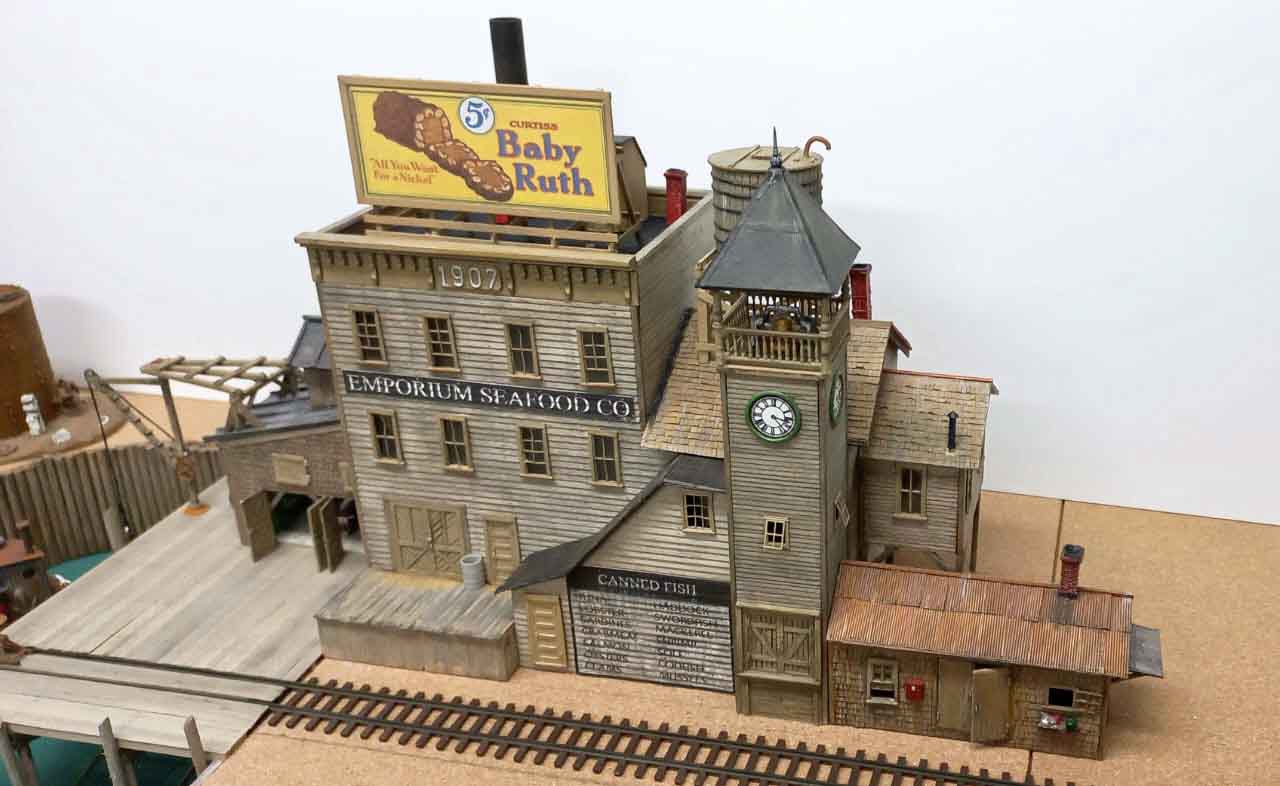
I have almost completed the build of the modified – kit bashed FSM Seafood Emporium kit.

It has taken at least 3 months of work, planning on how it would fit in the specific area on my layout and how to modify it to be plausible.

What takes a lot of time and thoughts is working it as a mirror image as well as reversing it and believe me, I’d did make the odd mistake before assembling it.

I did make some minor changes to the kit to personalise it.

Below are a few photos of it. I am busy sorting through my “bits” box looking for details to add to it.

Lights must still be added as well, both in the interior of the workshop and the exterior of the whole building.

The white temporary floor in the workshop has to be removed and all the machines will be mounted on a strengthened wood floor on the wharf.

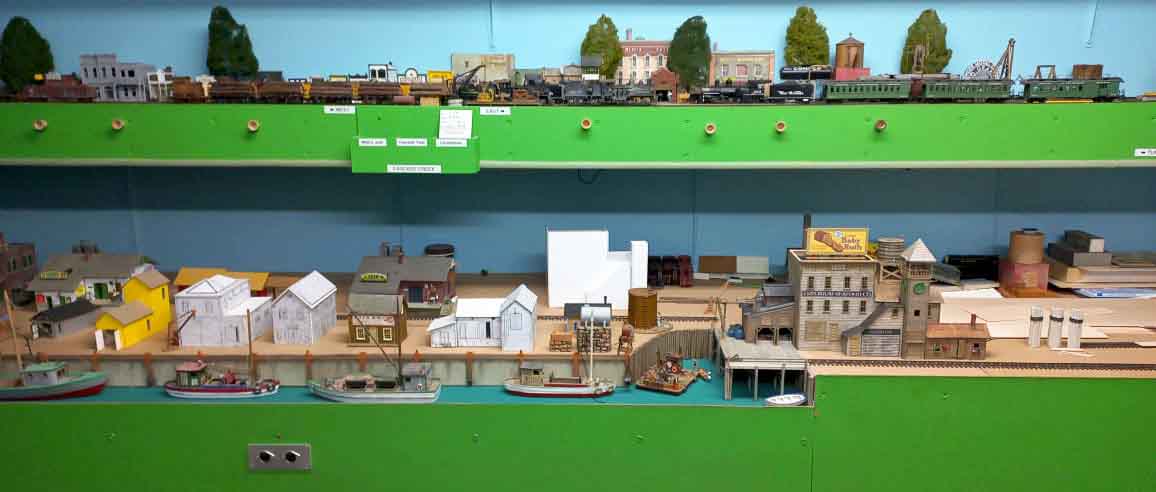
The whole complex (8 separate components) is shown in place on my HO scale layout.

I searched the internet to find a suitable poster for the billboard as the original poster and other components was missing from the kit.

model train warehouse

model train warehouse with posters

model train warehouse

model railroad wharf

HOn3 warehouse

HOn3 scale warehouse

model railroad wharf

Below is the building situated in the Pelican Bay Area on my layout. (right hand side)

shlef train layout

Some questions have been asked, where are the trains.

The answer is waiting for more HOn3 track and points as the manufacturer of Micro Engineering products has ceased operations at the time of writing. I have had to order Peco HOn3 track and points and play the waiting game for them to be delivered to RSA.

Brian – the HOn3 guy in Knysna RSA.”

A huge big thanks to Hall of Famer, Brian, for sharing his HOn3 log train and wharf update.

I know I’ve said it before but I so enjoy seeing a layout evolve.

That’s all for today folks. Please do keep ’em coming.

And if today is the day you stop dreaming and start doing, the Beginner’s Guide is here.

Best

Al

PS Latest ebay cheat sheet is here.