He’s been kind enough to send in pics, and a video of his layout in its early days.
I thought it worth posting, because it just goes to show it’s all about making a start:
“Alastair.
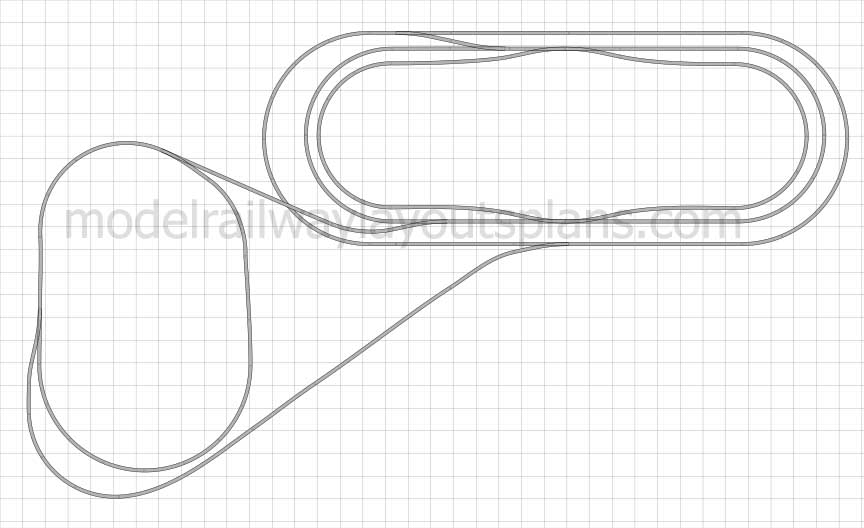
Some of the comments asked to see track plans.
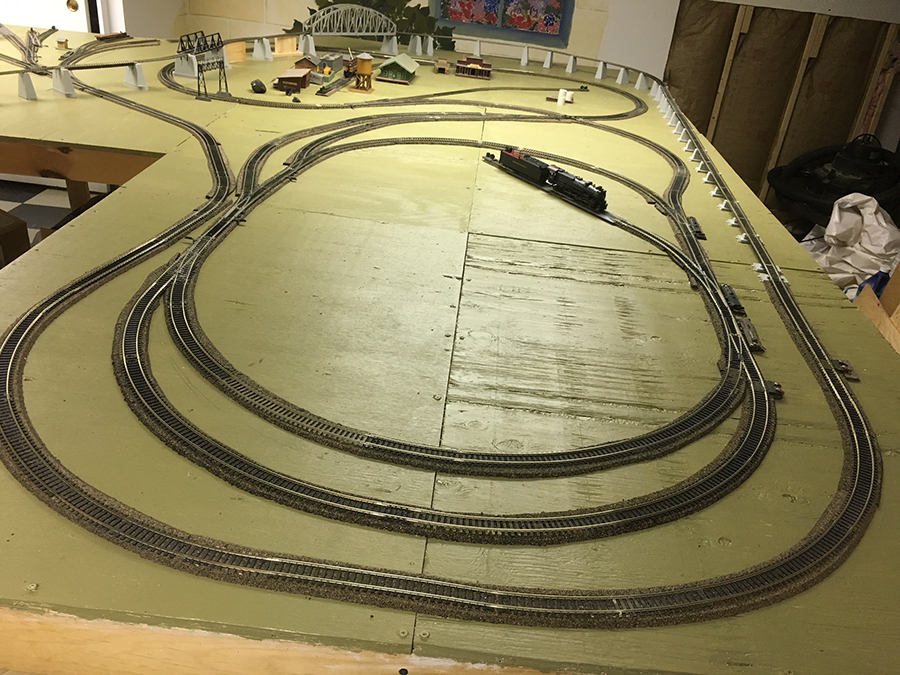
Here are some early days on the layout without scenery.
Scott”
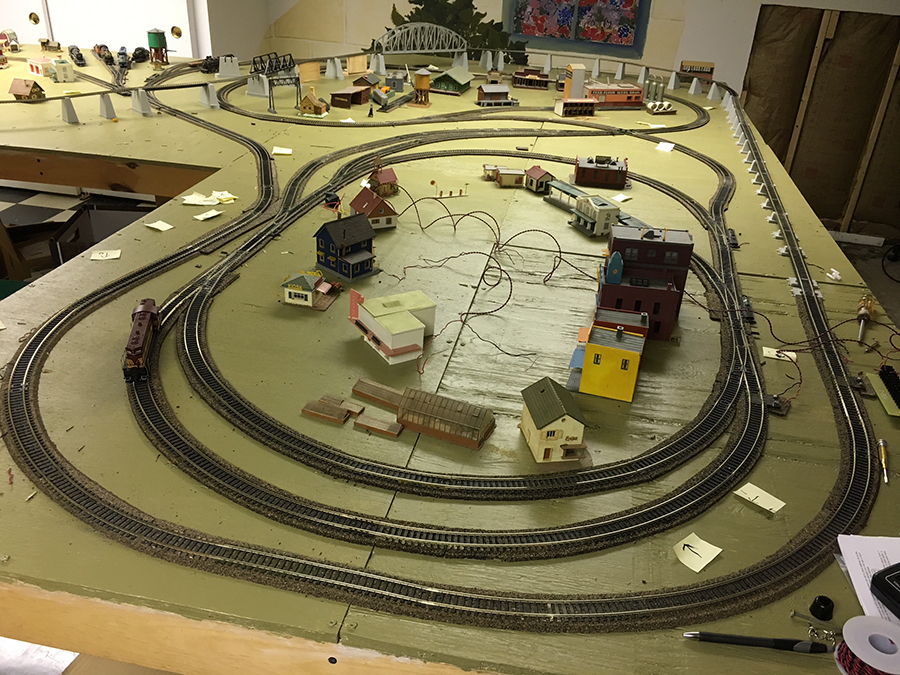
You’ll remember from his last post that his layout is approximately 100 square feet with two layouts connecting from inner to outer.
His inner layout is from an old Atlas book with 18 radius turns and the outer was freelanced.
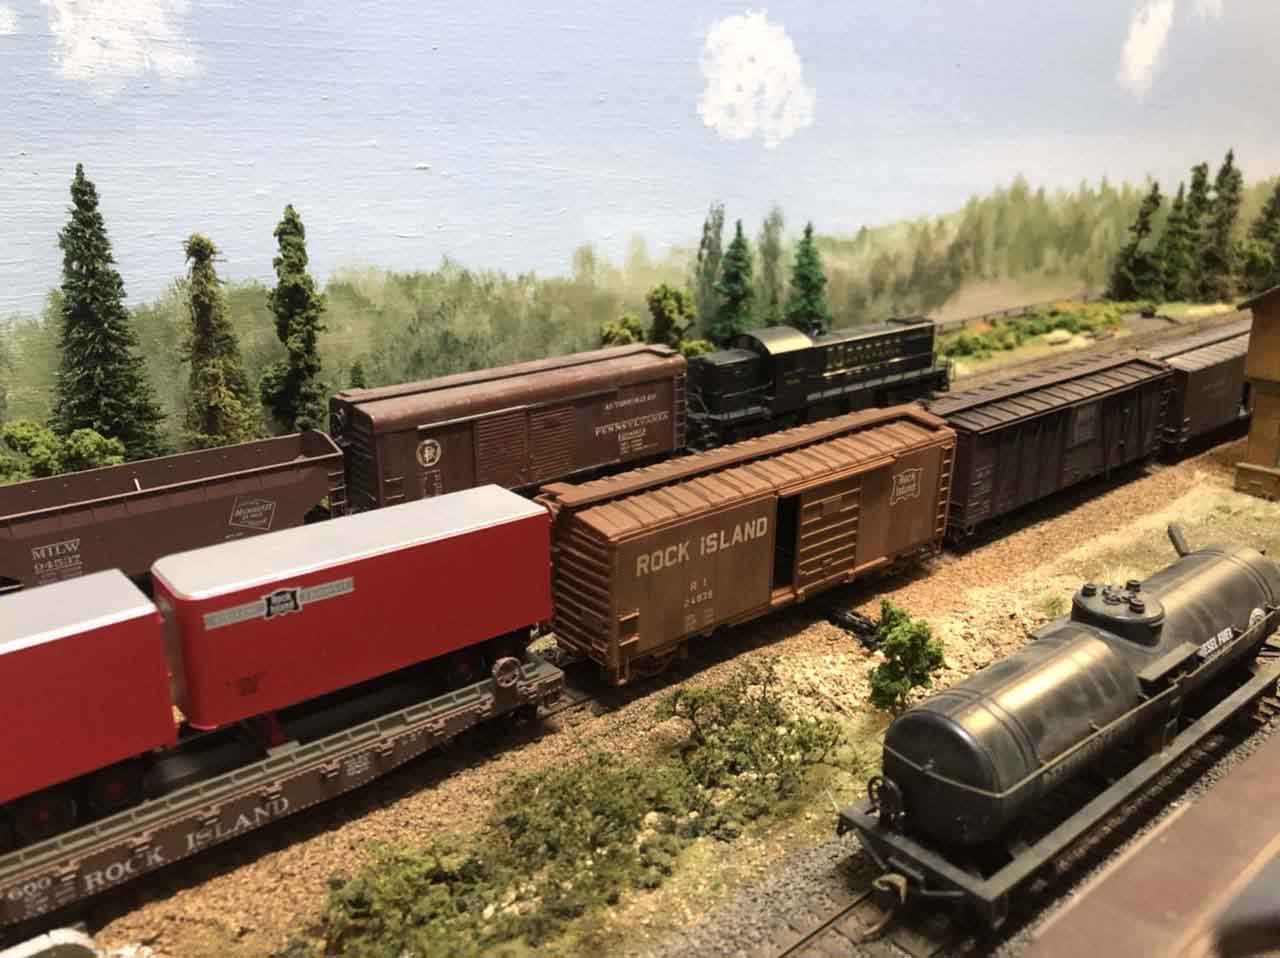
Bill’s model railroad layouts
“My wife thinks I went a little overboard as now I have the 4X16 HO switching layout and the 3X15 N scale layout and I’m in the planning stage of a 4.5X12 O and ON3O layout.
For the HO layout I have scenery basically finished and now I’m going into detail mode and will be weathering cars and engines and finishing up a variety of small projects.
While it’s mostly done it’s never done and Ive been enjoying operating the layout.
Paul’s been in touch with his HO scale 4×8 layout:
“Hi Al,
I thought I would send you a movie clip of my 4×8 layout.
It has two separate rail systems running. The lower rail is DC while the upper rail is NCE DCC. I have a MTH Dash 9 running at the same time as a Mantua 2-6-6-2 Steamer.
I started building this setup on Dec 1, and finished as shown by April.
My wife is an artist and she helped with the colors, textures, and ideas. She also did the painting at the rear of the lower layout section. Currently I am setting up my basement for a larger layout.
I can’t believe that at 75 I would be starting on this endeavor, but I have been encouraged by your daily blog and seeing all that others have accomplished.
And Brian’s been in touch again to answer a few questions on his layout (his post is here):
“Hi Alastair
Thanks to all those who posted encouraging comments on my layout, very much appreciated.
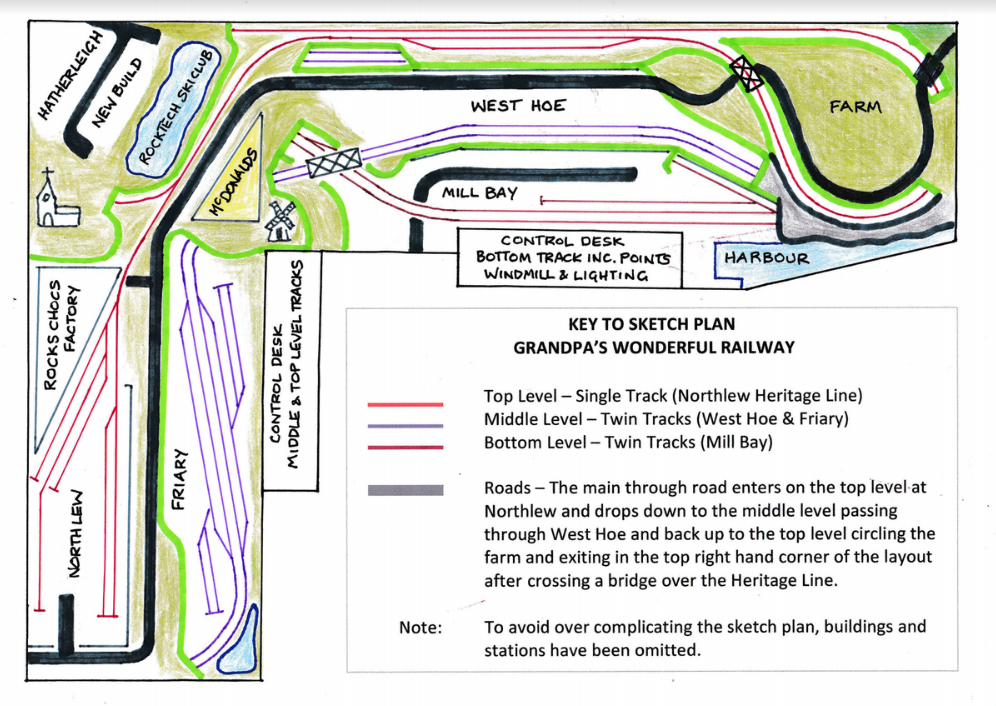
Someone wanted a track plan, so I have attached that.
The video footage of the layout was taken on a Panasonic DMC-FZ38 camera (tripod mounted) and the videos downloaded to my AppleMac and imported to iMovie for editing and compiling. For the sounds I searched on YouTube for videos of the actual locomotives (or close to) and converted the video to an mp3 file using a free YouTube to mp3 converter (there are several on the Internet).
After converting the mp3 files they were downloaded to the AppleMac and dragged into iTunes. These files were then imported into the iMovie project from iTunes and edited as required. Job done. It was great fun having a go at this and I was quite pleased with the resulting video although the actual video is a little burnt out – it was a very sunny day when I filmed the videos.
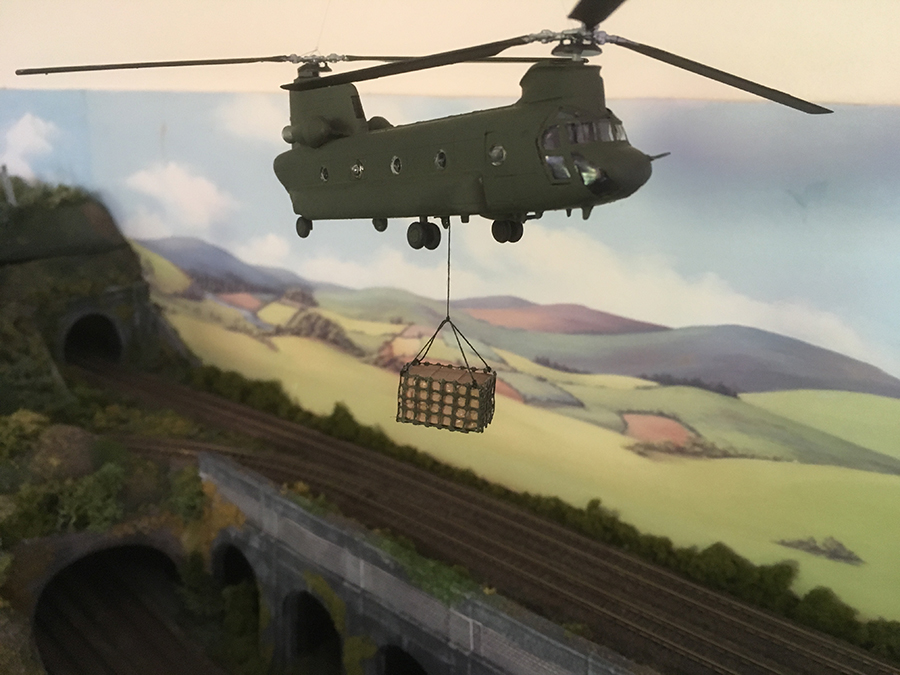
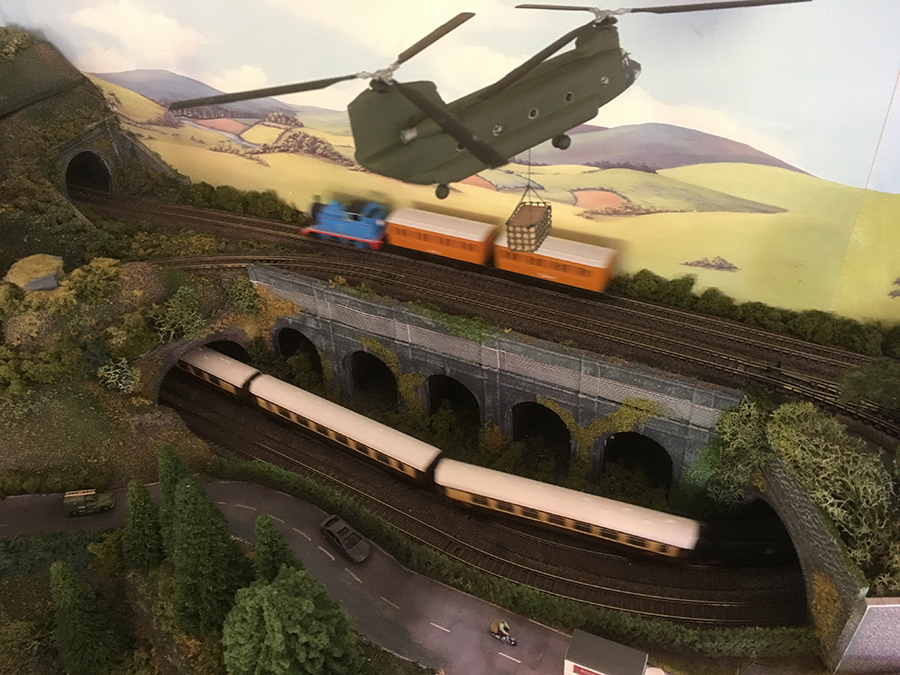
Jim wanted information on where to get N gauge helicopters. There are no 1/148 helicopters to my knowledge and I did search the Internet for some time. However, 1/144 seems to be a readily available scale with aircraft manufacturers. The helicopter in the photo is a Royal Navy Sea King HAR ‘Ace of Clubs’ from a 1/144 kit by Sweet purchased from Hobbylink Japan. The Chinook that I have just finished is again 1/144 by ACE Corporation and also available from Hobbylink Japan. Reveal did manufacture a UK Chinook in 1/144 but you may have trouble sourcing it now.
Eric (Leeds) wanted to know my next project – Have started a two level OO layout in the loft. The top level is a simple single loop DC circuit with fiddle yard, and the bottom level is a double loop DCC circuit with various sidings yet to be laid out. I liked the idea of having sound actually in the locos (too many locos on my N gauge layout to convert to DCC) so I have bought a few Hornby/Bachmann DCC Sound locos which are excellent. I have also bought a Faller Car System starter set which on initial trials is pretty impressive. However, the loft is too hot to work in during the summer months (particularly in this heat wave we’re having) so work has been put on hold. I’ll send some pictures and a video soon of my progress.
Here’s a few of pictures of the Chinook over my N gauge layout.
Thanks again Alastair for a brilliant newsletter.
Kind Regards
Brian”
And lastly, on to ‘Bonkers John’.
A few of you have been in touch asking about the printable buildings again – and I thought a very quick youtube from John would help:
Andrew’s been in touch, he’s shared how to build a corner tunnel for a model train:
“Hi Al,
Like so many of your followers I enjoy your blog. And like so many others have scrapped my last layout and started again (Photo Corner 1) using many of the tips and ideas that you have shared from other model railway enthusiasts.
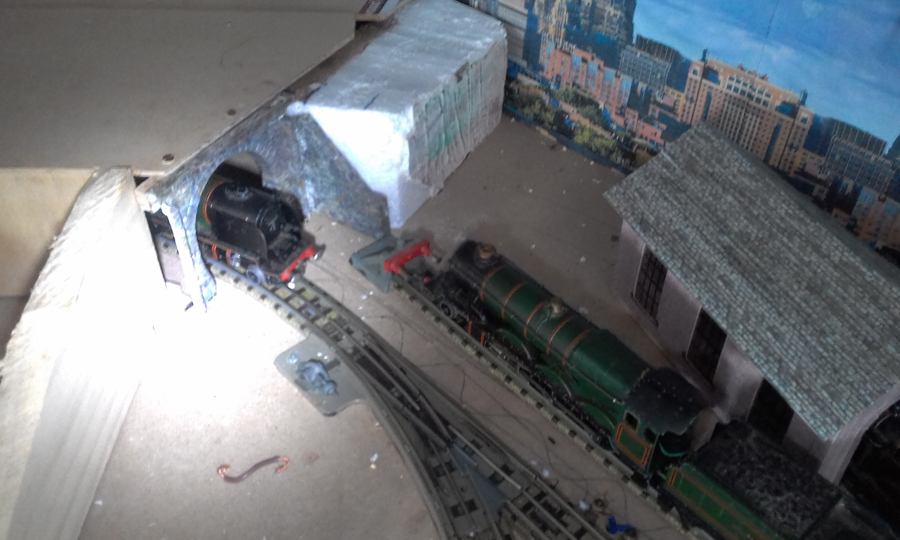
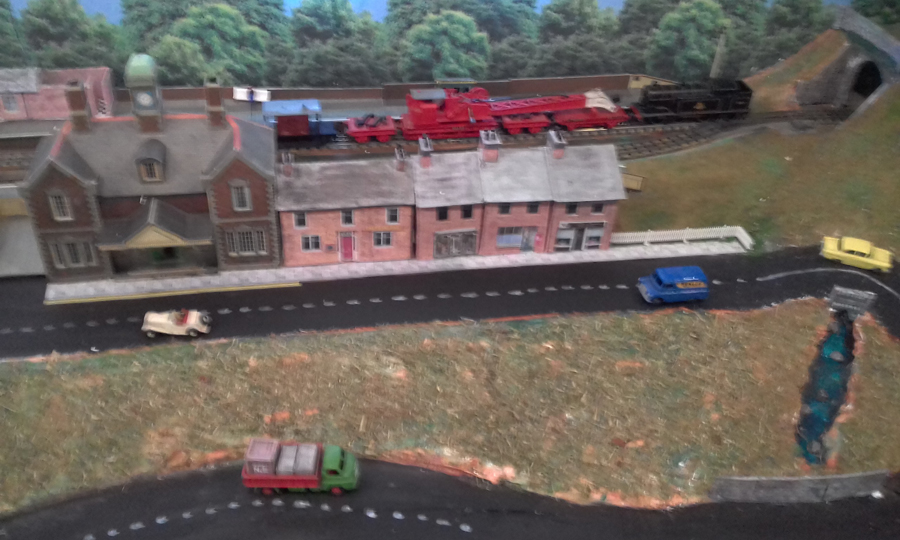
I attach a series of photo showing my construction of a tunnel in the corner of the layout. The curve is standard Hornby Dublo 3 RaiI that is fairly tight (15 inch radius) and I wanted to be able to remove the tunnel top in case of derailment and for track cleaning.
Because there is critical clearance between the tunnel walls and the overhang of larger locomotives on the outside of the bend (Photo 1A) and passenger coaches on the inside I needed to ensure that the tunnel would be in the exact same position when replaced.
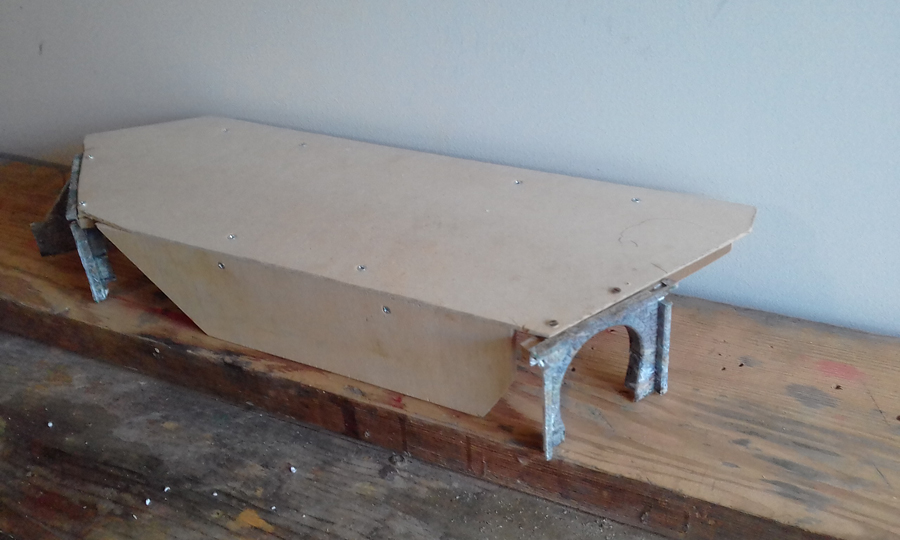
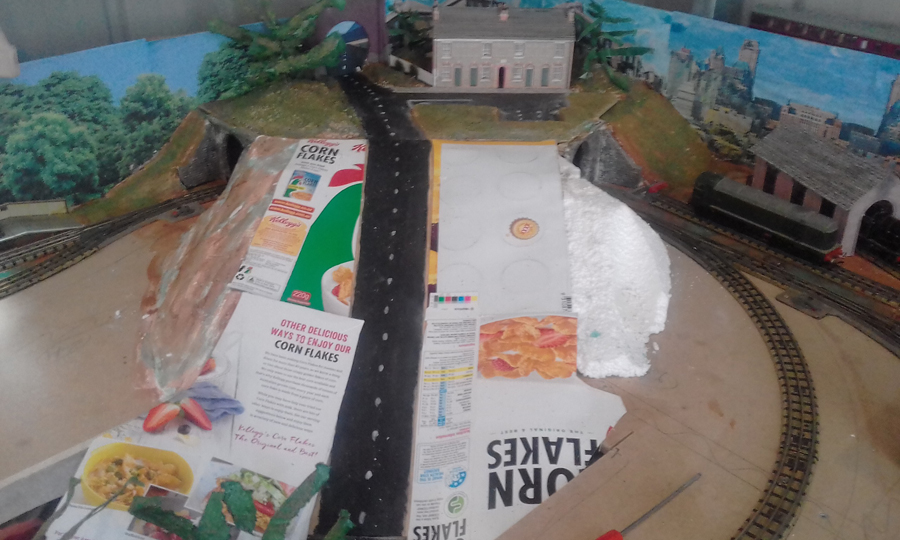
I made the tunnel from 5 mm ply (Photo Corner 2A) and used small pieces cut in a U shape on the baseboard to relocate the tunnel top (Photo Corner 2B)
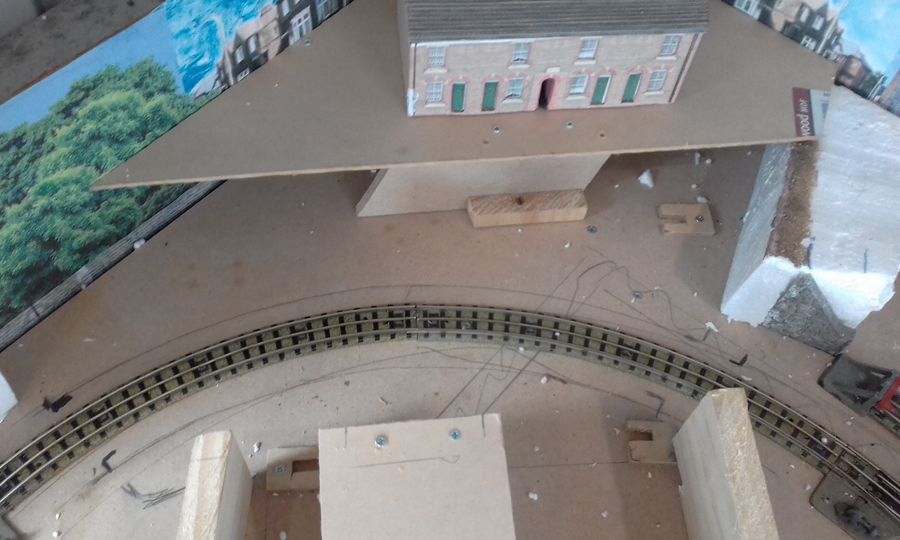
I used expanded polystyrene and wood off cuts to form a frame for the scenery (Photo Corner 3) filled with newspaper (Photo Corner 4) and covered with light cardboard (Corner 5) – A mistake – I should have put the shiny side down as the plaster did not like sticking to the shiny side and requiring a pre-coating of PVA to secure.
I gave a coat of plaster of Paris, the first time I have used this for landscapes and found it sets very, very fast. A mixed blessing and I am told that the addition of household washing up liquid will slow the setting time – Perhaps one of your followers will be able to confirm. (Photo Corner 6)
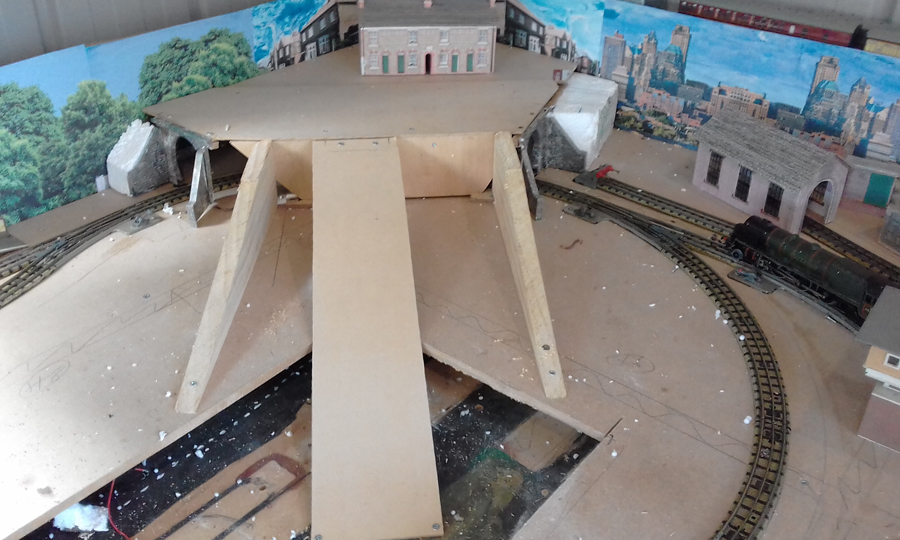
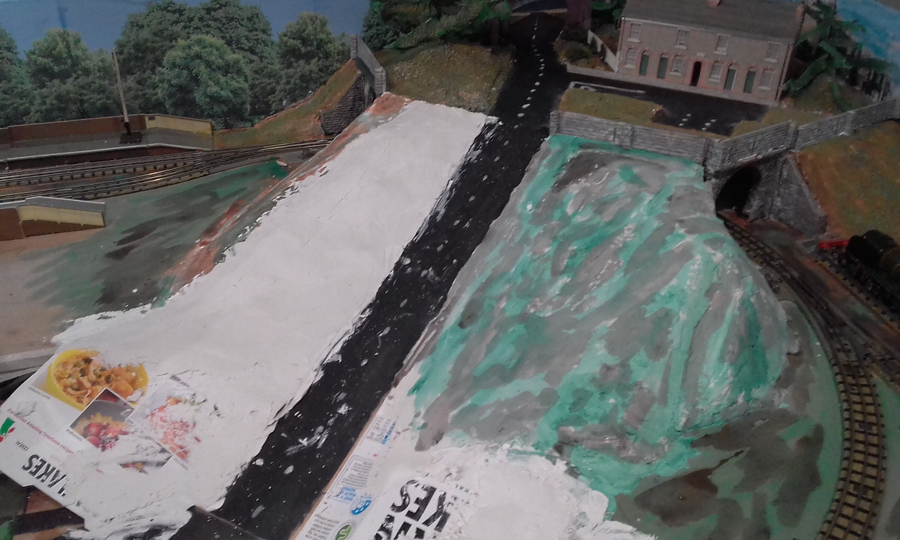
I first give a coat of diluted green and brown acrylic paints then PVA and coloured sawdust (Corner Photos 6, 7 and 8). I have a petrol motor grass mower that allows some cuttings to fly up onto the blade protection cover and dries them. I use these with a thick PVA solution to make a rough heath-land effect (Photo Corner 9).
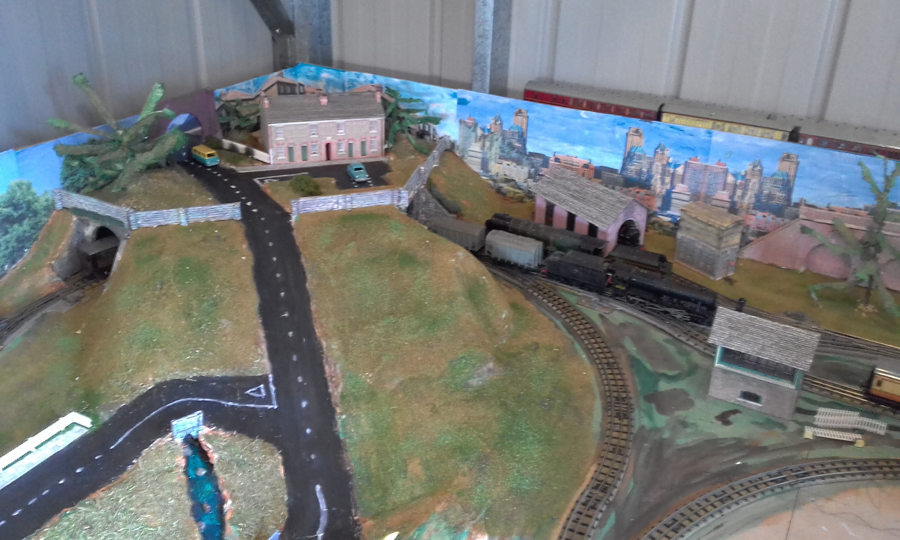
A special ‘Thank You’ to Dangerous Dave for his road tunnel – I have plagiarised his idea which may just be seen at the back of photos 5, 7 and 8.
Also a thank you to Fred and his trees. Mine are not as good and made from old wire, kitchen paper, shredded and spray painted and may be seen in photo 8
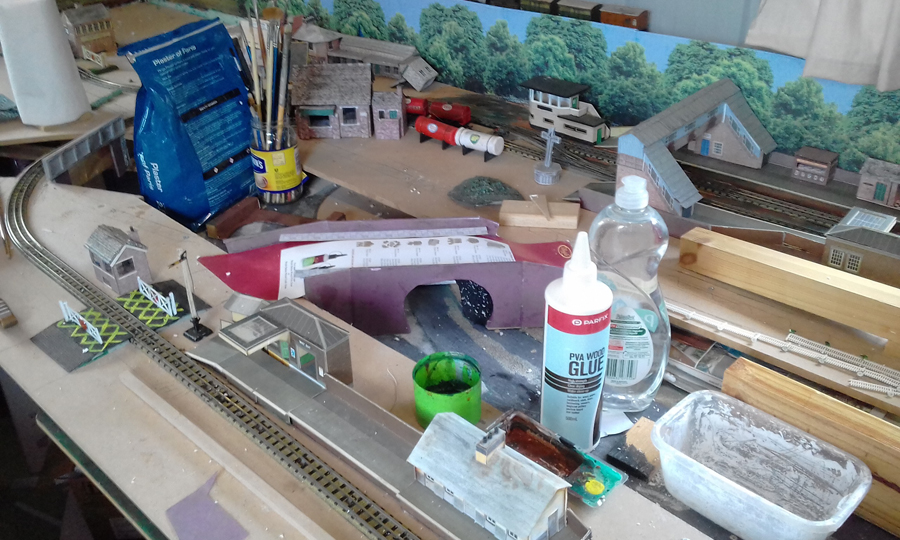
And I am a messy worker – (Photo Corner Mess)
Best wishes to you and all your followers
Andrew
Cooroy, Queensland, Australia”
(All images are clickable.)
1A:
2A:
2B:
Corner tunnel for a model train:
Corner mess:
A huge thanks to Andrew for sharing how to make a corner tunnel for a model train.
I don’t think he should worry, I suspect we are all messy workers. Besides, whoever has seen a tidy layout in the making?
That’s all for today, folks. Please do keep ’em coming.