Brian’s been in touch with his double deck HO scale layout:
“Hello Brian here : I have a nice start on a HO freelance layout with many cool features I wish to have your viewers see, since I have always been on the receiving end I thought I could give you my view of what I’m building.
The layout at this time has no name still working on it . But I think I have it to a place I could share it .. I have a few very general pics right now with more to come when I tell my whole story which I think will amaze most viewers.
Its main section is 25×8 with the upper level 38’ the lower main layout has three intersecting loops which allows operators move trains to all loops and up the grade.
The main industry on the layout will be coal the other will be mixed freight, still putting it altogether but that’s what’s cool it keeps the viewers coming back to see the progress.
I’ll have one passenger train on the layout it’s the walthers dinner bell train the station will be on the second level.. there is a small log camp up there also with many other small and med size industry’s yet to be placed . One I know will be a slaughterhouse for the farm on the lower . People gotta eat !!
So for now I’ll end.
Brian”
Now on to Jan:
“Gday Al,
I have been receiving your posts for quite some time now, some of the tips from your contributors have been very helpful. I thought I would share some photos with you.
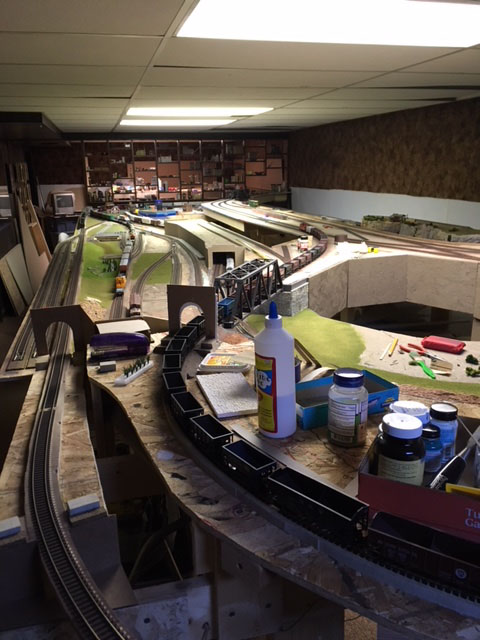
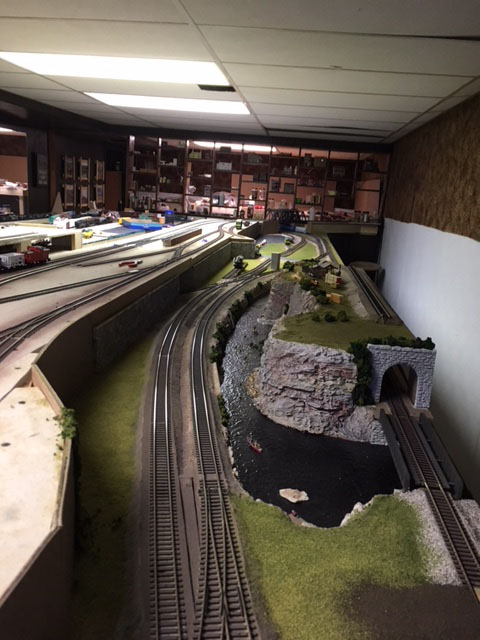
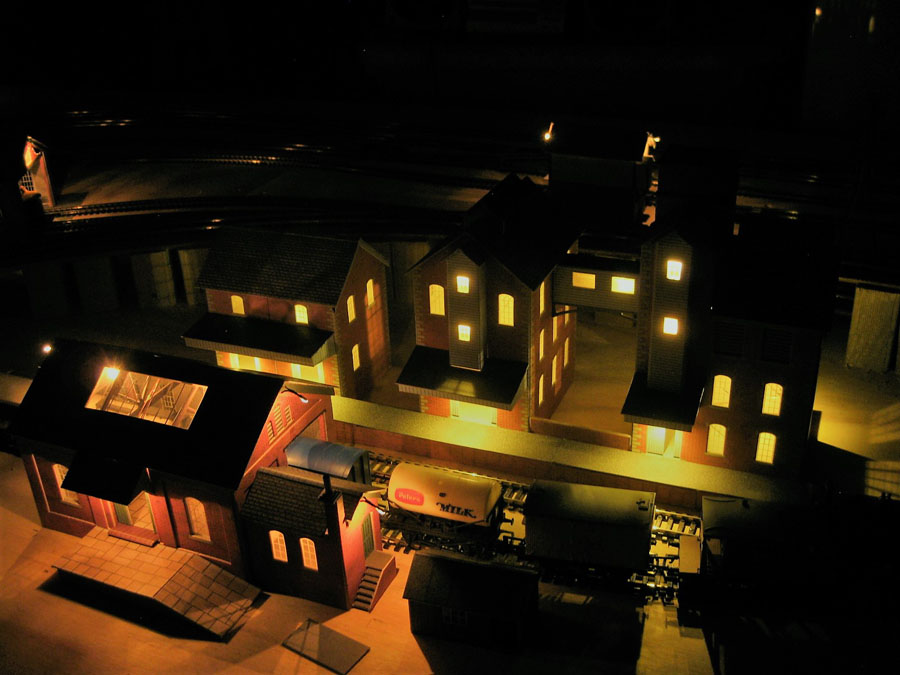
My layout was 9 months in the planning and the building of it has been underway for 12 months. My preference for an English layout and OO scale have lead me to creating a town and country setup and for this I have found Metcalf models invaluable. I’m planning my first trip to the UK so up to now it has been episodes of Midsommer Murders/Poirot and suchlike that have inspired my choice of scenery.
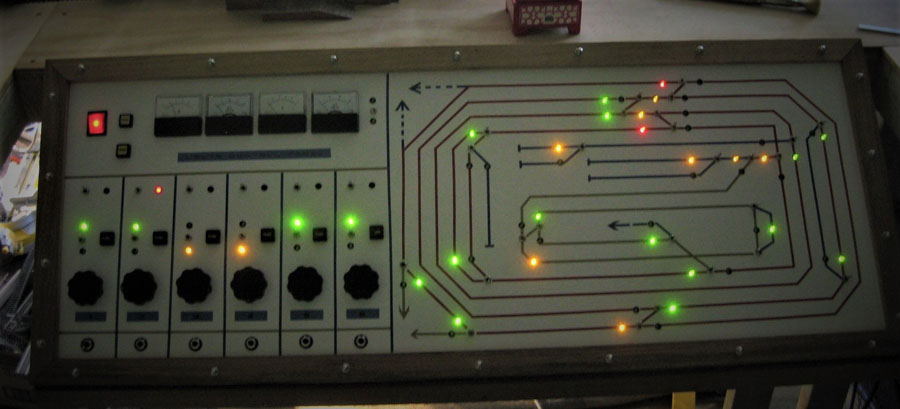
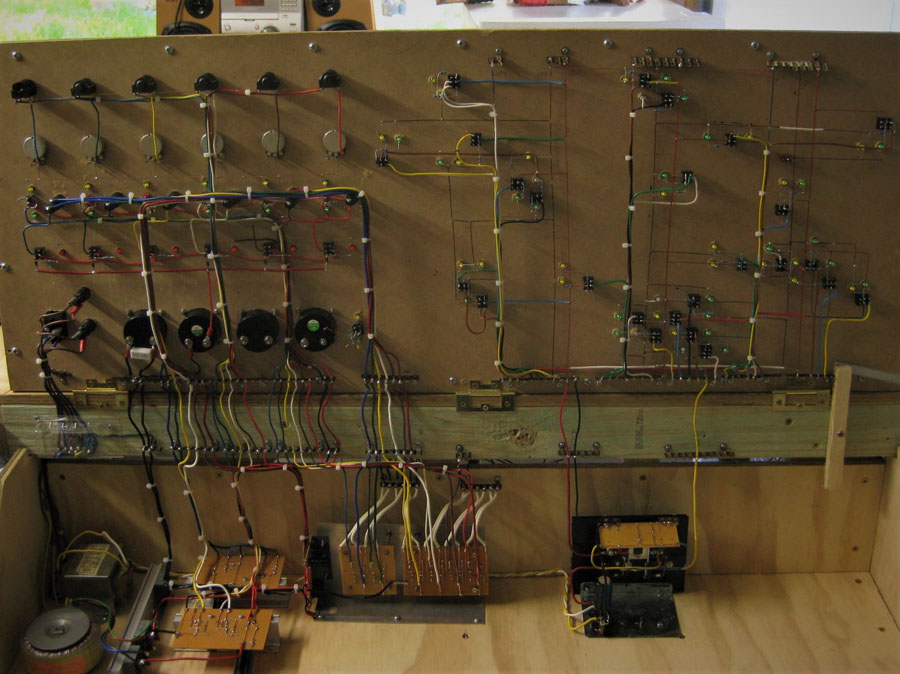
I have laid down a double helix track and used some store-bought gear but have also scratch built many of the signals and railway crossings. As an electronic technician I could not help myself and have put lights into all the buildings and designed and built a Control Panel to take care of the 4 main lines and the double helix.
My layout is, as you can imagine, a work in progress and I will send through more photos and information as I progress.
Again thanks for all the help.
Cheers
Jan Watters (Mr)”
Next, Fred:
“Hello Al,
thought this might be of interest the layout has been a long build very stop start ….with the bit of fun filming as the layout is all sorts ….”
Kurt’s been in touch with his German model railroad.
I do really enjoy the layouts with a theme, especially the ones that are inspired by trips or past events.
And because a layout can be whatever you want it to be, the options are limitless:
“Al,
I’ve been reading your emails now for about a year, and the many postings, along with several YouTube videos I’ve found, have been really helpful for the layout I started in the fall.
Like many of your contributors, I’m resuming a long-dormant hobby I started over 40 years ago when my daughter was a toddler.
I began with a Tyco HO set and adapted track plans from a booklet of blueprints the Atlas Co published on layouts.
To facilitate moving the trainboard, which we used on the floor only at Christmas time (as in my childhood with an O-gauge set of Lionels), I cut a 4’x8’ sheet of plywood down to 6’3” (ca. 1.9m) in length.
Several years later, after my son was born, I had a trip to W. Berlin.
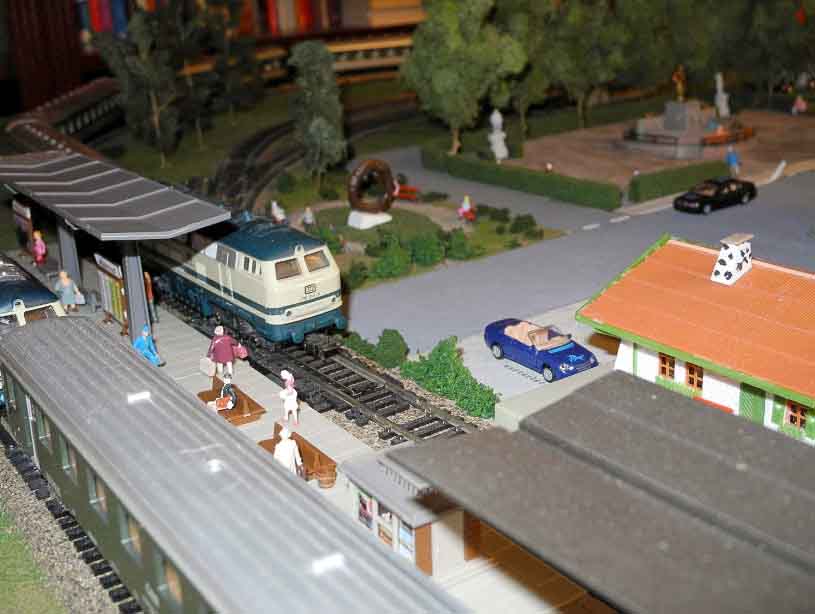
Here I purchased a set of passenger cars and a diesel engine that the Italian company Lima made, these with German and Austrian markings.
I was only interested in running trains, so I quickly filled up the board with dual ovals, a siding, and multiple spurs, running up to 4 engines off two power packs and track insulators separating sections I controlled with Atlas Selectors.
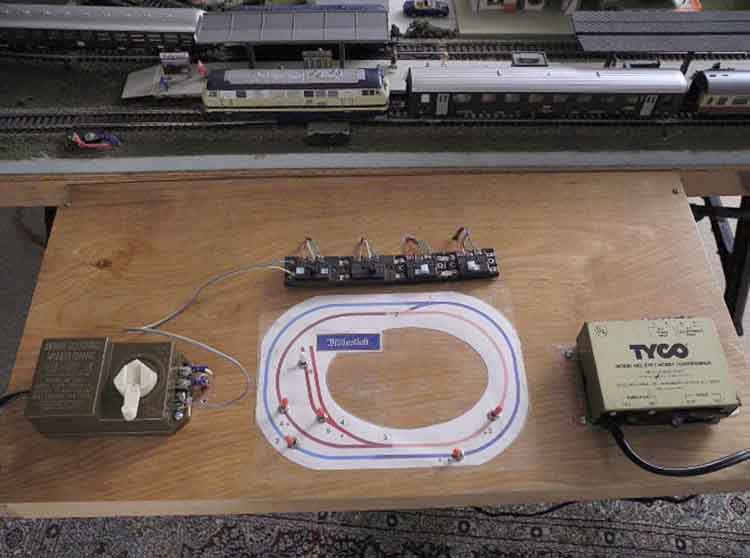
This time I wanted to add a control station with a track diagram, and that approach required relatively complicated wiring through a terminal block.
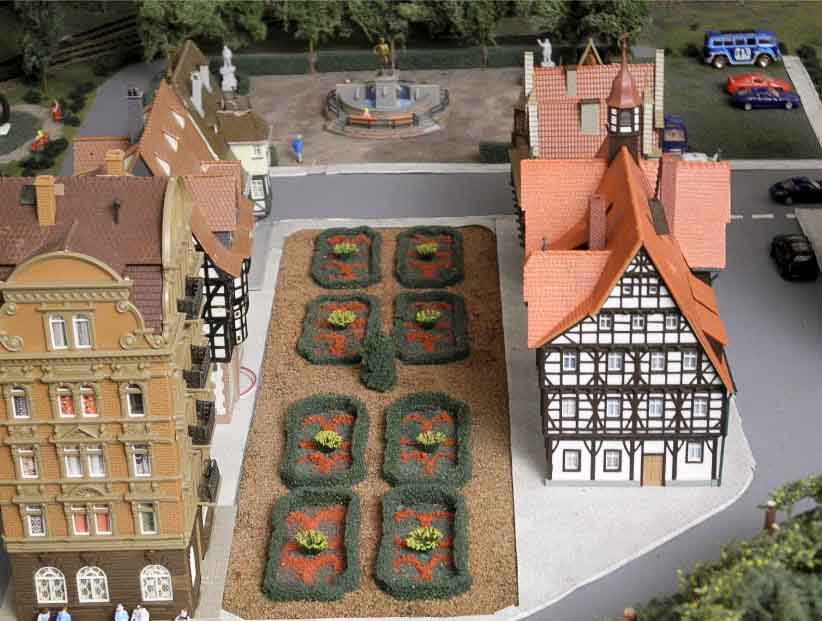
The setting is a village of half-timber buildings that could be anywhere from Troyes in eastern France to Maribor in Slovenia.
But the DB markings on the engine and cars give it away as Germany, probably near Austria (one car has ÖBB markings).
The fictional town is called Müllerslust, based on a song, “Das Wandern ist des Müllers Lust” [my translation is: Traveling is a Müller’s joy], and the town is therefore Müller’s Joy.
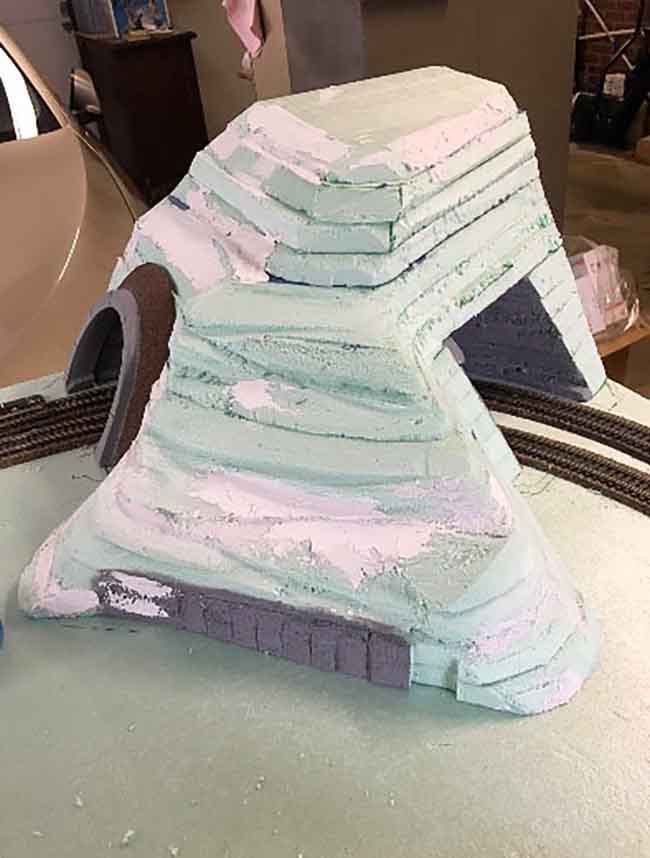
Since I have no experience building scenery, I made many mistakes and adapted accordingly.
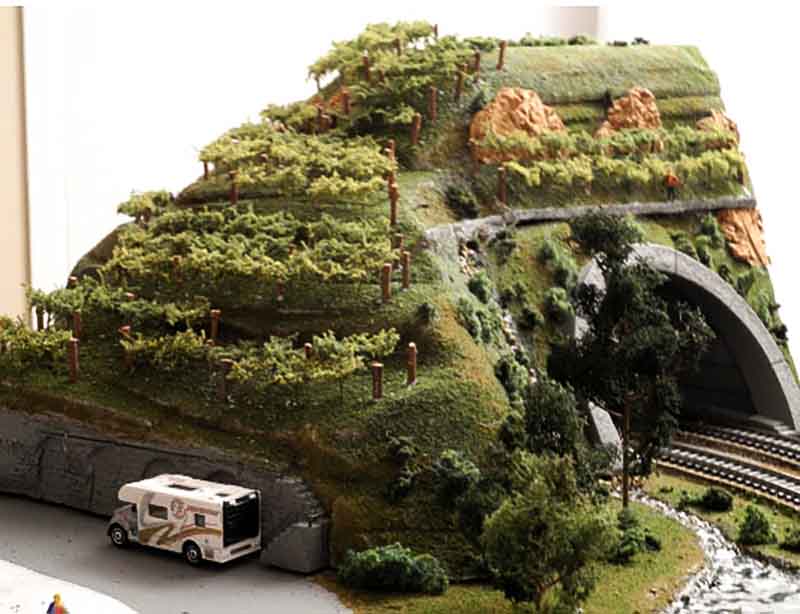
I started building a tunnel with a long, initially gradual, grade, but for a vineyard I wanted on the hill, I searched the internet and discovered how steep the vineyards in the Mosel Valley are—and I found the possibility of cutting the gradation to accommodate a road.
The pictures I found online helped immensely.
The style of one building is a couple of centuries newer, and I have an anachronistic Baroque garden in the town center (though it goes well with the non-matching building, part of a lot I bought on eBay—thanks for that frequent suggestion).
I’m now far enough along with Phase 1 to share pictures.
Phase 2 will add lighting, some of which will run grain-of-wheat bulbs on AC and others will run LEDs on DC. For the latter, I’m going to use an old mobile-phone charger, which will provide a constant voltage at an appropriate level.
As you’ll see from the photo of the control block, there is sufficient space to add switches for the lights or other things.
In Phase 3 I’ll add road signage. One problem I discovered with Faller kits, which I like for their detail, is that they sometimes require supplemental kits not identified in their descriptions.
I have a two-track crossing that will eventually need sensors, and a park fountain that requires a pump to circulate real water.
I now have the pump, but it’s not clear what sensors are appropriate.
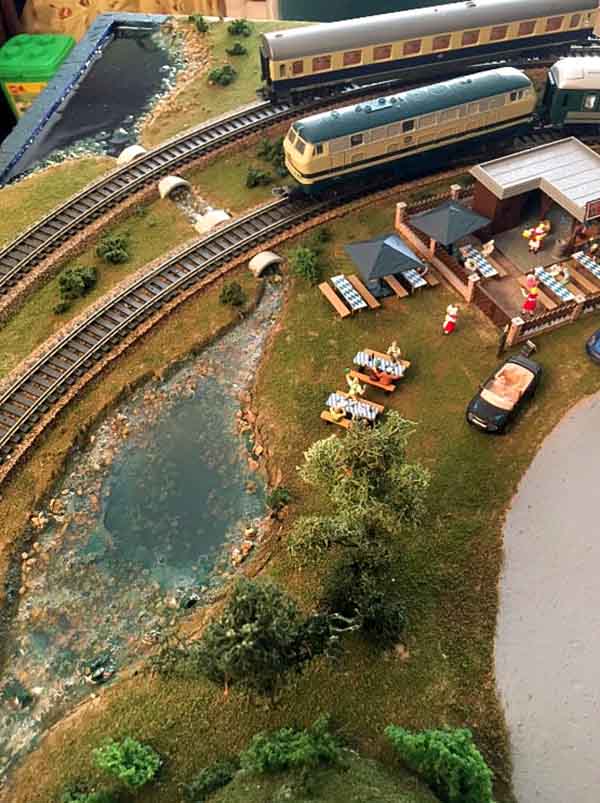
I had read that Woodland’s “Realistic Water” often develops bubbles.
While we were on vacation, and the trainboard was in the hot garage, the last pre-vacation layer of “water” turned somewhat brown in the shallow pond. With subsequent layers the murkiness has diminished considerably.
For the deeper water (upper left in the picture), I added blue food coloring to the next layer; I used too much coloring, but I notice that in this section I don’t have the bubble problem. The picture makes it look like there are bubbles, but what you see is really a slight rise around the rocks (talus).
Do any of your readers have suggestions on how to avoid the bubbles? It seems the problem develops over several days; you don’t see it right away.
Best wishes,
Kurt”
I love that so many of us return to this hobby after decades away, and it’s still just as fun.
A big thanks to Kurt for sharing his German model railroad.
Rods been back in touch, this time with his model train incline deminsions:
“Alastair,
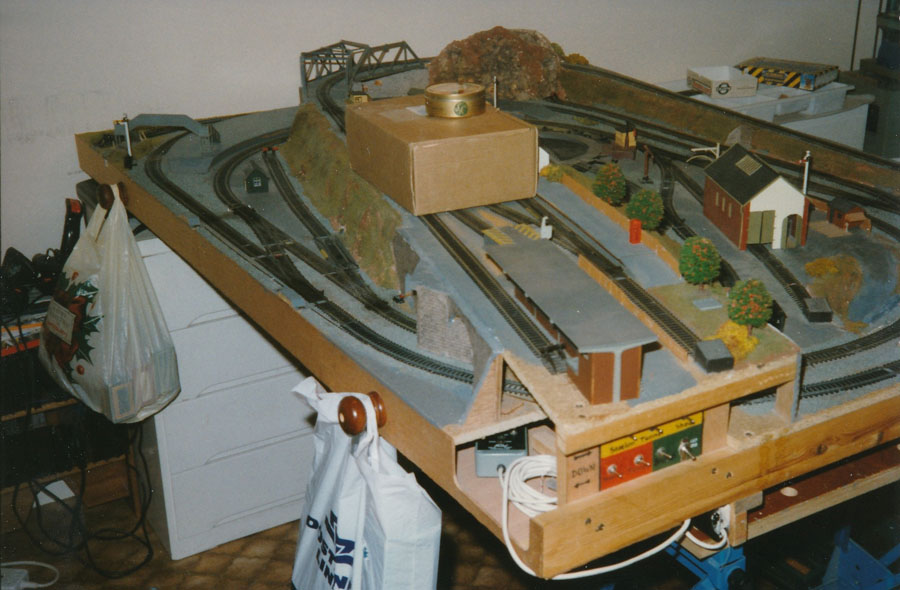
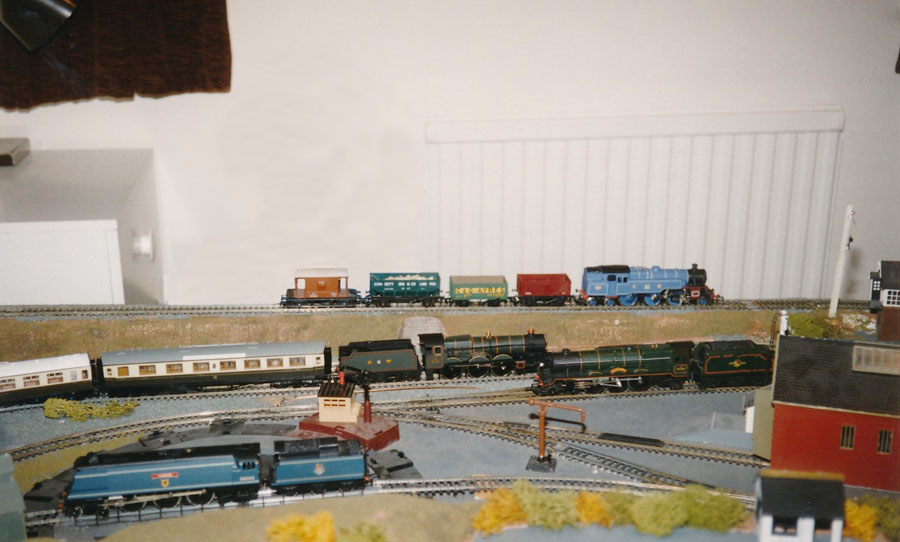
Further to the post about calculating inclines, this was the layout I mentioned in my posting, the overall view is not a great shot as it was taken just as a record when it was all packed up ready to be sold.
You can see the incline on the far side rising from points in the outer main line just out of shot, to cross the girder bridge at the far end. This was a climb of about two and a half inches in about seven feet or about 1 in 30, eased a bit at each end to transition to level.
A pacific or 4-6-0 would take three pinpoint bearing coaches up the bank quite well, and a pannier tank with a traction tyre would do two of the old plain-bearing Triang hopper wagons, fully loaded with fish grit, and a brake van, but that was asking a bit much.
The layout overall was 6′ x 4′ and built on crossing L-girders made of 2″x 1″ so it was quite rigid but would just sit on the spare bed whenever we didn’t need it for visitors. If we had someone to stay, it could be stood up on its end against the wall and covered with an old curtain.
Rod”
Rod’s Model train incline deminsions got me thinking, and I had quick look for other posts on inclines:
“So, you guys want to see another use of TYCO parts? How about this?
Takes a few TYCO trucks, plastic OR the metal ones…..(Yes, theres a reason to this madness!)
The plastic trucks, you model logging railroads? OR have a logging line on your regular railroad as a servant to the system? Need log cars? How about an alternative to the expesive, disconnect cars from Kadee? NOT as detailed, but close and WORk, and in use with logs on them, will look just as good!
Take an look, (actively, that is) for old TYCO or even Mantua cars that are considered “Old Timers”. The trucks under these cars, are the ones, you need!
You’ll see in a bit why I say, the plastic OR the metal trucks for this build….
These are the Kadee cars:
These are nice models, a bit of work to build and a lot of painting of moving parts, YES they do swivel, and transpose as the car is loaded with logs, PLUS, they have sprung wheel sets in them! SO, a little reason to why they are a bit expensive for a set of them! Sadly, I got mine for a good price, otherwise, I wouldn’t have them!
Then as I built these, I seen something…..
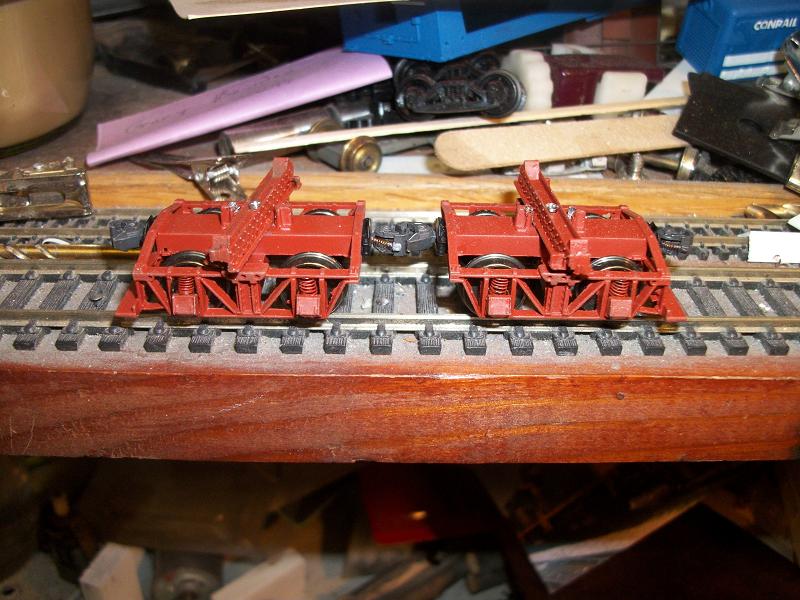
A little brass stock, tubes, and solid square rod and a bit of solder and flux, and you can make something a bit close to the Kadee models, but, older looking for a year gone by? Sure, its a logging railroad, they never had brand new equipment all the time anyway, so…..
With the plastic TYCO trucks, you got this:
If you look the Kadee couplers are burried inside square tubing thats the same inside diameter of that of a Kadee coupler box, WHICH, allows me to stuff the coupler, and a draft gear box, inside the brass tubing, then it was marked from the outside to be drilled and taped for screws. The top of the inside of this box, has one extra thickness of brass shim stock to give a bit more “meat” for the tap to hold 2-56 threads in and try to prevent stripping out of the threads….REMEMBER, it is brass after-all!
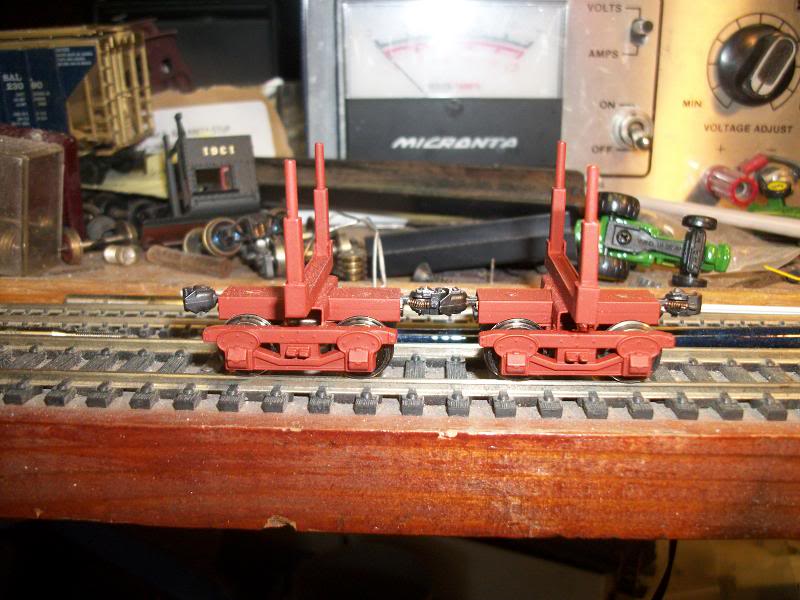
This frame of the log “bunks” are bolted to the truck. NOW, you’ll be enlightened as to why I said both, plastic and metal trucks above! See, the mounting of the bunks to the trucks?
This picture shows that the log bunks made of brass construction were bolted to the plastic truck. THIS “Disconnect car” will NEVER be loaded with logs……..why? Well this is an unloaded model and can’t, these “carriages” have to swivel UNDER the logs, OR atleast the bunks do….At least to allow the car to traverse through curves in the track if these don’t swivel it will derail the car!
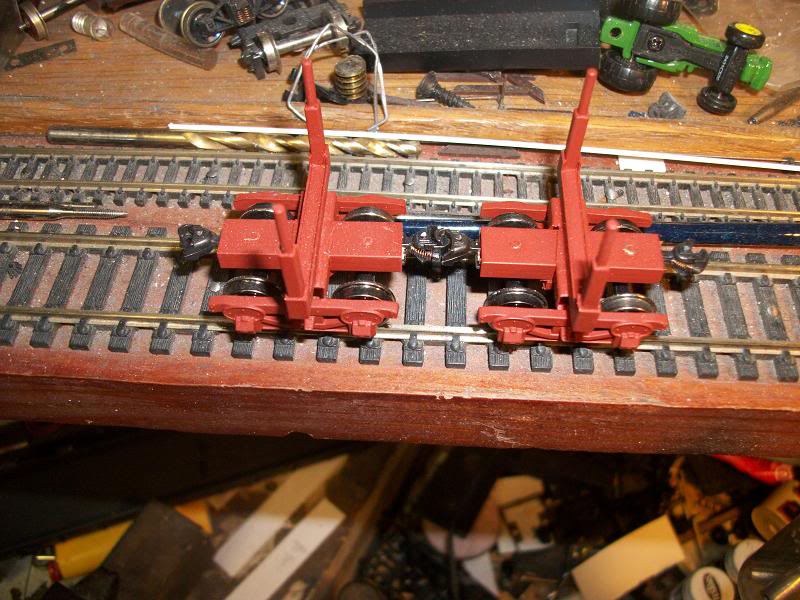
On this particular set of “Disconnect” log cars, those plastic trucks, from TYCO (or even Mantua’s will work the same way) but they were plastic, and somehow the truck actually was broken! The plastic snapped right at the location of the truck where the bolt was to hold it to the cars floor, This is WHY these are ridgetly bolted to the log bunks made of brass, to hold them together and keep the bearing locations in-gauge for the wheelsets! Thus, using a BROKEN part, and giving it a new life and returning it back into rail service! Thats why I choose these….. To not toss them away but use them in another light and make use of broken parts….. Most guys either toss ’em out, OR put them around an engine service yard, I choose to putthem back into rail service in a whole other way! Gives them a new lease on they’re life span!
Having that done in the manner I diod it adds to the fleet of log cars I’m building, BUT gives me some that can remain unloaded, for that differernce sake. -Not EVERY car at a sawmill, or in a yard is always “loaded” so.. this gives me some unloaded cars!
These type cars will be hastely detailed, beat up and look terrible as to be the “uncovered” disconnects…..to hide all this, and such and look somewhat realistic. NOW on the metal trucks, this WILL NOT appear the same, the metal trucks, will have the bunk to swivel above the truck frame, to have logs mounted in the bunks and chained down like my other log cars have had done to them.
NOW, when I get to building the metal trucked ones from Mantua, those will have the log bunks to will swivel, and be loaded with real wooden logs! As the bolster center for the screw will be its pivot point…..
Hemi”
A big thanks to Hemi (again!) and to Rod for sharing his Model train incline deminsions.
And if you’ve picked up a tip or two over your last few visits, don’t forget the Beginner’s Guide is cram packed with ’em.