N gauge track plans – Ed’s

Ed’s been in touch. He’s added to the N gauge track plans on the blog:

“Hi Al,

I regularly find myself glued to yours and others posts, I find the entire world of steam railways fascinating.

A year or so ago I decided to start an N gauge project as I used to have one as a young boy.

I still feel guilty to this day about trying to make that track work better by trying to take it apart as an 11 year old. Boy was I wrong!

Anyway, I wanted to share some progress of the build to see what people might suggest as I’m going to tackle a OO gauge 1st (easier to model).

Here’s the N gauge.

I bought a job lot of trains, Track and the odd building from eBay at a bargain price and as soon as I got it through the post at work I opened it up.

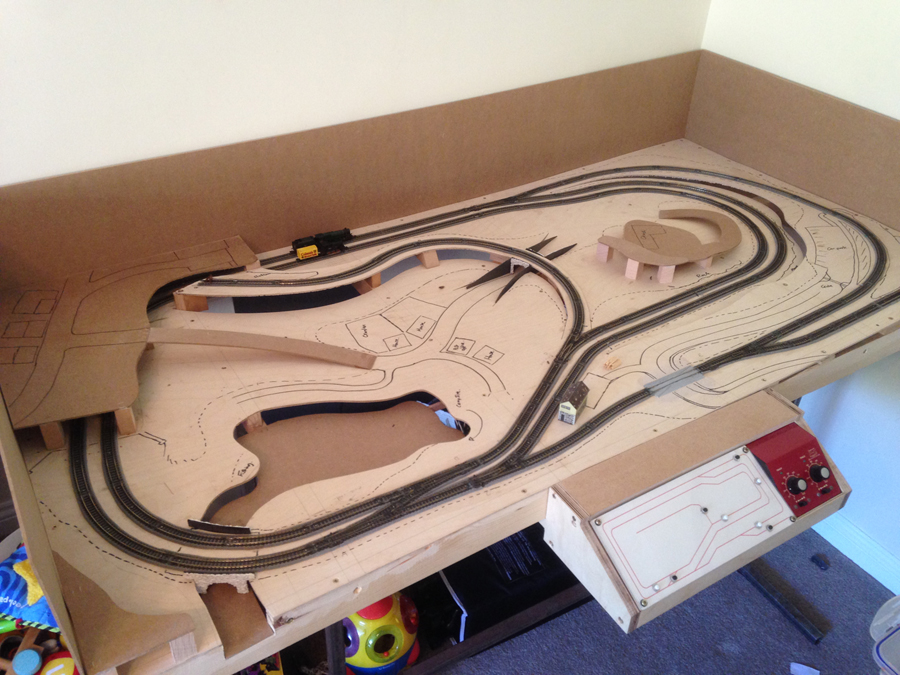
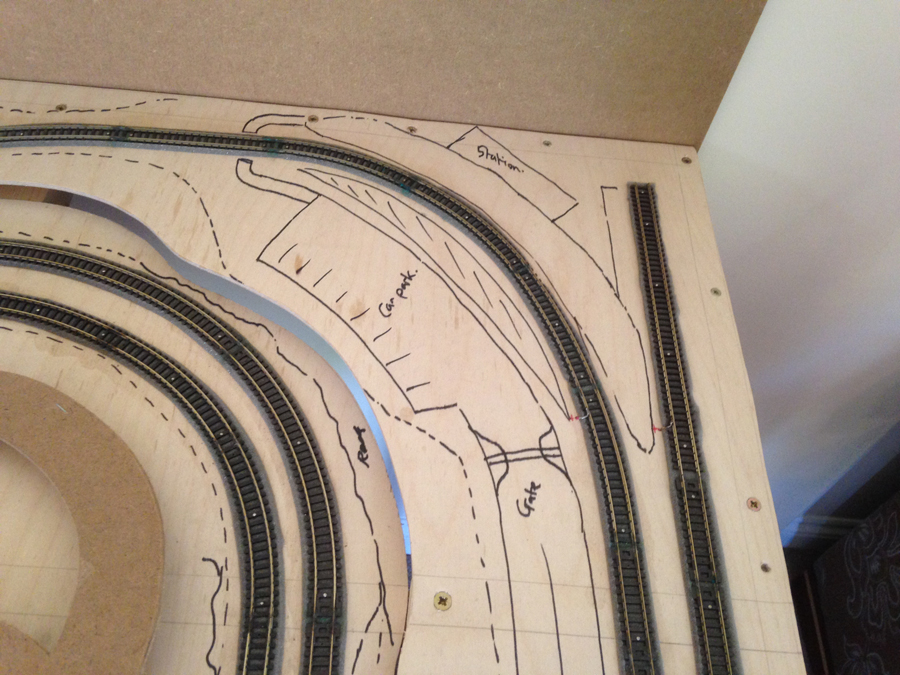
I started to play around with the idea of a single rail double loop that half of which would hide under a hillside.

Instead I decided to go for a side by side in the style of my old train set, *see previous email* I preferred this with the prospect of the trains passing each other, luckily in the box of track it allowed me to create exactly what you see.. Well plus a couple of the original points from my youth set!!

As for the layout, it’s going to be based on the Pennines as is such a beautiful old world place. I’m from Lincolnshire and it’s far too flat for my likings.

My wife is from waterfoot in rossenddale Lancashire, where they still run a Steam railway. It’s beautiful!

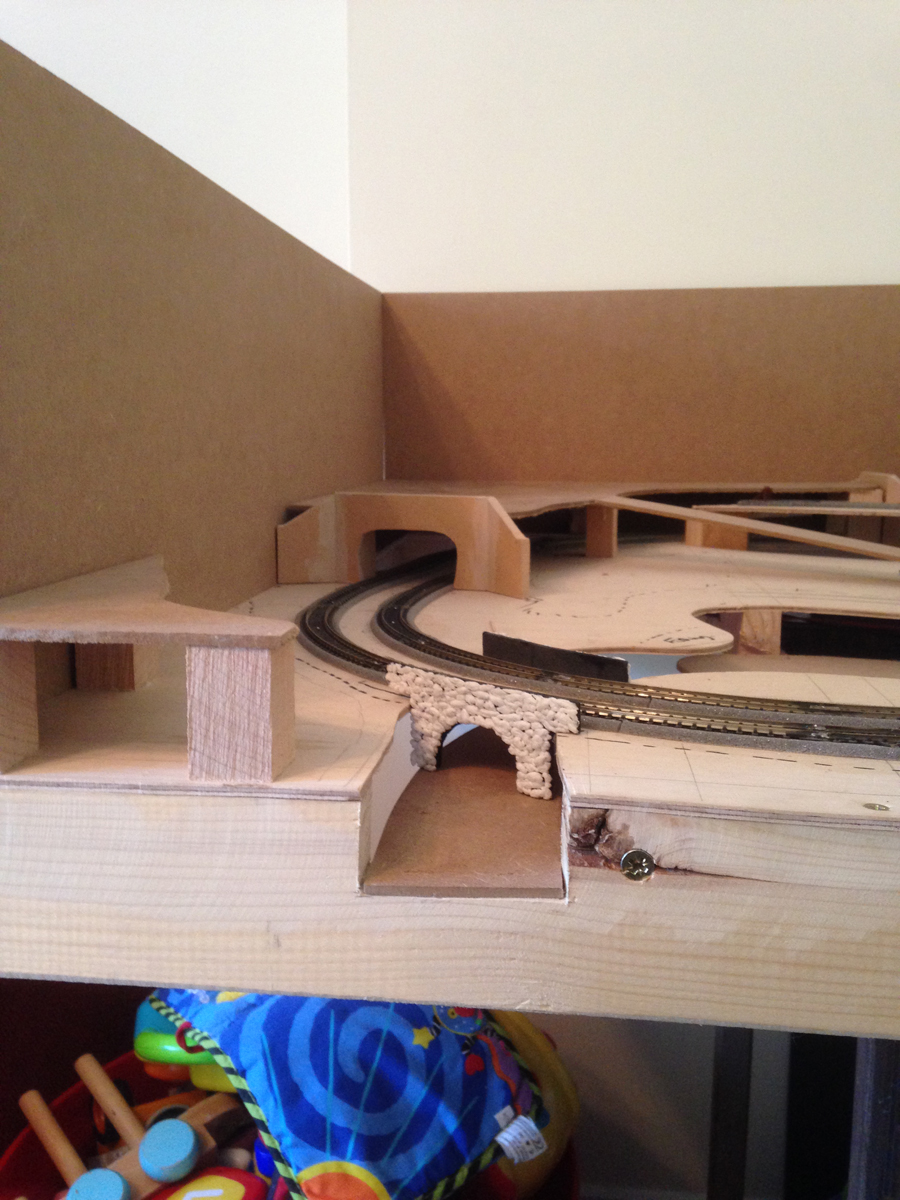
So from left to right on the picture, small village on top of the tunnel, road leading down into a hamlet, in front of that is a fishing/ boating lake with a campsite beside it.

I wanted the river leading from it to flow to the front where you could see an “under bridge scene”.

The hamlet then leads under the track to a church on a hill (Christian element) the track we just went underneath leads to the 1st station on the track on the inside circuit.. The second station on the far right with a car park on the inside of the track is on the second circuit.

The control board is wired to control a simultaneous change where needed to save the head game.. I first made the mistake of not having a discharge unit in the switch circuit. It was a nightmare! Wiring is not for me!

Well I hope this is enough info for people to see my vision, I hope that I one day get time to finish it but 5 young kids keep me busy and tired!

Ed”

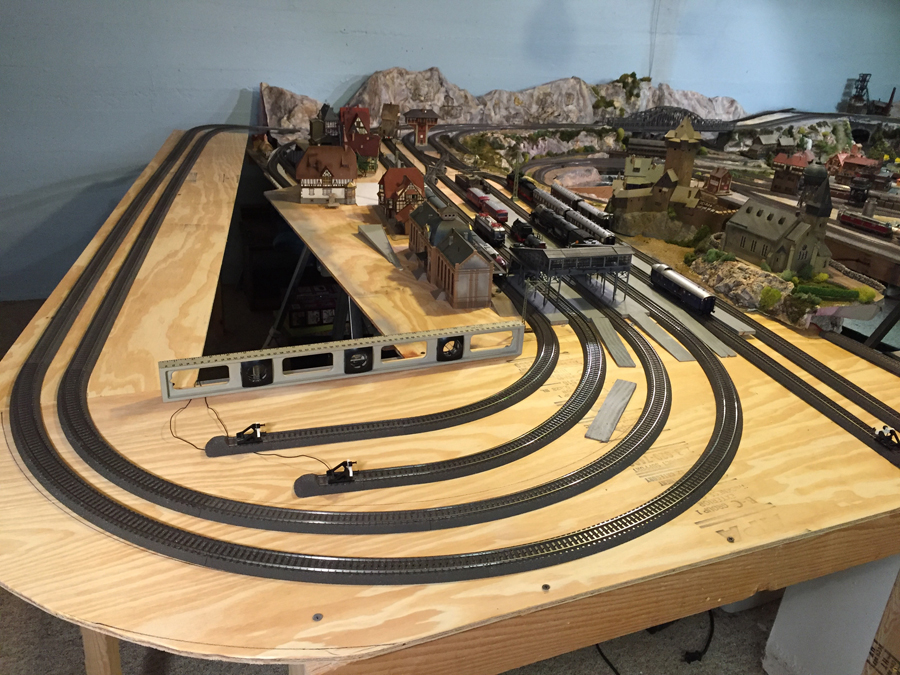
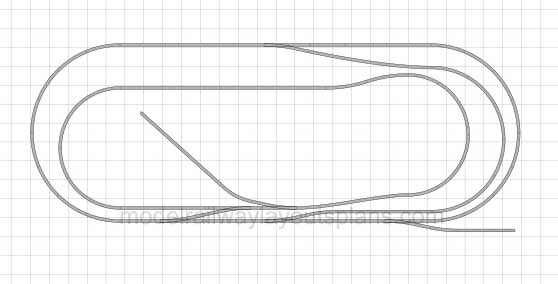
N gauge track plans:

N gauge track plans

N gauge track plans

N gauge track plans

N gauge track plans

N gauge track plans

n gauge track plan


“Hi Al,

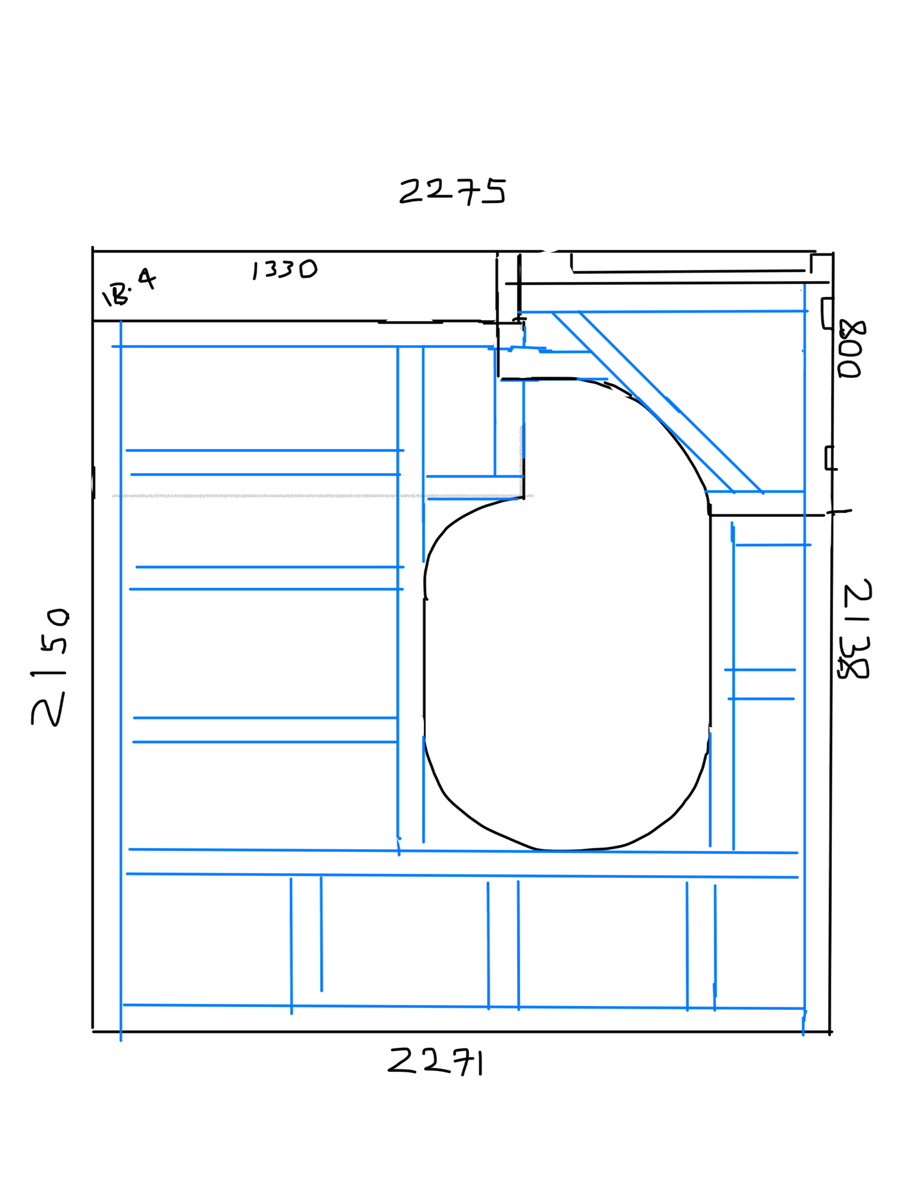
Just thought I’d drop you a line with a few pic’s, I retired last Christmas (aged 61) and was given permission from my wife to commondeer the small bedroom in the house for my layout, I’m 12 month’s in now and have just finished the baseboard framework, there’s plans for a small higher level later on.

It covers just short of 50 square feet so it should be quite a nice layout as I’m modeling in “Z” gauge…… hope my eye’s hold up!

Thanks to you and all the modelers for sending in their pic’s & videos…… keep em coming guys.
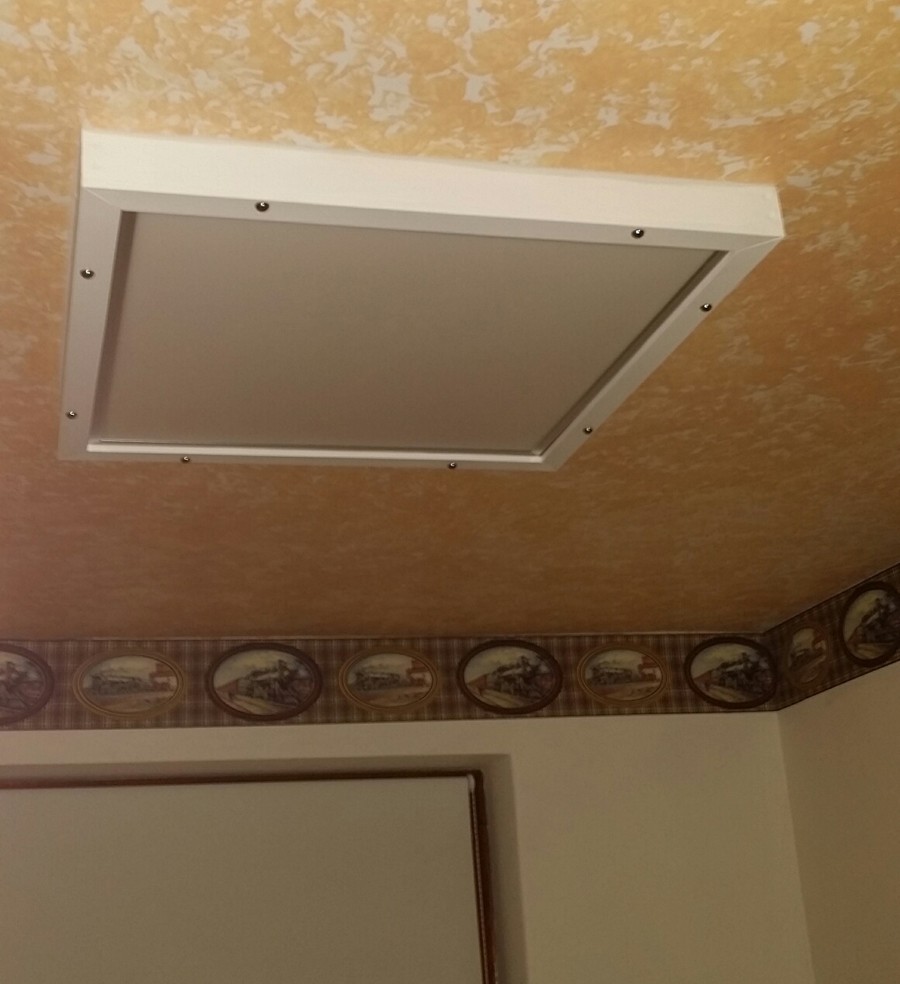
The roof light is one single LED by the way, very bright.

Keith”

benchwork

model train benchwork

model train benchwork

model railroad benchwork

model railroad benchwork

model railroad benchwork

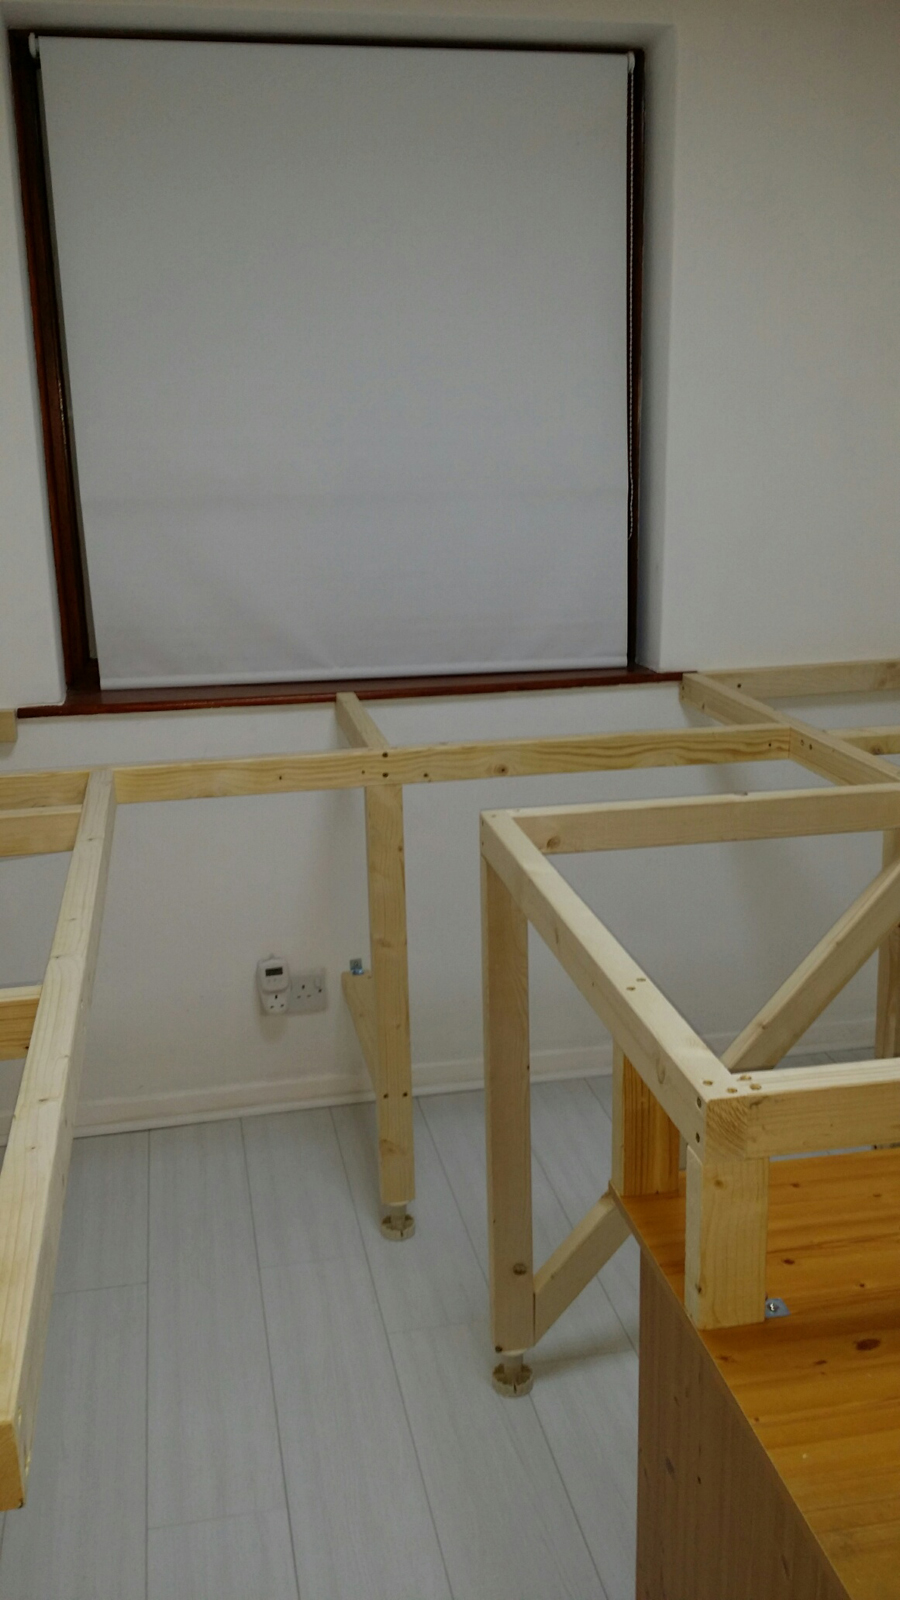
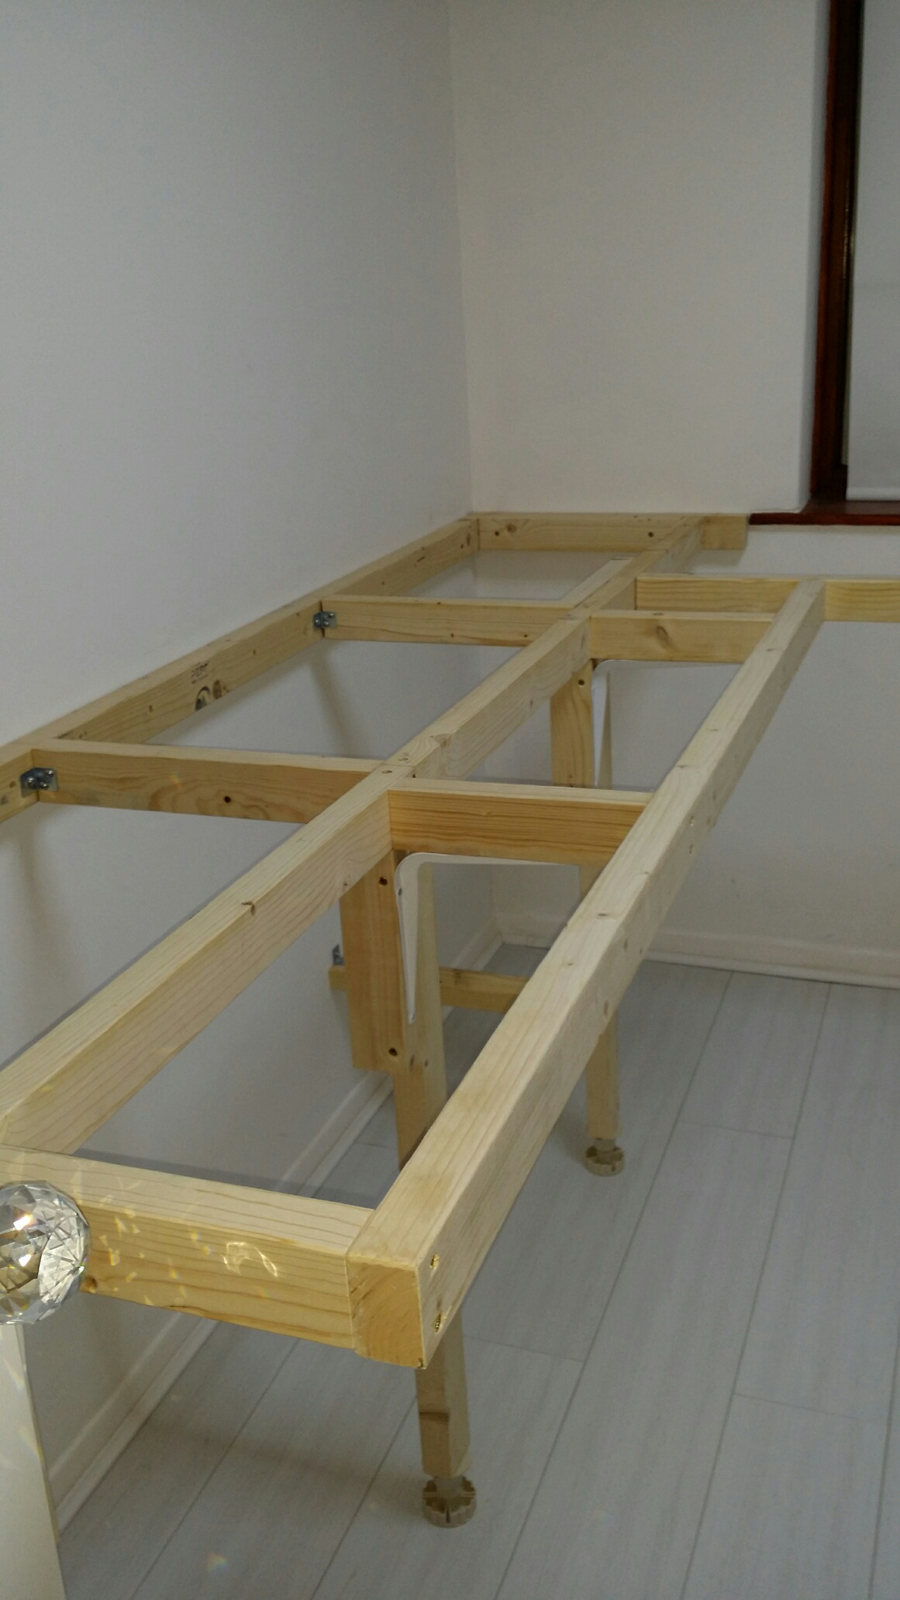
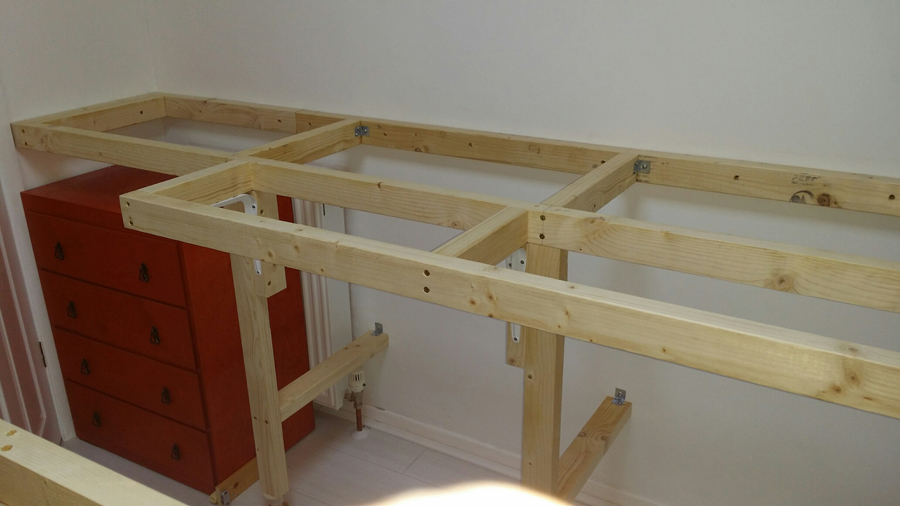
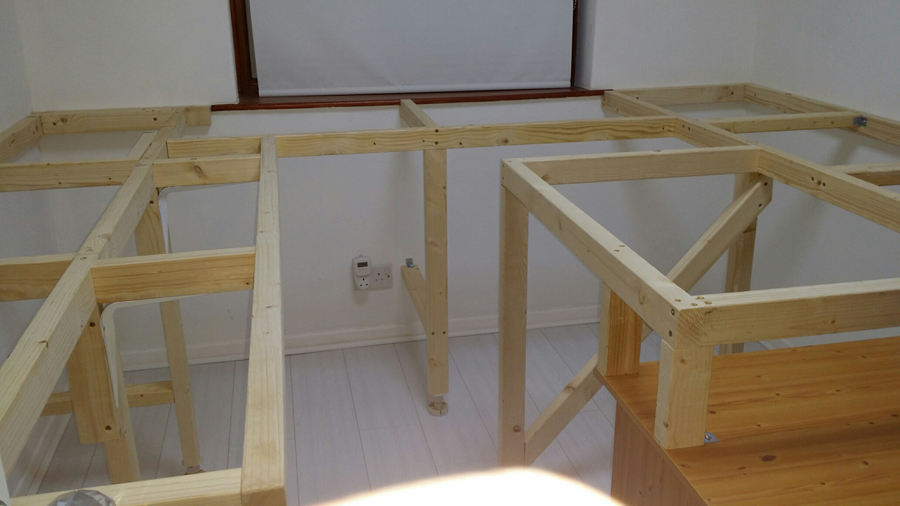
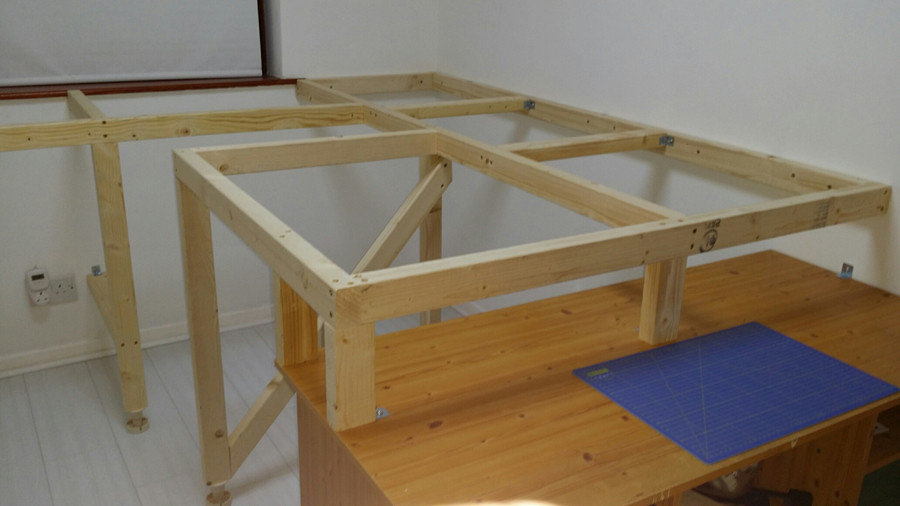
A big thanks to Keith and Ed. It just goes to show how a little planning can go a long way. Having a bench to work on properly and get the most from your space, may not be the most exciting part of your layout – but it’s a sound investment in the long run.

Mind you – you don’t have to have build a bench. Remember John’s ironing board layout?

That’s all this time folks. A big thanks to Ed for adding to the N gauge track plans collection.

Please do keep ’em coming.

Don’t forget a simple way to plan your layout and make things happen is with the Beginner’s Guide.

Best

Al

PS Latest ebay cheat sheet is here.

PPS More N scale layouts here if that’s your thing.


printable buildings

And there’s the Silly Discount bundle too.

Dave adds some carriages

Dave’s been busy again – does the man ever stop?

This time as well giving his latest video an Easter theme, he’s added a load of carriages to his locos.

I like the truck cam shots best. Have a look:


Now for a trip down memory lane. I was chatting with a good friend the other day and he asked me if there is a layout that particularly sticks out in in my mind. And do you know, there is, for two reasons:

1) There are very few layouts that could feature Godzilla and get away with it.

2) It’s got bags of character and lots going on.

So here you go. Here it is – all the posts, stretching over a year or so, for the ‘Amsterken’ layout.

Amsterken 1

Amsterken the video

Amsterken Updates

Amsterken at night

Amsterken grows

Amsterken sequel video

Hope you enjoyed the flash back! Don’t forget if you do want to search the site, there’s always the Golden Key.

That’s all this time folks. If Ken’s inspired you (how can he not?), the Beginner’s Guide is here.

Best

Al

PS Latest ebay cheat sheet here.

HO train table construction – Glyn’s

Glyn has been in touch again with an update and a video this time, it’s on so much more than just HO train table construction.

If you need to jog your memory, Glyn’s last post is here.

“Hi Al

Ive just uploaded my first attempt at a video of my HO layout construction.

It’s not terribly professional I’m afraid but it does give some sense of how things are progressing.

Having edited the video about a month ago I’ve since added another outer double mainline loop to extend and connect the 2 outer limbs of the layout to create a mainline through station instead of the end terminal station shown in the video.

I’m in the process of starting to video the extension construction but it will take some time editing the clips.

I’ll get them to you as soon as I can.

ho train table construction

ho train table construction

And here’s the video – HO train table construction:


Thanks again for all you do to bring us together as hobbyists.

Regards

Glyn”

Next, some pearls of wisdom from Mike:

“Scale-

You can purchase an app to help with scaling conversions. I used Woodland Scenic Scaler. Very helpful as I added road beds, scratch buildings, and scenery.

Laying the Track- I use an all in one track for my layouts because most off the shelf beginner sets come with this style of track.

Its easy to work with, come in many different lengths, straight , curved sections, and you can add turnouts, crossings and crossovers.

It does have some limitations but it is perfect for most beginners.

The plastic road bed does not look realistic however with a little weathering and some ballast it looks just great.

In my garage, I measure and tape out on the floor the shape of my layout. Once completed I then layout the track.

The all in one track makes this very easy as it just snaps together and apart.

Note: I made a few early mistakes (costly) when purchasing locomotives and rolling stock.

Follow the manufacturers recommendation on ” runs best with 22″ or 18″ radius track” if its best run on 22″ and you have 18″ you will have issues with operations on the curves.

Power Up- I switched from DC to DCC on my second layout. Most new sets come with a very basic DCC system.

The basic sets are easy to program and add a bit of realism that really adds to the fun.

I used the Bachmann Dynamis system but there are many others out there that are more and less expensive.

The beauty of these systems is that you can control the entire operations of your layout from the tip of your fingers. ( lights, speed, sound, crossings, turnouts etc.)

The newer controllers are even more advanced. You can run your system from your phone or tablet.

Scenery- Most of my tips are already posted but I do like to add real items like rock, moss, dirt. I will use ground coffee to simulate dirt and small twigs and branches for my trees and shrubs.

I like to make my own signs and billboards when possible. Its much cheaper and I think they look very realistic.

I just search on line for the signs I want to build, ( billboard , street signs, railroad signs etc,) print them to scale and use painted balsa wood to build the posts and frames

I also add graffiti and decals using a similar technique. You can purchase decal/transfer paper at a local supply store. find the graphic you like on line, scale, print and apply. Cheap and easy

I build mountains and tunnels with foam, plaster sheets and sometime a combination of both.

I did learn from an early mistake to add an access panel on the back side of the piece for the unfortunate derailment or cleaning.

I think that’s all I have for now.

Best,

Mike”

A huge thank you to Glyn – did enjoy the video on HO train table construction and a wholelot more. It’s strangely satisfying to see what other folk get up to in their garages, basements and lofts.

That’s all for today folks. Please do keep ’em coming because it’s getting very thin on the ground this end again.

Please do keep ’em coming.

And if today is the day you get started on your layout, the Beginner’s Guide is here.

Best

Al

PS Latest ebay cheat sheet is here.

PPS More HO scale train layouts here if that’s your thing.


model train answers