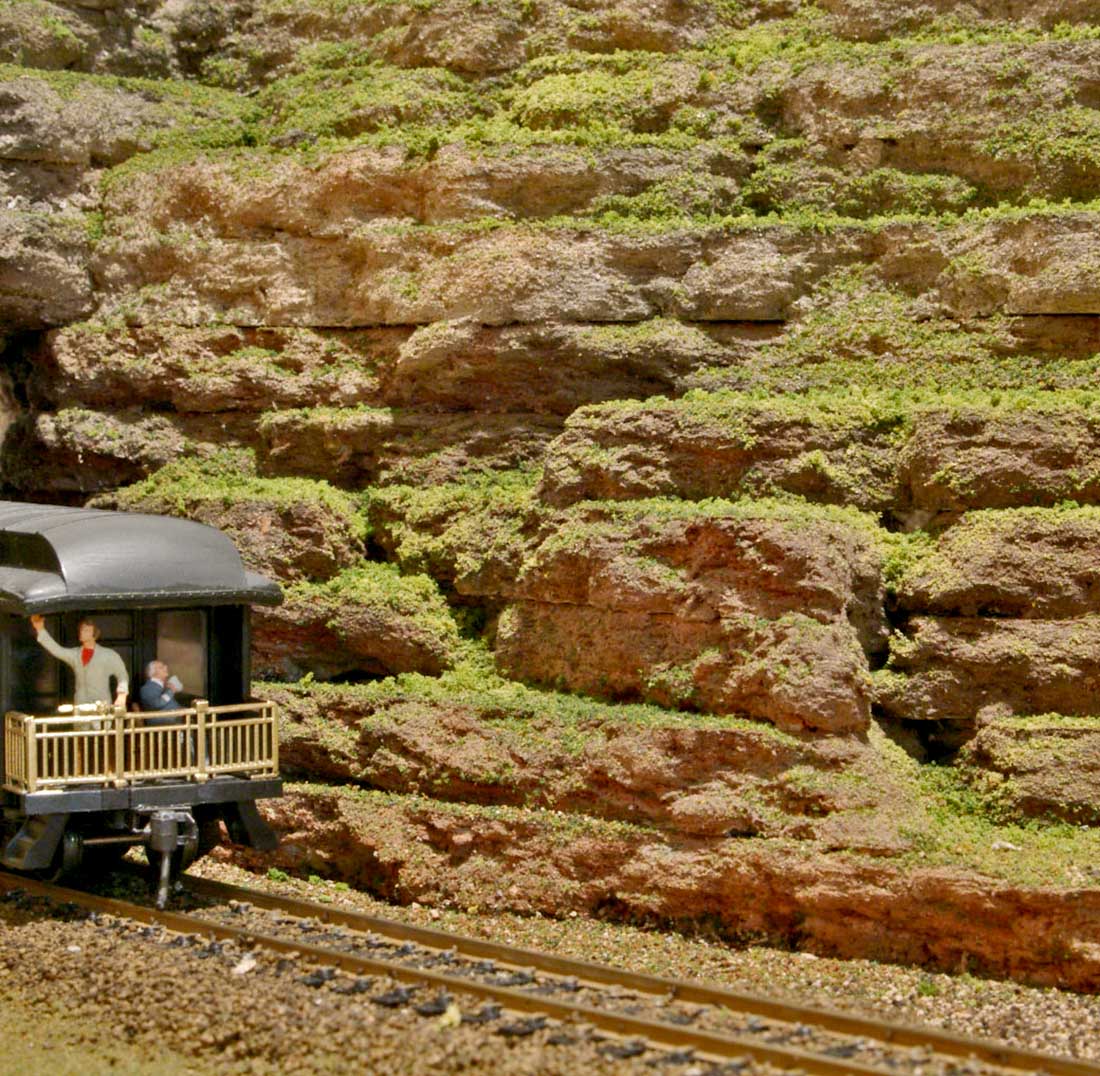
Make a train tunnel out of styrofoam

The very talented Martin has sent in this superb ‘how to’ on making a train tunnel out of styrofoam:

“Here’s ‘My way’ of making scenic items to place on model railroad tunnels. I produce many different models usually which have some form or rock face, but not all are landscaped the same although I do tend to put plenty of grasses & many bushes on my models.

This project is a single track tunnel entrance designed to fit in the corner of a layout with the track running behind the back scène to a ‘fiddle yard’.

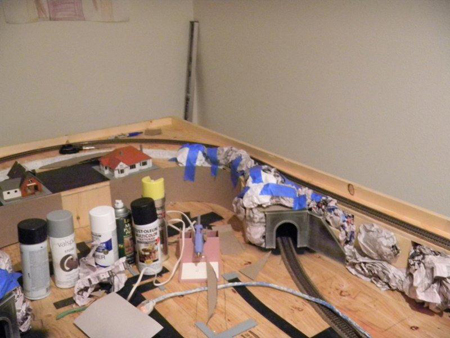
First I use a type of insulation foam which is used to insulate houses, the off cut’s are ideal to make models. (Please excuse my untidy workspace).
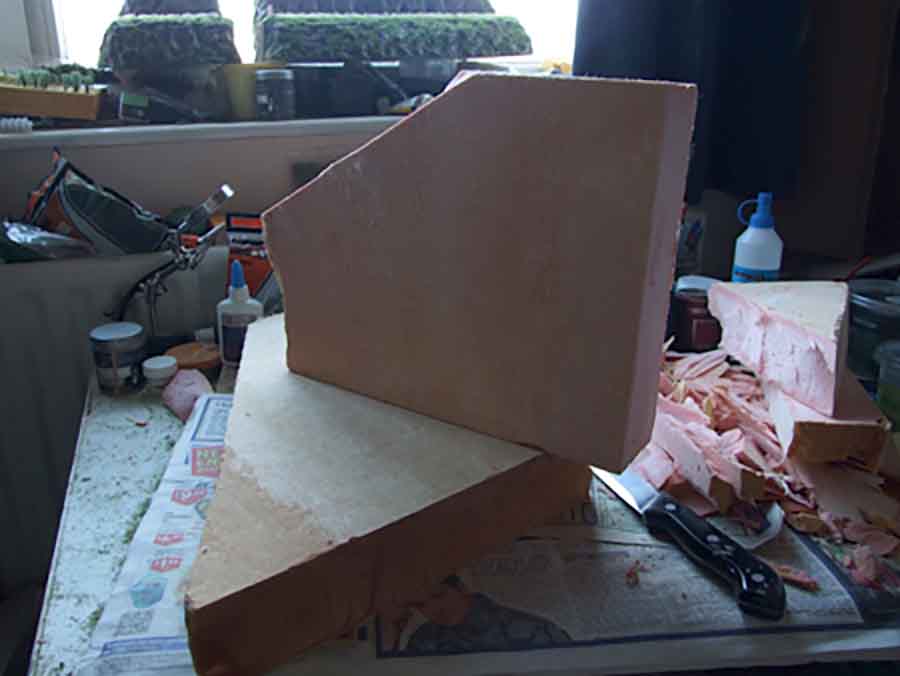
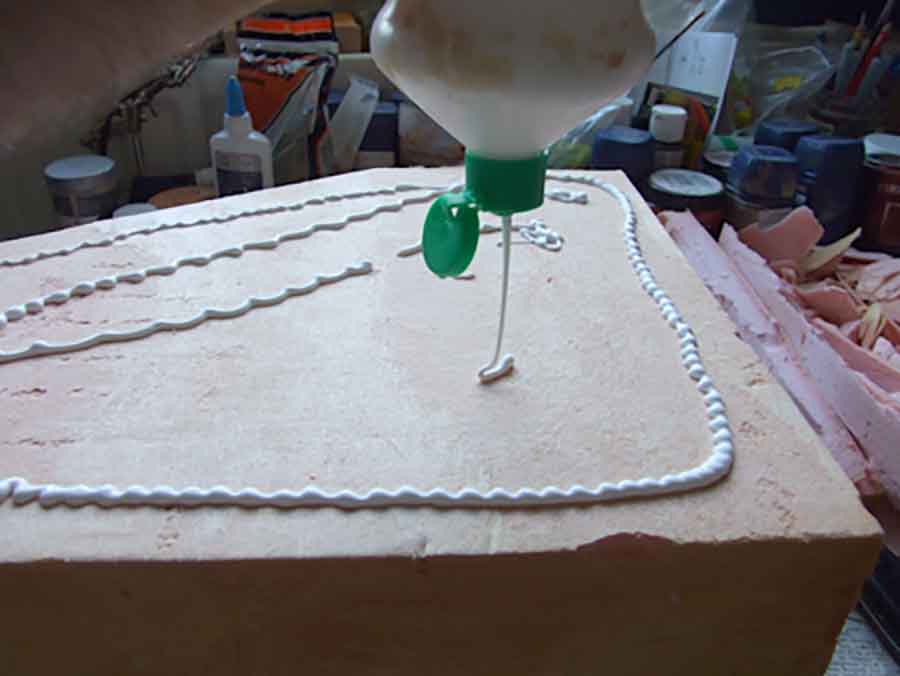
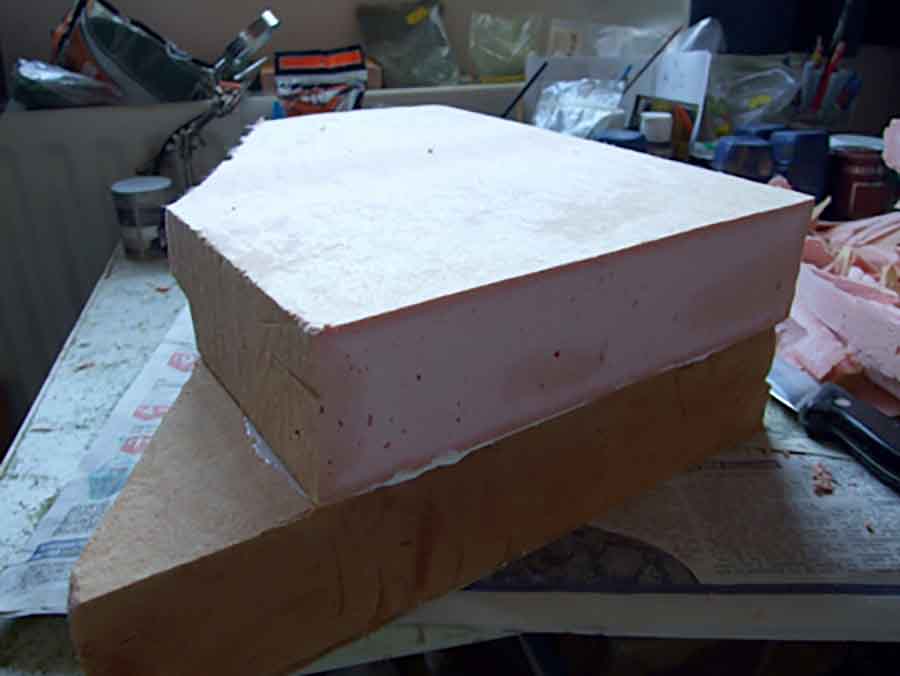
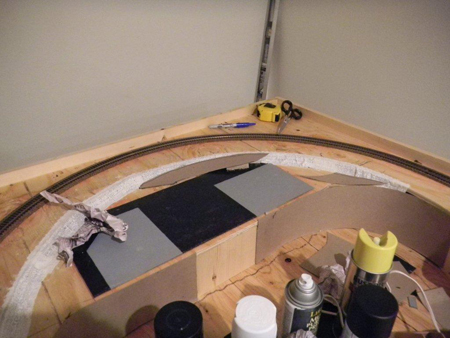
foam for train tunnel

glue foam for tunnel shape

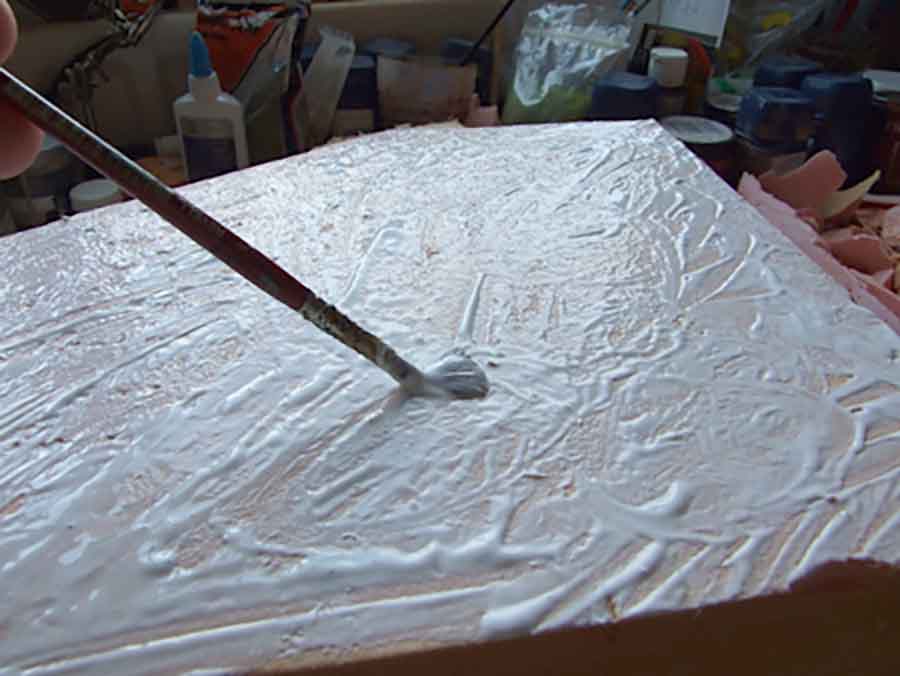
spread glue for tunnel layers

layers for tunnel entrance

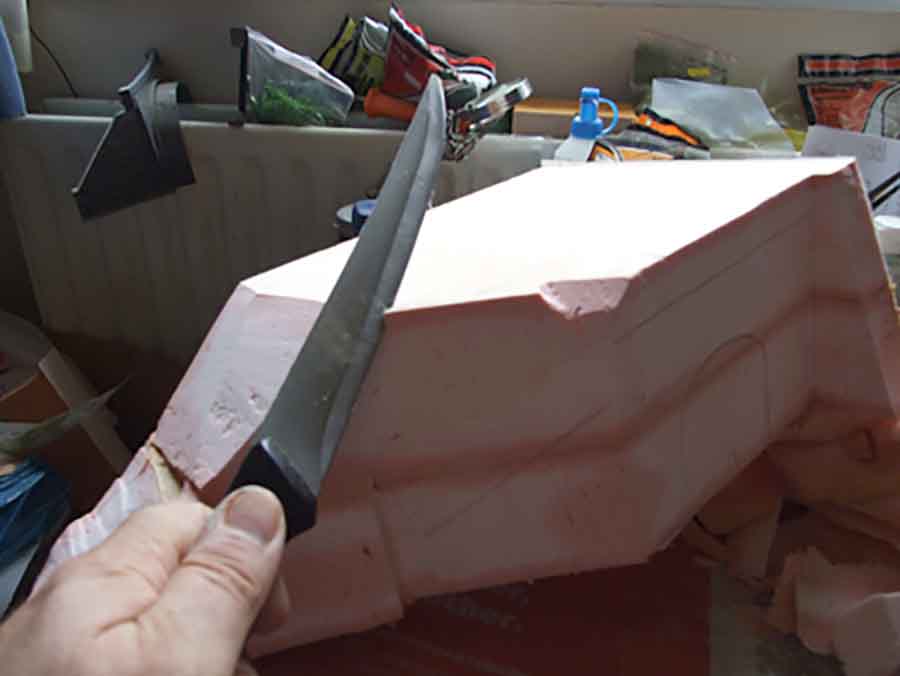
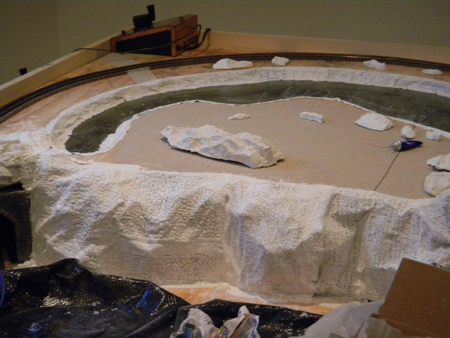
carve foam for mountain

carve train tunnel entrance

On many occasions I do not use a portal for the train tunnel, but carve my own into the foam, this model I decided to paint a resin postal to use.
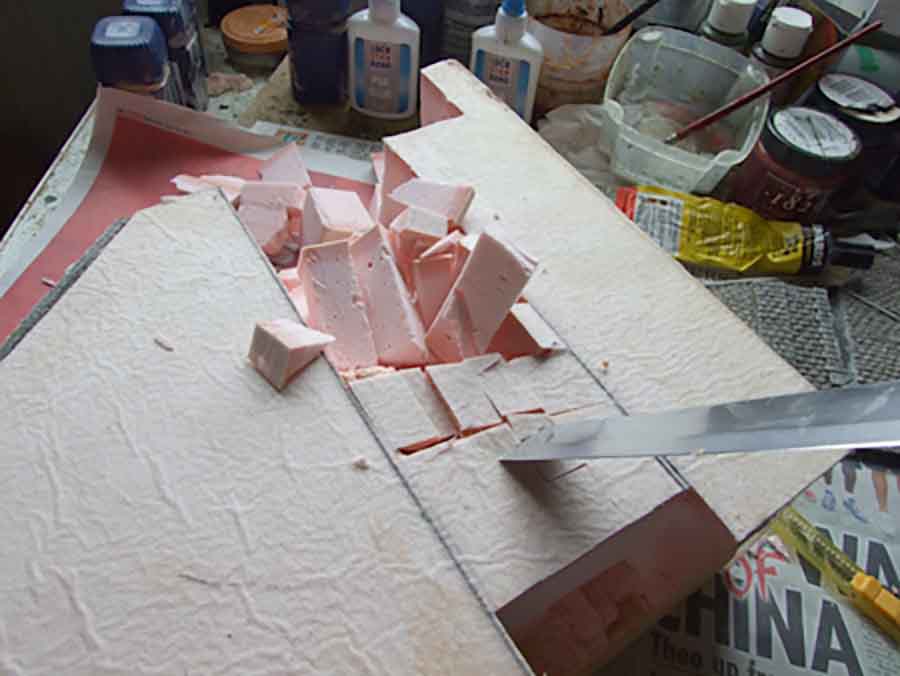
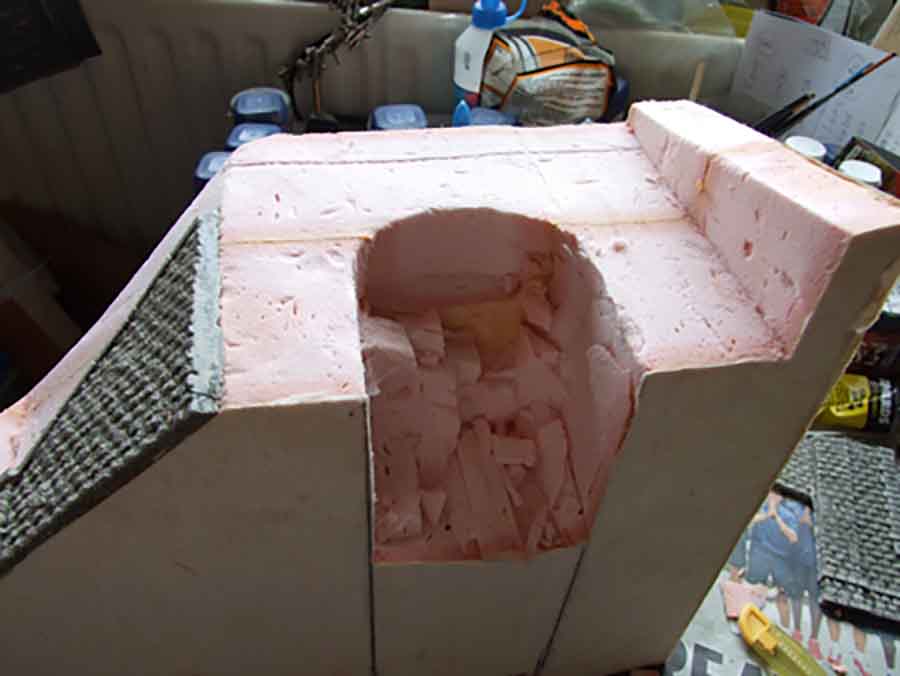
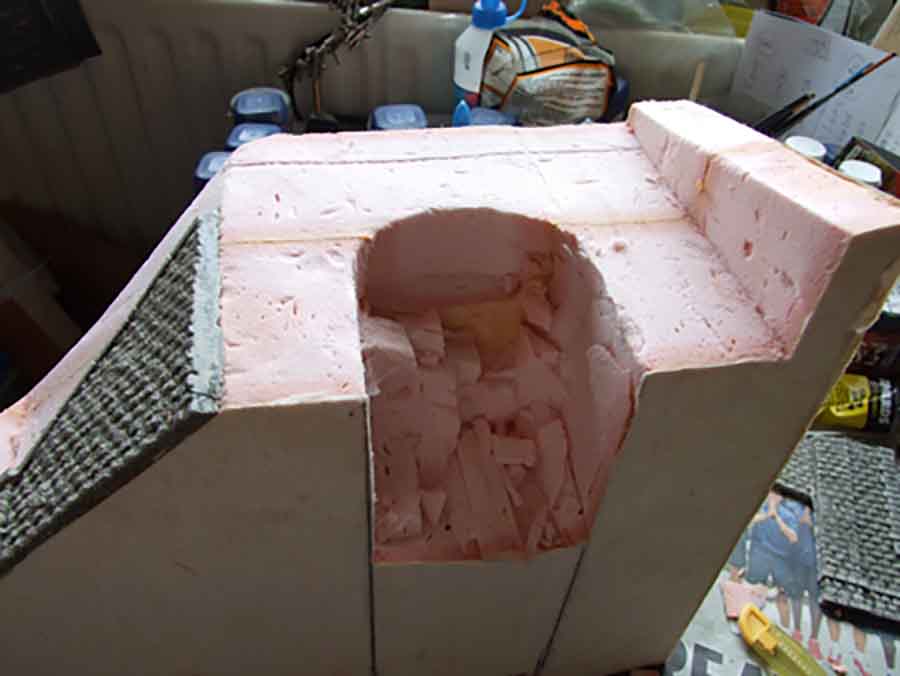
carving out train tunnel

make train tunnel

The roof of the tunnel was shaped by using a desert spoon.
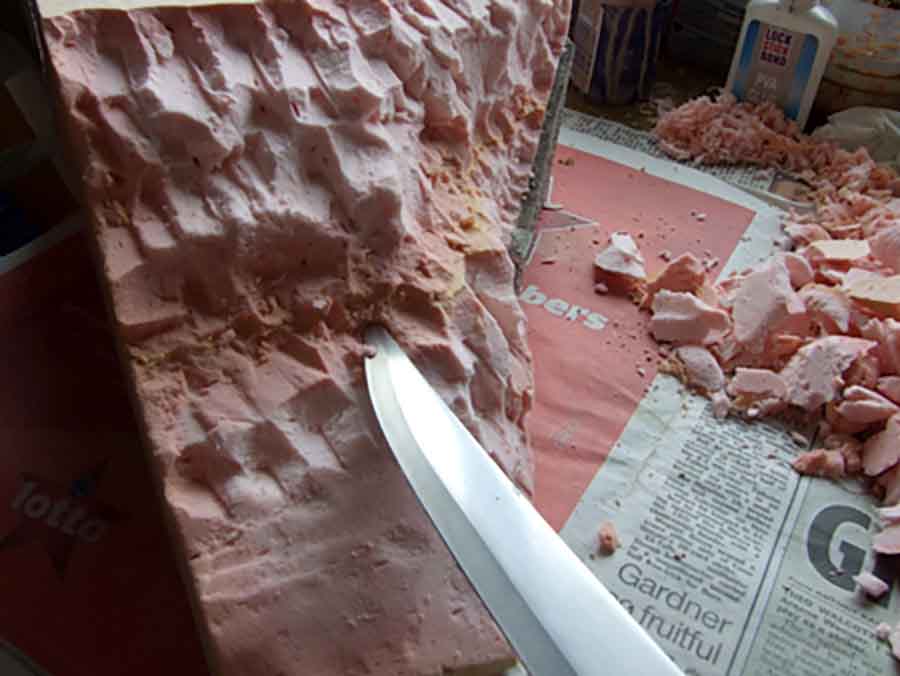
carving mountain styrofoam

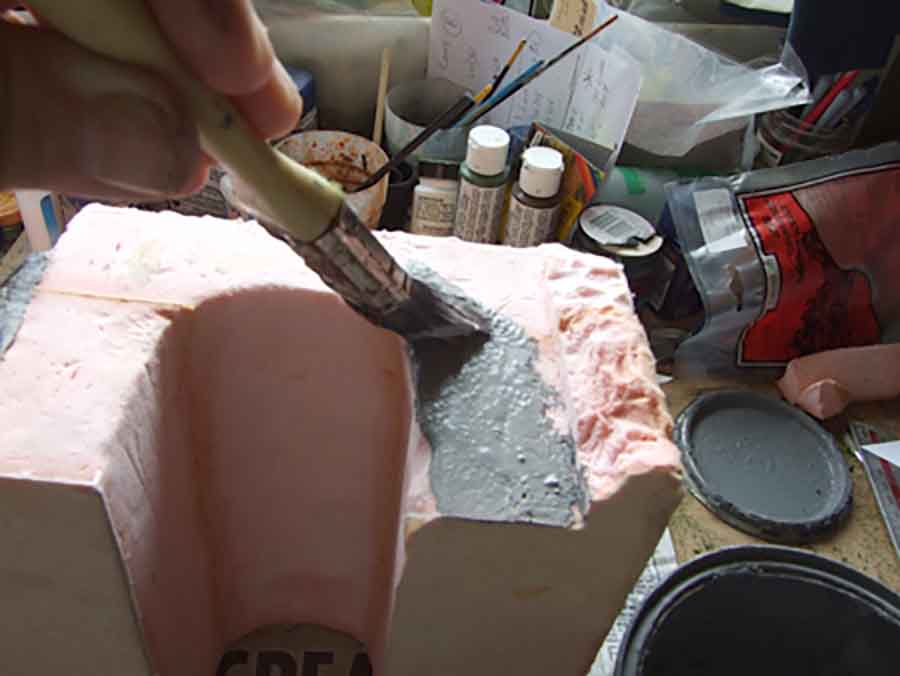
painting mountain styrofoam

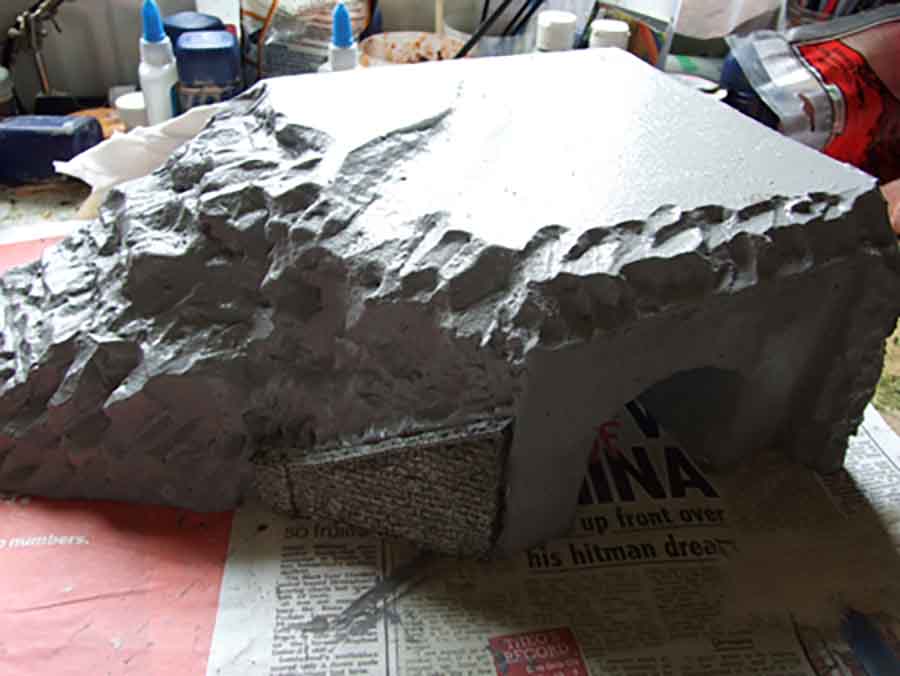
paint base layer for train tunnel from styrofoam


Once dry, I paint the rocks with a very watery black into the cracks.
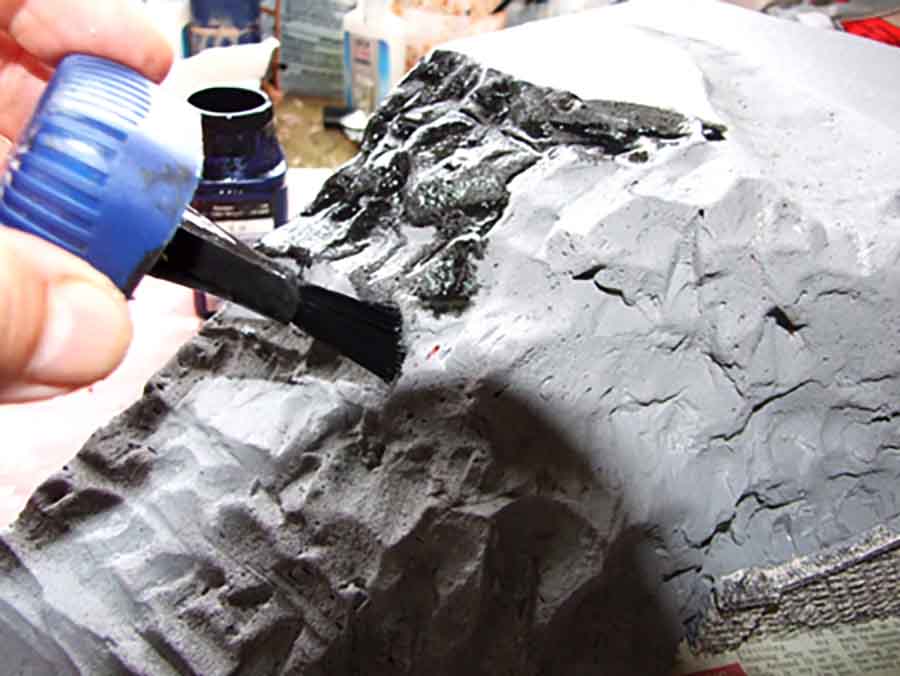
adding rock shades paint

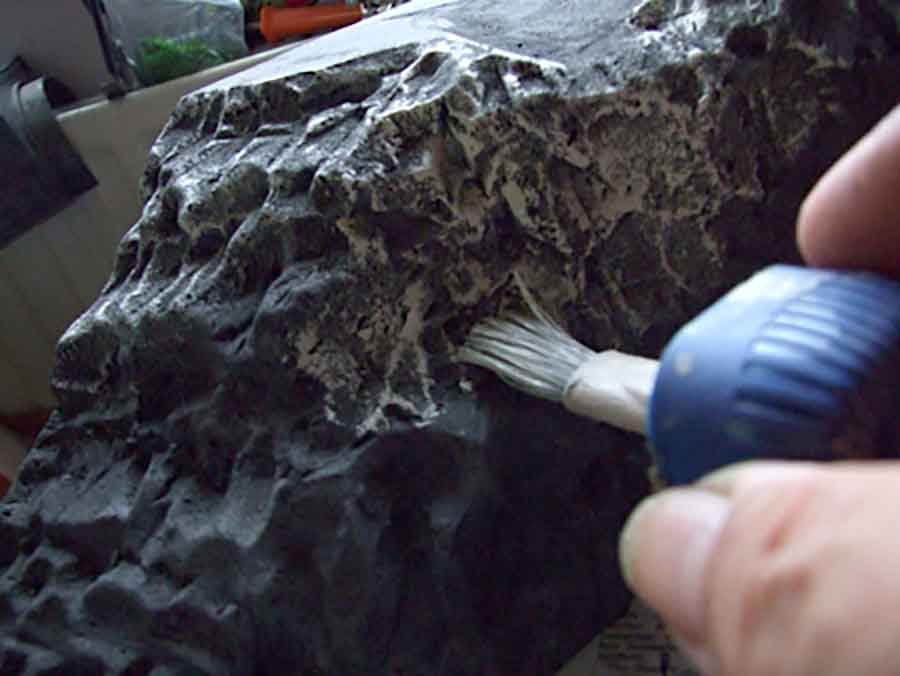
lighter rock shades paint

Then I use a light emulsion on an almost dry brush to bring out the highlights

The tunnel portal can be then glued onto the foam by using a strong contact adhesive bought from the Poundland shop in the town centre. The model is now ready to

Start applying the landscaping. This is a matter of taste and I vary my models by the use of a variety of types of grasses & bushes. Most of my materials are Woodland Scenics,

Although I do sometimes use other makes. On this model I have chosen to first apply an olive coloured grass onto the rock embankment.
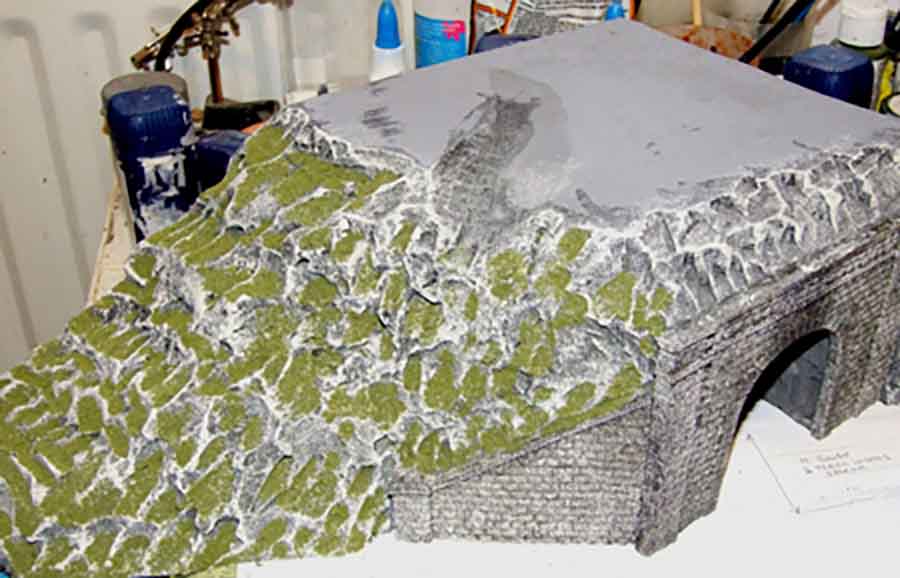
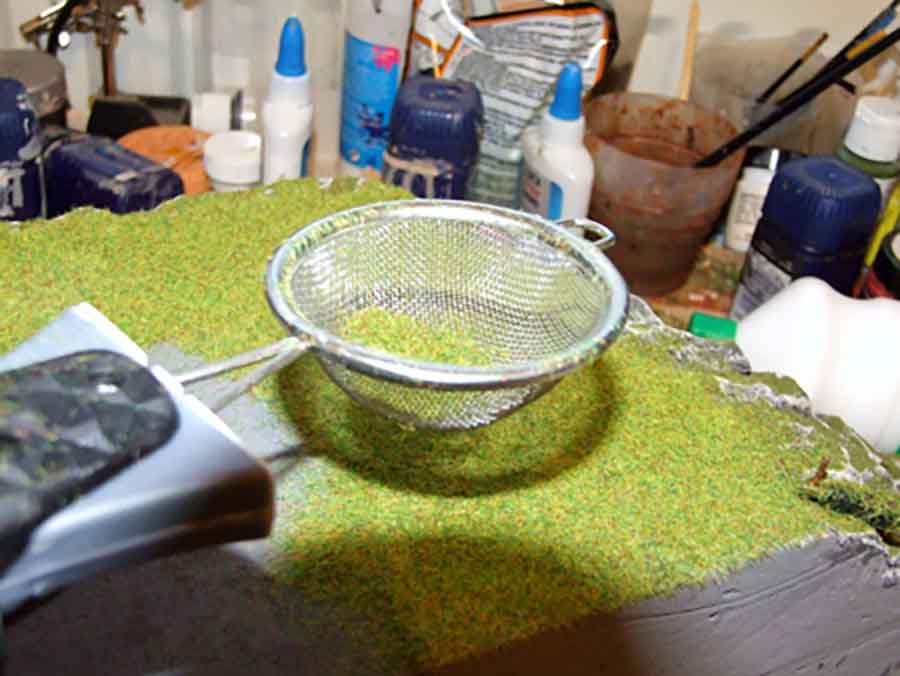
adding grass to railroad tunnel

adding grass shrubs to railroad tunnel

Then I applied a summer ‘Static grass’ by the use of an electric applicator

With short static grass, the static effect of making the grass stand up is not very effective. But when I use 4.5mm & 6mm grass the effect is very lifelike.

The next job is to apply a variety of bushes onto the model, again by PVA glue

All that is left to do then is to give the model a spray of watered down PVA glue (always remember to run some clear water through the spray  when you have finished as it can set in the nozzle & ruin the spray for future use).  I then sprinkled some Woodland scenics coarse turf onto the summer static grass and a little on the rocks.
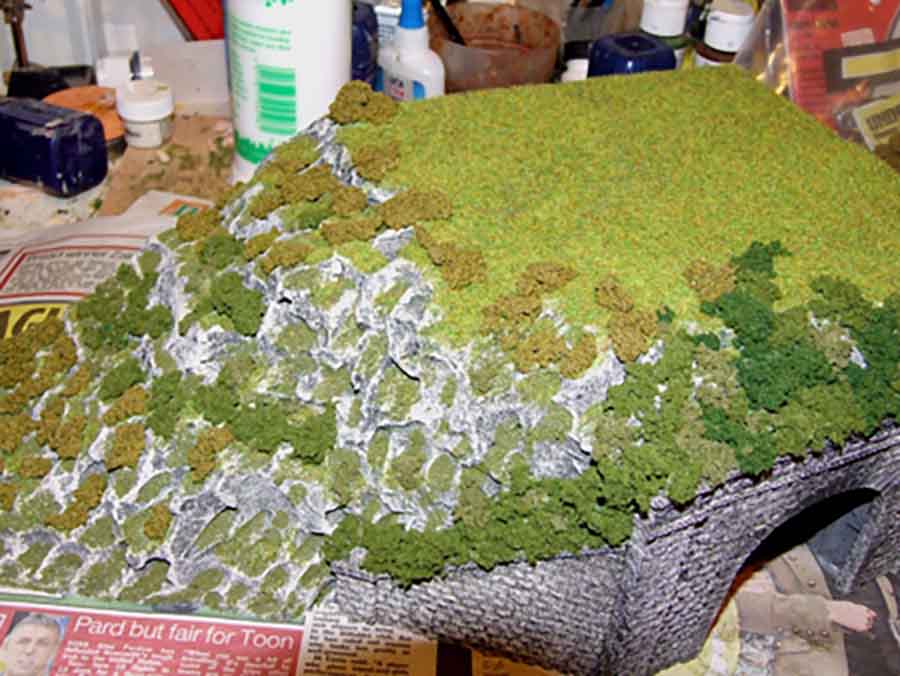
grass ground cover on mountainside tunnel

I usually add a row of various bushes along the back edge of the model.

That is how I make a train tunnel out of styrofoam, I hope that it gives you some ideas? Whilst this is drying – Here’s one I made earlier where I carved the portal myself.
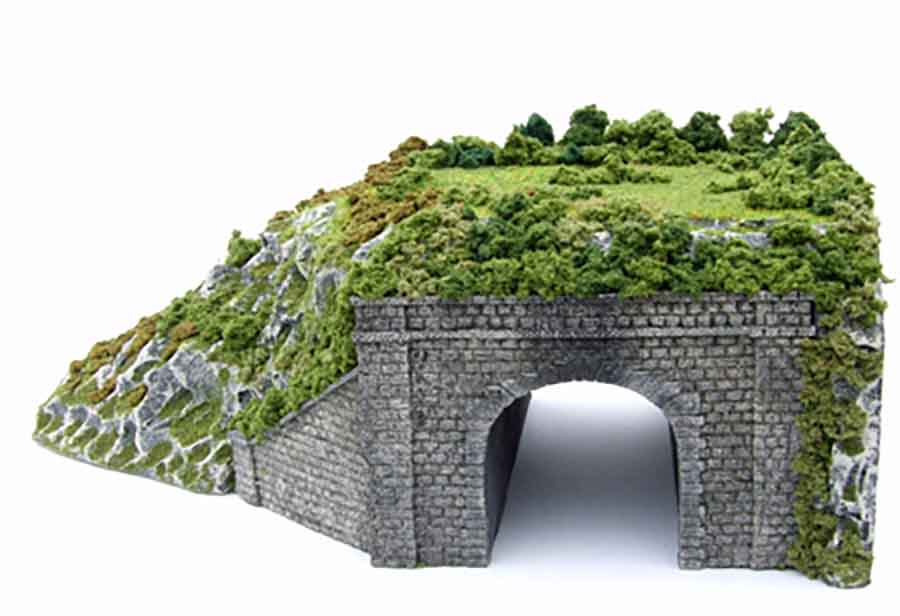
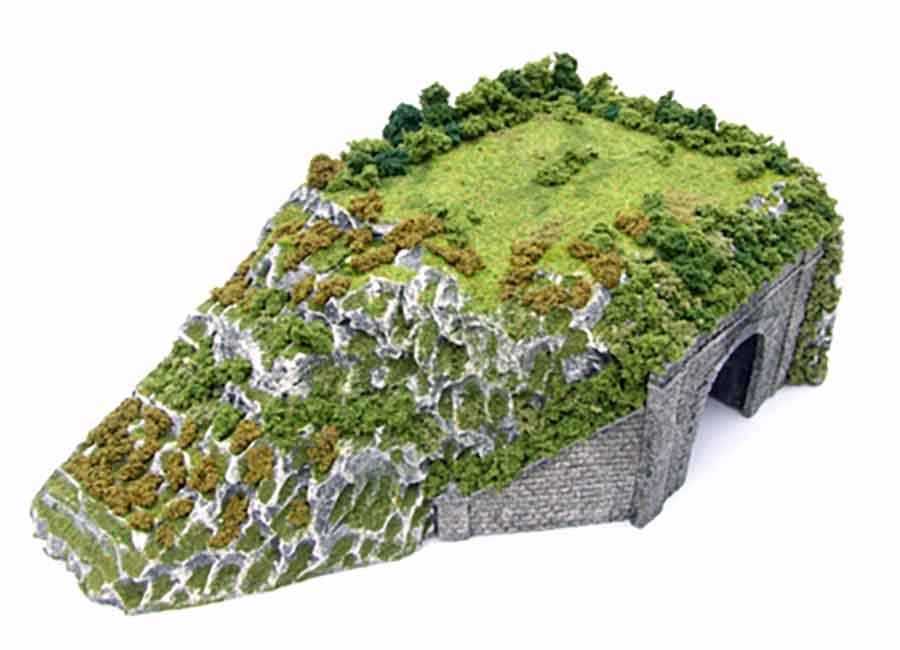
Martin – I think it’s a suberb model railroad tunnel ‘how to’. Thank you from all of us.

And for those of us not as talented as Martin, don’t forget the Beginner’s Guide where there is lots more stuff like this.

If you’re new to the blog, there are hundreds and hundreds of posts that will help you – but you really do need to jump on the newsletter to see them all.

Here’s a few that may help:

Rob adds a tunnel to his layout.

Bob’s railroad tunnel.

Both of these use tunnel downloads from the printable buildings.

Others, just freestyle all the way – like Peter. You can see how he made his model railroad tunnel here.
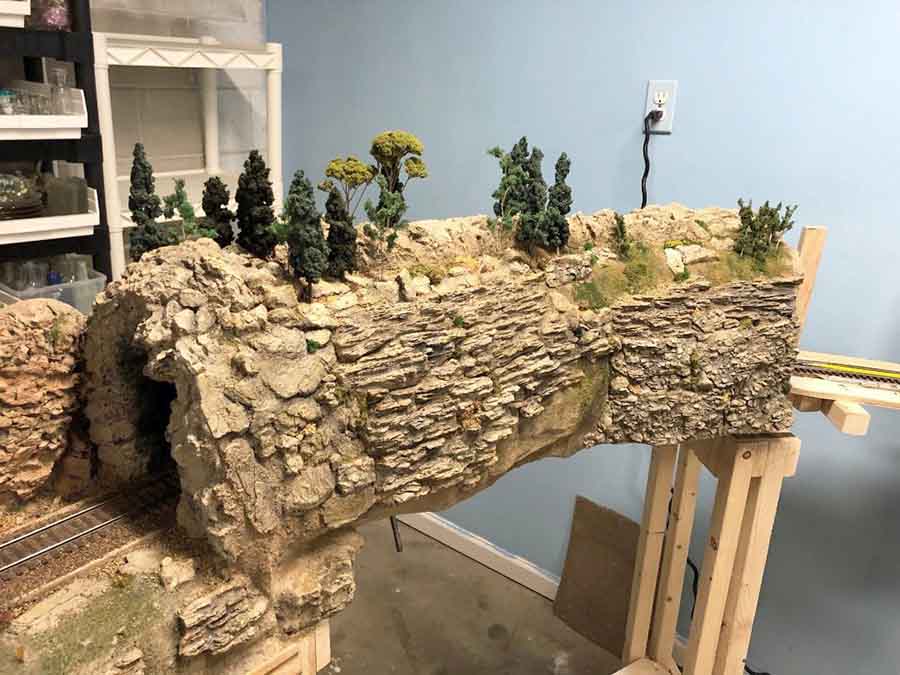
O scale tunnel

Mark also has a very simple and effective way of adding scenery to his tunnels.

His tunnel is made from plaster rather than styrofoam, but the effect is the same, have a look at his pics:
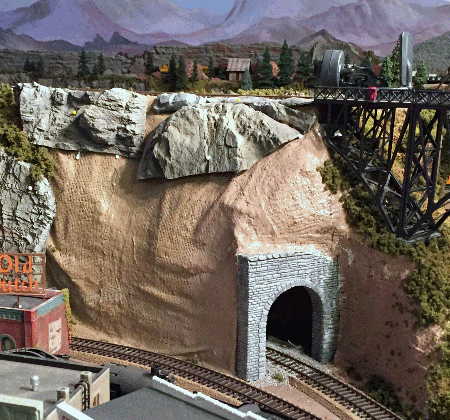


Whatever method you use to make a tunnel for your layout, there is always something very important you should consider.

I see it come up time and time again on the blog – and knowing it can save you a lot of blood, sweat and tears.

It’s this: always make sure you have access to the inside of your tunnel.

You will get derailments in there. You will need to clean the track in there. And somehow, stuff that shouldn’t be in there gets there.

Here’s Ron to elaborate:

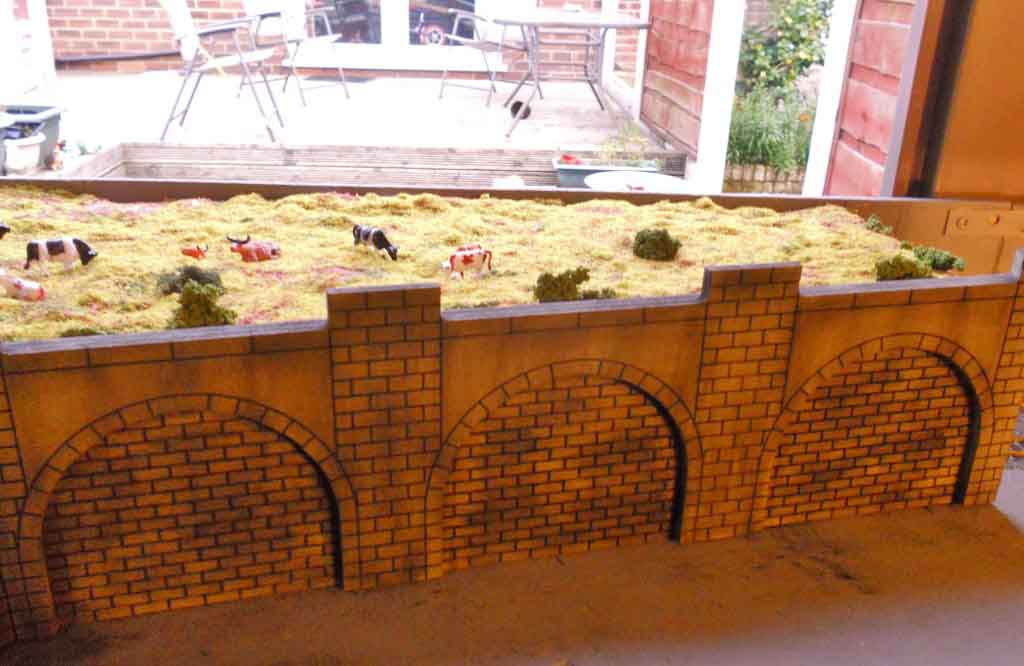
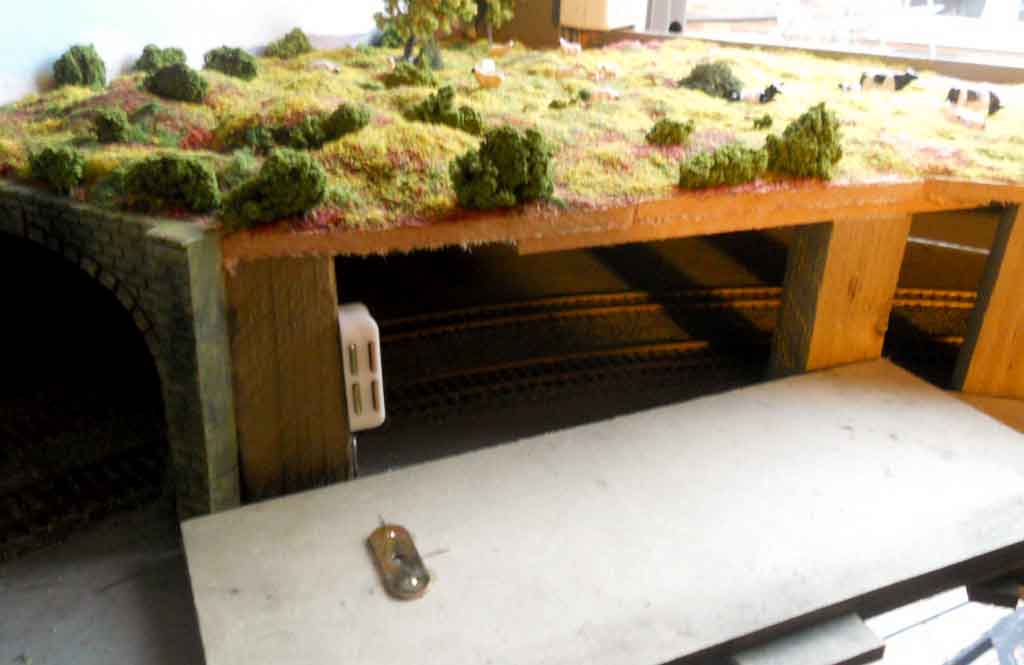
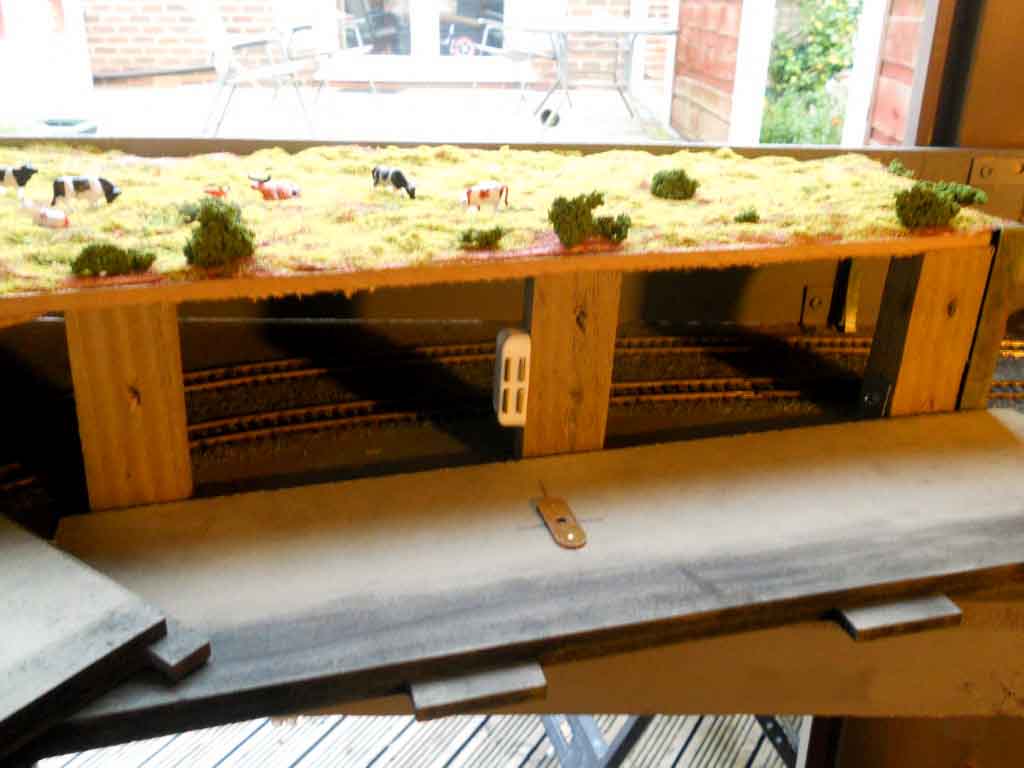
“Hi Al, just a couple of pics of the corner tunnel I made on my shed layout, I got the retaining walls on ebay.

I weathered them with my weathering powders in about an hour, really easy to do.

I wanted access to my track for cleaning and maintenance so I bought a couple of those magnetic latches you get for wardrobe doors etc, which works great.

I hope the tip is useful to somebody out there, by the way the whole train tunnel and scenery cost me about $20.00 using scrap timber and scatter etc from my bits box.

Thanks for all the brilliant tips and information from some really great modelers on here.

Cheers Al,

Regards Ron”
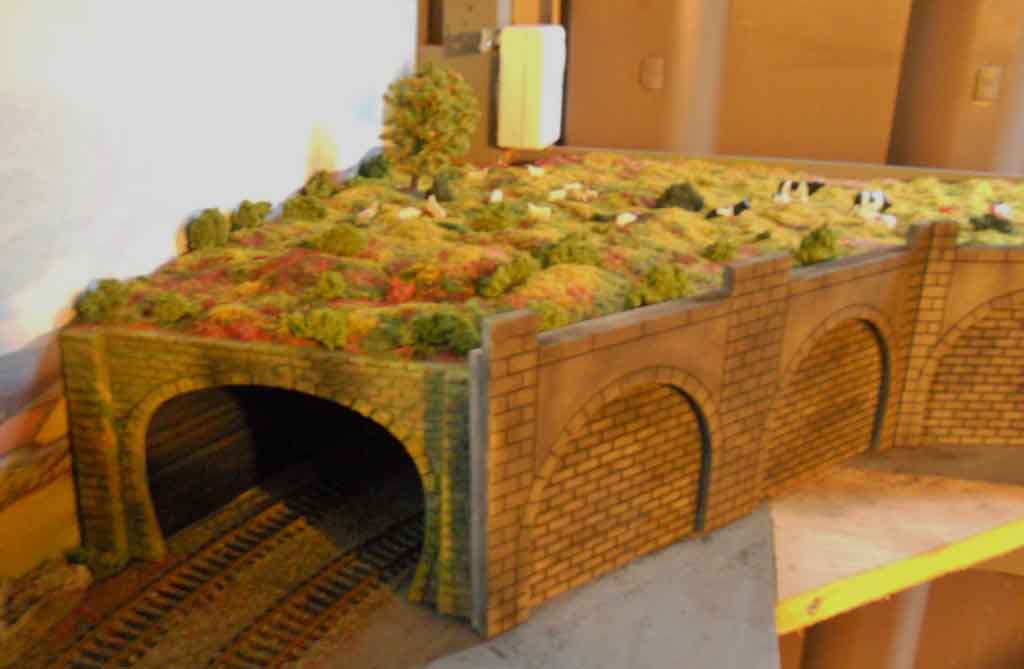
corner tunnel model railroad

corner train tunnel

access to train tunnel

access for model railroad tunnel

Of course, with a styrofoam tunnel, you may need to get your thinking cap on.

But however you make your train tunnel, access is really, really important – it doesn’t matter how good your landscaping and scenery is, if your layout doesn’t let you run your trains because of a troublesome tunnel, it will become a real thorn in your side.

If you look at how Gary built his layout up with styrofoam, he made sure he could get inside his tunnels and he really enjoys running his trains. Here’s a pic:
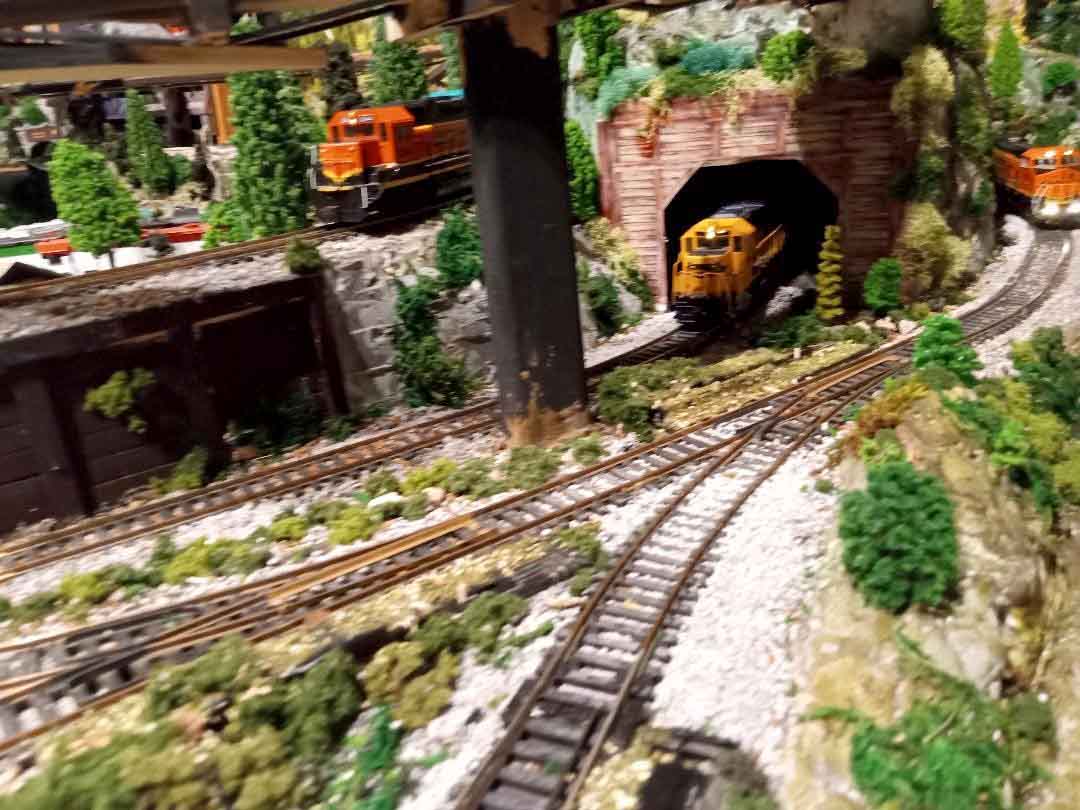
HO track layout tunnel

Henry also has a good technique which he shows in his post: Building model railroad tunnels.
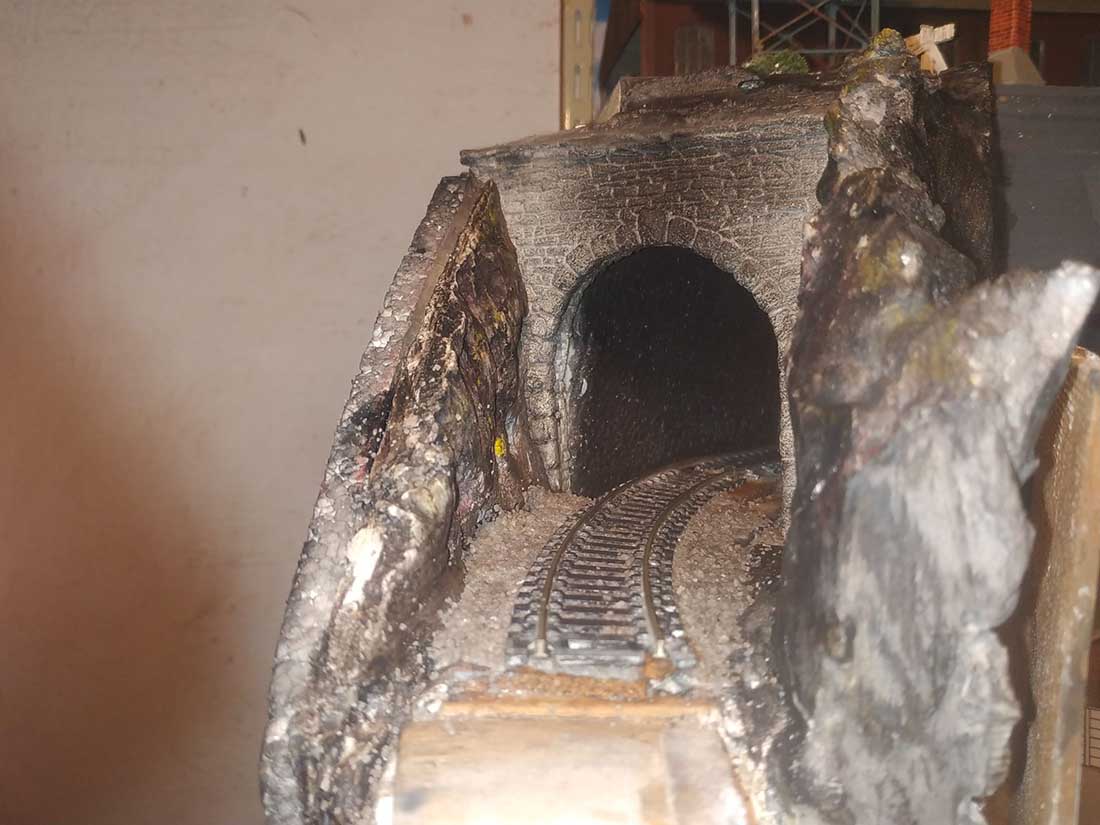
building model railroad tunnel

John, who is a regular contributor to the blog, has a fantastic model railroad tip for the inside of tunnels:
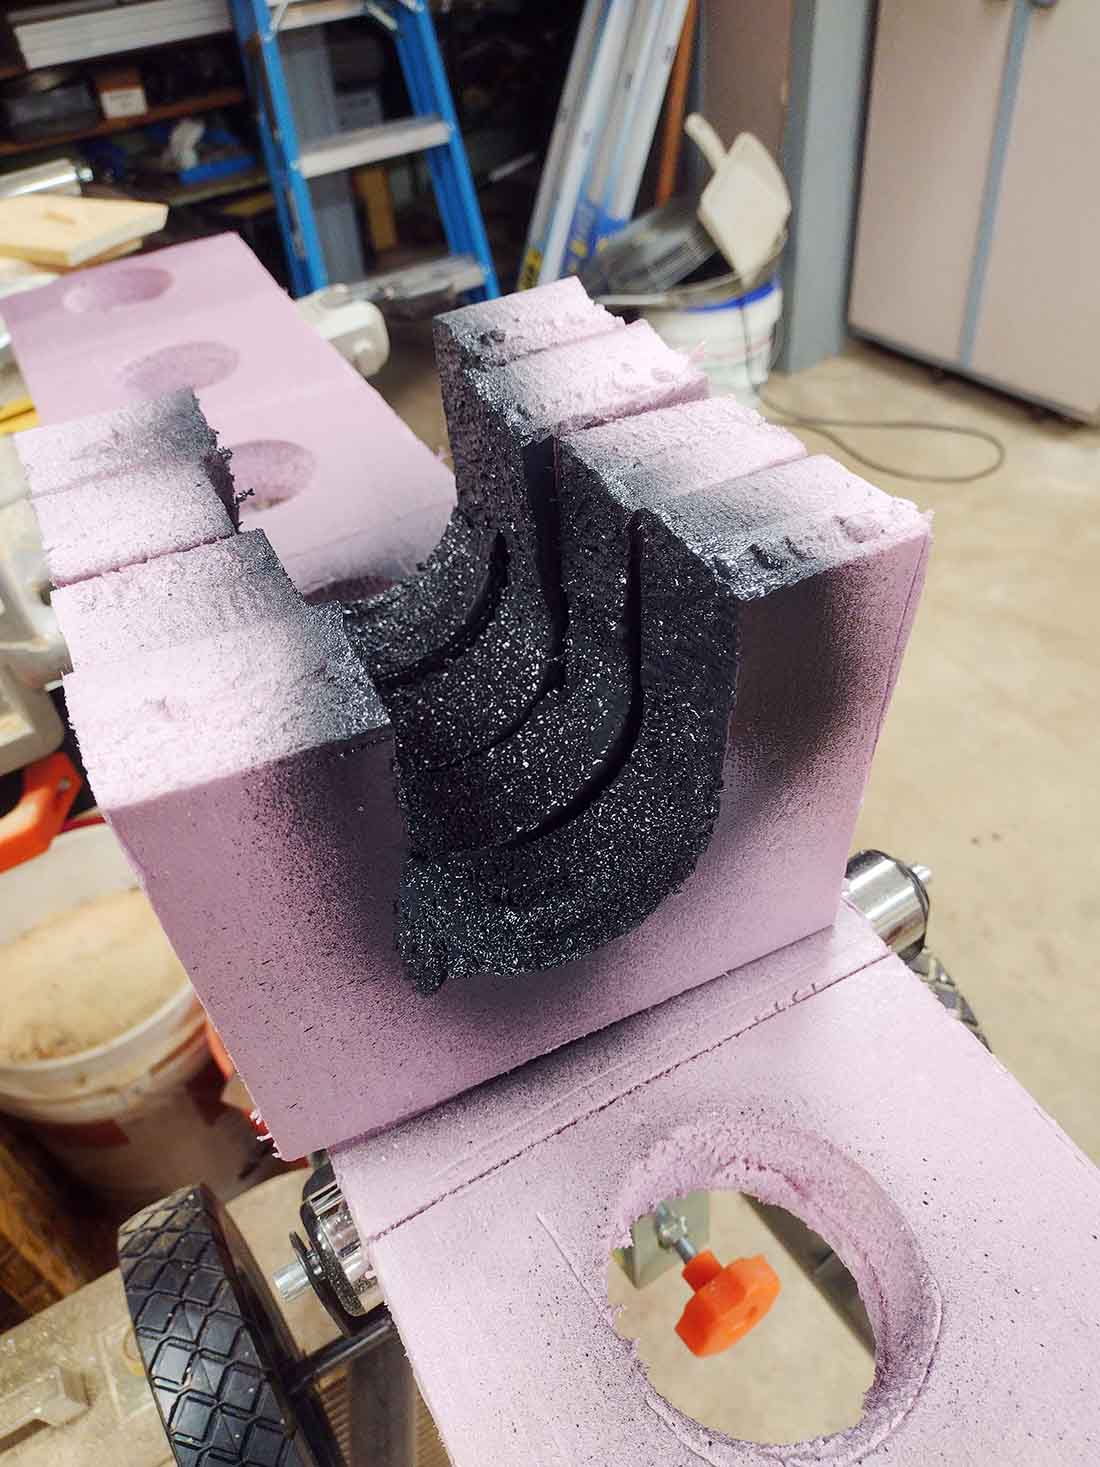
tunnel liner

Model railroad tips

Bill – also a regular contributor to the blog – has an excellent way to make tunnels too:
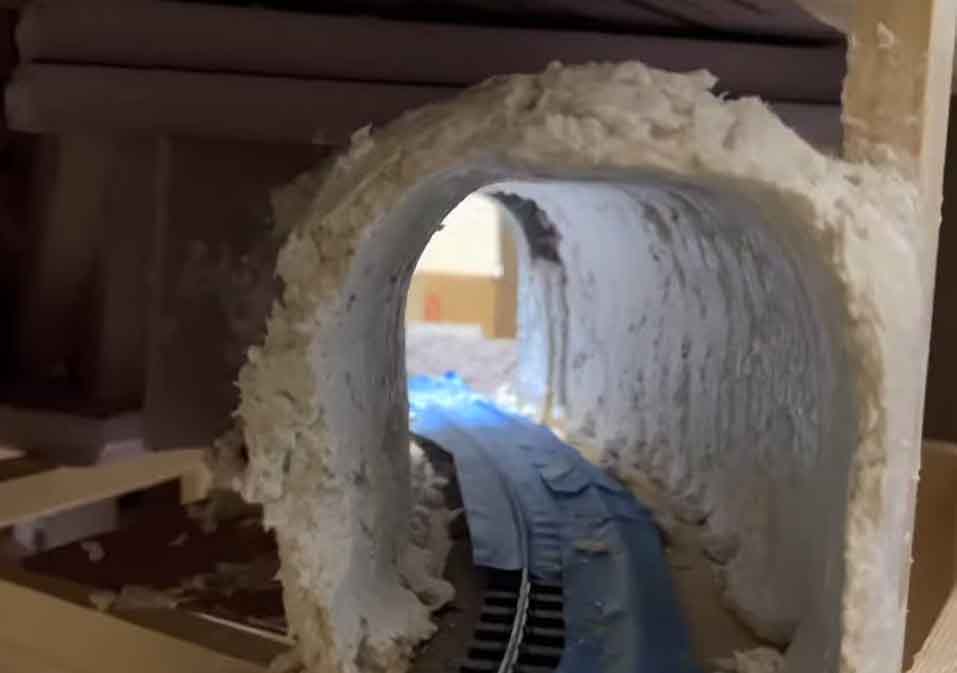
model train tunnel liner

Model train tunnel

That’s all for today folks.

Please do keep ’em coming.

And if today is the day you get going on your layout, the Beginner’s Guide is here.

Best

Al
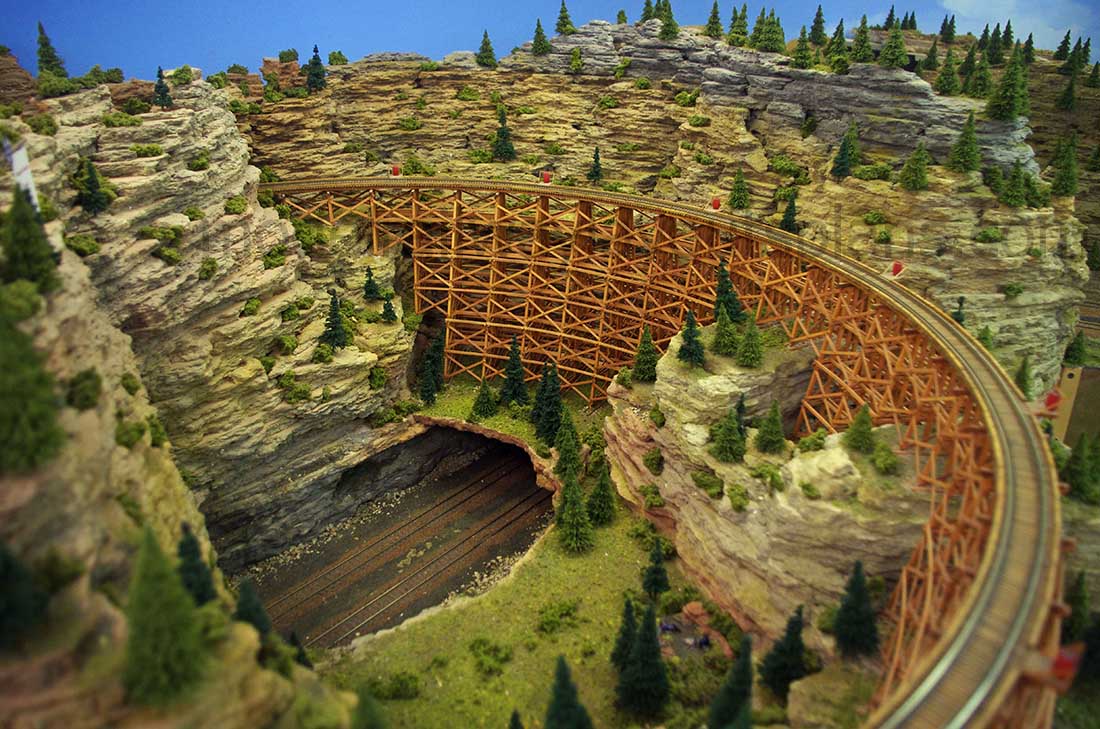


Model railroad layout tips

Rich has been in touch with some model railroad layout tips:

“Having access to a wide variety of products from Walthers, Inc.; one product I found which works great for ballast on model railroads, is plain old beach sand. You can get some, wash it, rinse it, let id dry before using.

Then, when you go to use it, you can spray it with a diluted tint, let dry, and then use it for ballast.

For HO railroads, beach sand will duplicate ballast for use around yard tracks.

To model strata in rock faces; I use molds for rocks, but also use gypsum boards, made over an inch thick. I cut the width down to 1.5 to 2 inches wide, then carve the exposed side, before putting in place and coloring.

The process might be a bit time consuming for some, but I like doing that in places where the use of such is not readily noticed; as in an extension of a modeled rock face.

I also use gypsum board as underlayment for the trackage, and hide this with a cork roadbed, which I then hide with ballast.

I have also learned that gypsum, in loose form, makes good “snow”, although you have to be careful not to get it wet, as it will clump, and after it dries, it sticks.

One thing about Gypsum, is that it is the main ingredient in Plaster and sheet rock. But it is great to work with; and I have laid road ways, air strips and even built buildings using this stuff. It really is great for model railroading.

I also use a wood water proofer, but what I use is Kuprinol 10; which comes in either clear, or green. I use the green for water proofing wood posts when building fences, decks, or setting up foundations for barns, sheds, etc.

I have been using the clear product for making many of the wooden structures on my layouts, water proof, so that the structures don’t absorb water vapor from the air.

Also, Thompson’ Sealer works just as good, but I find that to be a wee bit more expensive, per gallon.

To me, the best tip I could give to any one wanting to get into model railroading is: “Start small.” Regardless as to how big you eventually “grow” your layout; don’t make the mistake of trying to do every thing all at once.

Start with a small layout, which should not take more than one or two weekends to complete.
Then, as time, space, and budget permits, add to this small layout.

Keep your expectations from leading you to get more involved in the modeling, when you don’t have time or space, or the budget to get deeper.

Don’t run lots of trains; although you can have many different types of locomotives and rolling stock.

AND, The most important idea to remember is: Don’t let others tell you what you need to do with your hobby. The model railroad you build, belongs to you and your family; not to the rest of the model railroading community, (unless you start a club and invite others to join). If you want to make it “Toy like” in appearance; this is your prerogative. Remember: This is Your hobby, and every thing you do with it, belongs to you.

I use gypsum for scenery, which I buy direct from the maker. It works out real good, and can be mixed with dry colors for various shades of rock and dirt.

I also use in/out door carpeting, green in color, which I cover with colored gypsum, to simulate yards and fields. This saves time and money, and doesn’t look half bad.

For tunnels, I have molds which cover the outside with plaster, let set and harden, and then remove the tunnels and place them where they will fit on the scenery, before I build in the mountains. This gives me the ‘rock-cut’ interior, which most tunnels have, although for me, you can only seee into the tunnels maybe 6 to 7 inches.

For bridges, I use scaled plans and structural plastic shapes, which I heat weld when building the bridge. A current project bridge is being built using steel, for under-framing, with the plastic parts, (beams, columns, etc), heat welded together, so the steel will be hidden. This is because I plan a bridge which will be built in a canti-lever style, and will measure around 12′ long (real time measurements). This bridge is needed to span a walk-under part of the layout.

Have a great day

Richard”


“Hi  Alastair,

I’ve noticed a lot of train cars, etc. come with a plastic bag of some sort or other. I have been taking emptied plastic bread sacks, turning them inside out to dry them and remove the bread crumbs. After about a week I turn them right side out, punch some holes in them for ventilation and use them to store trains that do not have boxes or packaging. Then they can be wrapped in any medium you wish to use for cushioning and the cars are protected quite well.

I enjoy the emails I receive from you, thanks.

Best regards

Rich”


“I had been making a scale scene kit of a loco inspection pit.

I found a easy way to remove the sleepers of the track.

Leave the 2 end sleepers. &  with a soldering iron melt the clips from the sleepers, then cut the web under the track.

Then melt the rest of the sleepers with the iron to soften them, then pull them away.

Note this should be done outside.

Paul”


“Al, I know youre always looking for new ways to make a layout look realistic. I thought i might share something ive done to save some money. Resin or hydrocal retaining walls are expensive, especially if you need 10-15 of them. I found some images on google of several stone wall applications.

I expanded them to the largest size then printed them, then cut them to fit with mortor lines in correct format. Ive enclosed some pics so you can see how real they look. For  myself currently im on a fixed income, but I love the railroad.

Thanks.”

Don M from Jonesboro Ga


“Hi Al

Just by accident I Discovered a way to make rock walls from the above material.

I was making the scalescenes kit of the low relief warehouse & when I completed it, I found where I wanted to install was too small for it to fit as I had glued 2 large blocks of polystryrene there.

So anyway I needed to cut those blocks but instead cutting with a knife and making a mess, I thought why not melt off some those blocks & use a soldering iron to cut through them.

So  thats want I did with the iron, It did stink & smoke a little & it make a real neat rock face, all I have to do is paint it.

Paul”


“Hmm.

See, now I’m just starting out, and I’m having a ball re-laying out stuff as I experiment. Sometimes it’s tough to do too much in advance, especially when you’re just starting out and can’t decide between a loop and a switching shelf, so I came up with a few tips from my first tentative steps:

1. Get SCARM, and play with it to get a feel for the kinds of track pieces that flow together;
2. Start small, and be prepared to mess around a lot before you know what it is you want from your layout;
3. Never, ever, glue *anything* down unless you’re happy with it;
4. Try to have two layouts – a permanent one, and somewhere to try stuff out, even if that’s just the kitchen floor!

I’m at stage 3 with a switching shelf layout that *will* one day have a  loop, because I want the best of both worlds!

Keep on handing out this good info!

Best,

Guy”


“Hot-melt glue guns are miraculous in that you can use them on plastic or metal surfaces (to secure a figure, for example) and if you mess-up or simply want to move it: no problem. The glue releases with a little pressure and you can use your finger nail to peel-off the glue in preparation for gluing again—usually without peeling paint.”

Rick Johnston

Cincinnati, OH


“One of the best ways to show rapidly running water or waterfalls is to take lint (white) from your dryer and gently pull it over your waterfall area.  Looks very realistic!

Doug”


As you’ll read, there are some simple tips, and some which are a bit more complicated (have a look at the tips below in the comments too).

But as with all things, it’s just a case of breaking things down, step by step.

Take a trestle bridge for example – they look complicated.

But look how easy Dan makes them:

HO scale trestle template.

model railroad layout tips for trestle bridge

That’s all for today folks. A big thanks to Rich for sharing his Model railroad layout tips, and to the others too.

Please do keep ’em coming.

And if today is the day you get started on your layout, the Beginner’s Guide is here.

Best

Al
PS More HO scale train layouts here if that’s your thing.


Need buildings for your layout? Have a look at the Silly Discount bundle.

How to make model train rocks like Barry’s

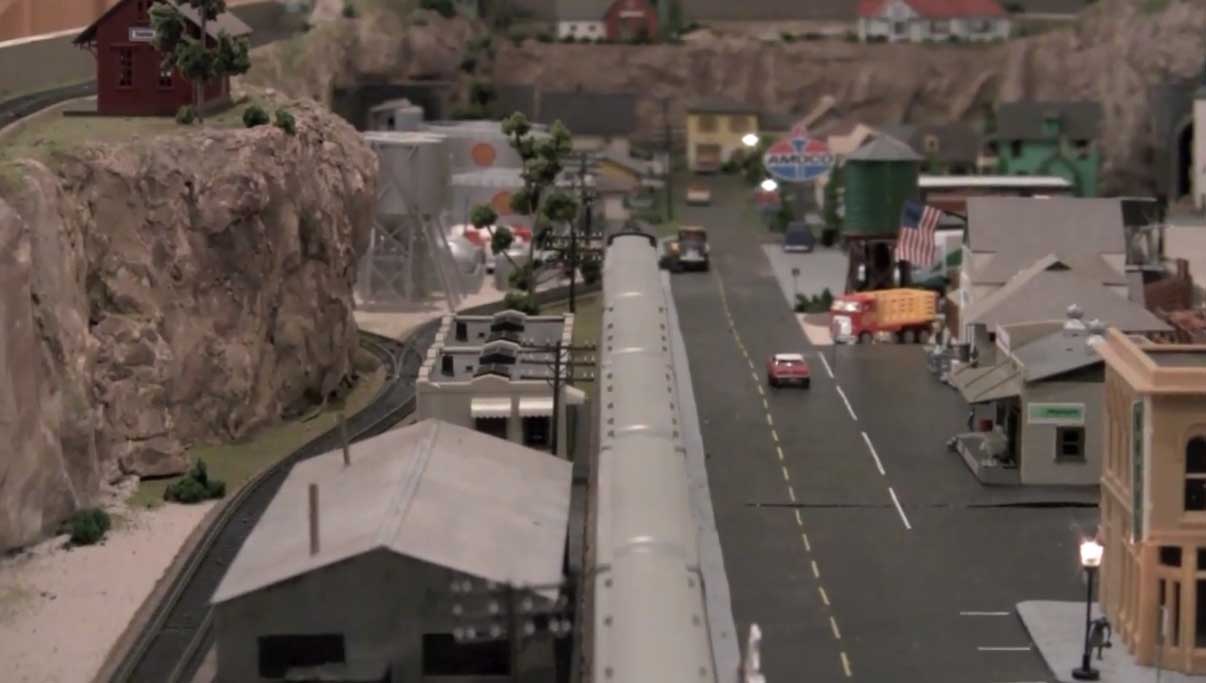
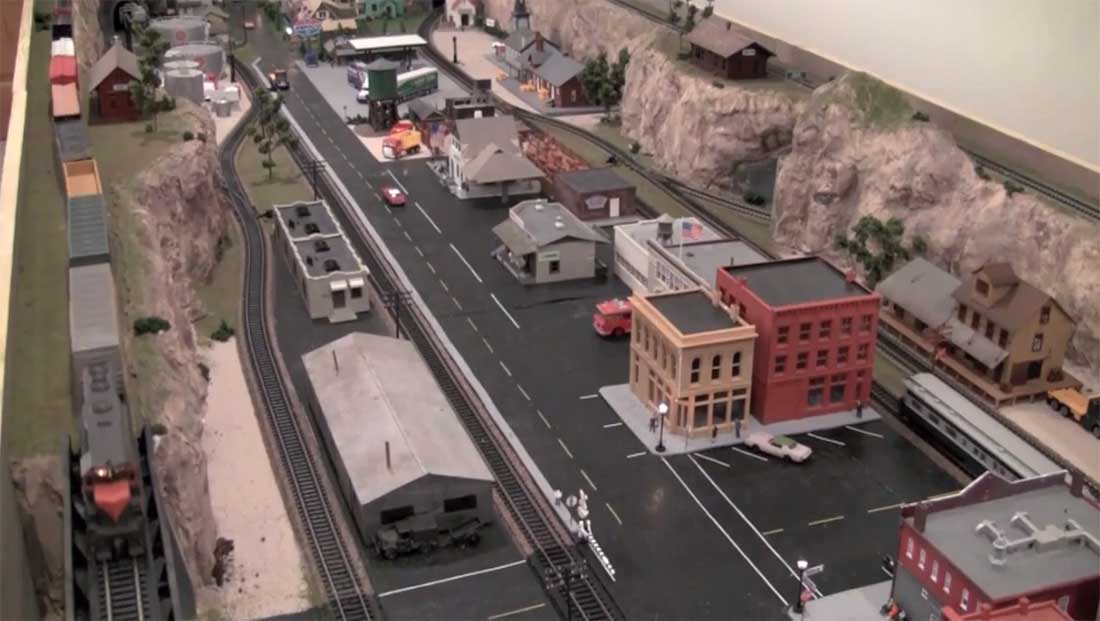
The comments on Barry’s model train rocks (Barry’s rock formations) came in thick and fast – so I asked Barry if he’d be kind enough to share with us how he does them:

“Al,

I’ve been trying to get this tutorial done so I can send it to you to hopefully explain how I do my rock formations that apparently look quite real.

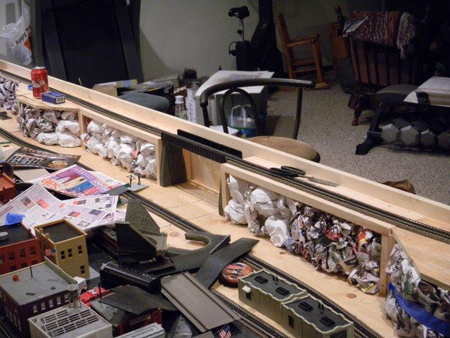
1) Build the supporting structure that will eventually be covered.

bench work HO scale

2) Stuff with crumpled up newspaper to achieve the formation desired.

paper rock foundation

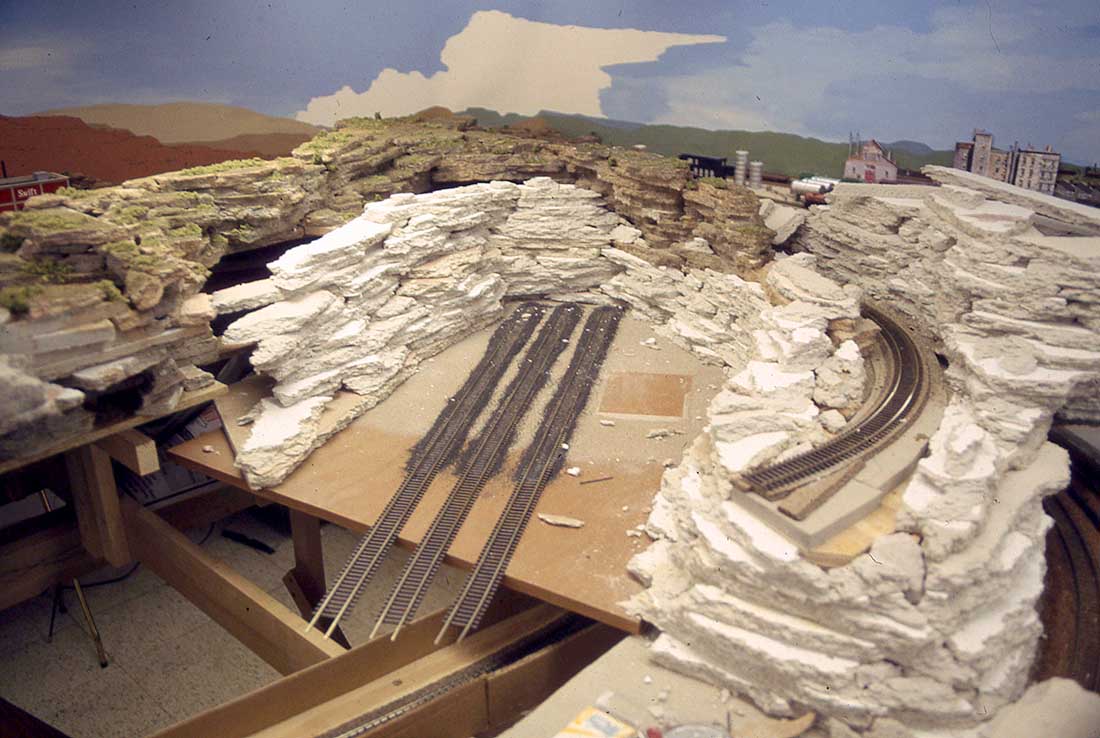
3) Cover with plastercloth or plaster soaked cheese cloth.

plaster paper for model train rocks

4) As the they are drying use your fingers to shape the effect desired.

5) Create rocks from rubber plaster molds and apply suitable castings to the face of the plaster formation with a hot melt glue gun and then fill in around it with plaster-of-paris.

model train rocks

6) Then paint with acrylic latex paints from a crafts store. I prefer the lighter colors to make the layout look brighter. I use a tan for the entire base coat, then a burnt umber for the highlights with an occasional darker brown for a deep crevice or crack. It takes some practice but it’s not difficult to get a good realistic result.

latex paint for model train rocks

7) I sprinkle my various colors of grass(comes in plastic containers from the hobby store).

grass model railroad


8) Finally glue clump foliage on for shrubs, drill appropriate holes for telephone poles and trees you can see the final results.

foliage model railroad

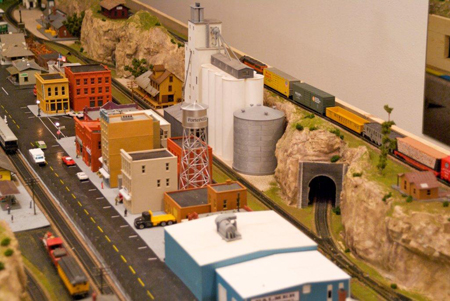
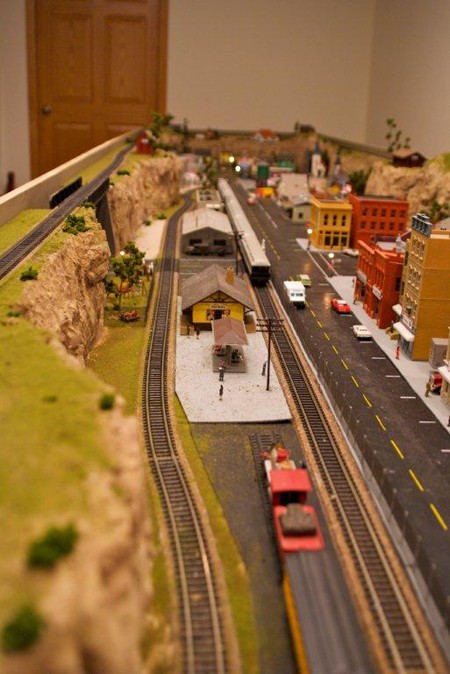
model train rocks

model train rocks

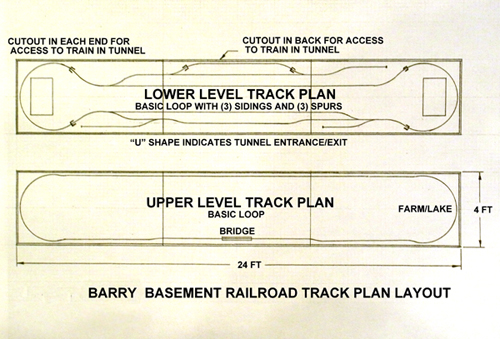
Here is my layout trackplan per request of many reader’s requests. Hope this helps them. I have made this layout extremely uncomplicated with mechanical turnouts as my Grandson is only (6) years old. Thanks to all the readers for their wonderful comments once again and thank you for publishing it. I like to help any fellow modeler in any way I can because this is a great hobby.

model train track plan


(Press play on the last one to see the video).

Regards,

Barry”

A big thanks to Barry for sharing his model train rocks!

It reminds me of Dan’s post, which you is also really good when it comes to making rocks, cliffs and roads:

HO scale roads.

HO scale rock formation

And there’s this on of Dan’s too:

Model railroad rocks.

model railroad rockface

Ned’s is really worth a look out too, it’s a great step-by-step: Realistic rock models for model railroad.

And for some more gems, just read the comments below!

That’s all for this time folks.

Please do keep ’em coming.

Don’t forget there’s more tips and ‘how-to’ stuff here.

Best

Al

PS If HO scale is your thing, there are lots of HO scale train layouts here.


Need buildings for your layout? Have a look at the store.

They are great fun to make and great value too.