Liz has been in touch with the story behind here HO scale small layout – and I have to say, it really does show what this hobby is all about:
“Hello from Texas, Al.
I’d like to share a story about my father, and how it took me nearly 50 years to realize that I, too, should have loved model railroading all along.
My father and grandfather (both named Windsor) were hobbyists all their lives. And while they each collected a good sized inventory of trains, neither ever managed to build a layout on which to run their toys.
My grandfather passed shortly after he retired at 65 and never had time. My dad made a couple of good starts on a layout (getting the bench work started) but never followed through because he had no one to share it with.
A couple years ago my dad started exhibiting signs of dementia, and sometimes struggled with daily tasks. He often forgot I was his daughter but he always knew my face. The one thing that brought his memory back was talking about trains and modeling.
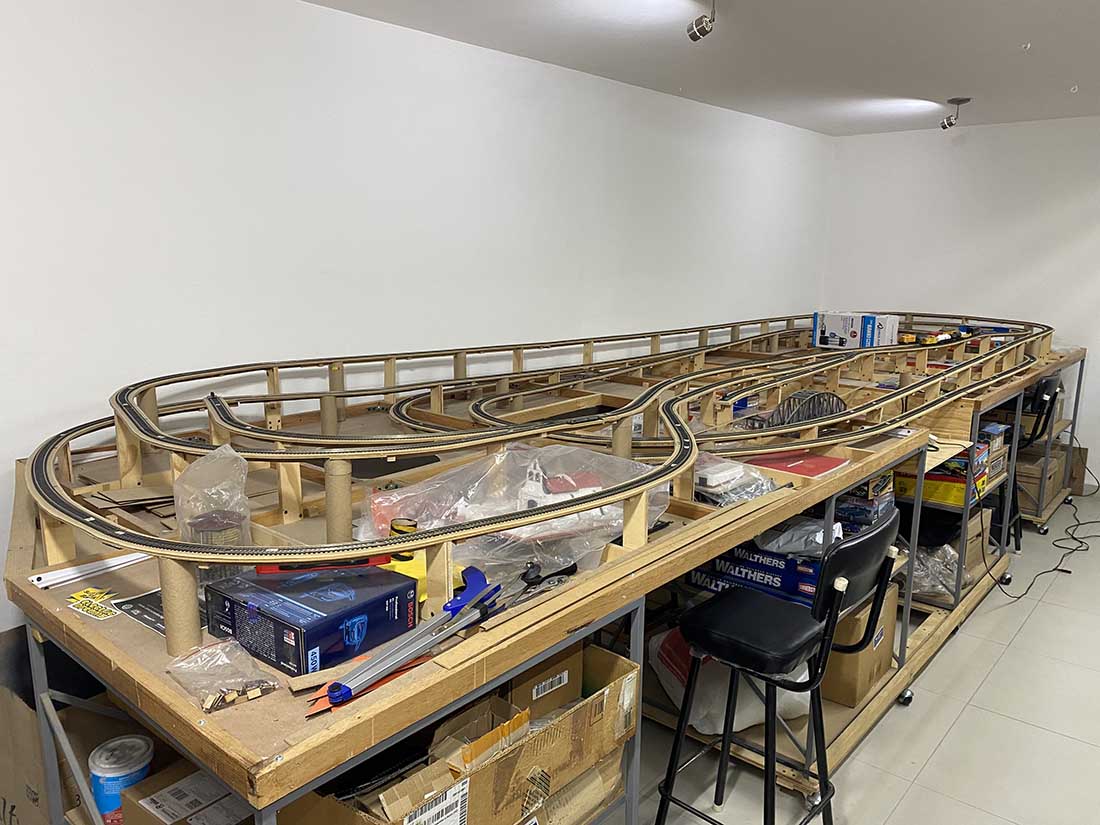
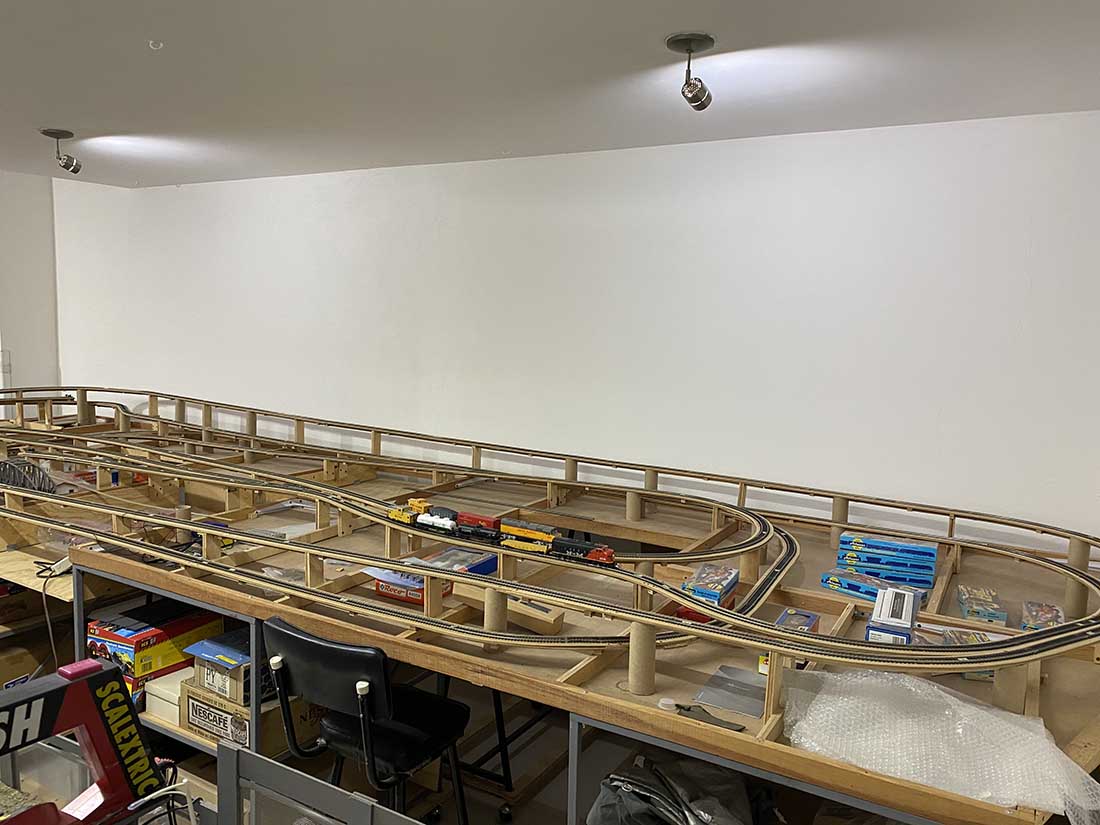
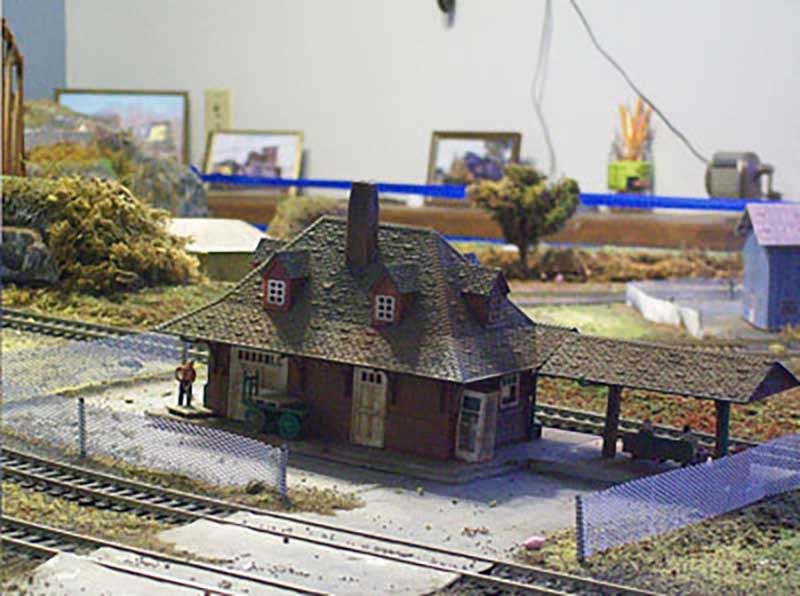
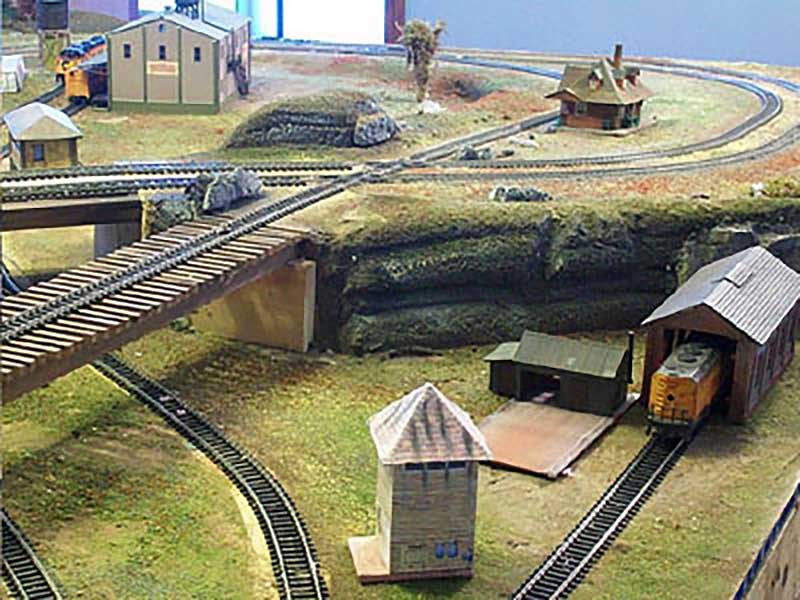
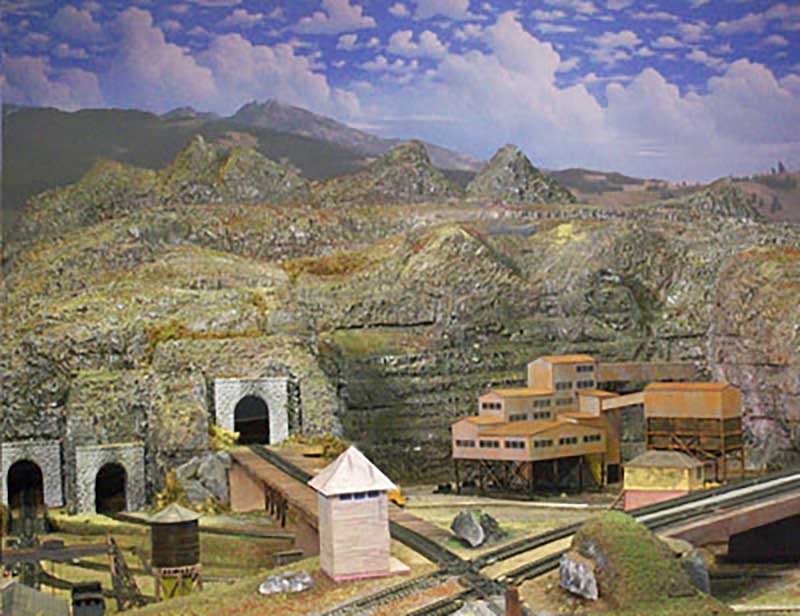
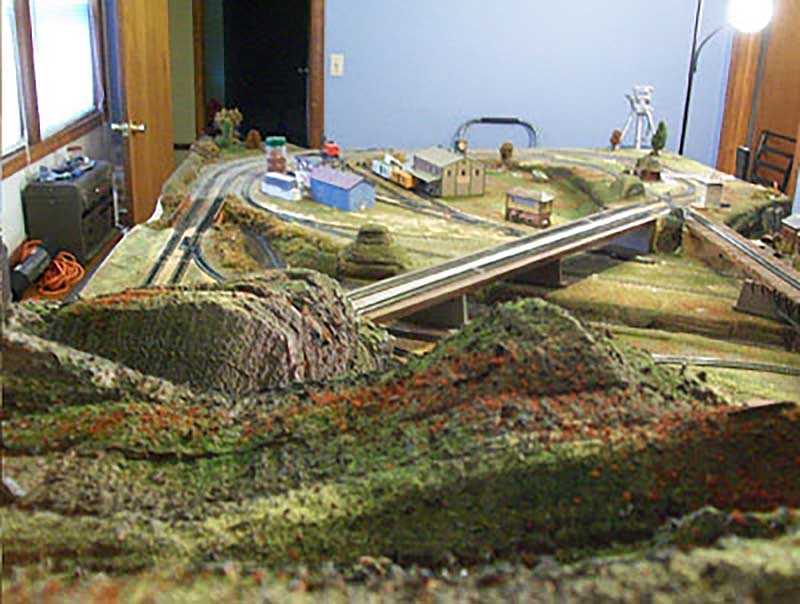
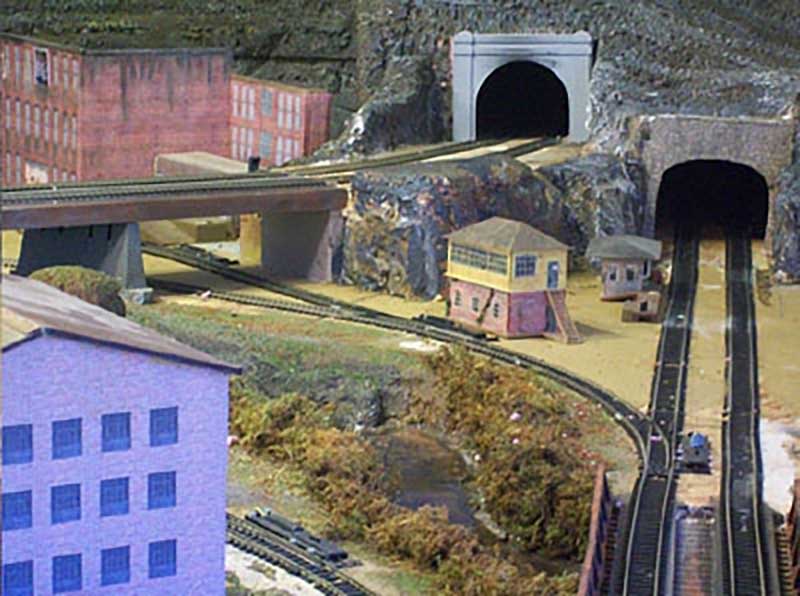
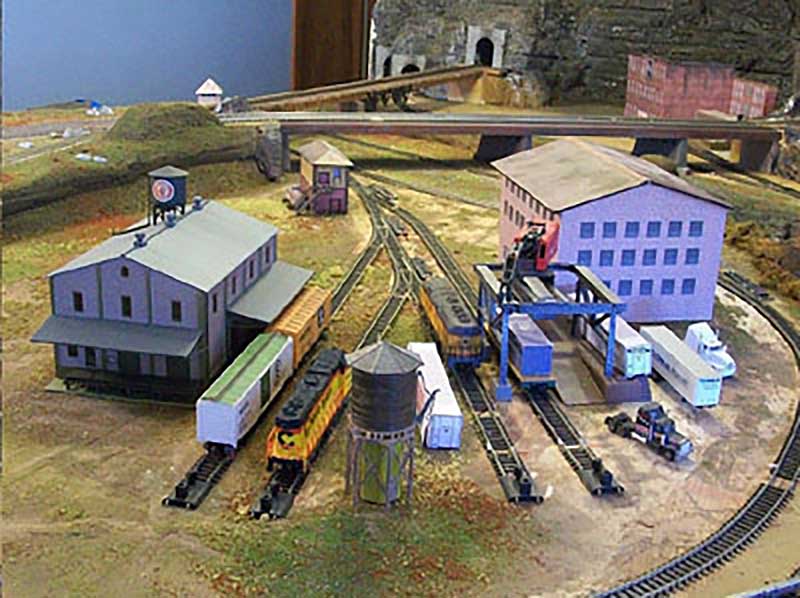
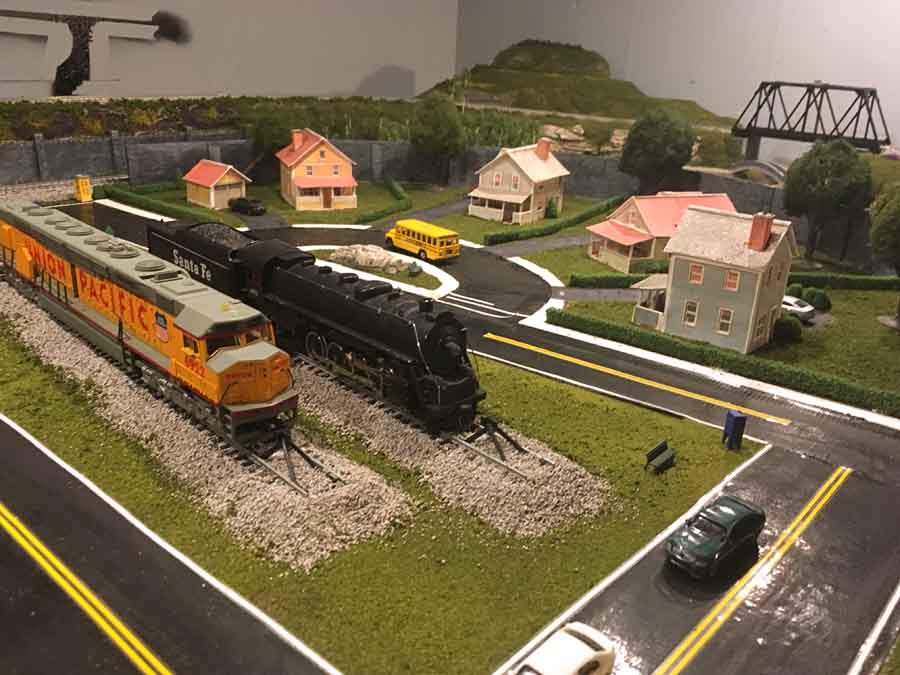
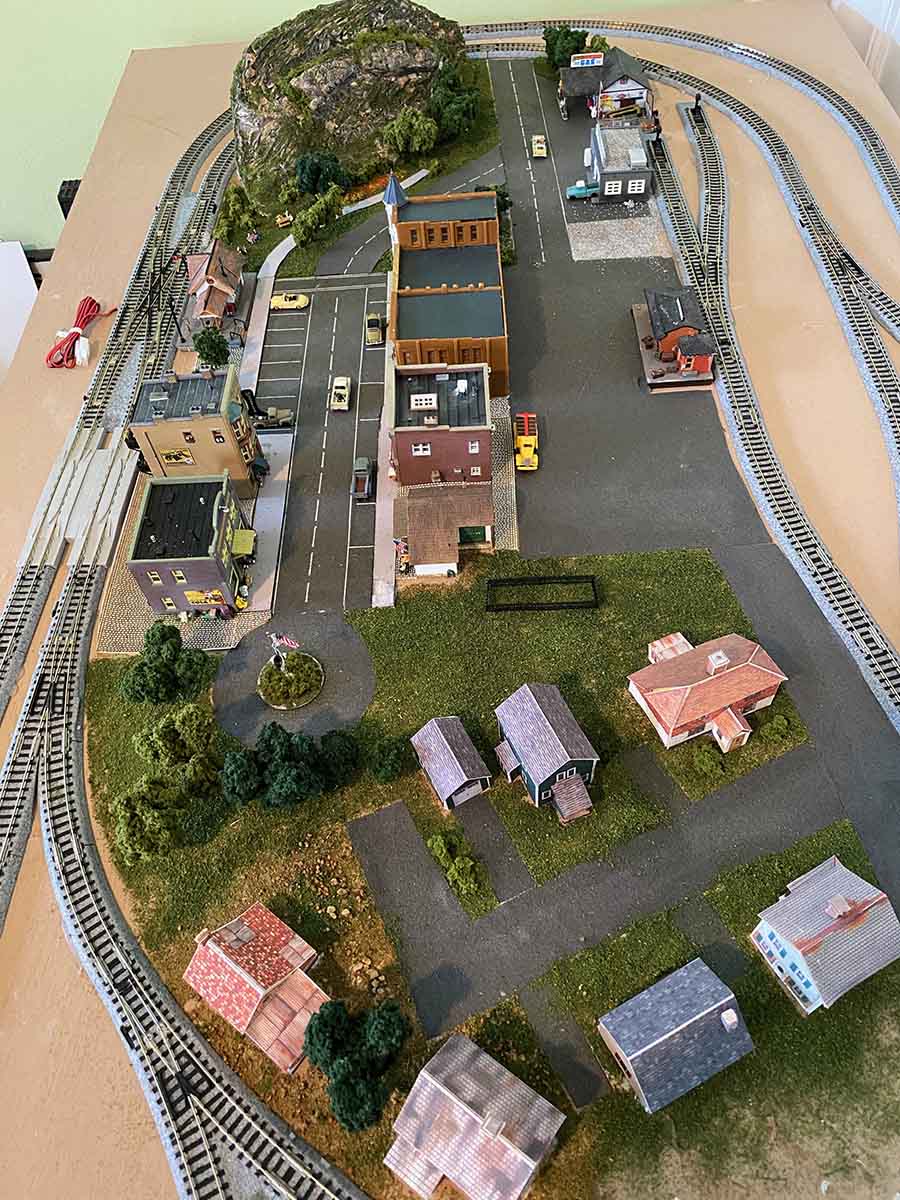
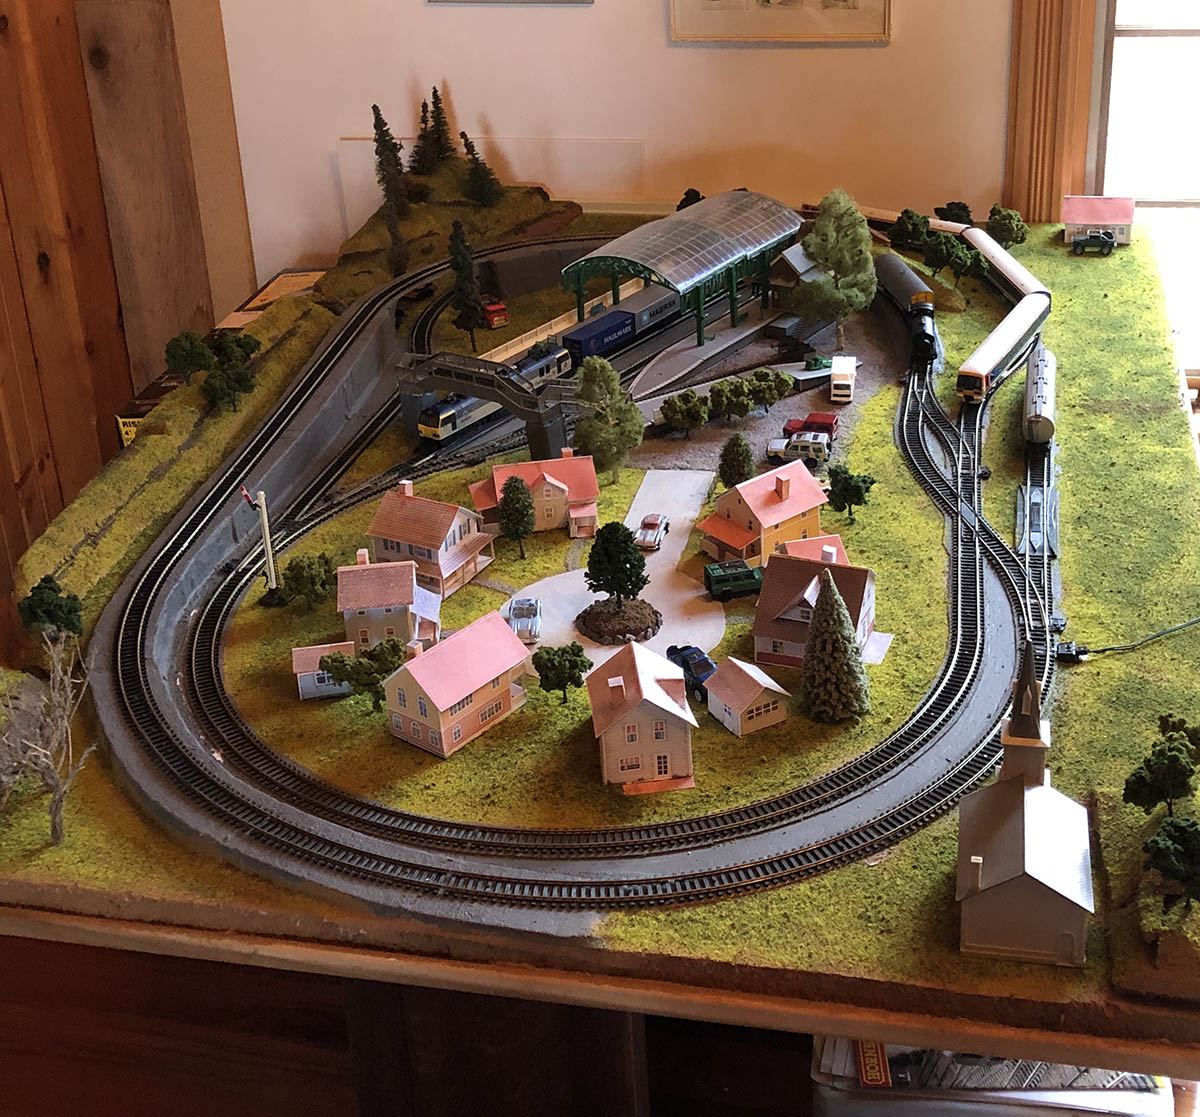
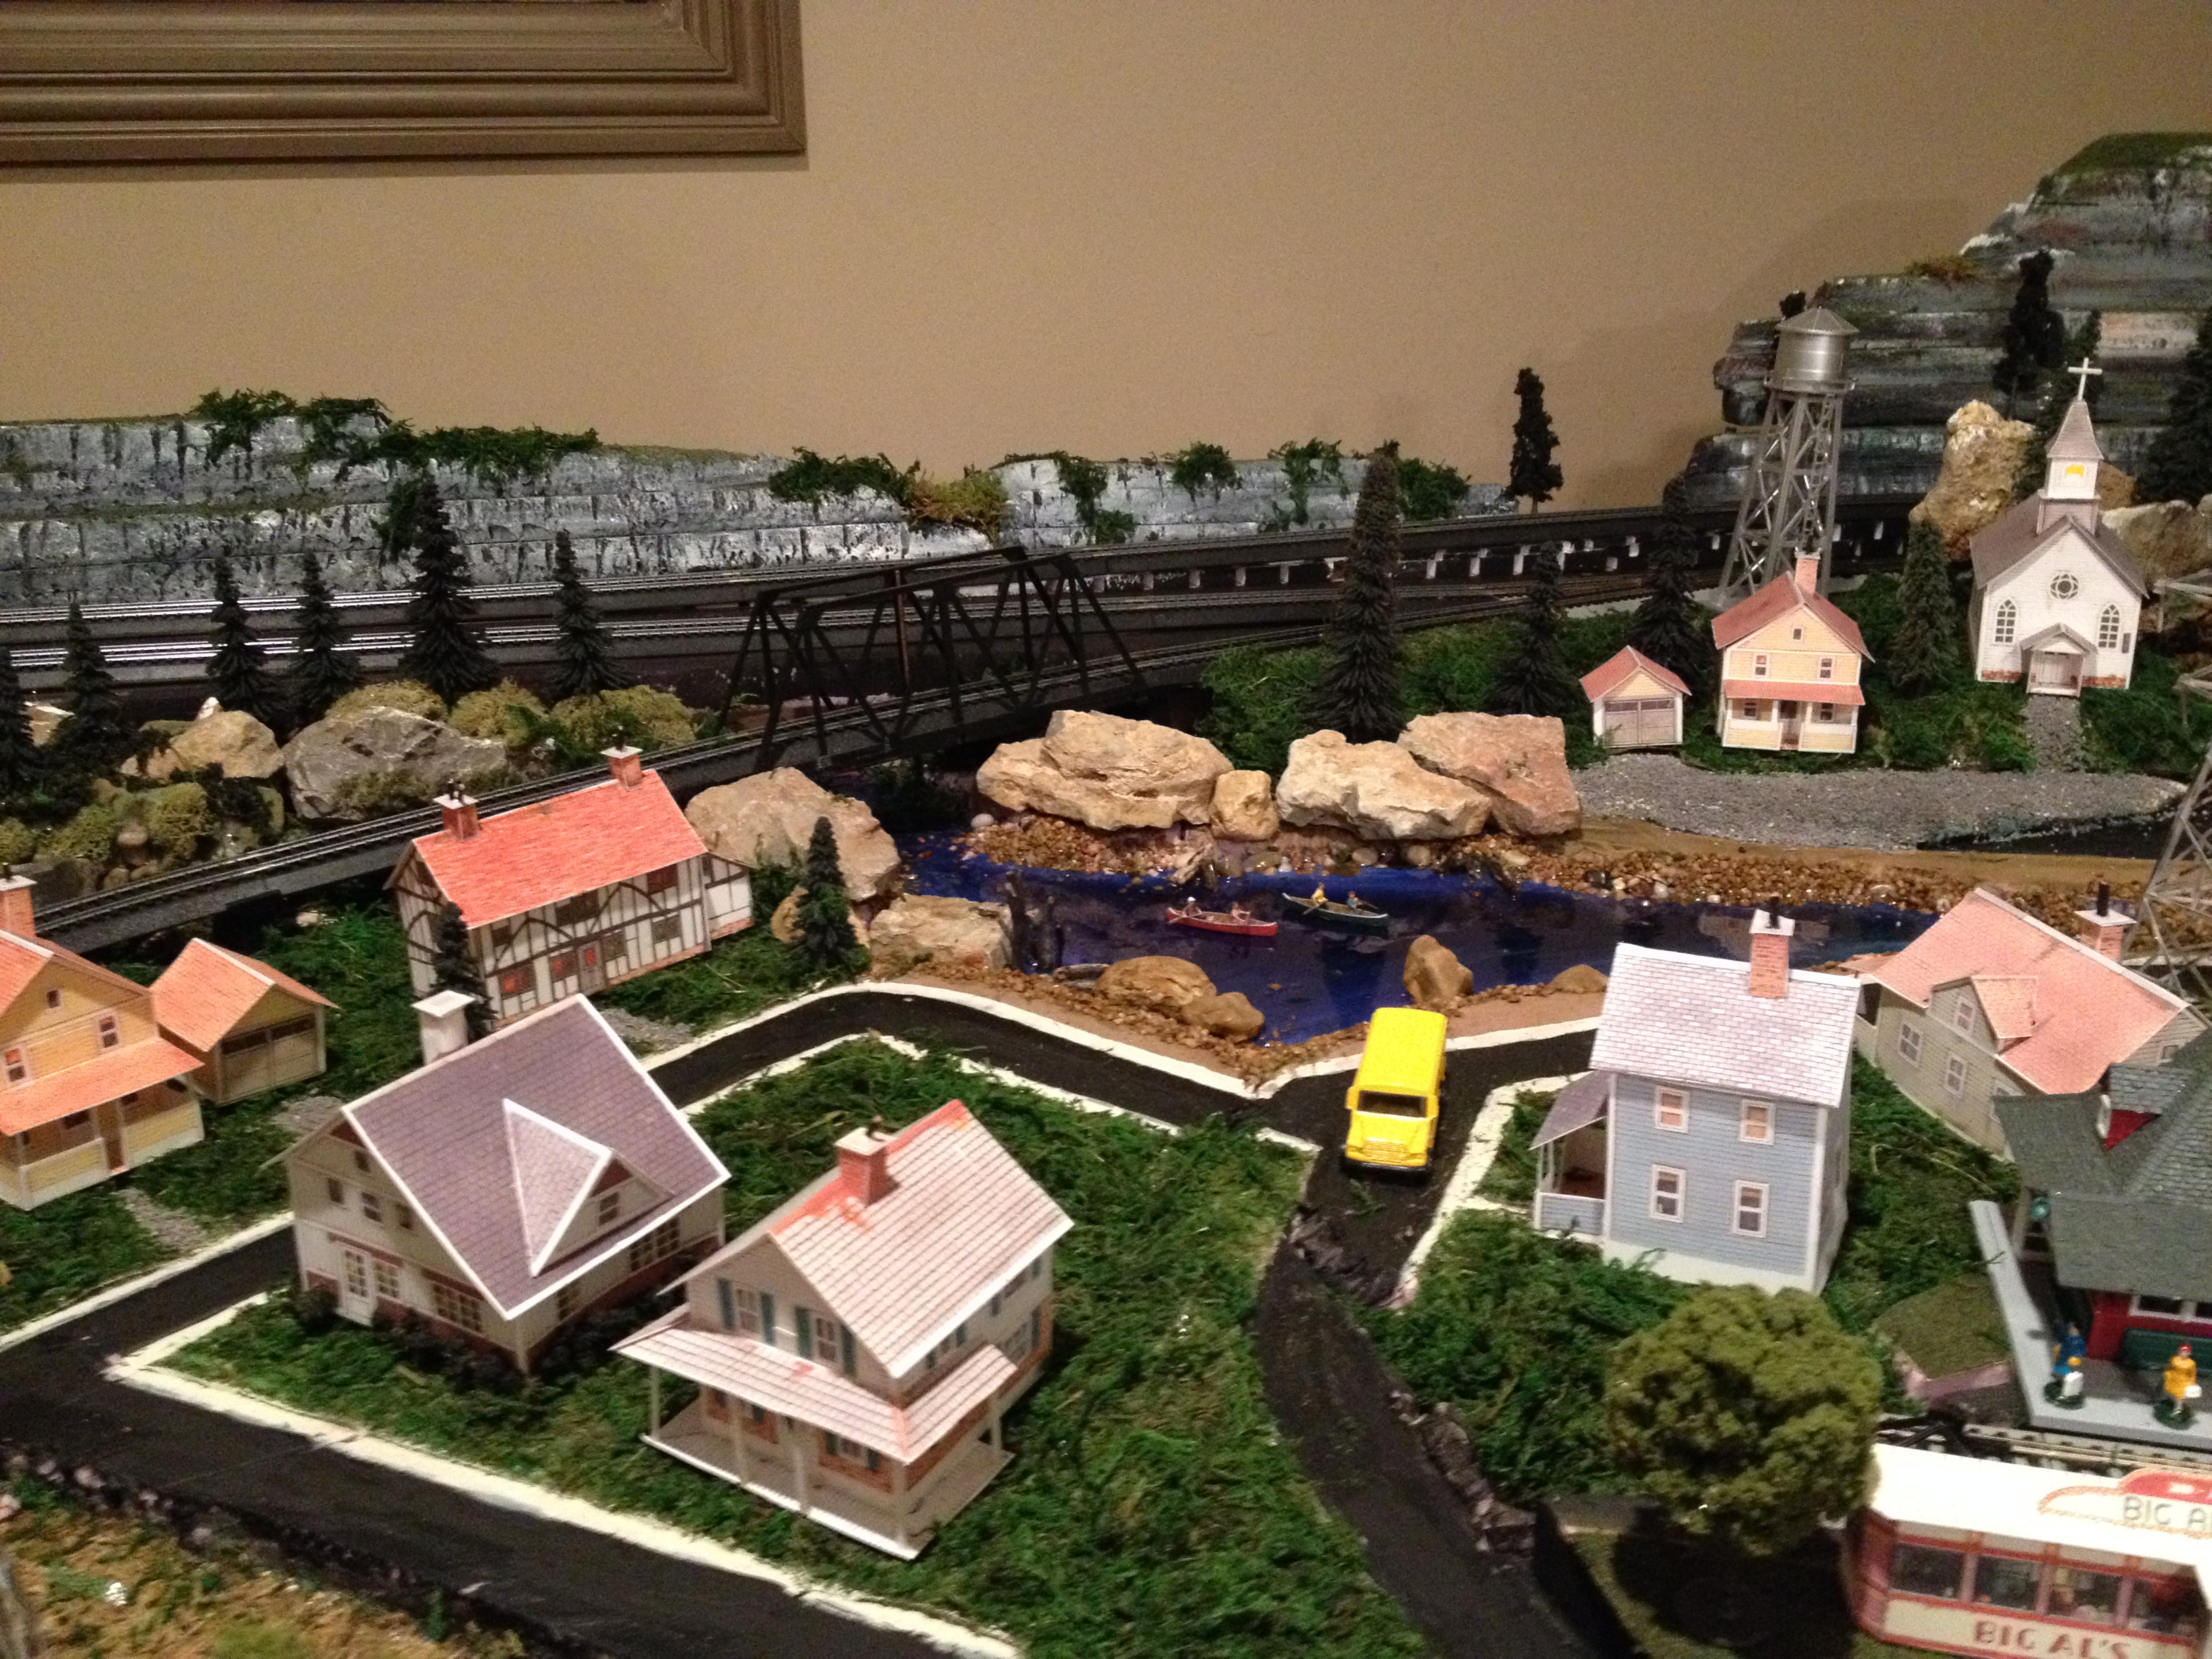
So, in December of 2022 I decided to build a small HO scale layout for him. I hoped it would help his memory, but also felt it would grant his lifelong wish of having his own layout on which to run all his trains.
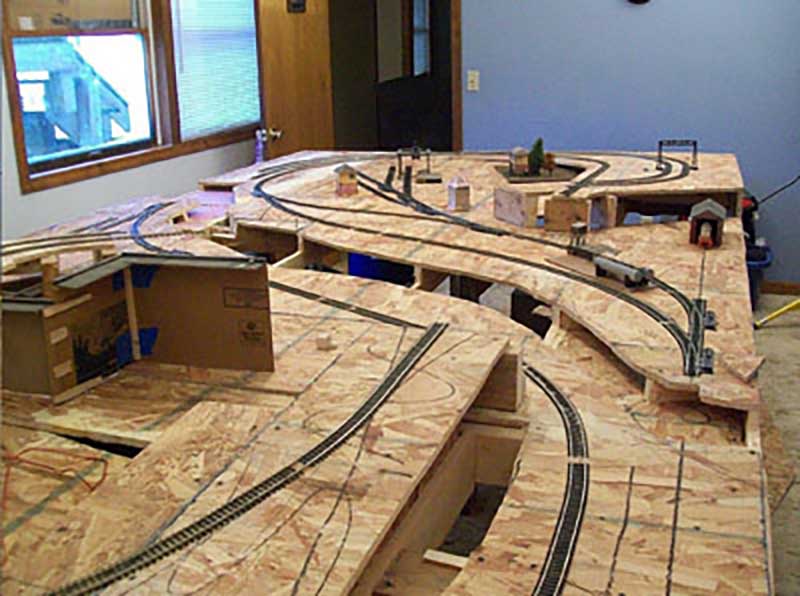
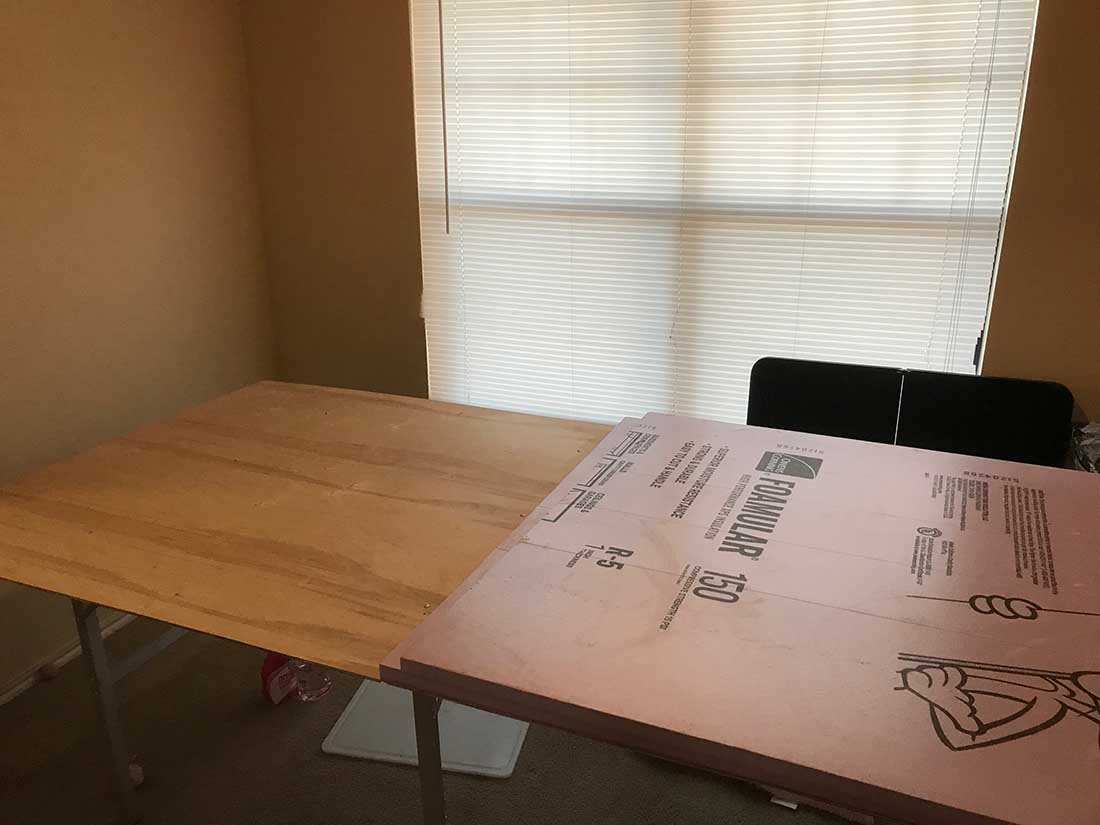
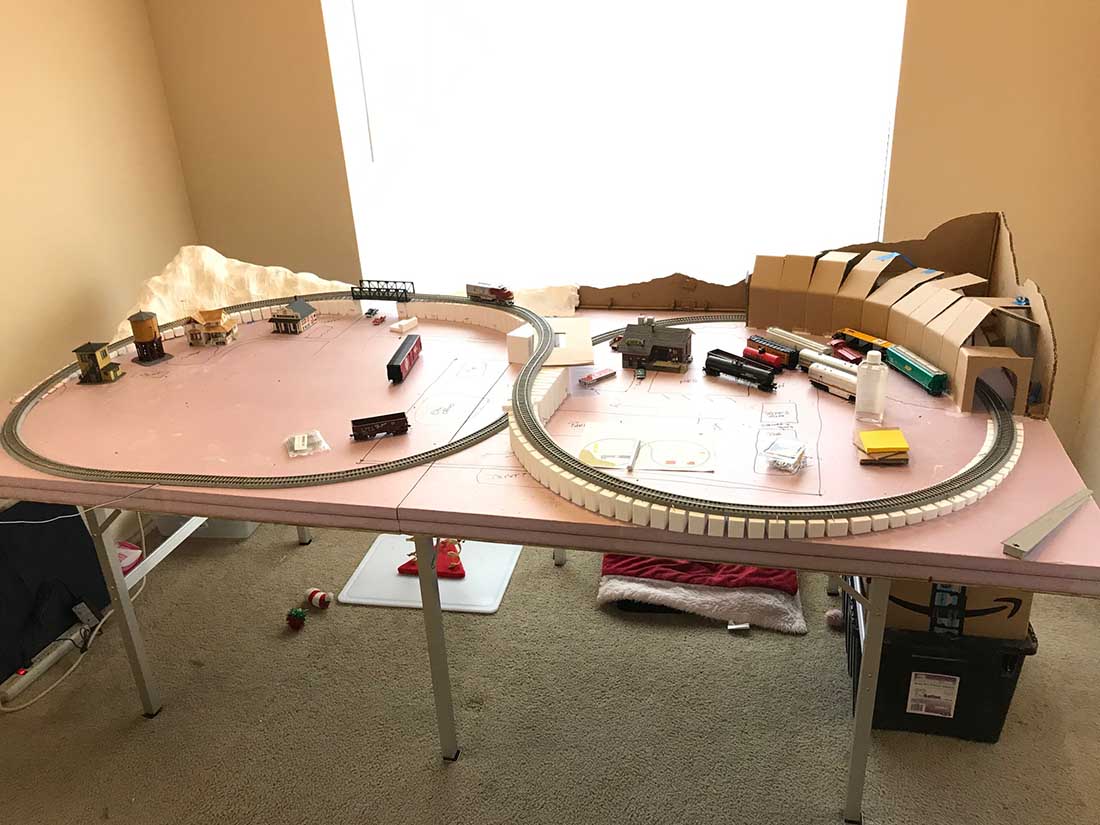
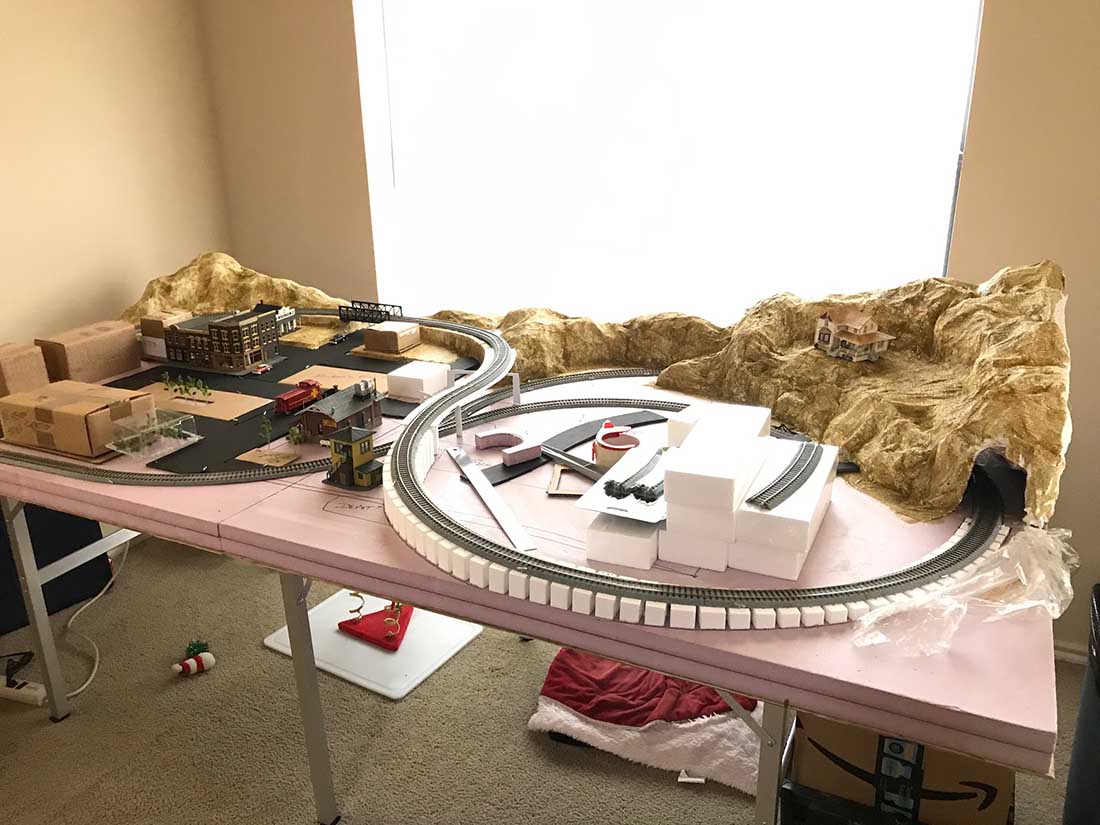
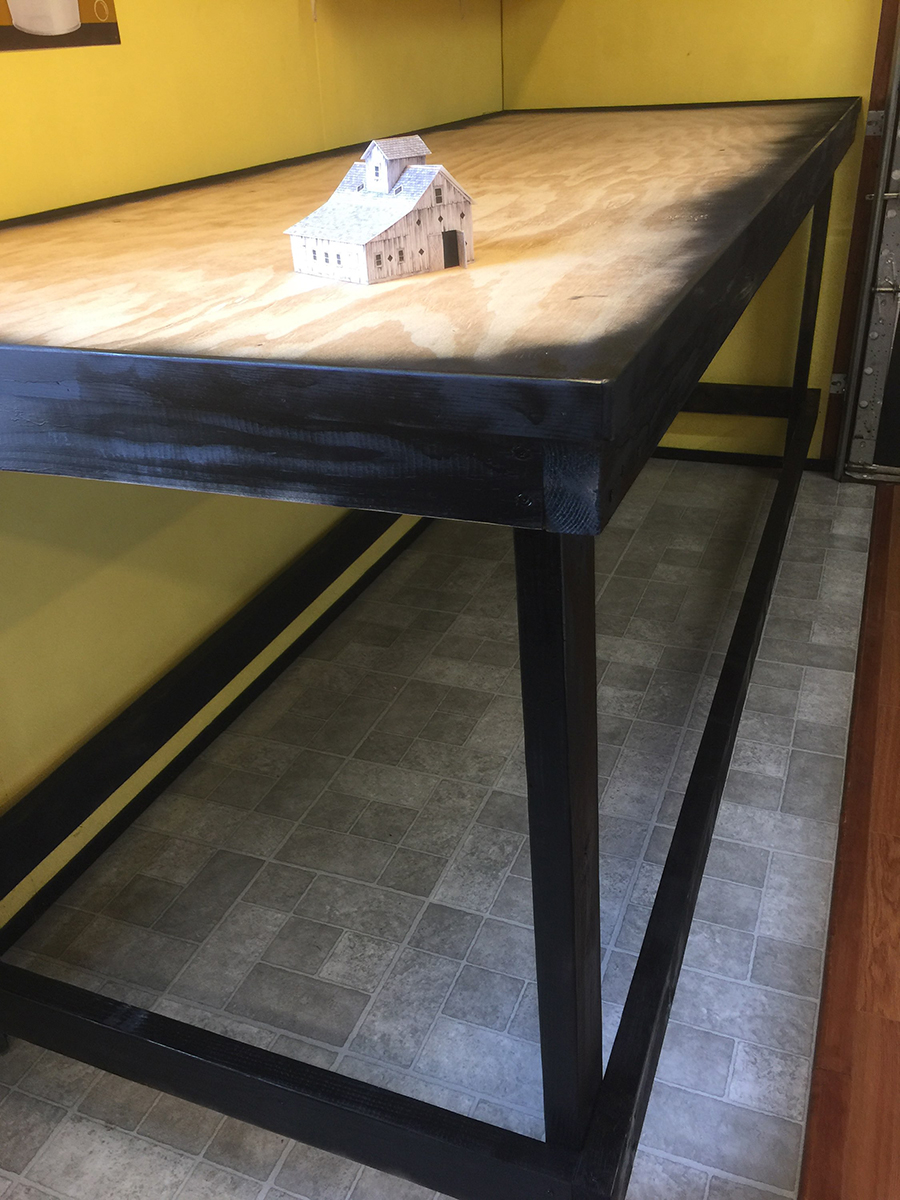
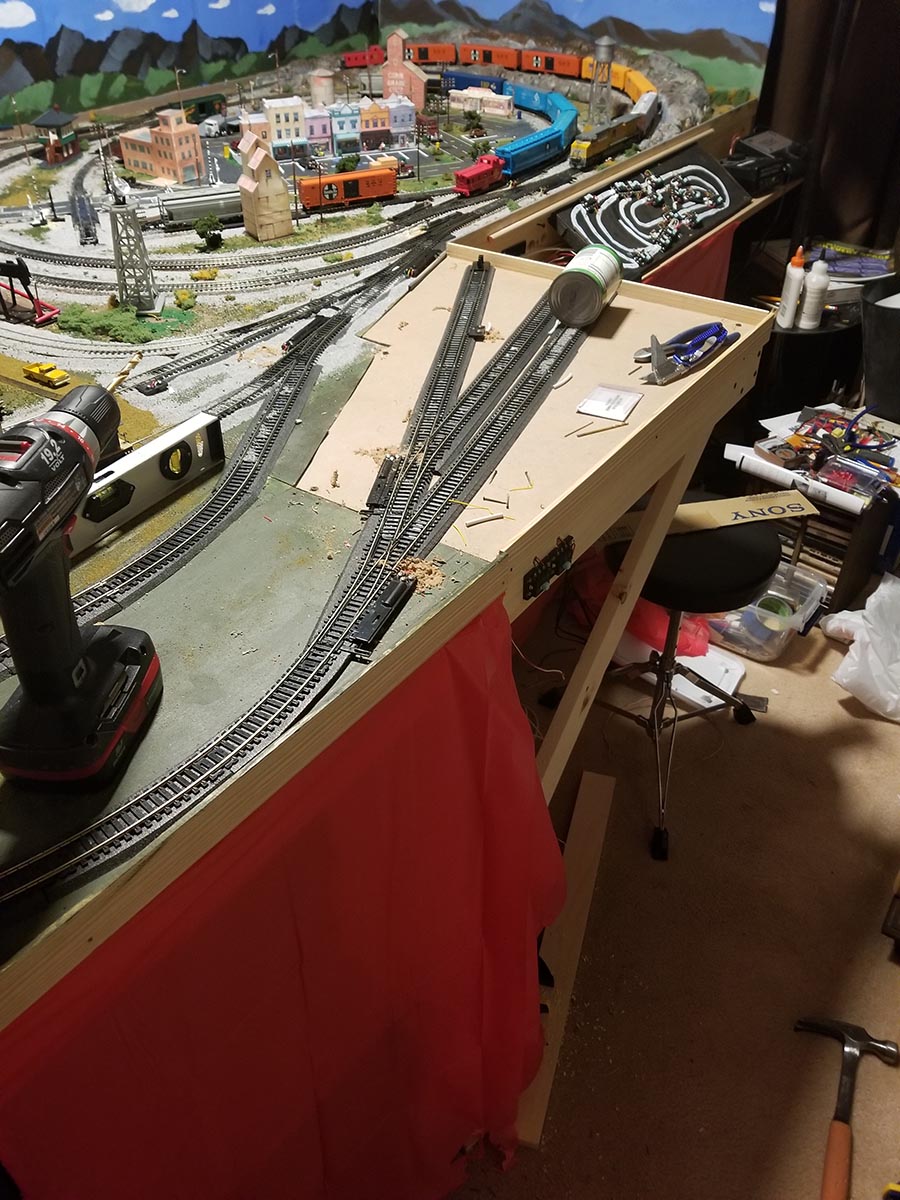
I had to learn everything from scratch… and also picked up a few shortcuts along the way. I don’t do carpentry, so bench work was out of the question. But I once saw in a product review on Amazon that someone used a ping pong table as their platform and laid a foundation on that.
For Christmas that year I got dad a Woodland Scenics Mountain Valley kit…most of what we would need to create a basic 8×4 layout. Most importantly, it came with step by step instructions.
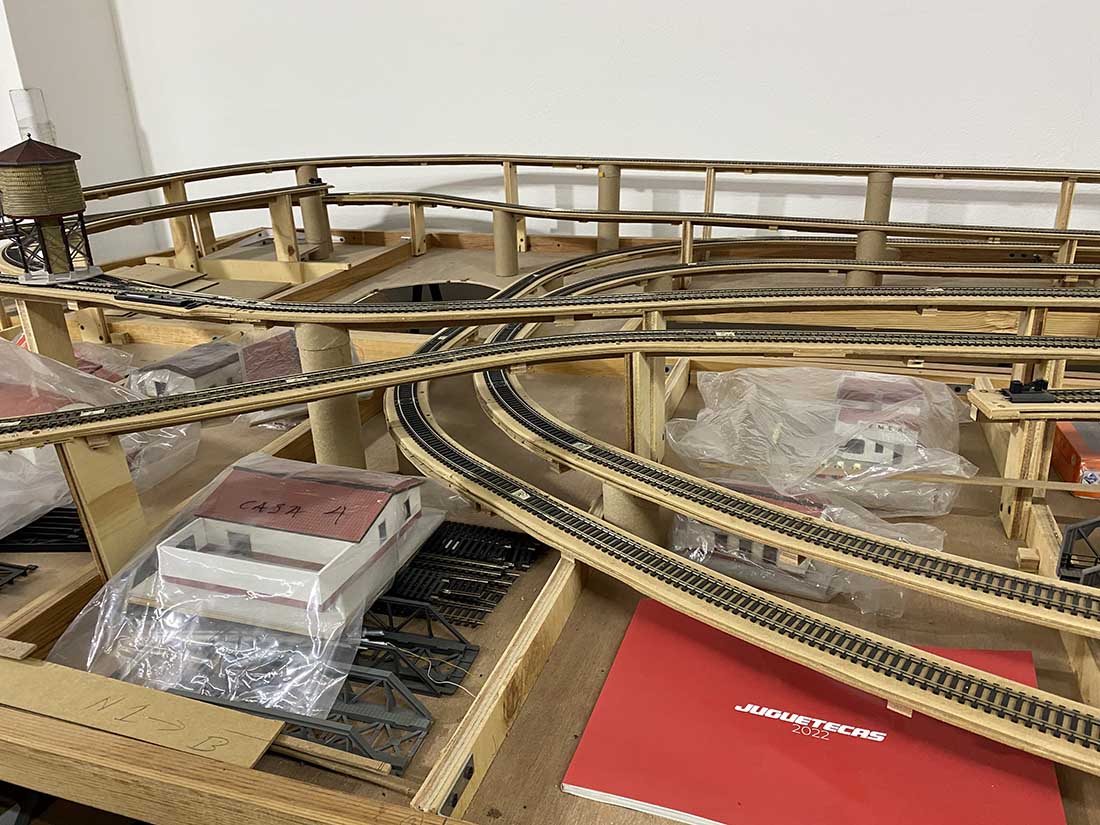
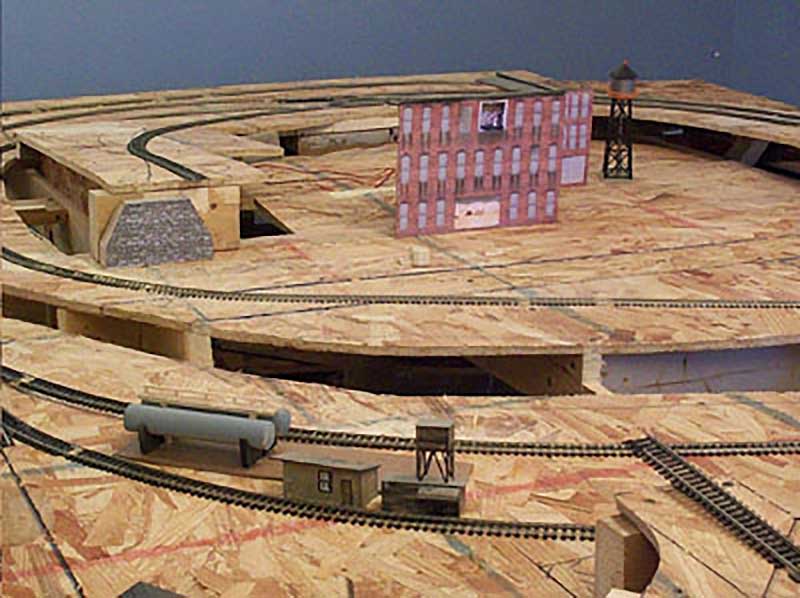
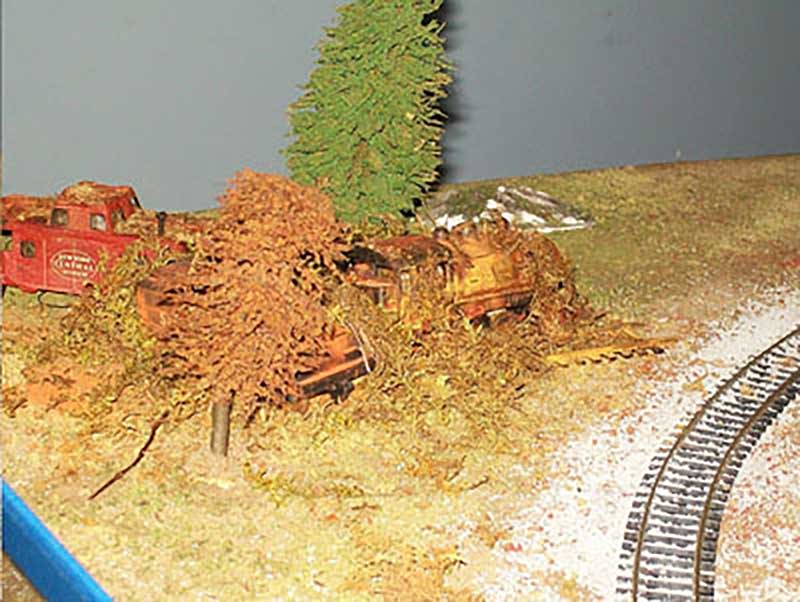
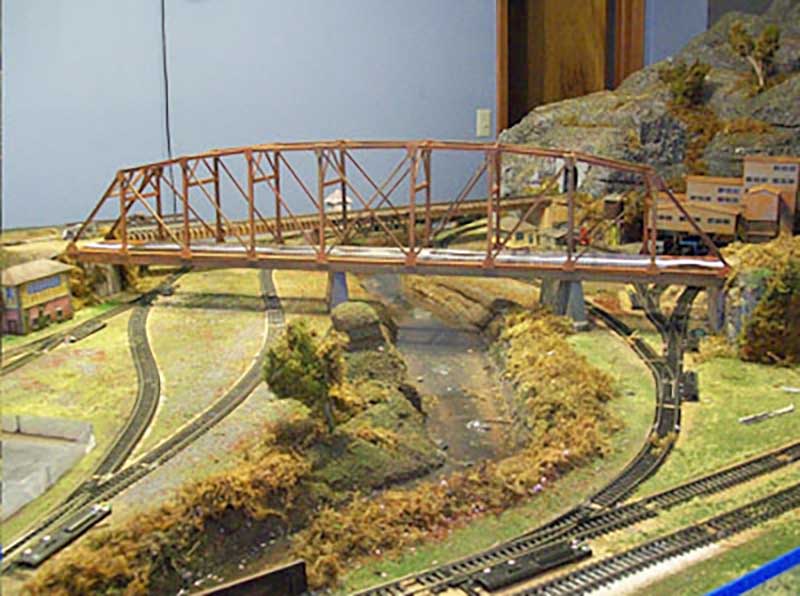
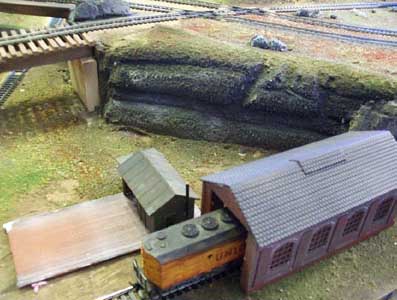
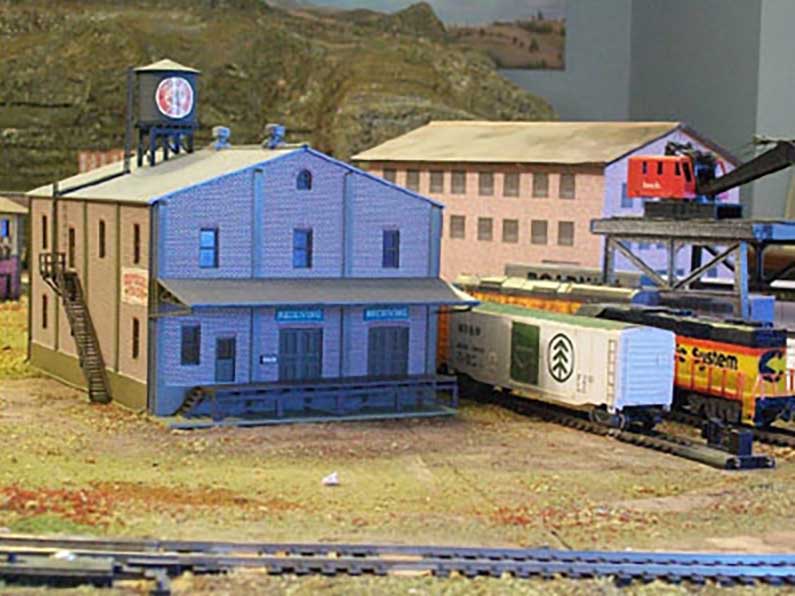
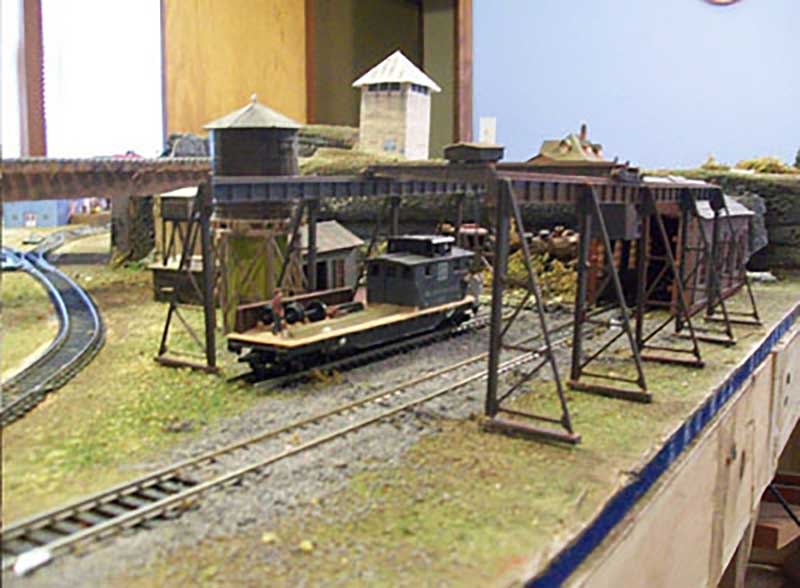
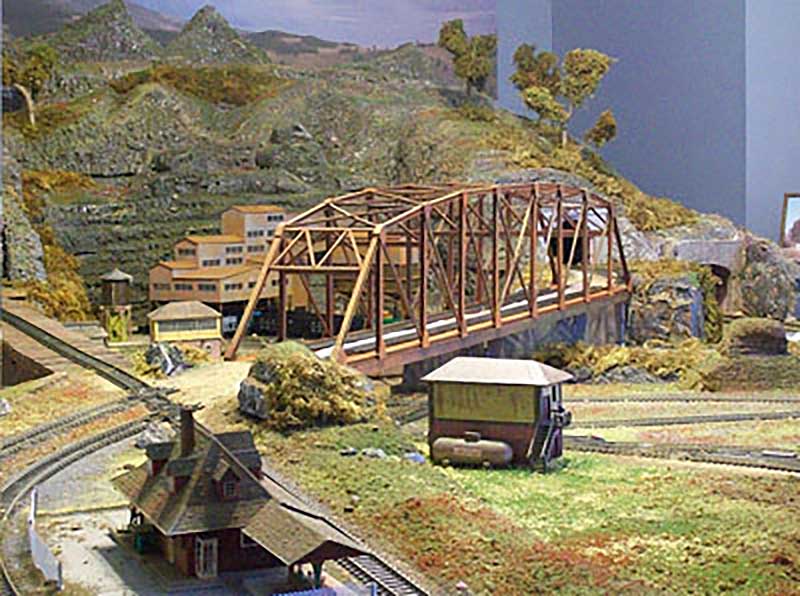
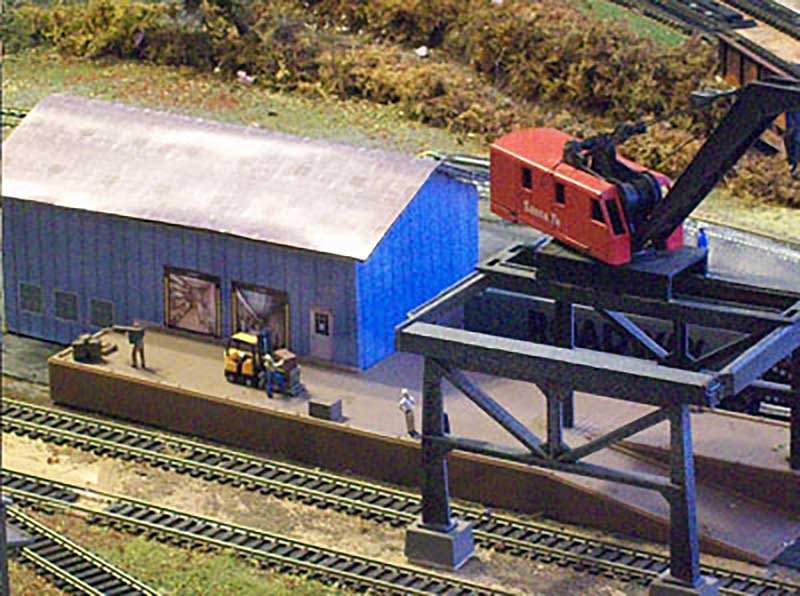
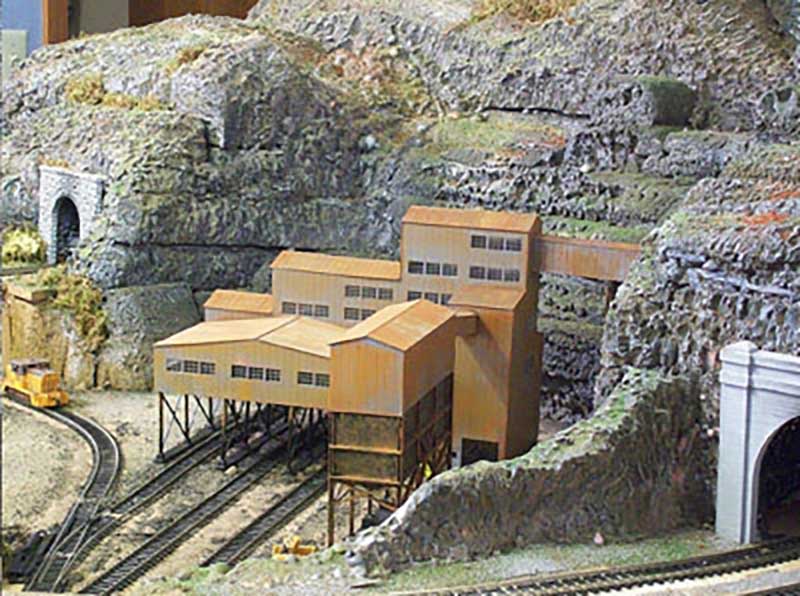
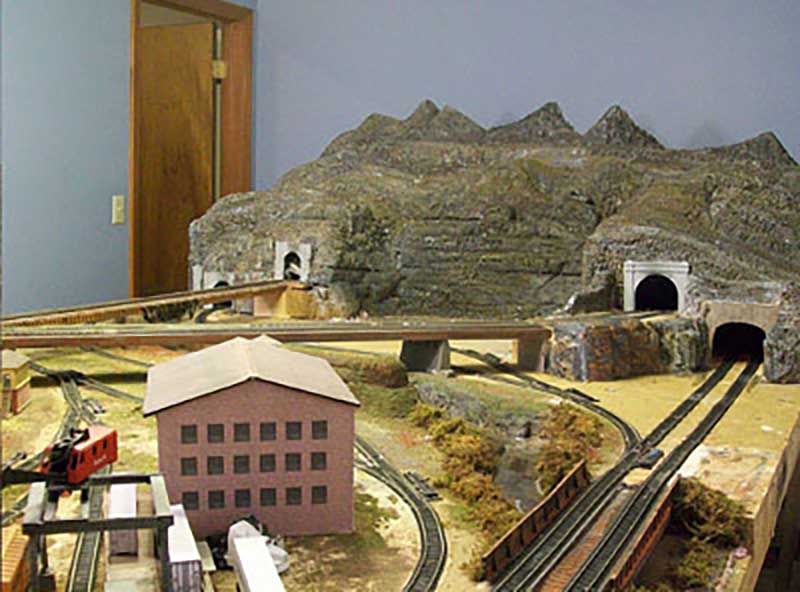
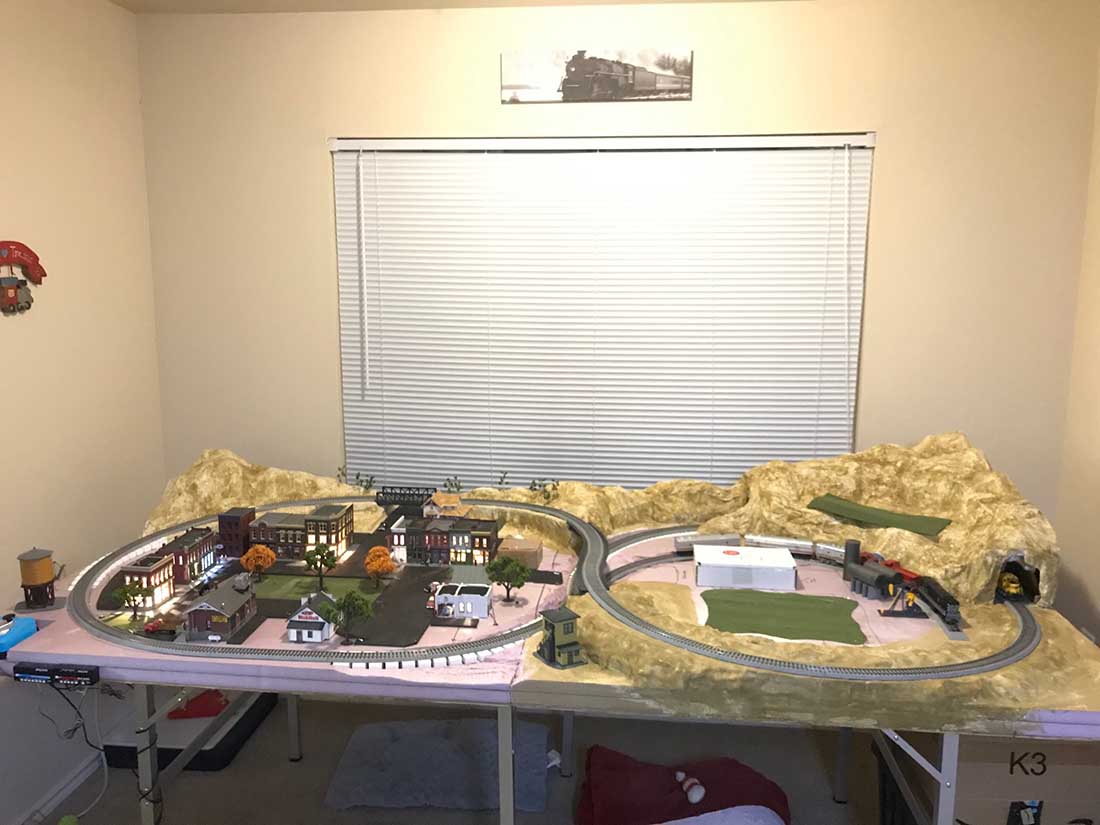
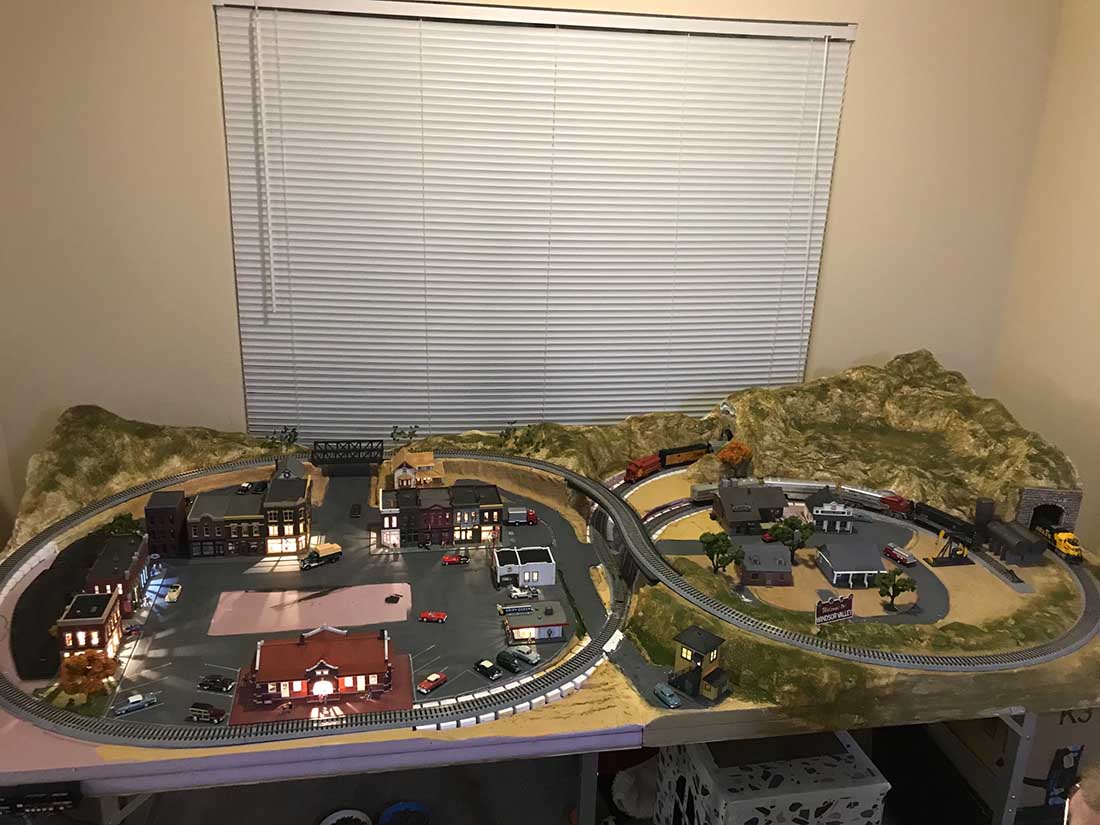
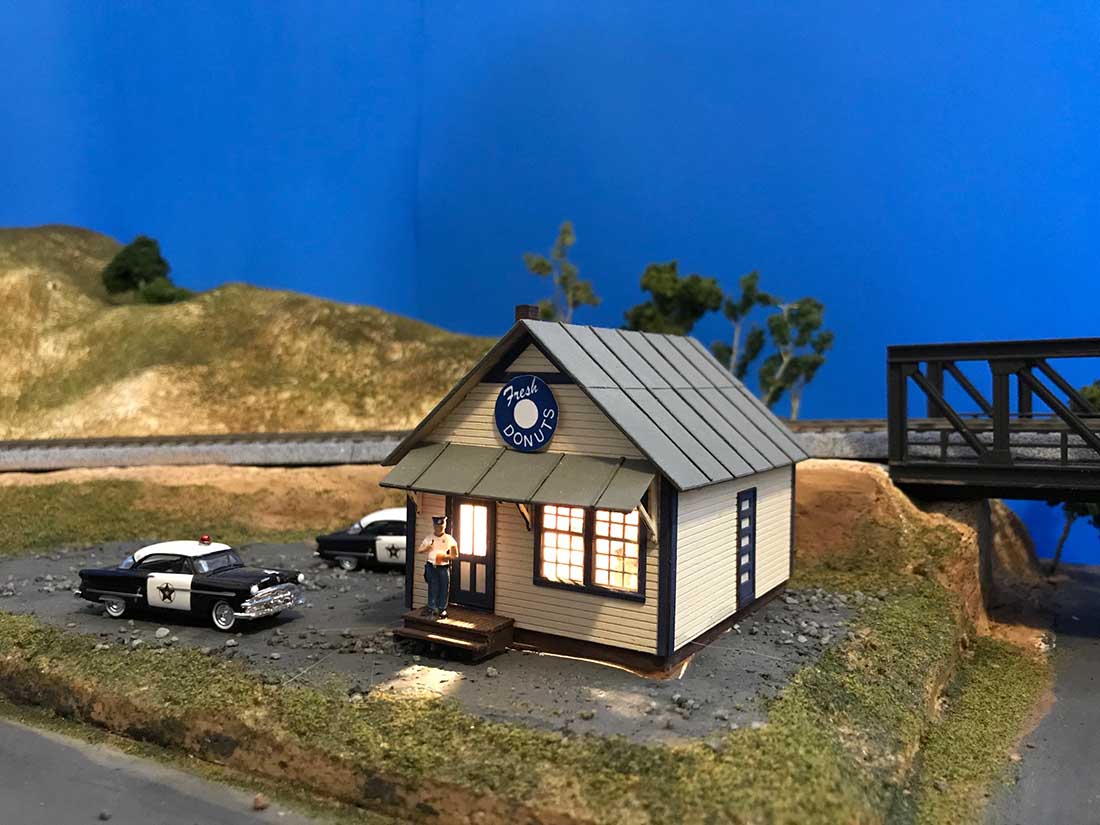
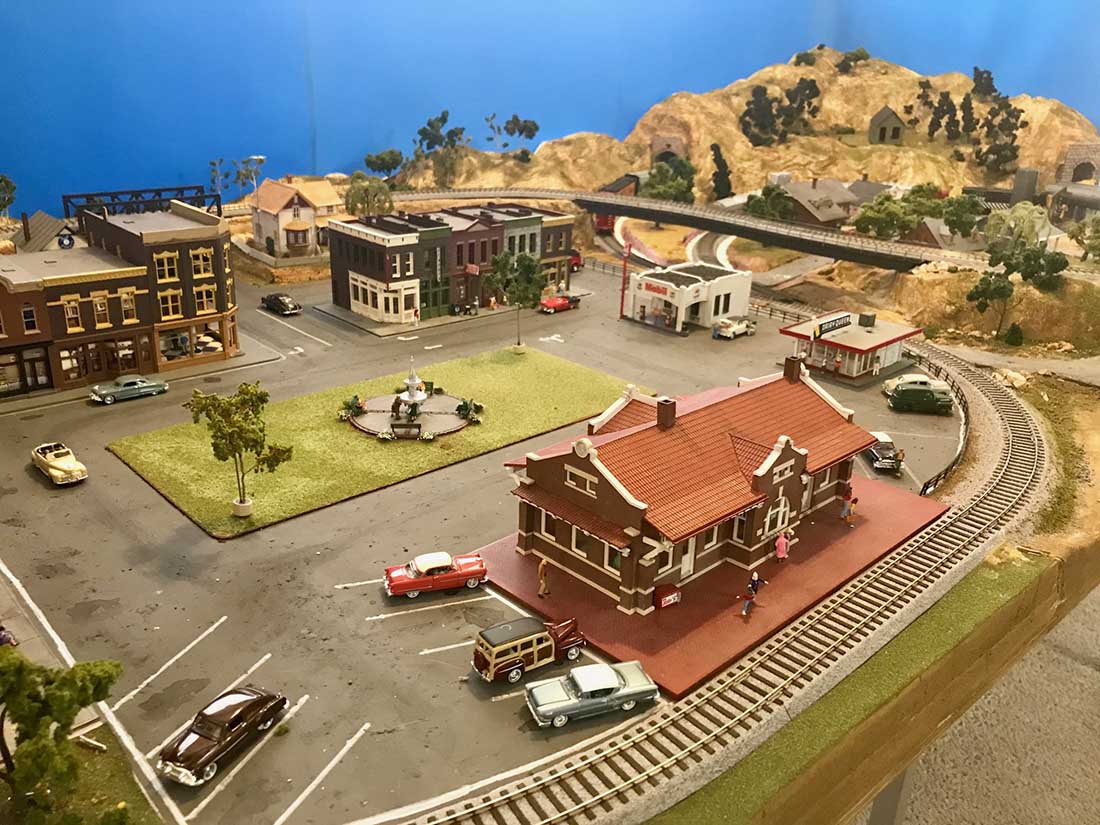
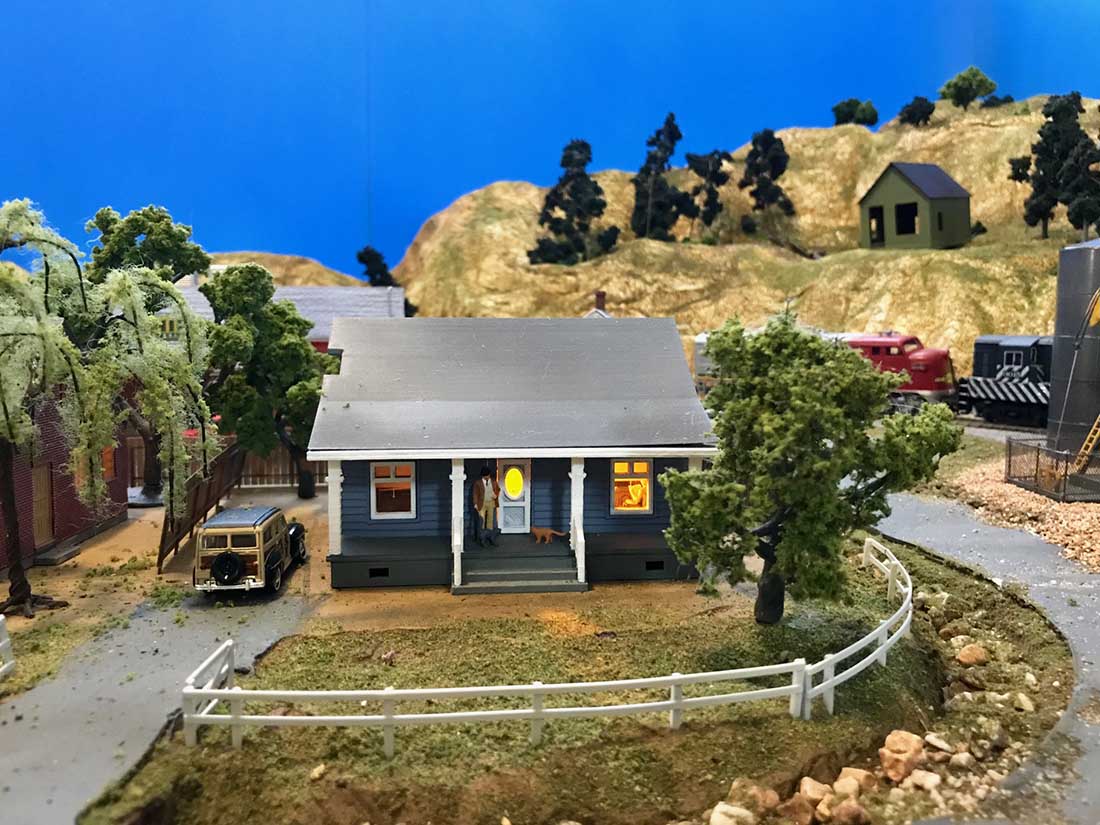
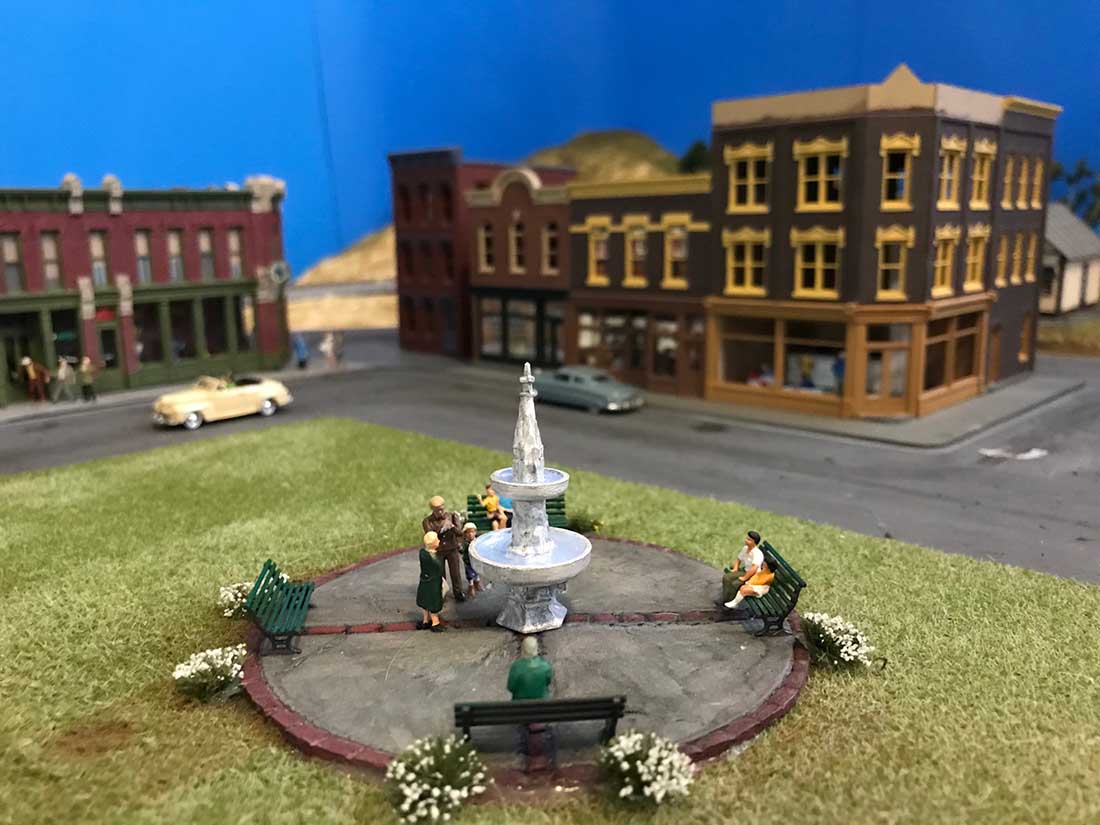
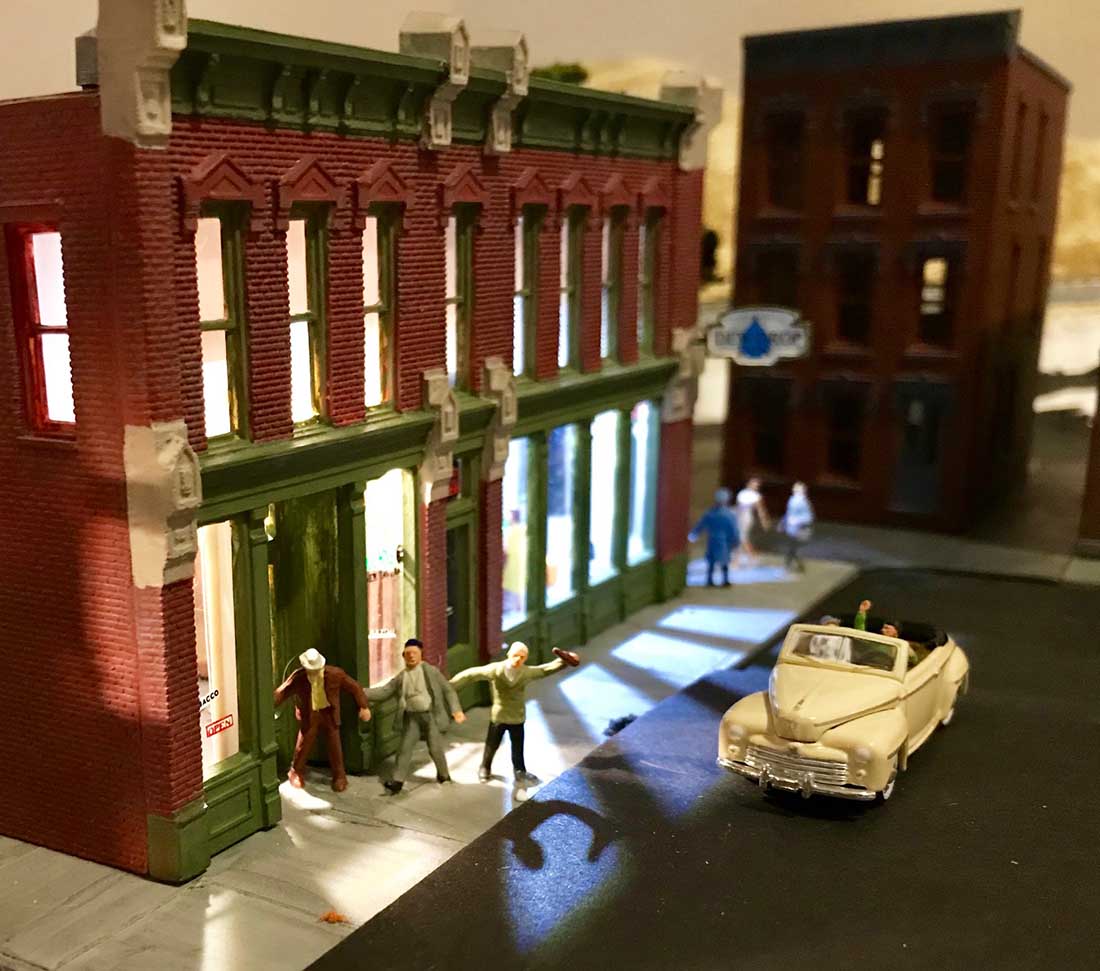
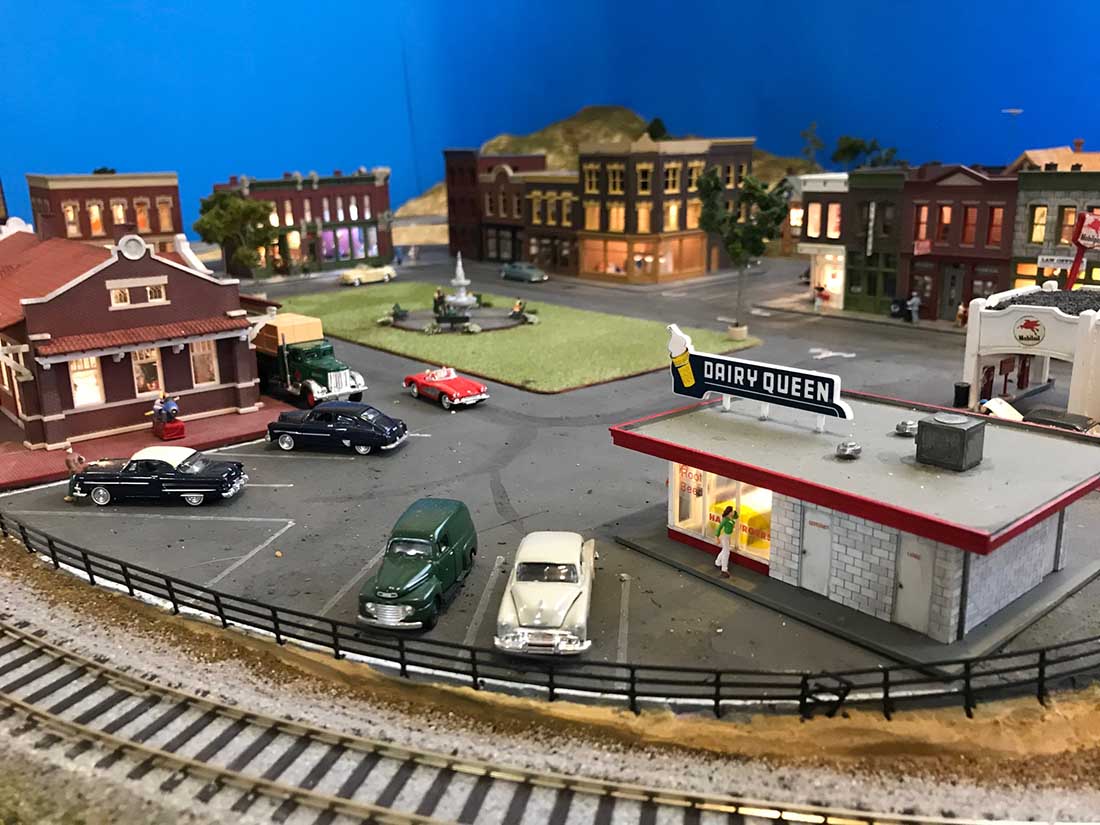
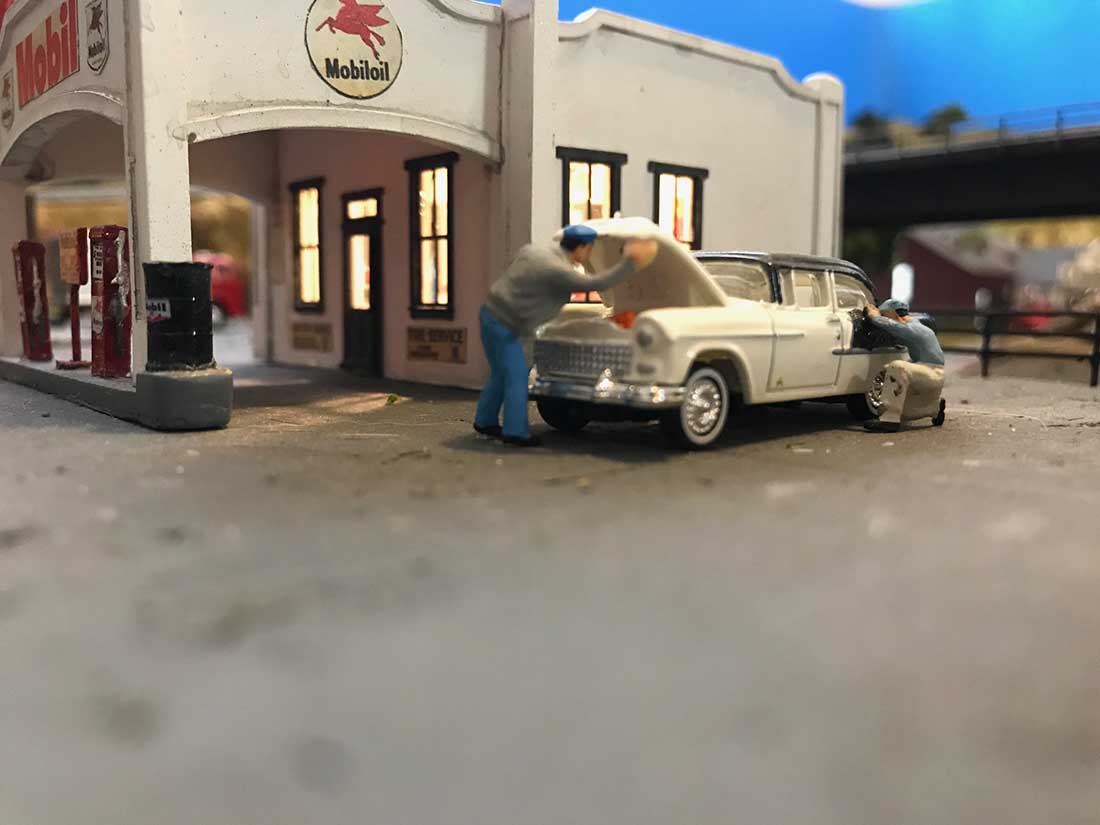
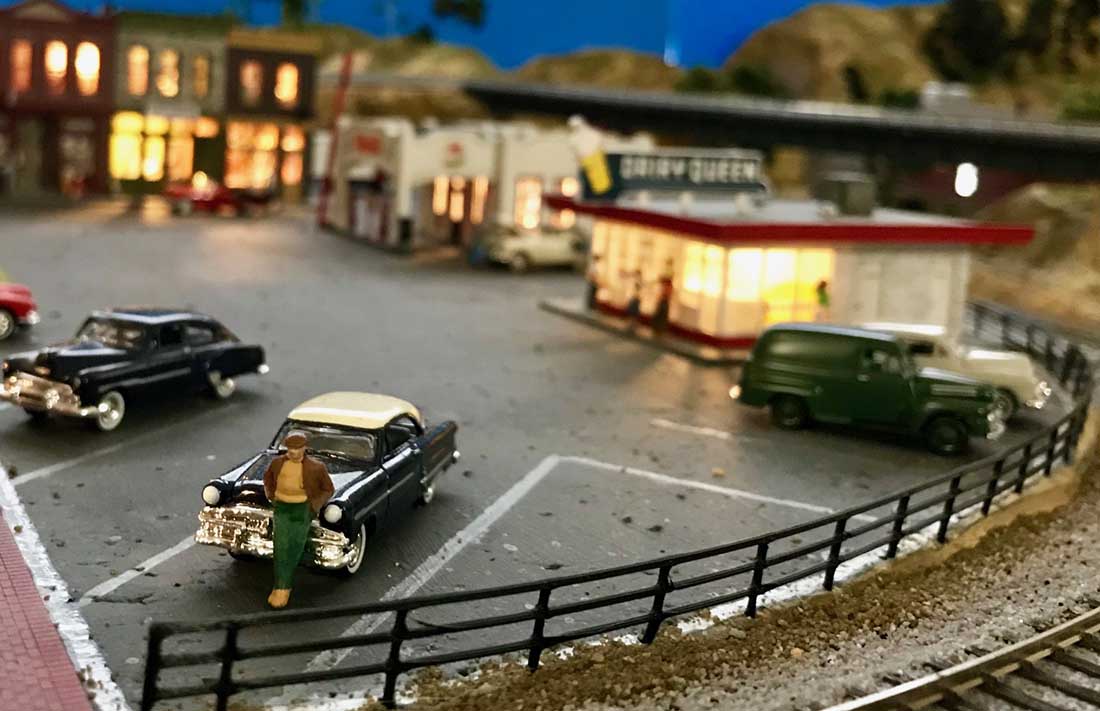
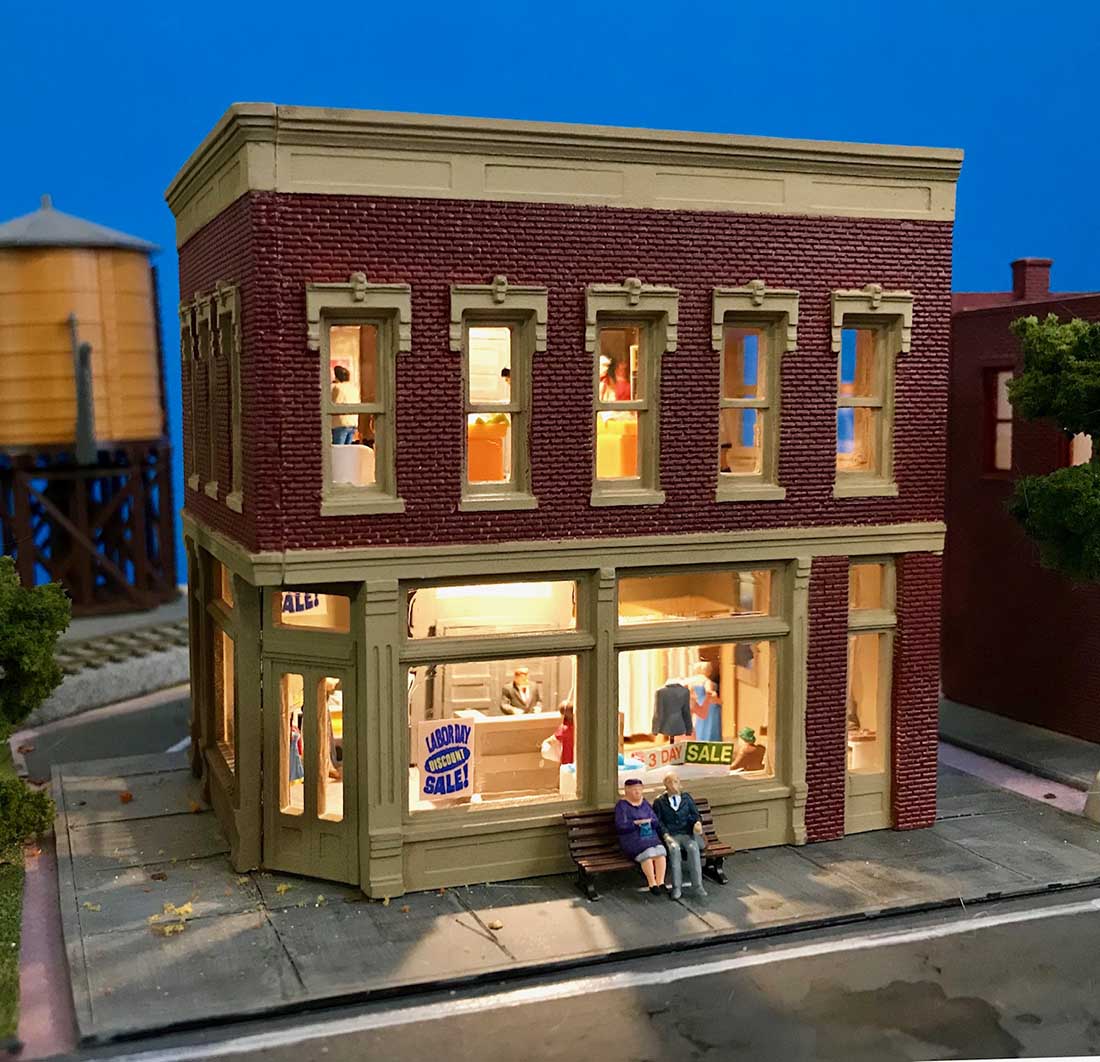
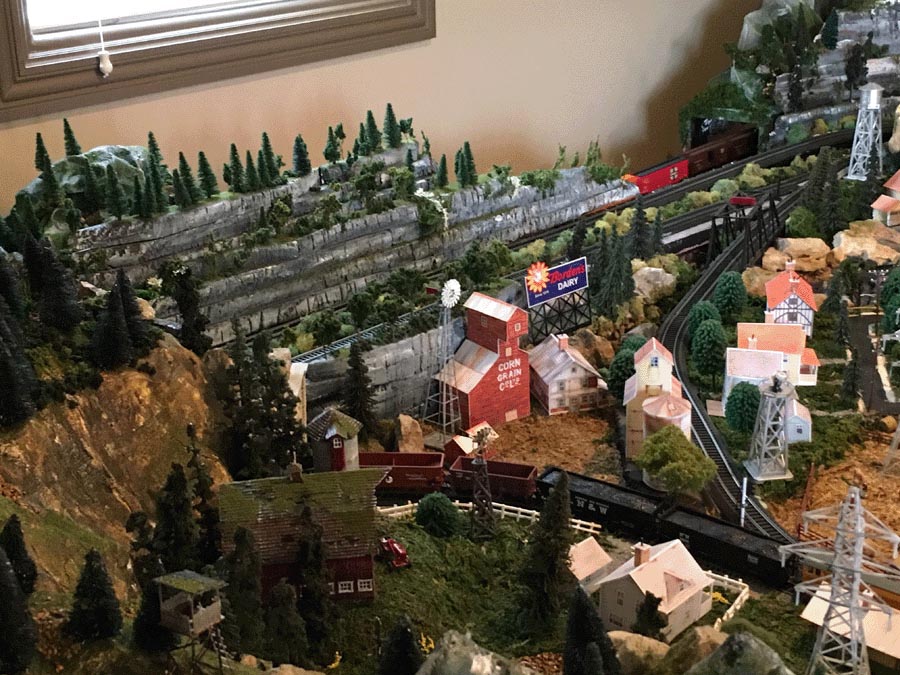
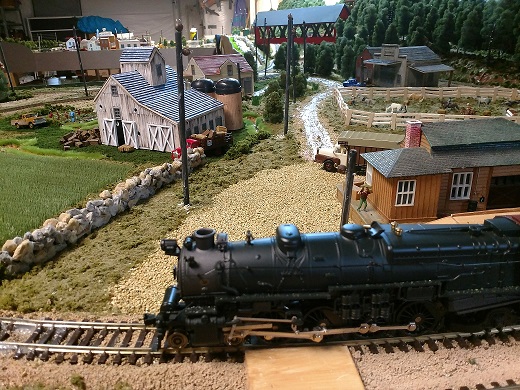
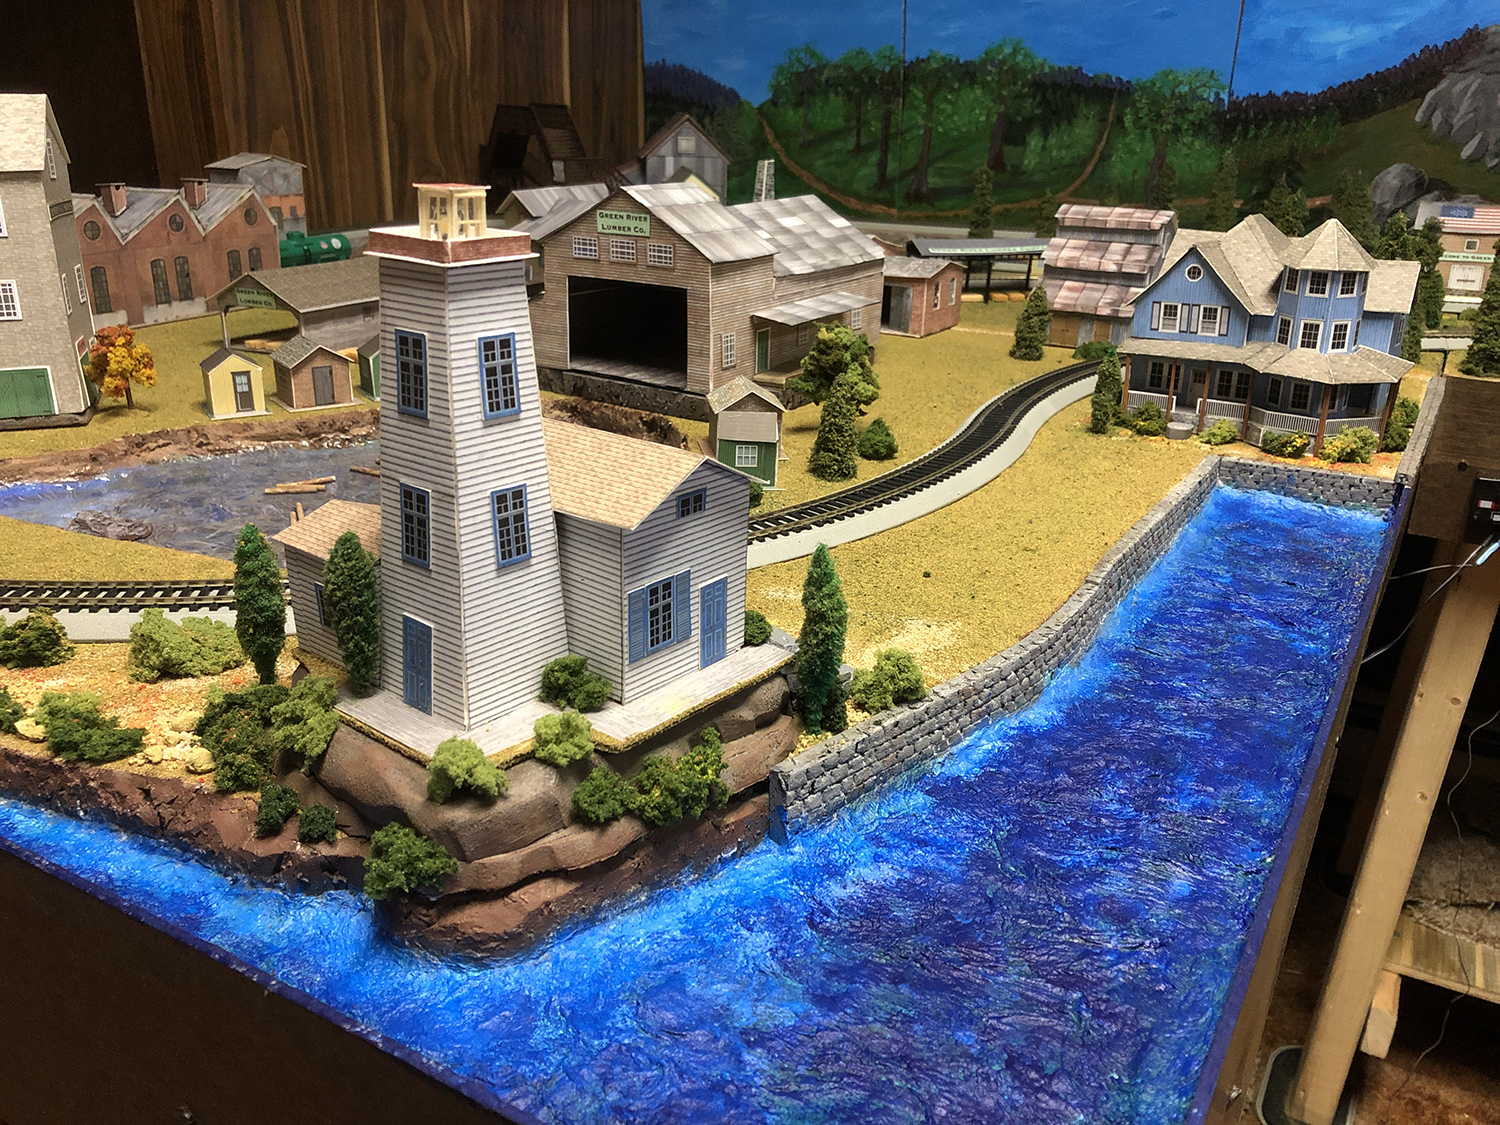
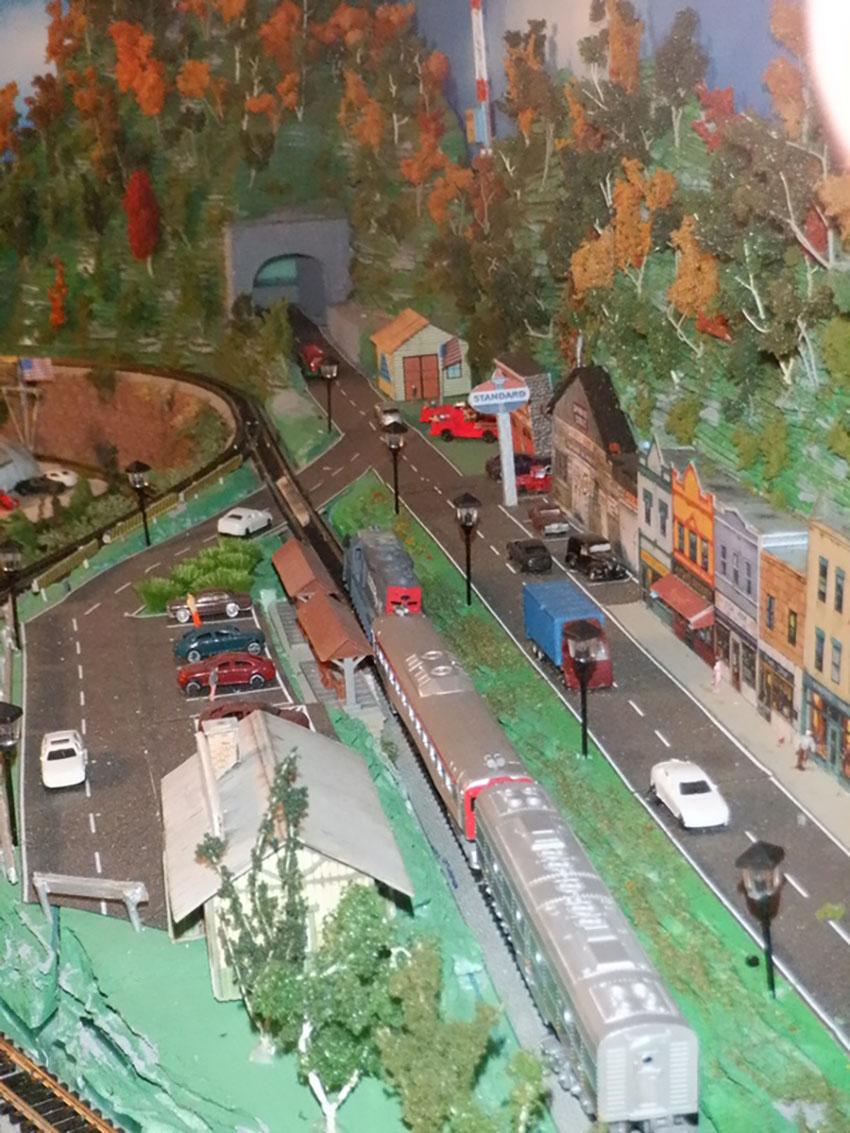
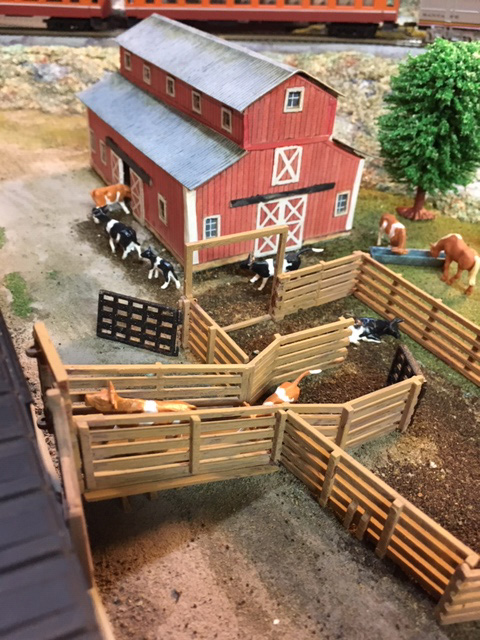
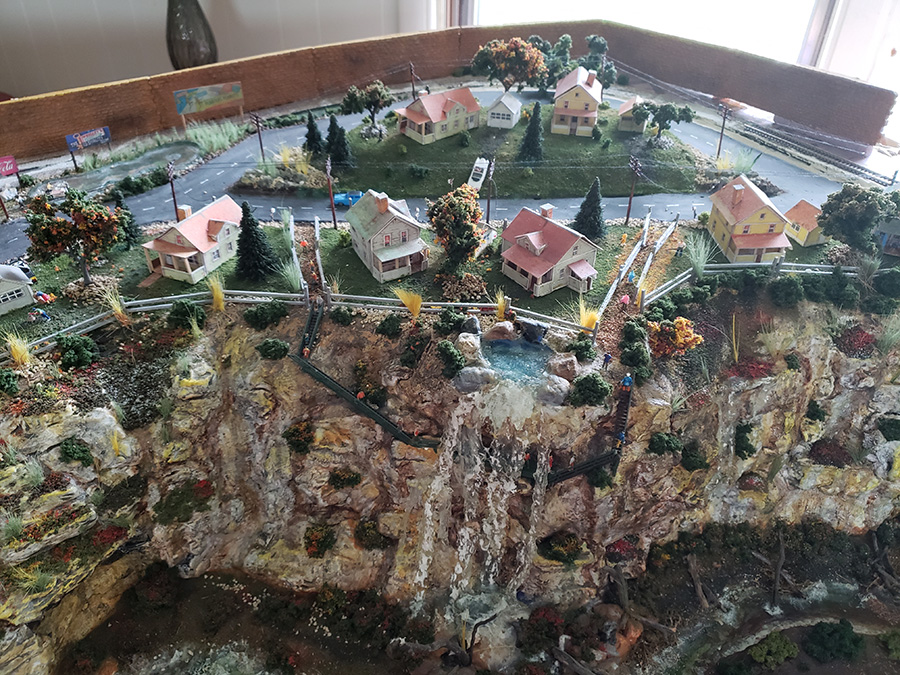
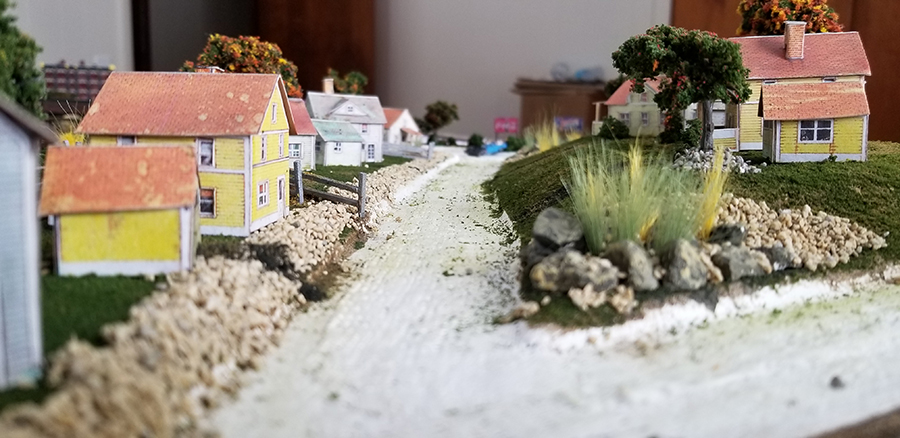
I started out with building structures…and that’s what hooked me. Detailing the interiors became story time and many of the scenes were intended to rekindle memories from my father’s life and my youth.
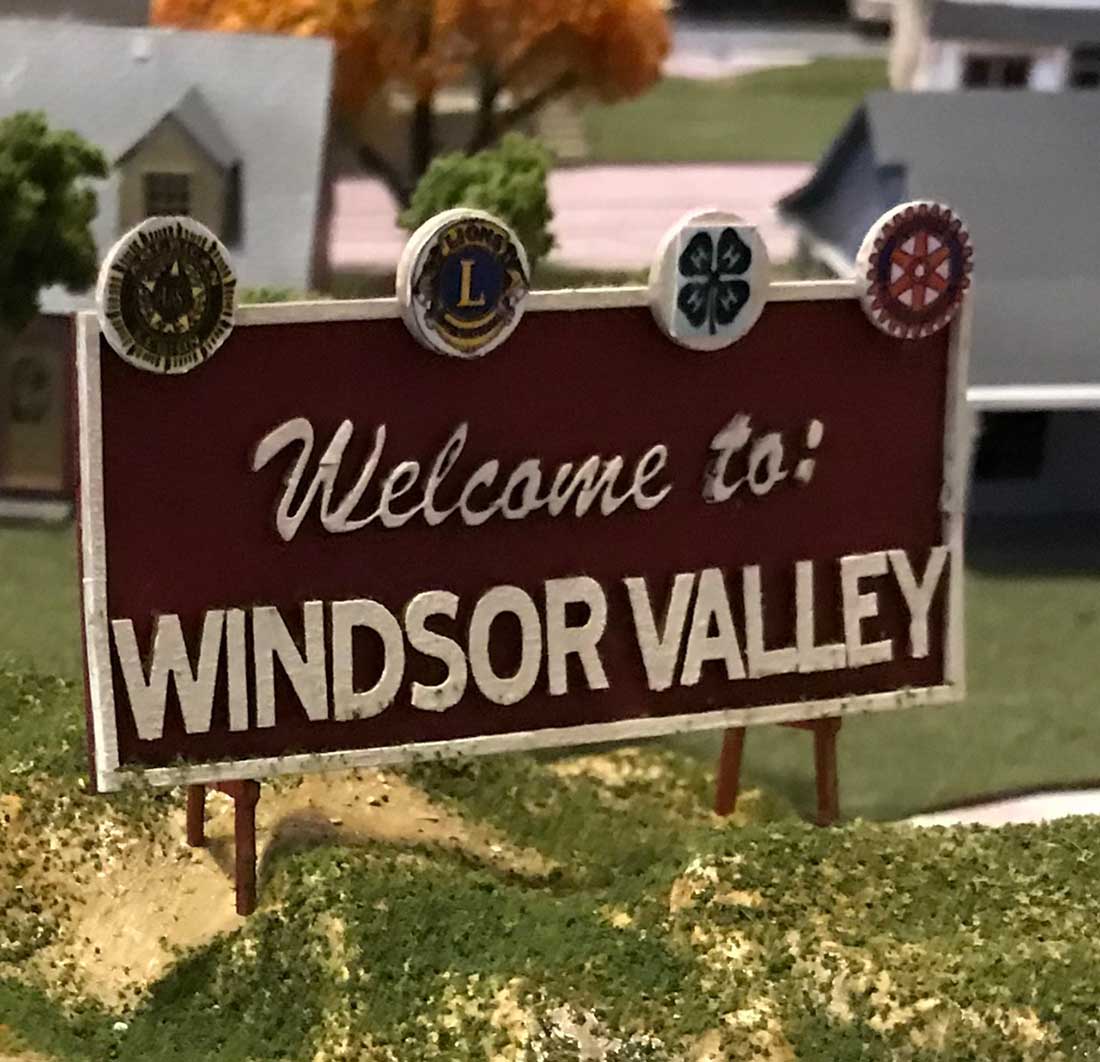
Windsor Valley is a fictitious conglomeration of one and a half lifetimes of memories. It’s far from professional, and a long way from being finished. But dad’s not doing so well lately, so it will eventually become a legacy project that I carry on with on my own.
My father was always a fan of your site, Al, and he always looked forward to seeing your emails in his inbox. When he stopped reading and checking his emails, I took over and started reading them daily… and this small layout wouldn’t be much at all without everything I’ve learned from your starter’s guide and all the amazing contributors. For that, my dad and I both thank you all.
My apologies for rambling on so much. The details for anyone who might ask:
Size: 8’x4’
Scale: HO
Power: DC (though I do have a DCC controller—but with dad’s dementia, I wanted to keep operations as simple as possible)
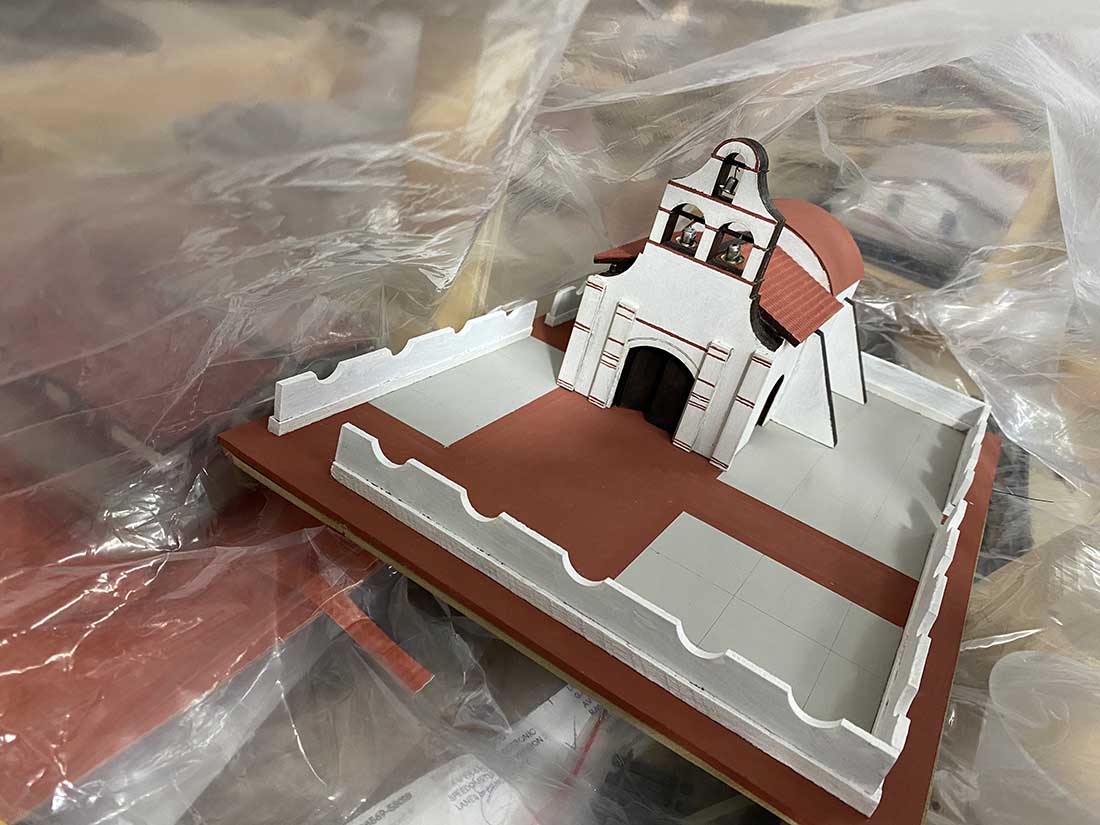
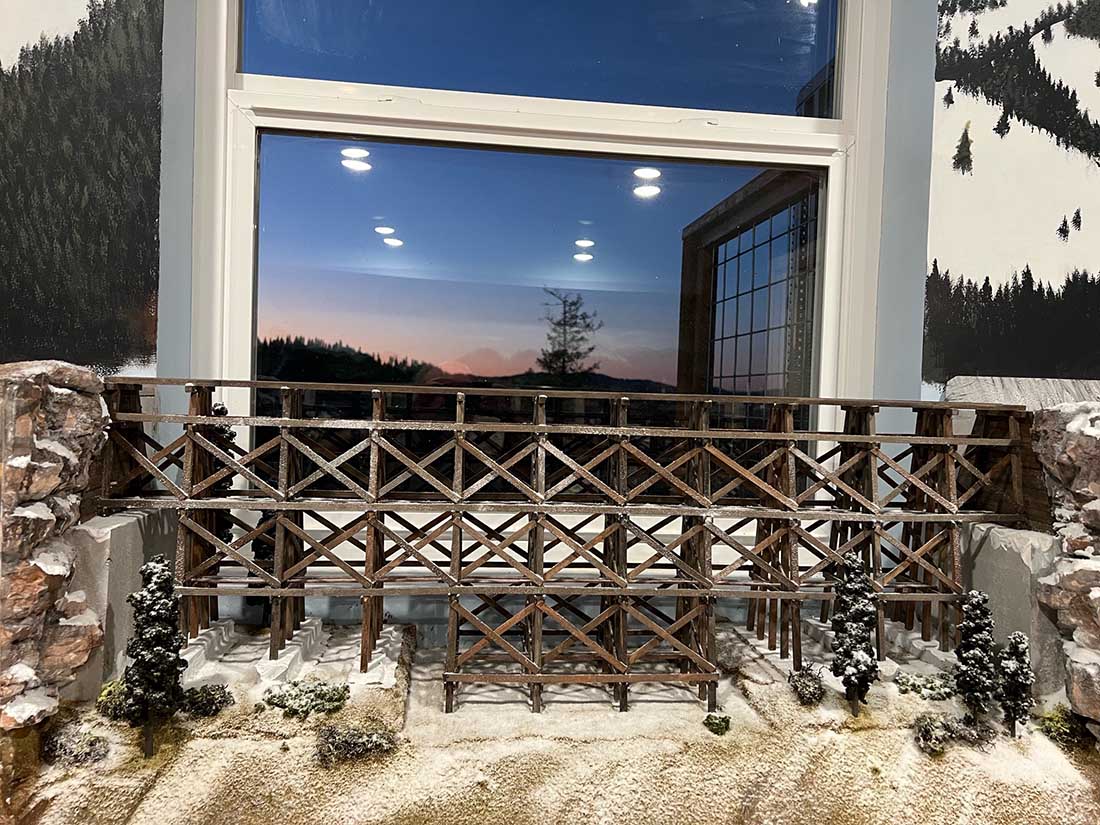
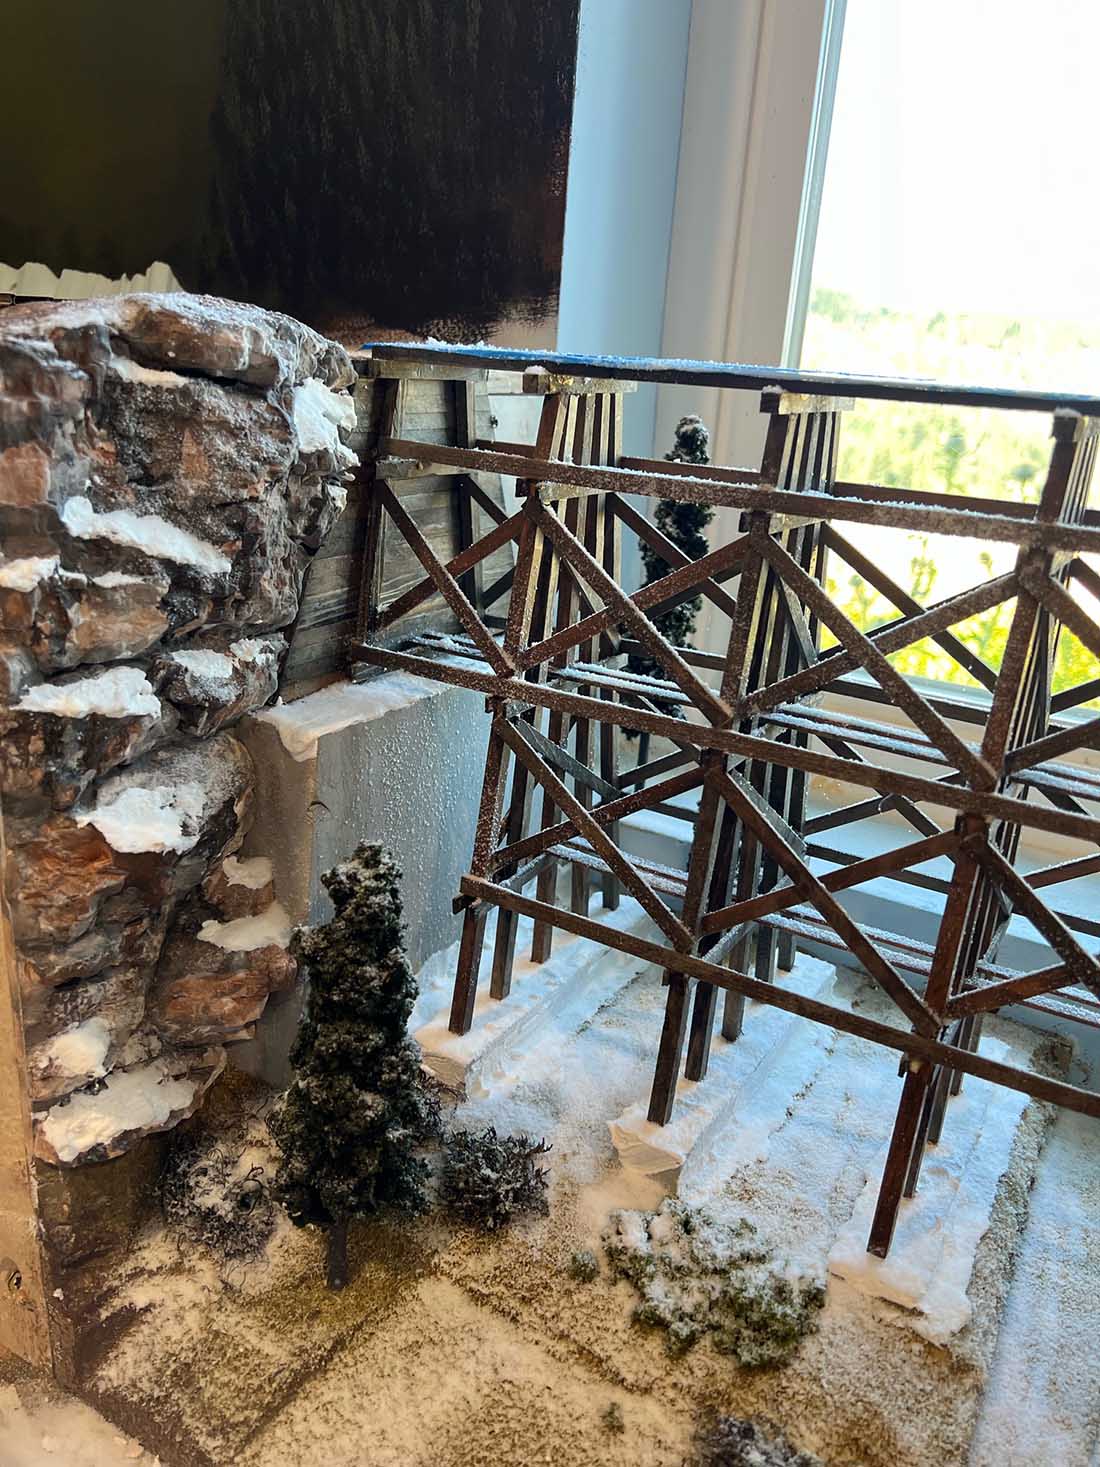
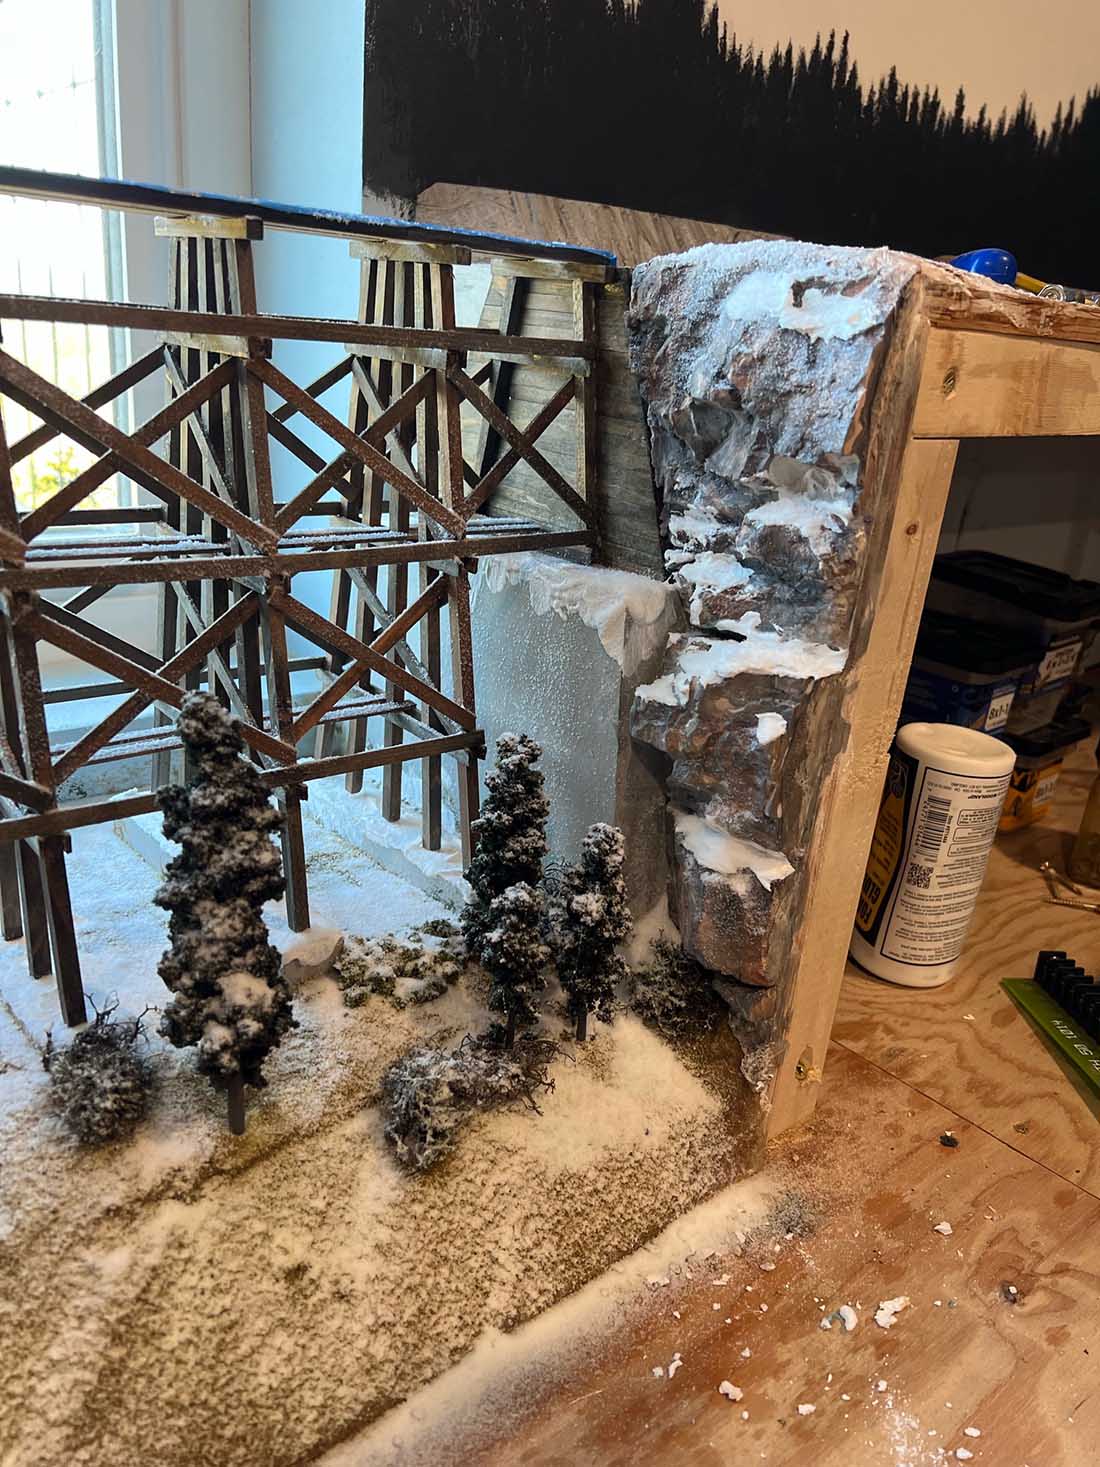
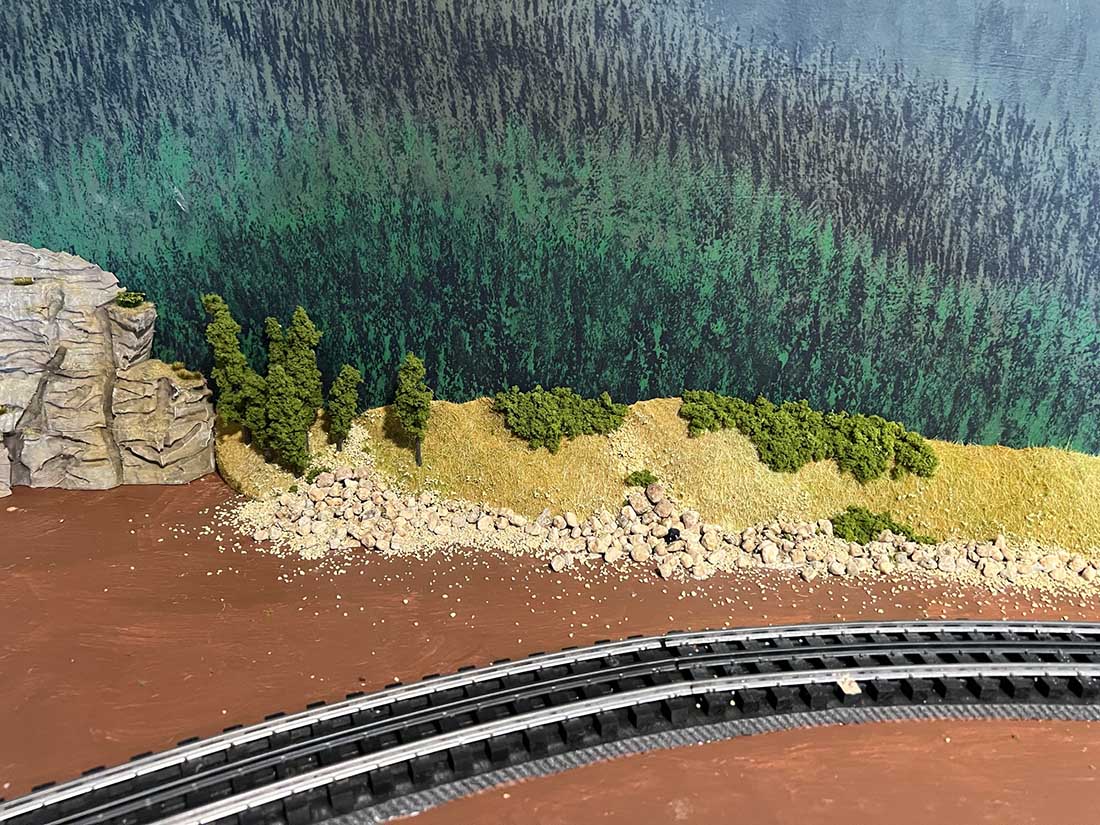
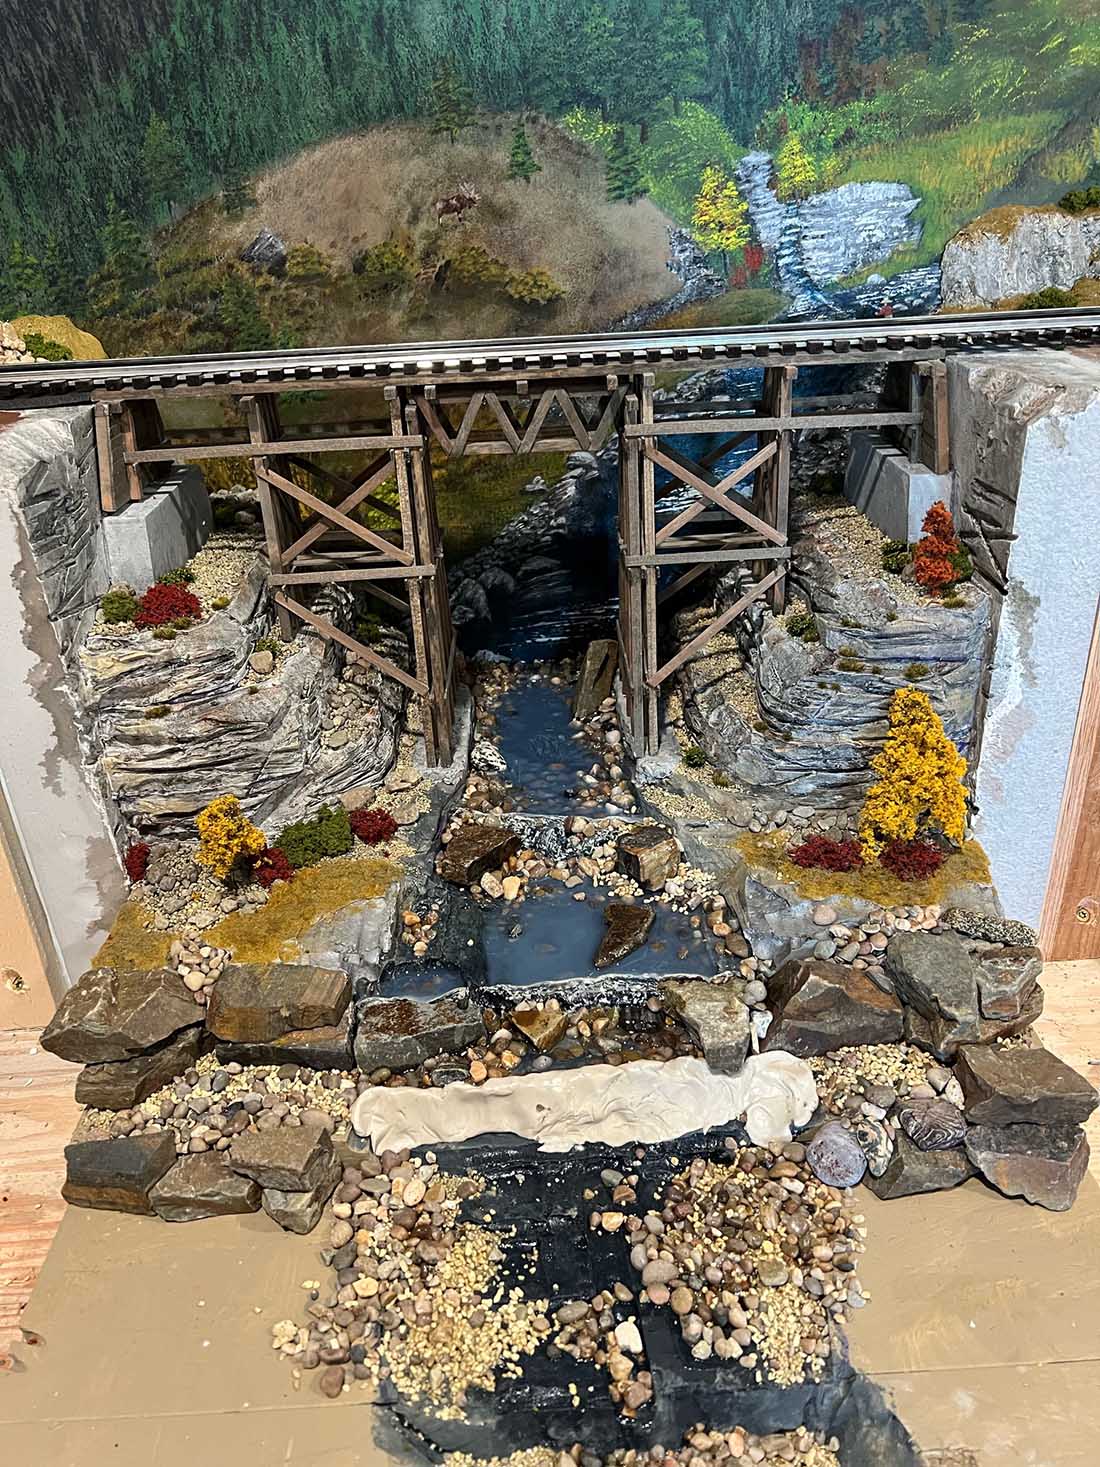
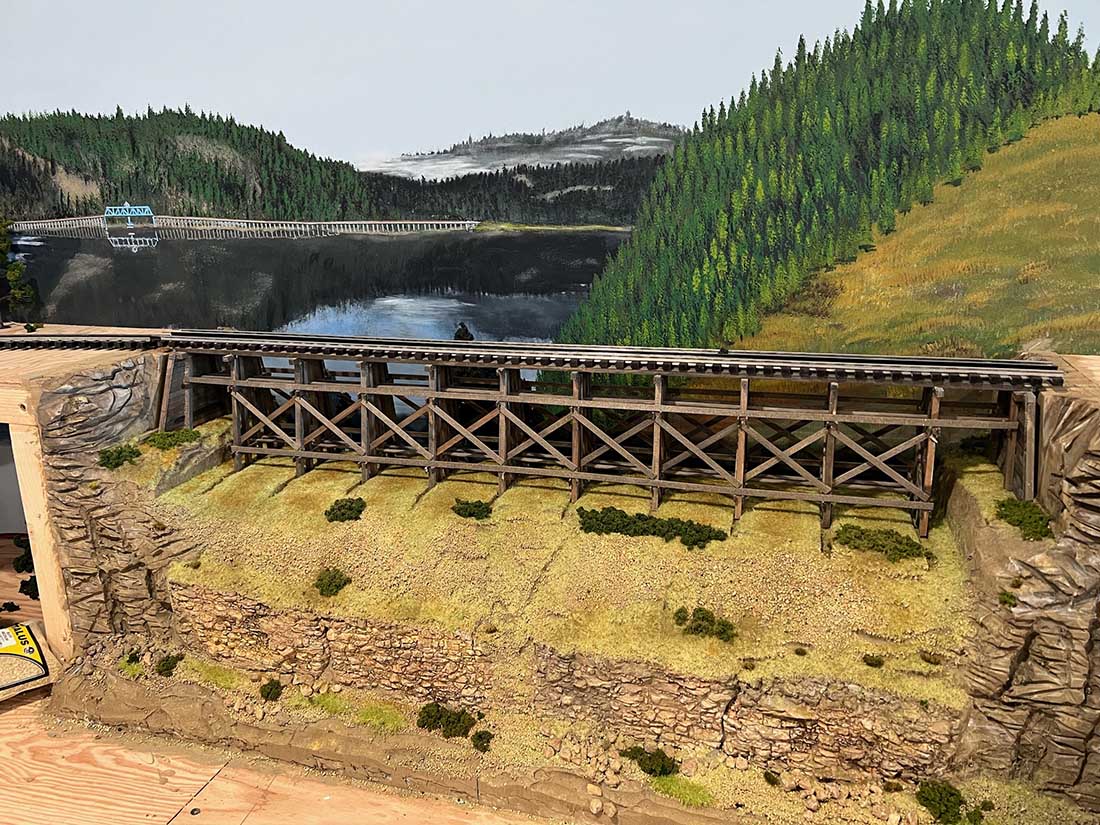
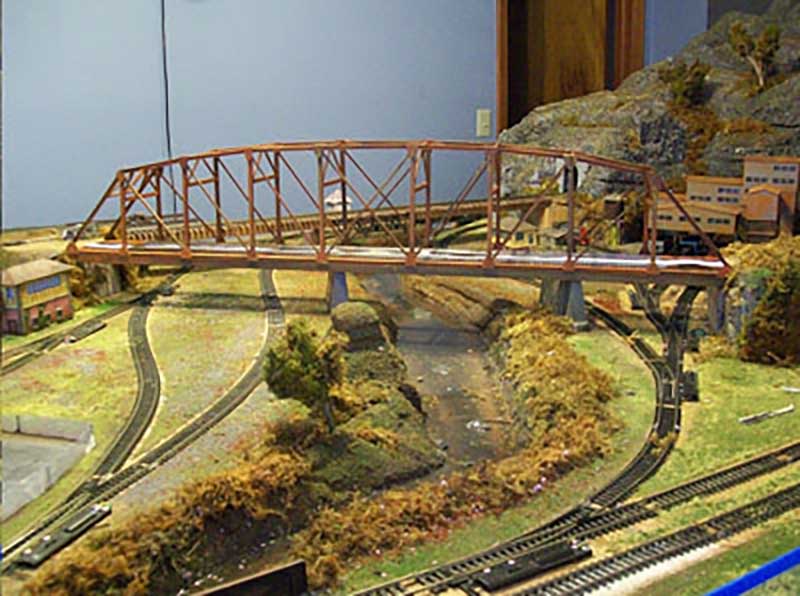
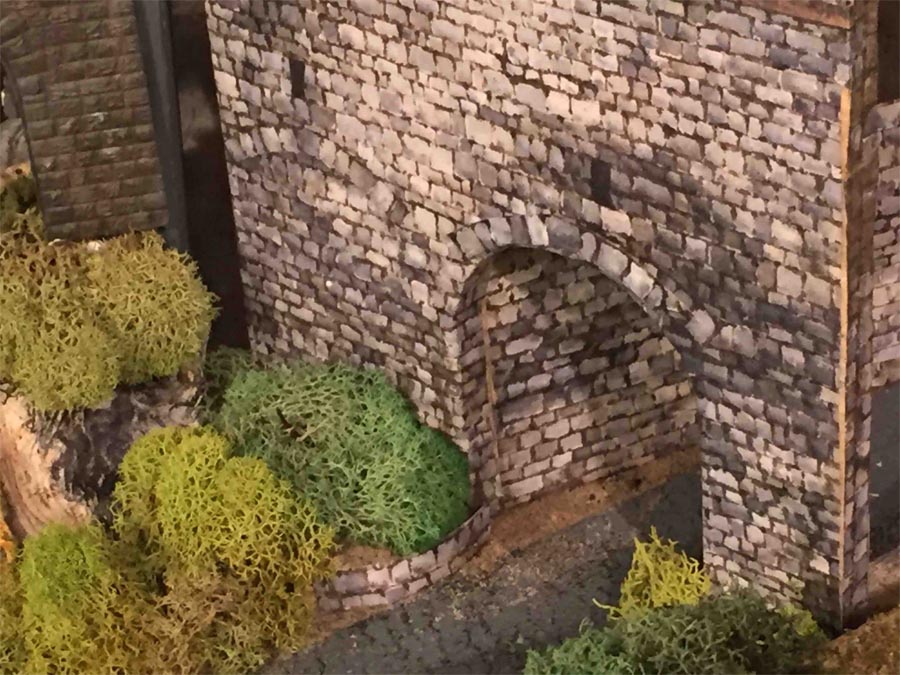
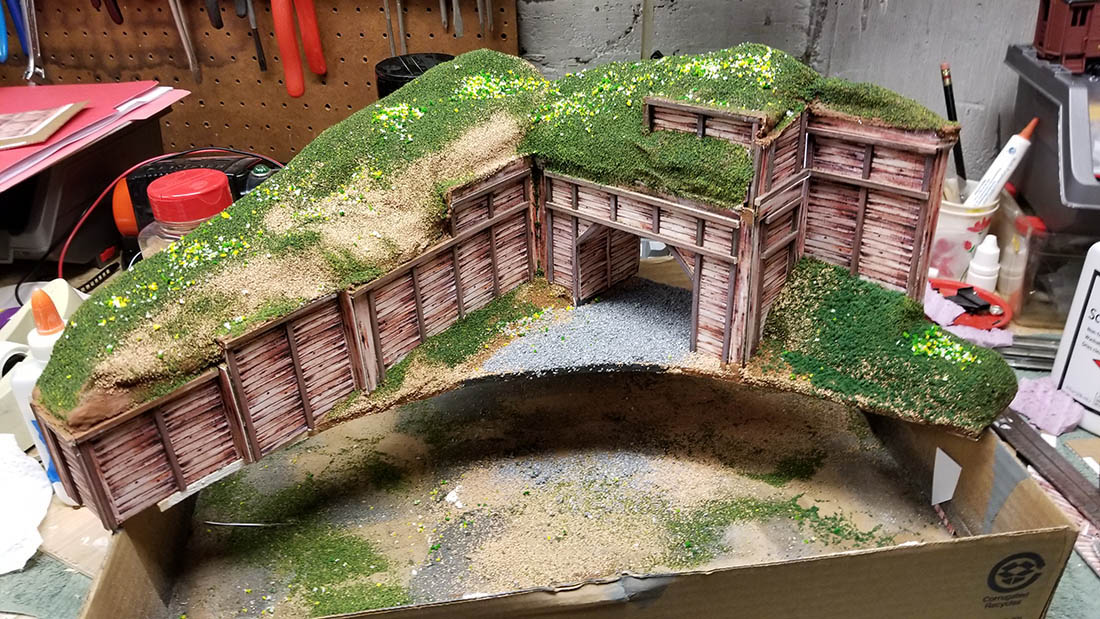
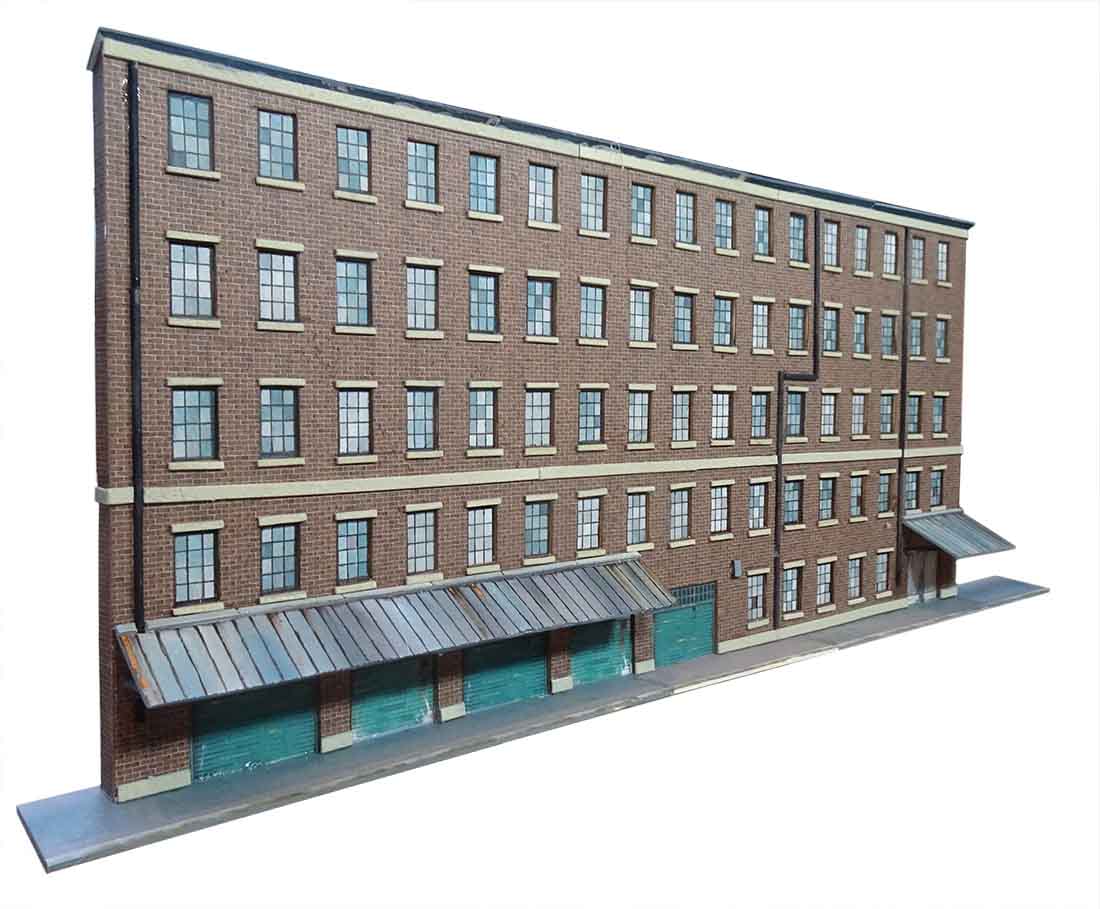
All the structures except two were made by me, including the rough attempt at a scratch-built curved deck bridge.
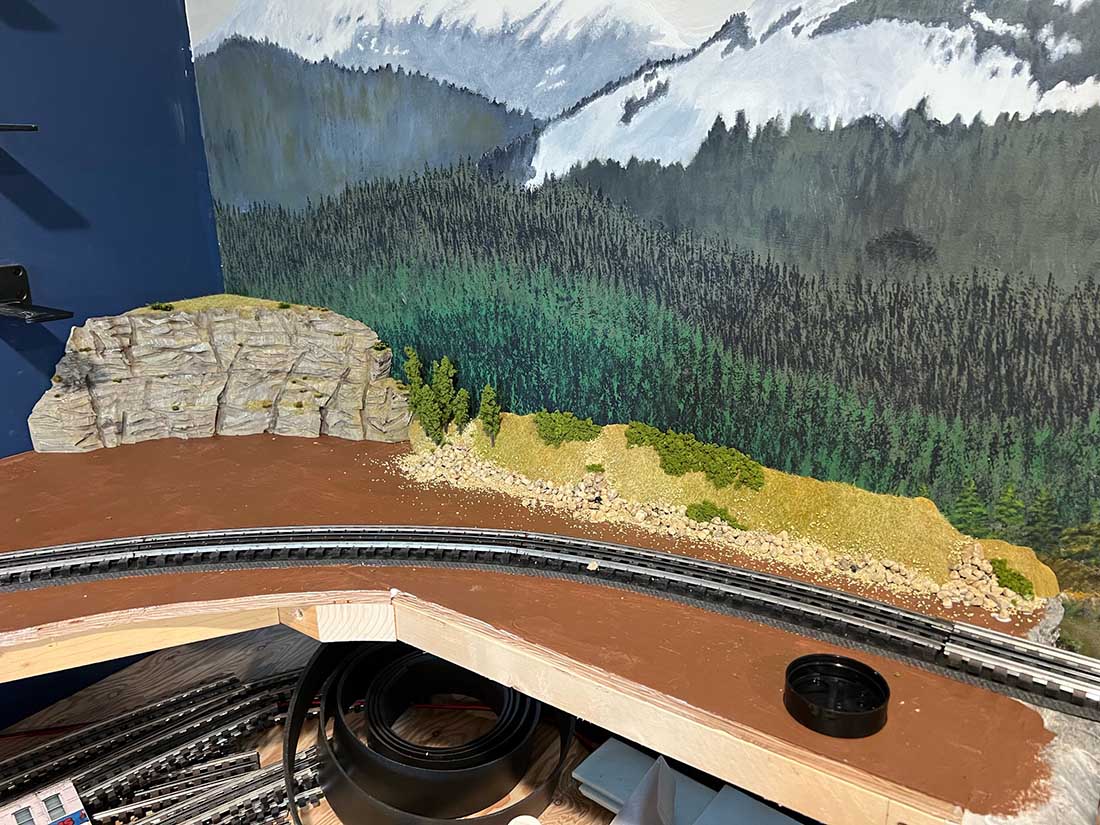
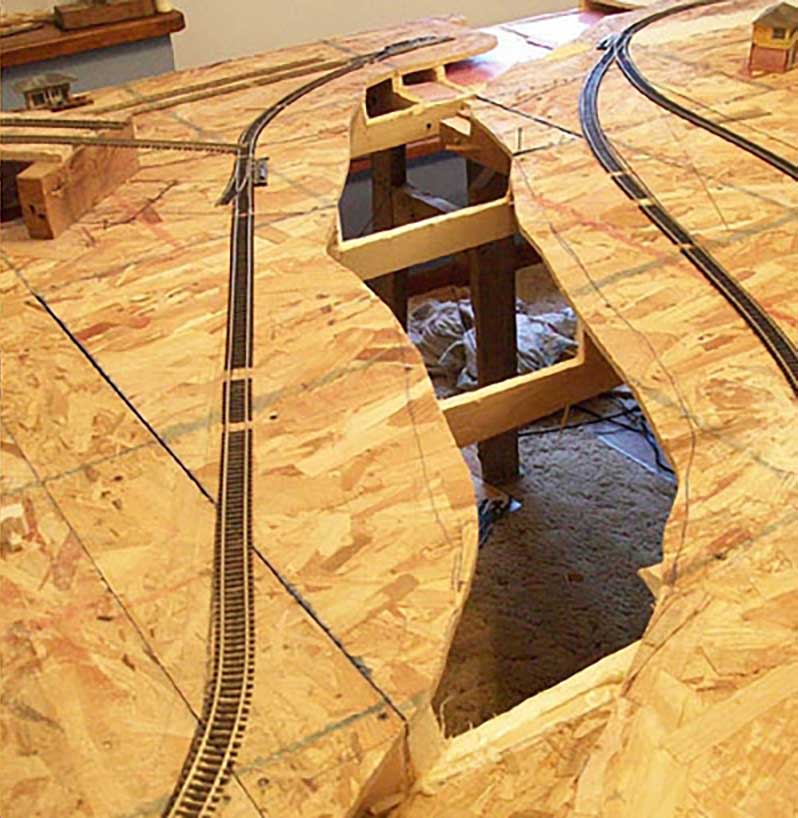
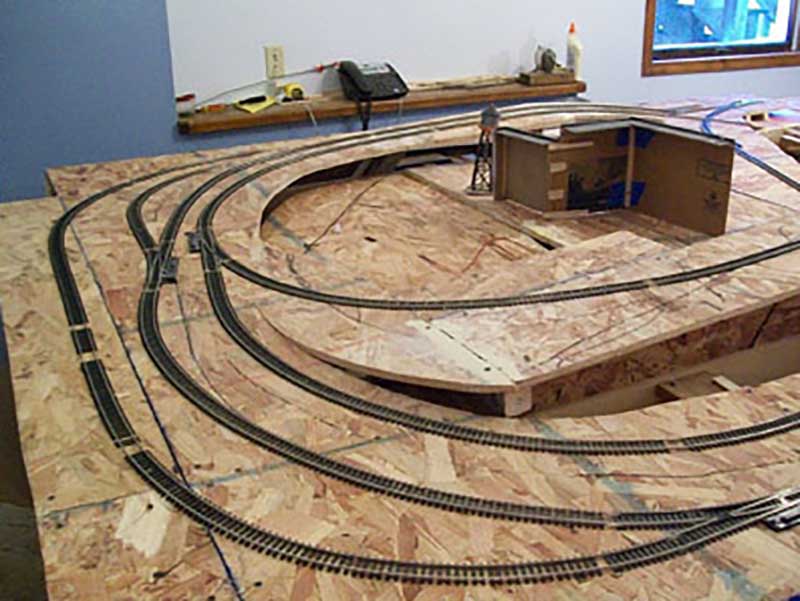
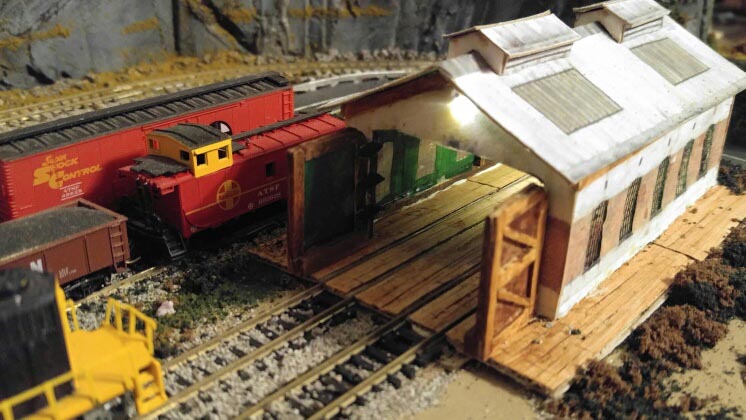
I’ll include a few photos of the evolution of the layout, but also will include a video link showing what it’s like now.
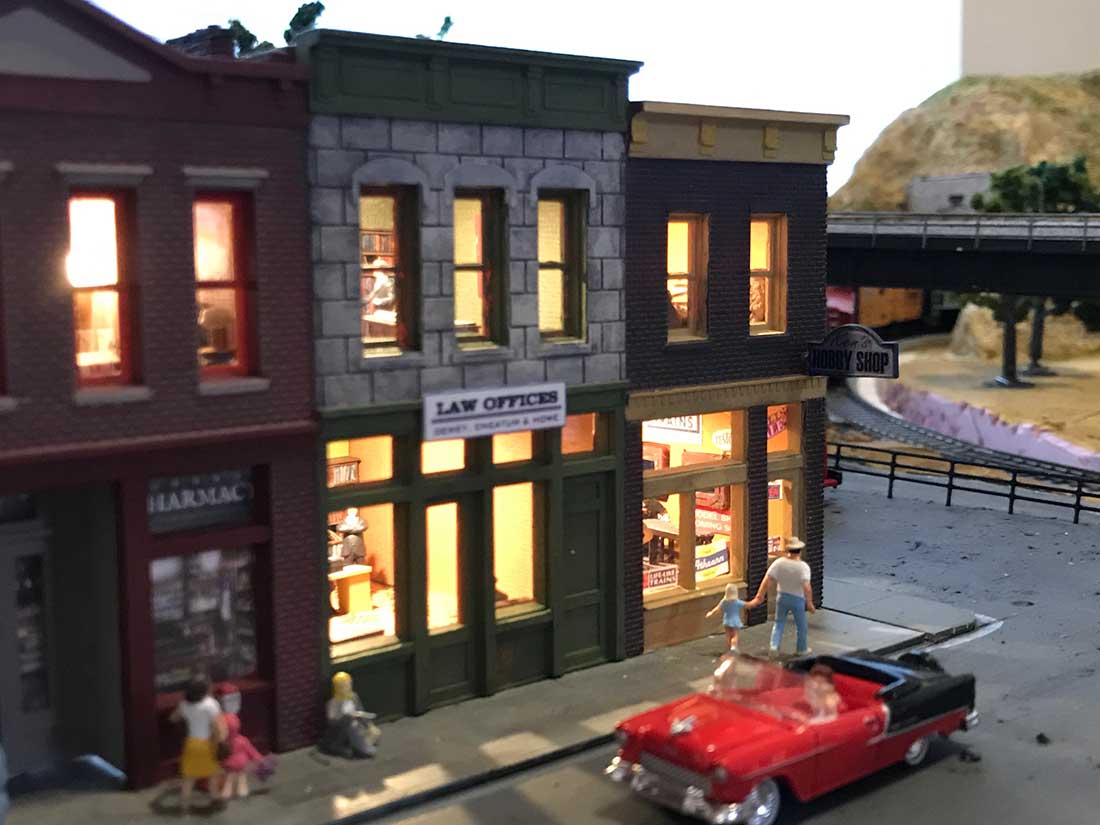
The last photo shows a man and his young daughter walking to the local hobby shop. It’s reminiscent of the occasional Saturday morning trips to Bobbye Hall’s Hobby Shop dad used to make mom and me accompany him on. Now I so wish I could get those days back and enjoy them instead of fussing.
Thank you, and cheers,
Windsor and Liz P. in Texas.”
A big thanks to Liz for sharing her HO scale small layout – I absolutley loved the narrative behind it. It’s heart warming stuff, so many of us have fond memories of trains and the old man.
So thank you, Liz!
Quite a few small HO scales on the blog now:
If you have a story behind your layout, please do mail me or leave a comment below, it’s what really makes this hobby in my eyes.
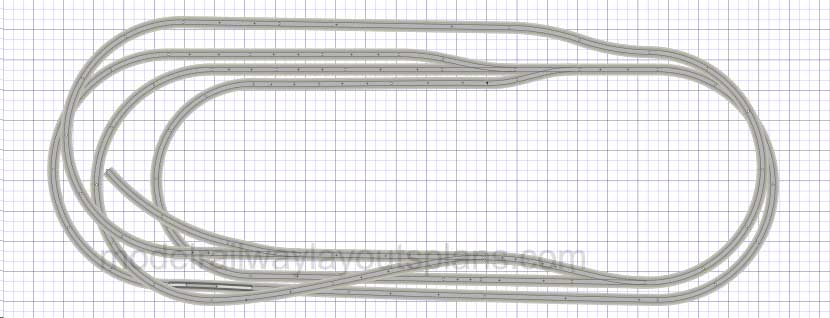
Small HO scale switching layout
HO scale layouts for small spaces
That’s all for today folks.
I’ll keep the silly sale open for a few more hours for all the stragglers. Then is disappears like a shadow in the night.
You get all the below for $9.
If you want to watch the full length version, with Bonkers John at full throttle, It’s here.
I’ve never given away so much for so little – just $9.
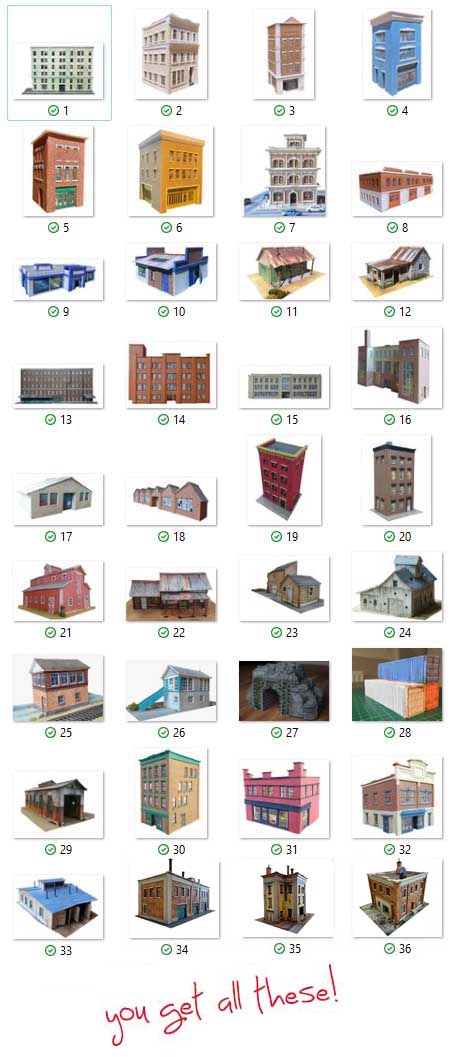
You get 33 printable buildings and the Beginner’s guide for just $9.
Even if you already have the Beginner’s Guide, there are still three brand new buildings.
What’s more, you also get the warm and fuzzy feeling of directly supporting the blog, which at the moment, is struggling somewhat.
Course, I’m biased, but the three new buildings on there own are worth $9 each – that’s what they sell for in the store.
So please don’t miss this offer – you are saving over $300.
What’s more, It will never, ever, ever be this price again.
Grab it right now before it disappears – it’s just $9 for the lot.

Are you really going to miss out on this crazy offer?
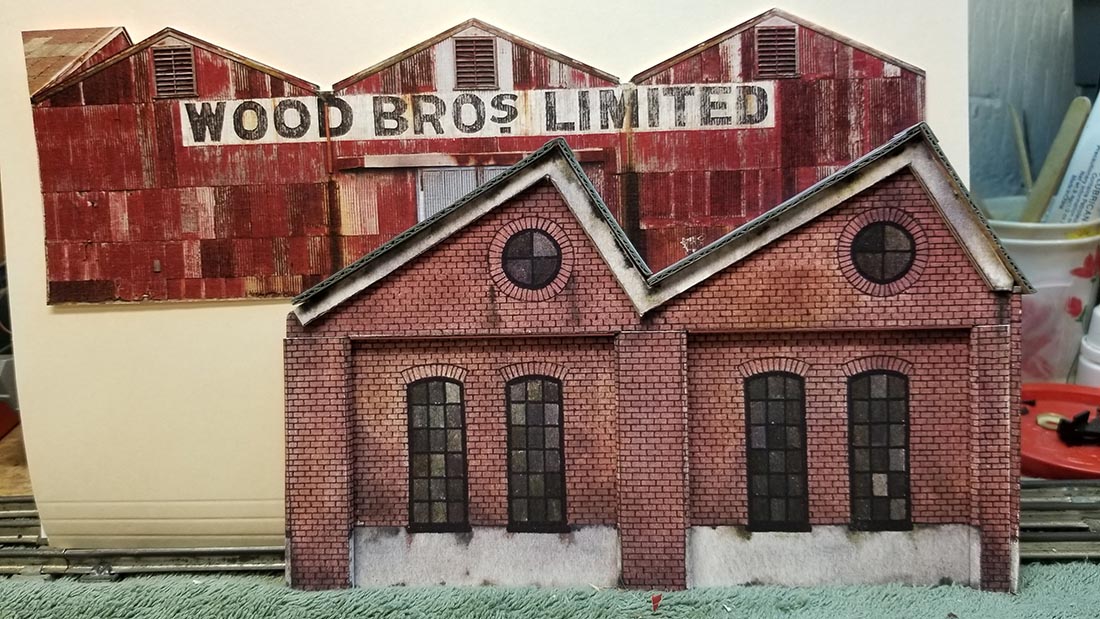
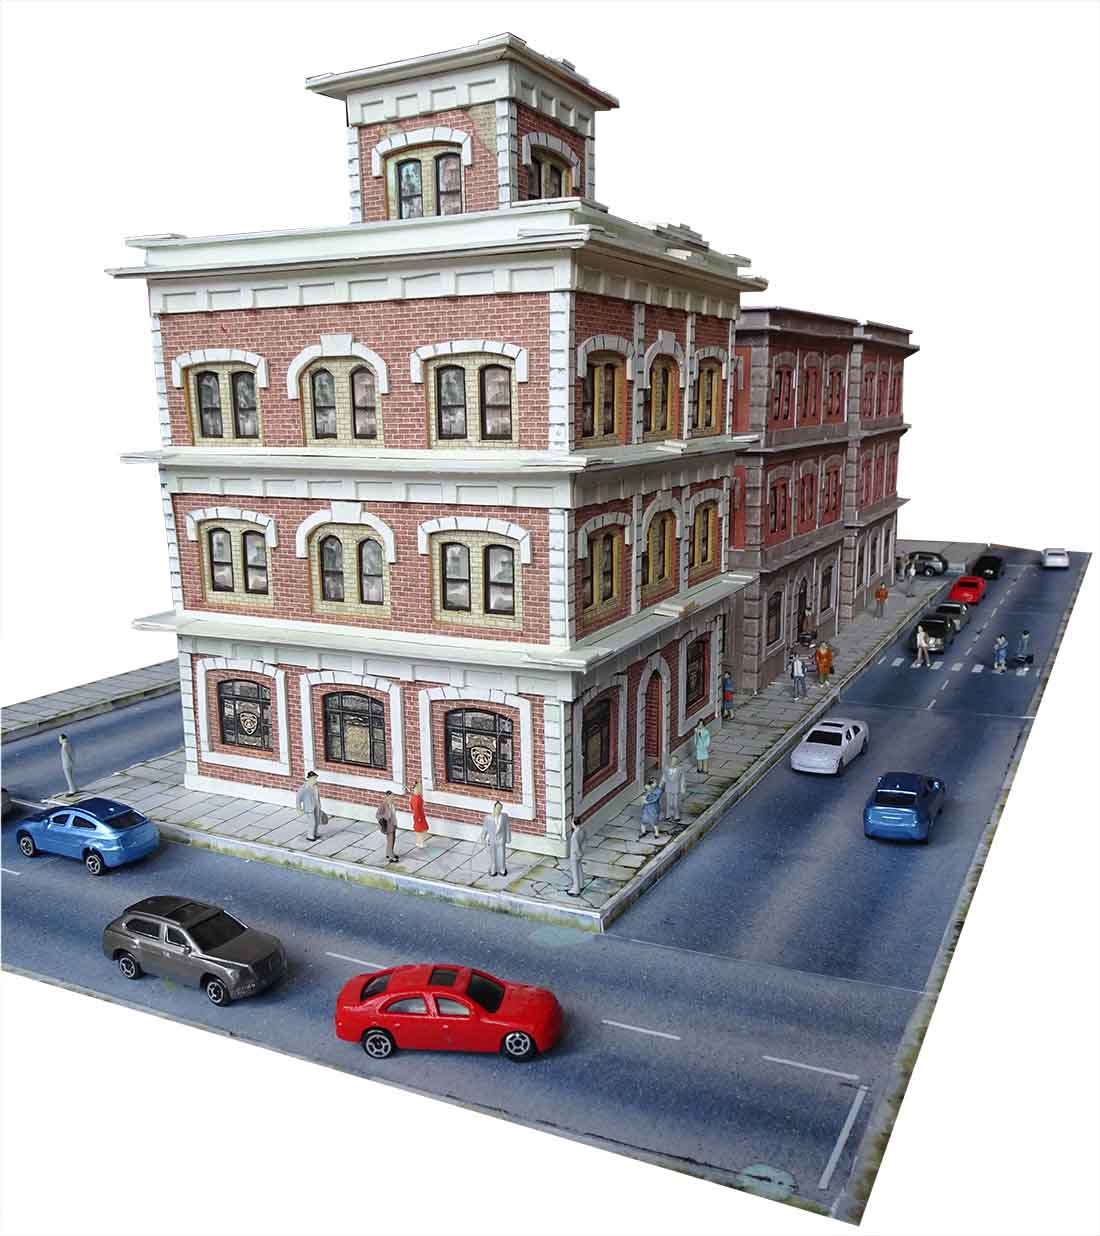
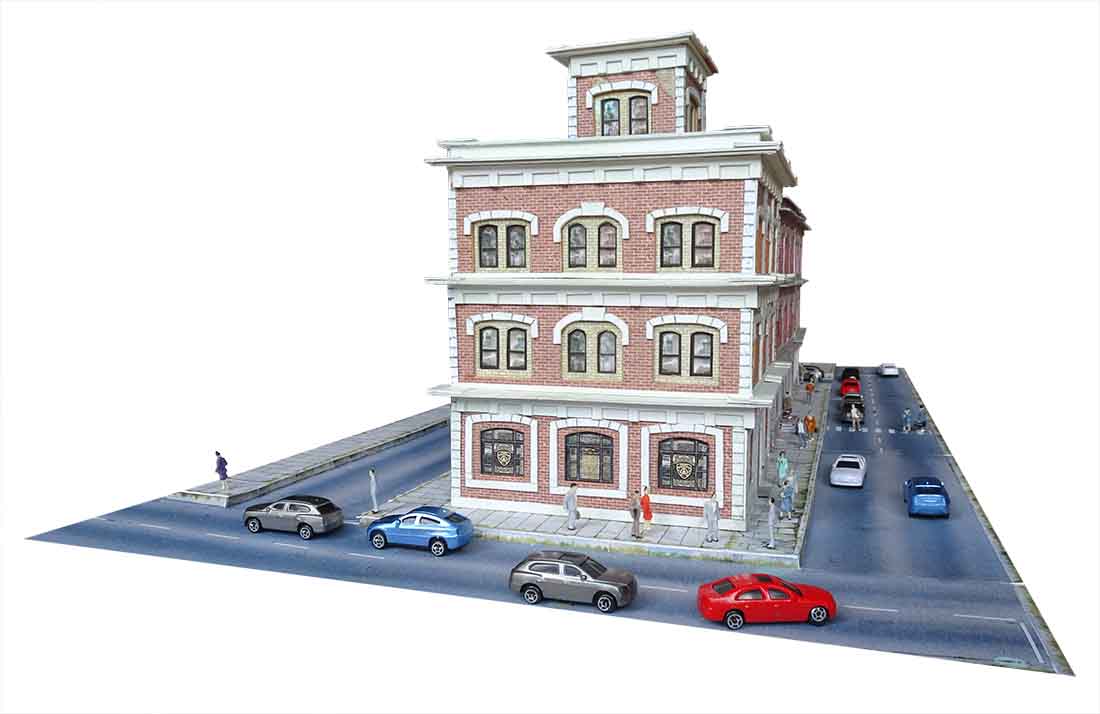
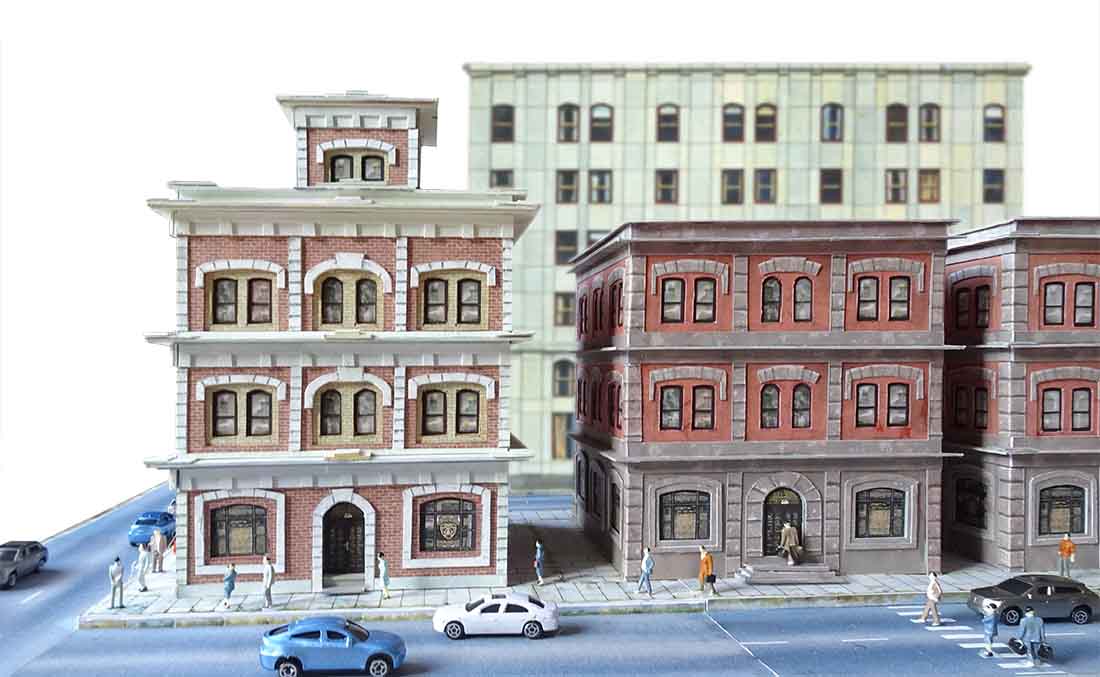
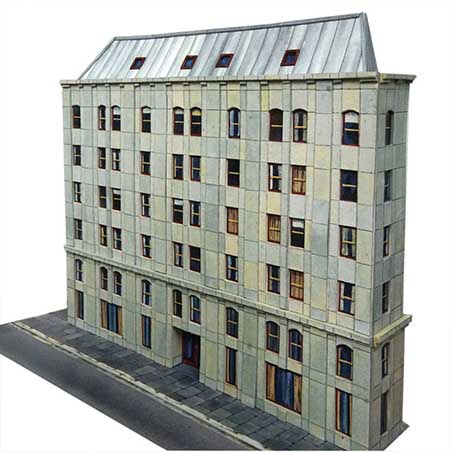
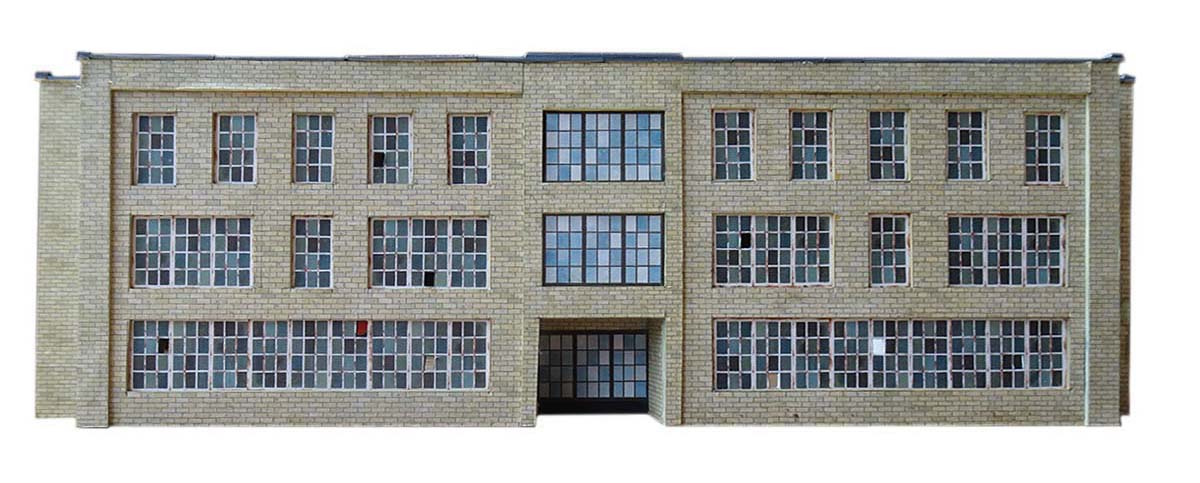
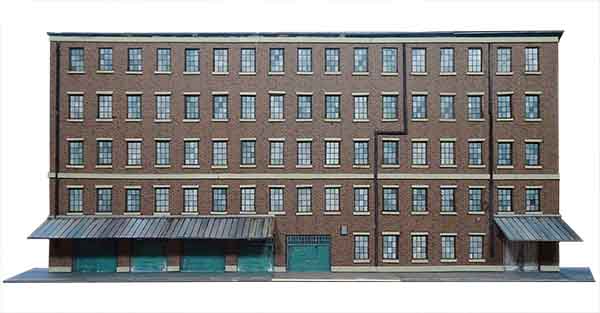
Here are some of the buildings on your layouts:
“Al, like you I have been retired for some time now.
I have gone back to my American Flyer, s Guage boyhood train.
I have had “n guage, HO, G scale”, and this American Flyer has been the most fun of all. I guess it takes me back to my parents basement where my 4 x 8 foot layout was back in the early 50’s.
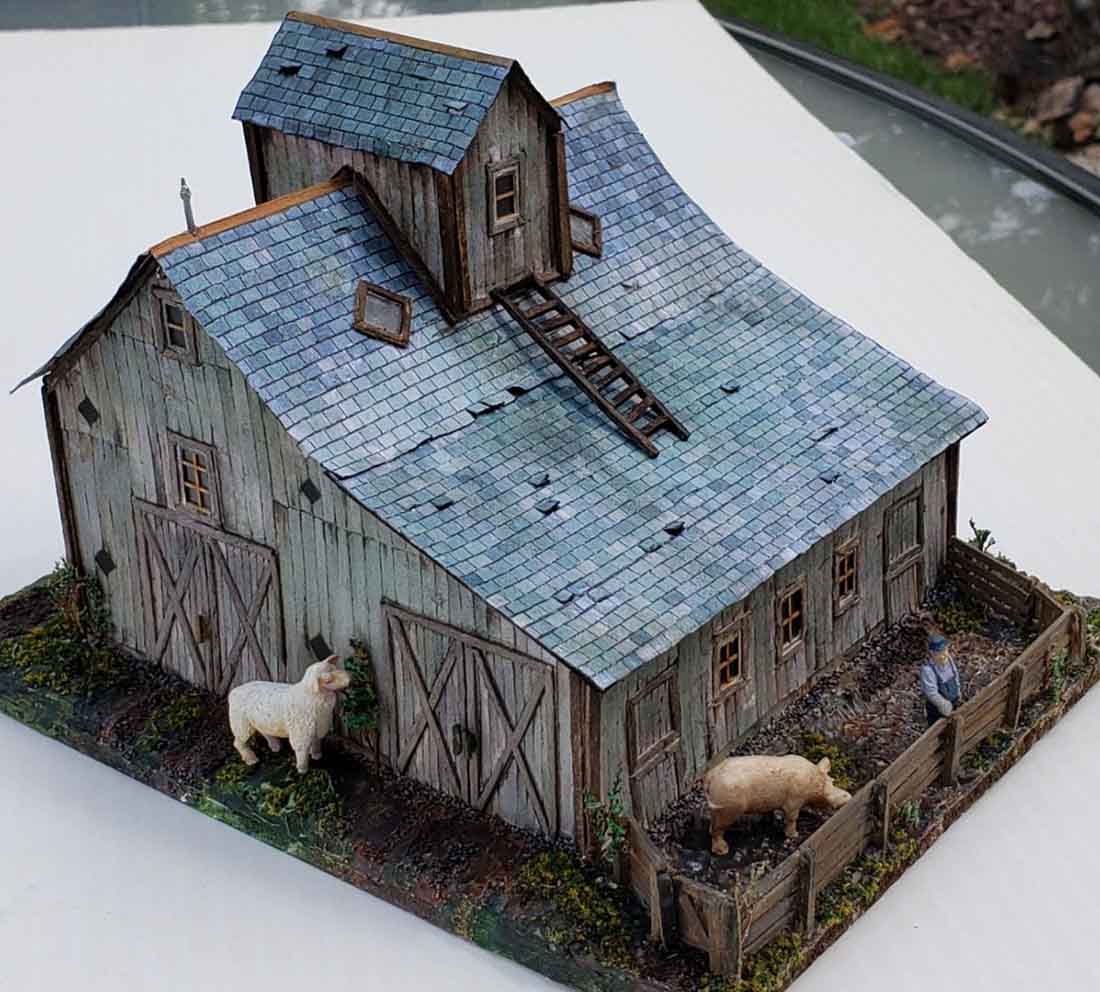
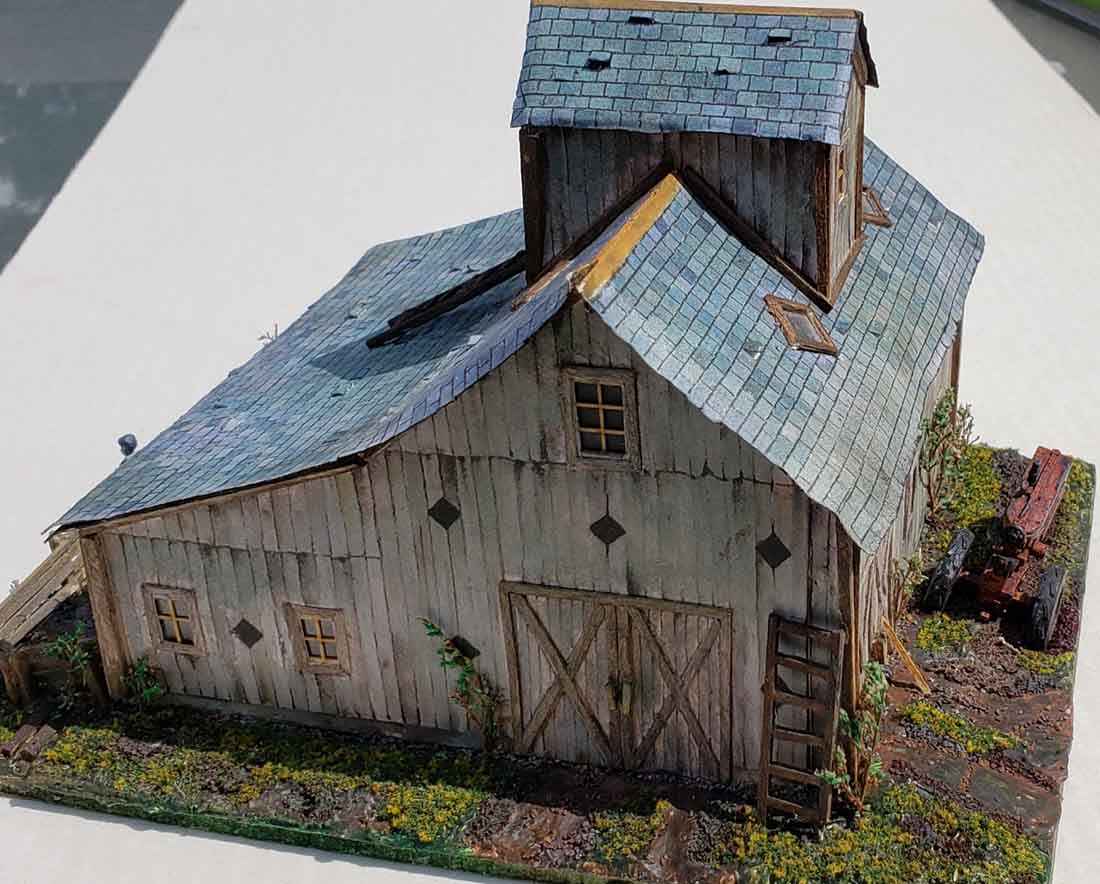
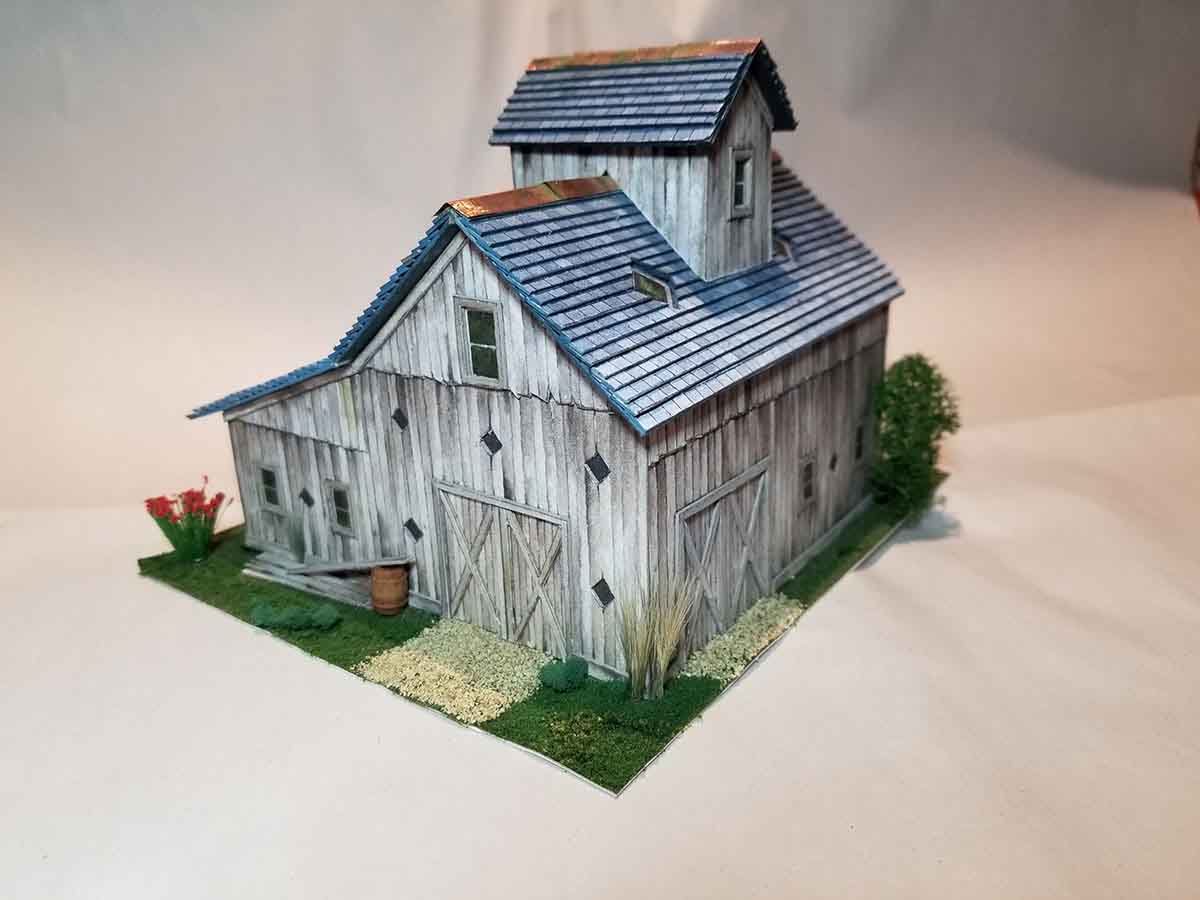
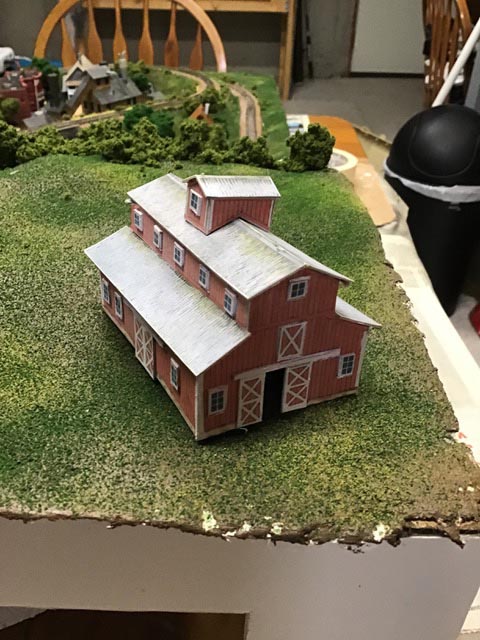
I resized your wonderful old barn and had so much fun building it. Here are some pics. Hope everyone enjoys it as much as I have.
Jerry from Illinois, USA.”
“Al,
Great project and a lot of fun. The barn is on it’s way to the Railroad Club.
Charles”
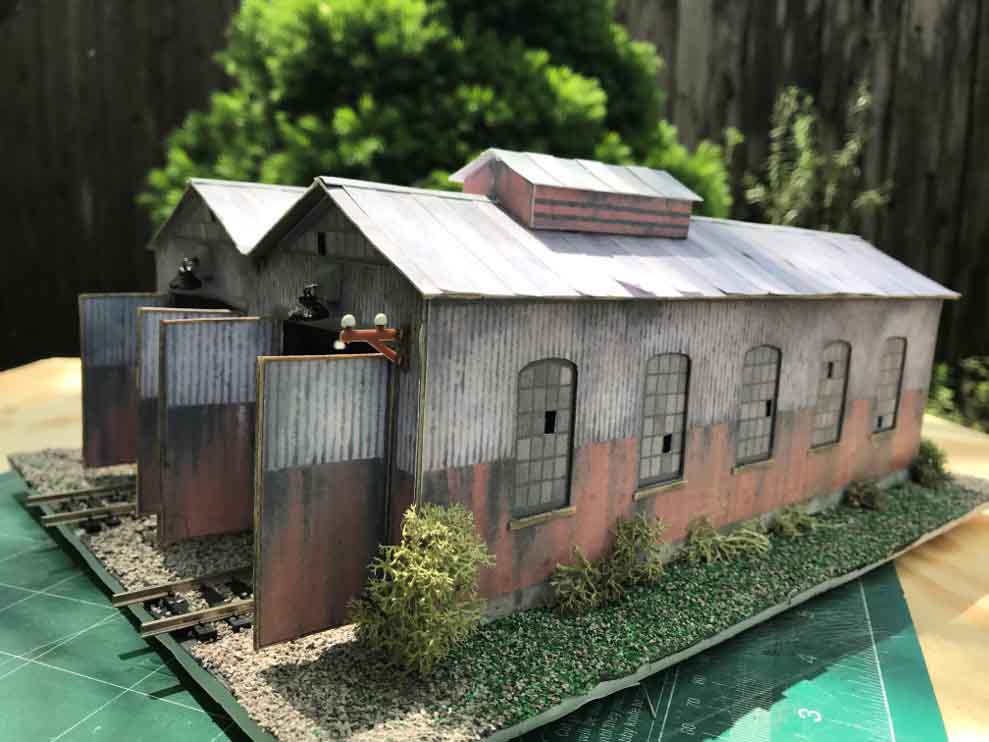
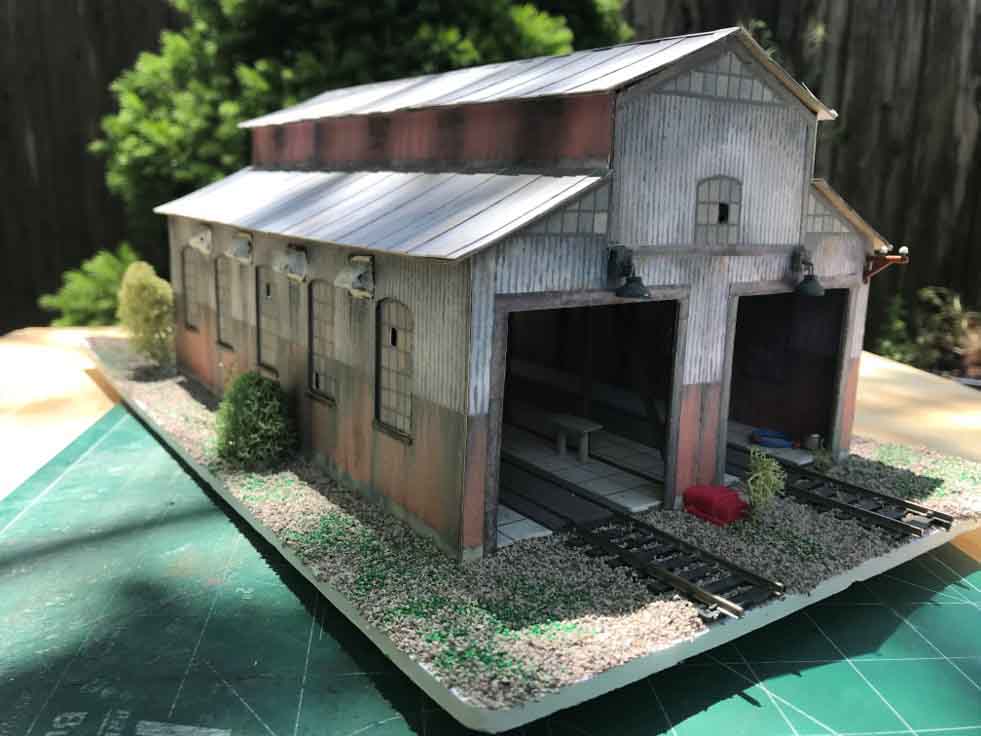
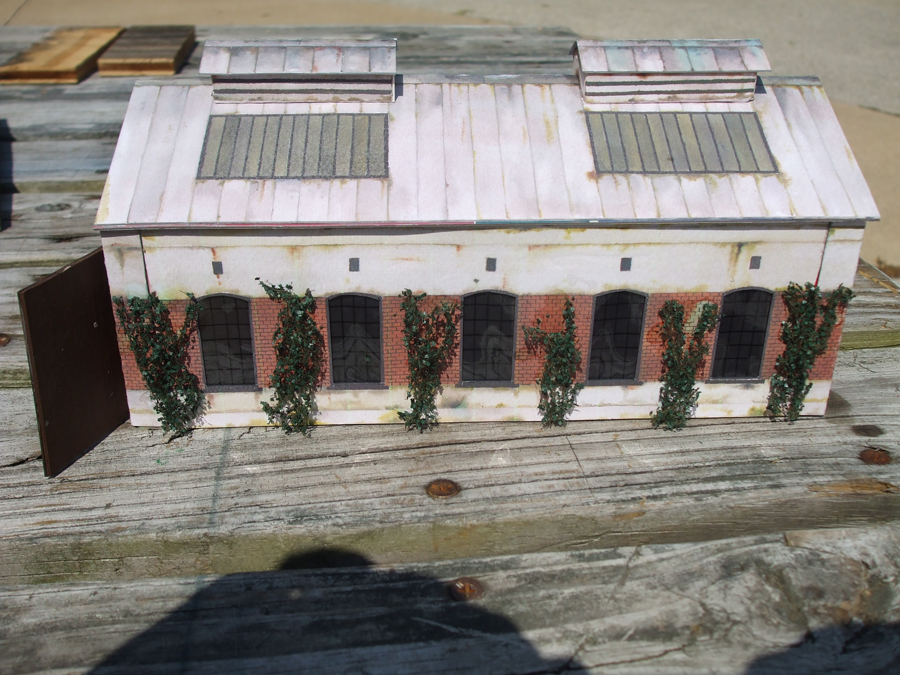
“Al
I have enjoyed your site for a long time, since I have retired had to find something to fill the spare time, I purchased one of your bundles and printed out one of the Engine sheds among many others.
I have created my own version of the Engine shed as shown in the pictures.
Side walls have ventilation fan vents.
I have dreamed to set up a model railroad layout for a long time and when I started to make it a reality one thing came up after another, like kids, education, weddings and now I have time and room to finish the dream, but not much of a budget.
Best to all talented people like Hall of Fame Dave, talented hobbyists and their many beautiful layouts.
Ryszard”
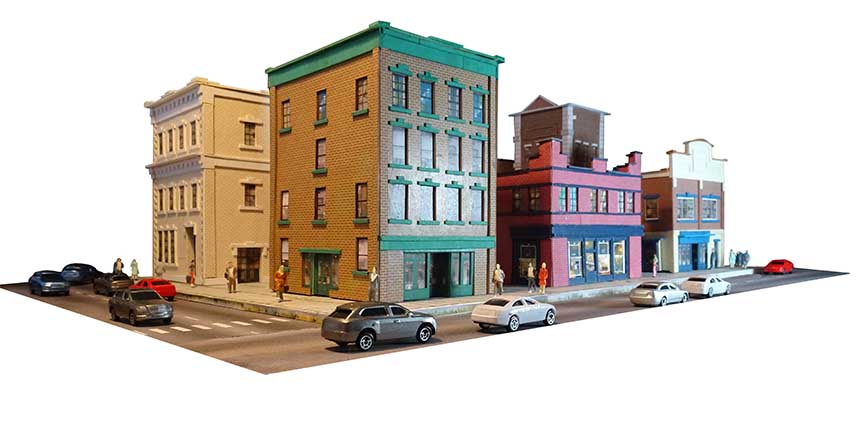
And of course, there’s lots of the printable buildings on your layouts.
Here some pictures of them:
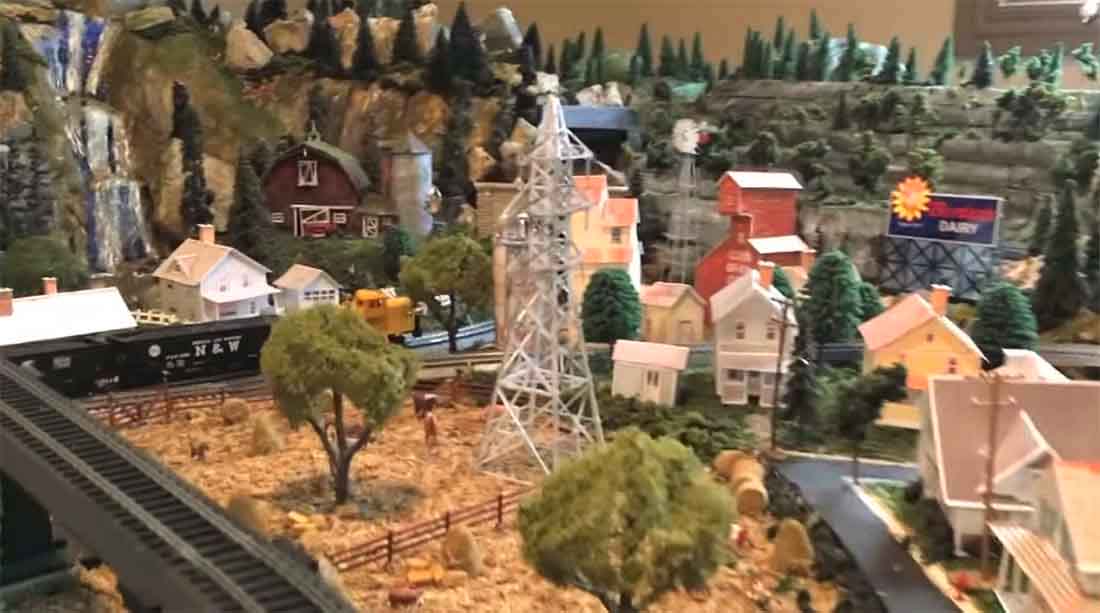
Mike has used a lot of the houses and grain elevators (not featured in the bundle – just using a print out example).
Rick’s has also made quite a bit of the printable buildings for his layout:
Rob has also created quite a few of the houses:
Cecil did a fab job on the Church:
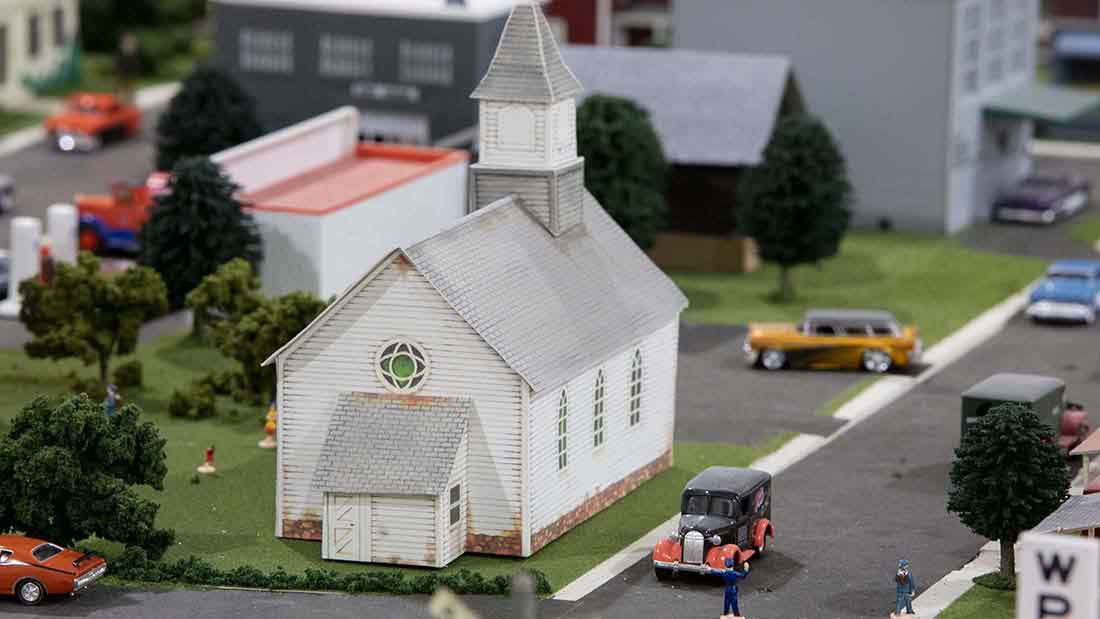
Again, the church doesn’t feature in this bundle but you get the idea.
Lita has started the scenery with the houses.
Here Glyn has used the viaduct print for a bridge base.
Gene adds a light to his engine shed and houses.
Rob adds a tunnel to his layout.
Nick’s simple layout looks fantastic.
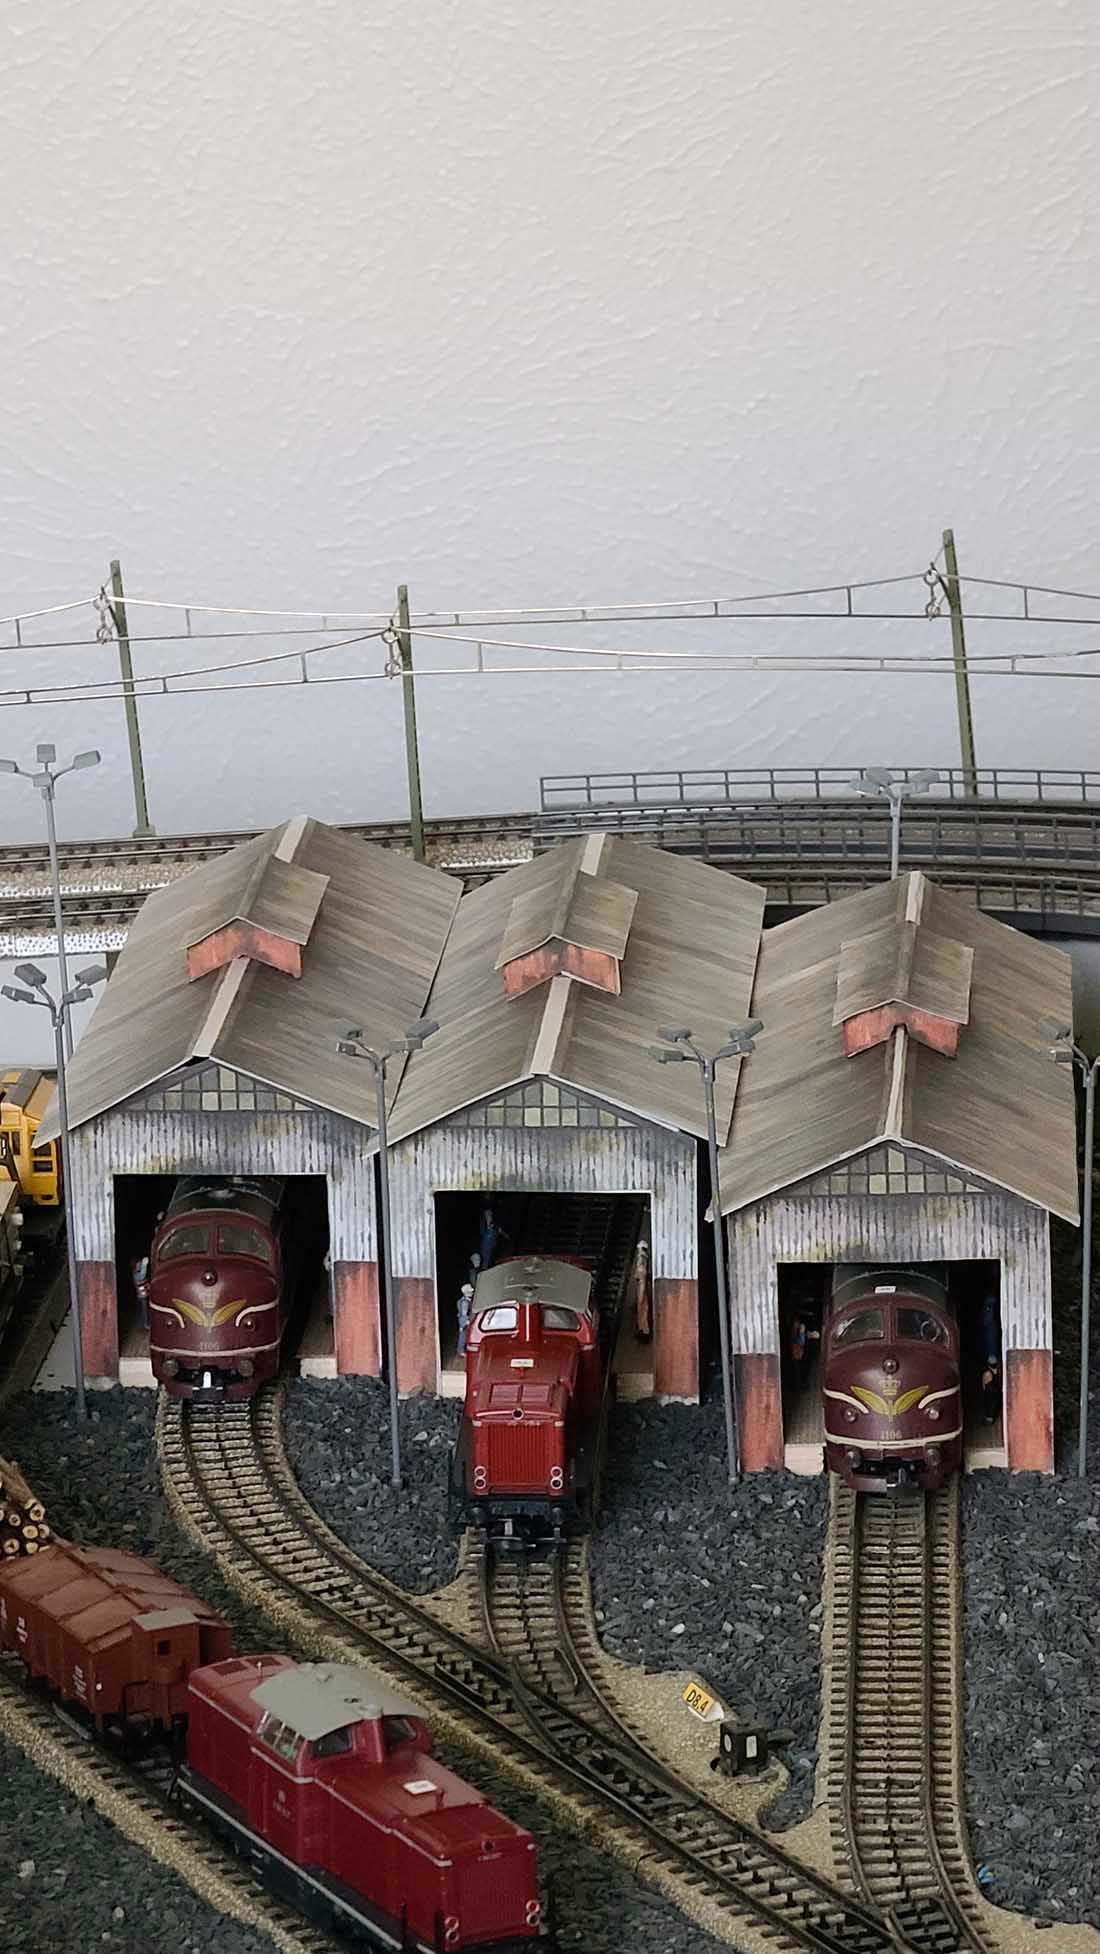
Dana’s engine house (It’s on the bottom one of this one).
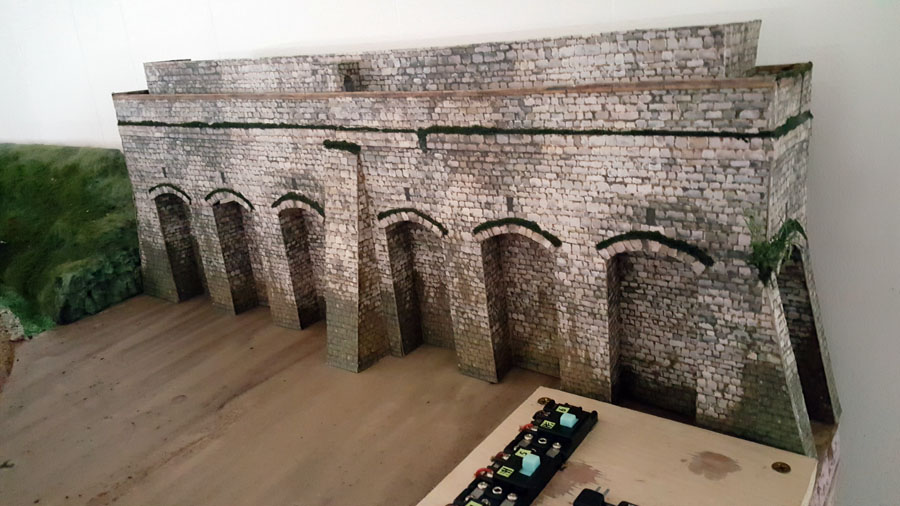
Peter’s Viaduct (it’s on the bottom of this post).
Richard’s layout has lots of the printable buildings!
Mike’s layout also has lots of the printable building on.
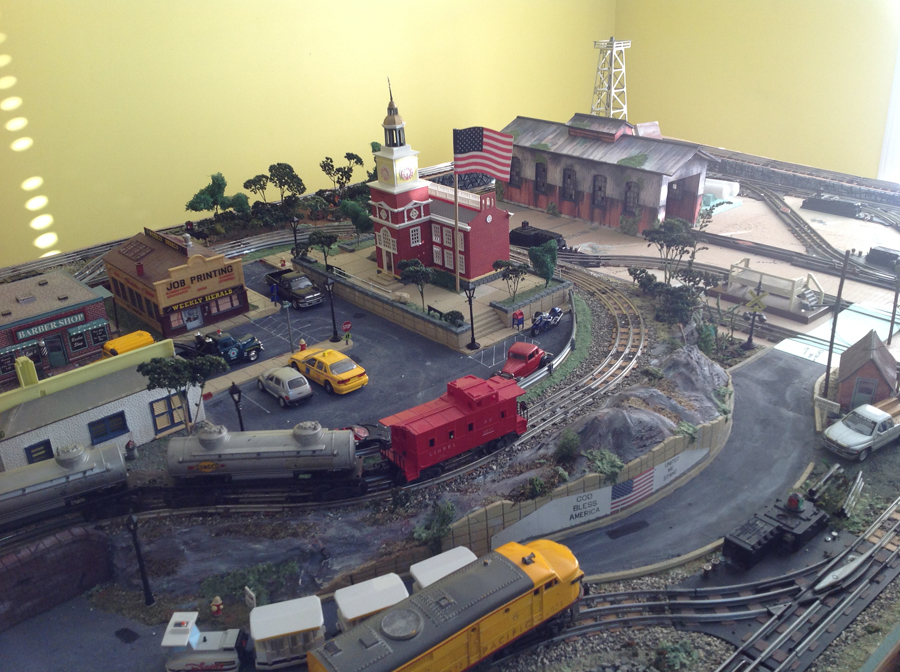
Stephen’s layout is another one with the Engine House.

Michael has done a great job on the houses.

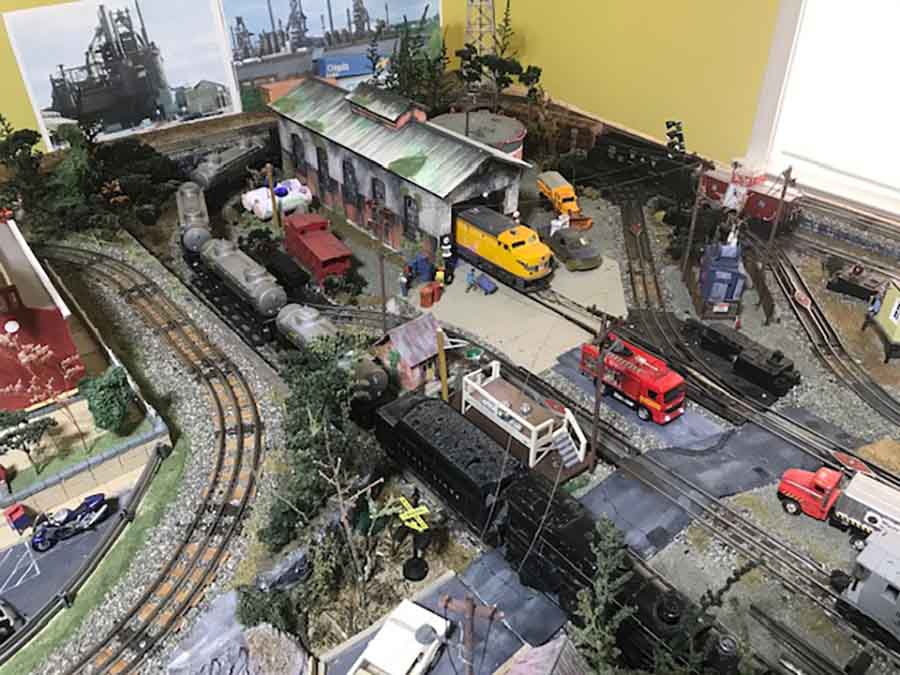

Lots of the printable buildings on Bob’s HO scale

John’s printable building street.
There are many, many more on the blog. It really does make my day when I open my inbox and see some on a layout.
Also, they are a great way to make that all important start – and that’s what it’s all about.
Right now, until Monday, you get 36 free printable buildings with the Beginner’s Guide for just $9!.
Here’s what you get:
And these are the buildings made from them:
All of these buildings are made from the same print.
And in the one below, a different building has been dropped in to make a back drop:
This building has been added to the free bundle too:
So you get 33 printable buildings and the Beginner’s Guide for just $9 – but only until Monday.
And here are some better pics of what you get – all for $9.

The prints make up a ‘scratch build kit’, and you are only limited by your imagination.
Here’s an example of the backdrops you can build.

But don’t forget – it’s not just the printable buildings you get – it’s the Beginner’s Guide too:
Of course, I’m biased so here’s what others say about it:
“Al,
I really like the Beginner’s Guide. As a true beginner it helped me quite a bit. The Guide answered questions I didn’t know enough to ask.
I haven’t gotten to the building prints yet, still working on my terrain.
Bruce”
“Hi Alistair,
Your print out building kits have saved me hundreds of dollars on buildings and they provide the unique option of being able to customize the builds most any way I desire.
Until I came across your kits, I was very limited on what I could add to my planned N-scale layout. Commercial building kits are way too expensive for a retired person’s budget.
I now have the ability to not only build nice scenes, they don’t require weathering. Something I’m not terribly adept at accomplishing. Also, as a 70 year old kid, working in N-scale can be challenging for clumsy arthritic fingers. Your kits eliminate most of those issues. All I need is a sharp blade, scissors, glue and my imagination.
Also, your beginner’s guide is invaluable. I’m a retired network systems architect, so tech is not scary to me yet surfing the web for information can be tedious. I was a pre-teen the last time I played with model trains, and a lot has changed in the hobby since the early 60’s. You’ve solved all of that by providing one source for virtually all my basic needs, plus your daily email blog covers it all. What an incredible resource you are to this hobby.
Thanks for doing all of what you do.
Best Regards,
Ken”
“Hi Al
I really enjoyed the beginner’s guide book. I’m new to the train world. I have just retired and trying to make an attempt to start a hobbie with HO scale trains. You and your followers have encouraged me for the last two year’s. I Thankyou and your followers for sharing their train world
Sam”
Of course, I’m very biased, but I think the Beginner’s Guide and all these printable buildings bundled free are a real steal – just $9 for the next day or so.
I think Ken’s quote above puts it best:
“Your print out building kits have saved me hundreds of dollars on buildings and they provide the unique option of being able to customize the builds most any way I desire.”
You get 25 printable buildings with the Beginner’s Guide (although with a bit of imagination you can make, many, many more).
You’ll see these buildings sell in the store for $9 each or more.
And the Beginner’s Guide sells for $27.
So you are saving a massive $342 on this deal.
You’re also getting the track plans PDF too.
What’s more, have a look at throught the store and you can see it’s a real, genuine, saving.
But please bear in mind, this silly sale is only for a few days, and then it’s all goes back to normal.
I do like to think that when I have a sale it’s genuine, and there is real value.
So if you fancy this bargain before it disappears like a shadow in the night, grab it right now.
Or, I know some of you good people just buy it to support the site. God bless each and every one of you.
Whatever your reasons, the Beginner’s Guide for $9 and the free printable buildings make it easy for you to make that all important start.
And that, my friends, is what it’s all about. Making that start.
If I can help you do that for $9, this sale will have been entirely worth it.
And whatever start you make – have fun.
Best
Al
PS This offer will end abruptly – please don’t sit on the fence if you are mulling it over.
PPS There is also a 60 day money back guarantee, you have nothing to lose!