Weathering model trains

Sam’s been in touch with some wonderful advice on weathering model trains – and the layout in general:

“I can’t believe how much time my layout takes – I love experimenting with different techniques – keep them coming please!

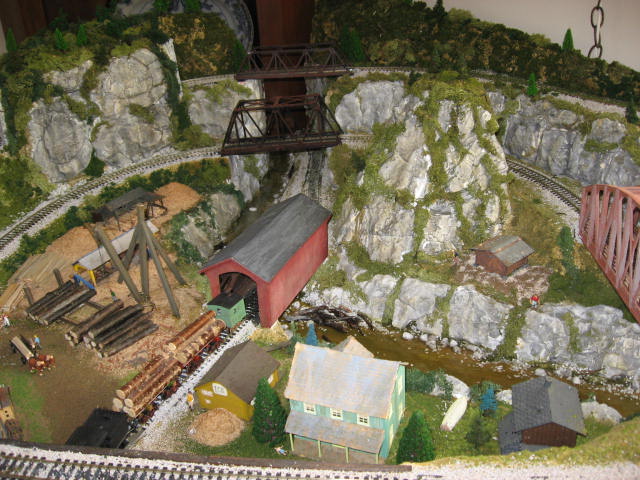
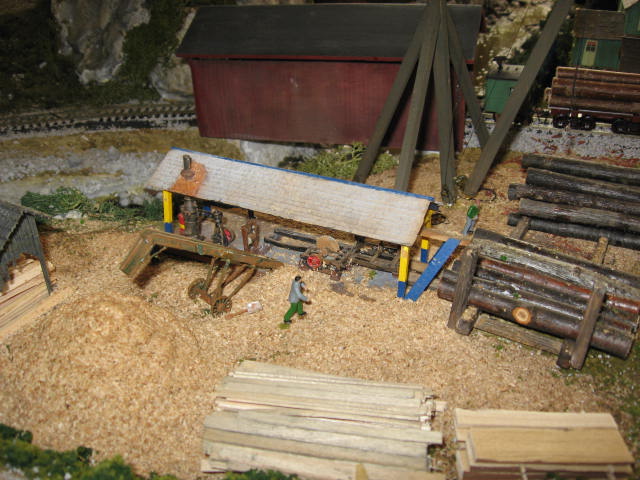
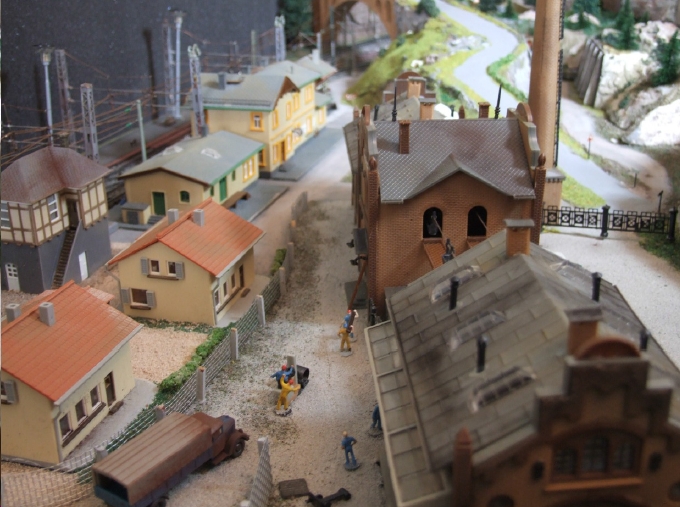
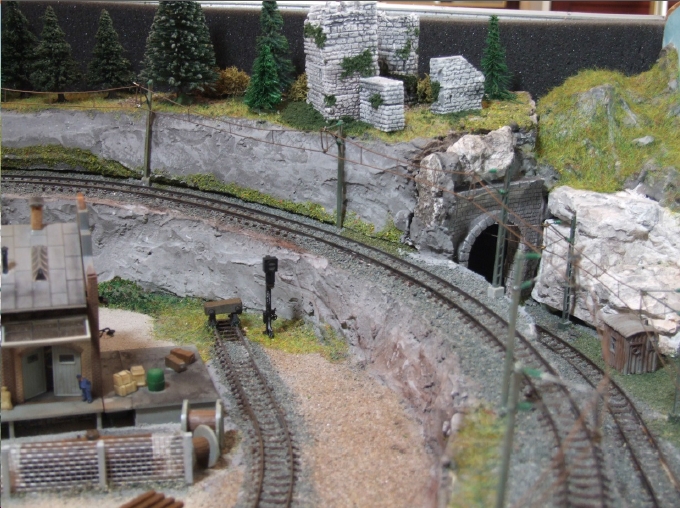
The Old B12 rusty loco was just an old bodyshell minus the front door – I glue gunned 3 wheels onto the body and applied rust effects (The Vallejo Rust and Chipping effects is a great set – comes with instructions and actually quick to apply with a brush and sponge)

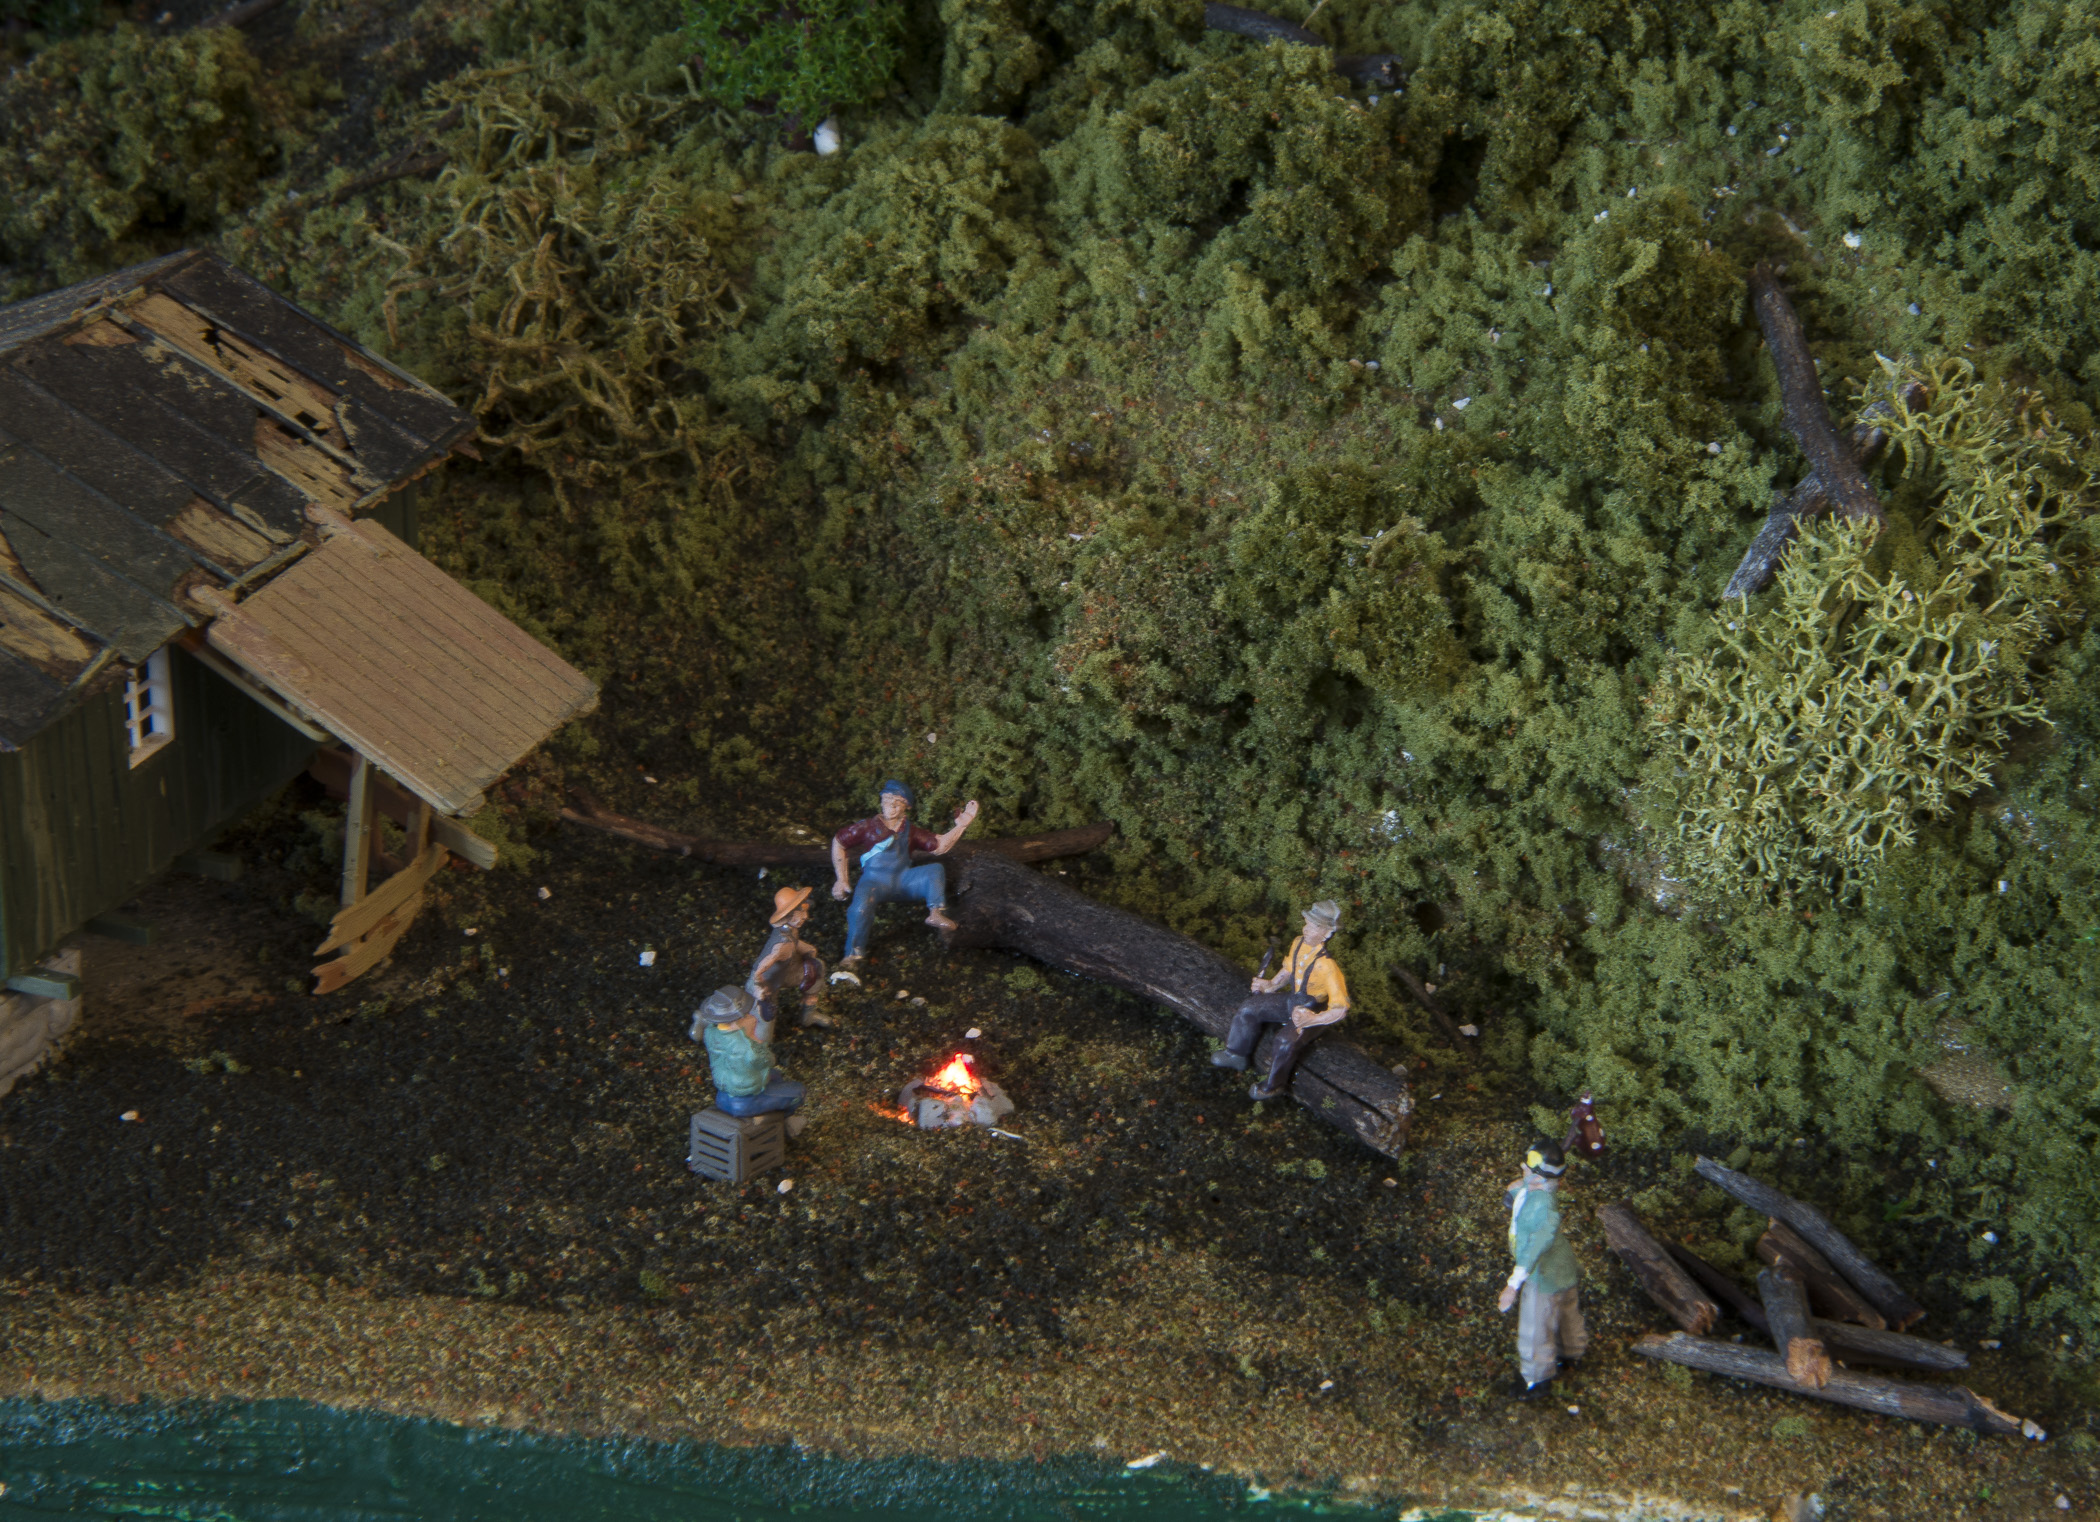
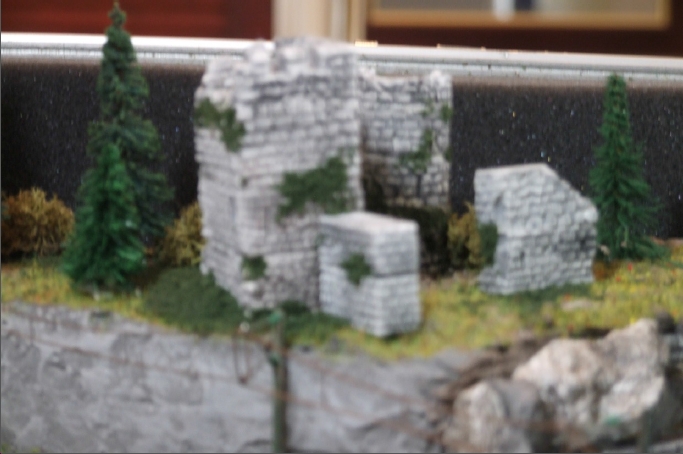
Apologies for the Jurassic park going on in the background – my son does like to put some life into my layout!!!!

weathering model trains

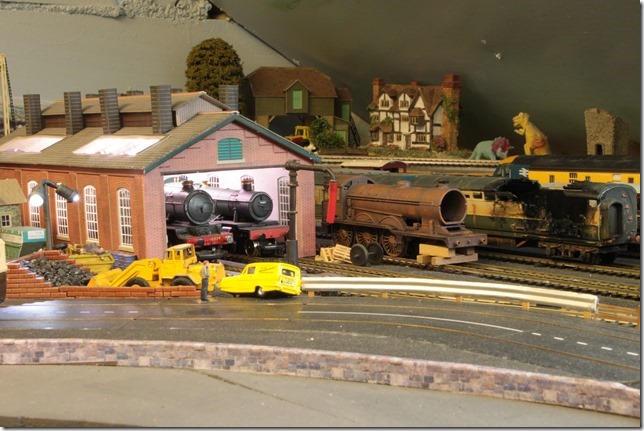
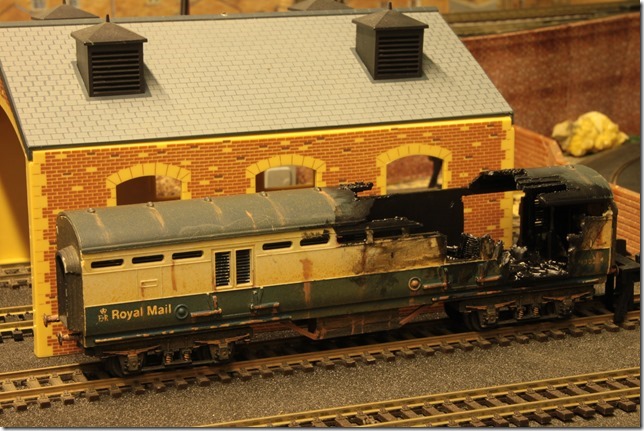
Vandals!!!!! A burnt out BR mail van – really easy – just attacked it with Dremell, stuck all the bits in the bottom with poly cement, liberally added some matt black paint and a few rust spots. The couplings were removed for realism (I actually used these to repair an old loco!). Took a couple of hours.

weathering model trains

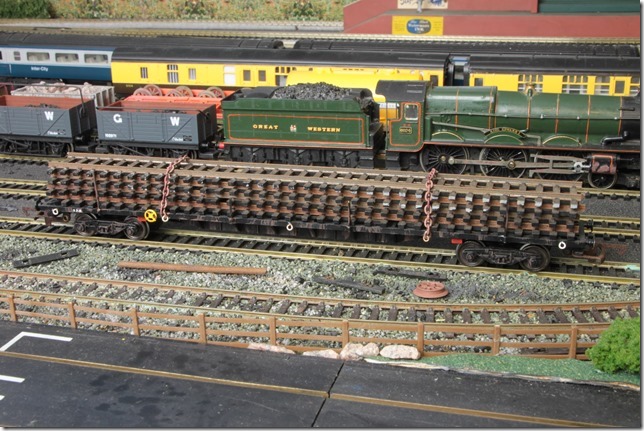
The rail carrier is the chassis of an old Lima coach with lengths of the old steel Hornby track – nicely rusted after leaving them in the garden for a couple of days – and held on with jewellery chain – rusted with the afore mentioned paint set.

weathering model trains

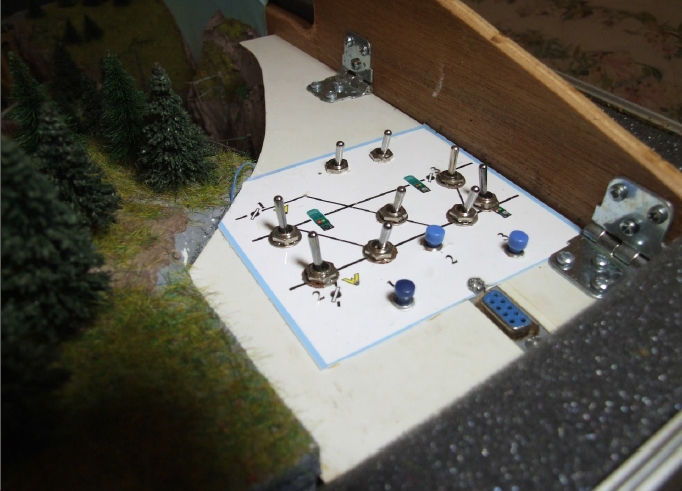
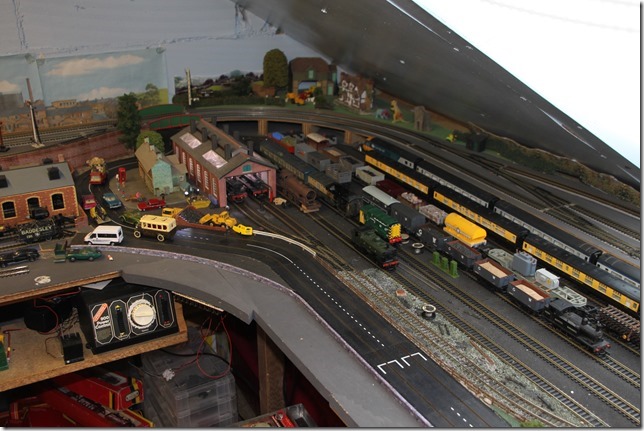
I’m still analogue!!! but have isolation rails to allow several loco’s to ‘park’ in sidings.

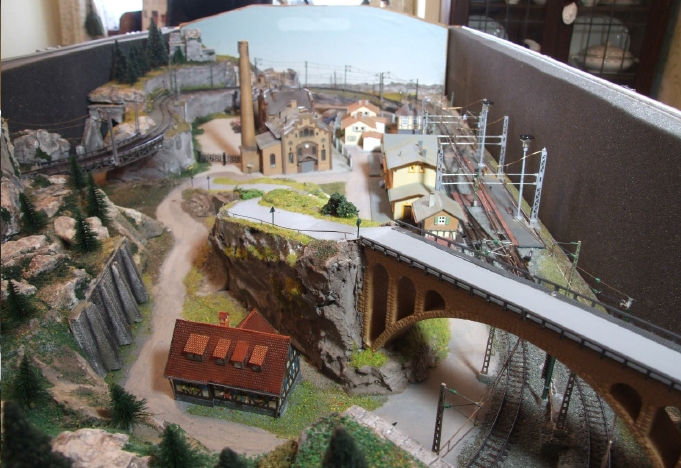
If anyone spots the slightly strange road way, it’s actually an old Minic Roadways set from my late father. Scale OO. I have a rail crossing so we can set two trains going and race, trying to beat the trains to the crossing.

4

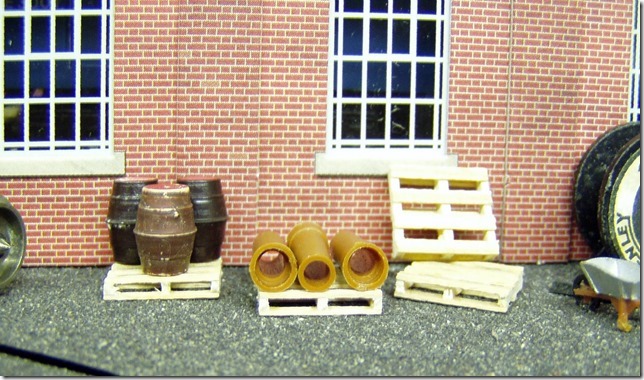
Home made pallets from thin veneer, sliced and glued – I measured a real pallet and divided by 76. Not sure if it’s worth the effort as they’re very fiddly to make!!!

weathering model trains

Sam”

A big thanks to Sam. There’s quite a bit on weathering on the blog now – here are a few more:

Weathered HO scale locomotives.

Weathering HO freight cars.

Weathering model train cars.

Weather a model train.

Weathering locomotives.

Weathered train tracks.

Weathering model railroad cars.

Weathering model railroad rolling stock tutorial.

Weathering rolling stock.


Next up, Mark:

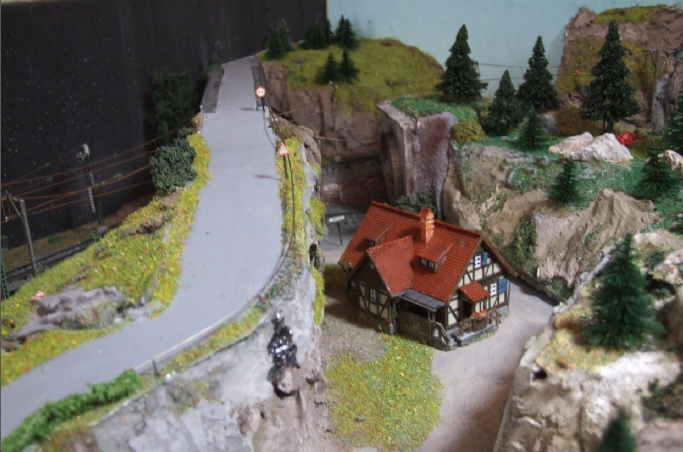
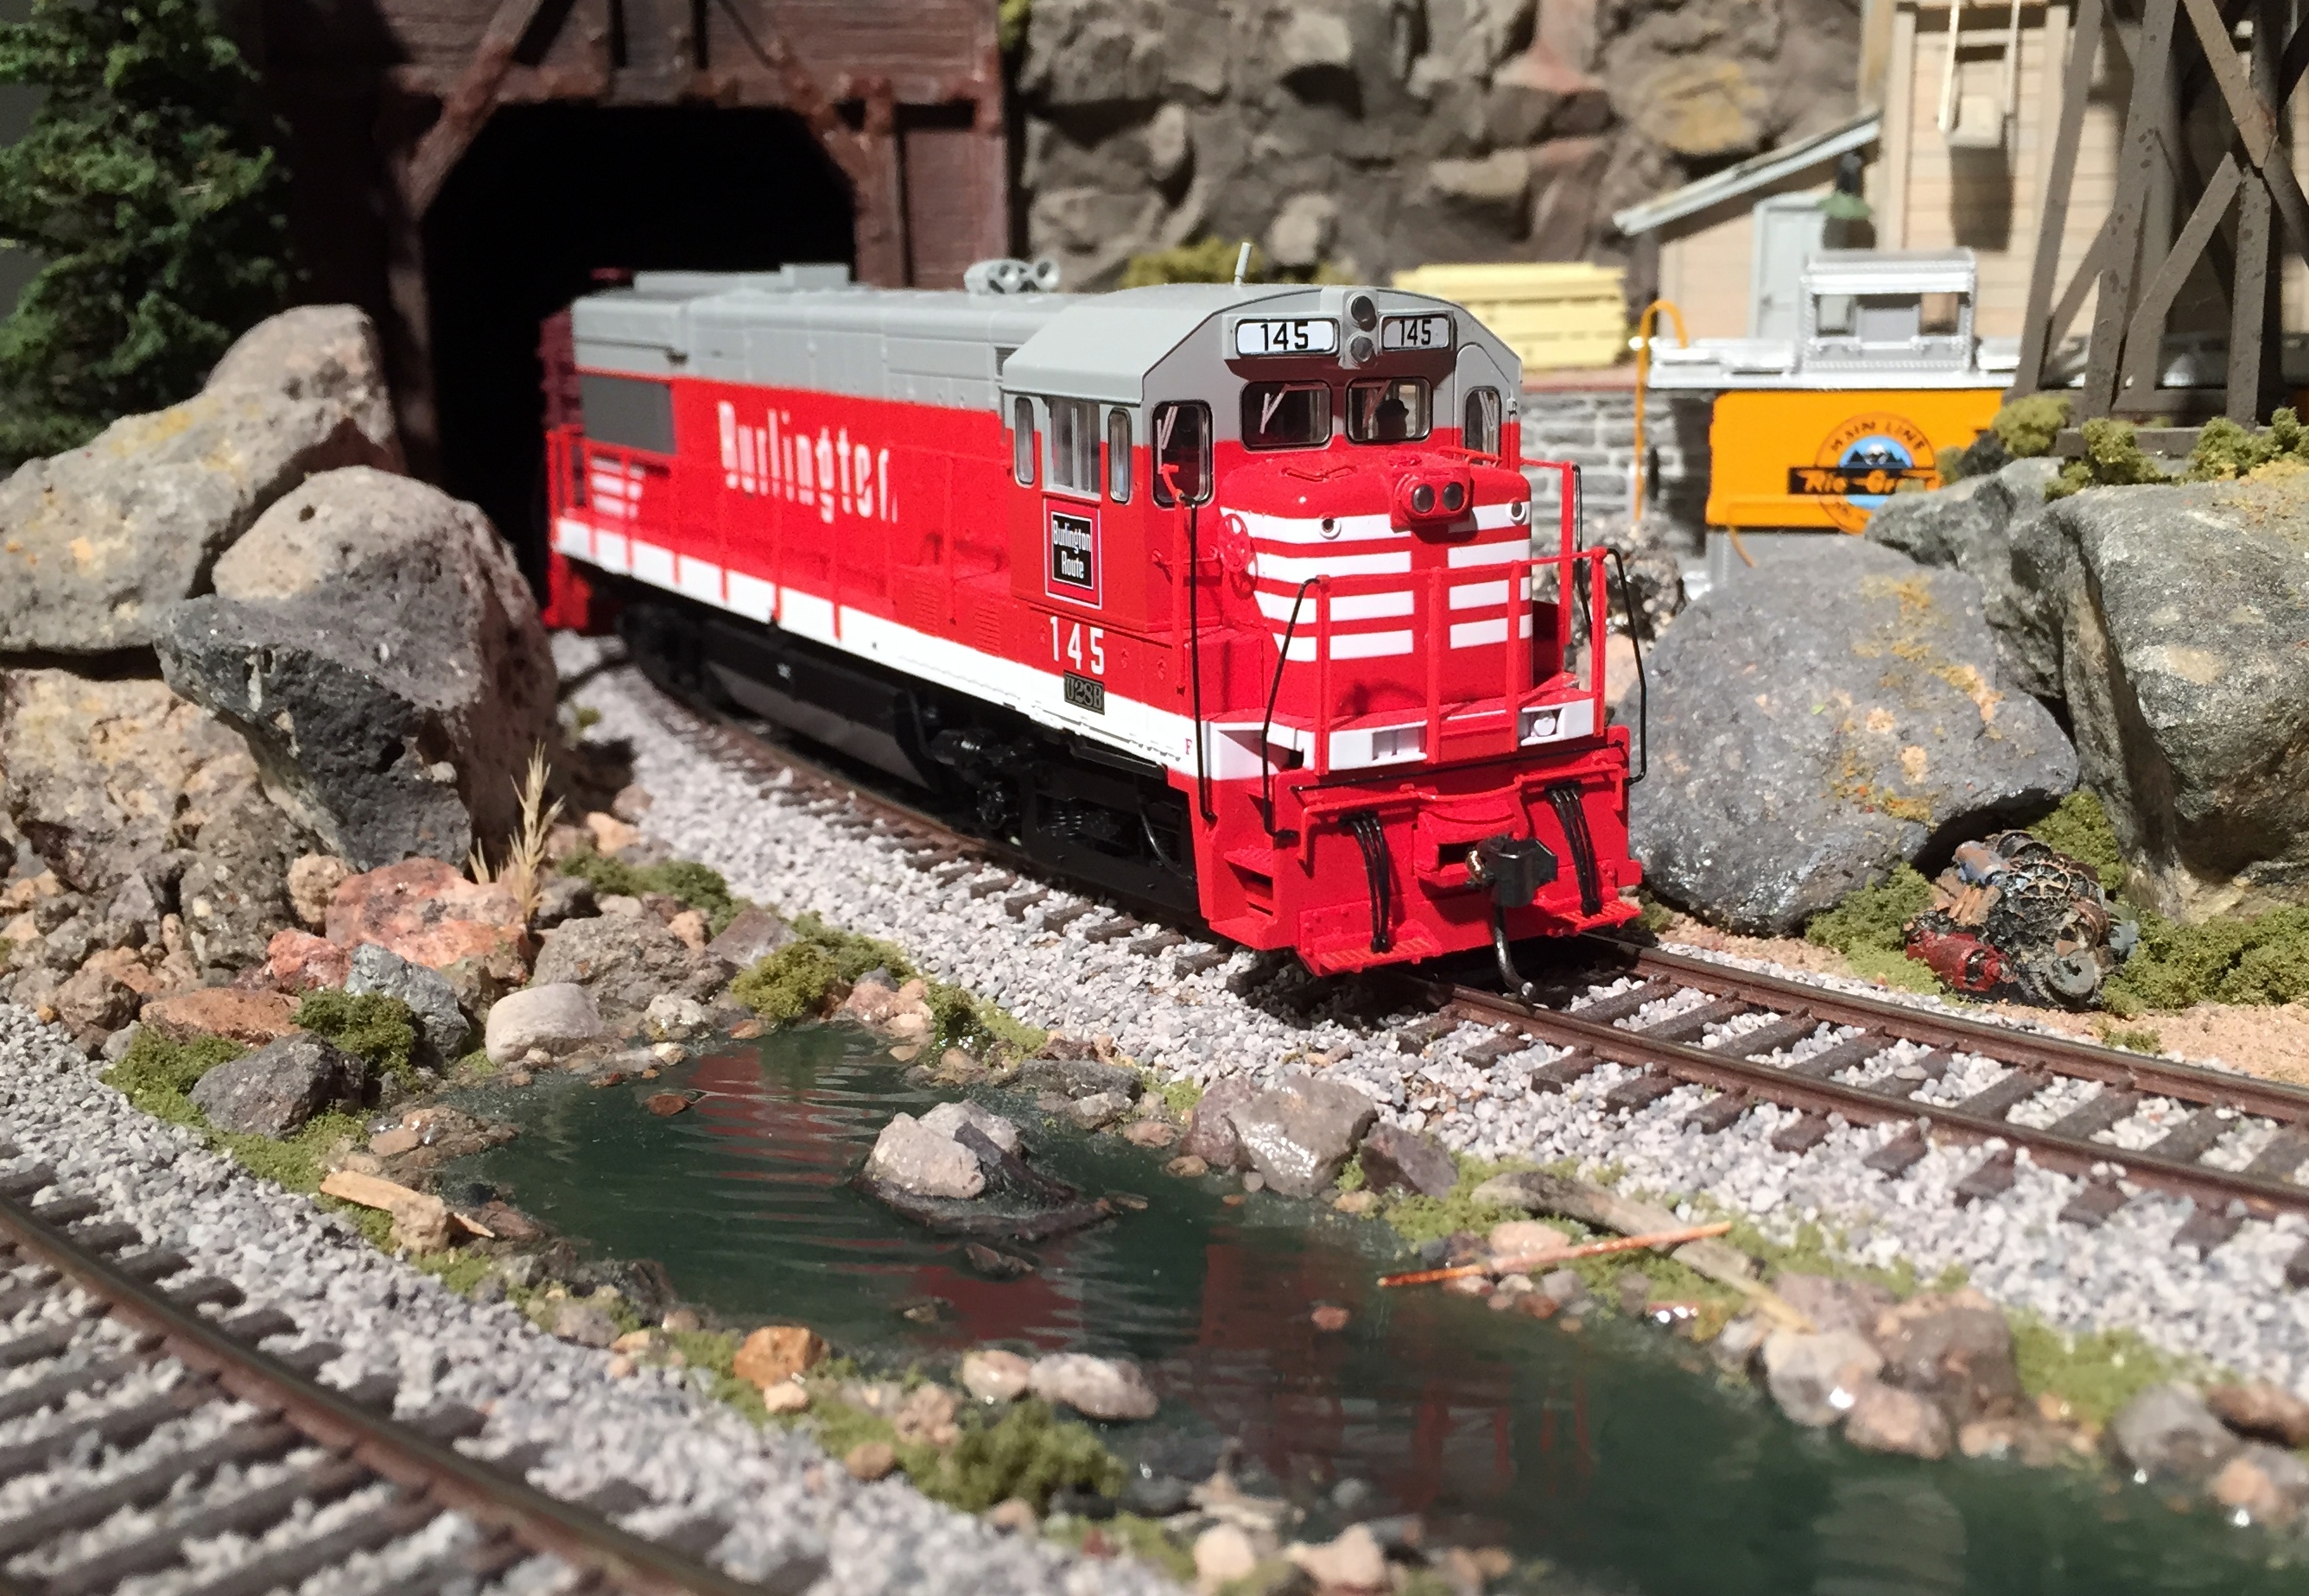
“Hi Al. To add interest to a still water pond you can add small lines of plaster to the pond bottom, then paint the bottom green and finish off with clear resin or Woodland Scenics water.

I added the BN red engine to better highlight the reflection.

Now if I can just get control of those pesky HO scale mosquitos…… 😉

Mark”

Burlington 145 on Thunder Mt.

A big thanks to Mark and to Sam for sharing his take on weathering model trains.

Sam proves you should really never throw anything away – and I love how he’s given his layout so much character.

Mark’s pic is stunning – as always. And a superb tip too.

That’s all for today folks.

Please do keep ’em coming.

And if today is the big day when you spring into action, the Beginner’s Guide is here.

Best

Al

PS Latest ebay cheat sheet is here.

PPS More HO scale train layouts here if that’s your thing.


printable buildings

And there’s the Silly Discount bundle too.

HO Layout – Ron’s

I have two layouts for you in today’s missive: Ron’s HO layout, and below that, the suitcase layout!

“I completed this layout this past holiday season.

It is a 4X8 HO layout built and planned for expansion. I built this with the idea of selling it as my joy is in the building and seeing the finished product.

It is foam over a wood frame and very light weight. The scenery is all hard shell plastercloth, with both molded and sculped rock and features made from light weight Hydrocal.

It is entirely painted and covered with landscaping materials.

All builings were built, kitbashed and aged. Some are scratch built, such as the lumber yard, covered bridge,etc. As soon as this sells I will start the expansion or a new design.

This is wired so that it can be used as DC or DCC Quite easily.

Ron”

HO layout scale 4x8 camp fire

HO layout scale 4x8 logging timber

4x8 HO layout house

HO scale 4x8 farmyard

HO layout bridges mountains


HO layout scale 4x8 timber yard

HO scale 4x8 oval track


Hope enjoyed Ron’s HO layout as much a I did, now on to CW:

“Hi Alastair,

Attached are pics of my “Train in a suitcase”. I have now sold it, but I am still working on another, larger layout for both analog and digital operation. Hopefully I will soon be able to send you some more pictures of my current venture.

CW”

DSCF3435

1

2

3

5

6

7

8

9

10

11

12


Big thanks to Ron for sharing his HO layout. I do enjoy the 4×8 HO train layouts.

One last thing – there’s a glue question on the forum. Can anyone help?

That’s all for this time folks.

Please do keep ’em coming.

And if you feel like you’re missing out on the fun, the Beginner’s Guide is here.

Best

Al

PS More HO scale train layouts here if that’s your thing.


Need buildings for your layout? Have a look at the Silly Discount bundle.

Model train tunnels – how to build them

Martin sent in this wonderful model train tunnels ‘how-to’. It’s so easy to follow – and look absolutely stunning.

how_to_build_a_tunnel_1

“Here’s “My way” of making scenic items to place on model railway layouts. I produce many different models usually which have some form or rock face, but not all are landscaped the same although I do tend to put plenty of grasses & many bushes on my models.:

This project is a single track tunnel entrance designed to fit in the corner of a layout with the track running behind the back scène to a ‘fiddle yard’.:

First I use a type of insulation foam which is used to insulate houses, the off cut’s are ideal to make models. (Please excuse my untidy workspace).

how to build model train tunnels

Picture shows a couple of blocks of foam which I will glue together.

how to build model train tunnels step 3

how to build model train tunnels step 4

I almost always use PVA glue which I find very good & cheap.

how to build model train tunnels step 5


Model train tunnels:

how to build model train tunnels step 6

Once dried I pick up my sharp kitchen knife and trim the foam.

how to build model train tunnels step 7

Having obtained a readymade resin portal for the model train tunnels used on this project, I marked out on the foam the tunnel and carefully began to carve the foam.

On many occasions I do not use a portal but carve my own into the foam, this model I decided to paint a resin postal to use.

how to build model train tunnels step 8

how to build model train tunnels step 9

The roof of the model train tunnels are shaped by using a desert spoon.

how_to_build_a_tunnel_10

how_to_build_a_tunnel_11

how_to_build_a_tunnel_12

how_to_build_a_tunnel_13

how_to_build_a_tunnel_14

Once dry, I paint the rocks with a very watery black into the cracks.

How_to_build_a_tunnel_15

how_to_build_a_tunnel_16

Then I use a light emulsion on an almost dry brush to bring out the highlights on the model train tunnels. The portal can be then glued onto the foam by using a strong contact adhesive bought from the Poundland shop in the town centre. The model is now ready to Start applying the landscaping. This is a matter of taste and I vary my models by the use of a variety of types of grasses & bushes.

Most of my materials are Woodland Scenics, Although I do sometimes use other makes. On this model I have chosen to first apply an olive coloured grass onto the rock embankment.

how_to_build_a_tunnel_17

how_to_build_a_tunnel_18

Then I applied a summer ‘Static grass’ by the use of an electric applicator.

With short static grass, the static effect of making the grass stand up is not very effective. But when I use 4.5mm & 6mm grass the effect is very lifelike.

how_to_build_a_tunnel_21

The next job is to apply a variety of bushes onto the odel train tunnels, again by PVA glue.

All that is left to do then is to give the model a spray of watered down PVA glue (always remember to run some clear water through the spray when you have finished).

It can set in the nozzle & ruin the spray for future use). I then sprinkled some Woodland scenics coarse turf onto the summer static grass and a little on the rocks.

I usually add a row of various bushes along the back edge of the model train tunnels.

That is how I make my models, I hope that it gives you some ideas? Whilst this is drying – Here’s one I made earlier where I carved the portal myself.

Martin”

how_to_build_a_tunnel_22

how_to_build_a_tunnel_23


Incredible work and stunning detail – thanks so much for Martin for sharing his model train tunnels ‘how to’.

There are lots of tunnel step-by-steps on the site, here are some more:

Building model railroad tunnels.

Model railroad tunnel building.

HO scale tunnel.

Model railroad tunnel entrance

Model railroad tunnel.

HO scale tunnels.

That’s all for today folks.

Please do keep ’em coming.

And if today is the day you get started on your model trains tunnels on your very own layout, the Beginner’s Guide is here.

Best

Al

PS Latest ebay cheat sheet is here.

PPS More HO scale train layouts here if that’s your thing.


model train answers