Yesterday was the deadline for the scratch building competition.
5 People threw their hats in the to the ring.
Let’s start with John’s creation:
“Dear Al…
The Shed Story now begins…
Two days into Al’s challenge I offered some “Work In Progress” photos…
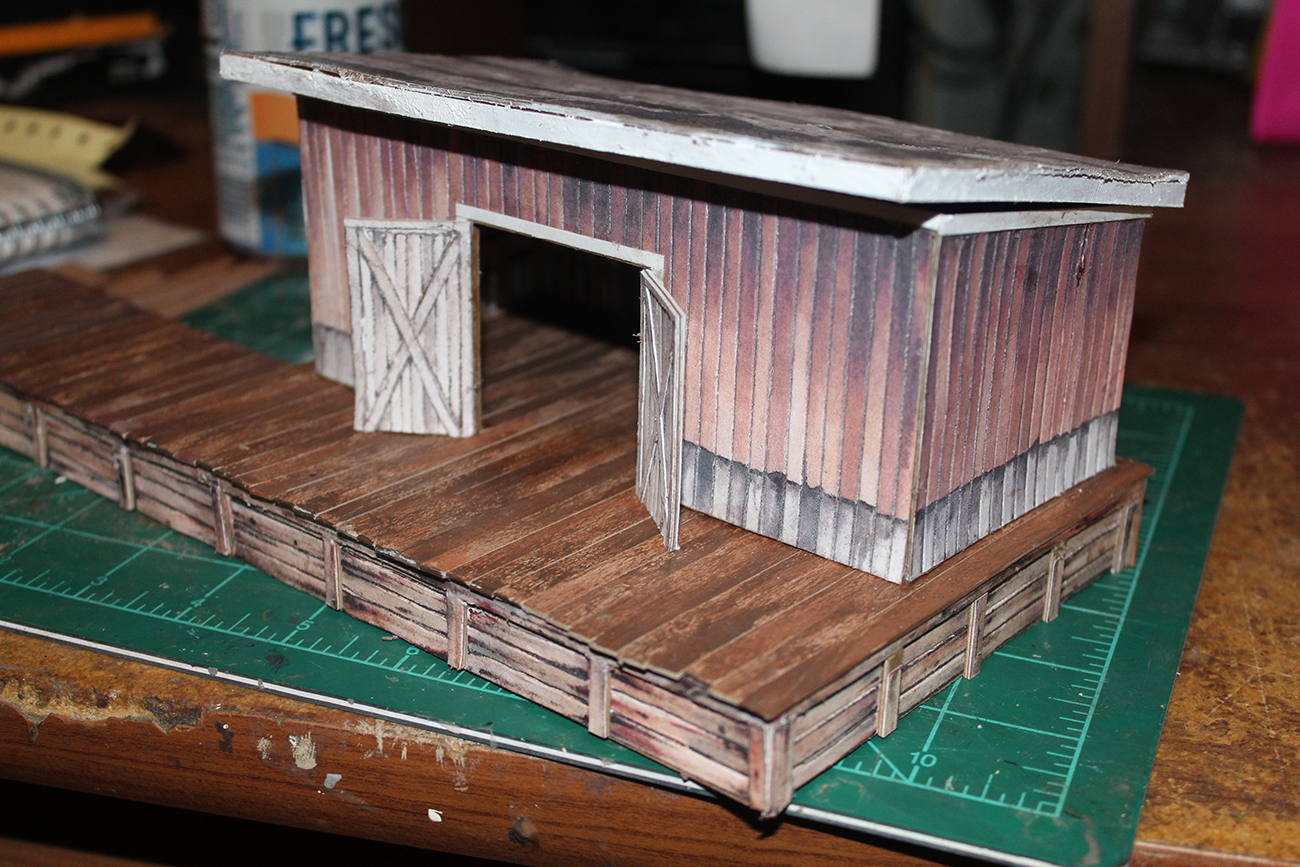
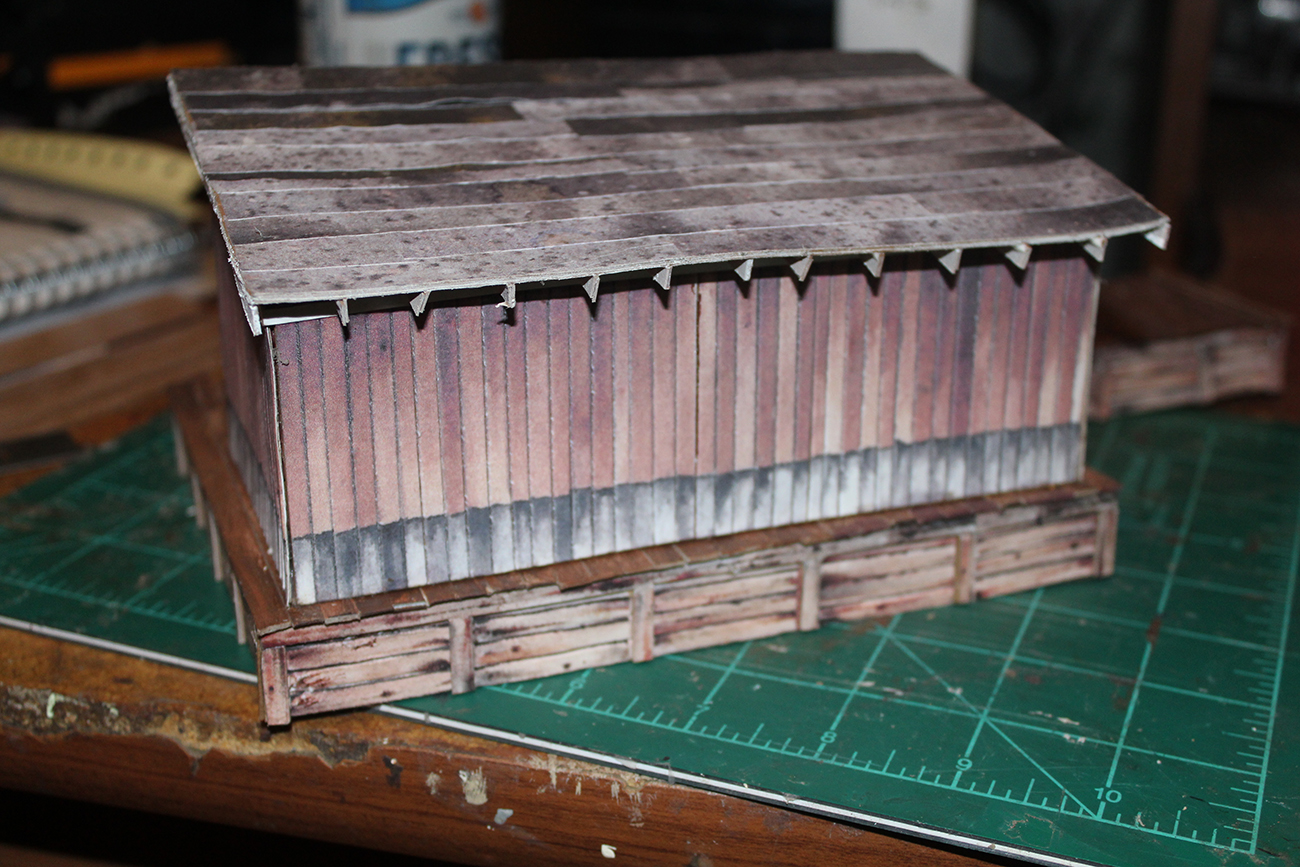
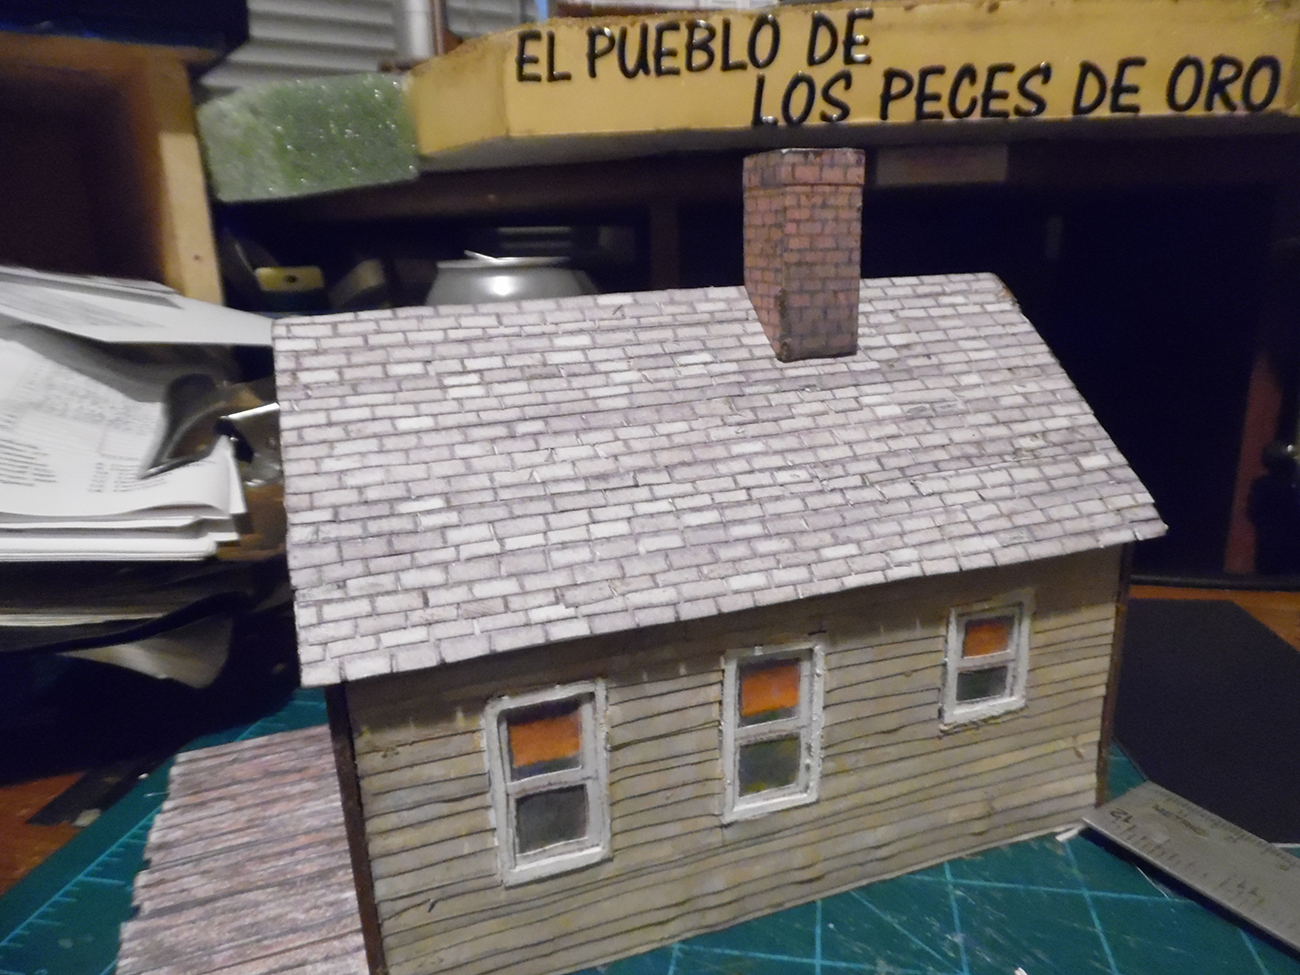
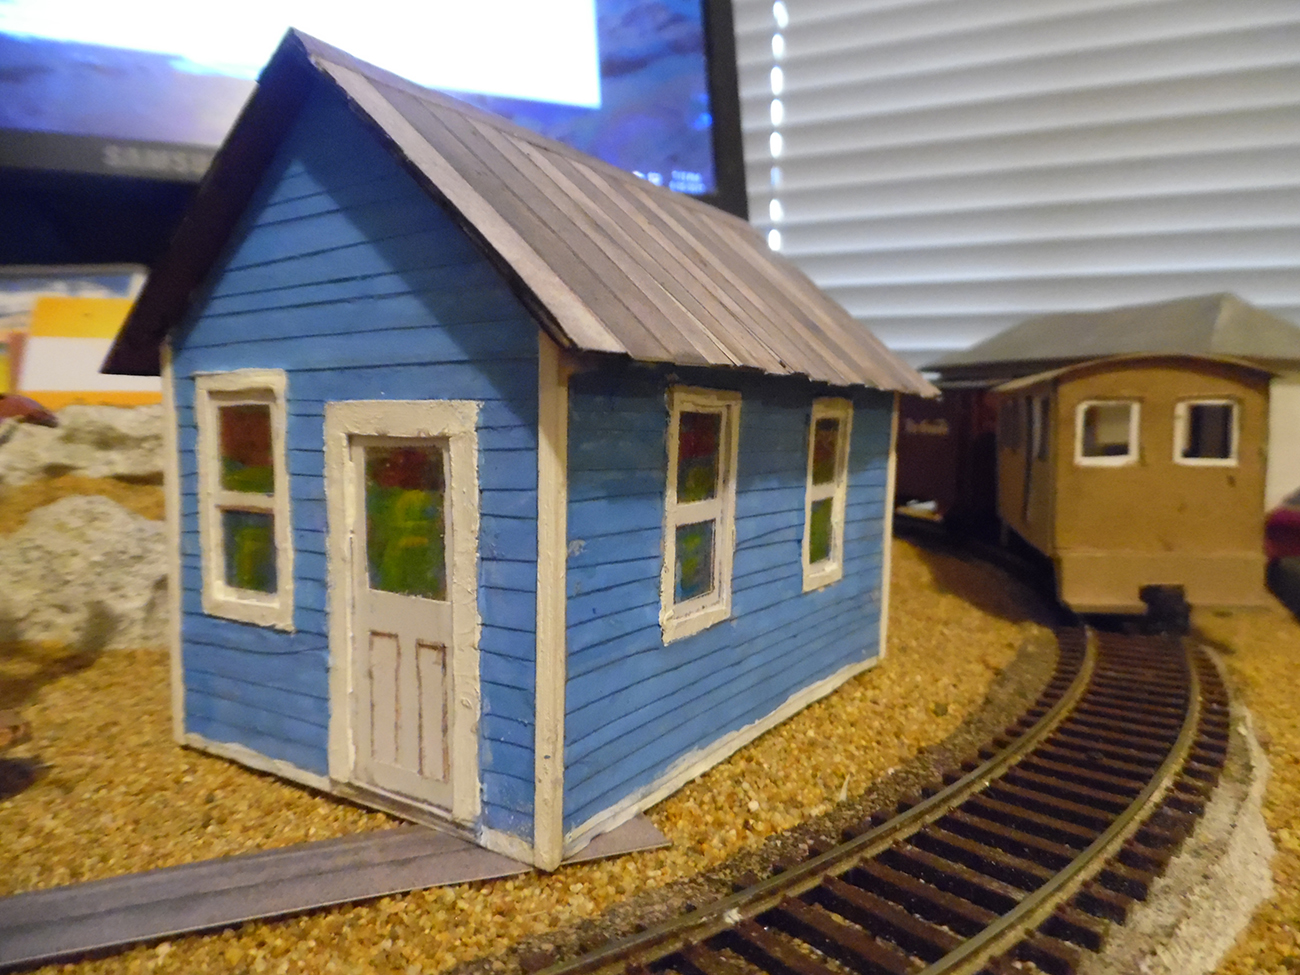
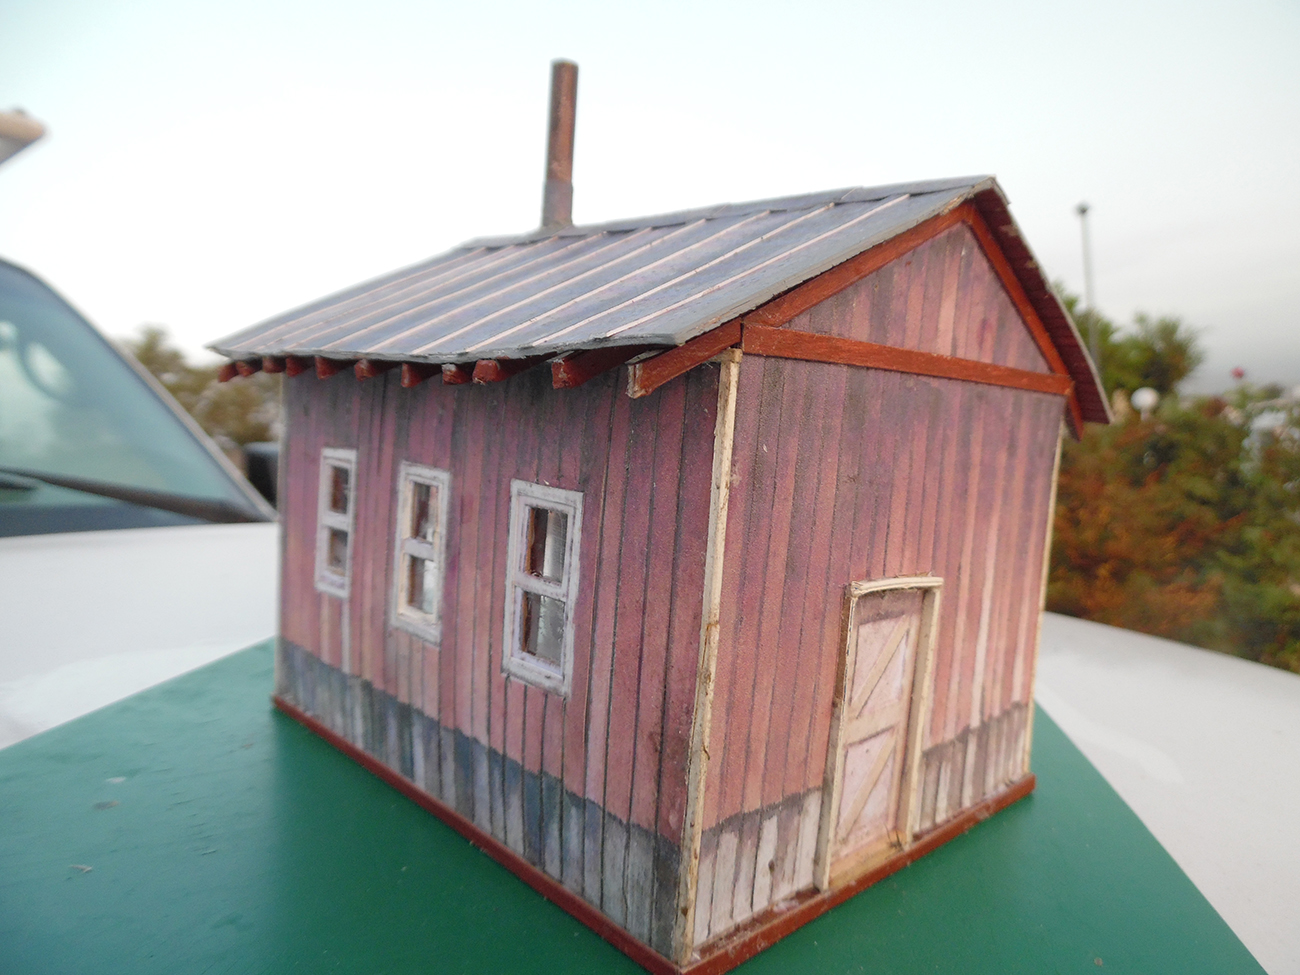
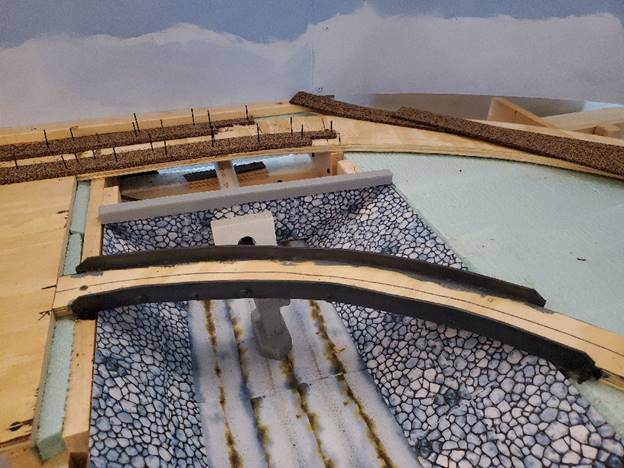
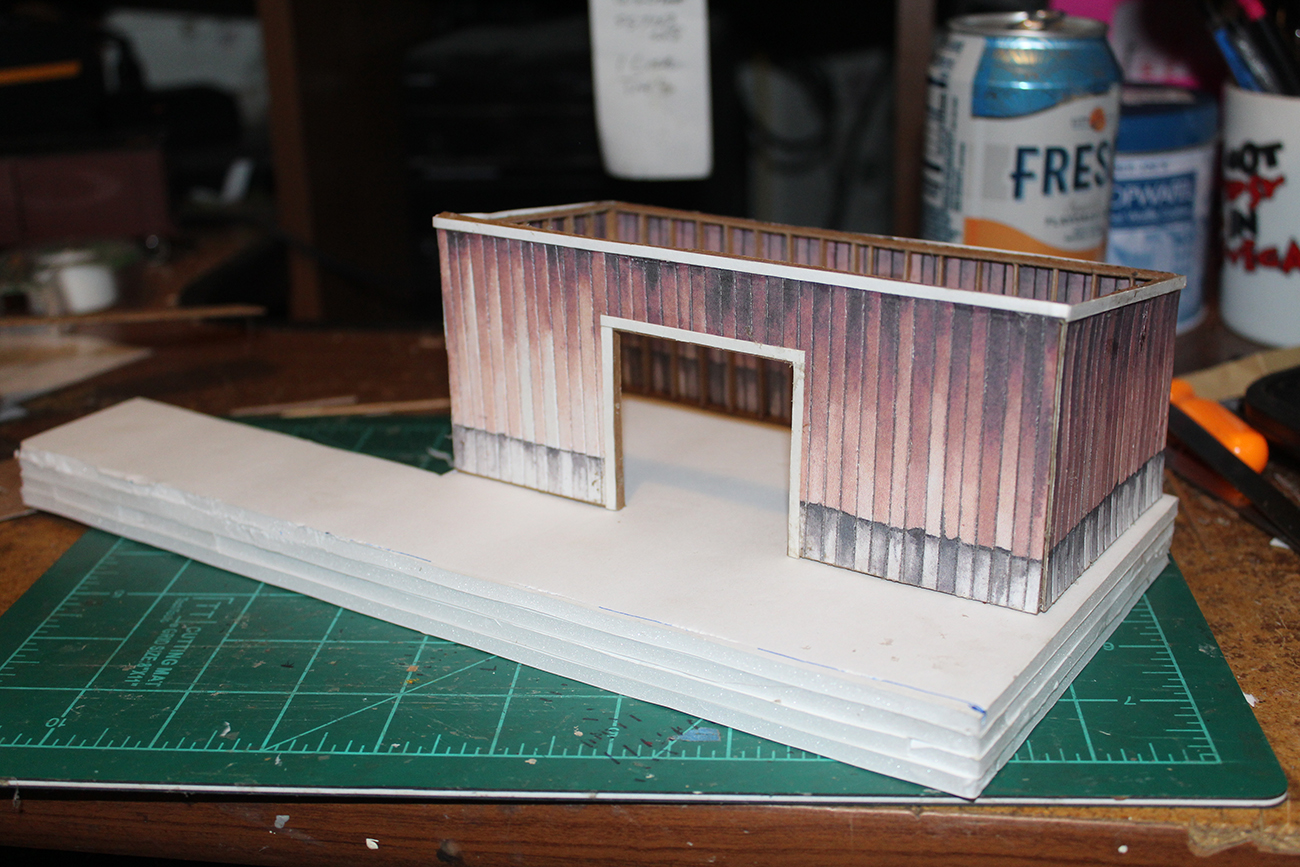
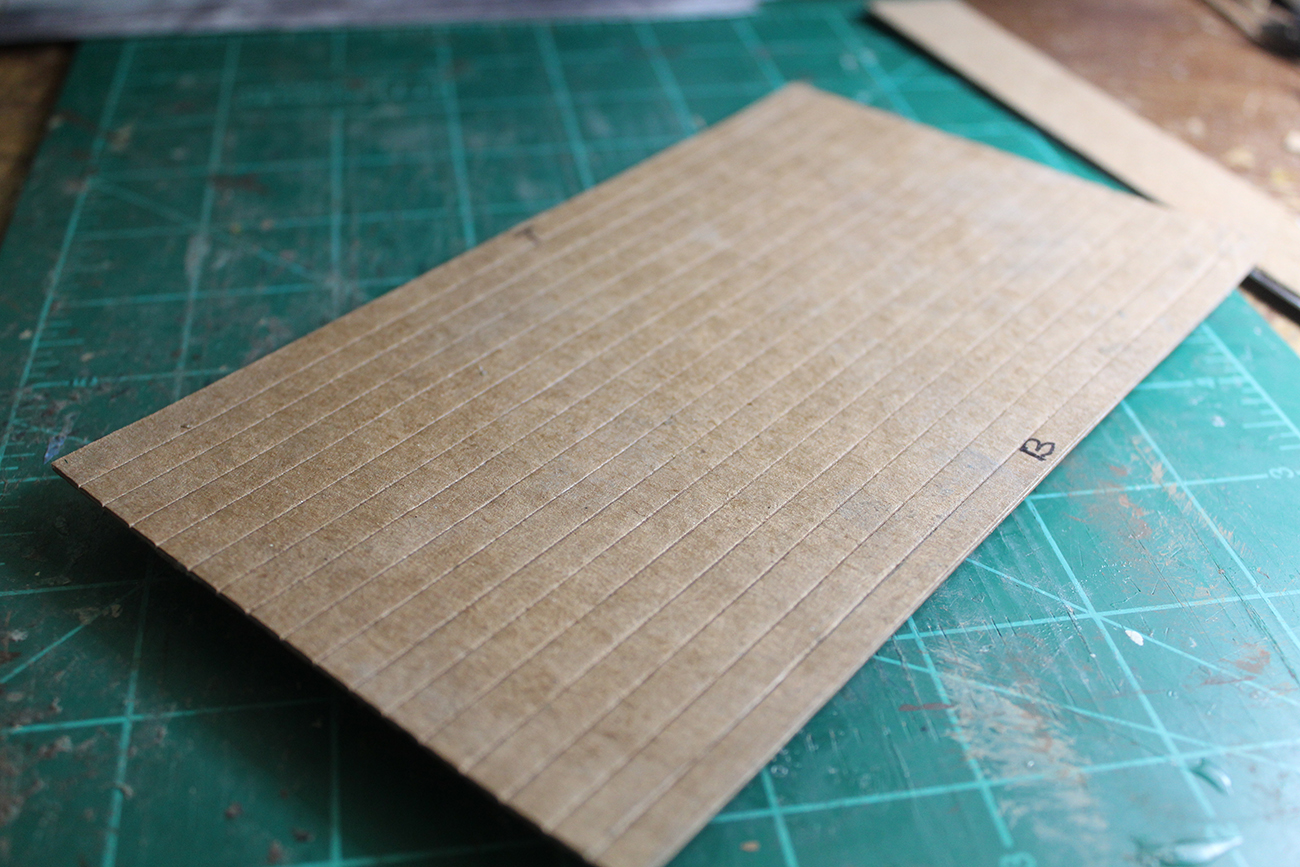
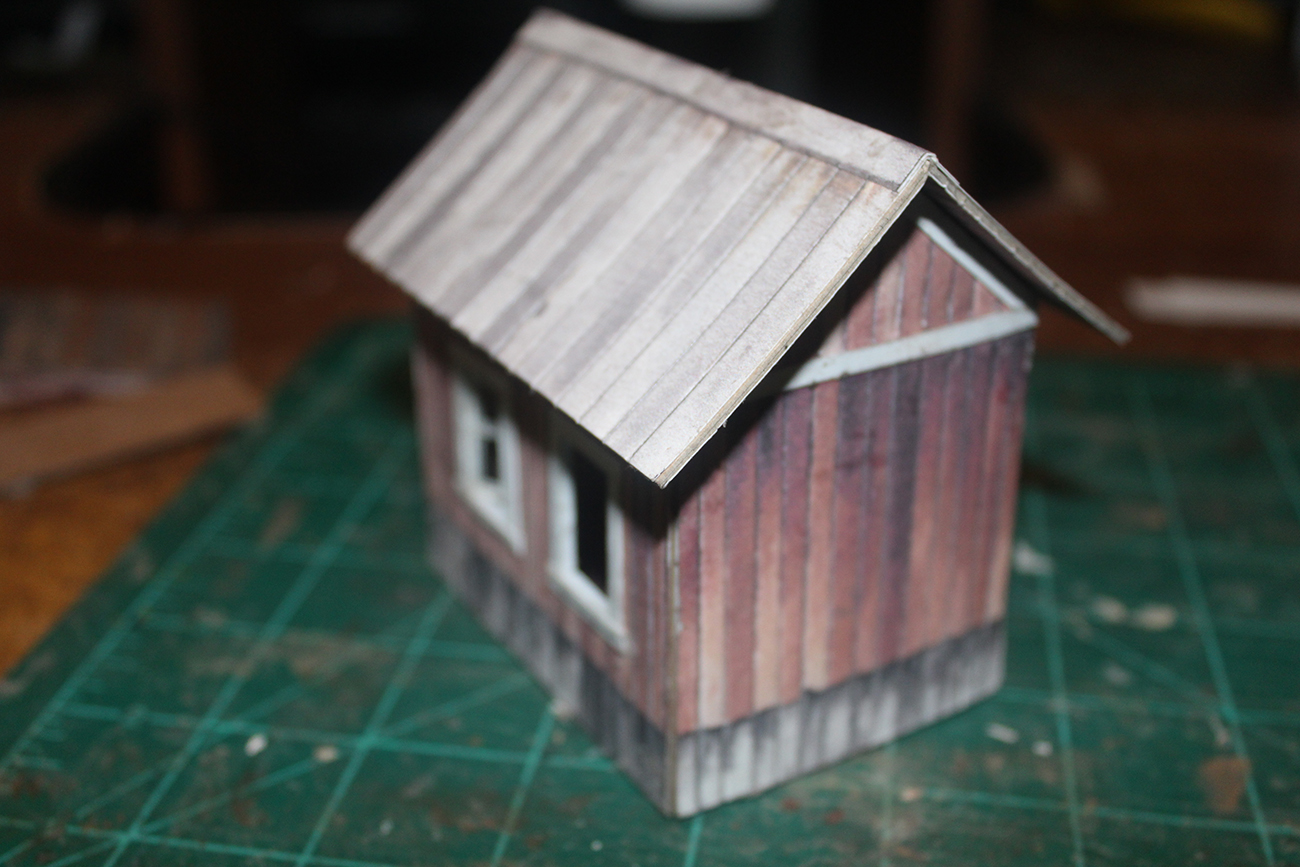
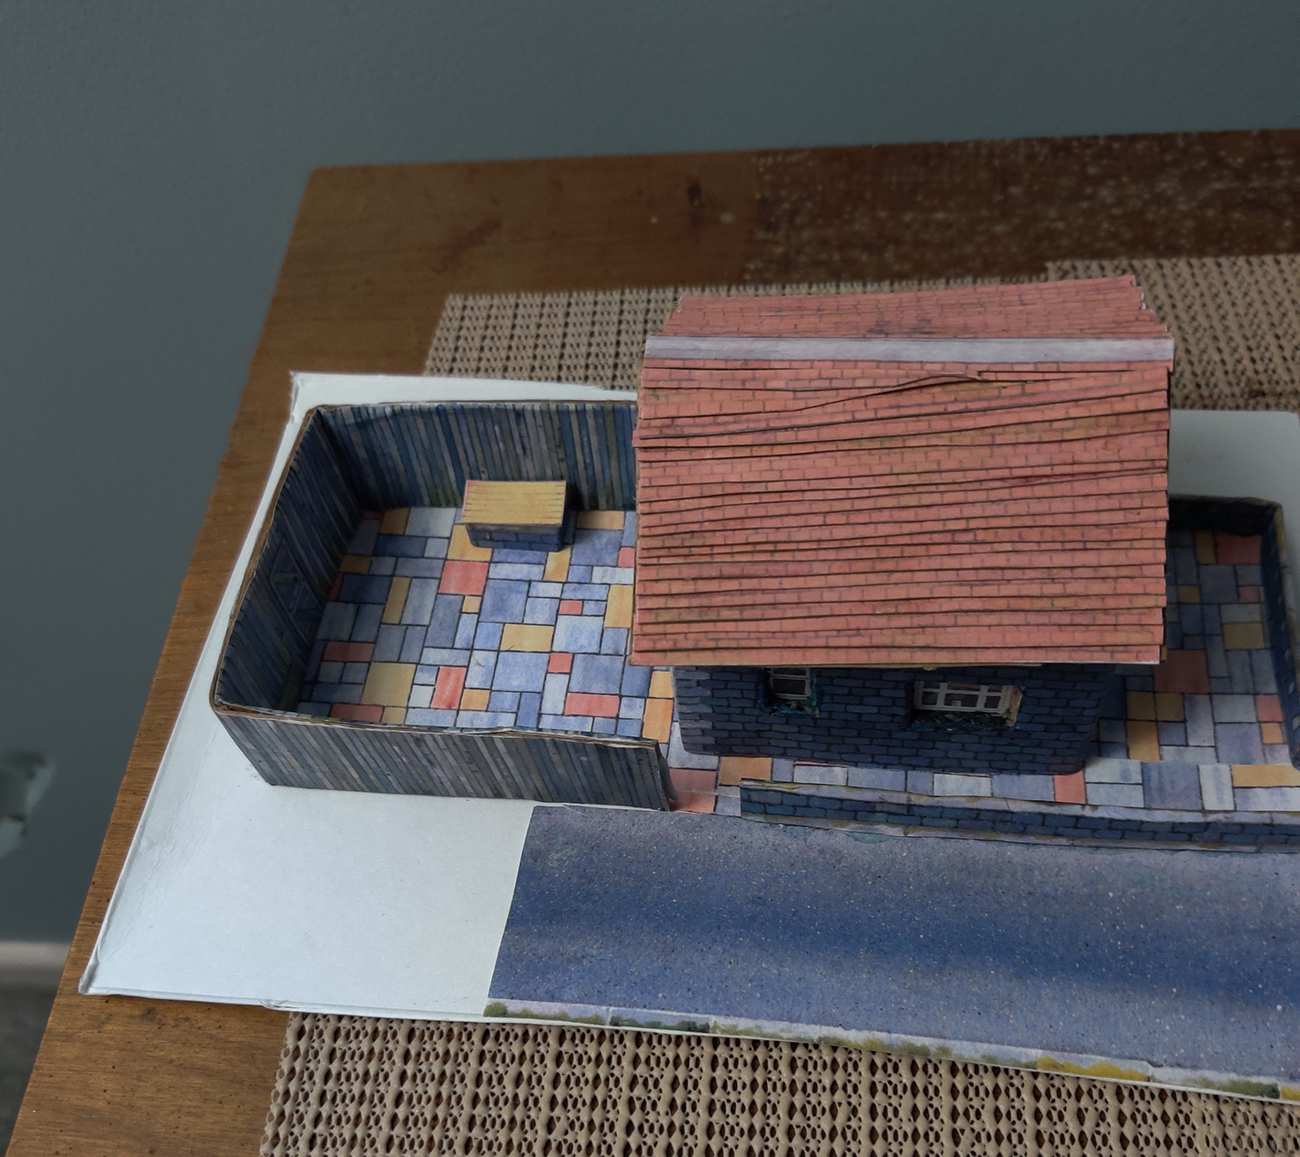
This is a small freight shed in 1/4 inch American O Scale…
The building now has a roof…
I intend to add a ramp and a small matching office…


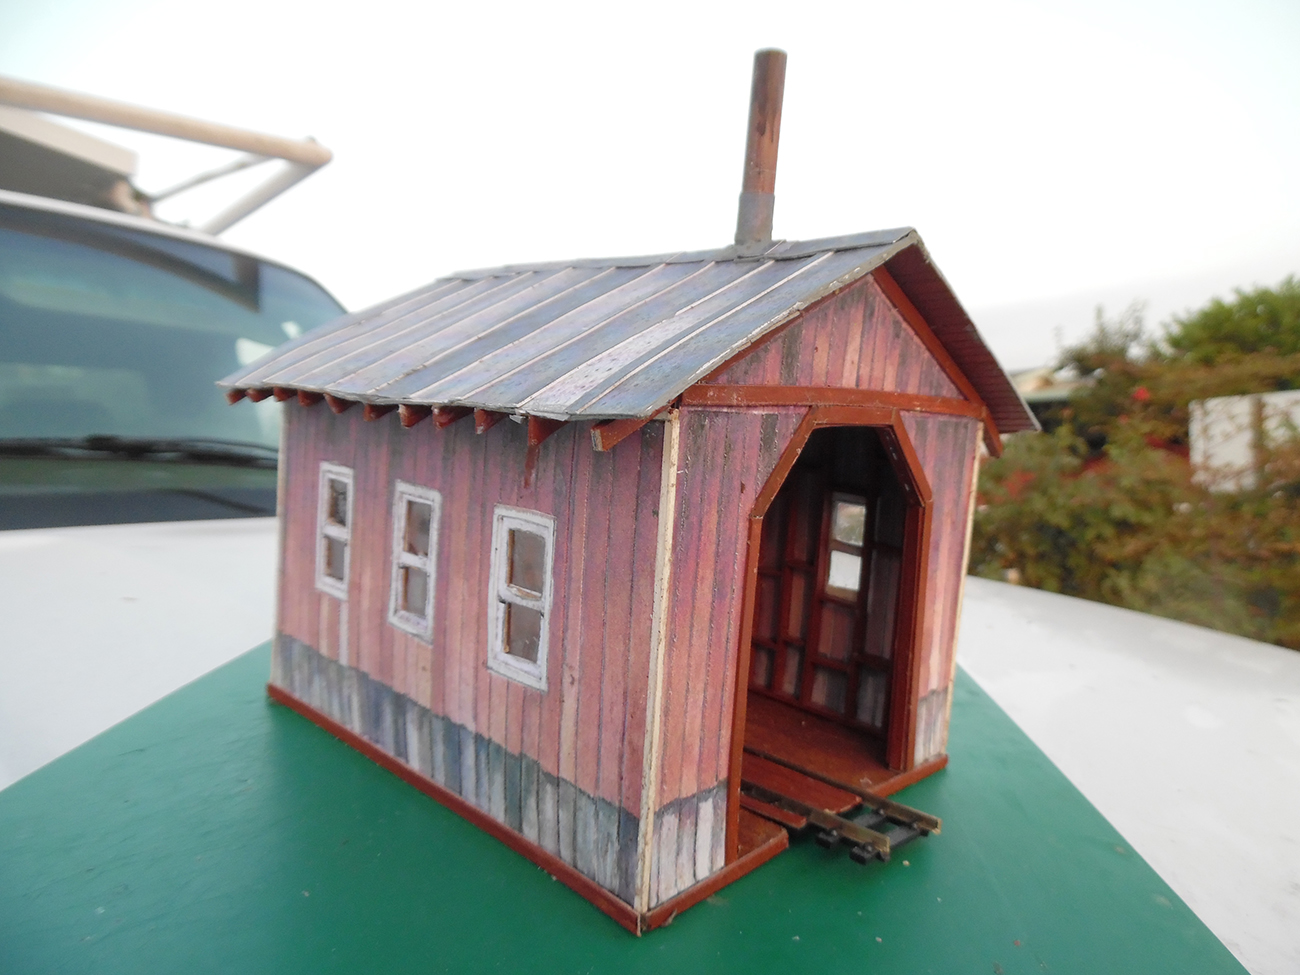
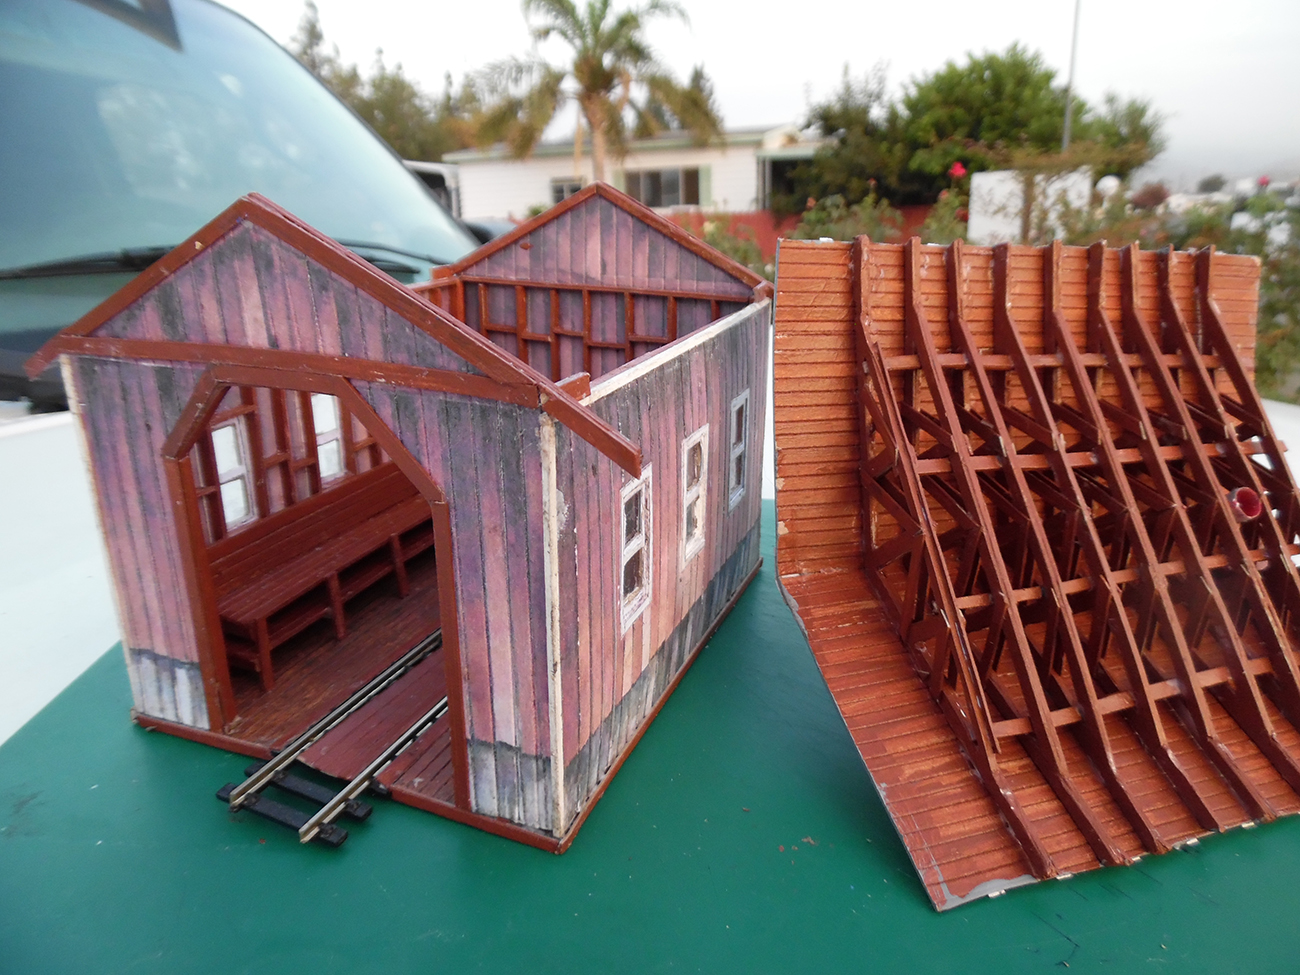
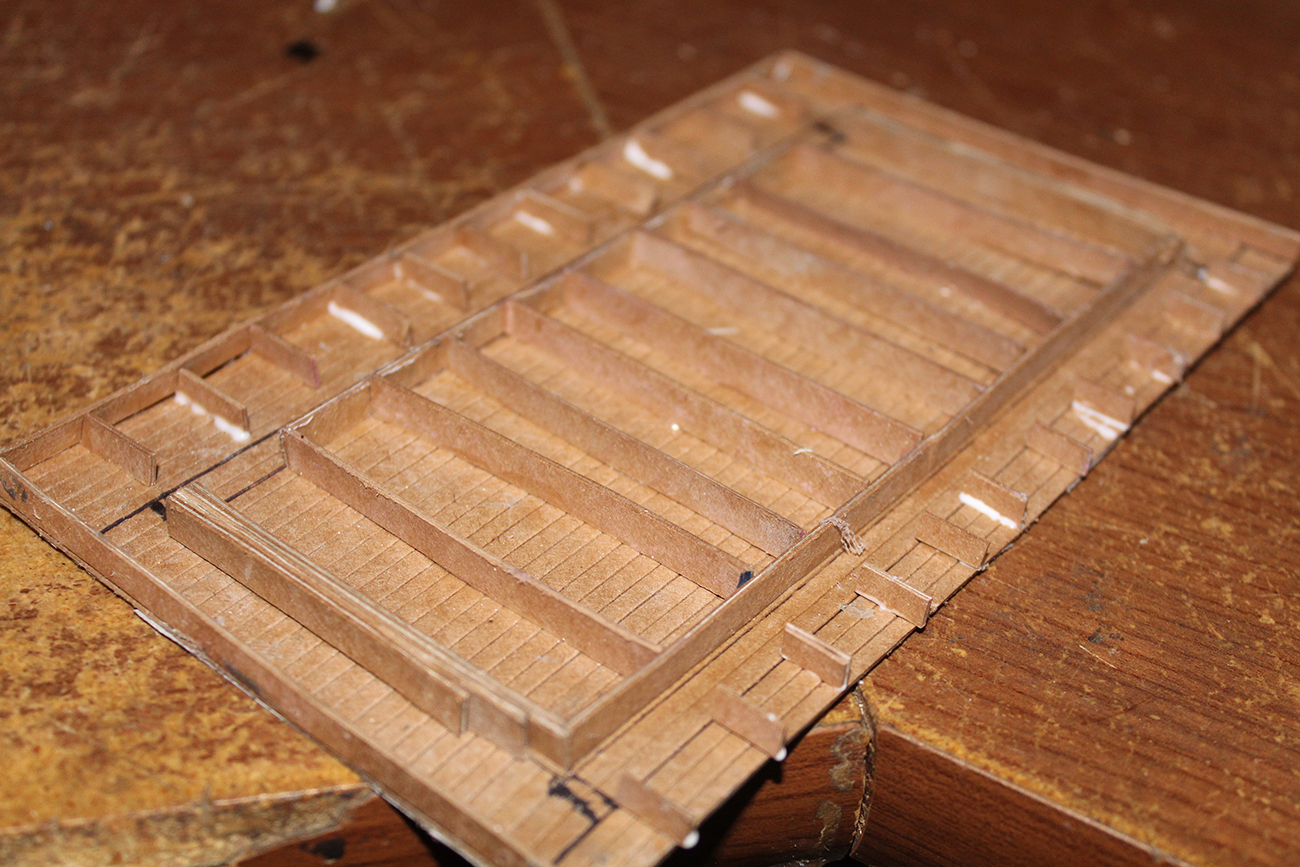
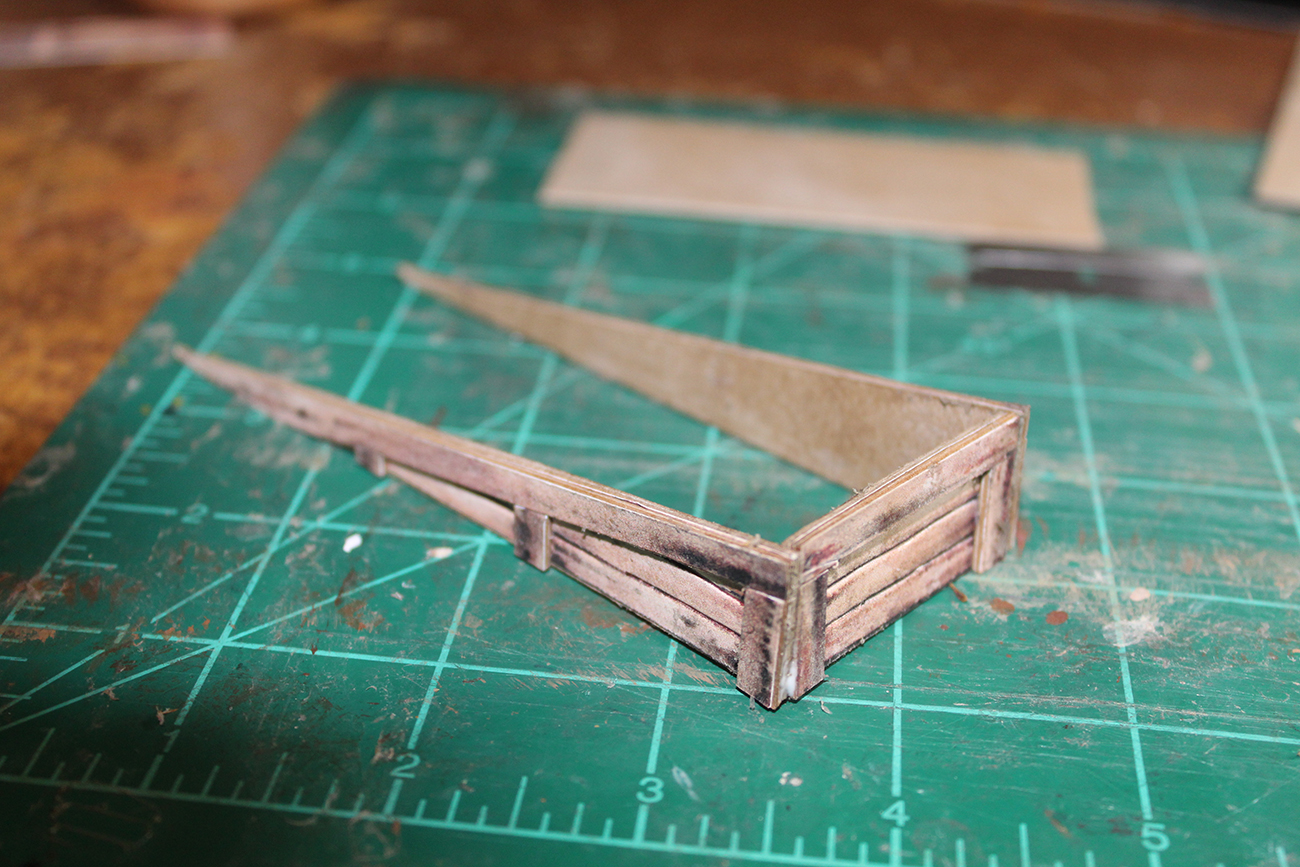
How I built my freight shed…
The shed portion came first…
The covered bridge kit was first printed out as it comes…
It was then cut up to give me the pieces that I needed…
Those pieces were then copied at 135% to give me what I wanted…
The width of the boards, how high the boards needed to be and so on…
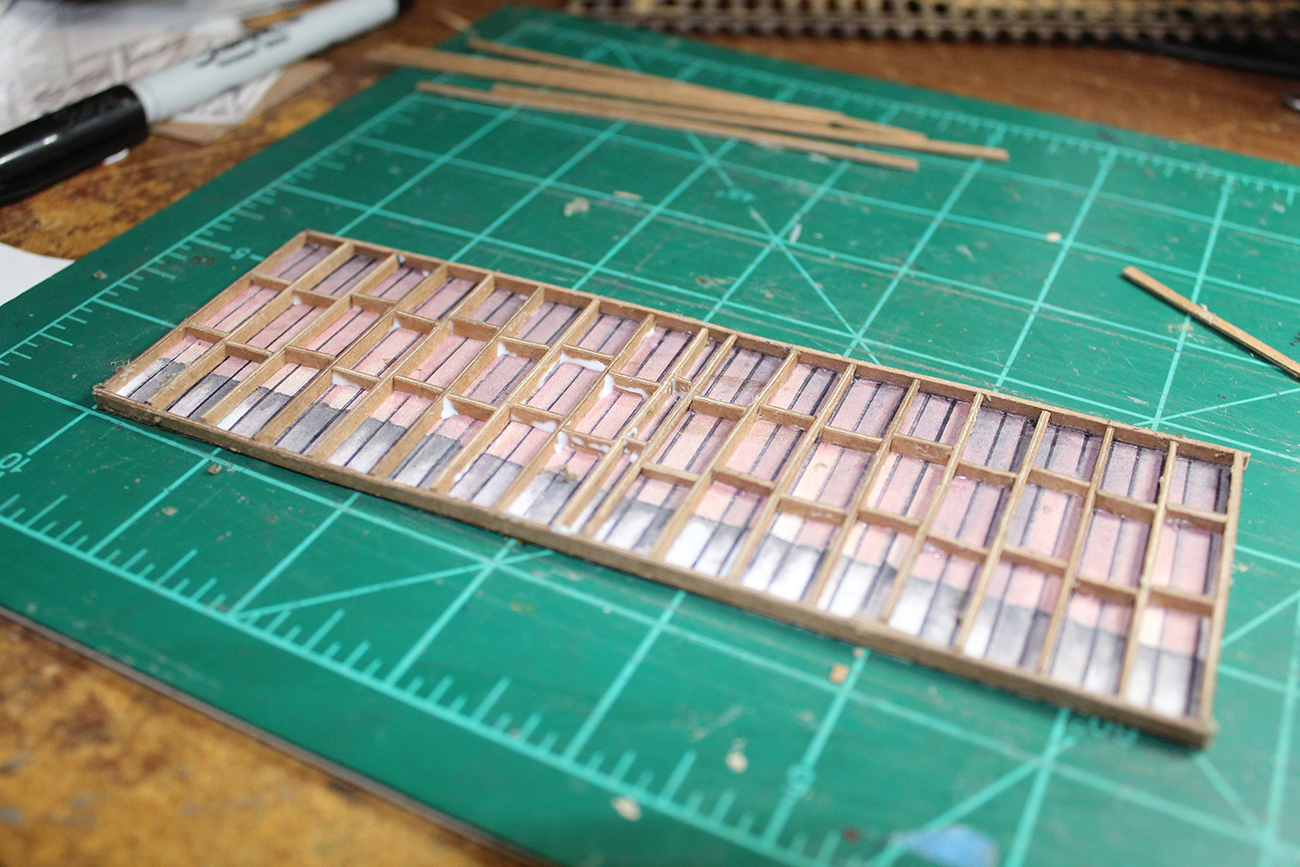
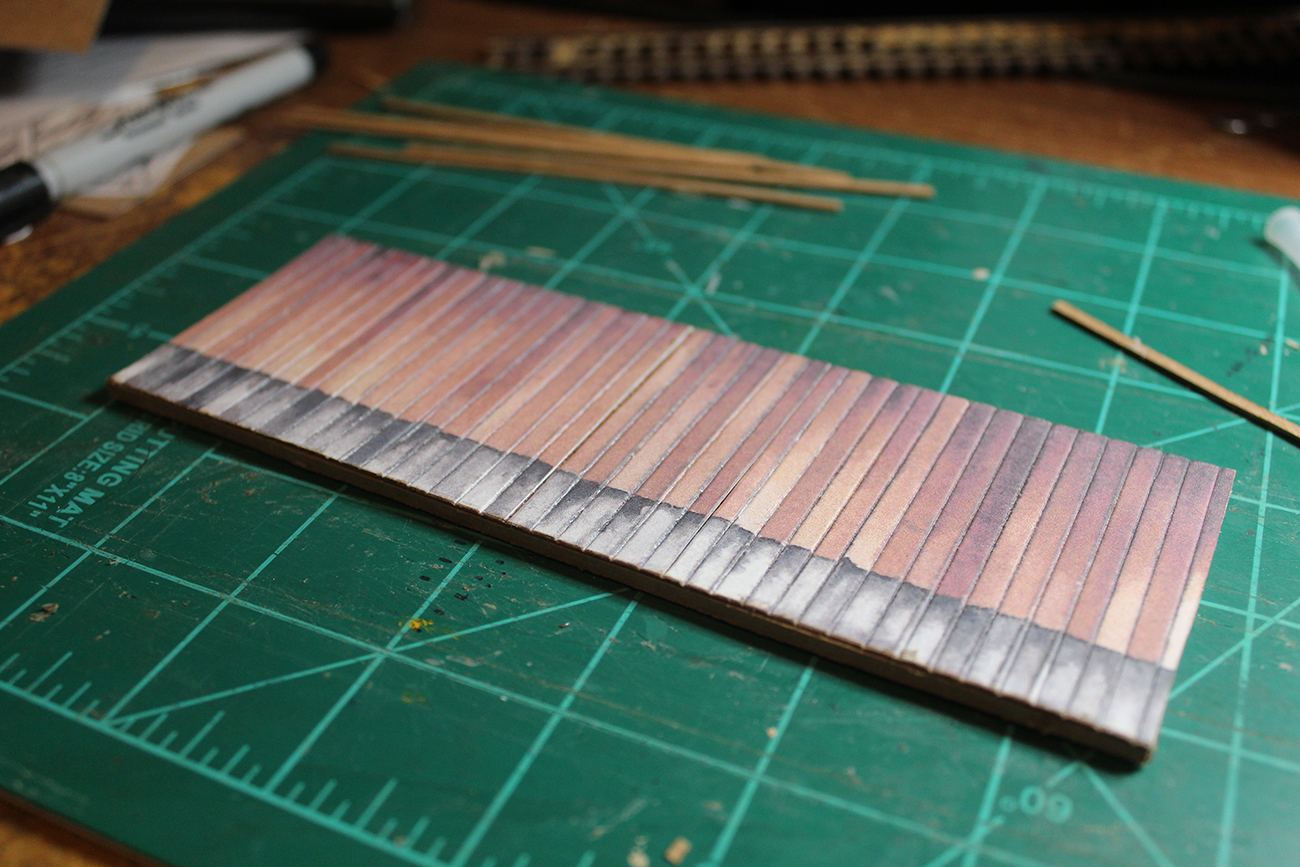
These were then glued to cardboard salvaged from soda can boxes…
They were glued to both sides of the cardboard and both sides were
scribed with an awl to give texture and relief (making it look like individual boards),
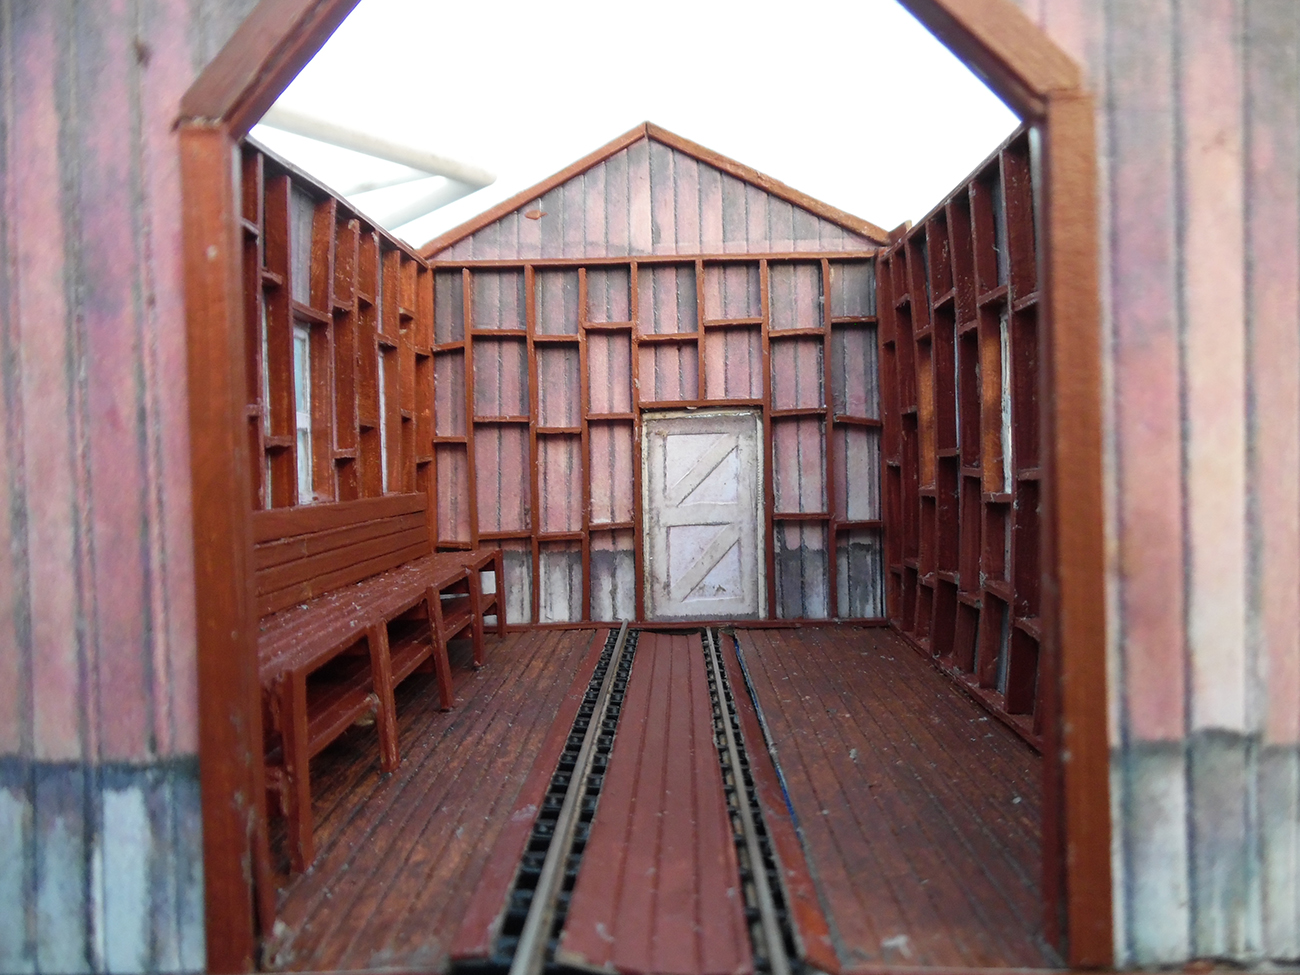
Card models tend to need interior support to keep warping down…
Balsa is popular but in building the Porterhouse I discovered I could use card as well
The use of card gives detail to the interior walls of the building…
The interior detail is important when one is in O scale and plans to have open doors!
The door opening was sized from the doors of Al’s barn kit… printed and then copied at 150%
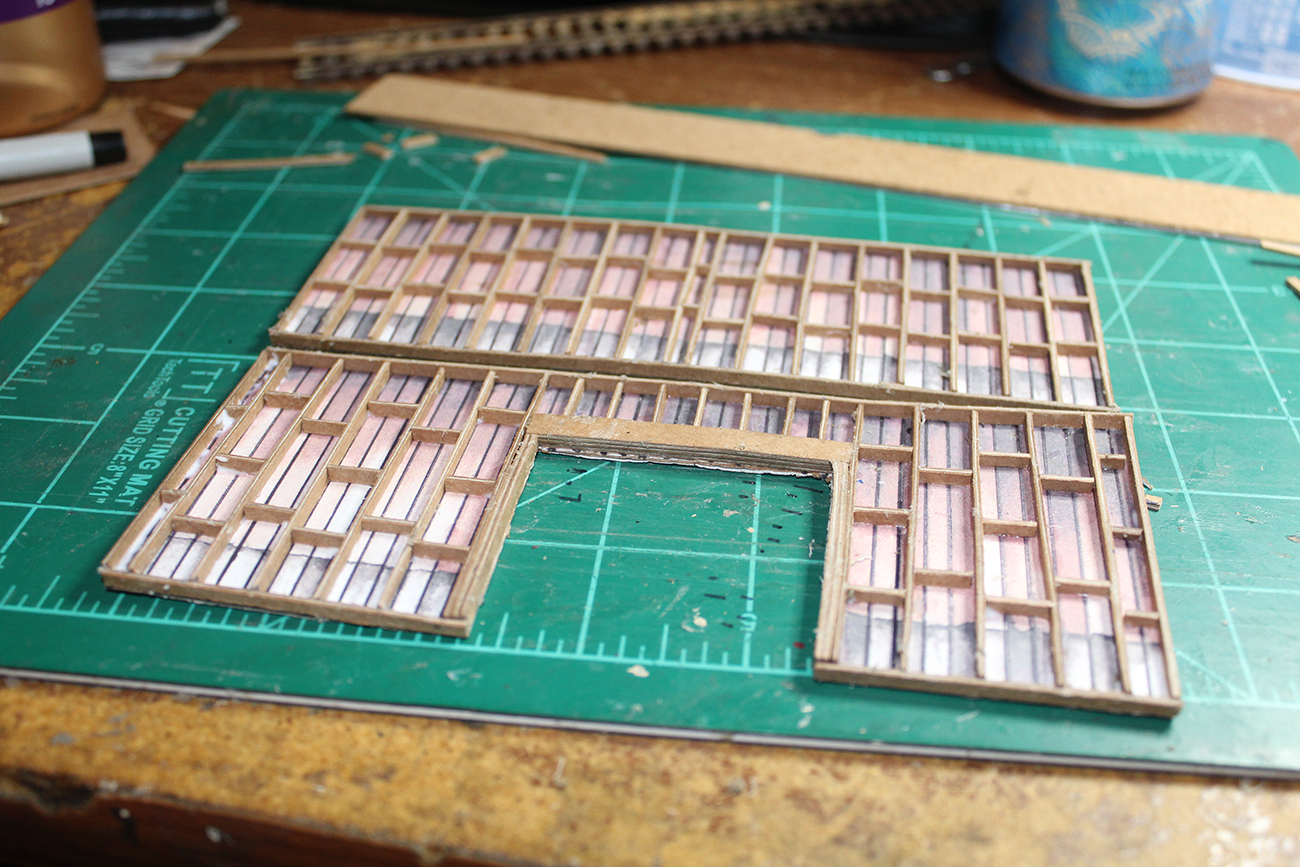
Note, the ends were cut before the interior detailing was added…
All was measured to the best ability…
And space was left so that it would all fit together
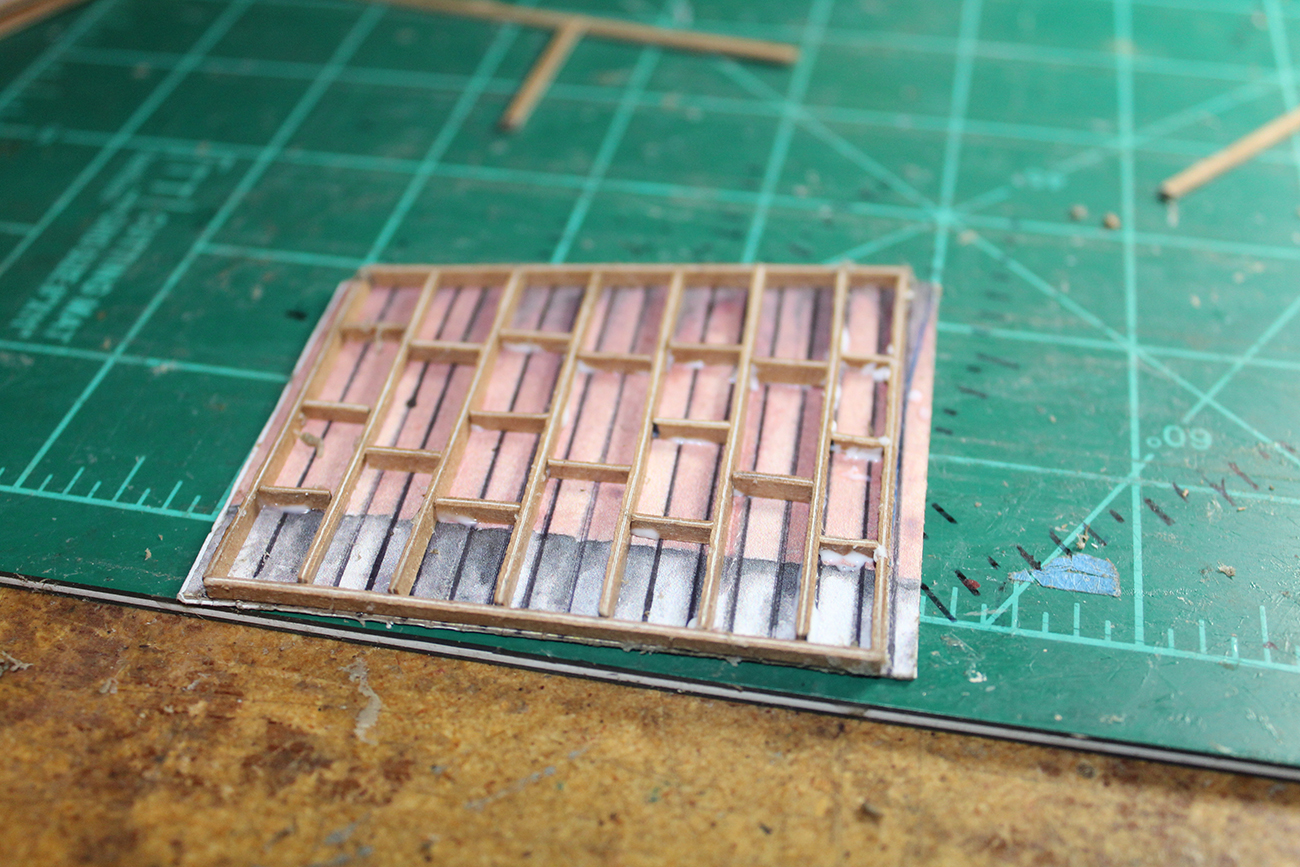
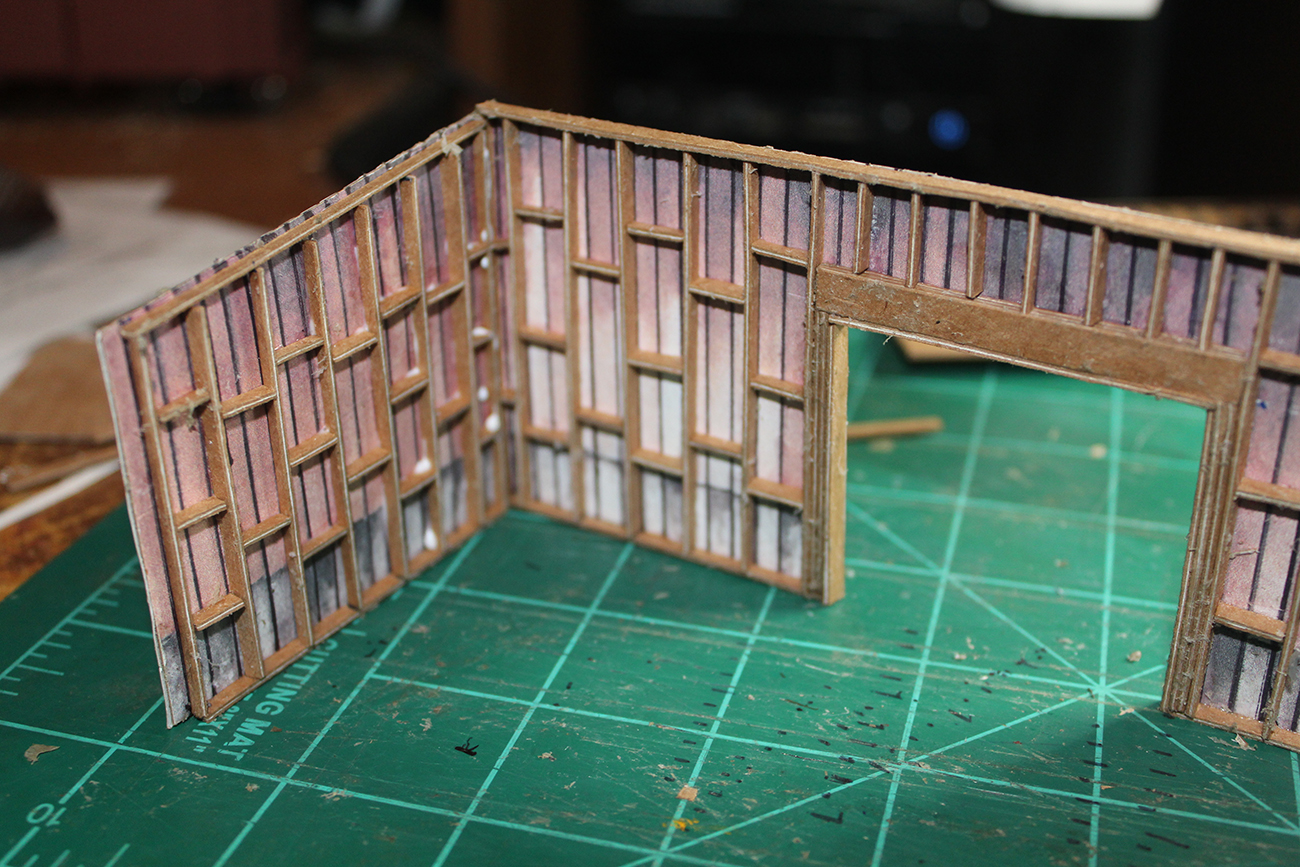
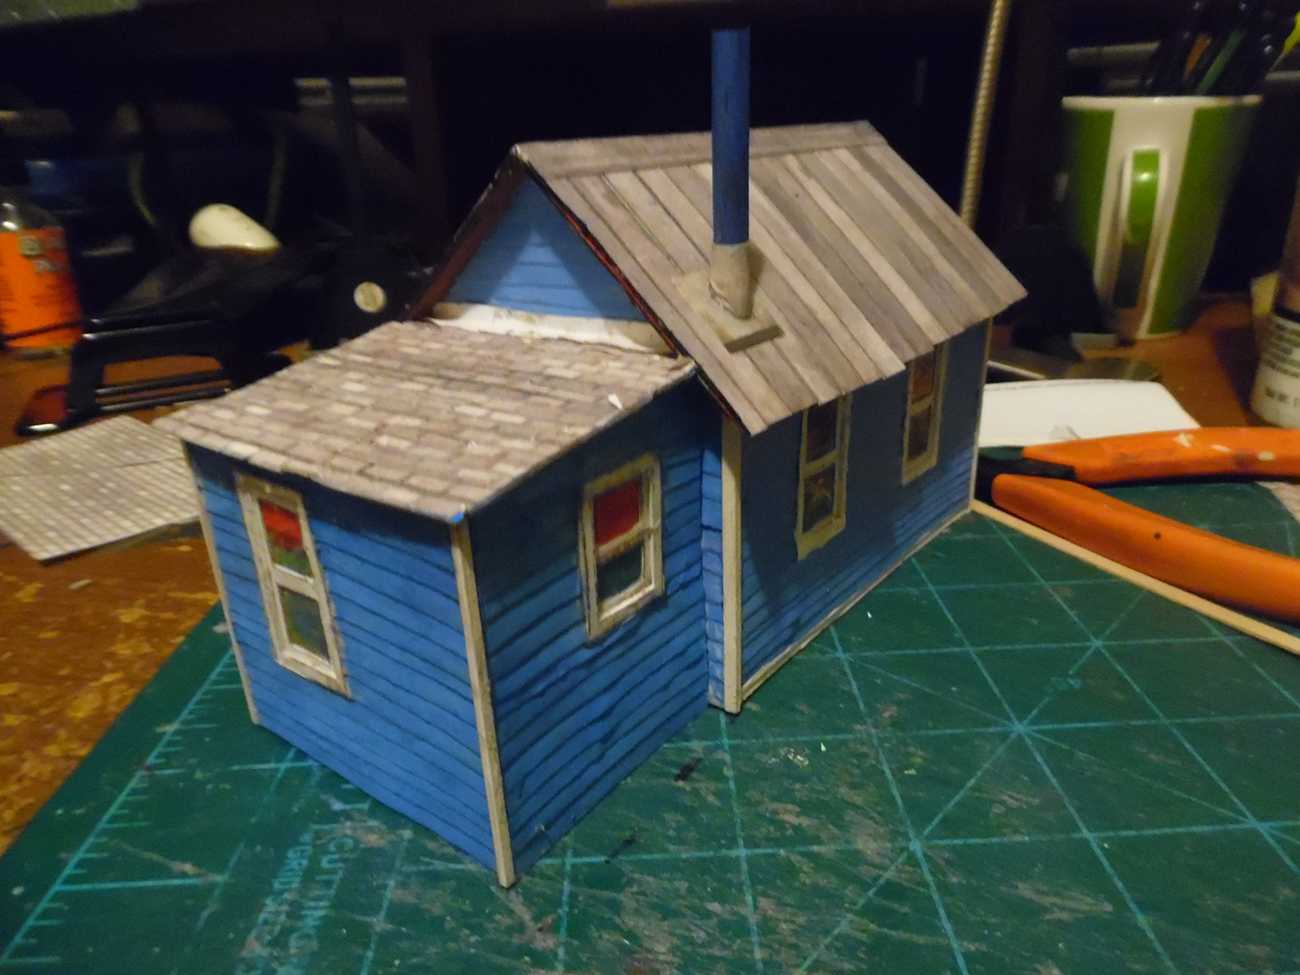
Once I had my walls finished…
I glued the shed together…
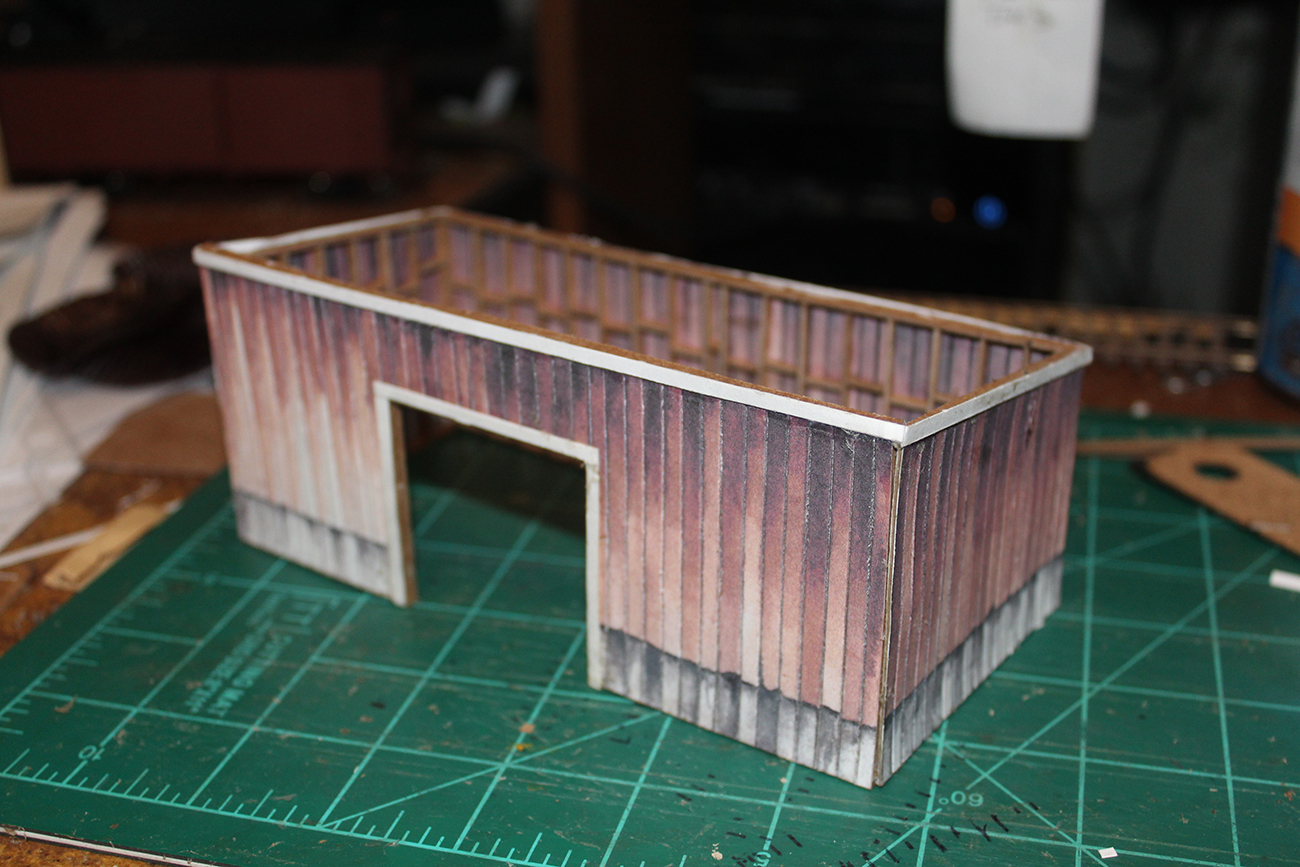
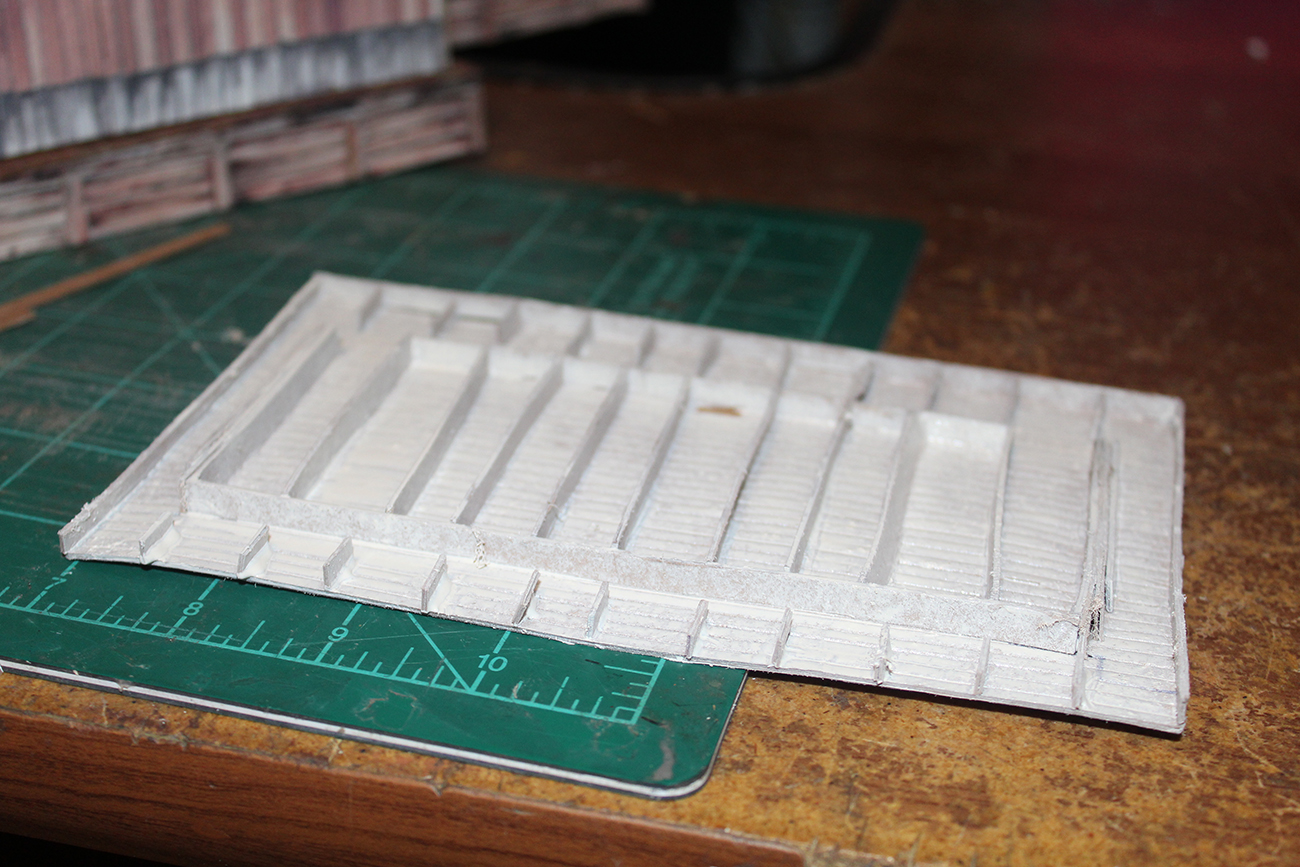
Once the shed was together so I had a better idea of how it would all fit, I began the base… The platform was made of foam core board.
I framed the foam core board to allow for track height and the height of the floor of a box or flat car.
Once I had the platform roughed in, the detailing came…
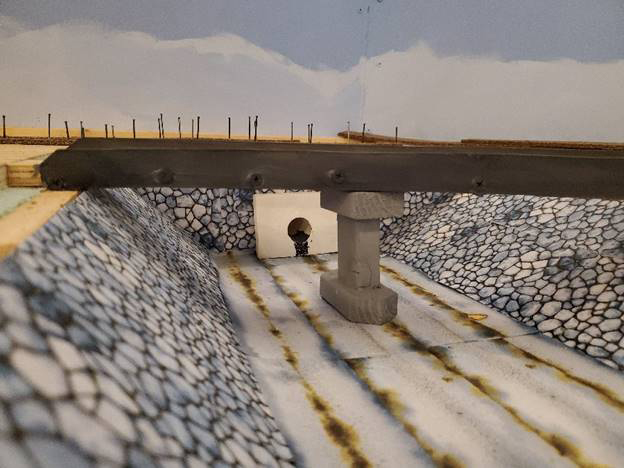
I used Al’s wooden tunnel set printed as it comes…
Actually I reduced it to 95% on the print out…
HO kit, printed a little undersized… For an O scale building…
That is “Eye Scale” for you!
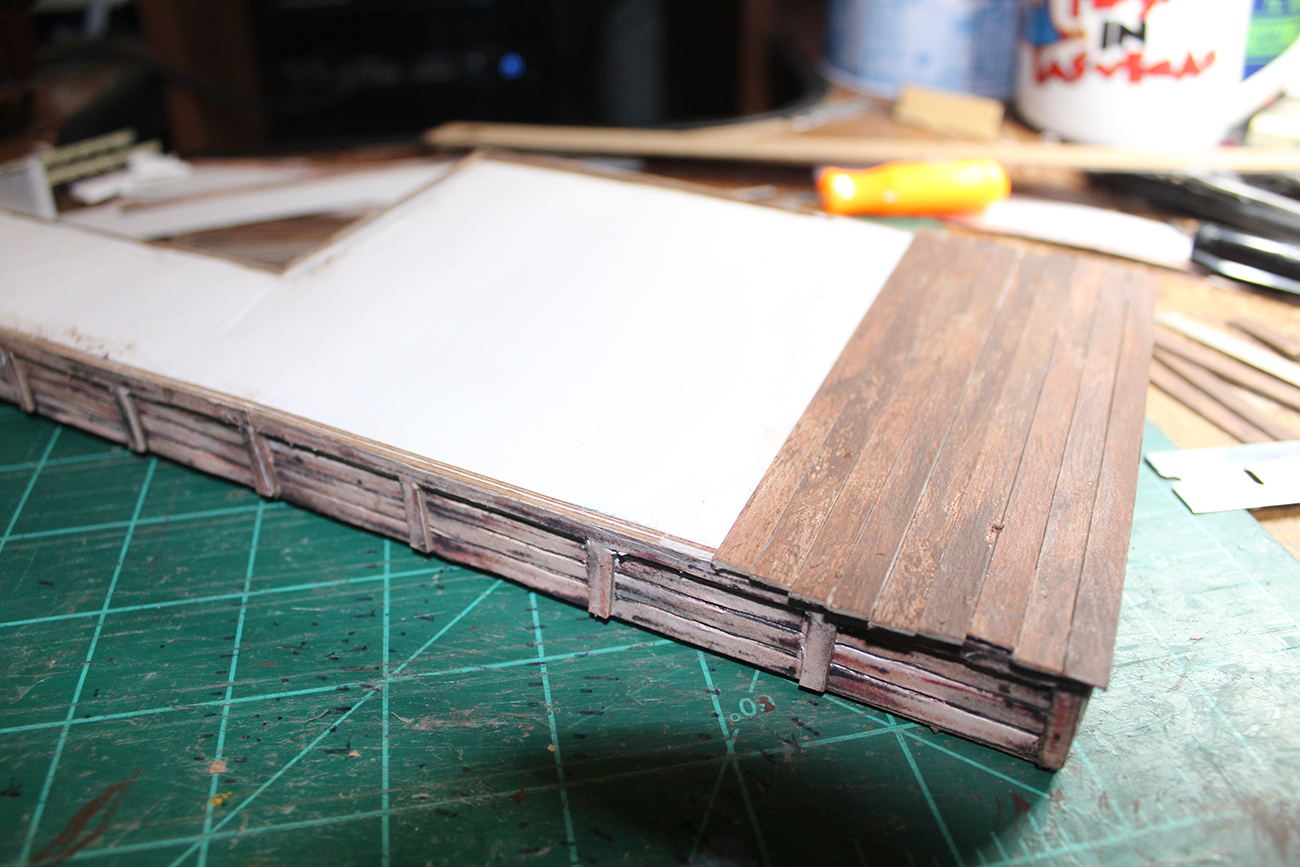
The prints were glued to double thick card.
The timbers were cut and then it was all glued to another print…
and glued to more card… this allowed me to scribe the boards behind the timber framing…


When I went to make the top of the platform, I did not find a print that suited me…
So I made my own texture and boards…
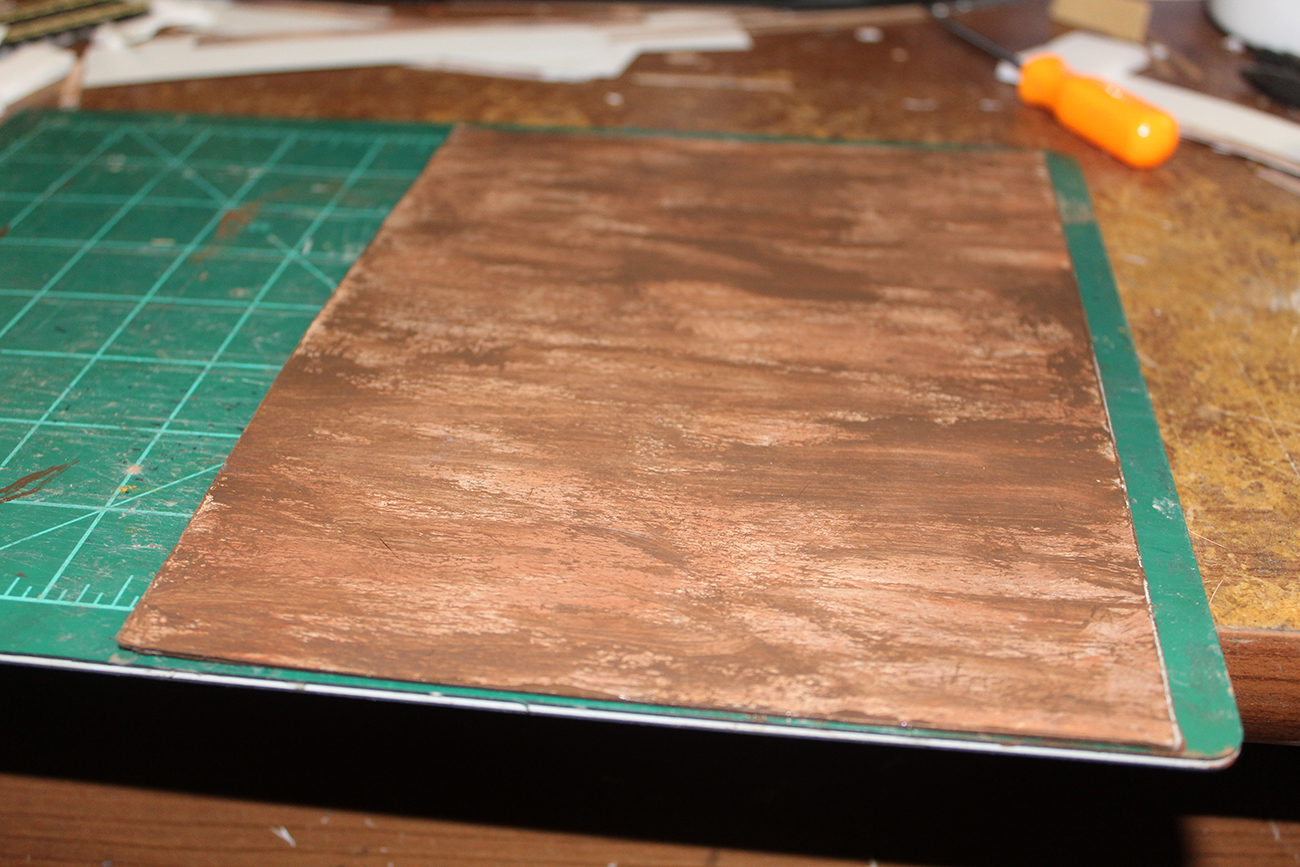
Double layer of card glued together, random painting with craft paints…
Boards were cut at 1/4 inch to represent 2 by 12 boards…
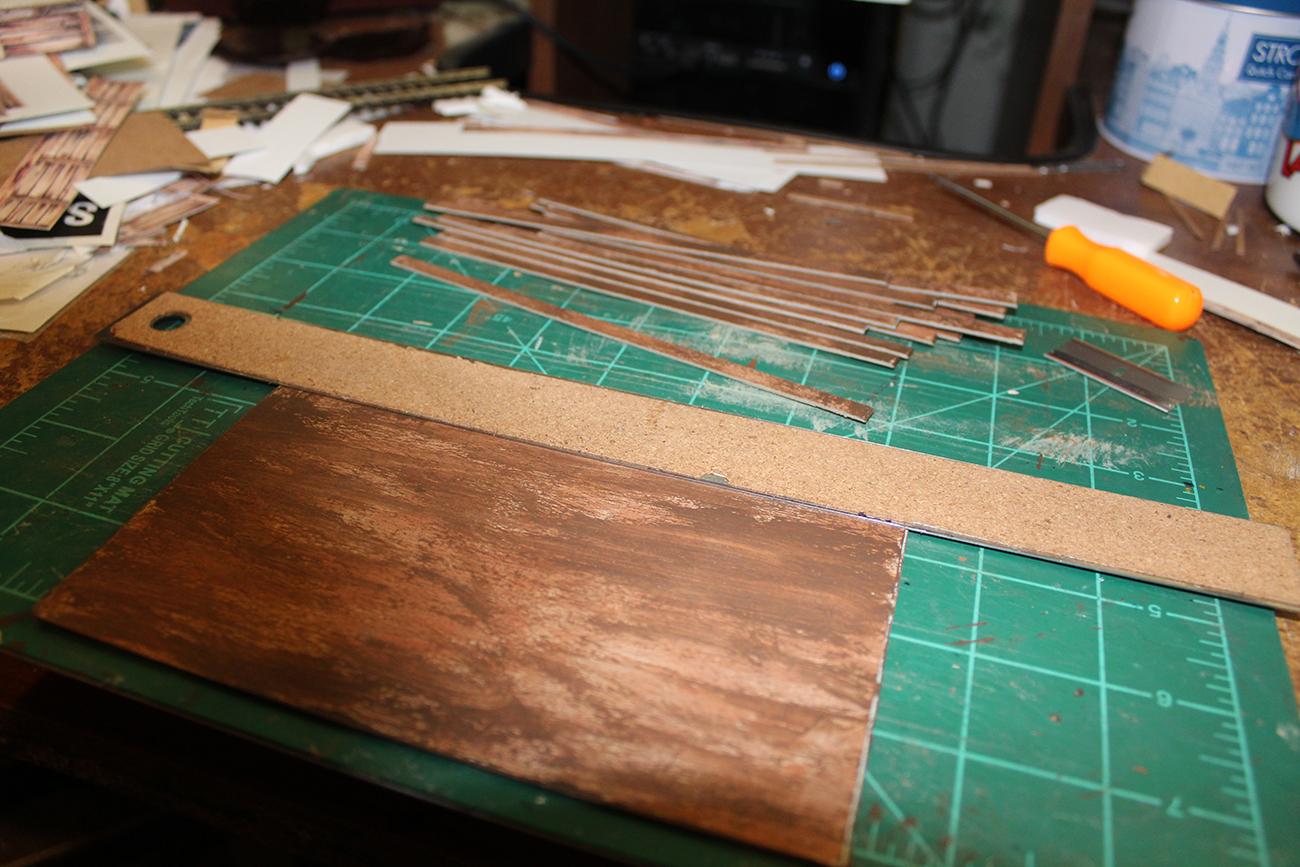
The finished platform…
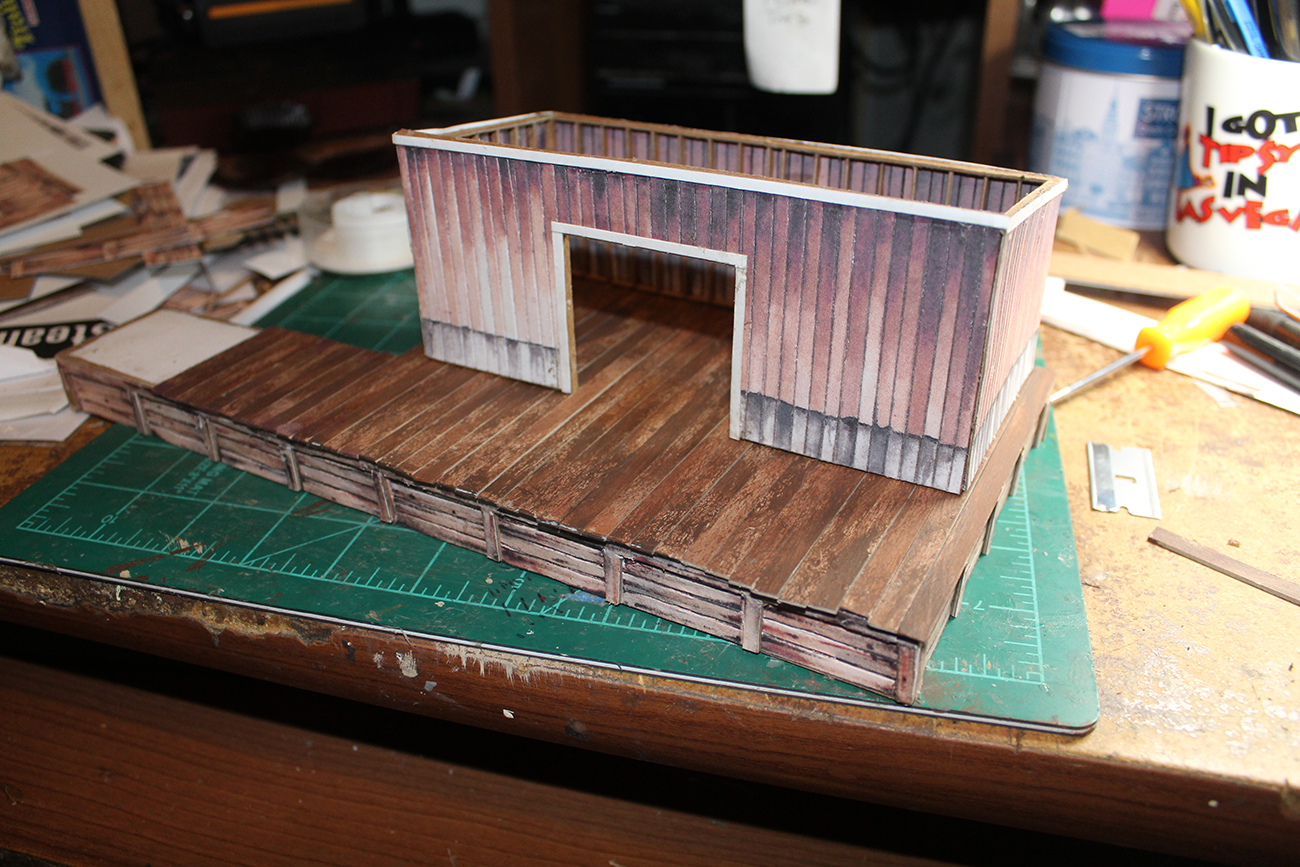
And the shed glued in place…
The doors for the shed were made from the barn kit as mentioned above… Four printed layers and one layer of card all assembled as mentioned when sharing the shed platform build.
All that is missing is a roof now…
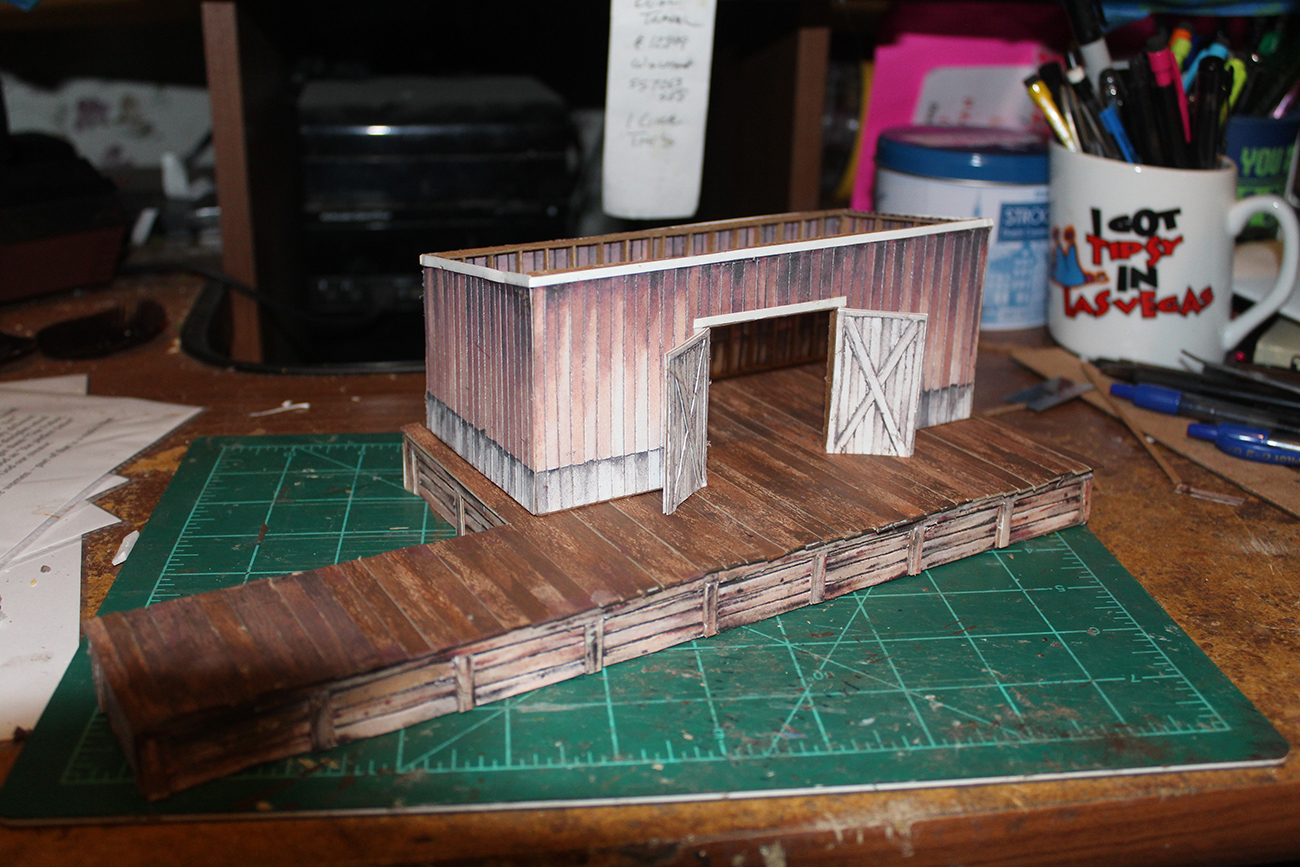
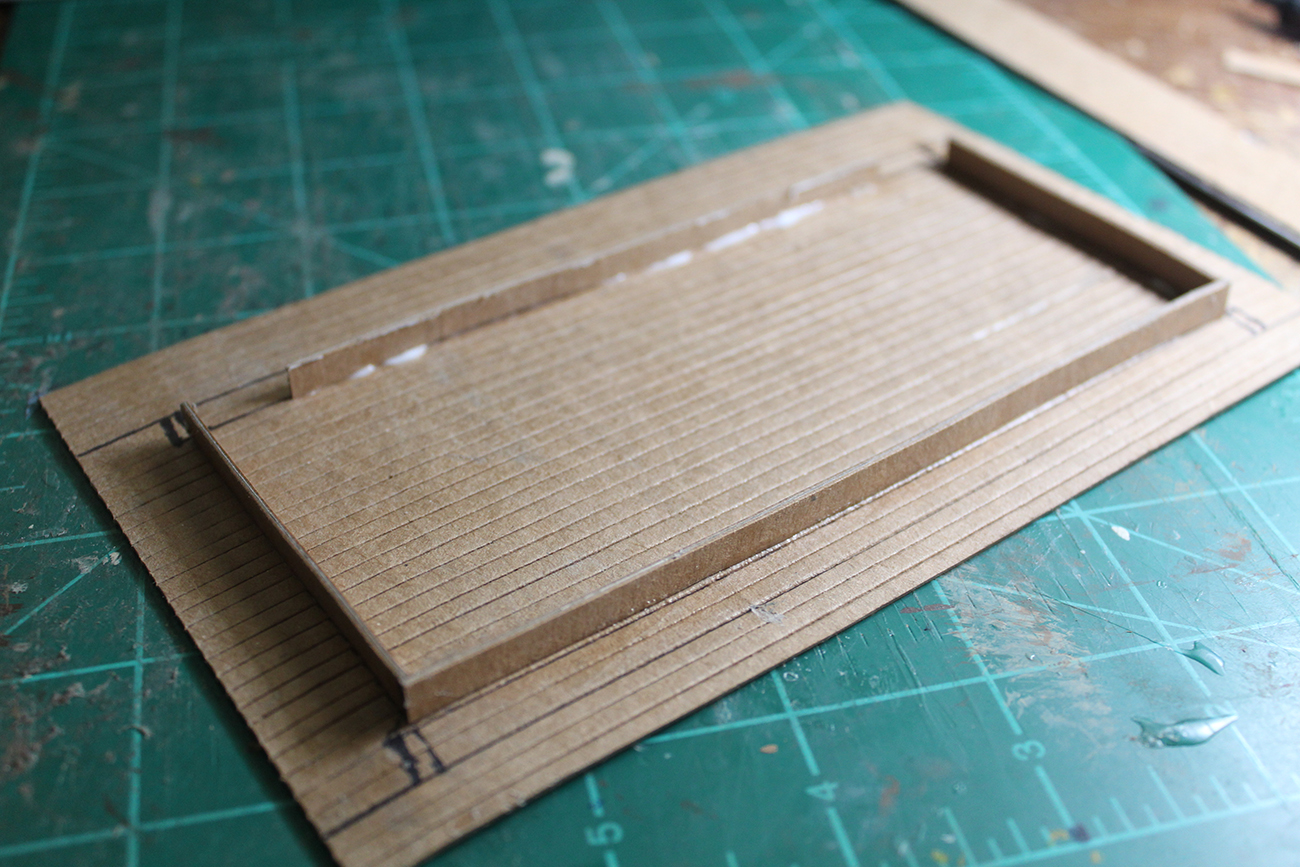
Now I build the roof…
the base is again a double layer of card that has been scribed to represent boards.
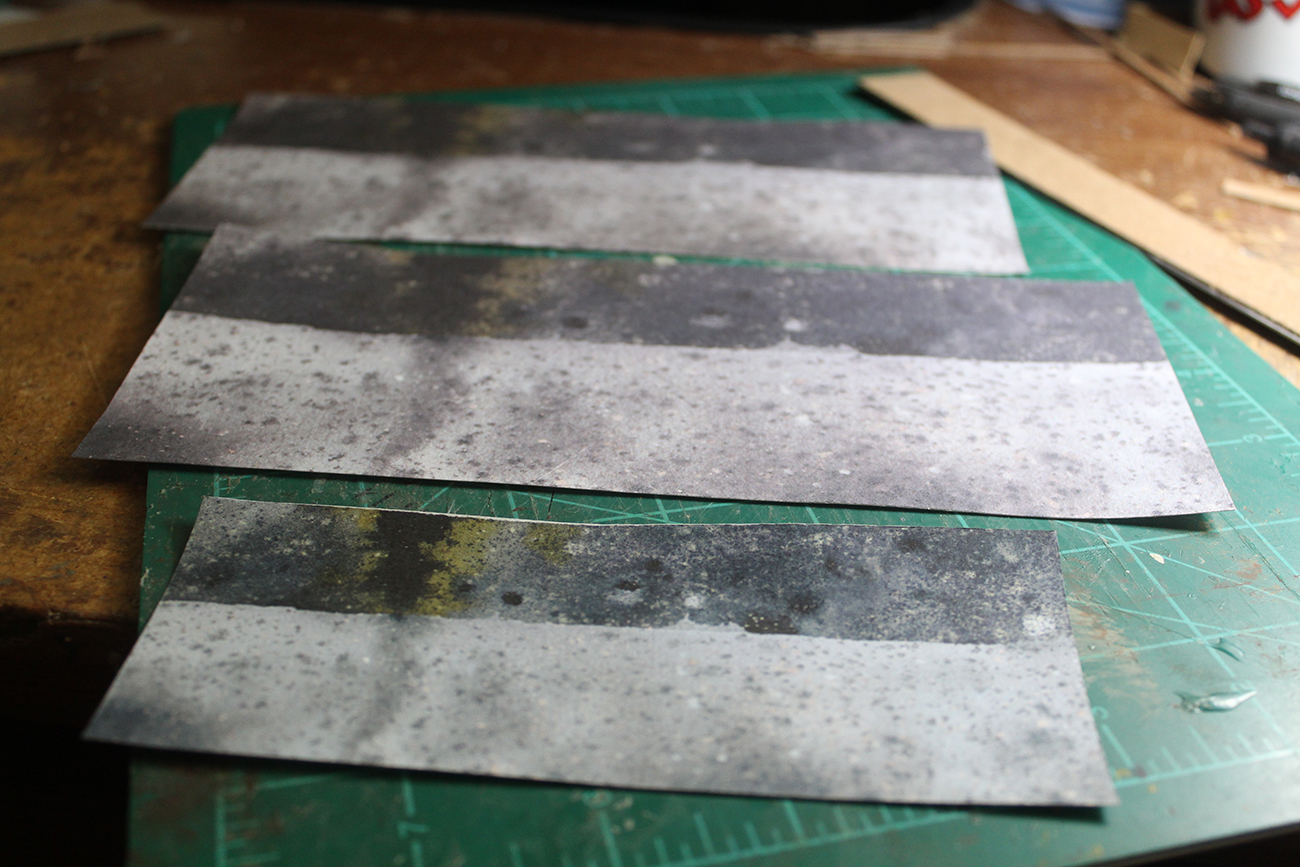
I took one of the textures from Al’s concrete and asphalt sheet.
I chose the one that looked most like asphalt (probably for a road)
Printed it up and then copied the print at 160% to get the size I needed..
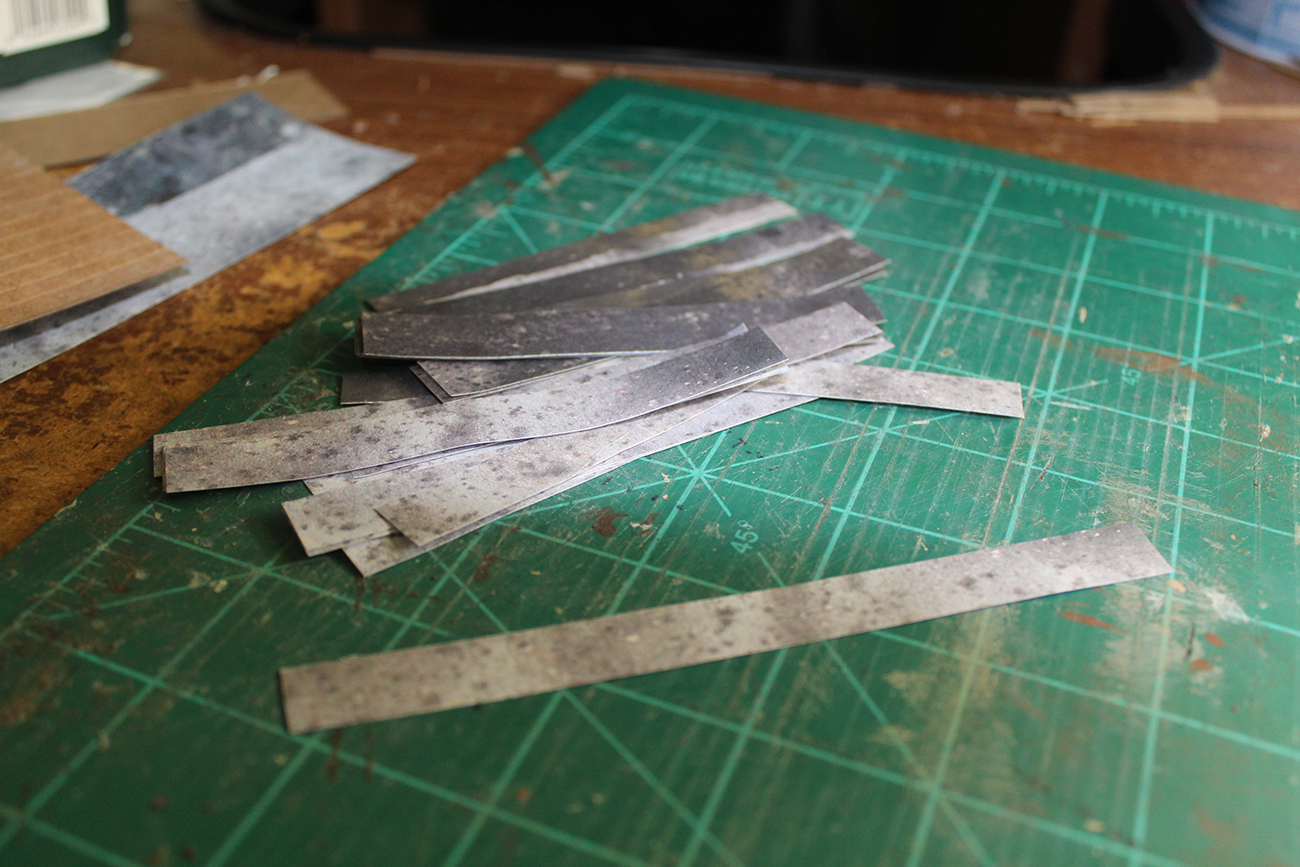
This time I tried something different… I purchased some tissue paper and spray glue.
I sprayed a standard (American) 8.5 inch by 11 inch sheet of printing paper and then put it glue side down in the tissue…
I wanted texture and something that would absorb the ink and fade it a bit…
I cut the resulting print into scale 2 foot by 16 foot sheets…
Once I had the sheets of “Asphalt” and the base, the time had arrived to “roof the roof” — Layering the “Asphalt” sheets…


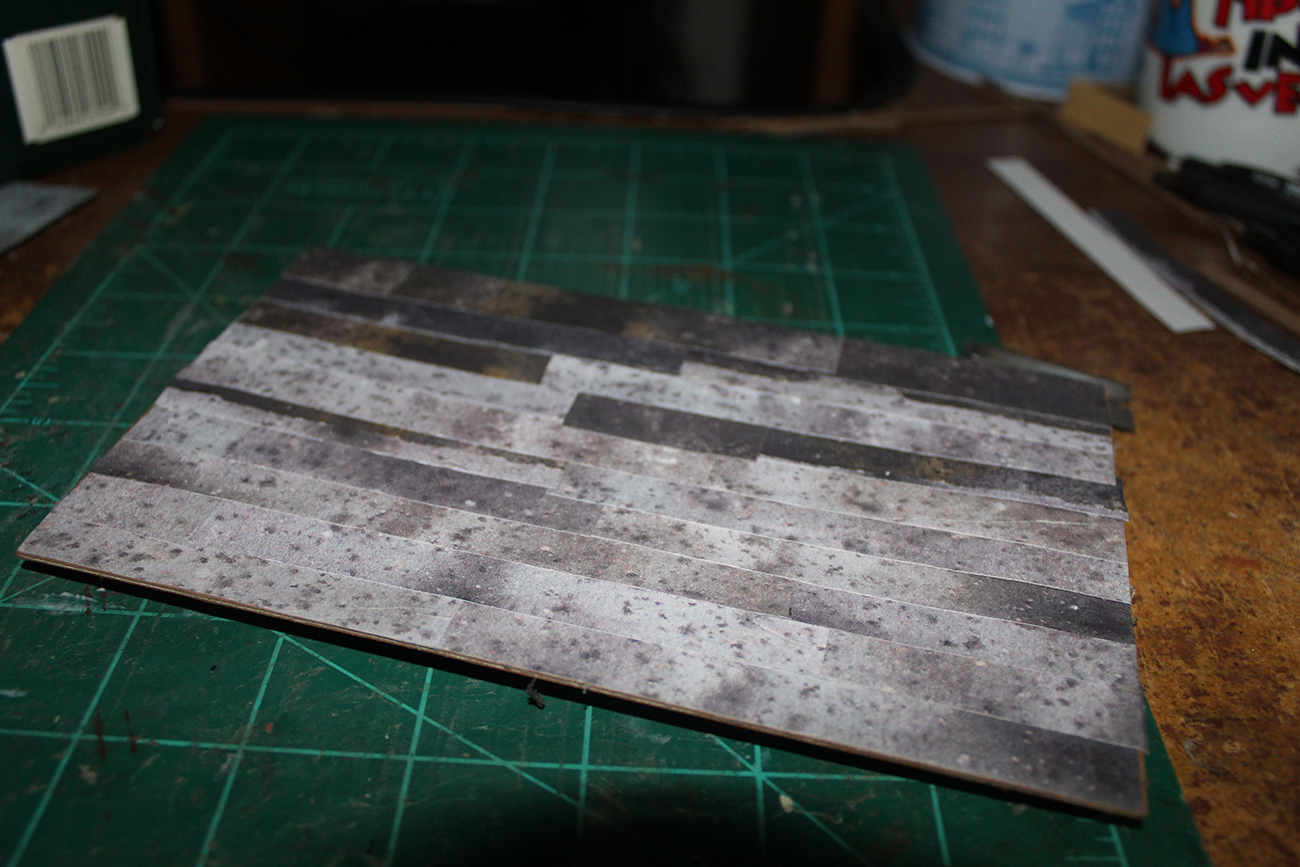
Once I had the “Asphalt” on the roof…
I needed to frame it…
This allows the roof to be removable and keeps it on the building as well.
I hope you have enjoyed all these..
I do apologize for the length of this…
I hope the details help others…
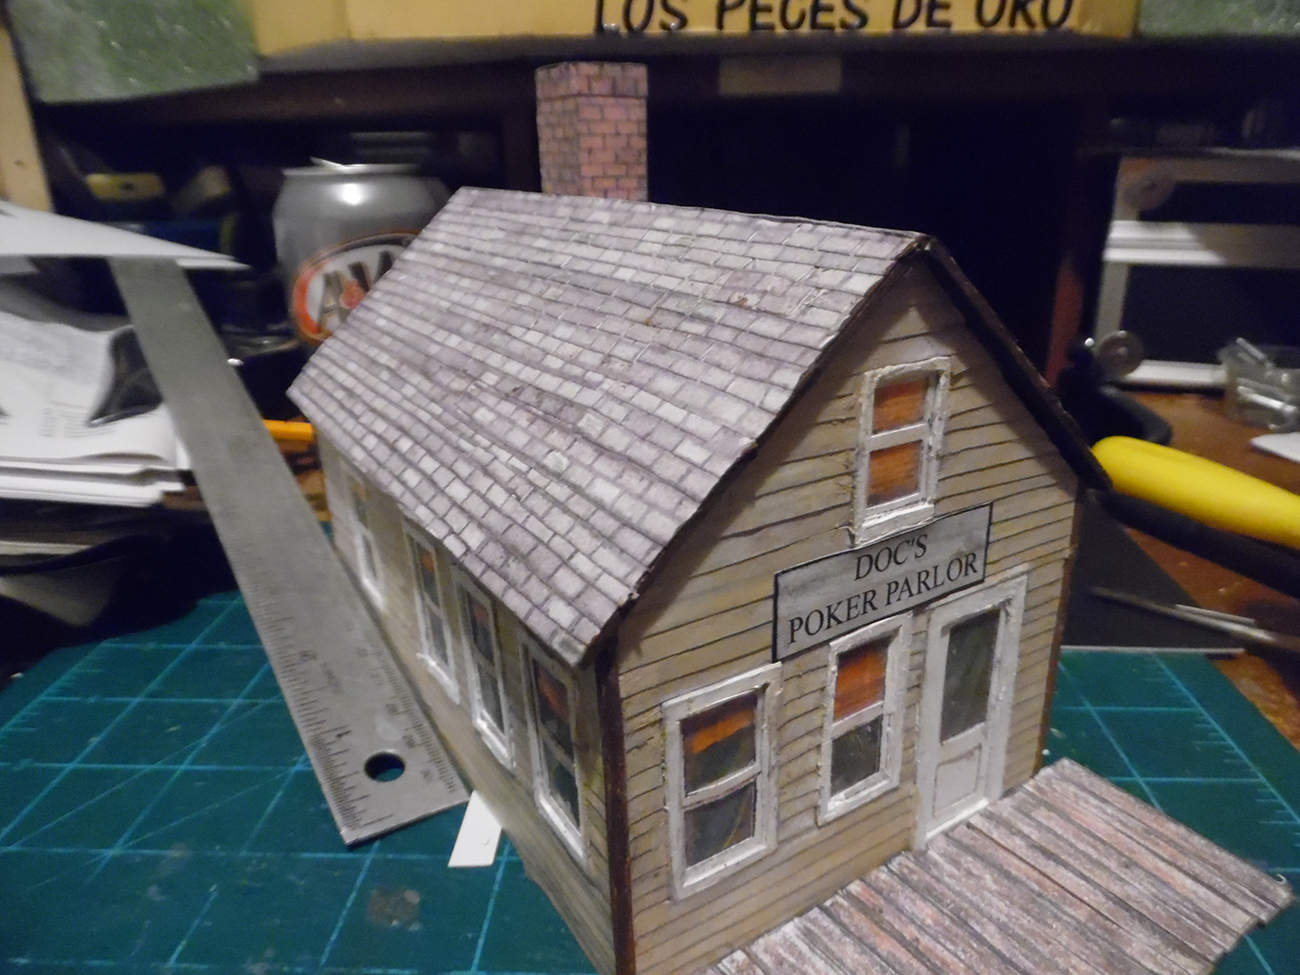
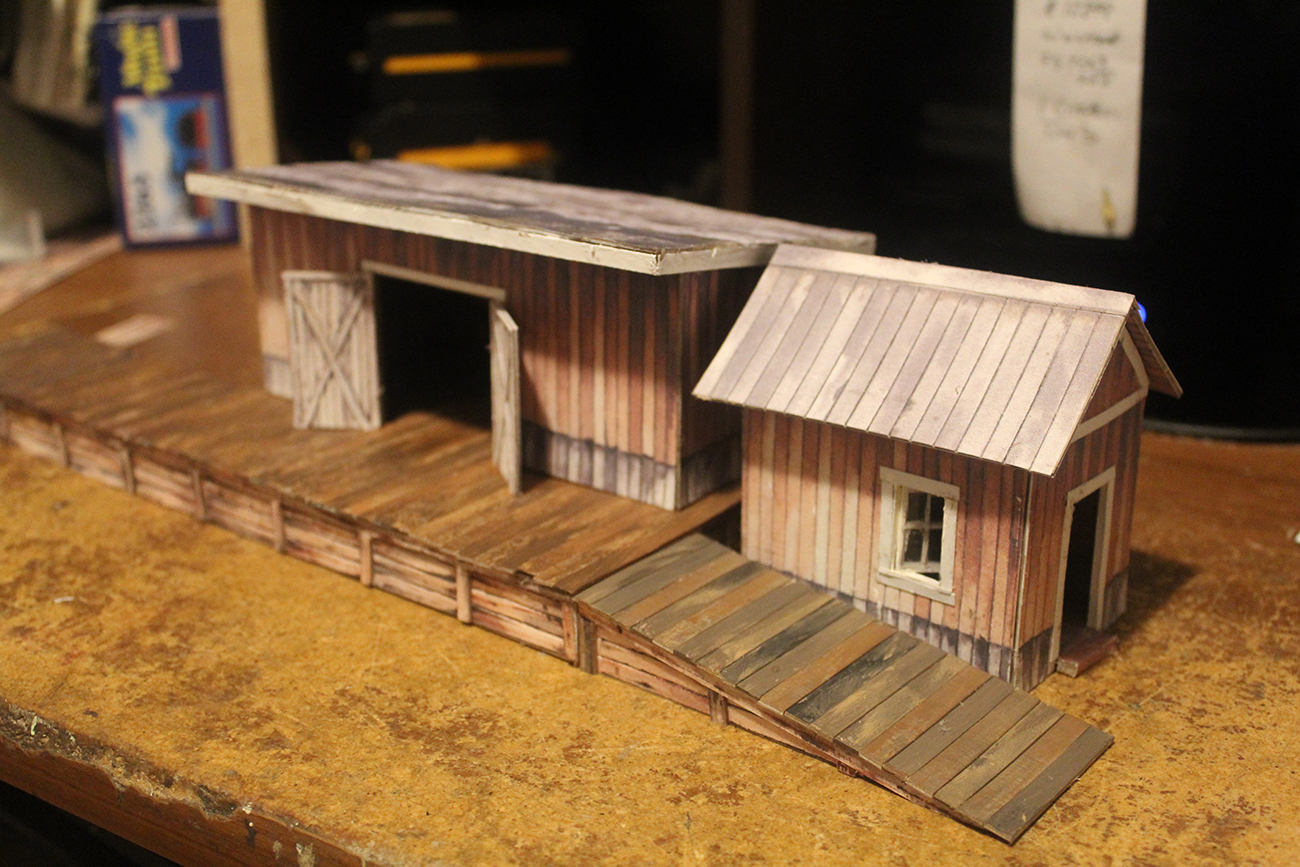
Here is the completed build as it is so far…
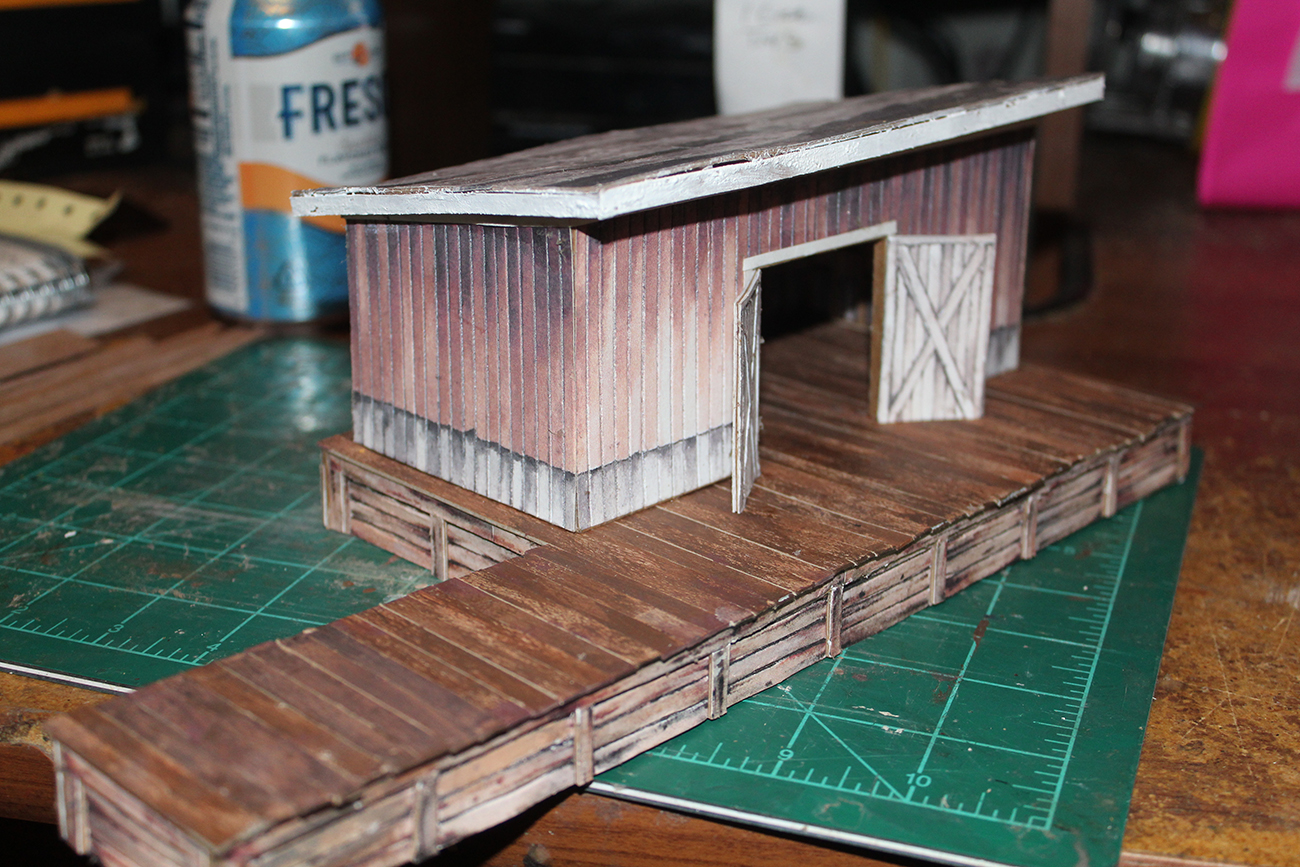
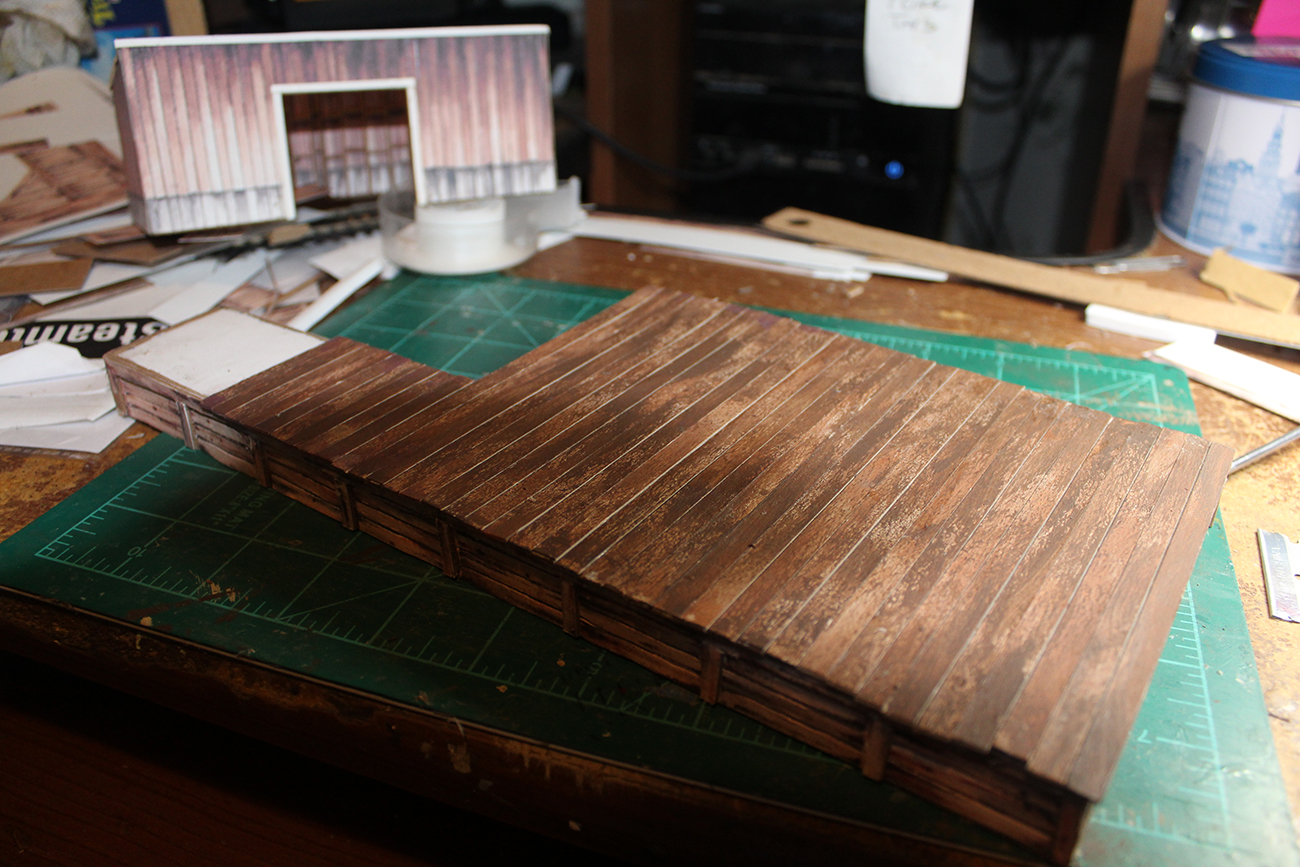
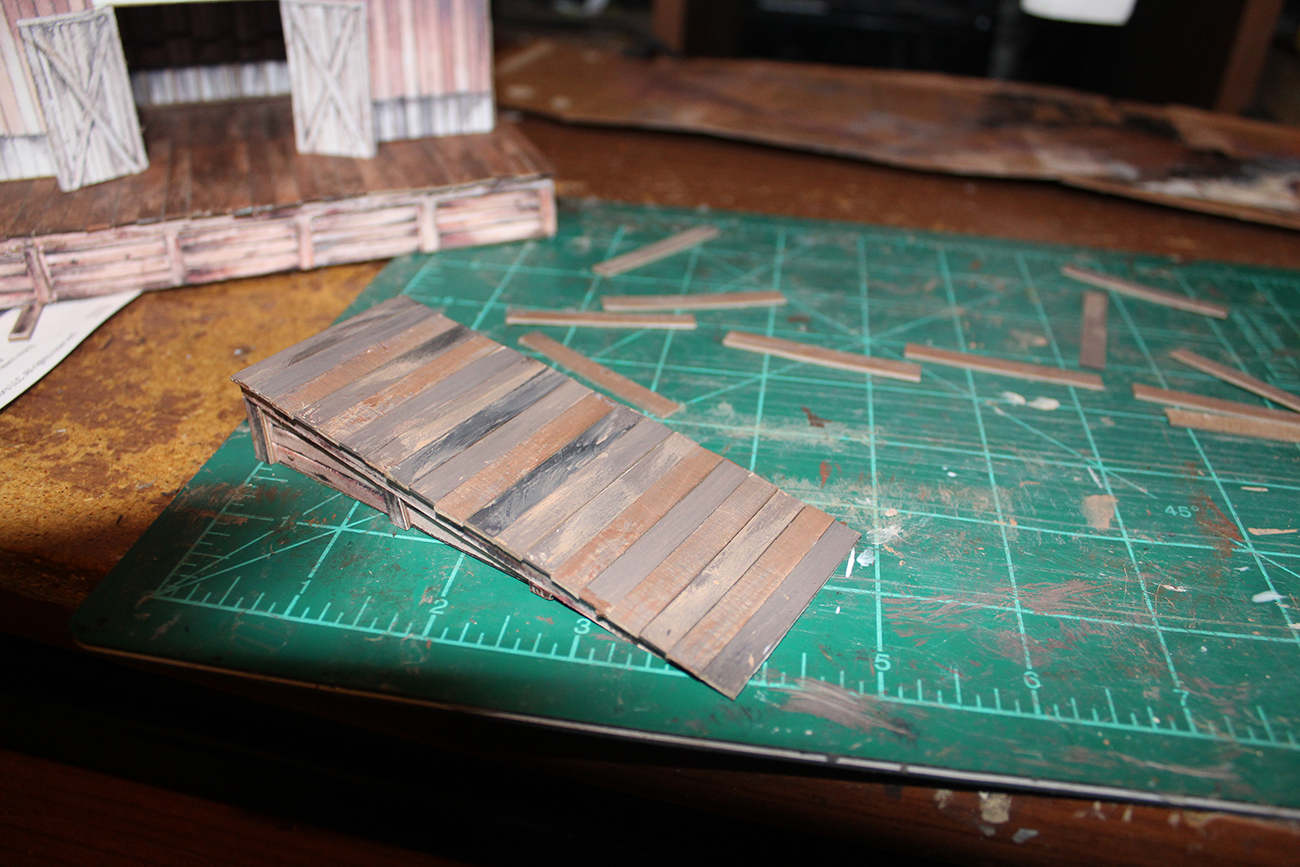
I built a ramp to go with my freight shed…
An office will follow soon.
The ramp construction may give more detailfor things in my tutorial on the shed…
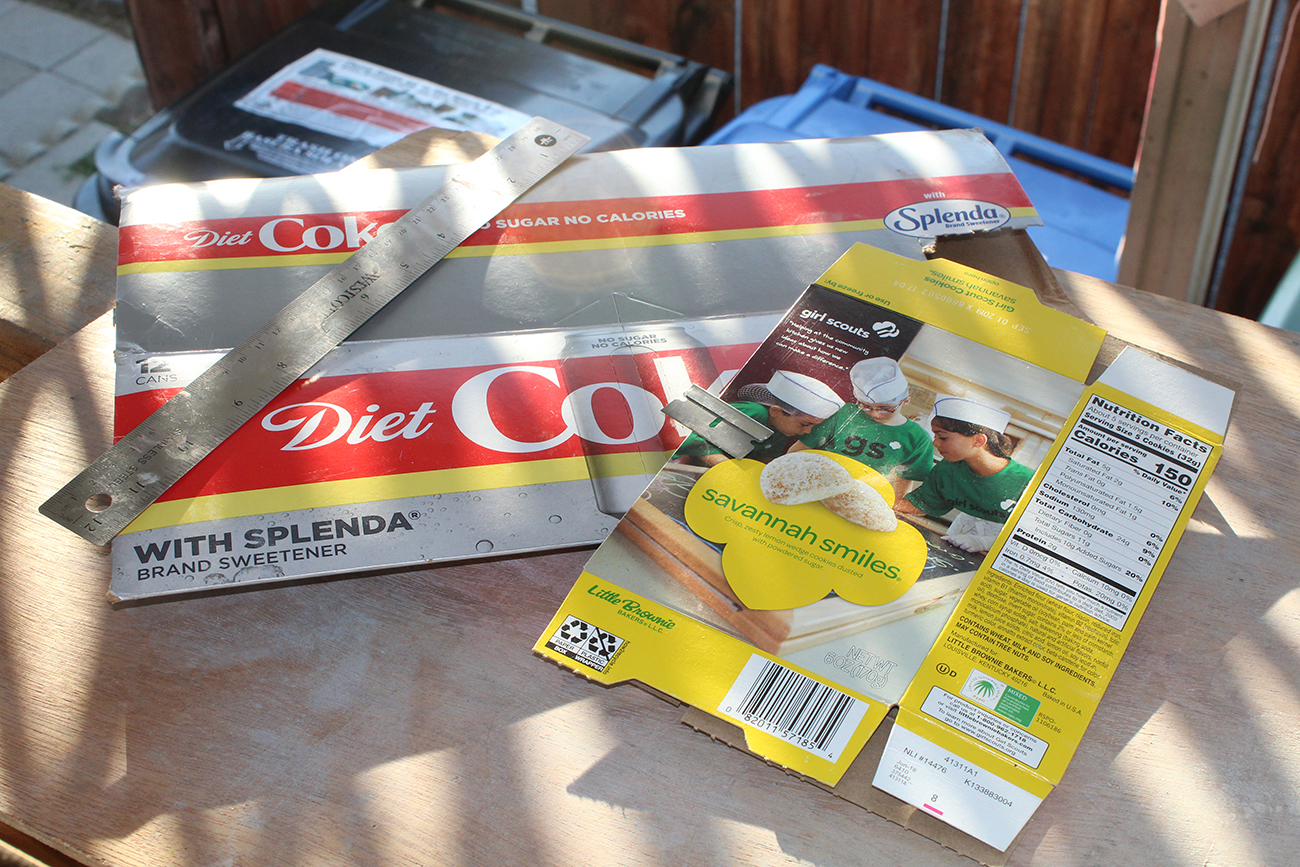
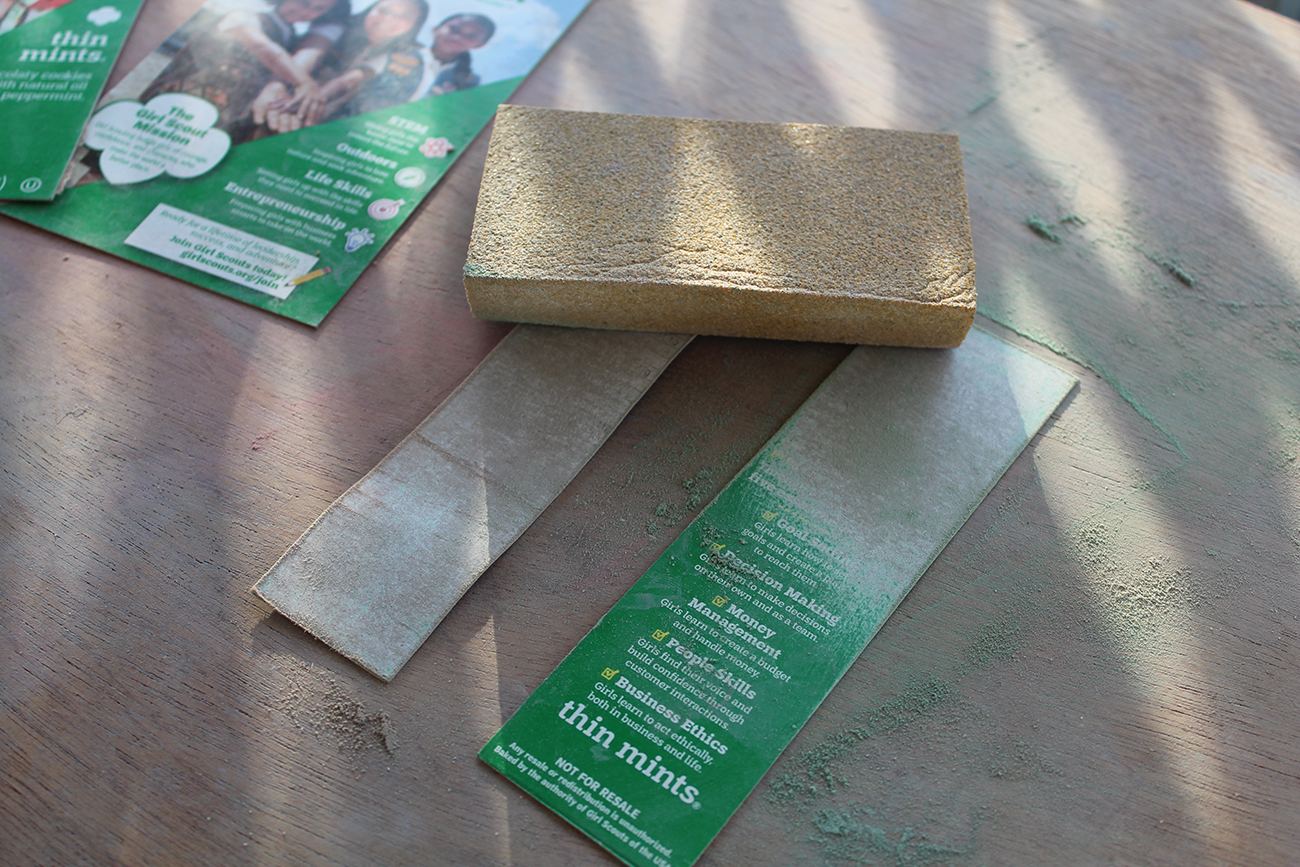
When building my structures I use “recycled” cardboard from soda can boxes and similar boxes.
I used to remove the waxy side “decorations” with steel wool.
I now use a rubber sanding sponge.. Faster and it does not cut my fingers.
I also use Aleene’s “Tacky Glue” for most of my work.

After securing the print to the prepared card, I scribe the board lines with a cheap awl that I got from Harbor Freight…
This gives definition and a 3d effect to the boards.
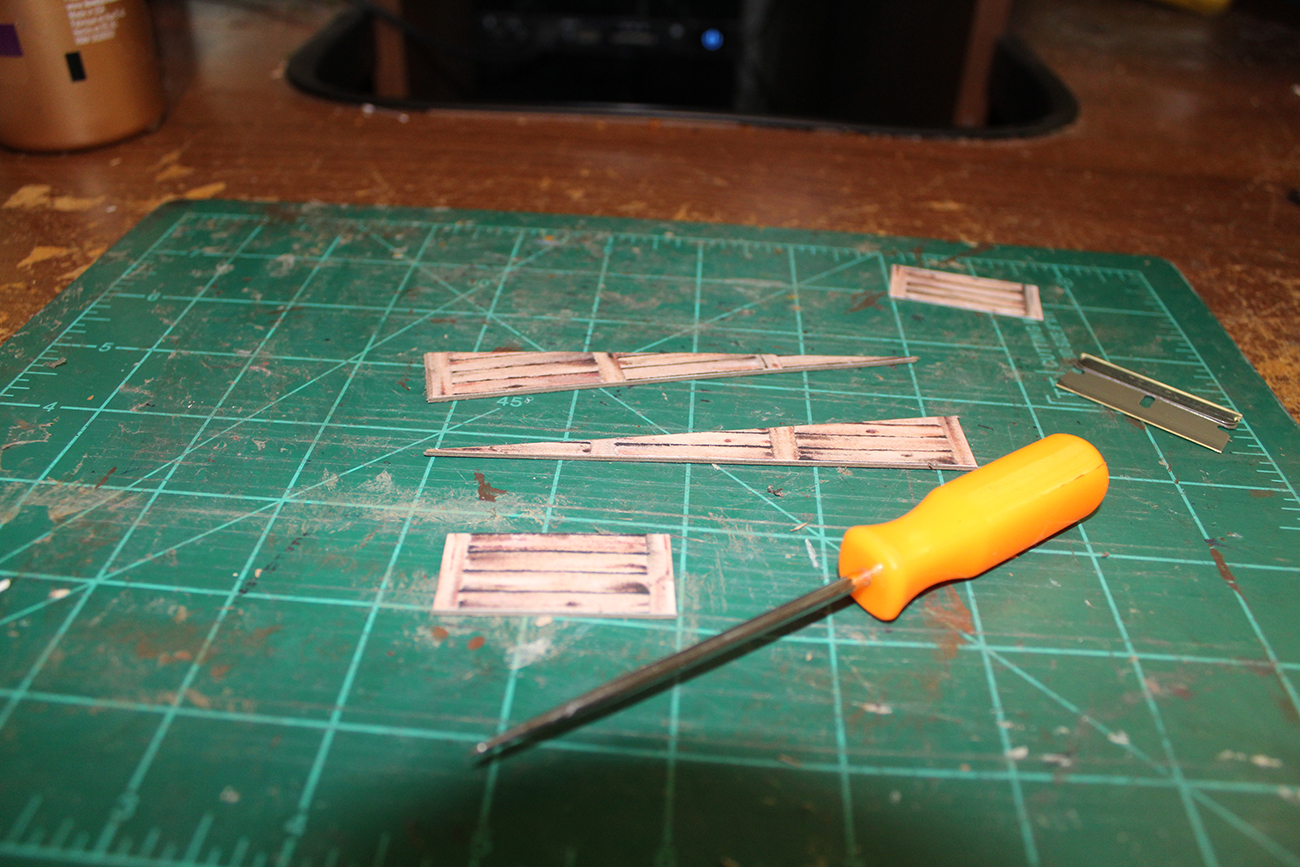

Once I had the sides done, I cut “boards” to finish them
These were from the Wood tunnel print.
Once that was complete I glued the side pieces of the ramp together.
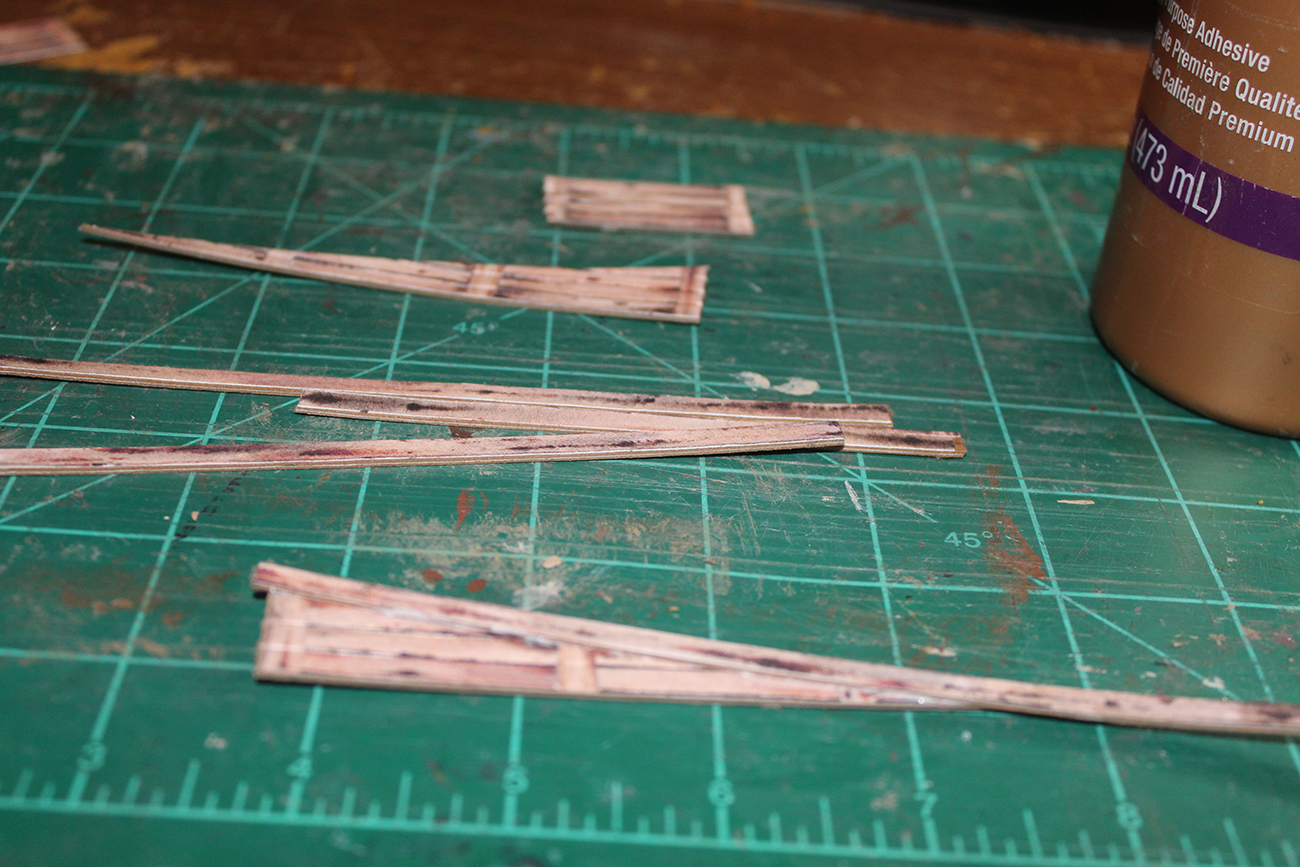
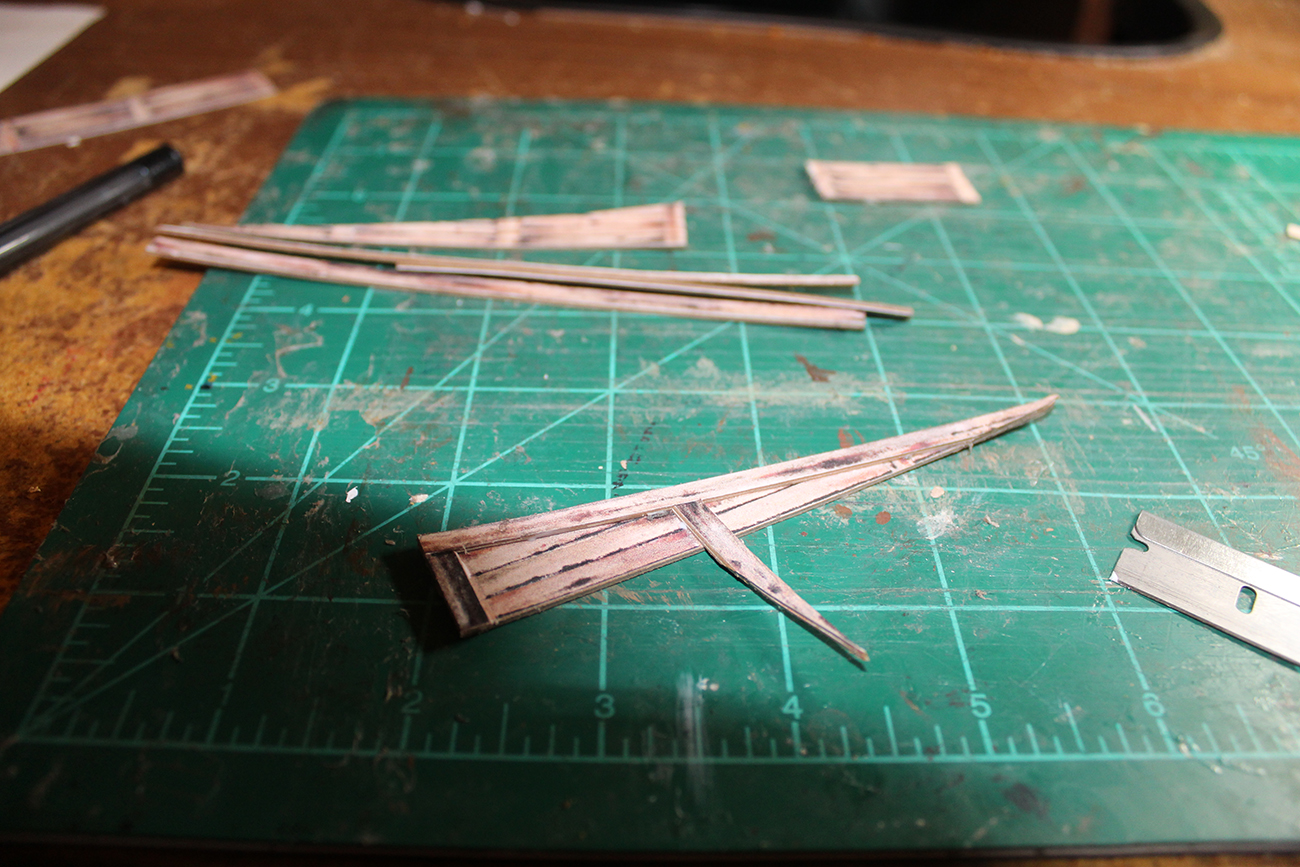
Once I had the ramp together, I had to stiffen it up before adding the top boards.
The top boards are painted card (Random browns)
To give the effect I was looking for and to match the planking that I made for the shed platform.

My completed ramp with the rest of the shed and its platform…
I only made one ramp but there are two or three places that I can use it…


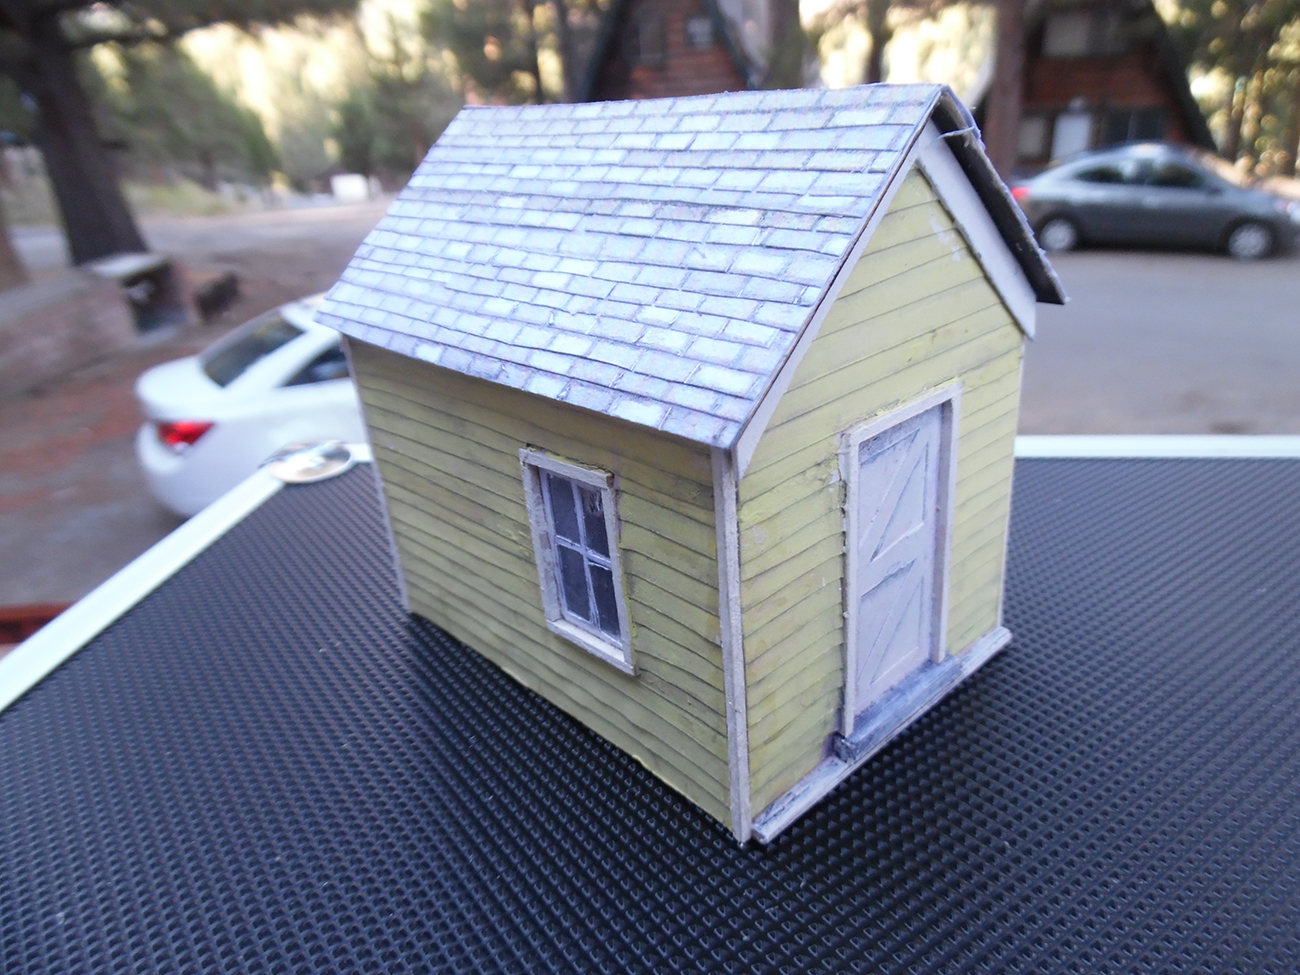
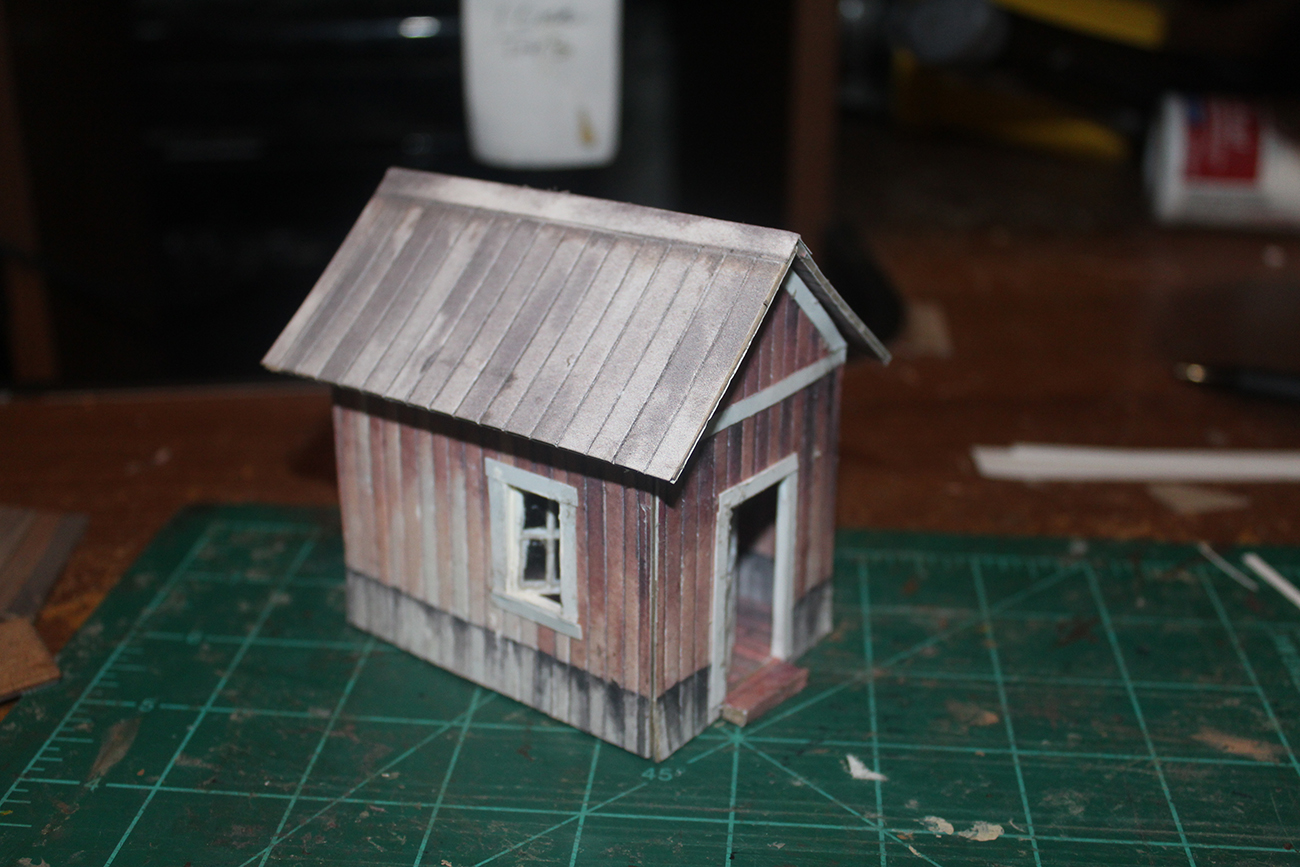
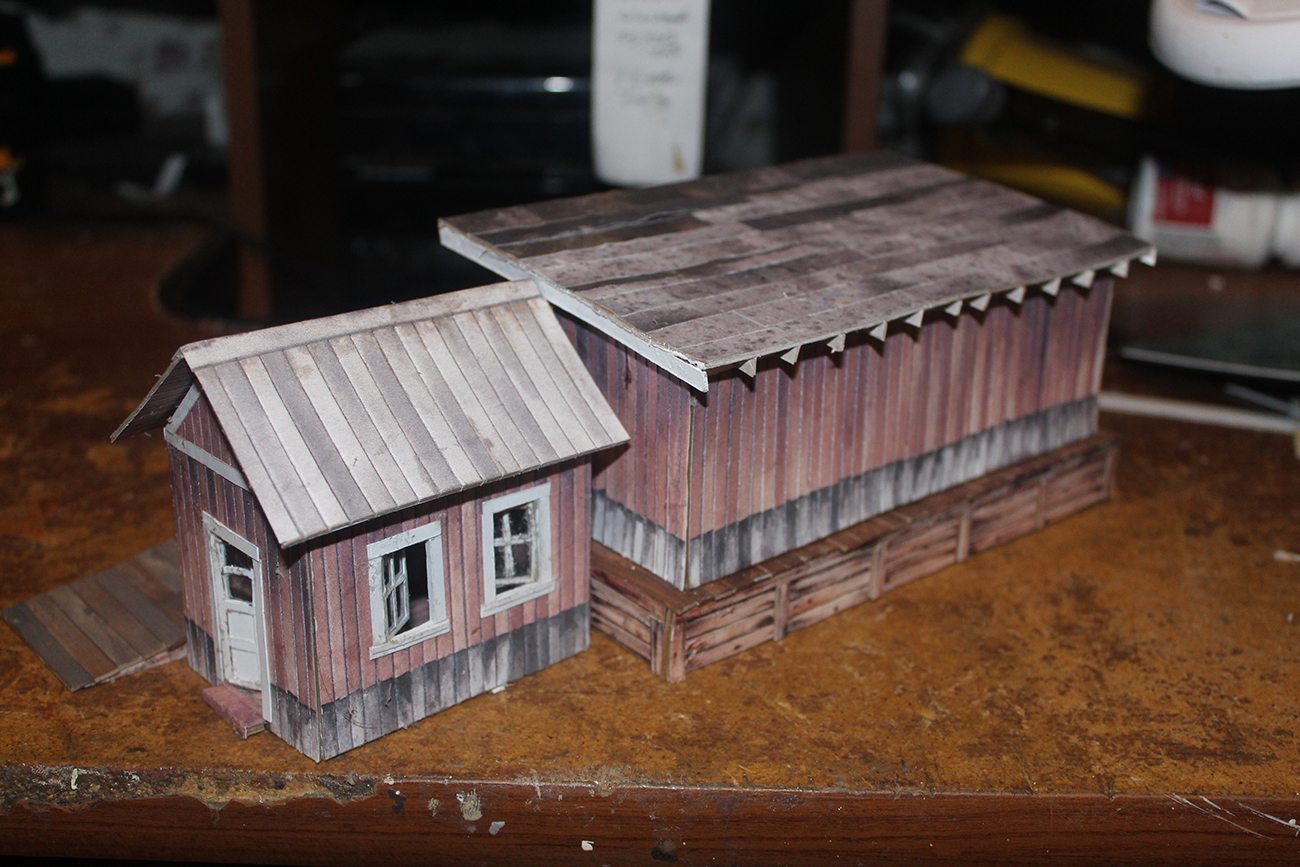
I mentioned that I wanted to build a little office to go with my freight shed…
I did and here it is!
When I built my freight shed that was inspired by Al’s contest…
I decided that it needed a shed to be an office…
Today I built that shed!
The walls are from left over extra prints from Al’s covered bridge.
The windows are from a small shed that is sold with a water tank..
The door is from one of the Garages that is part of the “Big Kahuna Deal”
“Wood” for the floor and the interior of the roof comes from his Corn Elevator…
(Also part of the Big Kahuna Deal).
The roof is from one of his engine house kits (the brick one).
The windows have “glass” from the “blister” off a package of track.
The windows and the door are in an open position to “invite” viewers in…
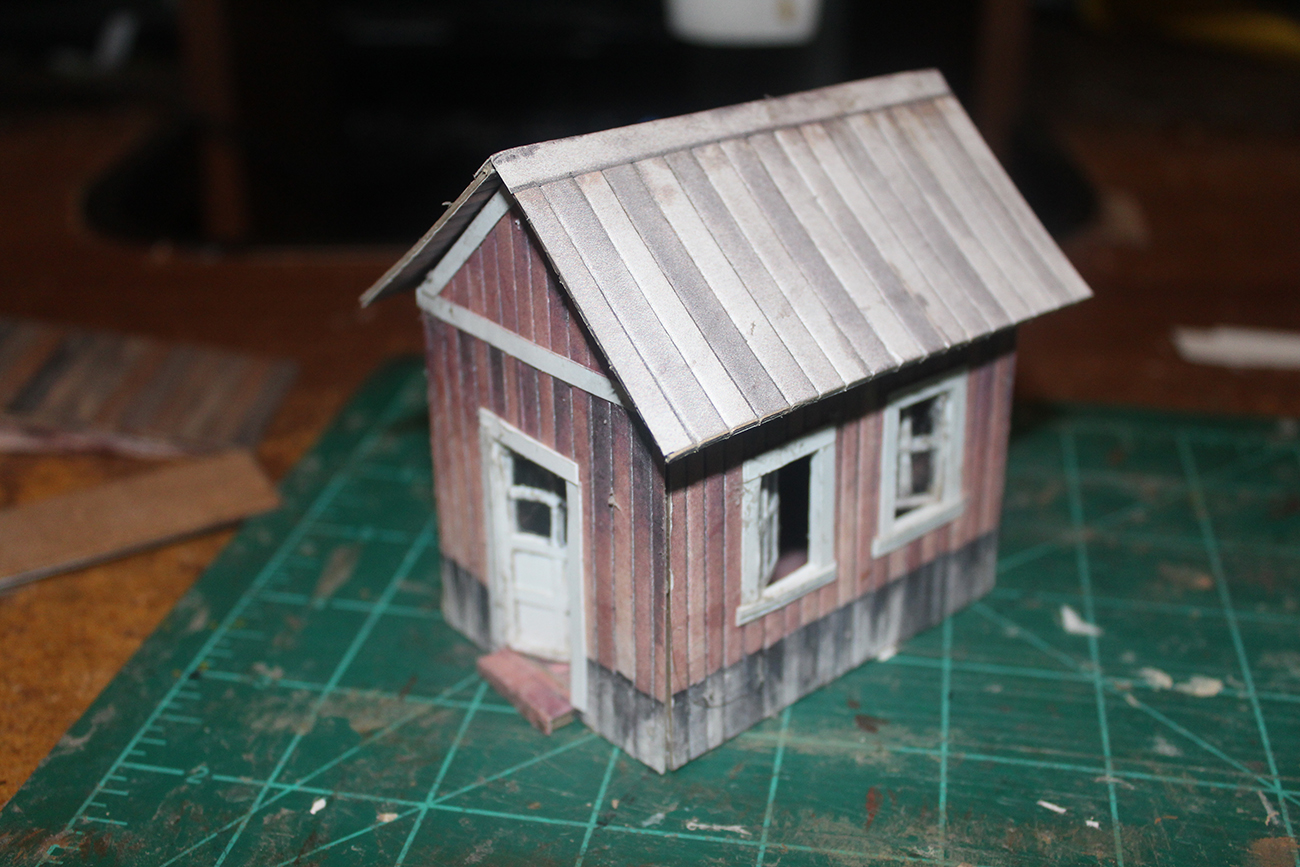

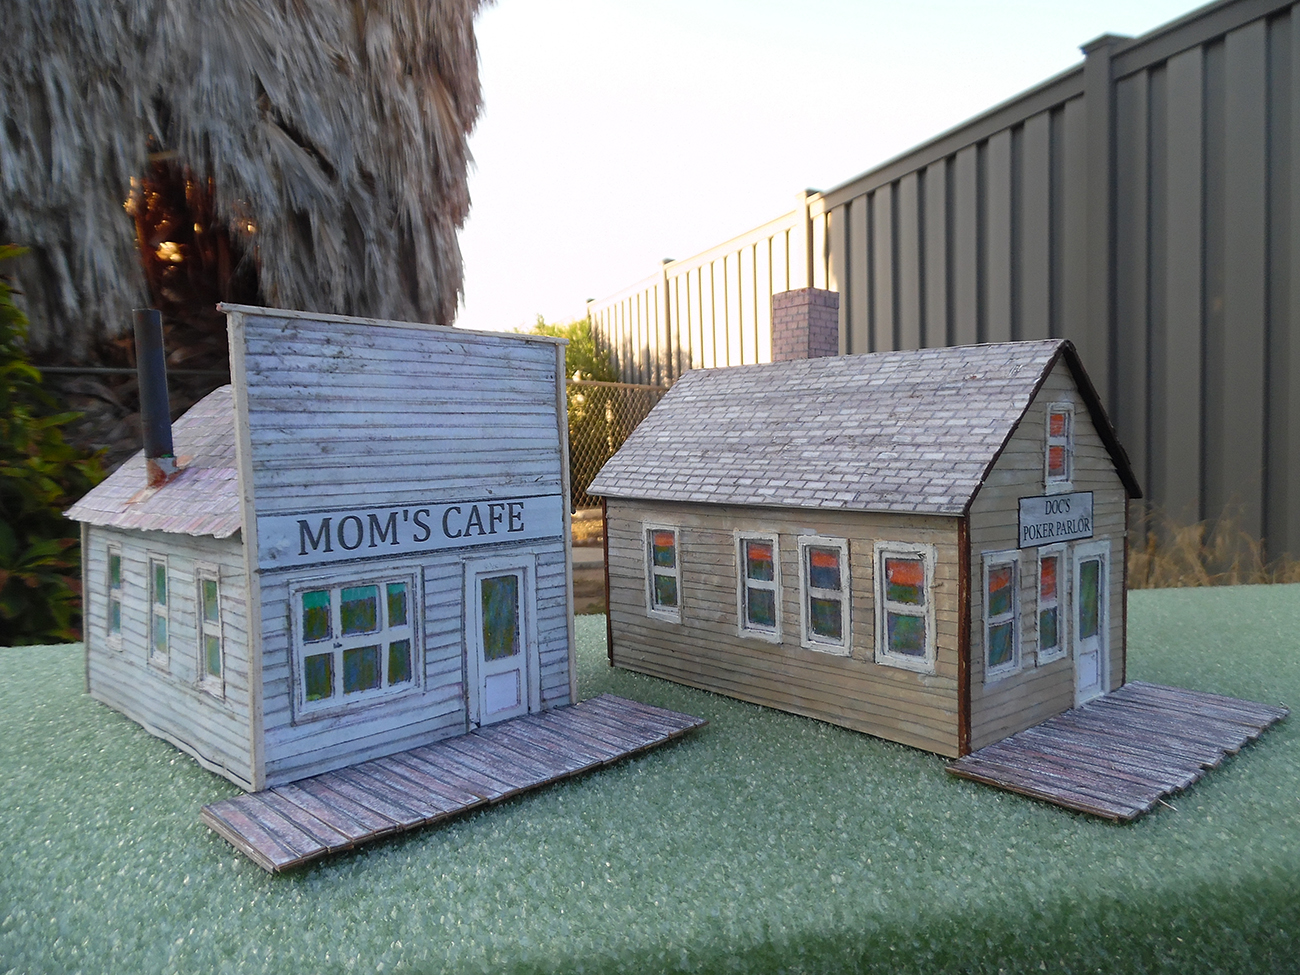
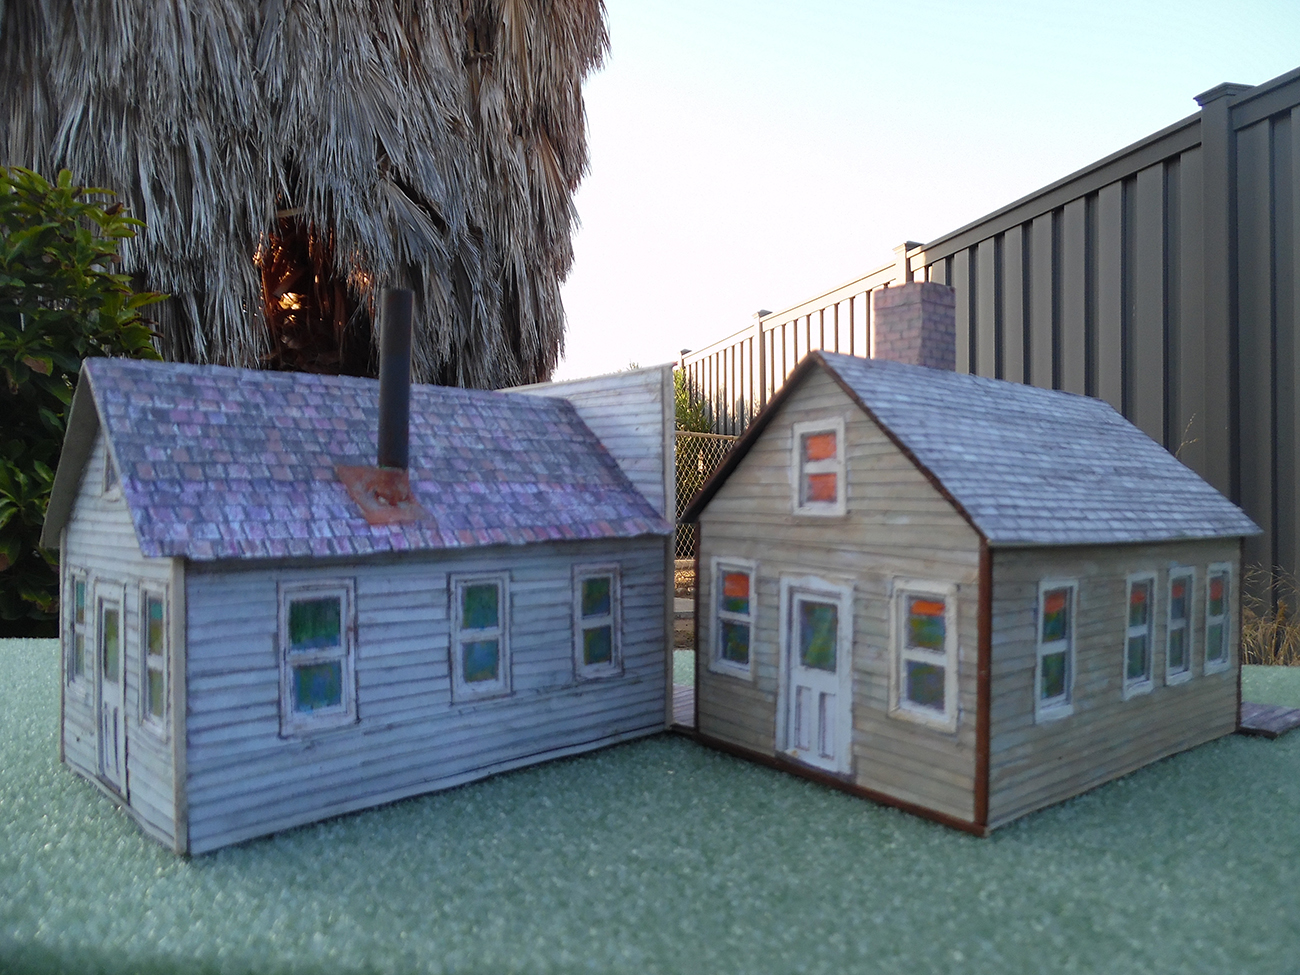
Here is what my “Office” looks like with the ramp and shed.
This is the intended position…
BUT… Since the ramp, office, and shed are three separate models…
A huge thanks to John.
Here’s what else I’ve had in for the competition:
“Hi Al,
Best wishes from down under and trusting you will stay safe, fit and well during this challenging time.
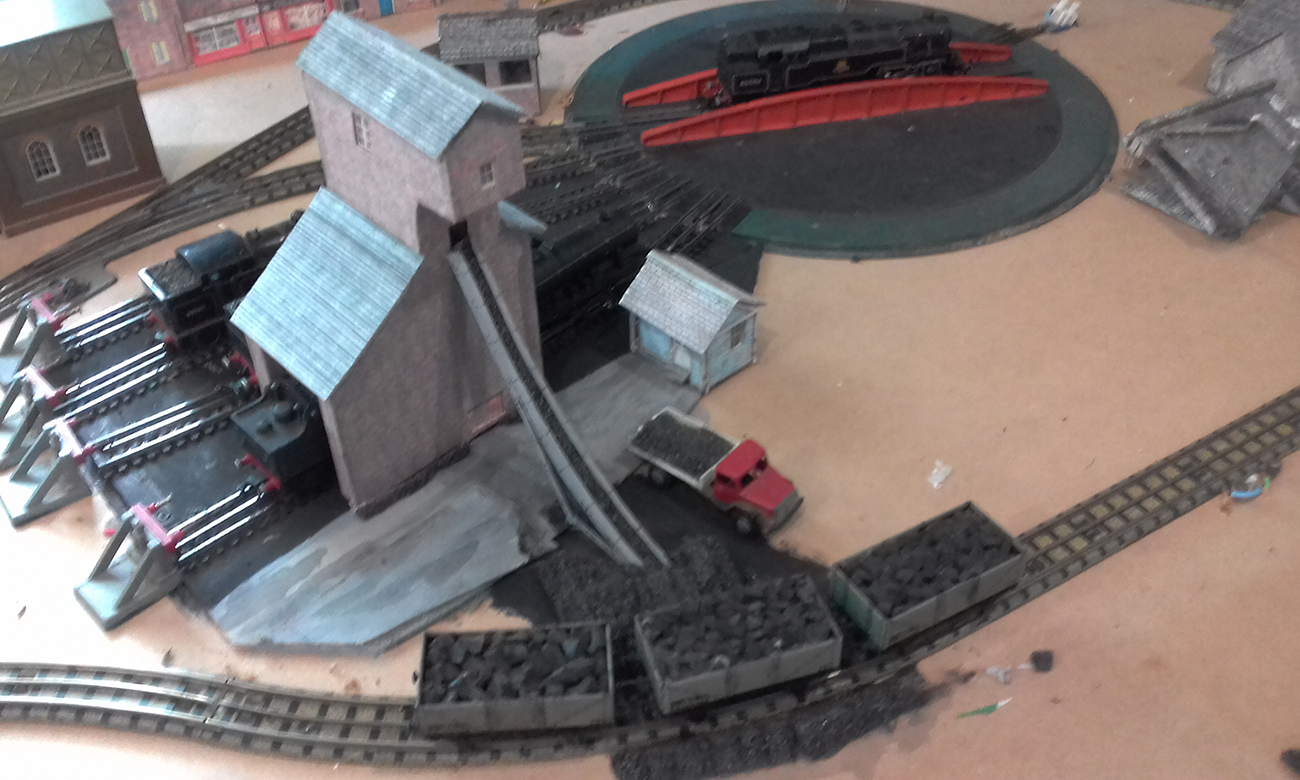
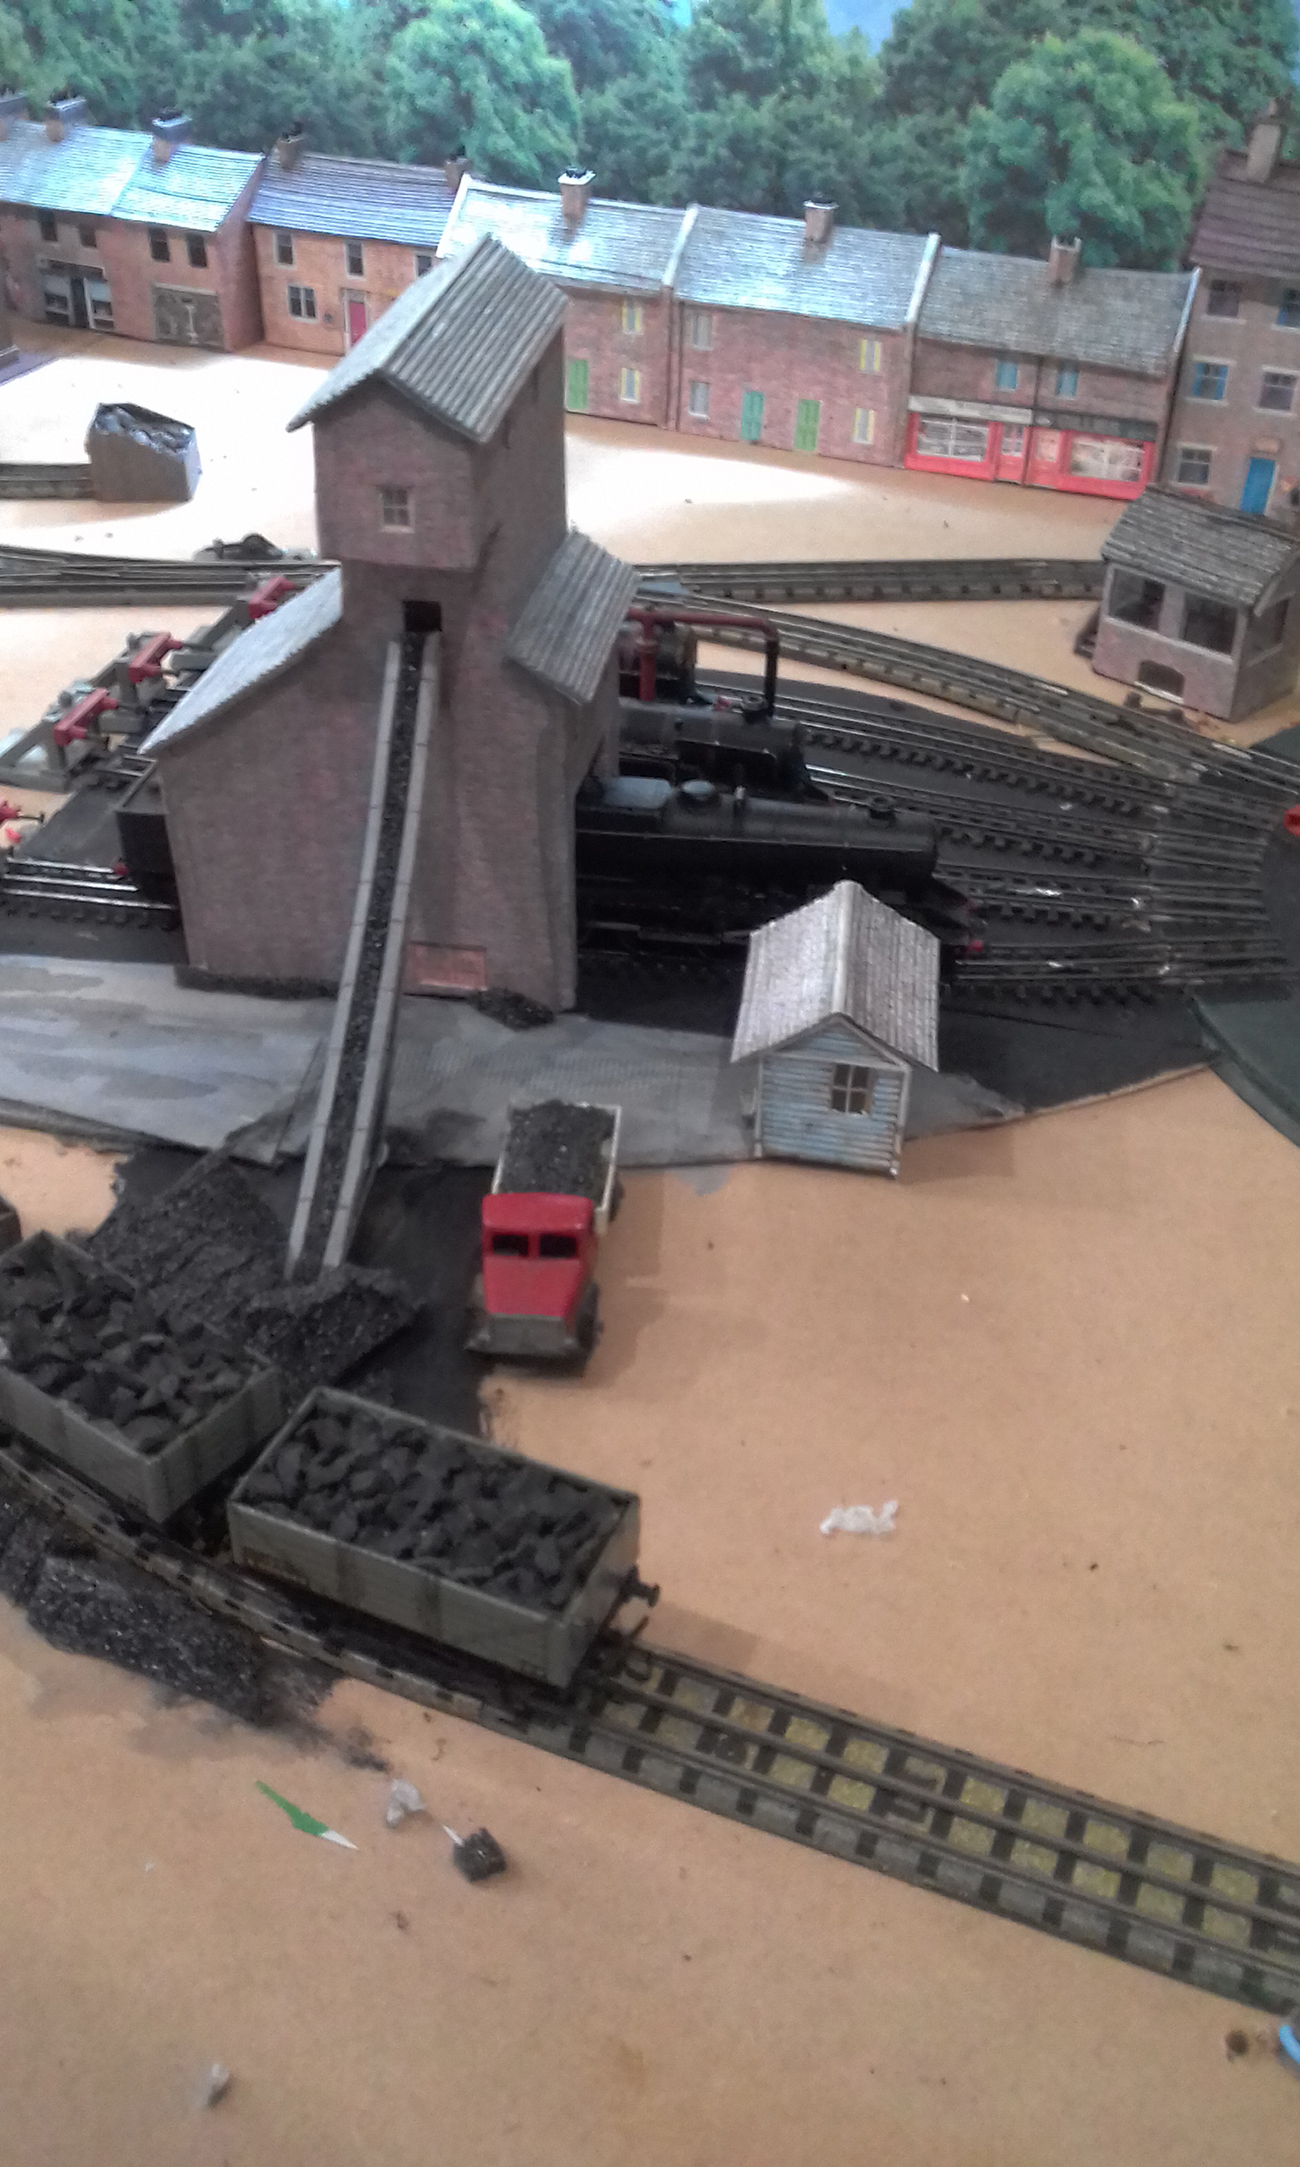
I attach a variation of your Corn Store converted into a coaling tower. As you can see work in progress, the piles of coal and in the elevator are from the packing around a computer and the lumps of coal in the wagons are chunks of old flip-flop shoe sole.
Best wishes to all your subscribers
Andrew
Andrew
Queensland, Australia”
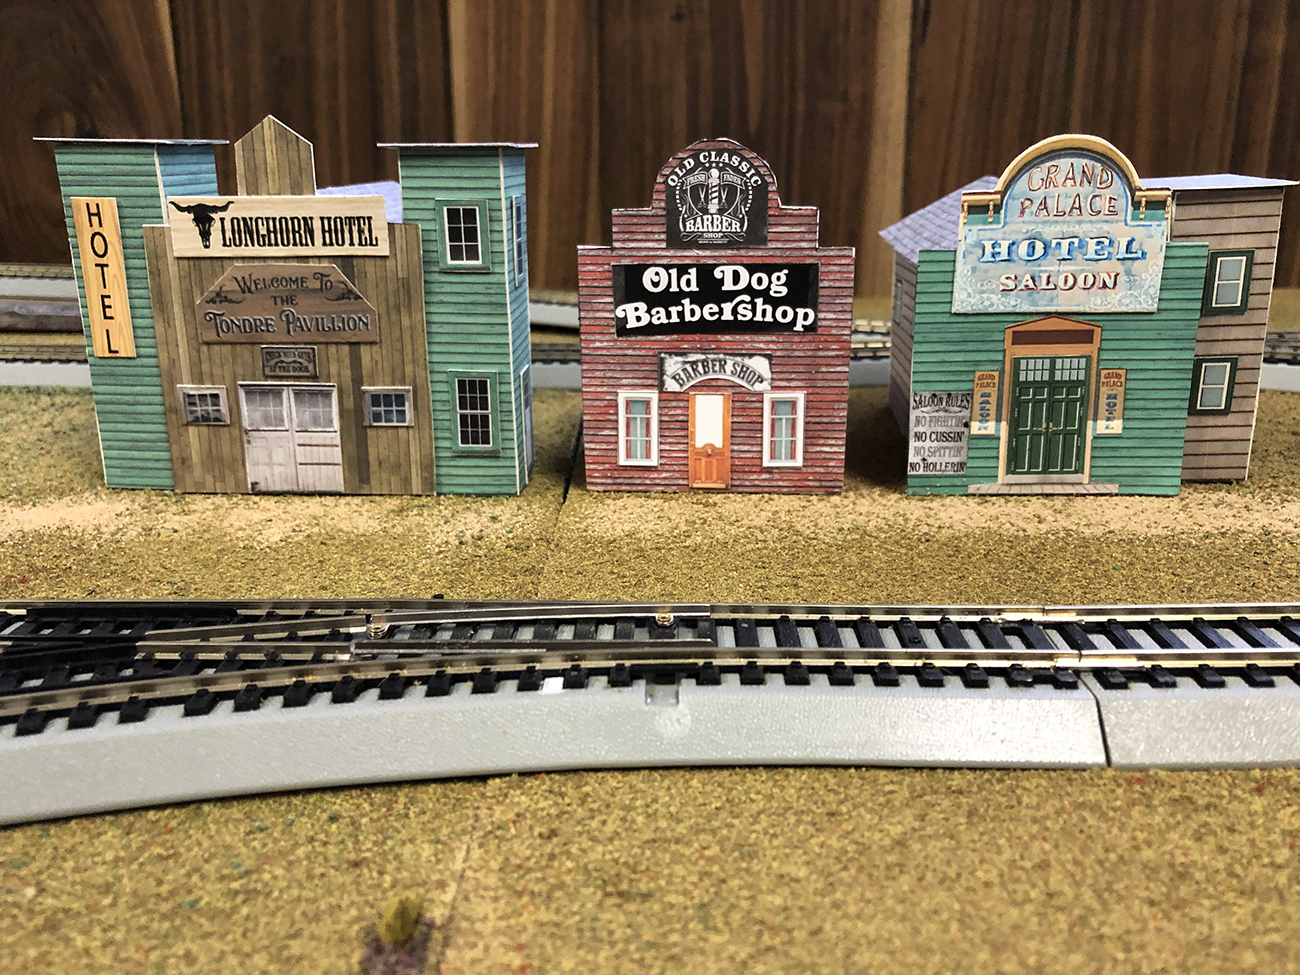
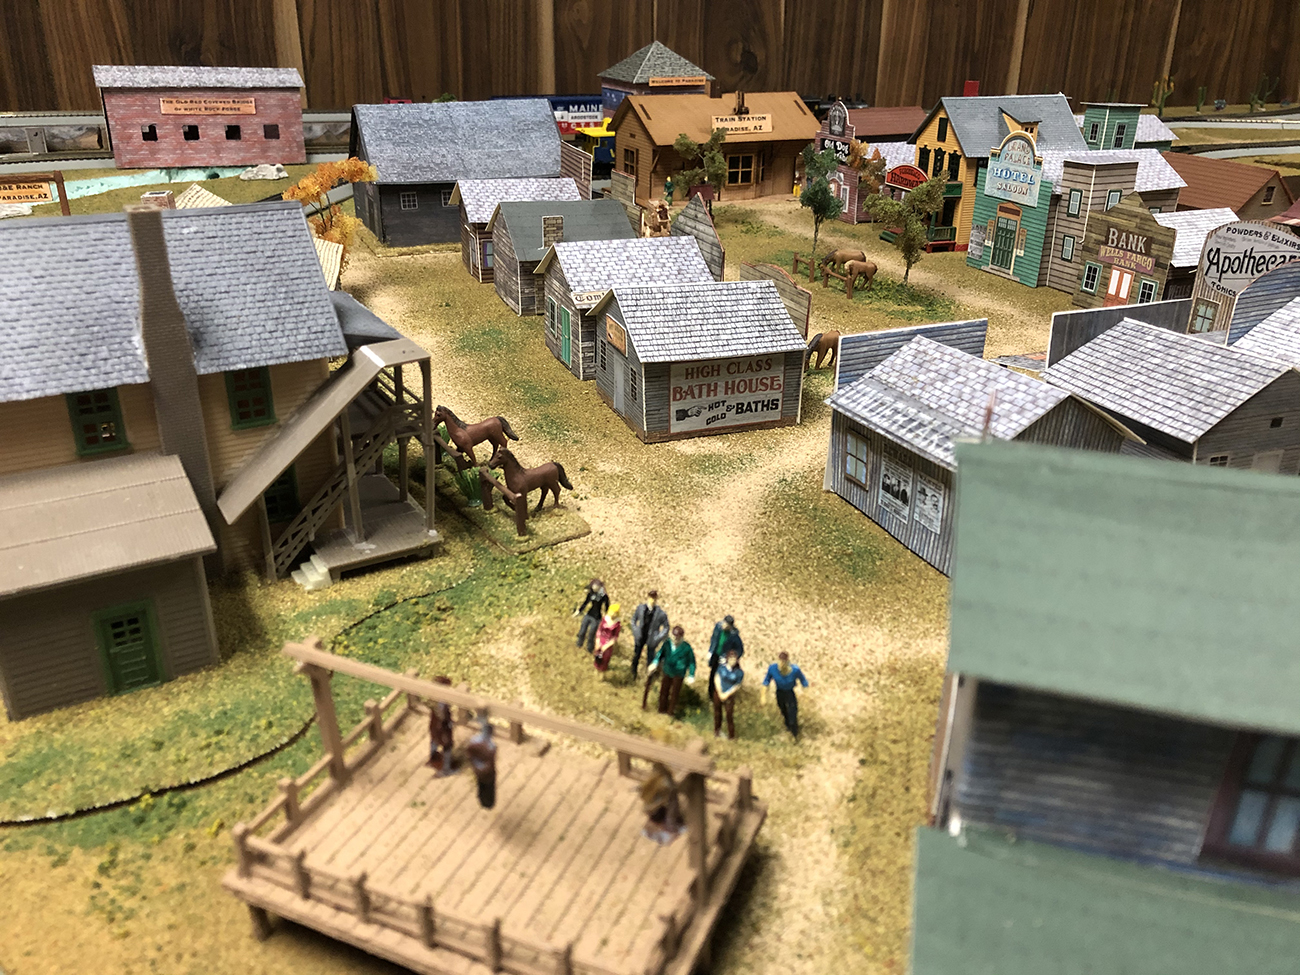
Now on to Nathan.
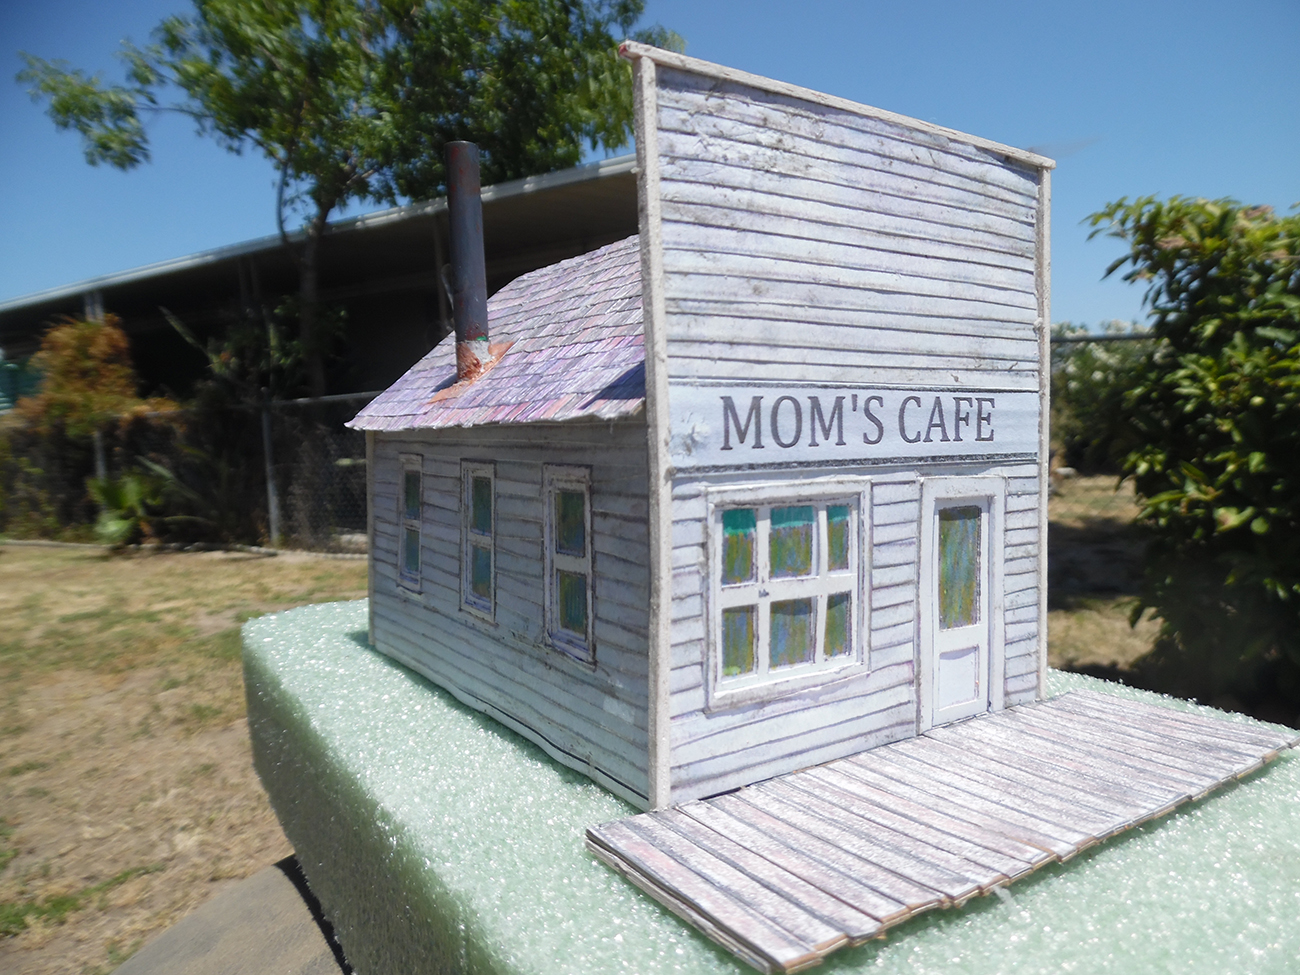
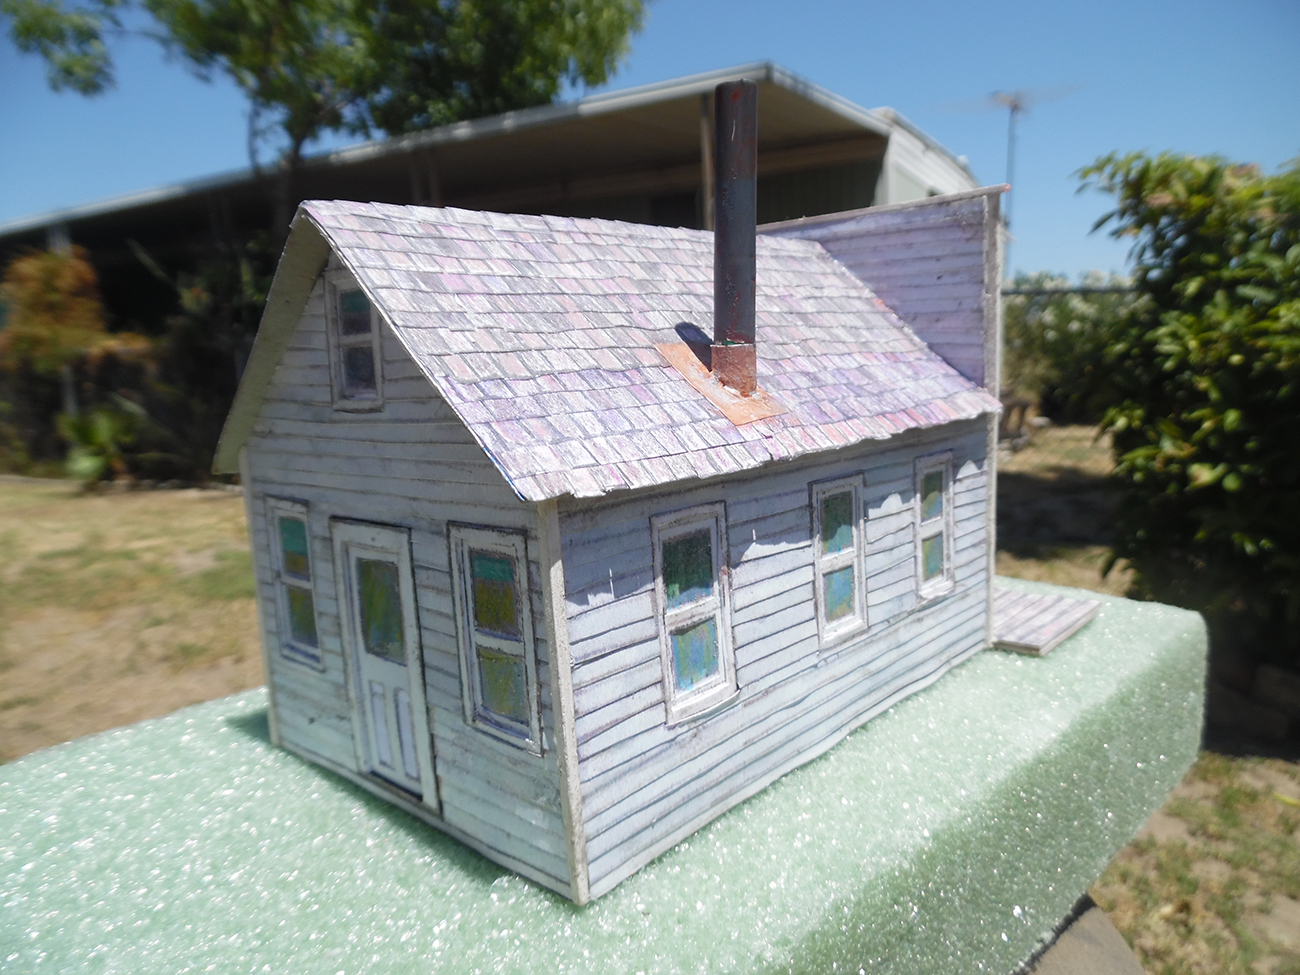
He built the Old Saloon, and added an outhouse!
“The start of the ghost town.
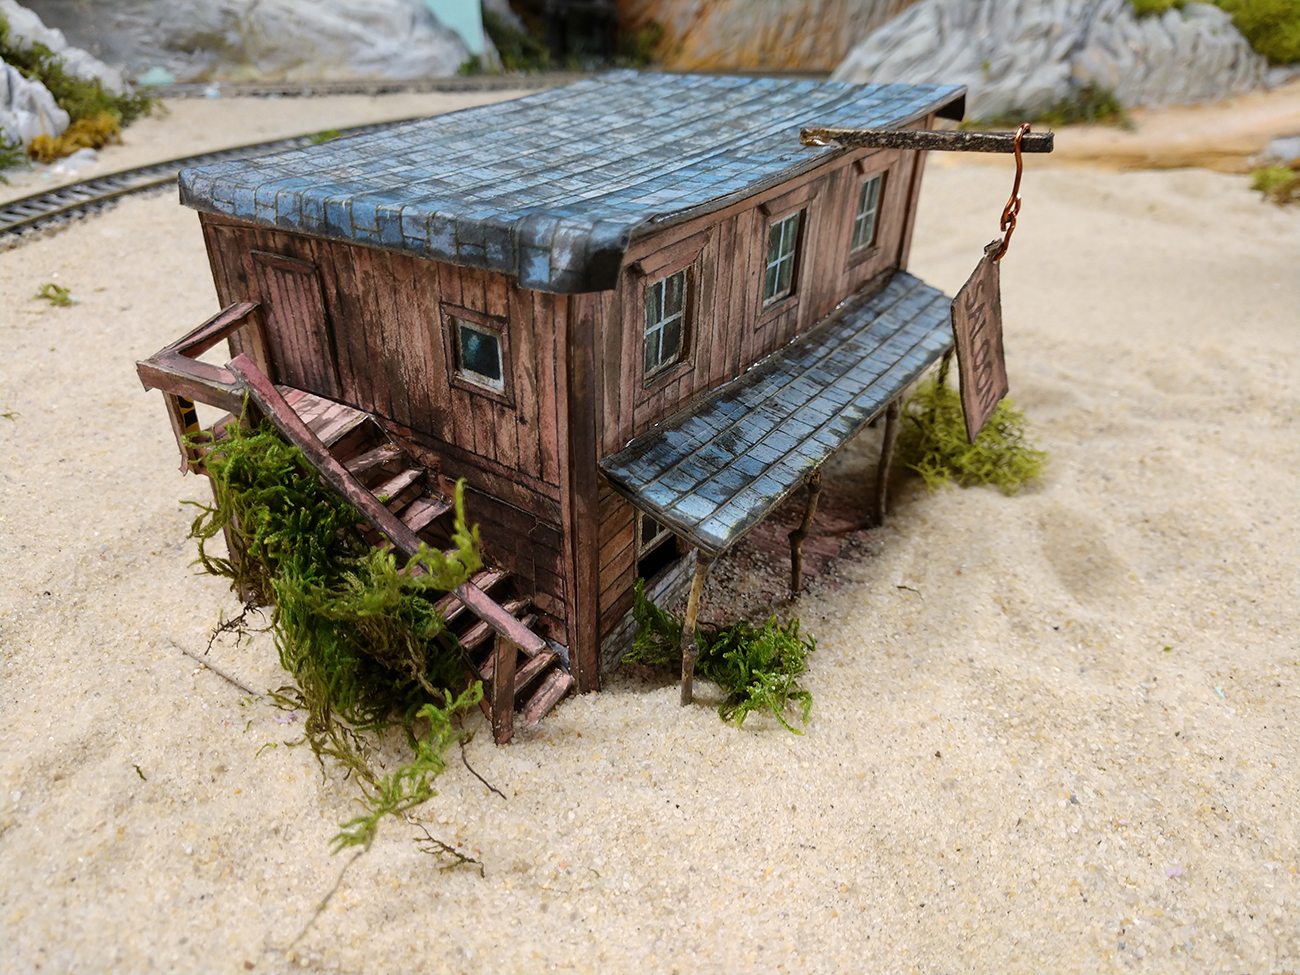
Realized every good salon needs an, out house, out back, privy, or necessary just in case.
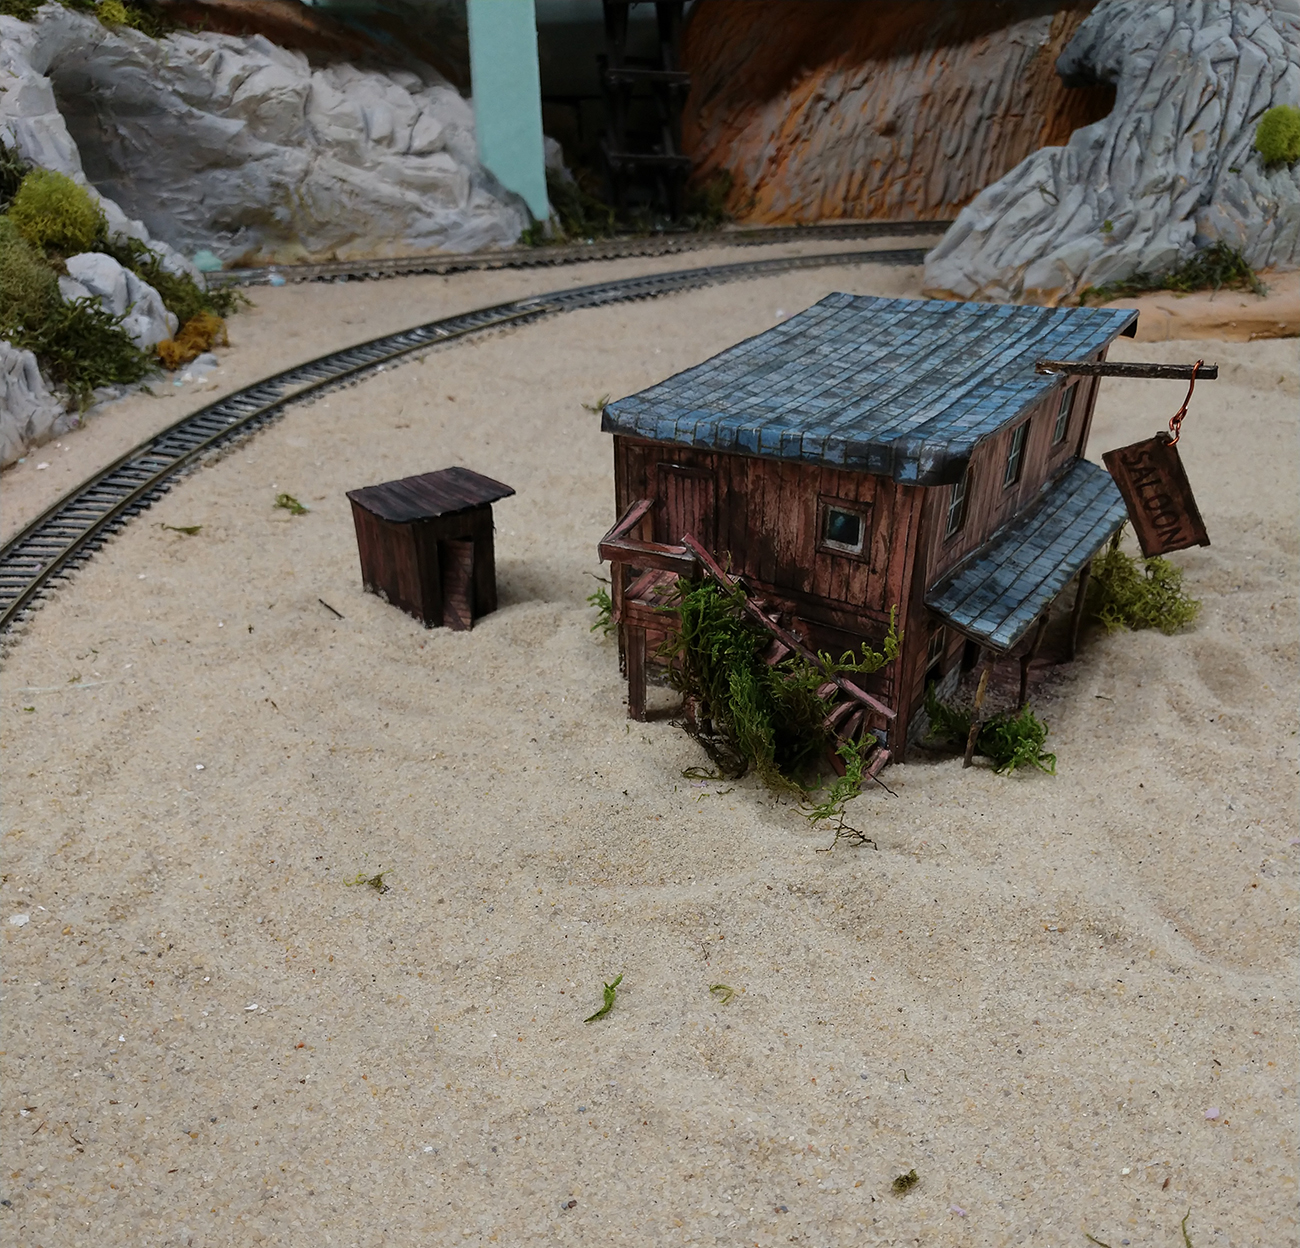
Nathan”
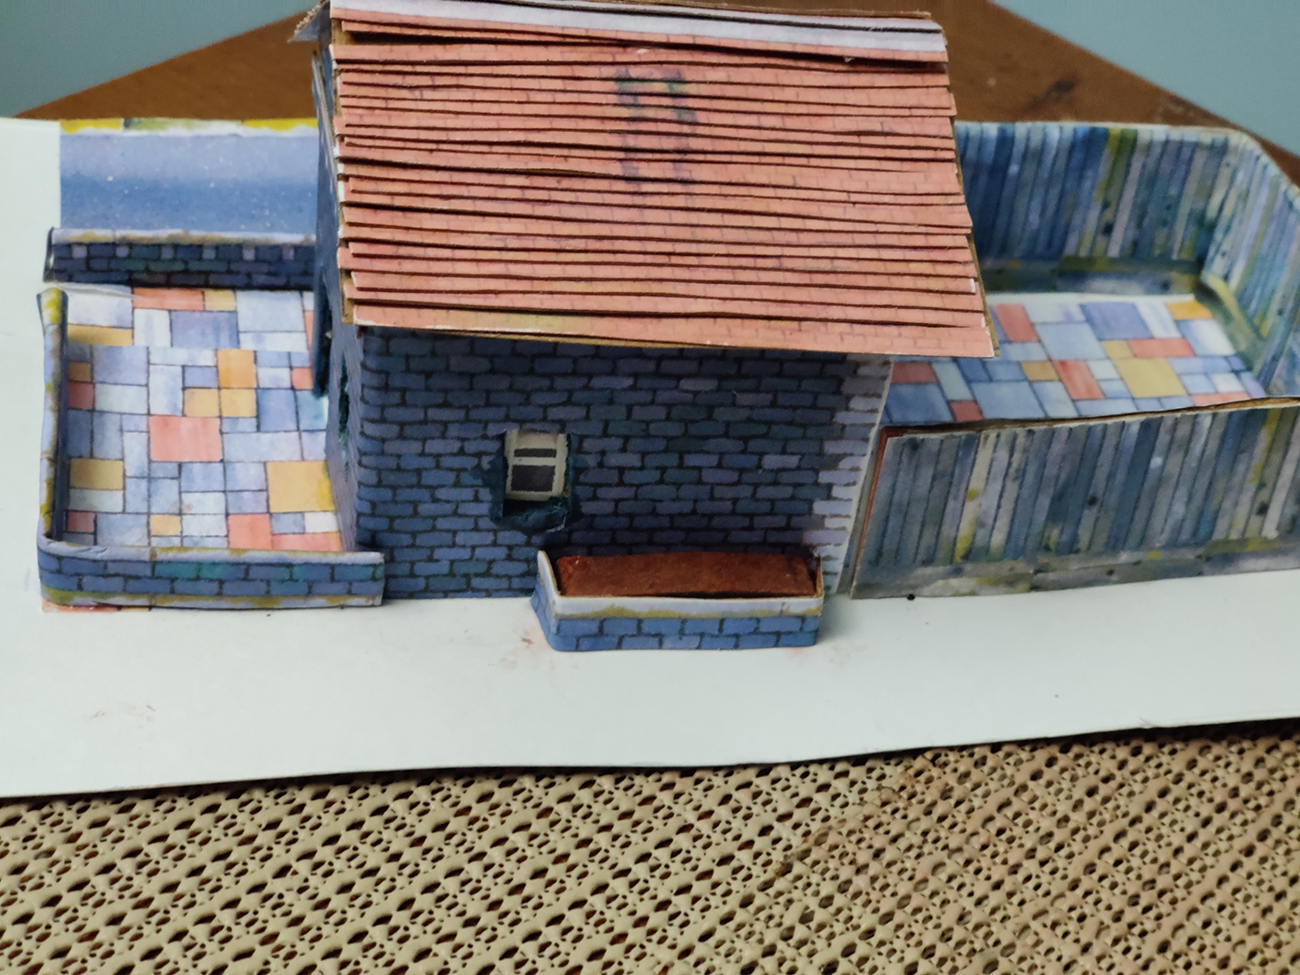
“Al,
Here is my original cottage made from several of your printouts.
I have enjoyed making 8 of your buildings so far which has made my quarantine bearable.
Steve
Ohio”
“Hi Al,
Been busy finishing some kit bashing to make my own designs.
Dana Green
via Maine”
A big thanks to everyone above for entering.
I thought they’d be a lot more entrants, but on the upside, it makes the voting easier.
Please just leave a comment below with the name of who you think should win:
John with his Freight house.
Andrew with his coaling tower.
Nathan with his outhouse.
Steve with his cottage.
Dana with his wild west buildings.
The winning builing will be put on the site for everyone to download for free.
That’s all for today folks.
Please do keep ’em coming.
And don’t forget the Beginner’s Guide is here if you want your own little project to come to life.
Best
Al
PS Latest ebay cheat sheet is here.