Mike’s been busy with his model railroad scratch building:
“Good Morning Al:
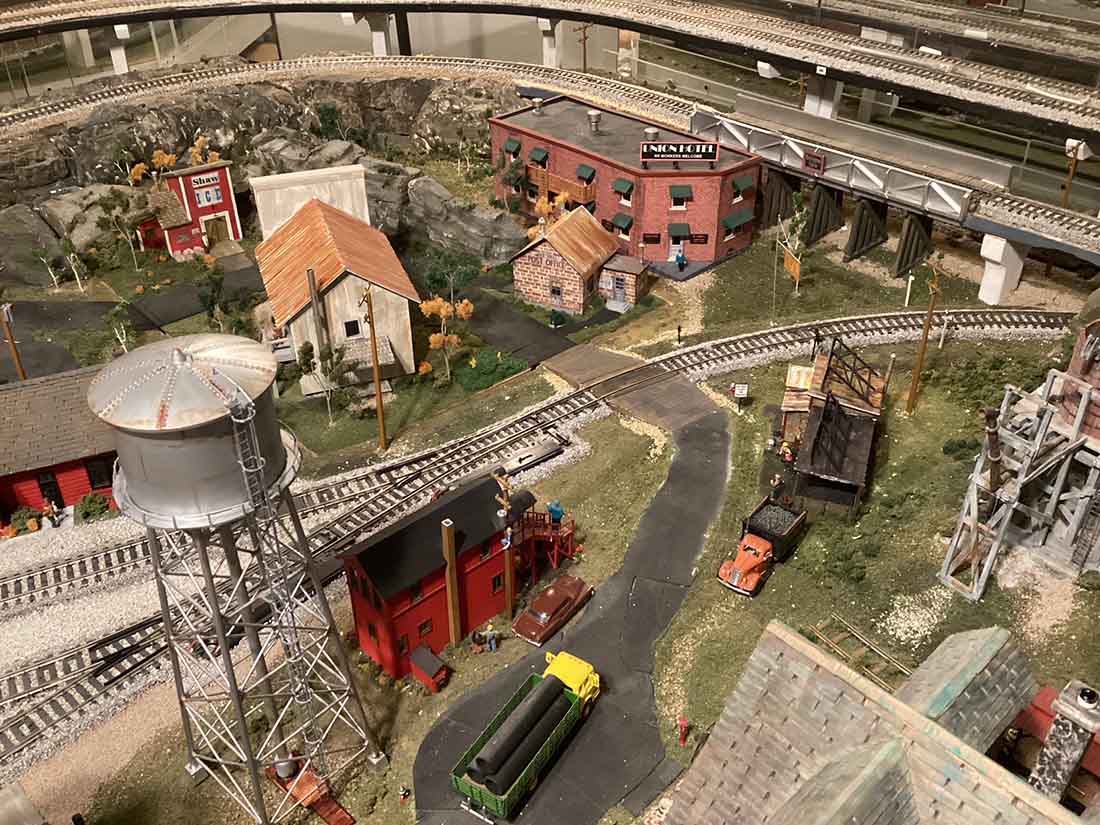
Hear a few photos of some of the scratch built structures on my layout.
There are many of us who just do not have a basement or family room to devote to large layouts. I am a retired golf instructor. I quit the game and teaching after 54 years in the game.
I kept busy (at my wife’s encouragement, yes that is no typo) by entering back into model railroading. I converted my golf room into my train room. I am really glad I did.
Fellow model railroaders, our hobby is like no other. We have a keen interest in railroading and a need to model our dreams and memories.
I came from a railroad family. My great grandfather, grand father and father all worked for the CB&Q RR and a spur. Totaling all their time, 110 years.
They all worked many jobs as they rose up in the ranks. But the one quality that they enjoyed most was family. Not just those they were related to, but those they worked side by side with daily. That same family is carried over into our hobby.
We Model railroaders are family in the sense of sharing ideas and encouraging each other. Alastair Lee has allowed me to see, and be seen, layouts from all over the world.
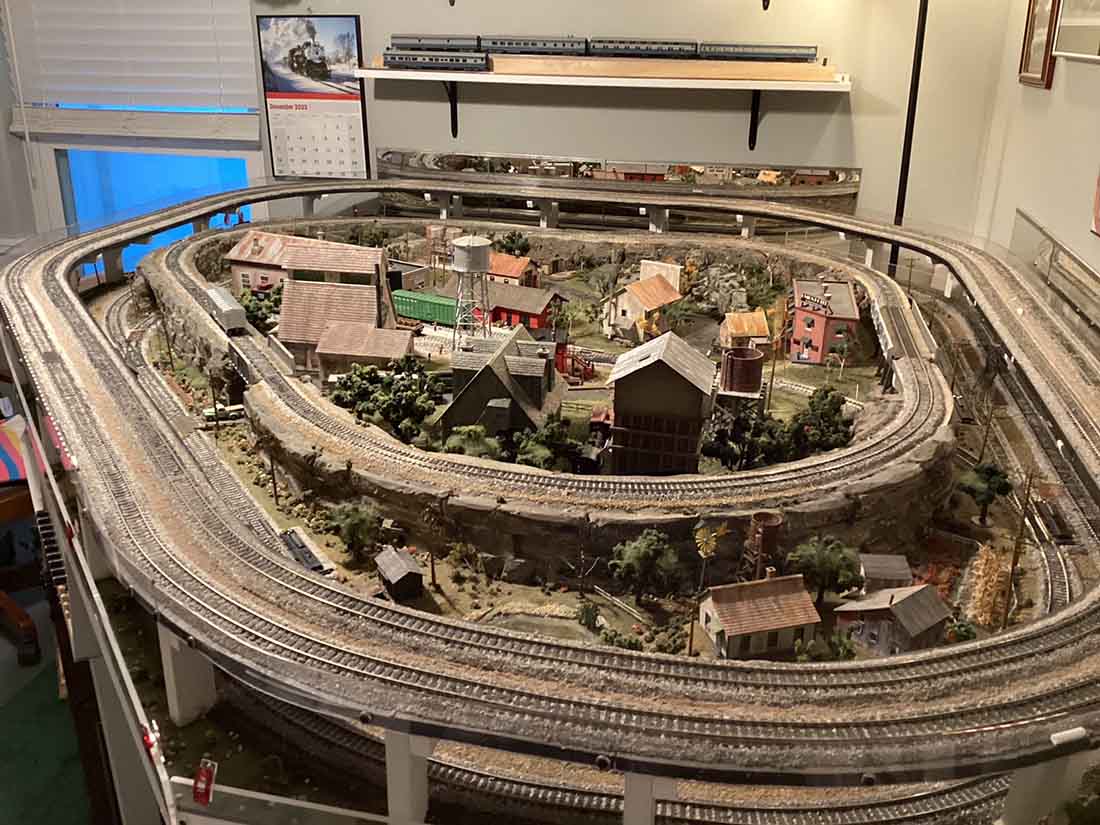
My layout started by first analyzing two criteria, available space and budget. I’m retired and stay within my means. I plan my expenditures, budget for the things I need/want.
I could spend more, but I found that when I metered out the cash…. I stayed on track (no pun intended) with my individual phases goals as the layout progressed.
What I have now took just over two years. I took my time and did it per plan. Getting track down, turnouts working allowed me to run trains.
Now the real fun began… scratch building. I studied architecture in high school, have a reasonable art ability and like wood working. So when it came time to add character to the blank canvas of the layout… those three all came together. My waive was a graphic artist. We always had all sorts of materials around I could “borrow”.
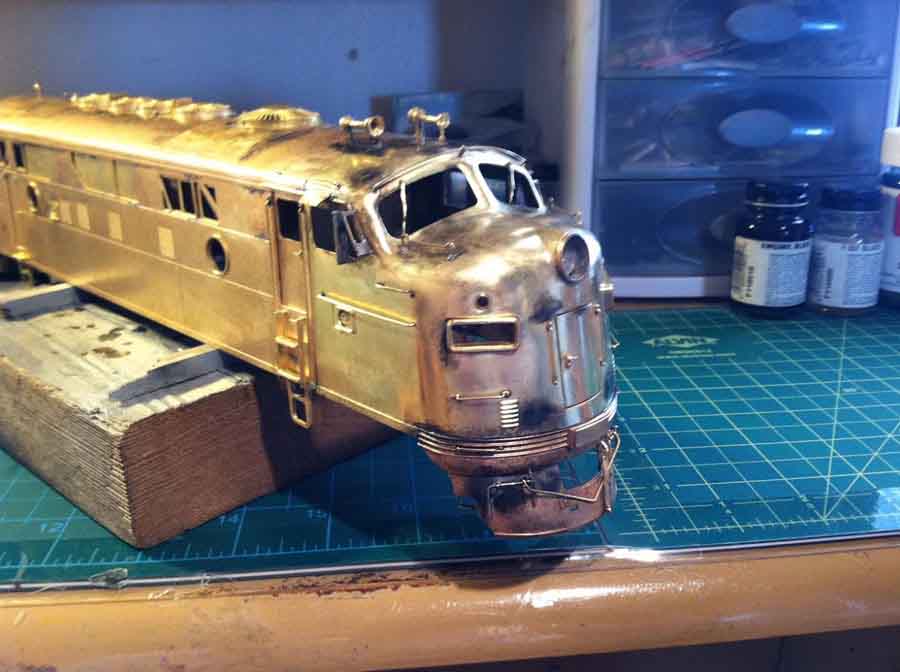
When I started out, I wanted real buildings that existed in the real world.
I spent time driving around the Midwest small towns where history still lives.
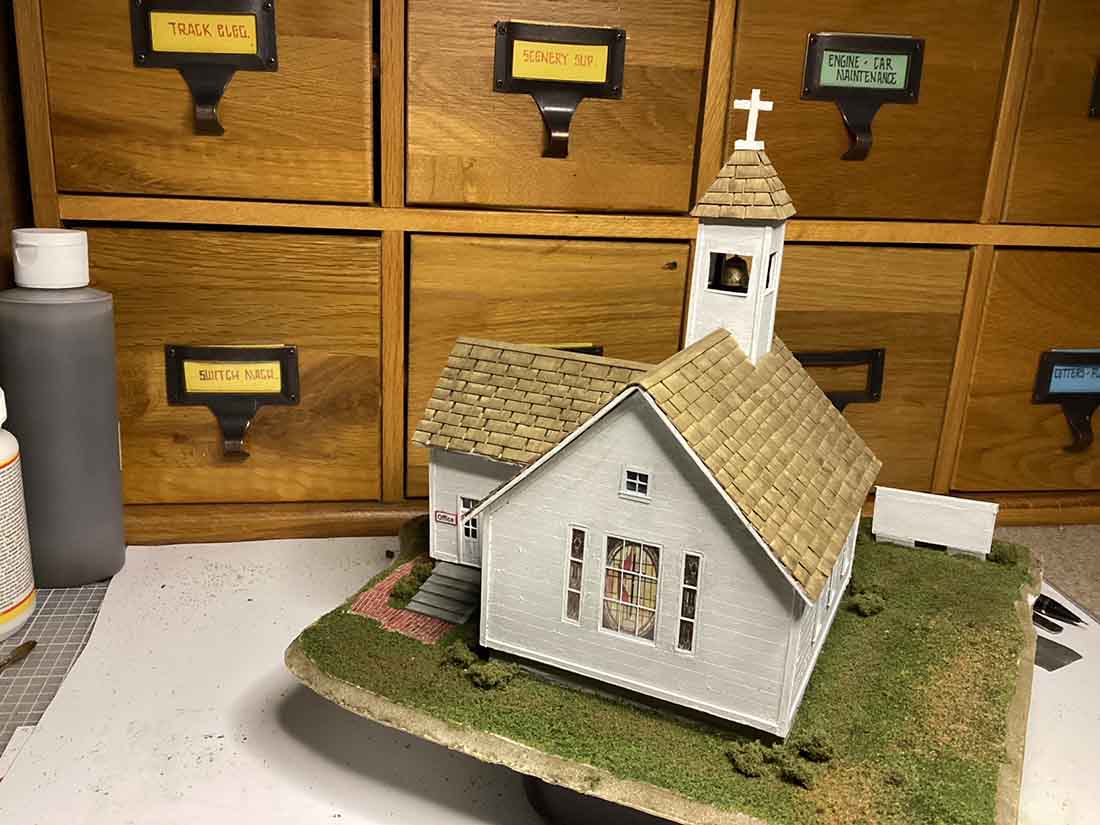
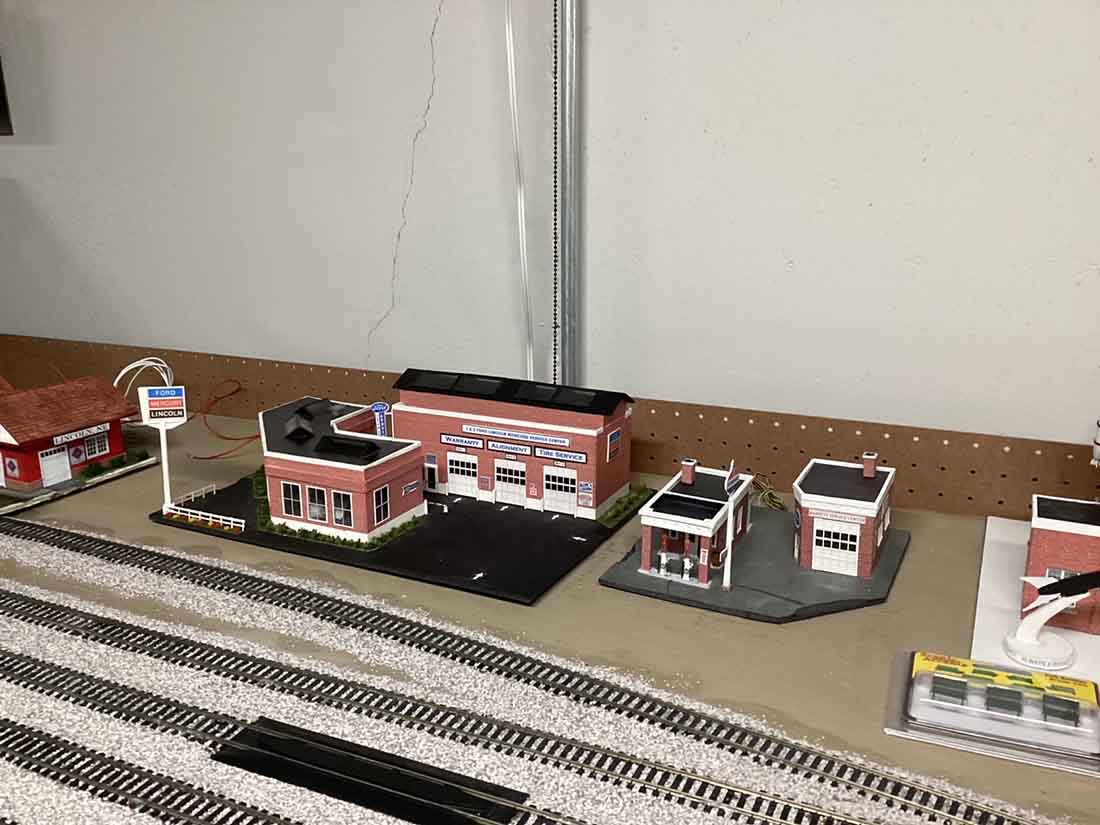
I photographed structures with character that just called out to be remembered, at least in miniature.
I approached each structure with the thought… they are not board for board exact copies. No one was going to live in them. They need to reflect an impression I had at first sight.
I have built more than 50 buildings in three years. Some are for a cousin’s 8 by 20 layout.
One is for a young YouTuber in Canada (SMT Mainline) and even one for a small boy in Moscow, Russia.
I have used different methods of construction to vary the feel of the buildings to avoid all looking alike. There are elements that I like and use more often, but not on every building.
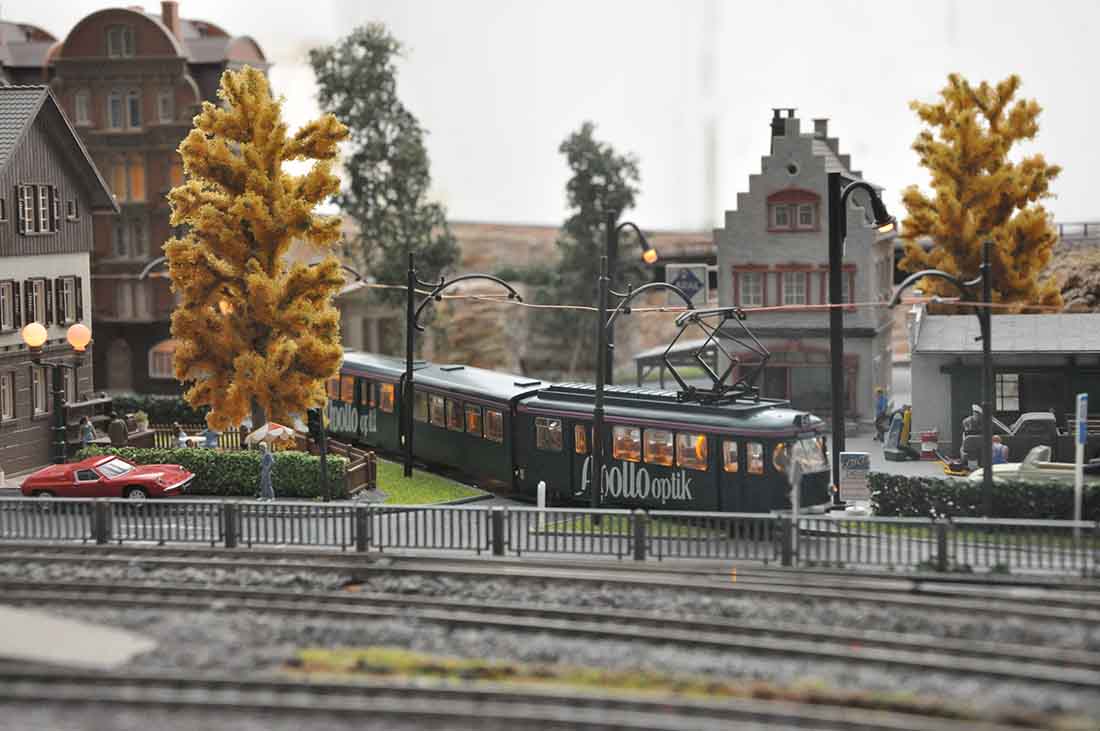
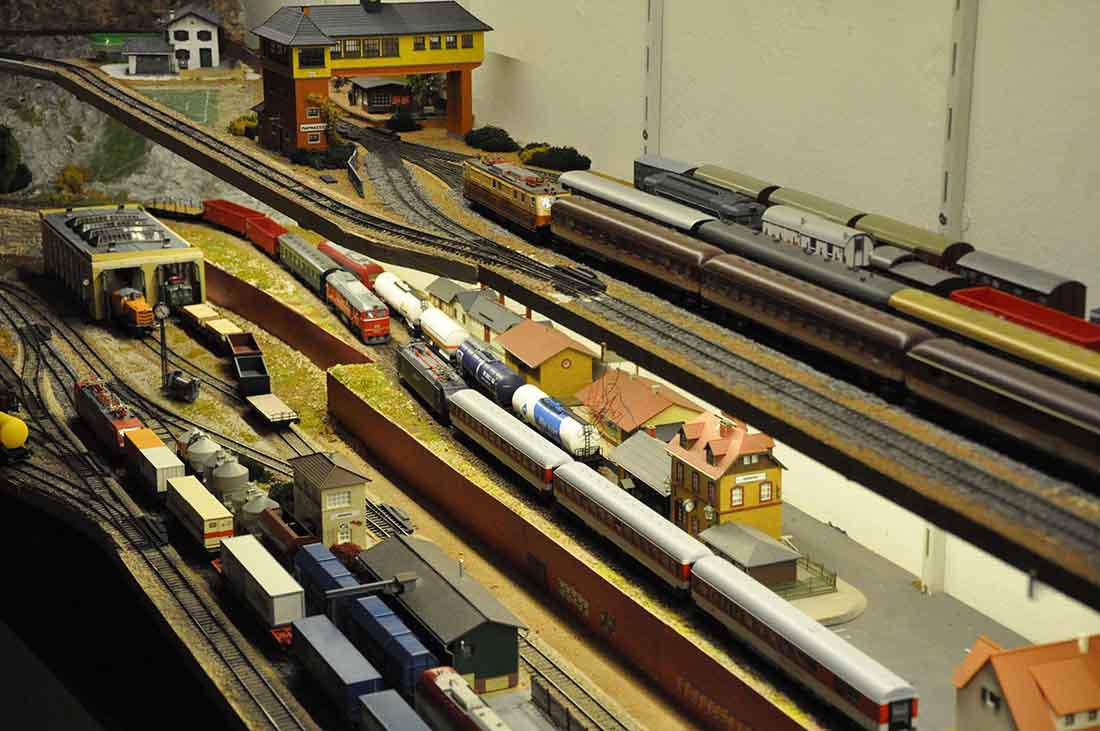
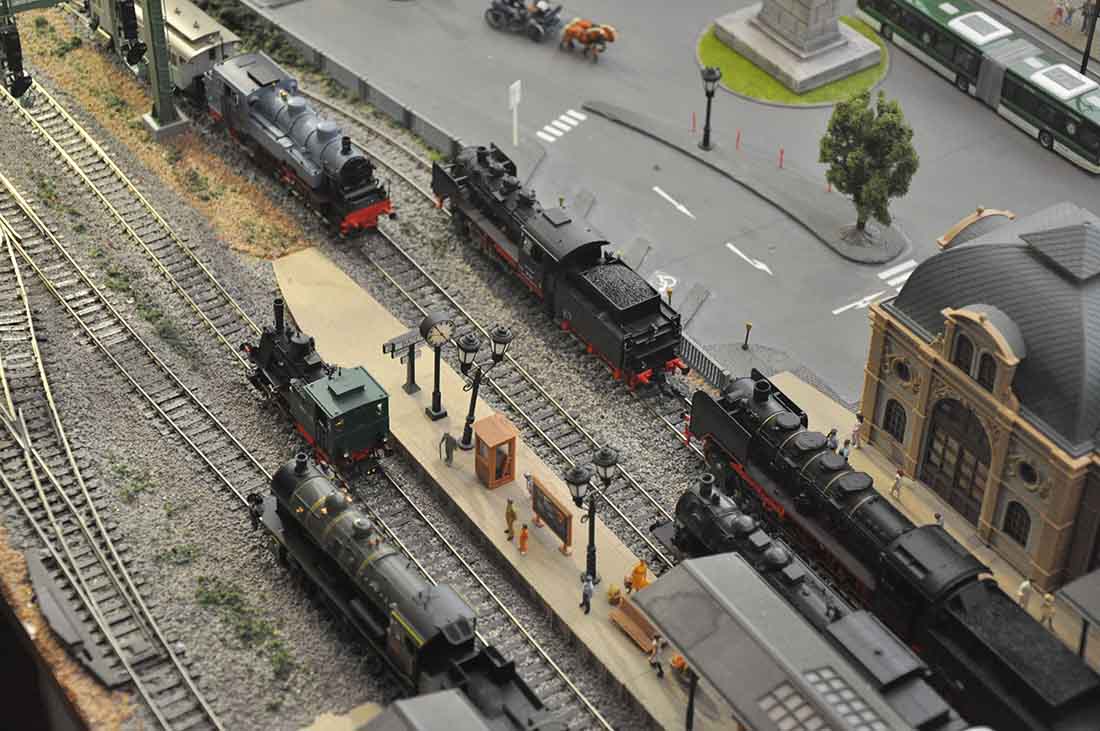
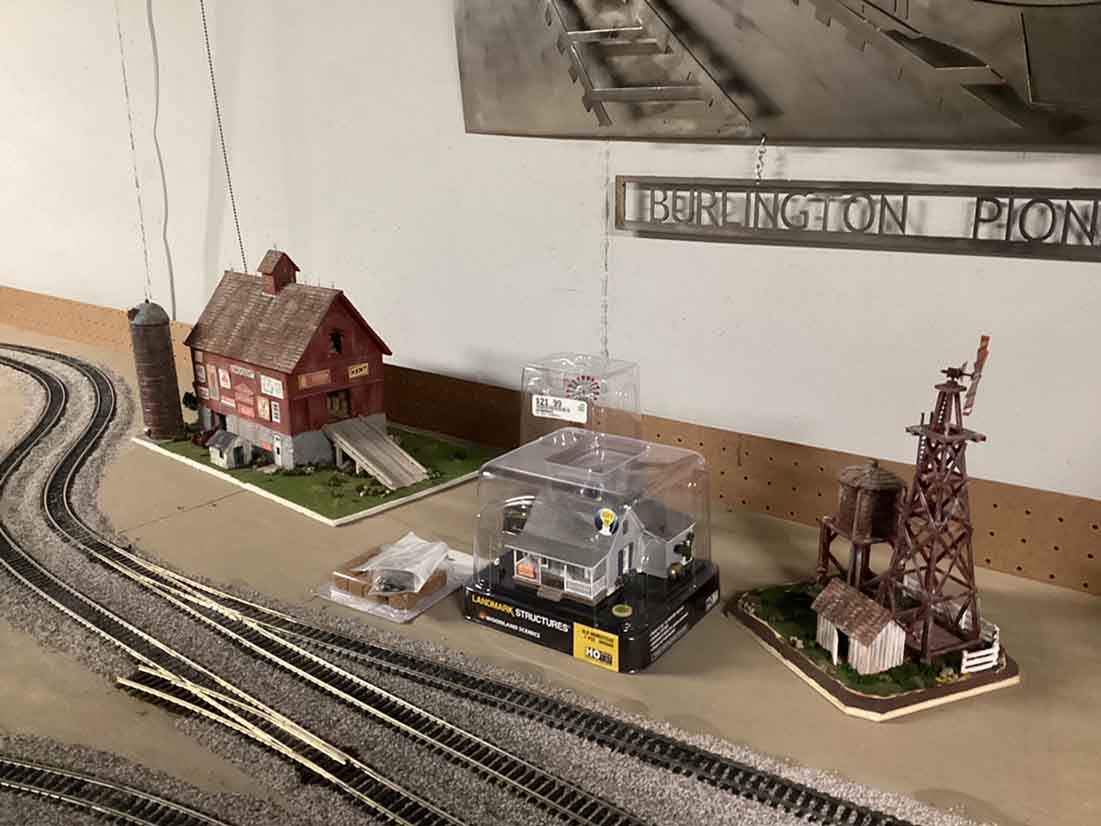
Here are a few of the buildings as examples of what I saw in my travels that would fit a theme, modeling the CB&Q RR in the rural area of the Midwest 1960 and prior.
I have three kits as well on my layout that were small and filled a small footprint.
My cousin has a lot of real estate to fill and buys RTR buildings. I can’t build them fast enough to fill the 8 by 20 layout.
Mike”
I did enjoy Mike’s Model railroad scratch buildings – but I’ll bet Mike enjoyed making them more.
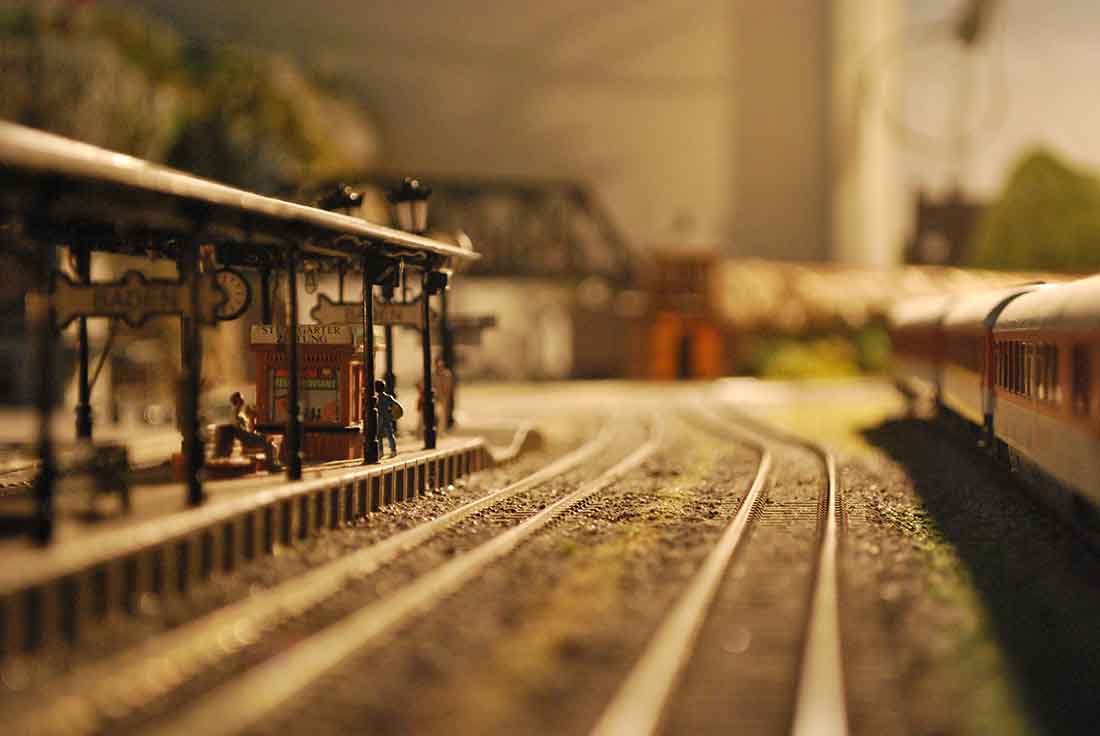
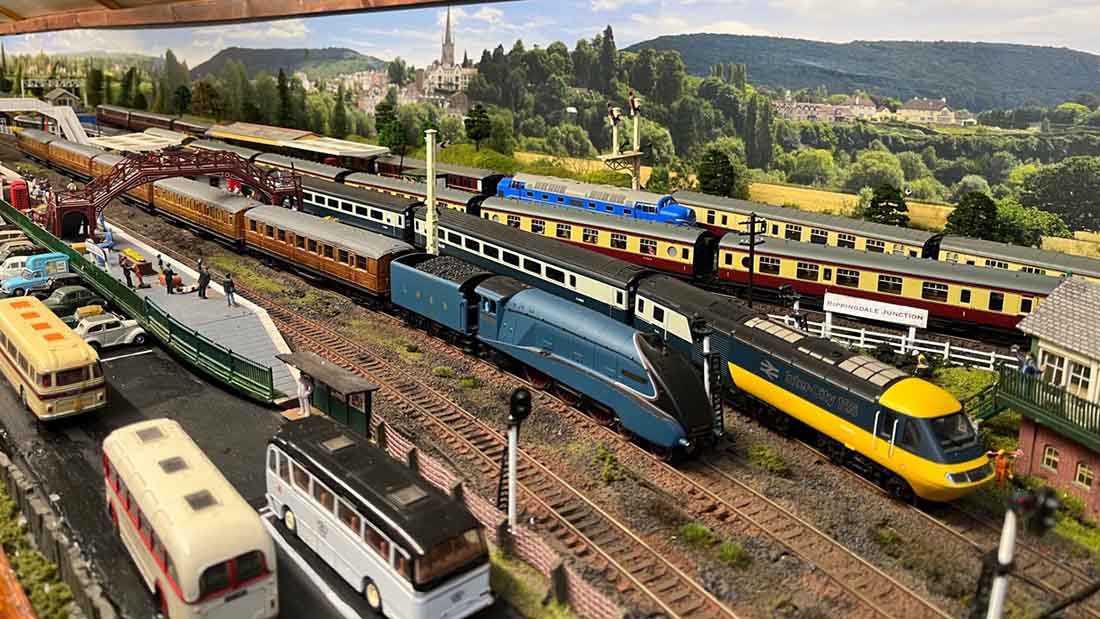
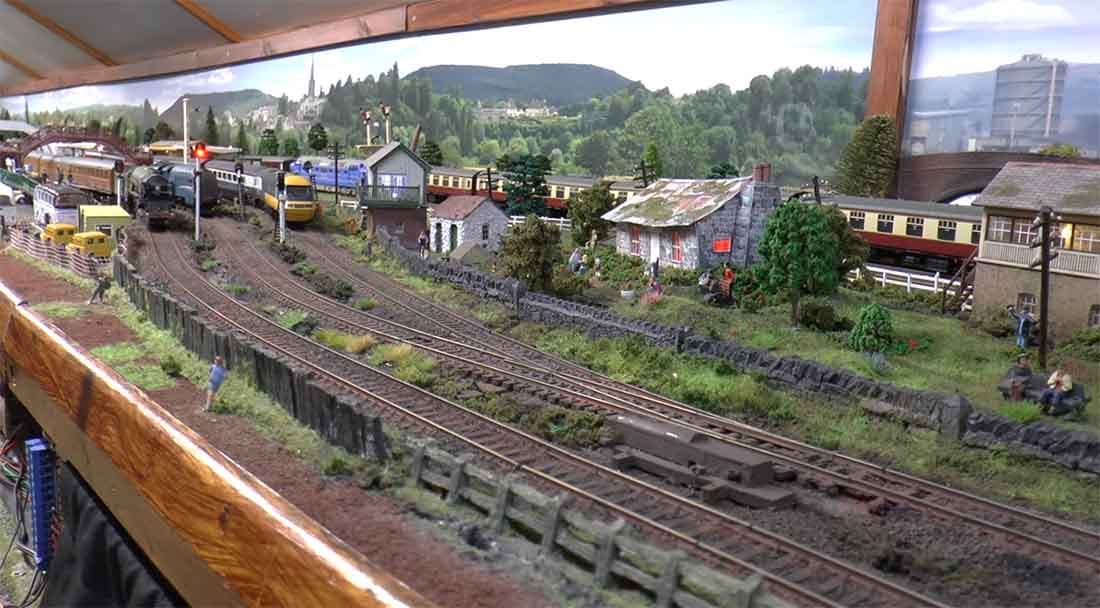
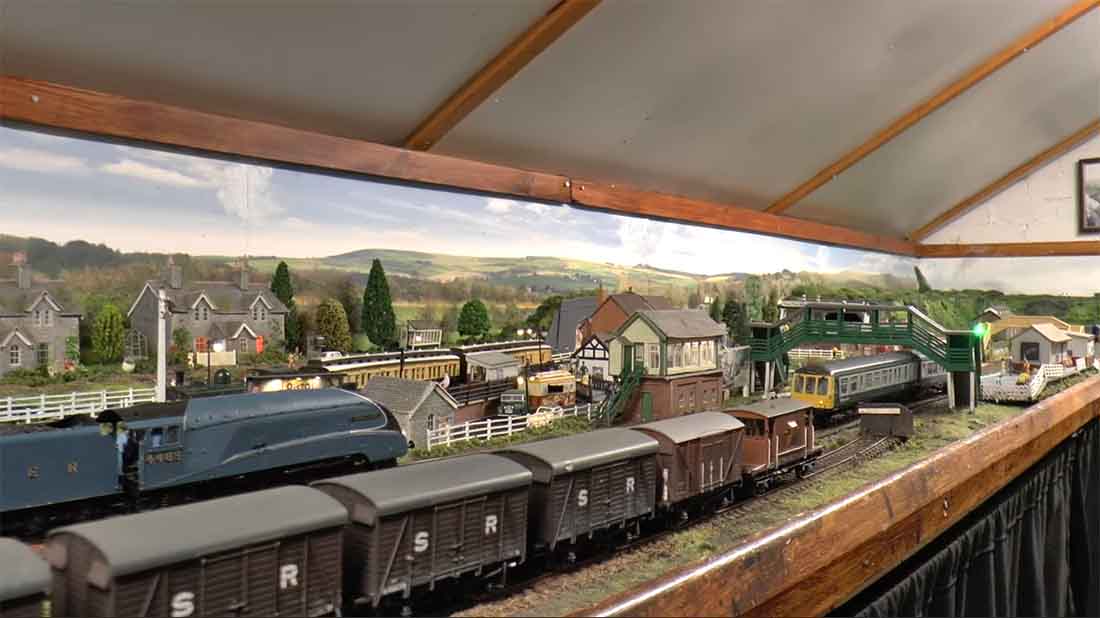
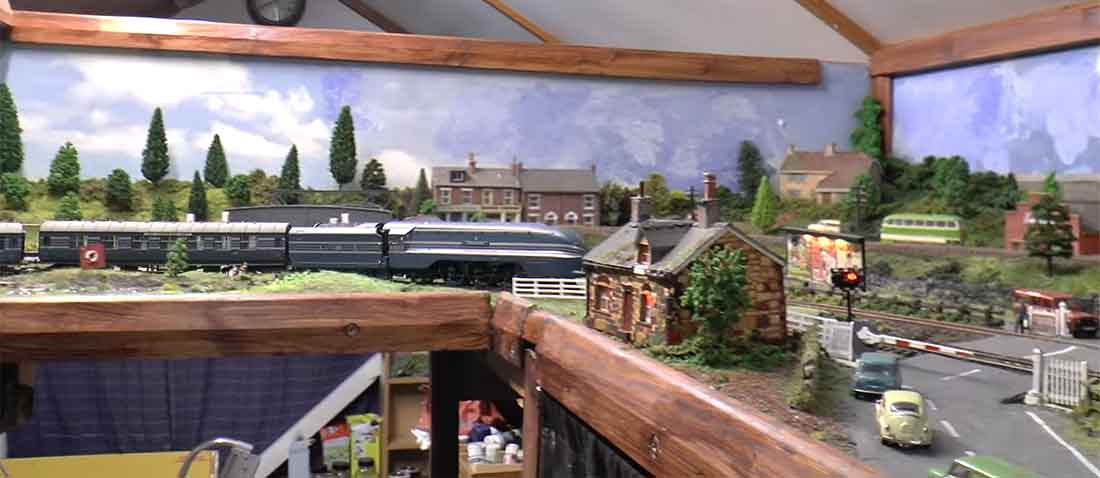
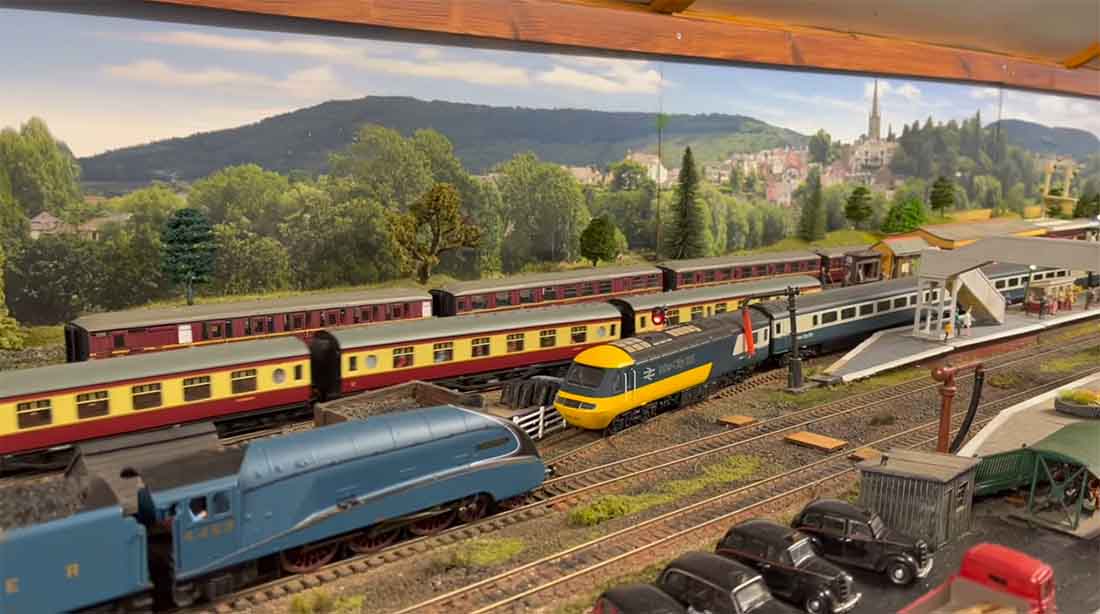
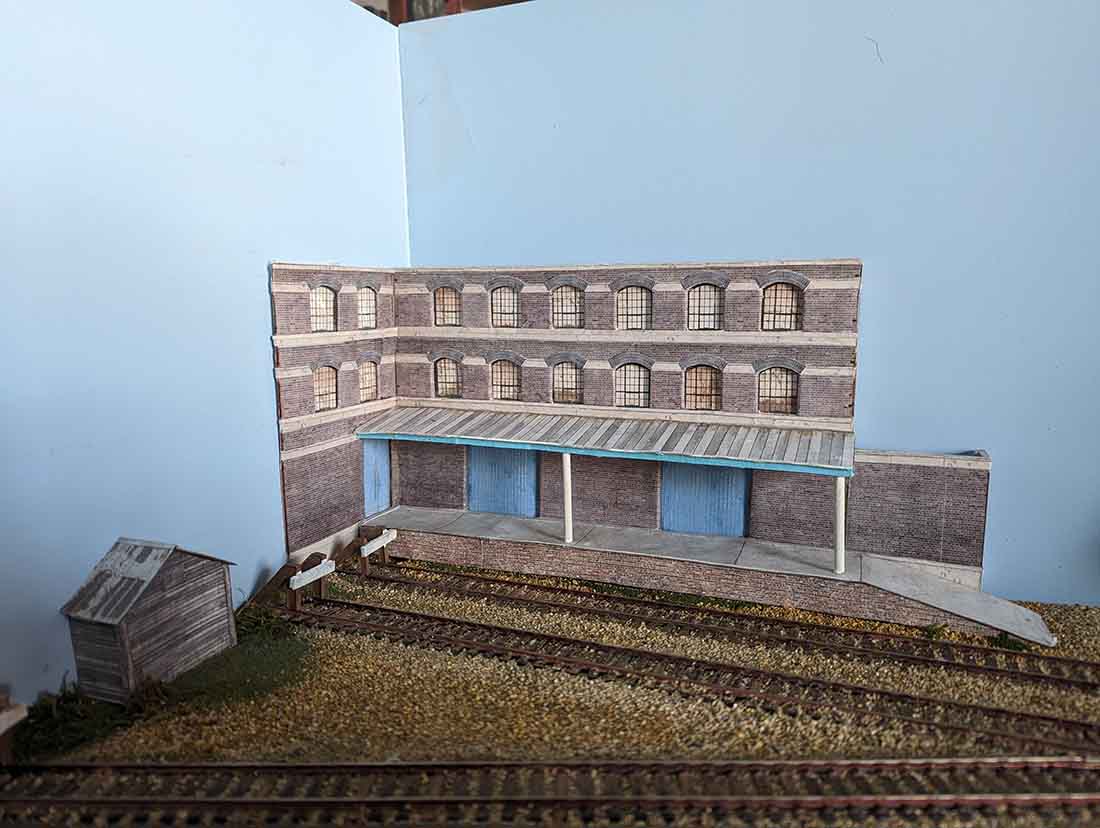
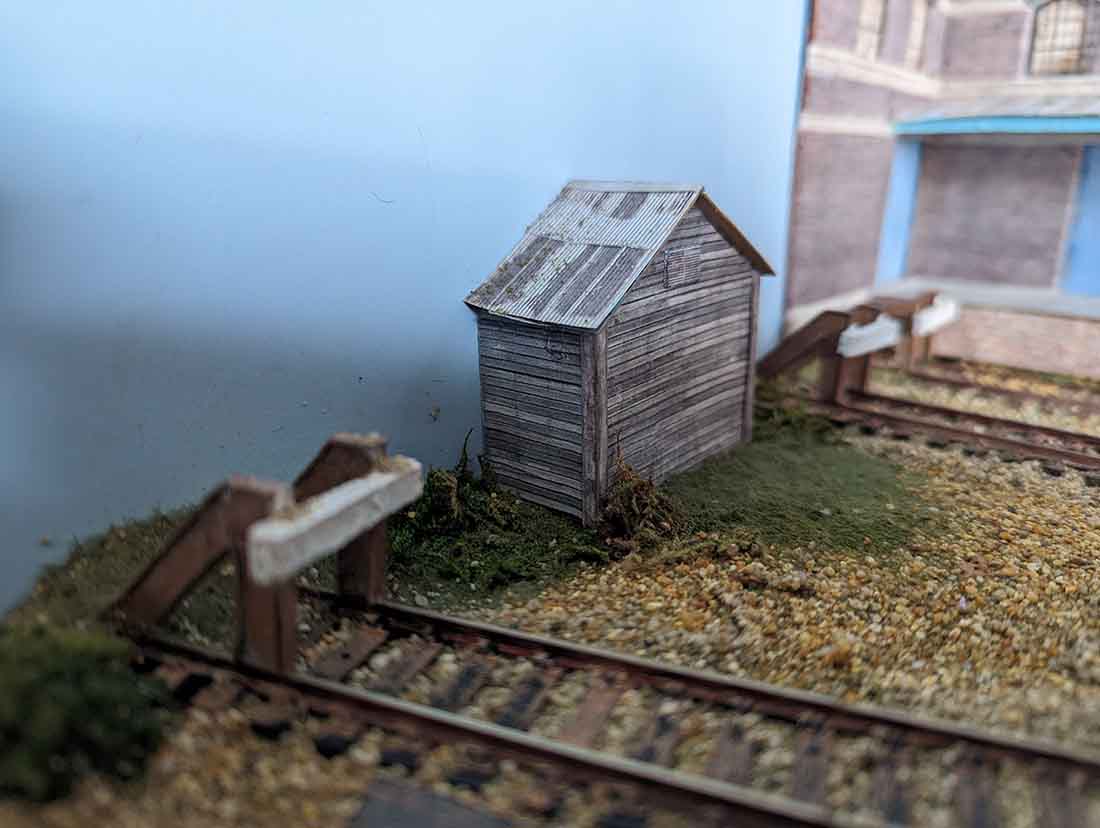
Around the start of this year I decided to depart from my Yankee ways to and build a UK themed layout.
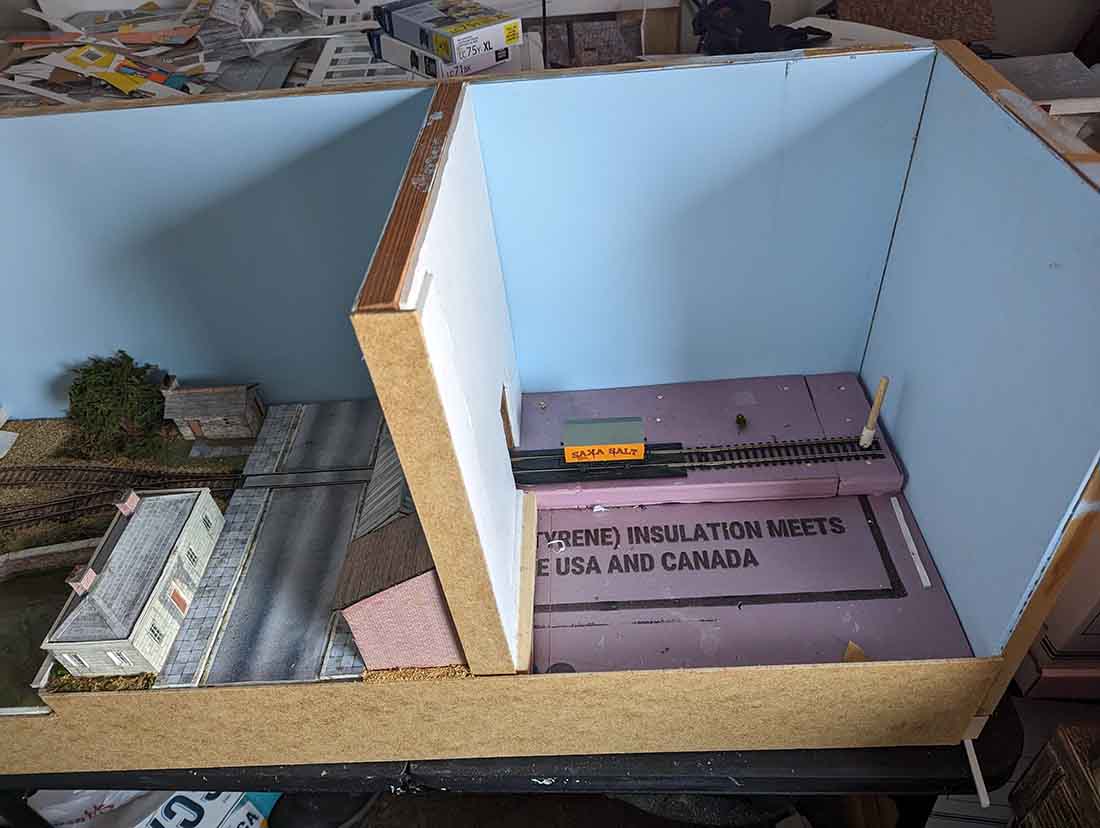
The layout is a small shunting/switching layout and roughly 12×24 inches including the fiddle area.
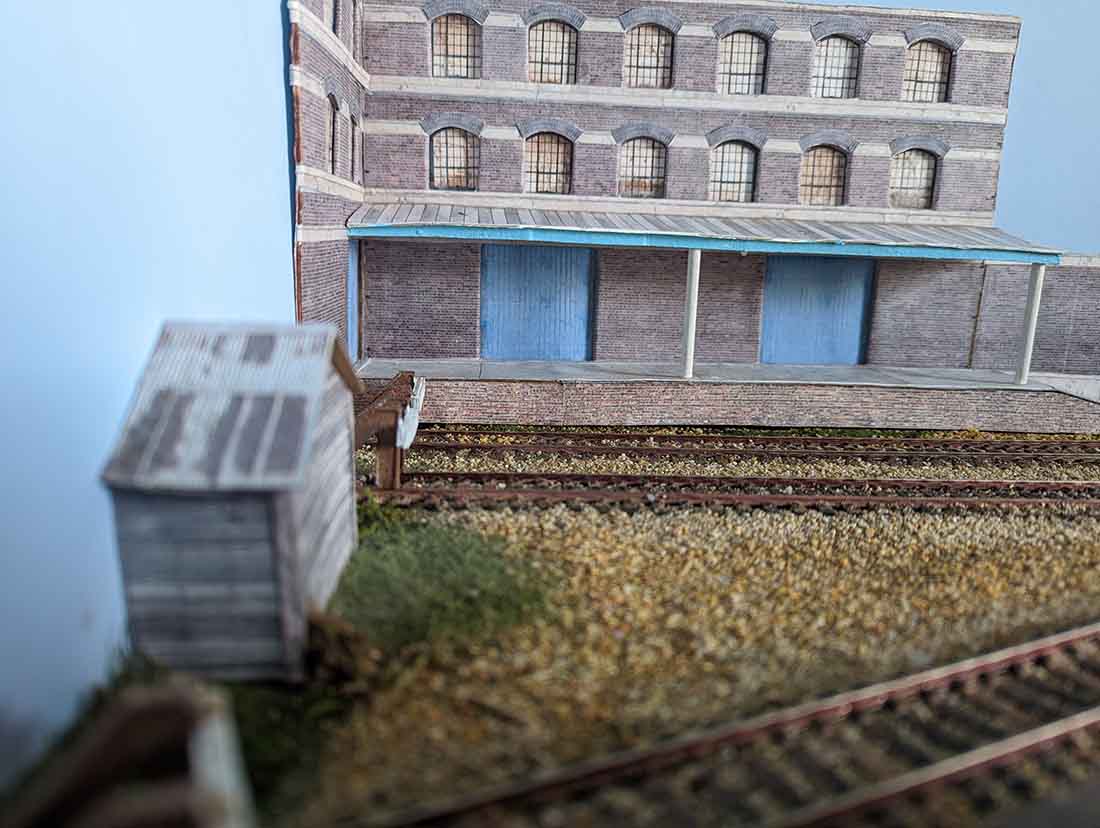
All structures are built from card with the buffer stops being built without any print out kit. (Yes, the buffer stops are card also.
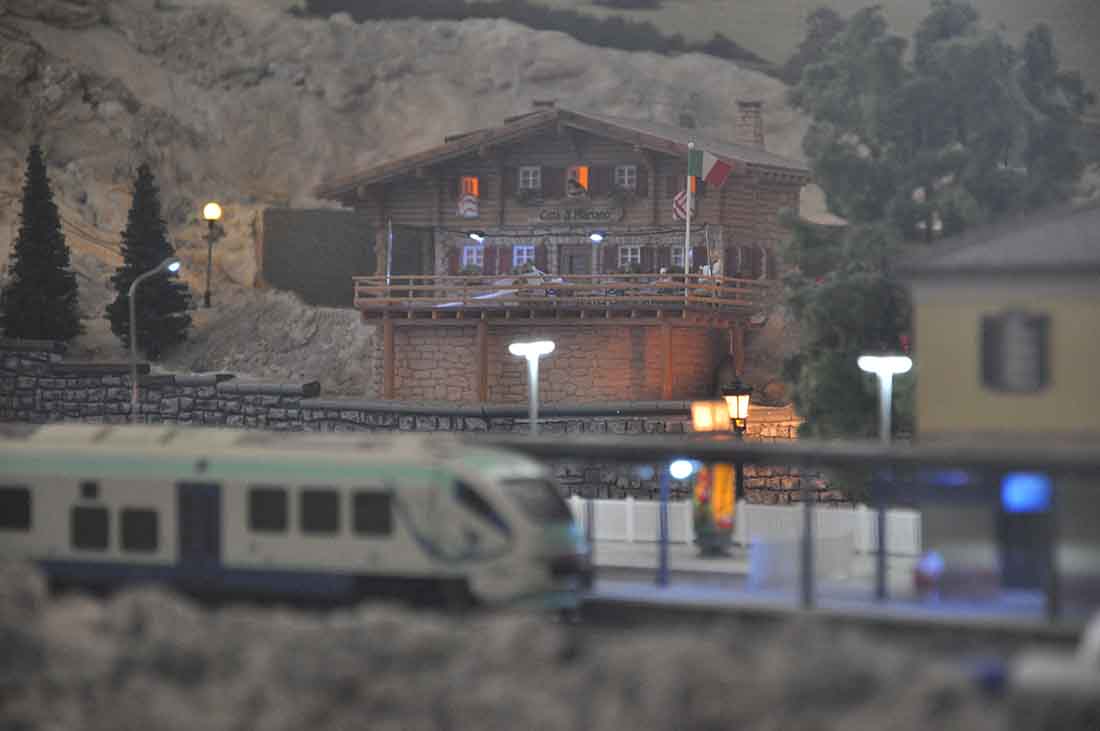
I have not yet figured out how to work with the tension lock couplers. While proper three link couplers would be nice, fitting them looks like more pain than value. I am also aware that many modelers in the UK are switching to Kadee couplers that are highly functional but look out of place.
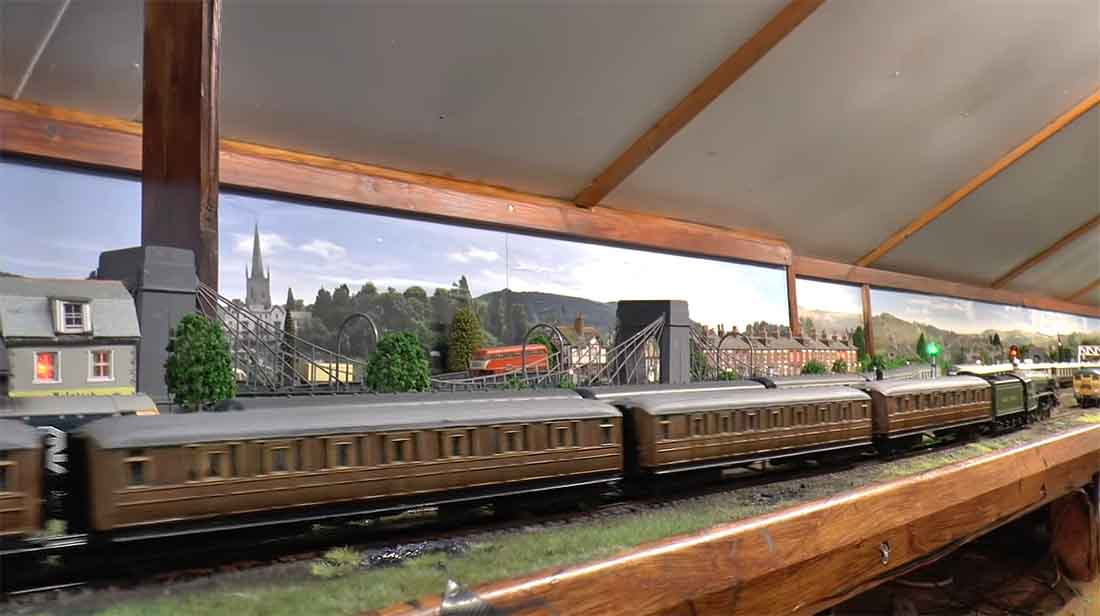
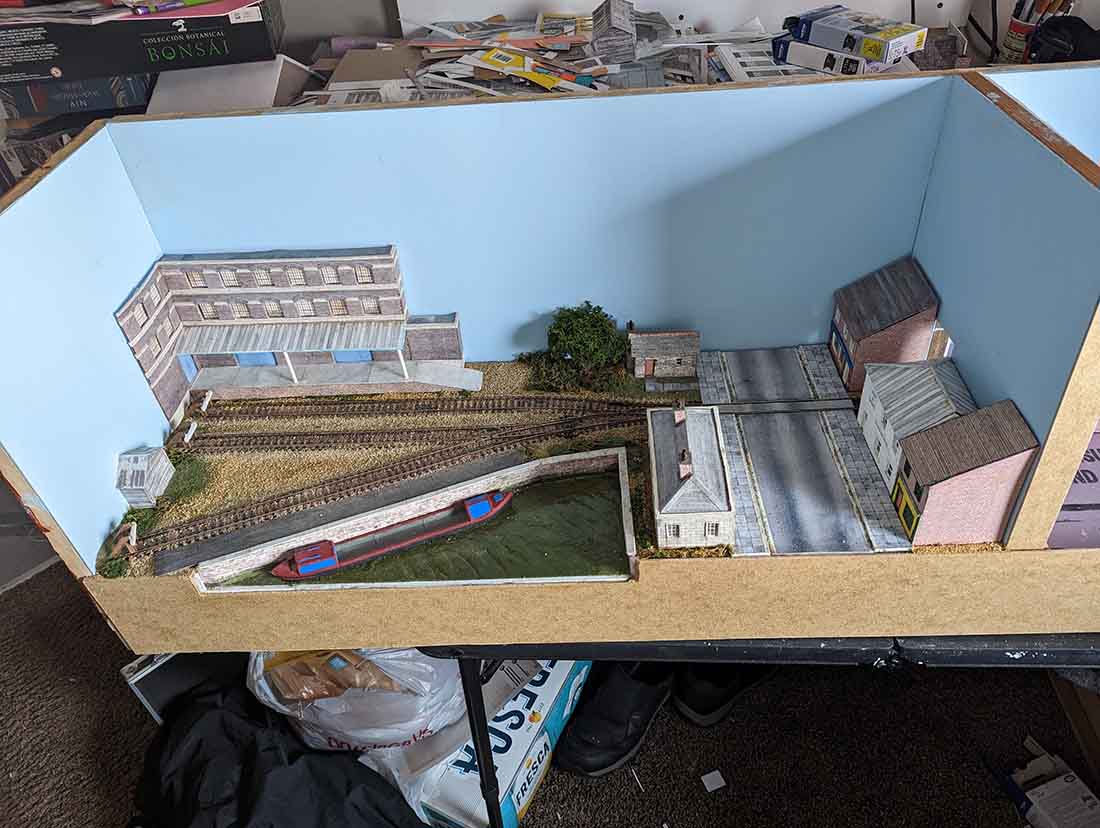
I think that I need to add a few clouds to the backdrop/back scene and there is something else that doesn’t seem quite right but I am otherwise happy with this effort.
I like to name my layouts but so far nothing has really “stuck” — Penny Lane is way too trite (and while I know it is sacrilege, I much prefer Herman’s Hermits, the Troggs, and Petula Clark to the Beatles.) – Quay House Road has a good ring as does Canal Street Quay.
Best
John”
A big thanks to Mike for sharing his model railroad scratch buildings, and to John.
Can’t wait to see what they come up with next, I really like any scratch building, and of course the printable buildings.
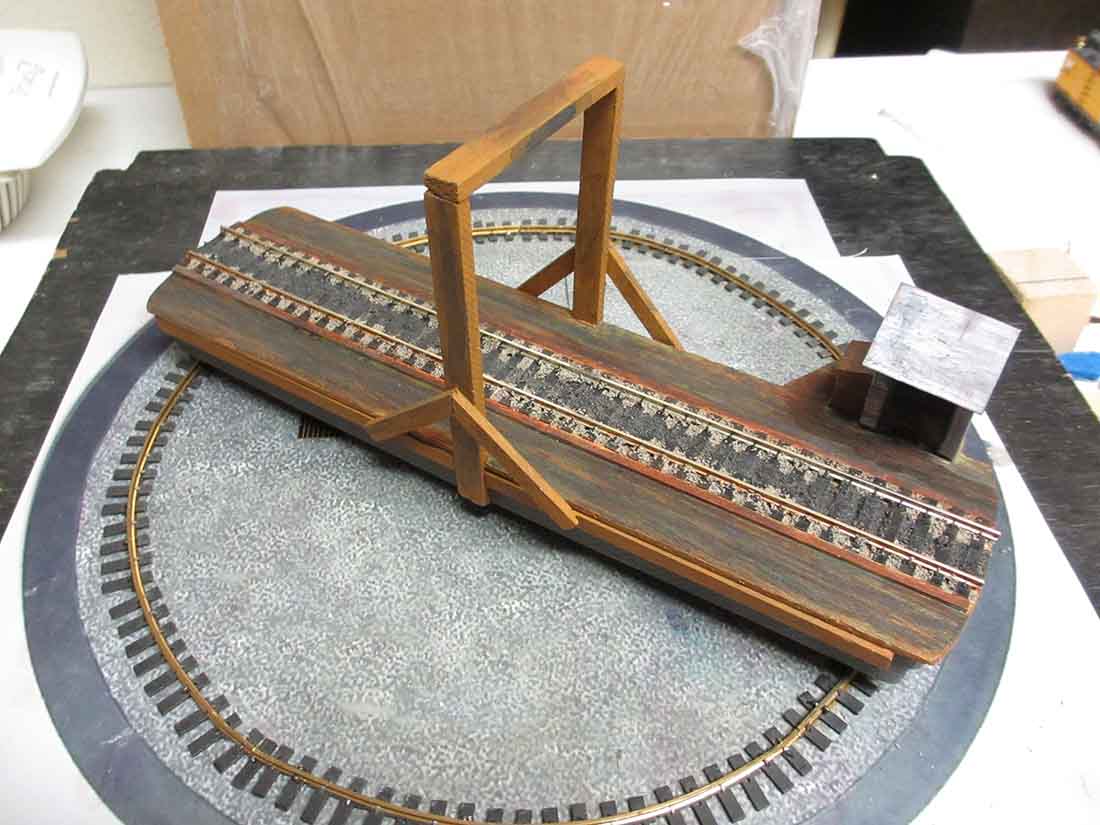
Tim’s been in touch with a very brave scratch build – a model train turntable.
And he’s done a great job too:
“Alastair here is a tip for Ken or anyone planning to scratch build a turntable:
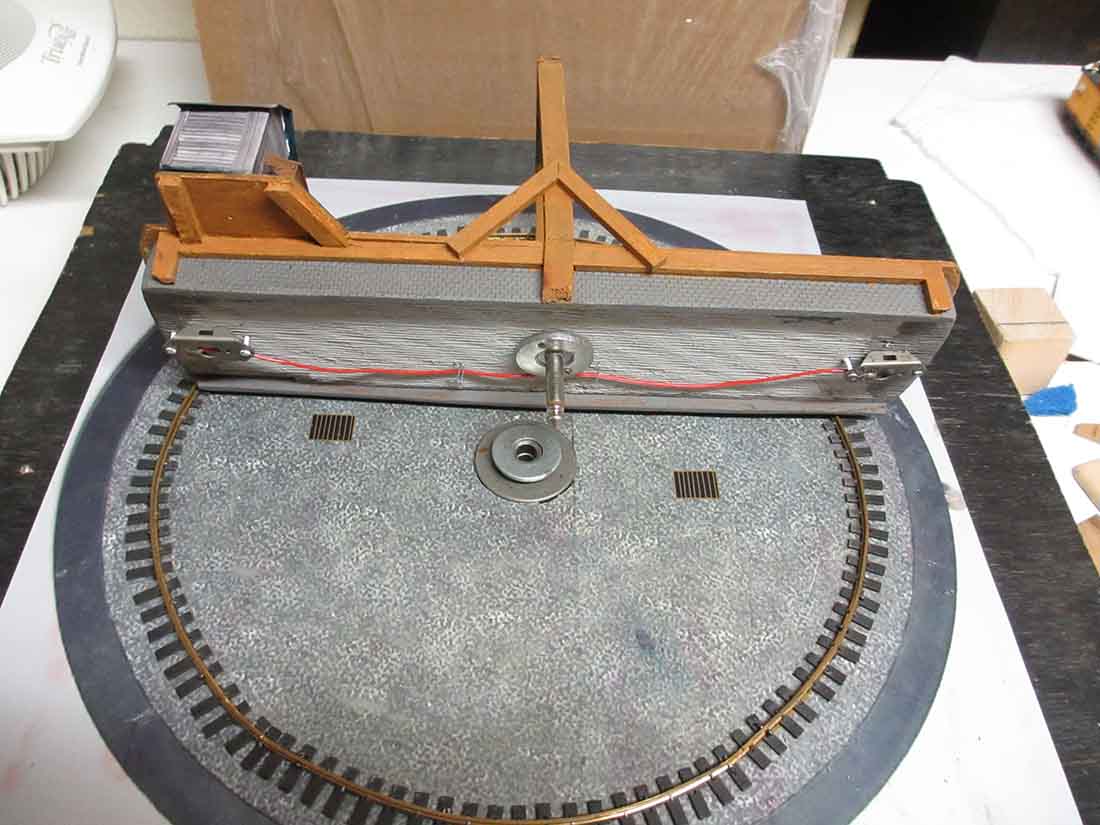
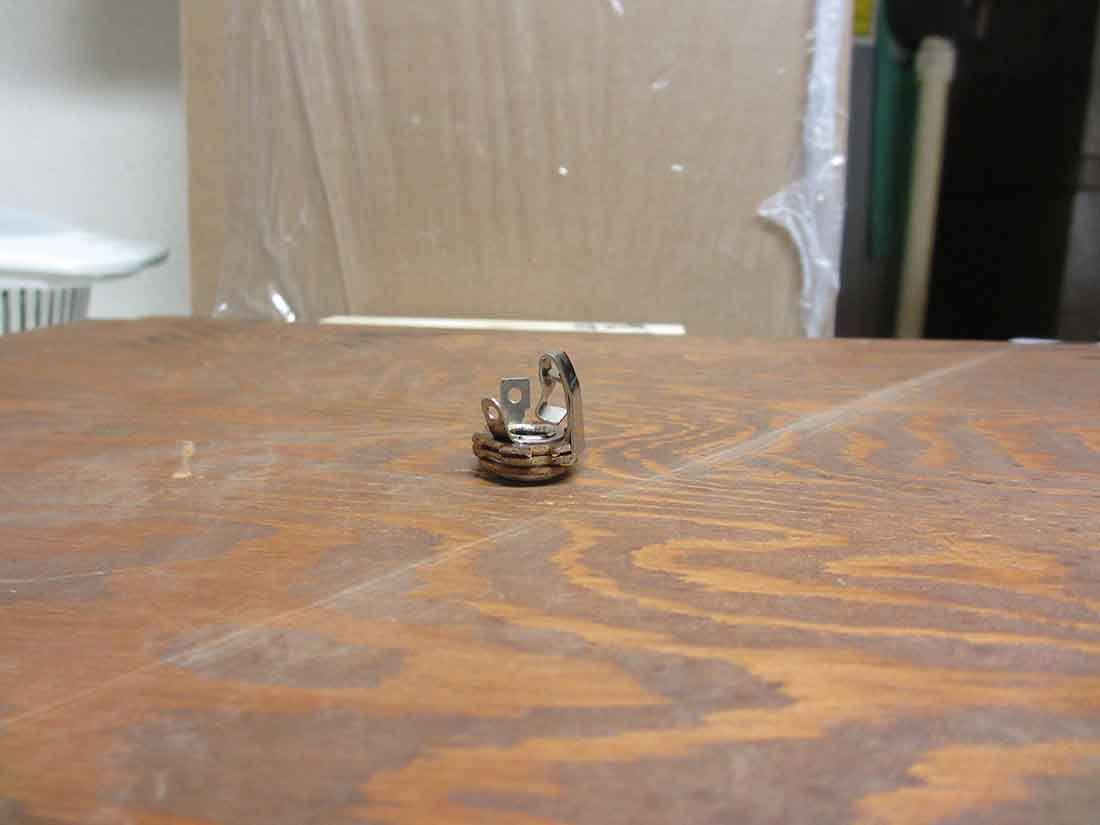
If you decide to make a scratch built turntable, you can use an old style large dual contact audio plug and jack as the spindle and pivot hole. This makes powering the track on the table very easy.
Wire the plug leads through the table to the rails and wire the jack from your track transformer.
When operating regular DC and completely turning your engine, the section(s) of inbound/outbound track(s) to the turntable must be isolated so that their polarity can be switched independent to that of the transformer.
This will allow the track to match the polarity of the rotated turntable, since this way of wiring keeps the polarity of the table constant.
Once the engine is off the turntable, the transformer direction can be changed to the new direction and then the isolated section must also be reversed again, to match the transformers direction.
The turntable will also need to be rotated back again to match the polarity of the next inbound engine.
The hard part is making sure that the plug is perfectly centered and perpendicular when screwed into the bottom of the turntable.
I got this tip from a video clip on scratch building a turntable, when I needed to build one to turn a doodlebug at the end of its branch run.
I am still working on how best to operate the table.
Since these pictures were taken, I have added wooden railings with a pit access ladder and a fine toothed gear around spindle and glued it to the bottom of the table.
I also found a roller bearing donut in my spare parts stash that reduces friction and stabilizes any wobble of the table due to the tightness or lack there of between the plug and jack.
The wire in the pic that runs the length of the table bottom is for an alignment indicating circuit.
When the tracks are properly aligned the table will complete a simple dc circuit to a light and battery (one light and battery with leads to each contact pairings) thru contacts in the pit walls at the center of each track and the opposite wall.
The bottom of the pit is just a picture from a computer paint program’s gravel texture with drawings of drains added.
The rail is old brass flex track cut in half and formed into a circle. Make sure that the alignment contacts on the table do not touch this rail or you will get a short in your circuit.
Alignment circuit:
wire to contacts on left side of pit }—@—+[batteries]~—{ wire to contacts on right side of pit
Best of luck,
Tim”
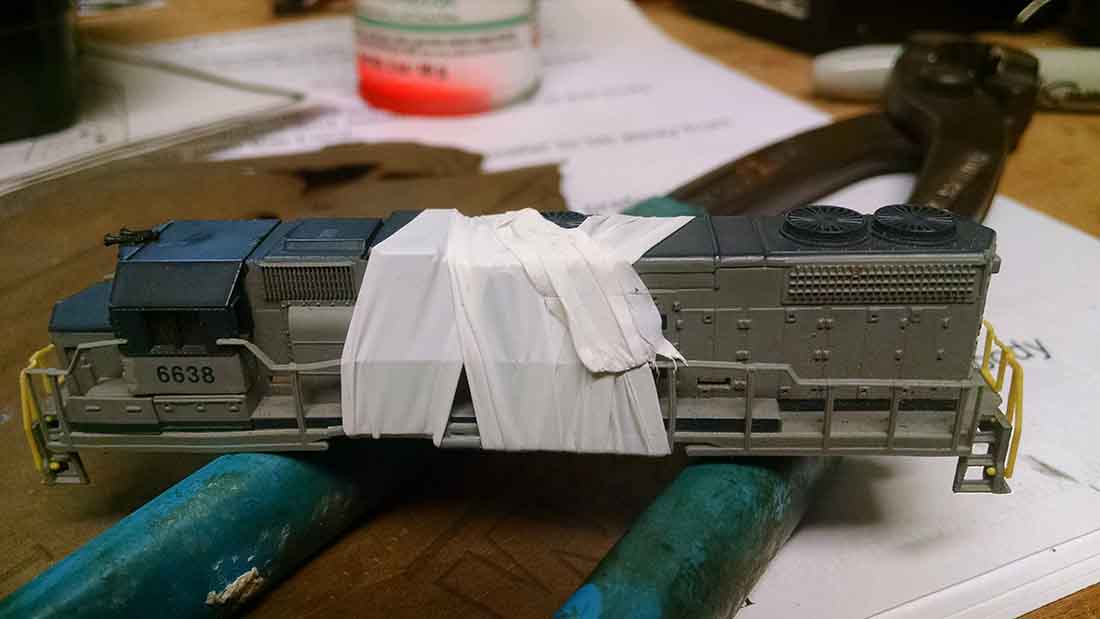
“Al–
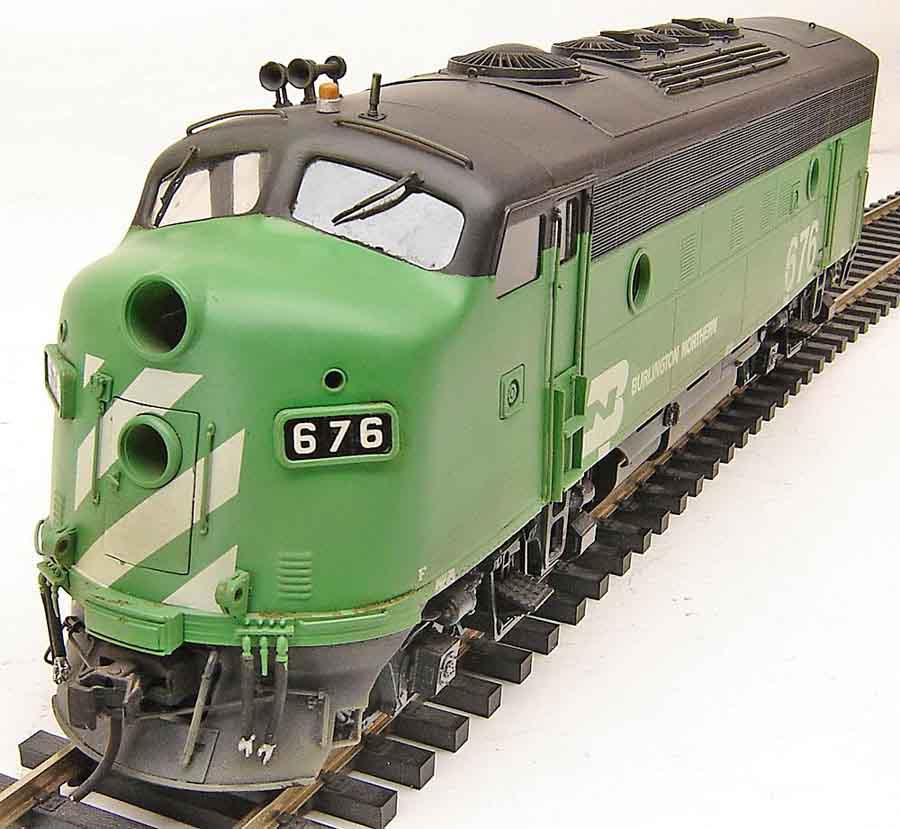
I have one for you; I was trying figure out how to hold one of those little bitty tiny N scale handrails in place while I glued it back in place with a bit of epoxy.
My hands are not stable, tape will pull the handrail right back off of its intended location, tape reversed with the shiny side toward the handrail will not let me position it correctly, etc., etc.
I looked around for a new trick and came up with using pipe tape (the stuff you use to prevent leaks on pipe thread) to wrap the locomotive.
It holds nicely, even stretching a bit like, but not too much like, a rubber band.
I have included a picture for you, and I really like all the tips!
This little guy is running around the tracks now, happy as can be!
Jerret”
And now on to Mark.
He’s shared a very simple but effective ‘how to’:
“Hi Al,
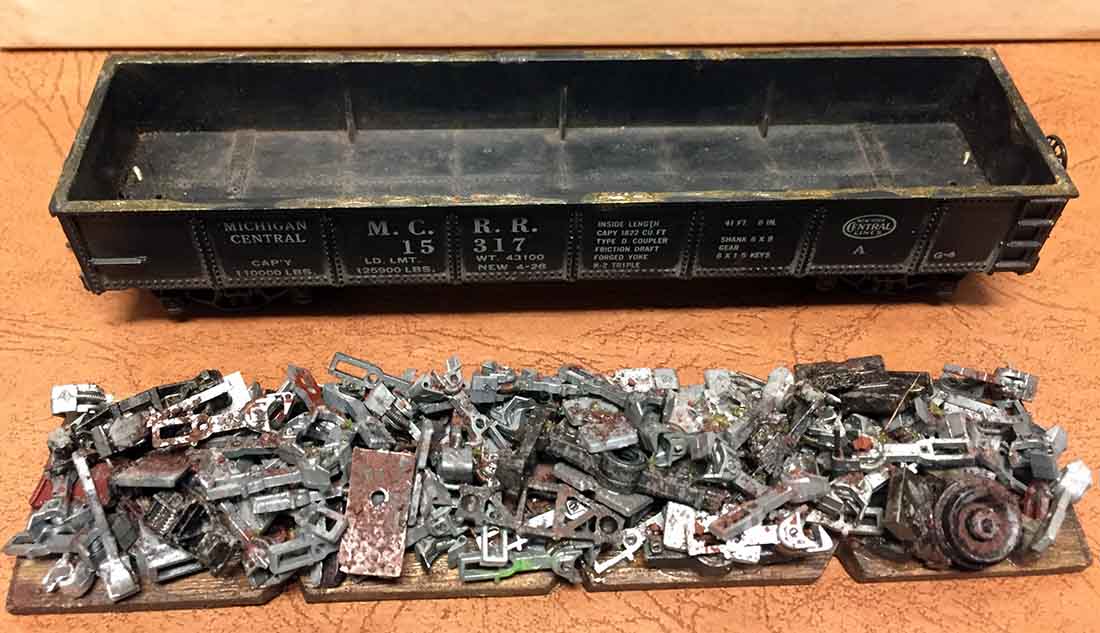
Looking around for a quick, fun, (and cheap) project this afternoon and I came across an old Varney gondola in the scrap box.
Added some metal wheels and Kaydee whisker couplers.
Cut out a load base from some scrap bass wood, piled some stuff on it from the scrap box along with some rust and dirt powder.
Then sprayed some alcohol on it to break surface tension and then drizzled some scenic cement on with an eye dropper.
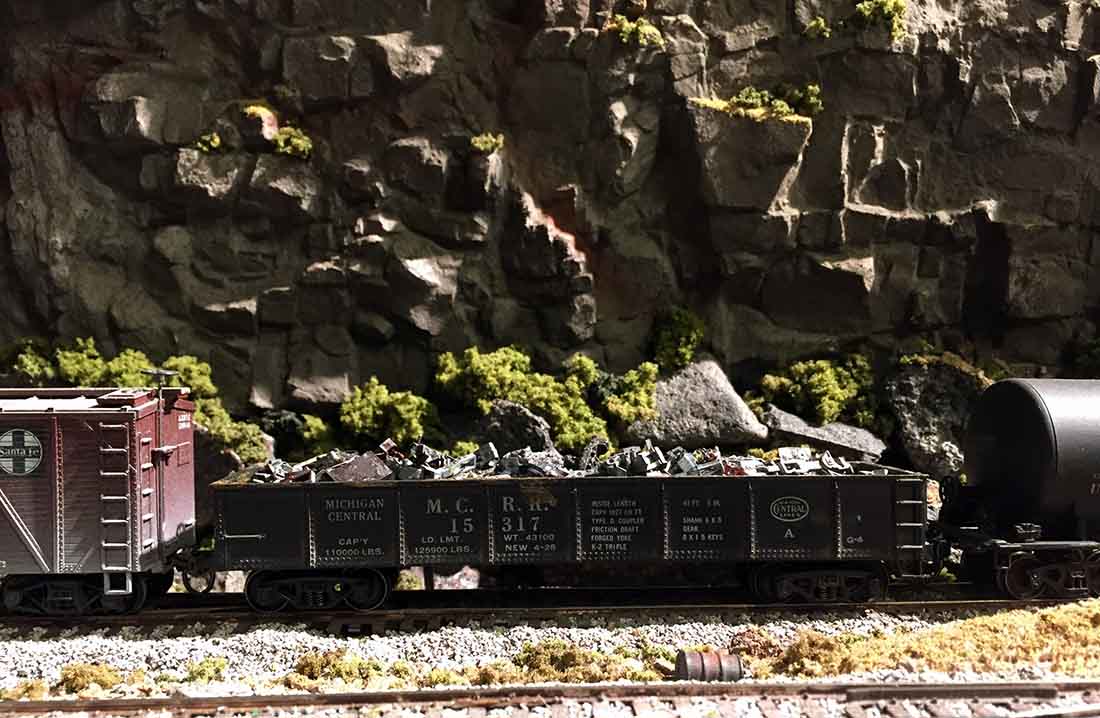
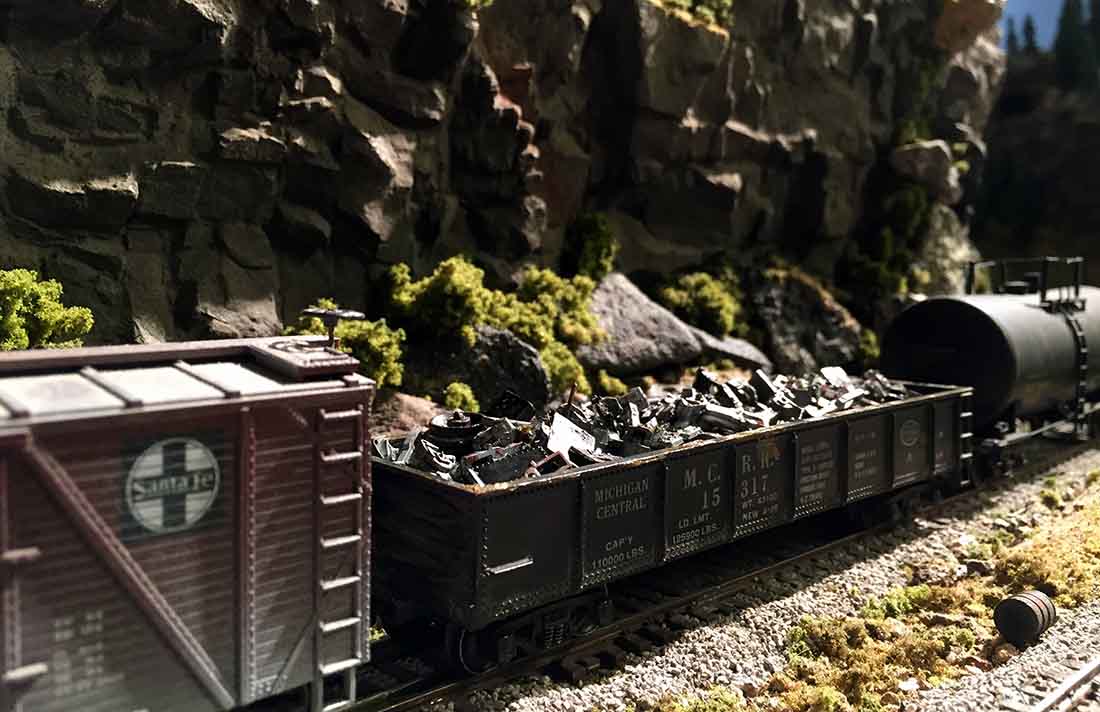
Let it set in the Las Vegas sun for a bit to dry, dropped the load in and it was on it’s way!
Took about two hours and just a few bucks of parts.
Great way to enjoy an afternoon!
Thanks for looking!
Mark”
A big thanks to Jerret and Tim. After all these years, I’m still constantly amazed at what comes in.
That’s all for today folks.