G scale layout

Tom’s been in touch with his G scale layout.

As usual, it’s stunning. Don’t just take my word for it though, see for yourself.

And please do leave a comment below – I’d love to hear your thoughts on his narrative too.

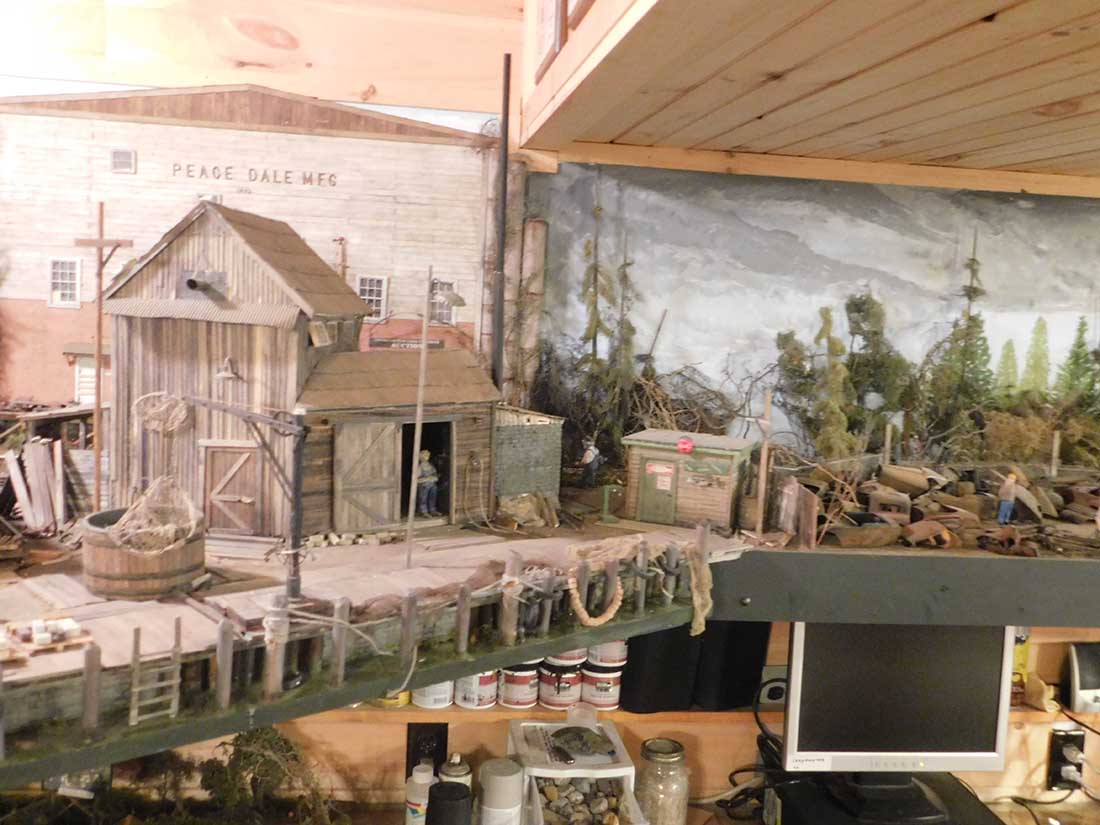
“My G scale layout was pretty much done on a whim, all my layouts have the same space.

They are all shelf layouts, 18-24 26-10, feet at both ends are just about 4 feet square, just enough to get a small engine around.

I have never been much of an operator with big yards and multi engine houses, good track work has been very important, I have thru DCC and all the headaches that can bring not to mention the expense, so this and other layouts have been basically double dog bone.

No matter how big or small a train layout you have, they just go from point to point in a basic circle!

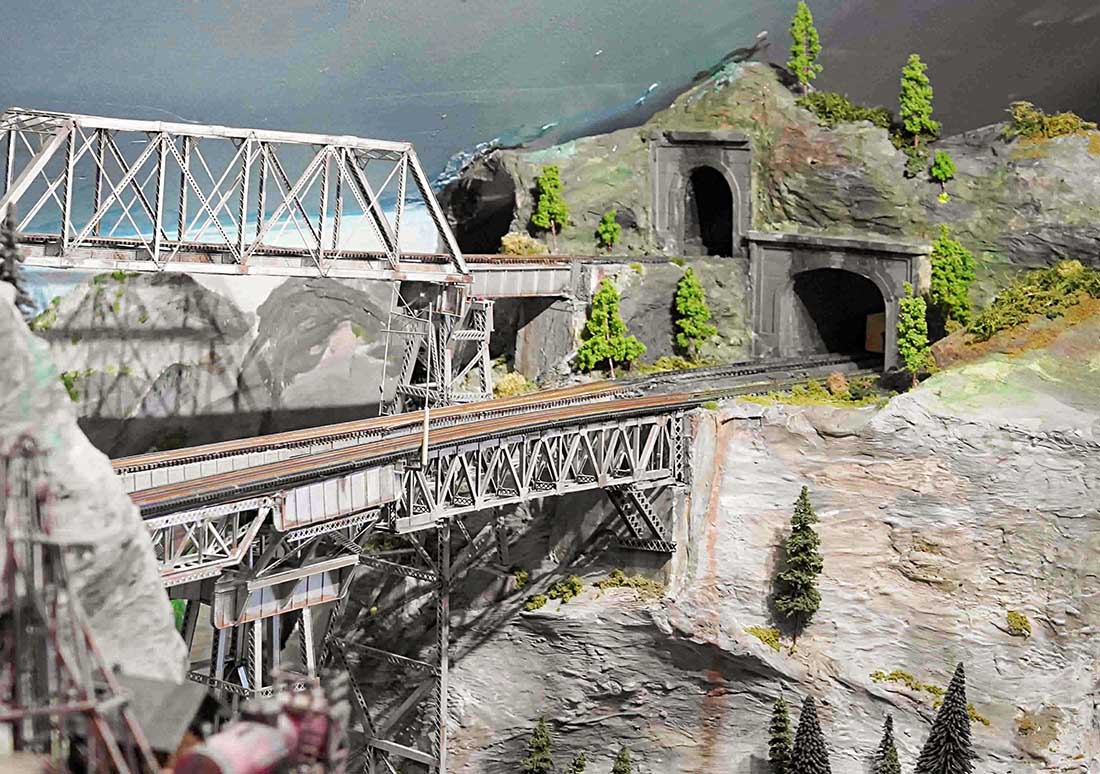
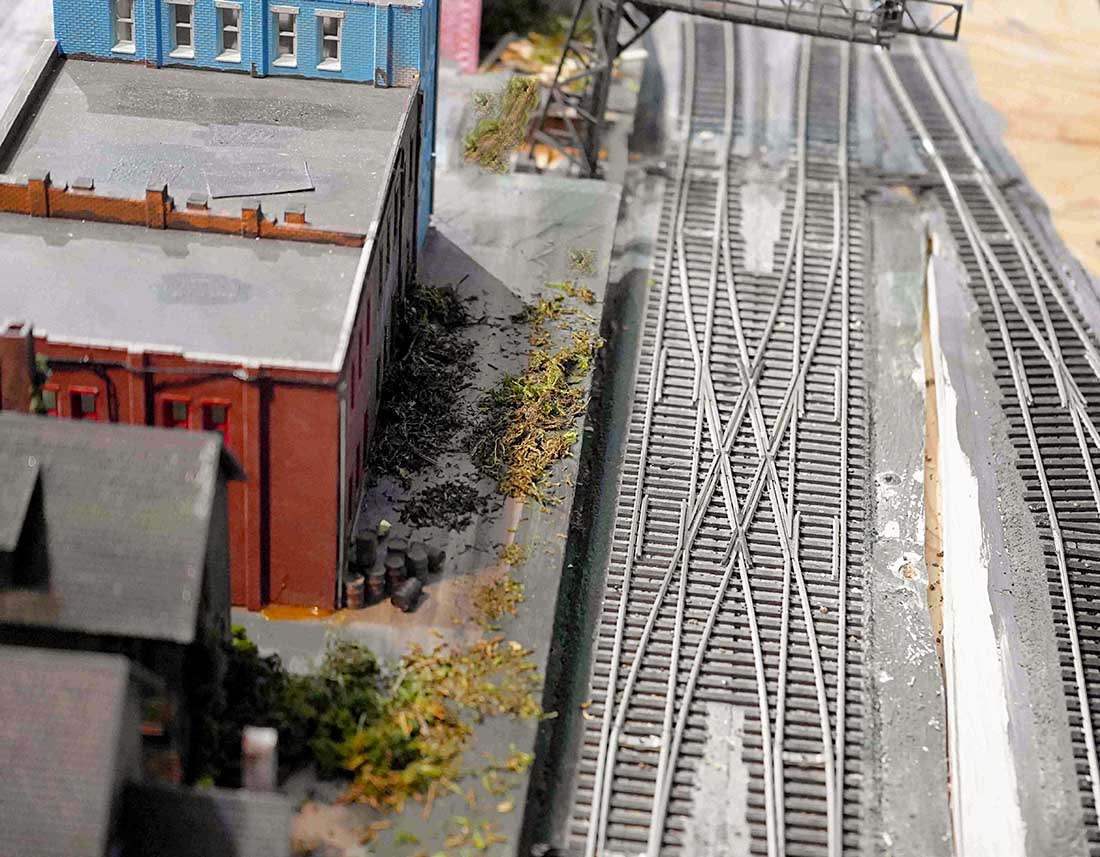
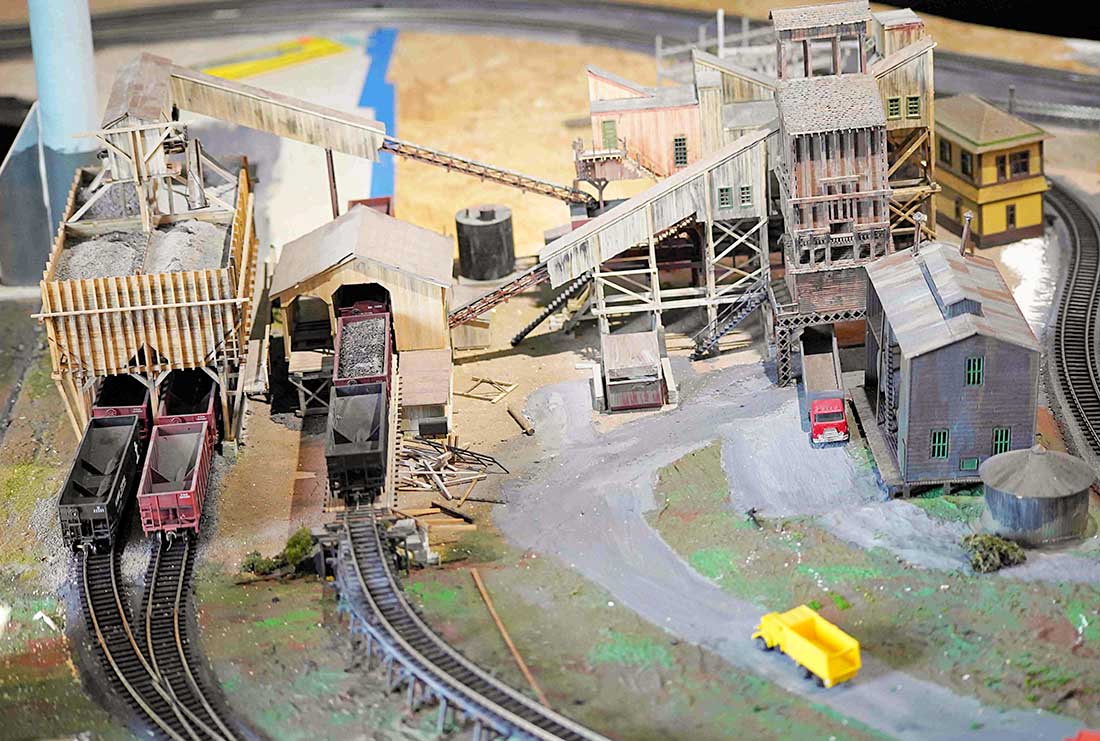
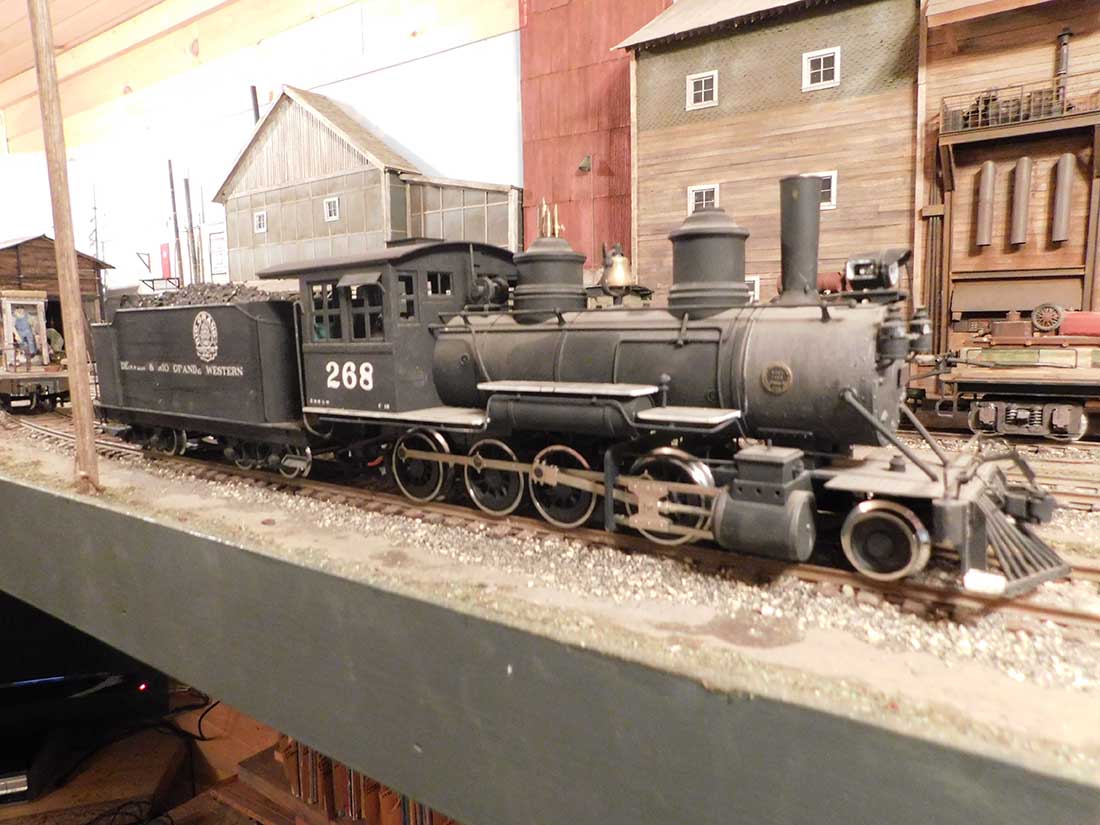
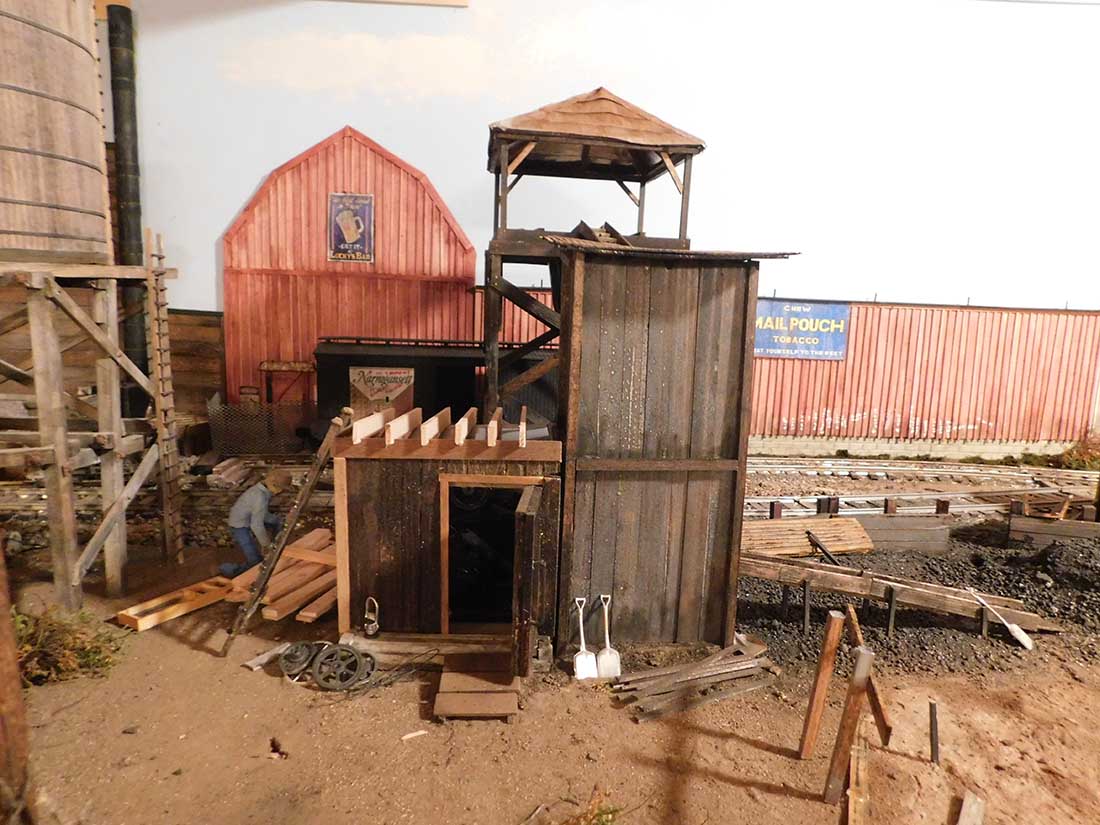
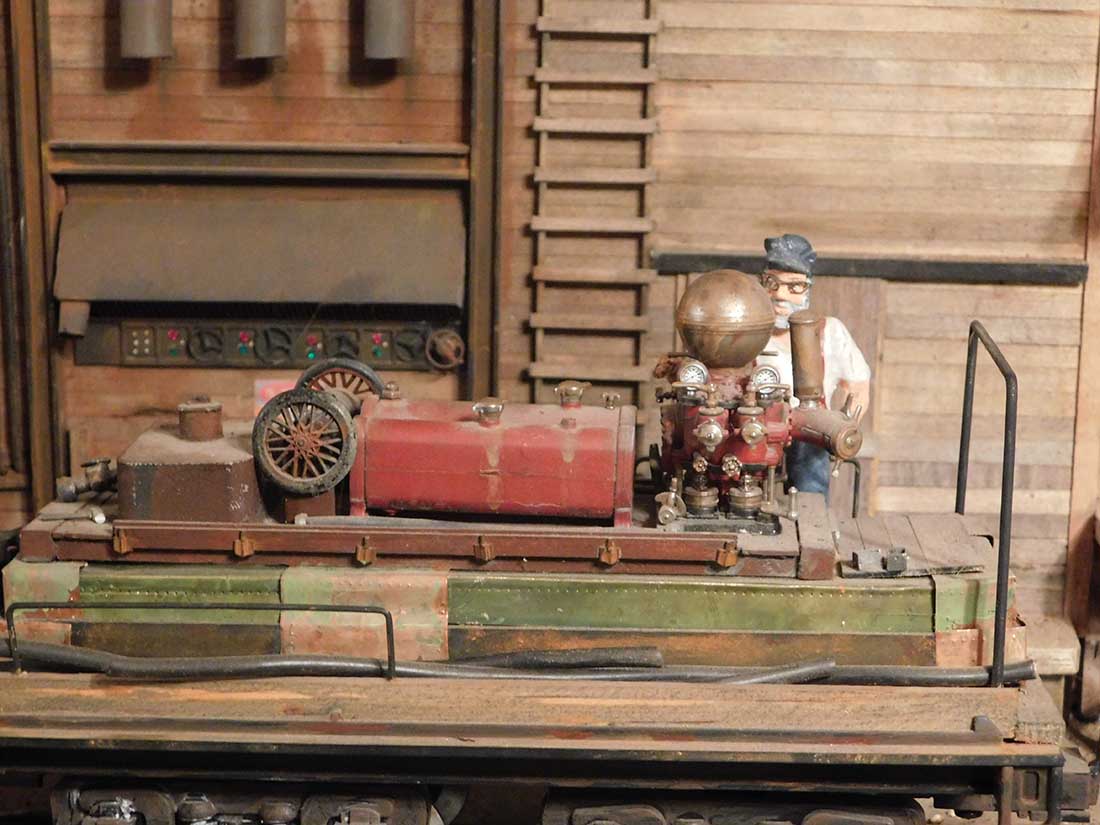
Now with limited space and in G scale this was a real challenge, I decided to have a basic circle at one end and at the other a big turntable and engine repair and service area.

At the time there were no G scale turntables on the market (at least nothing with in a budget) so I took a lazy susan that was buried in my wife’s kitchen (Not sure if to this date that she knows it’s gone!), covered it with 2×10 scale lumber, add the hand laid track, installed a removable handle to turn it around, (the engine runs off of rechargeable batteries) its Brass and heavy so when it gets onto the turntable it just makes it.

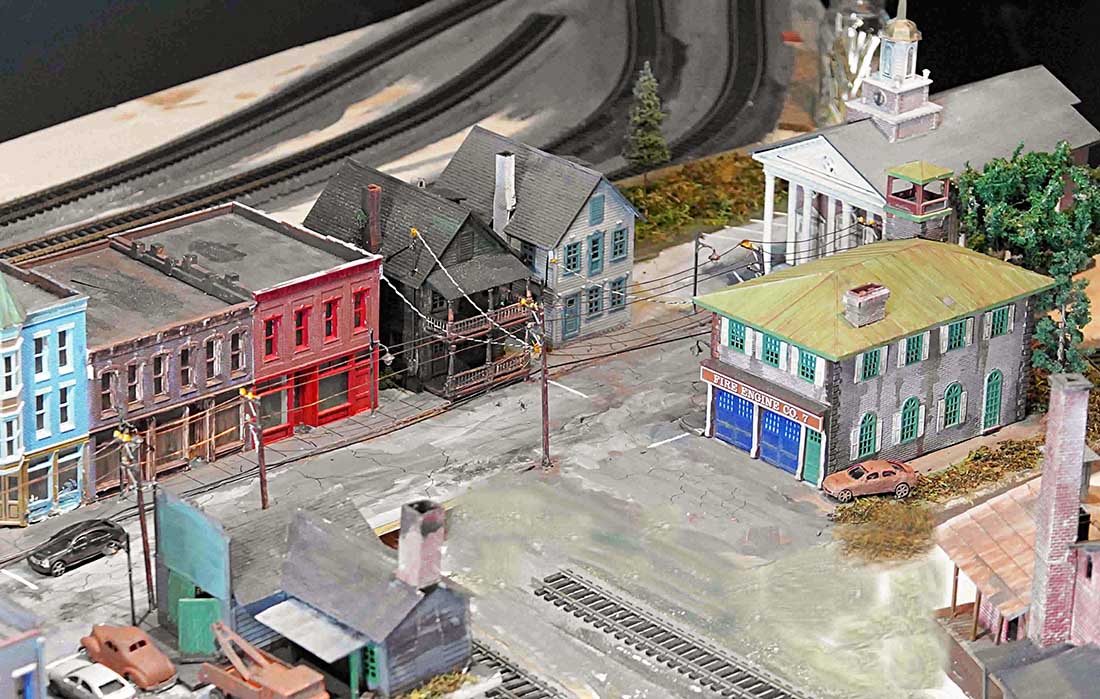
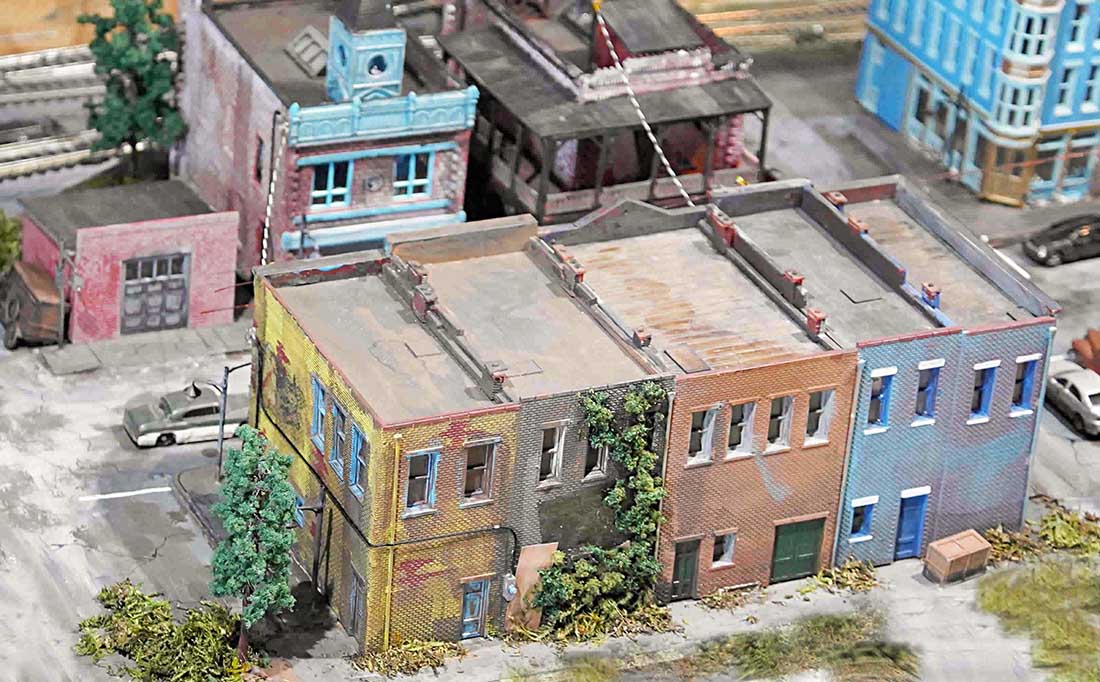
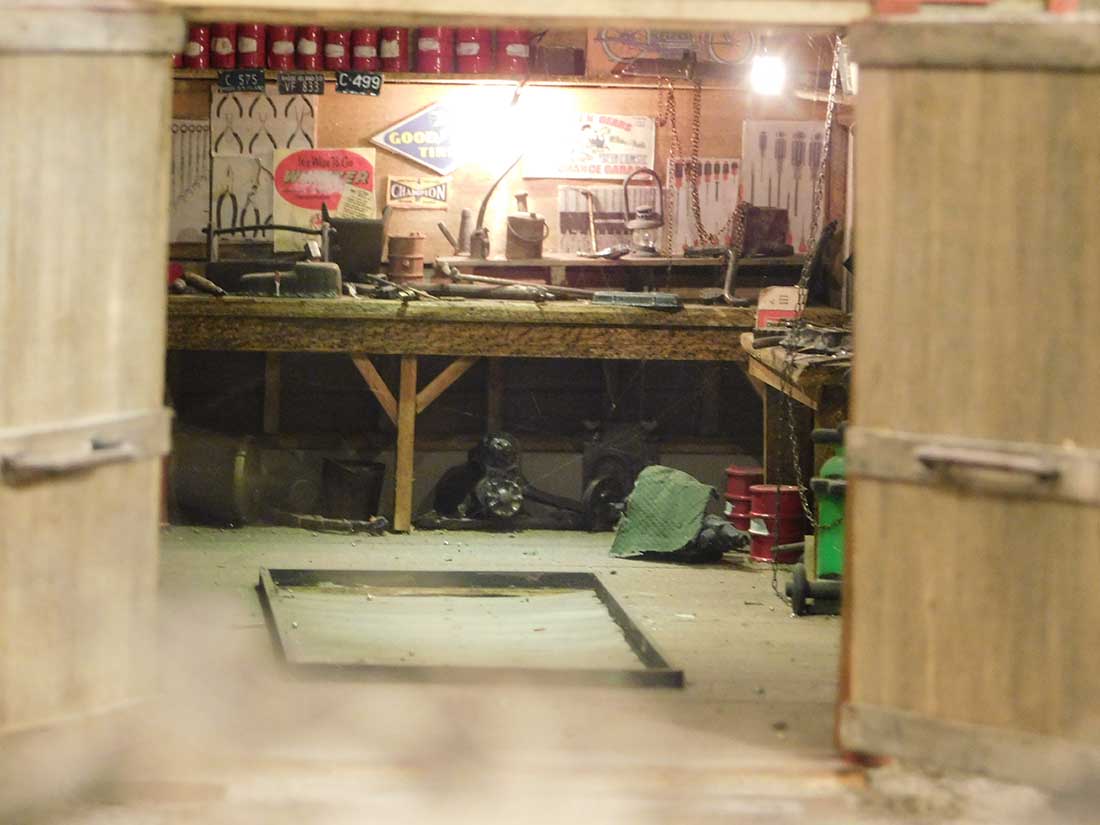
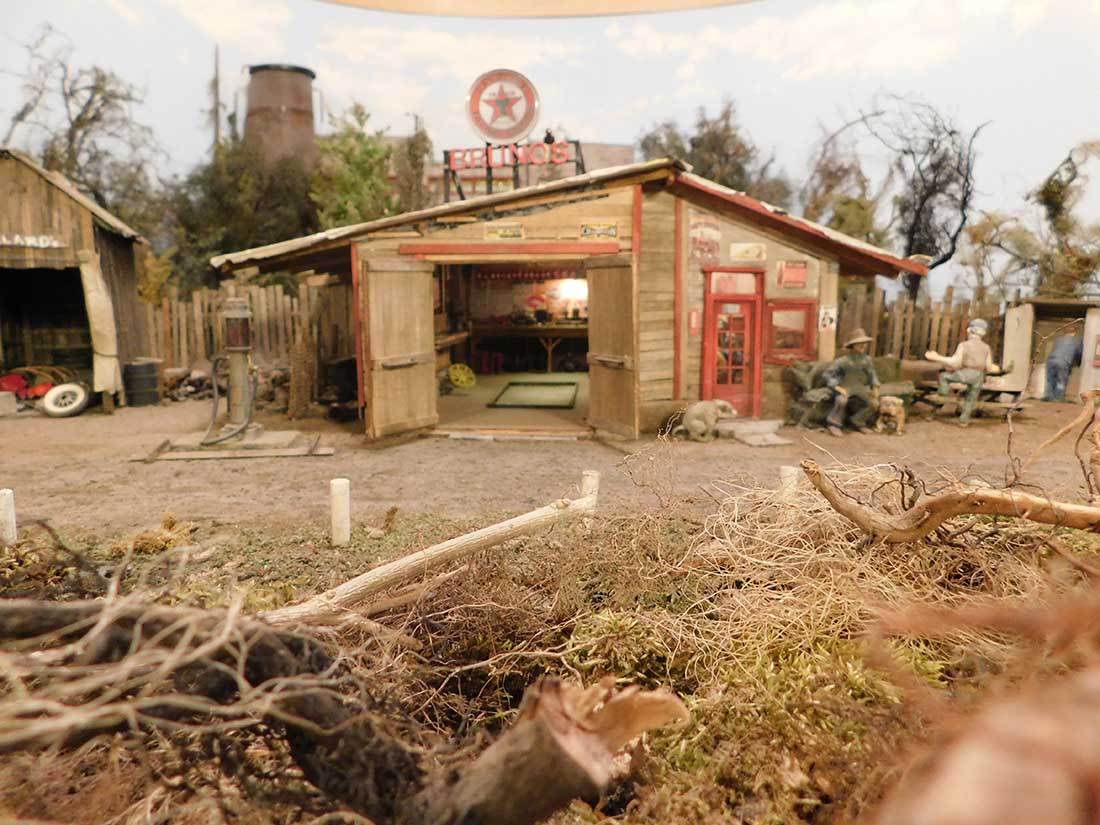
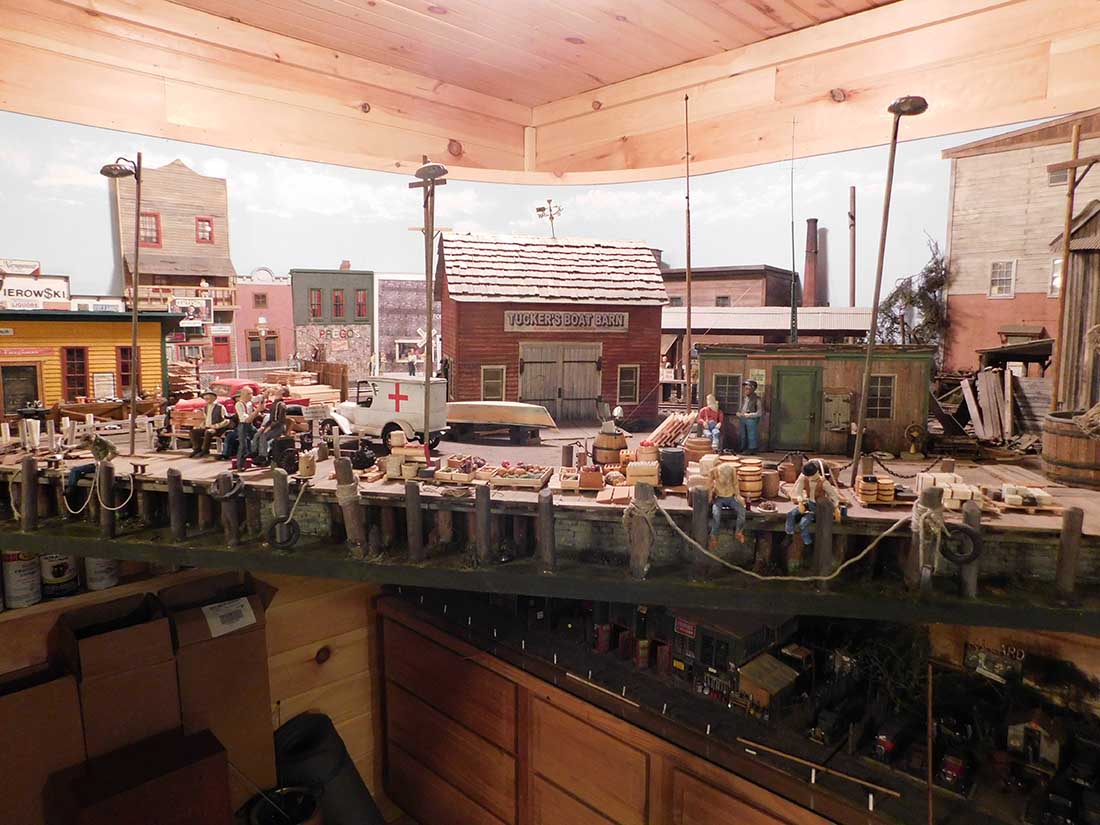
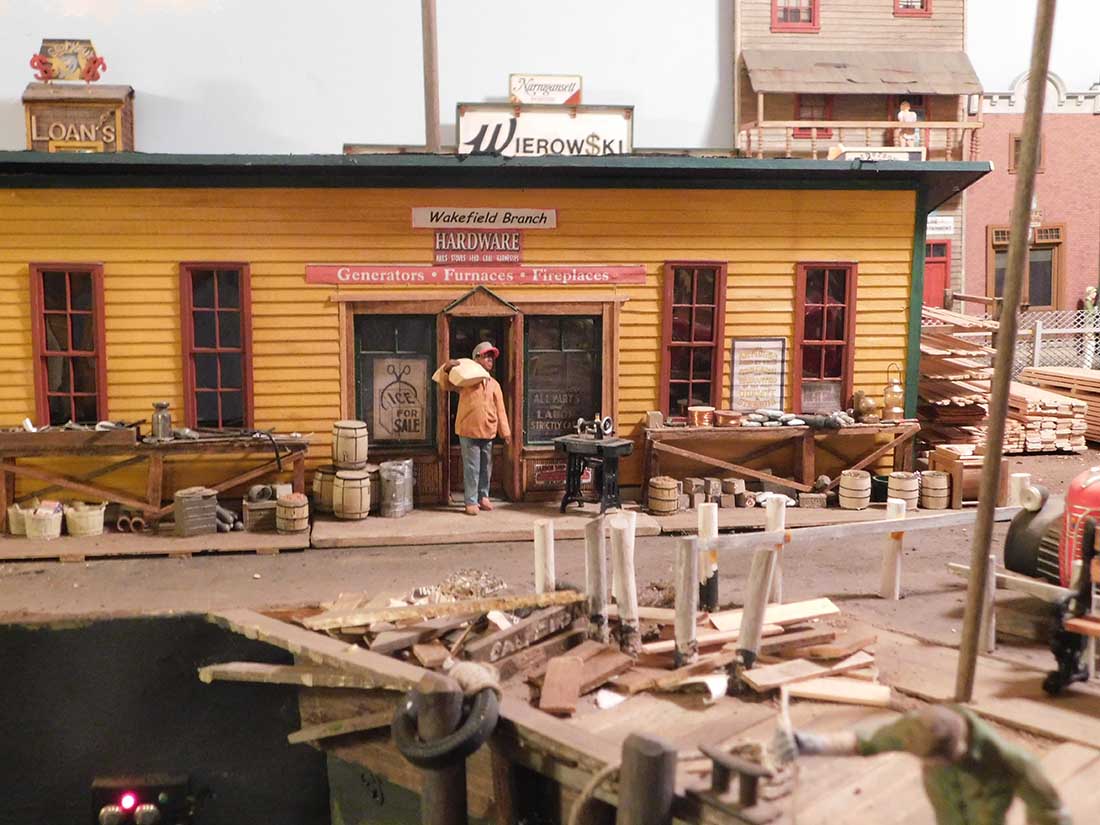
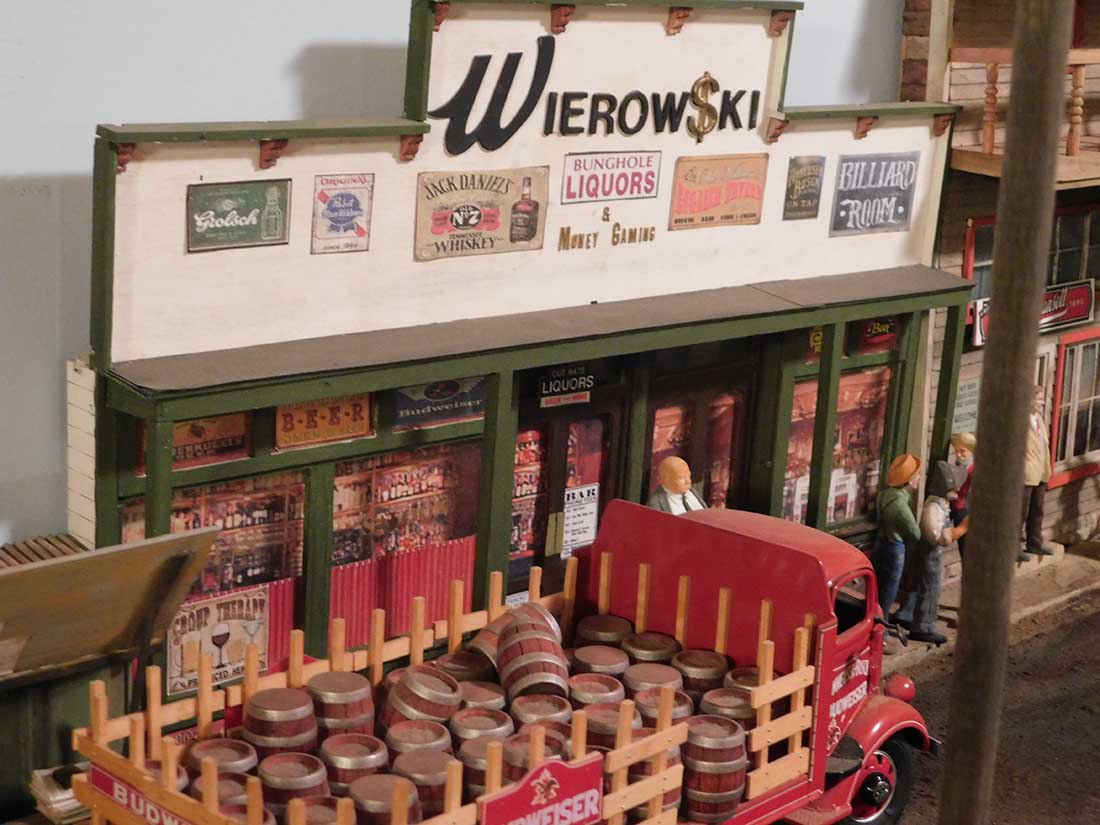
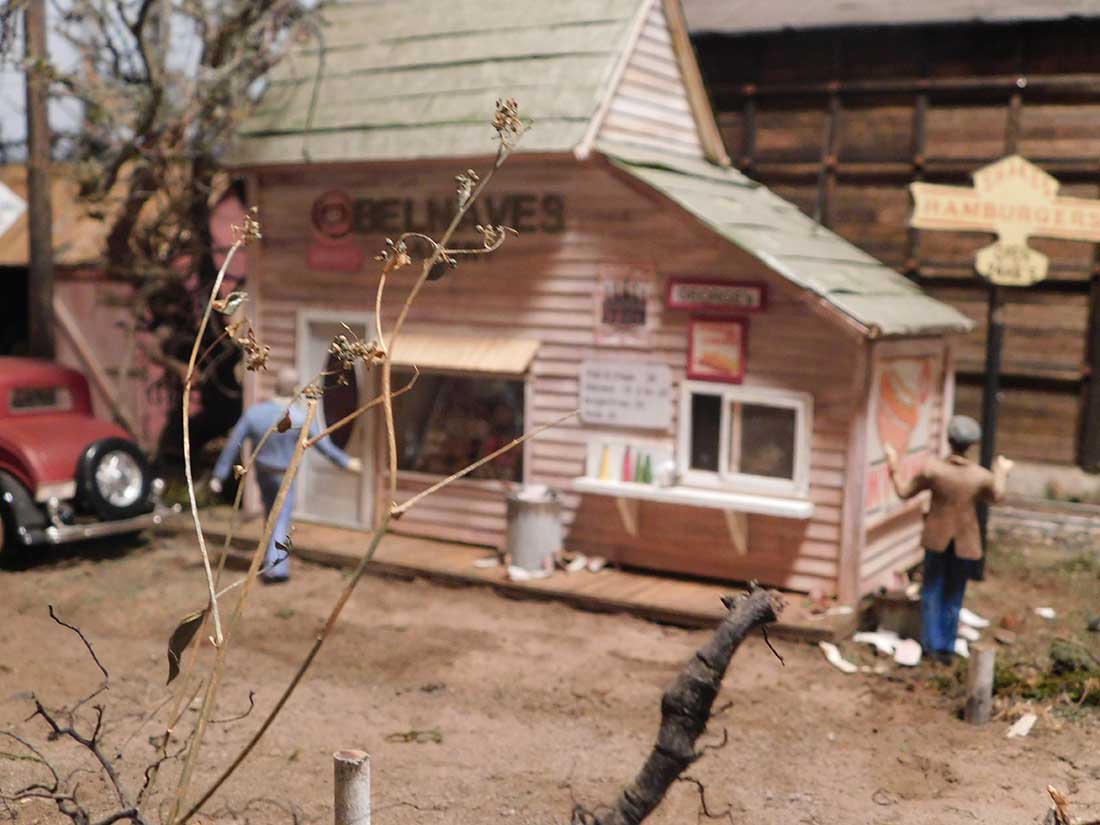
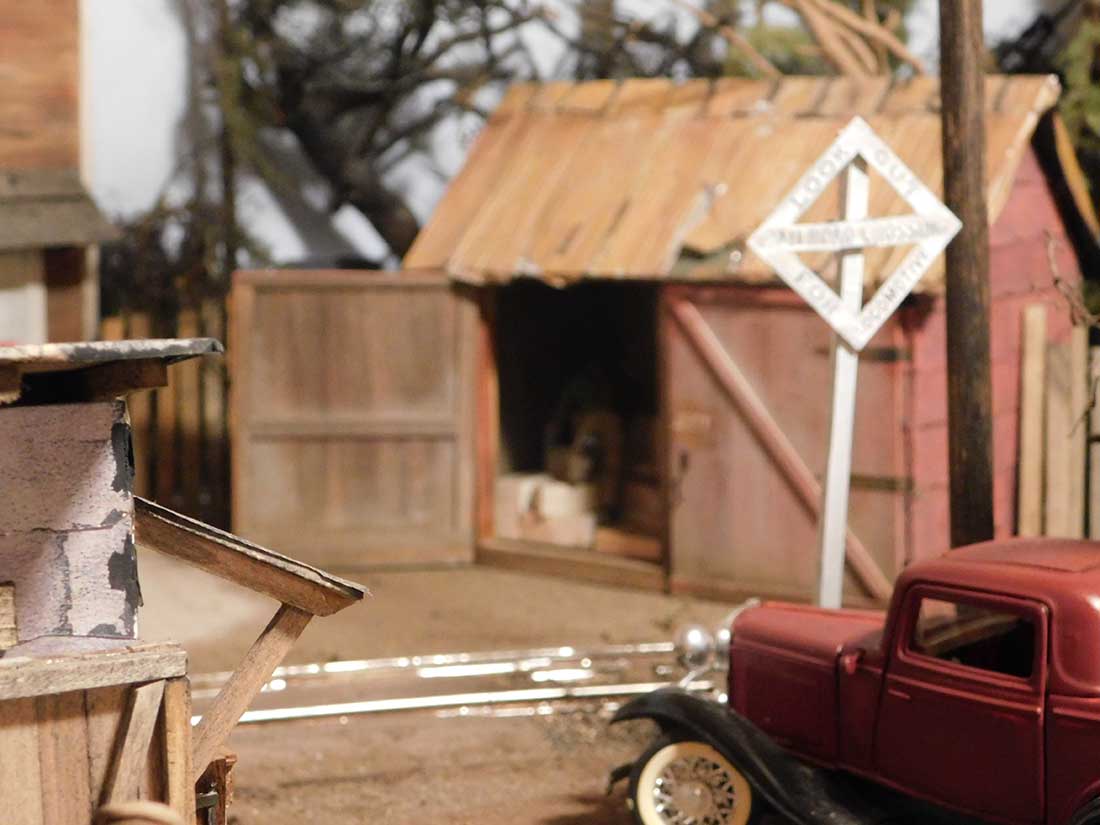
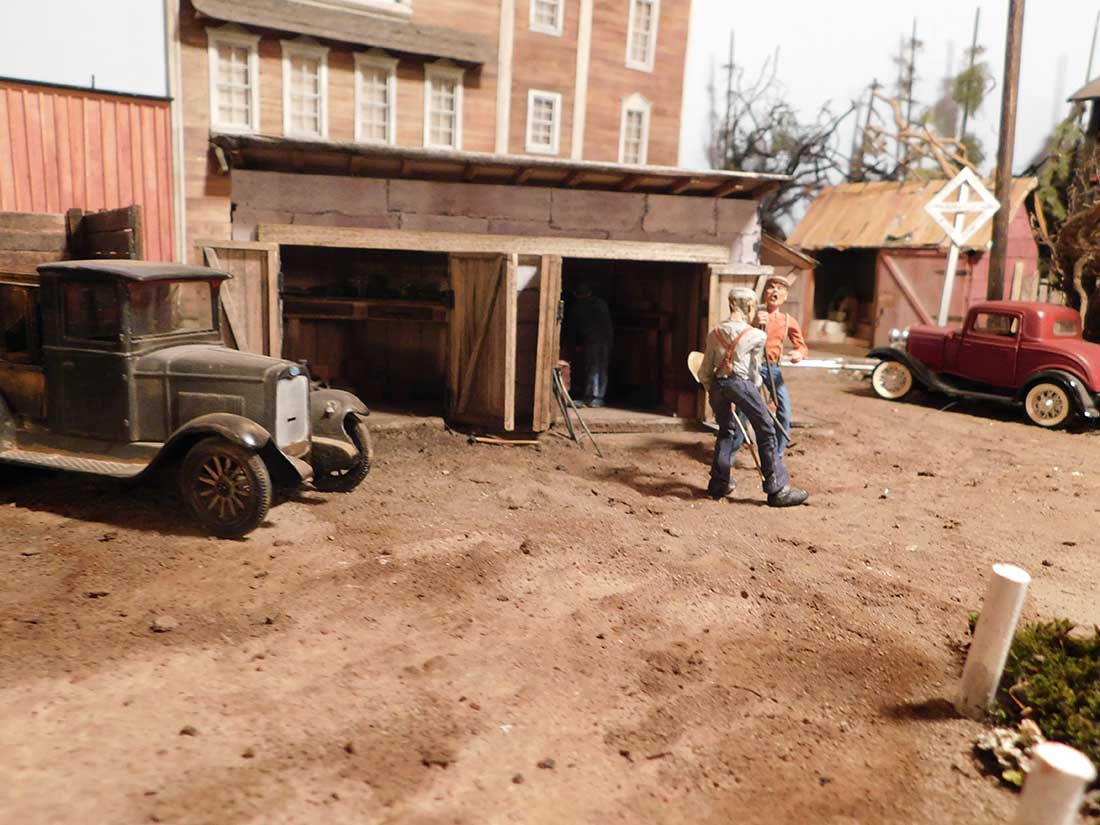
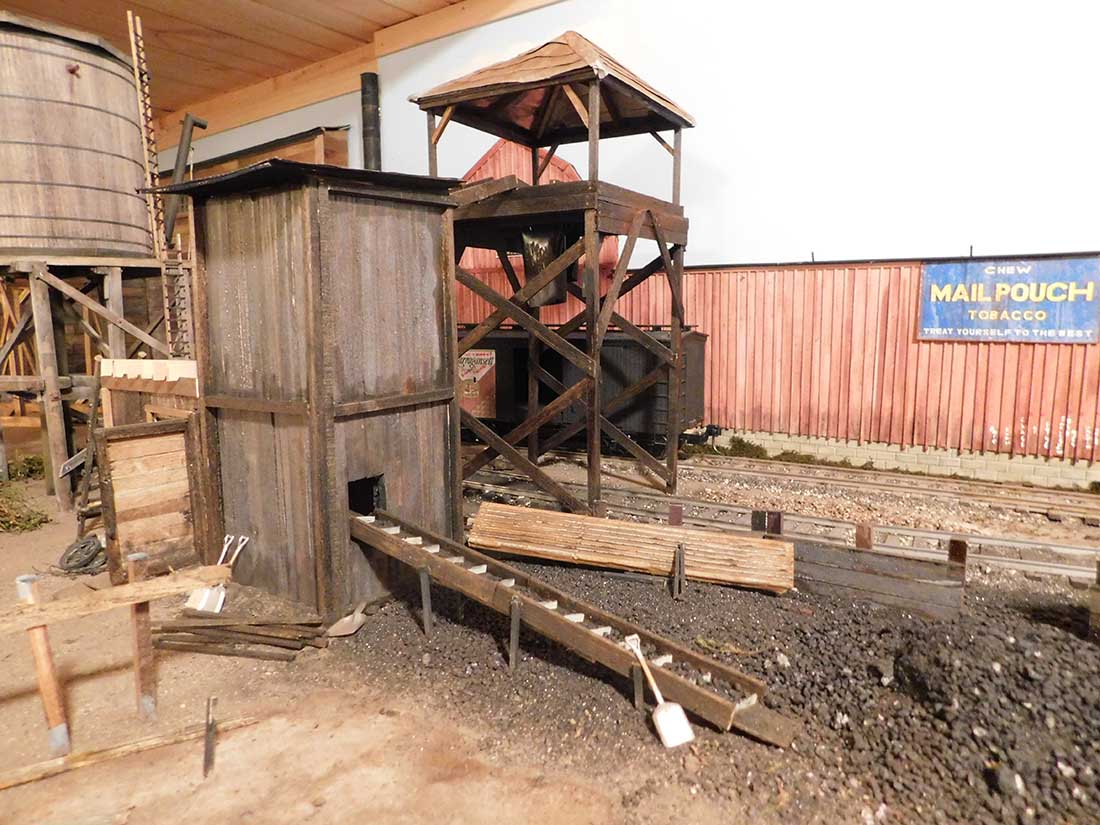
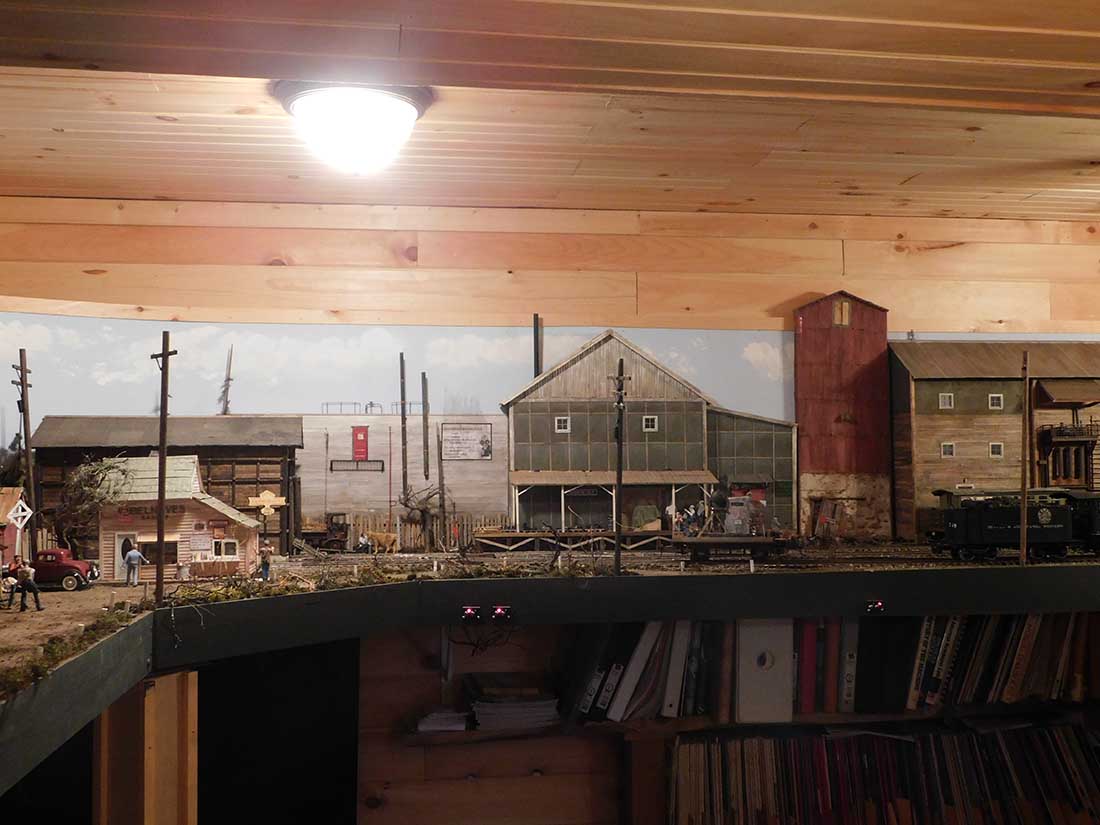
The rest of the layout was 100% scratch built (building and such).

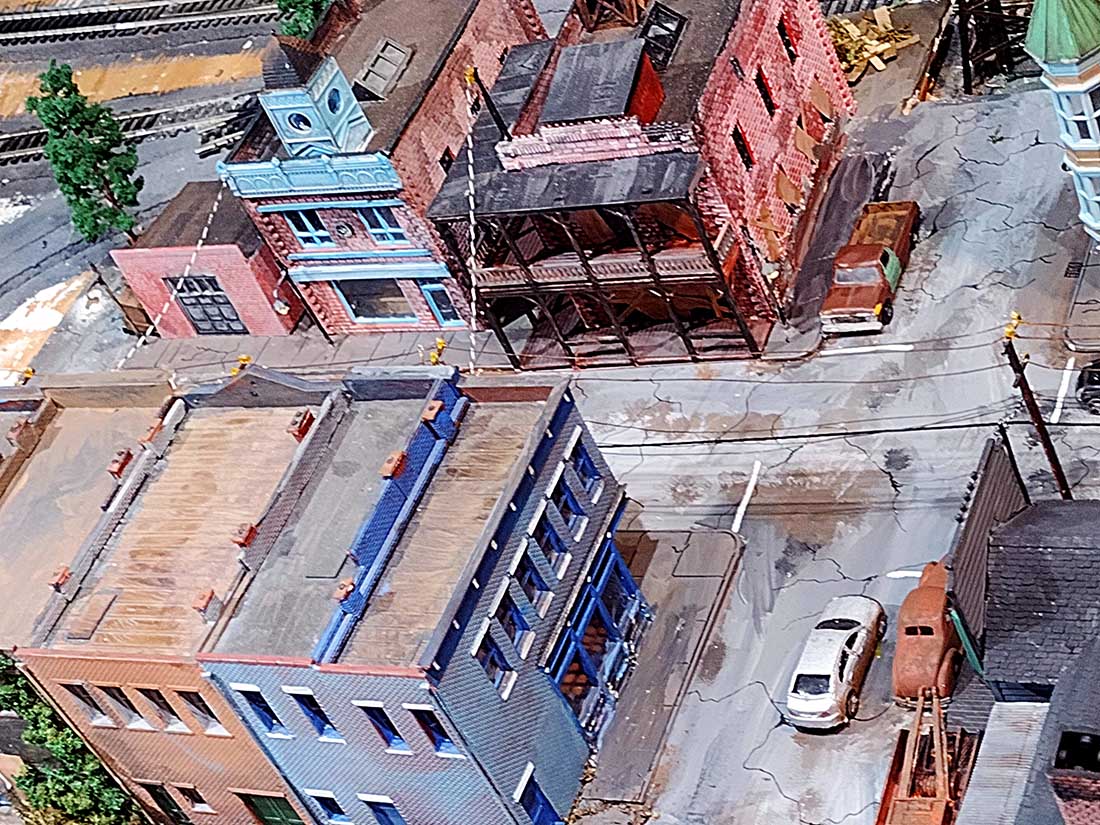
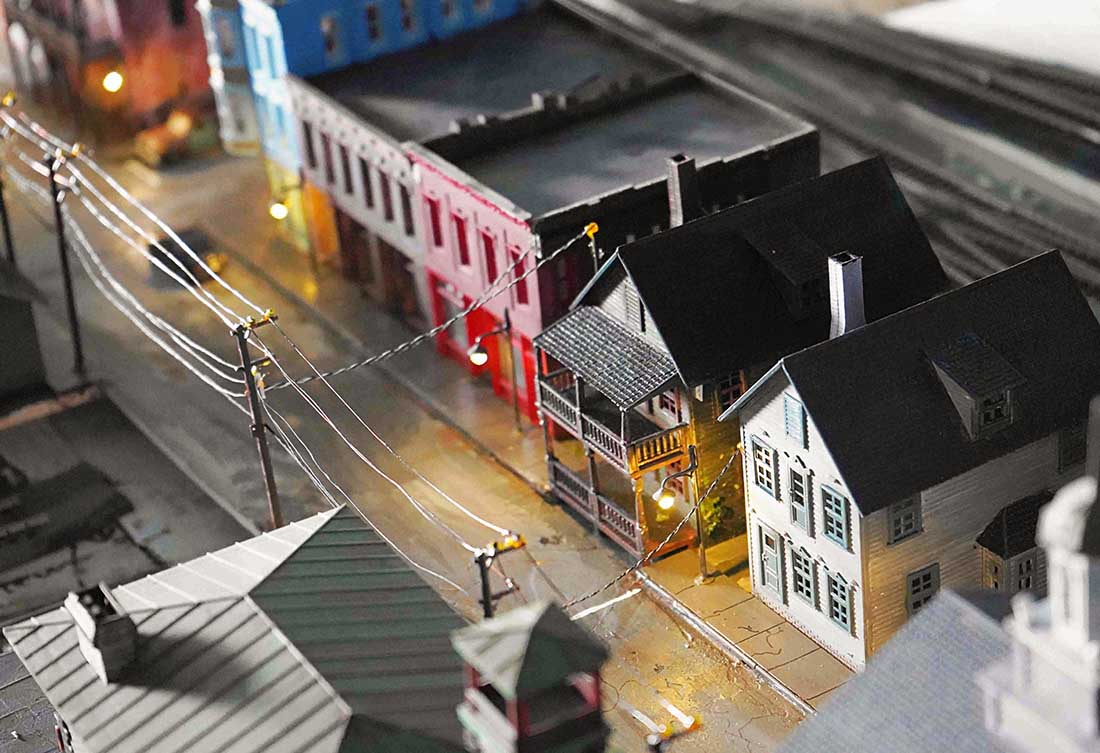
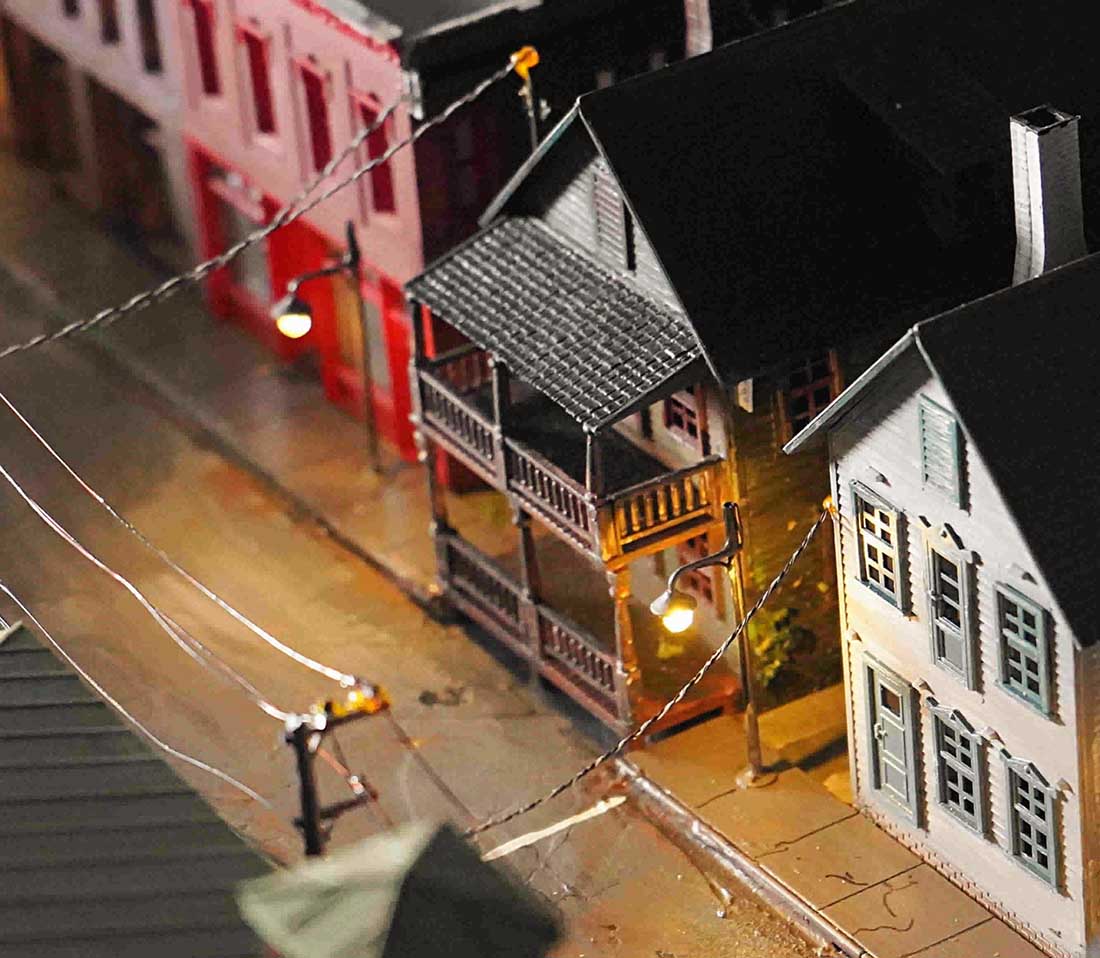
Being a old New England Yankee I’m pretty tight with a dollar. Most of the buildings are false fronts (not a lot of space in a shelf type layout.)

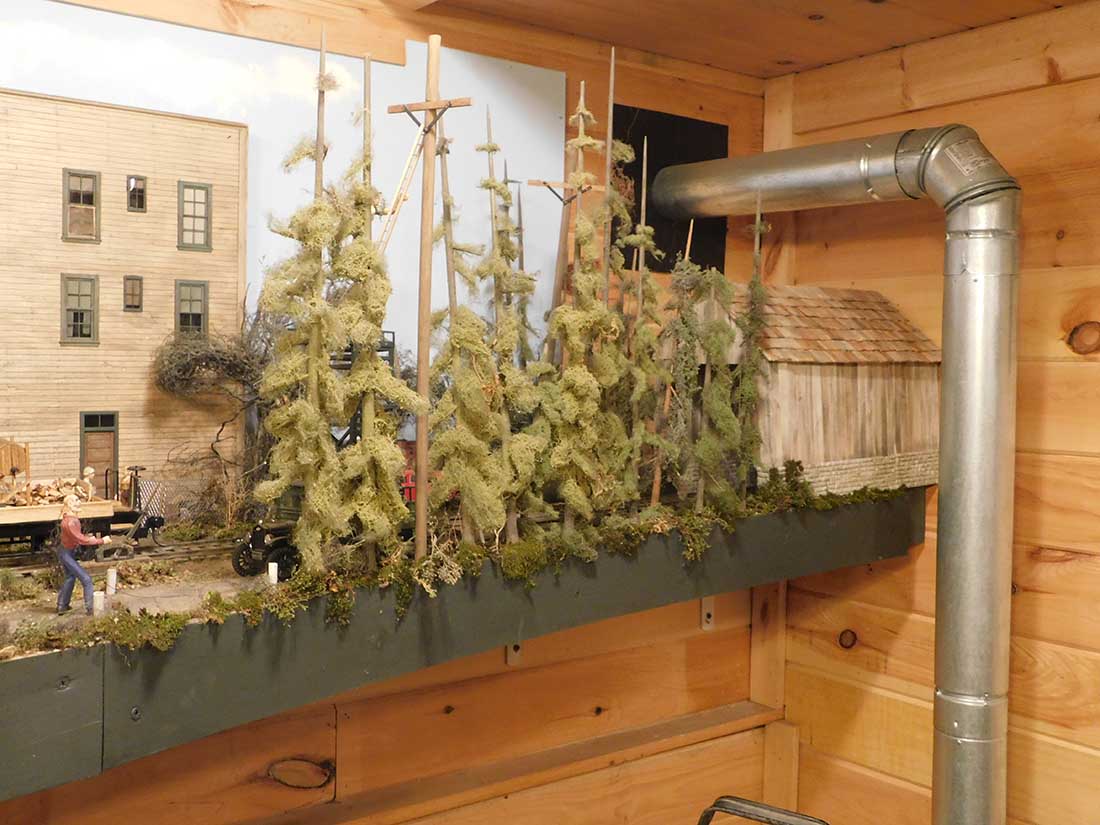
I have always been trying to make things look real. So what is a better way to do that then to use what mother nature has given us?

So many folks that have been here have said where did you get your trees and such, I explain that I just go outside and look around (now I must tell you that I live in a log cabin in the woods (lucky me).

They come back with “I have never seen trees like that” my response is, well you’re looking at the wrong end of the weed or tree or wild bush, “it the roots that your want”.

They mimic the outer growth, just pull the root up let them dry for a while spray some glue onto them and sprinkle on ground foam or what have you, even just plant them as a dead tree.

One big thing I found is the moss that grows on dead logs and such is easily scraped off with the putty knife. It will stay green for years, it will over the long run turn different shades of green then to tanish yellow color, moss gets its moisture from the air. Even after it fades out you can just spray it with a varied mixture of green stain and water.

I know I am rambling on but all this info will serve in all scales.

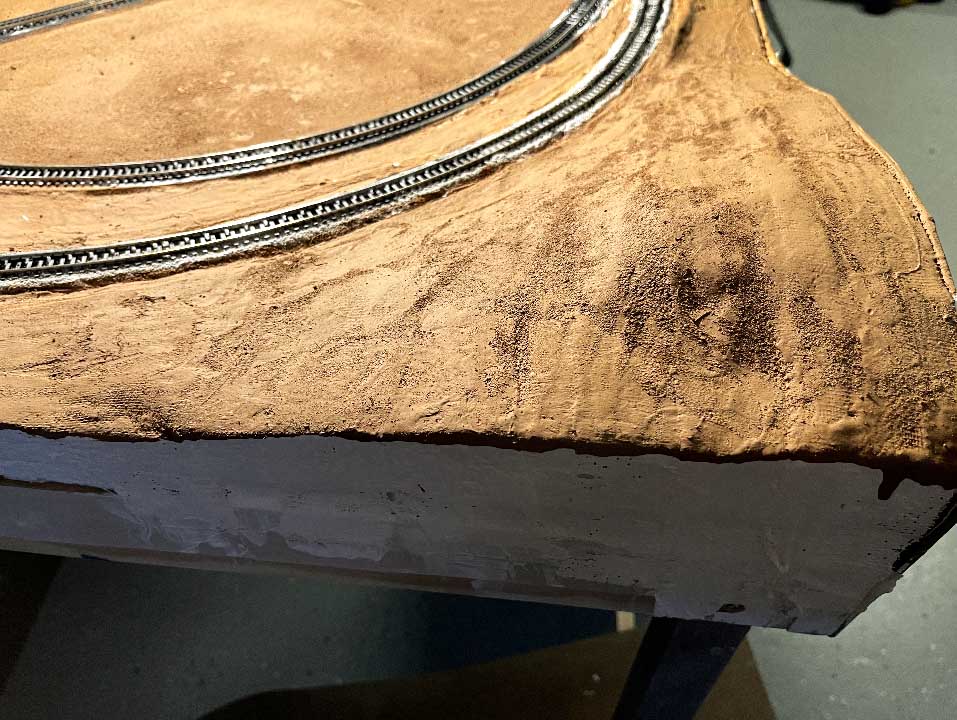
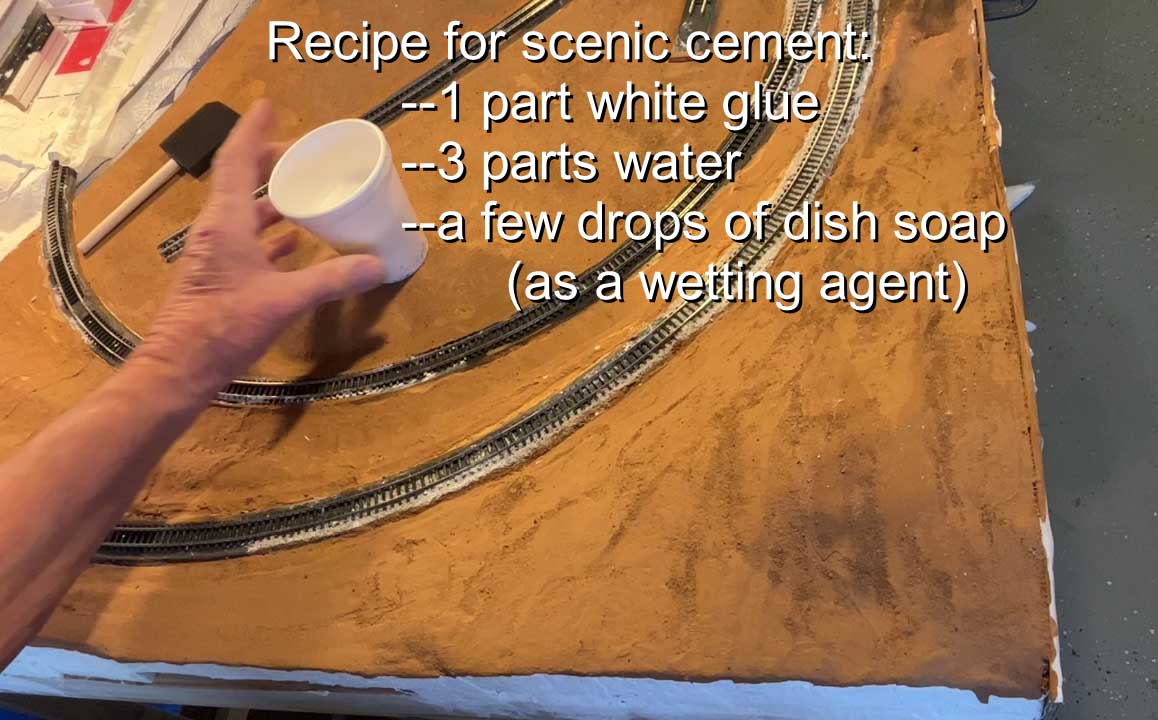
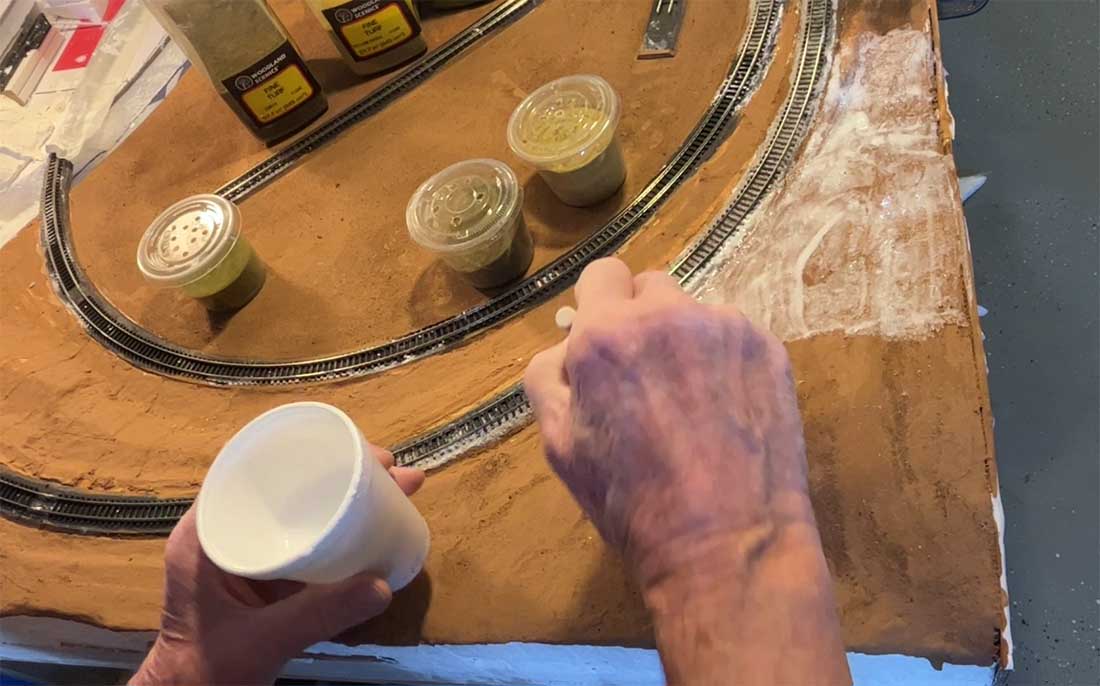
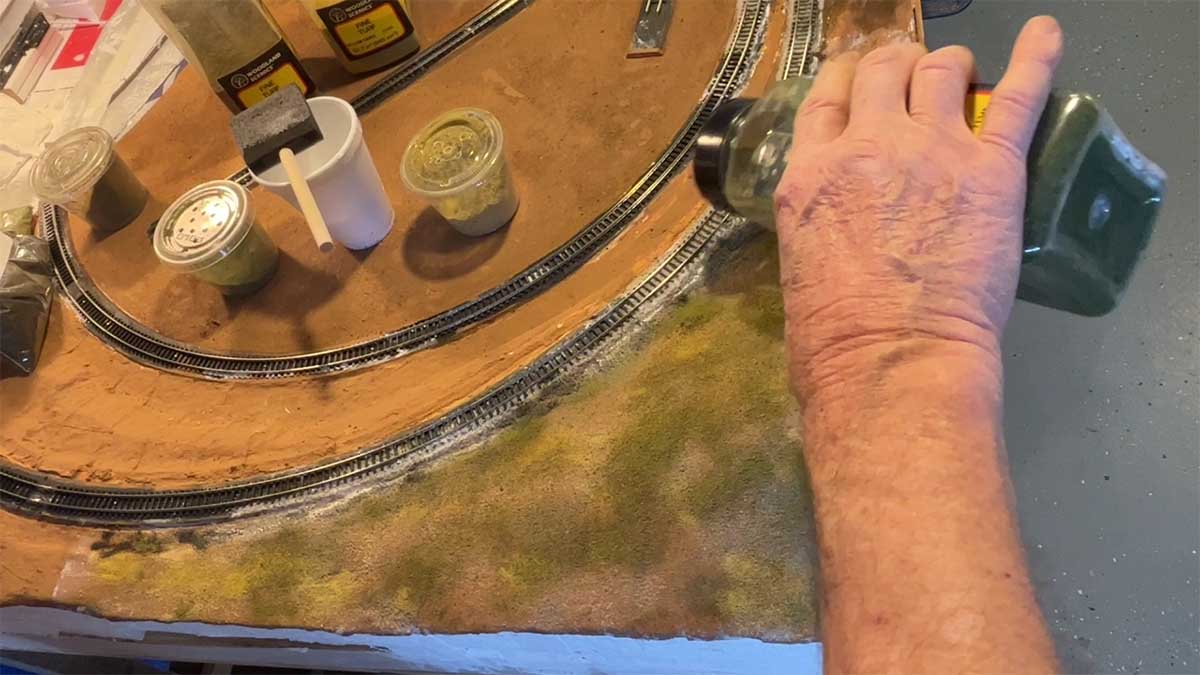
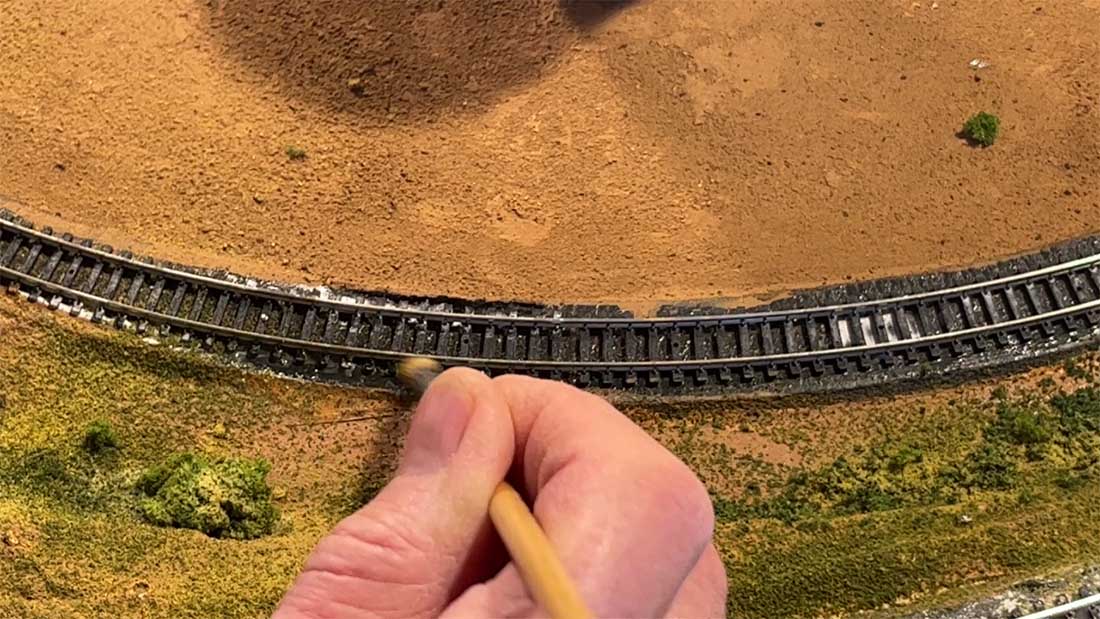
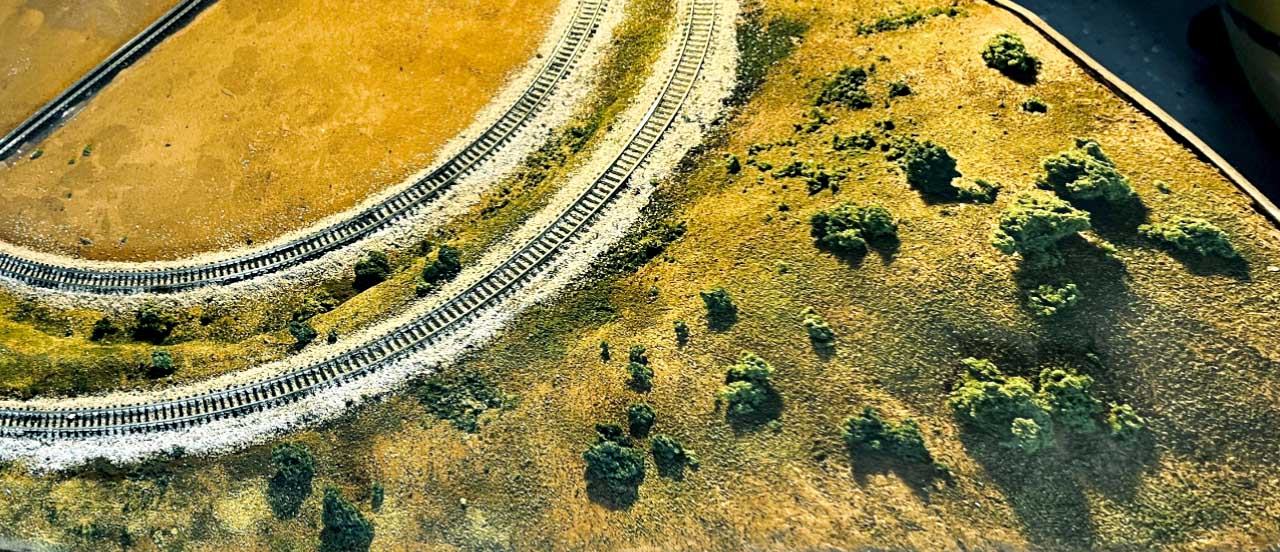
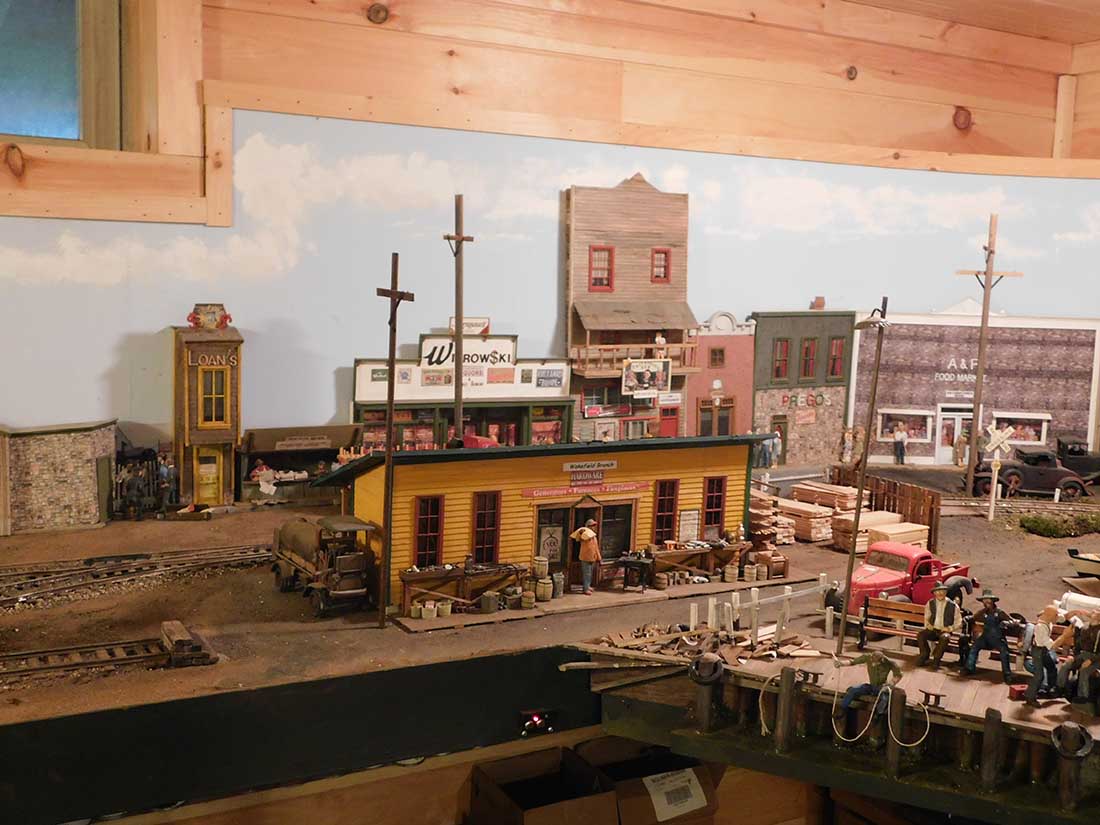
One other big thing I hear from visitors is “your ground cover color is perfect” I have to grin when I tell them that its just “real” dirt dried and sifted many time, spread with thick white glue ( say thick because this gives the ground texture and shape) not all ground cover needs to be flat or green like a golf course!

In the early days of railroading, tarred roads had not yet come into use, the answer was to oil the dirt, that was no big deal in model railroading, again the thick coat of glue, let it dry and here is the secret Black ink and alcohol just brushed on. ‘Don’t be neat’ – take an old soft brush, don’t brush it on but blot it, this give a different contrast to the blackness along the edges.

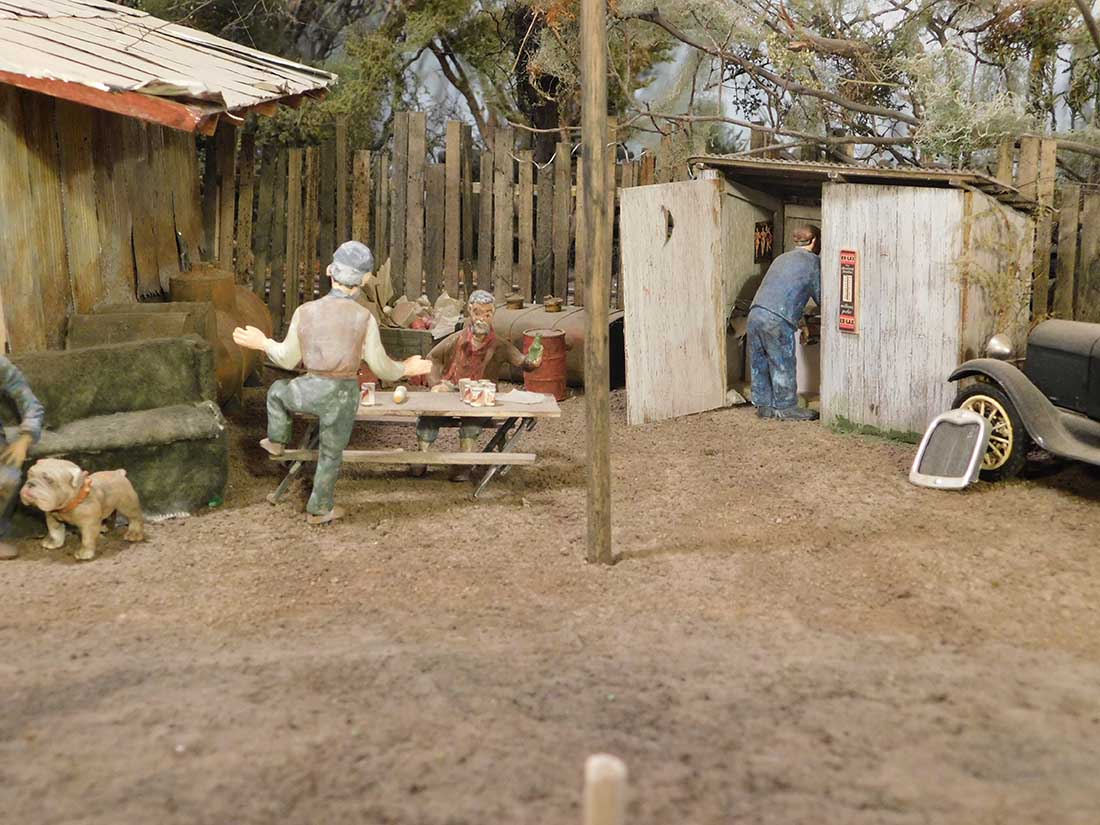
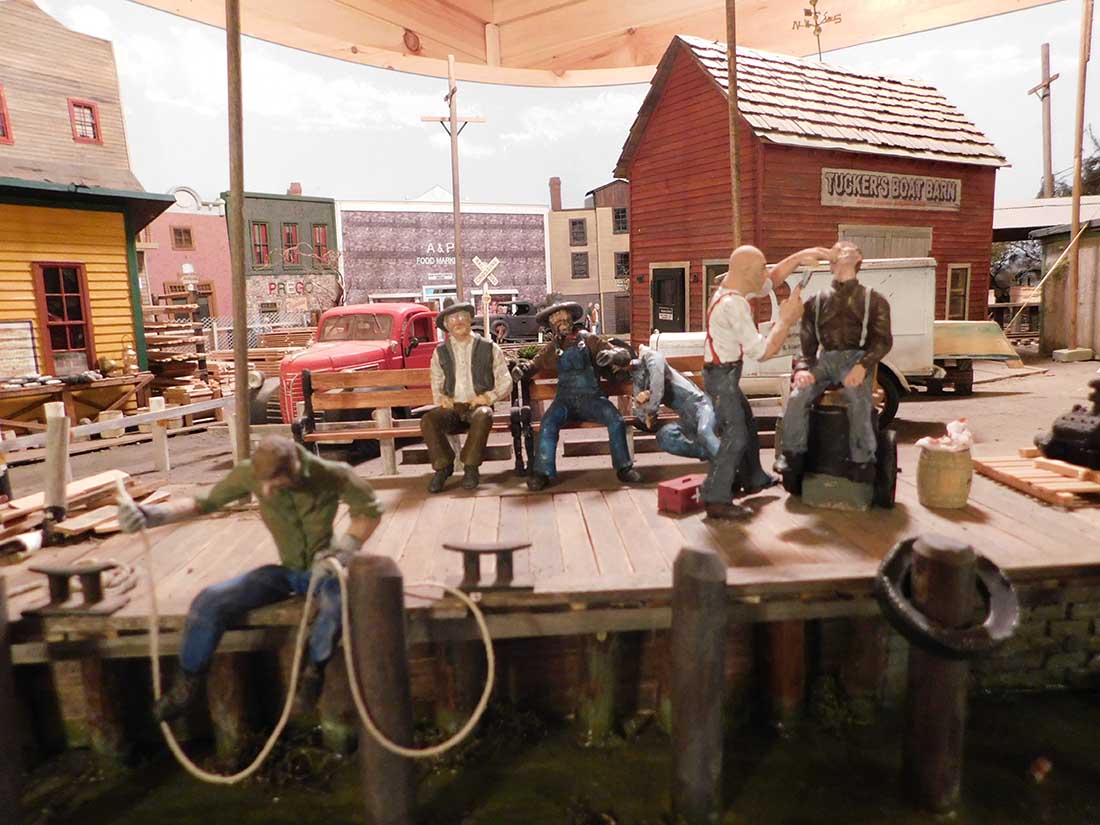
While I am mentioning ink, you would not believe what it can do to most everything on the layout, including those humans that look like tiny dummies.

First please change the colors that they use when making these tiny humans, purples and pinks and weird colors just take away from the realistic look, the same thing goes for skin color, try using a tan khaki color as a base and some off white or antique white, change it with every little human you create, different shades of browns with the antique whites and khakis mixed give great skin colors, highlight the cheeks.

When you are done with creating people now is the time for a very thinned out ink and alcohol mixture be sure to let the tiny humans dry for a day or so, you might need to use the ink mixture more the once all this seem like a lot of work but it well worth making it look real!

Tom”

g scale shelf layout

g scale yard

g scale shelf layout

g scale hut


g scale work gang

g scale scrap yard

g scale layout

g scale layout pier

g scale layout store

g scale people

g scale truck

g scale layout platform


g scale layout

g scale carriage

g scale layout steam engine

g scale people

g scale platform

g scale store

g scale car

g scale people

g scale car

g scale water tower

g scale timber

g scale shelf layout

g scale moonshine

g scale shelf layout

G scale shelf layout

G scale trolley

A huge big thanks to Tom for sharing his G scale layout.

(f you missed his On30 stuff, it’s here: On30 Locomotives.)

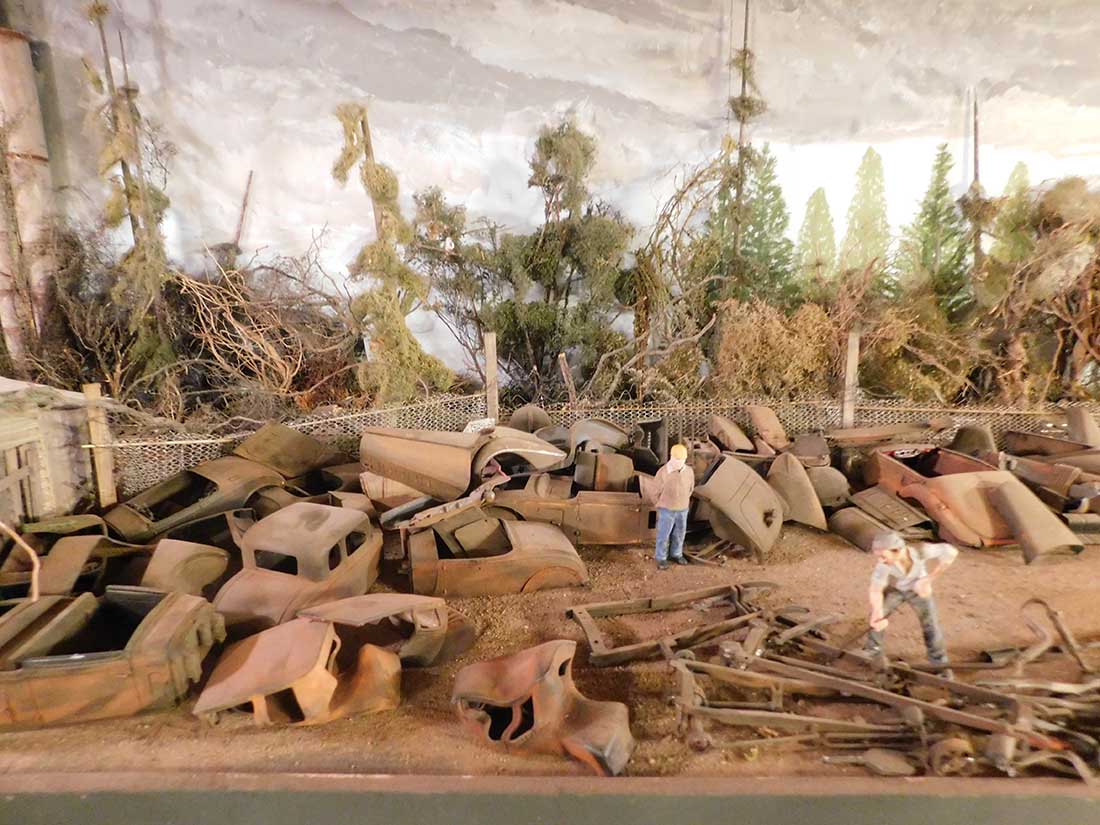
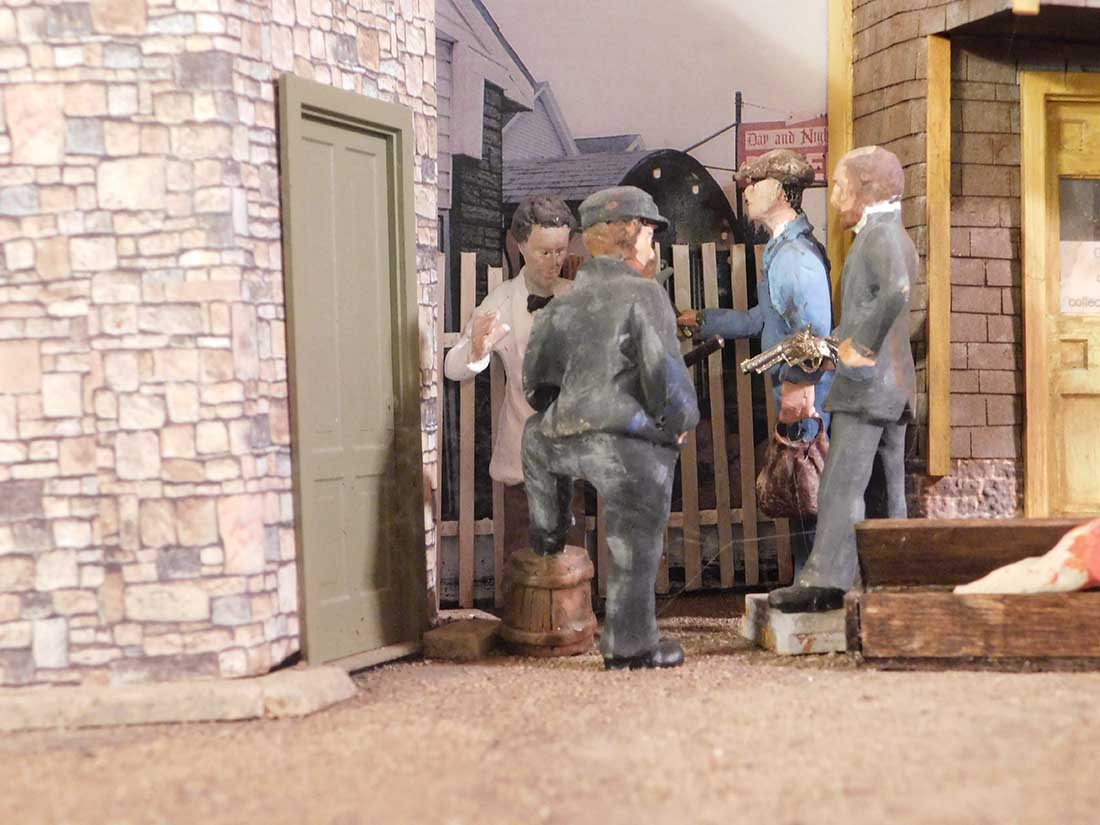
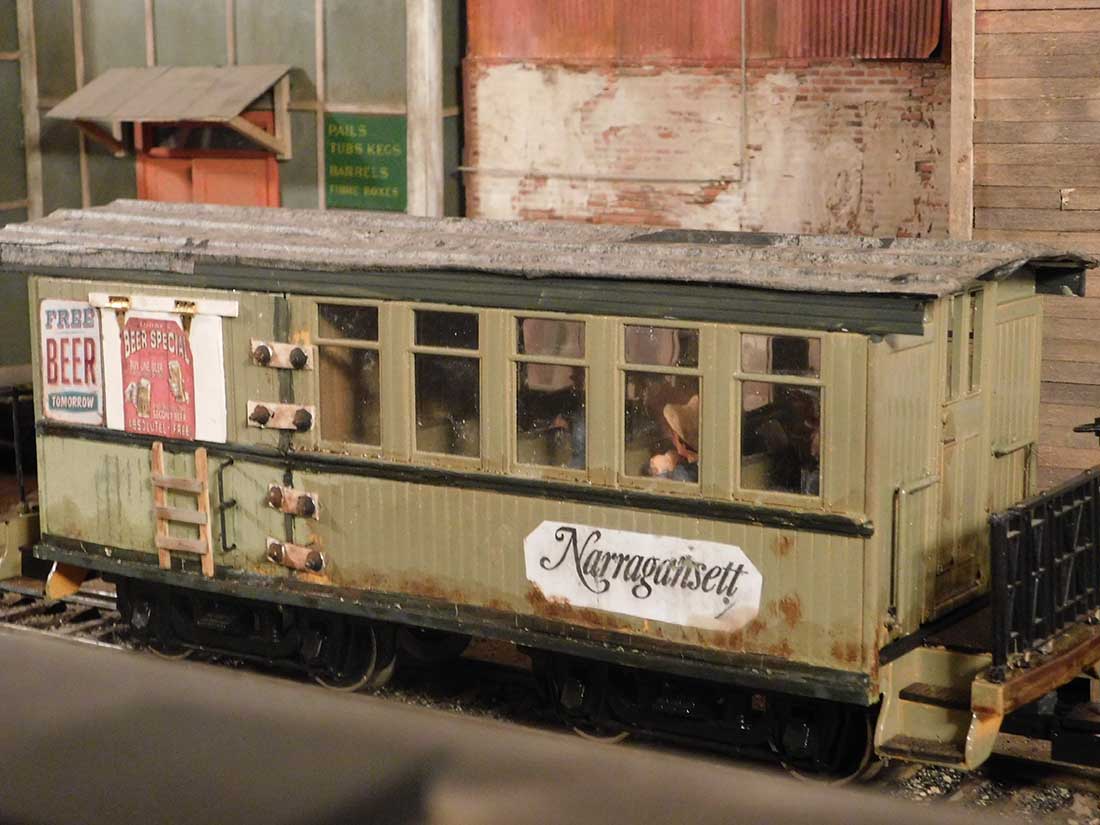
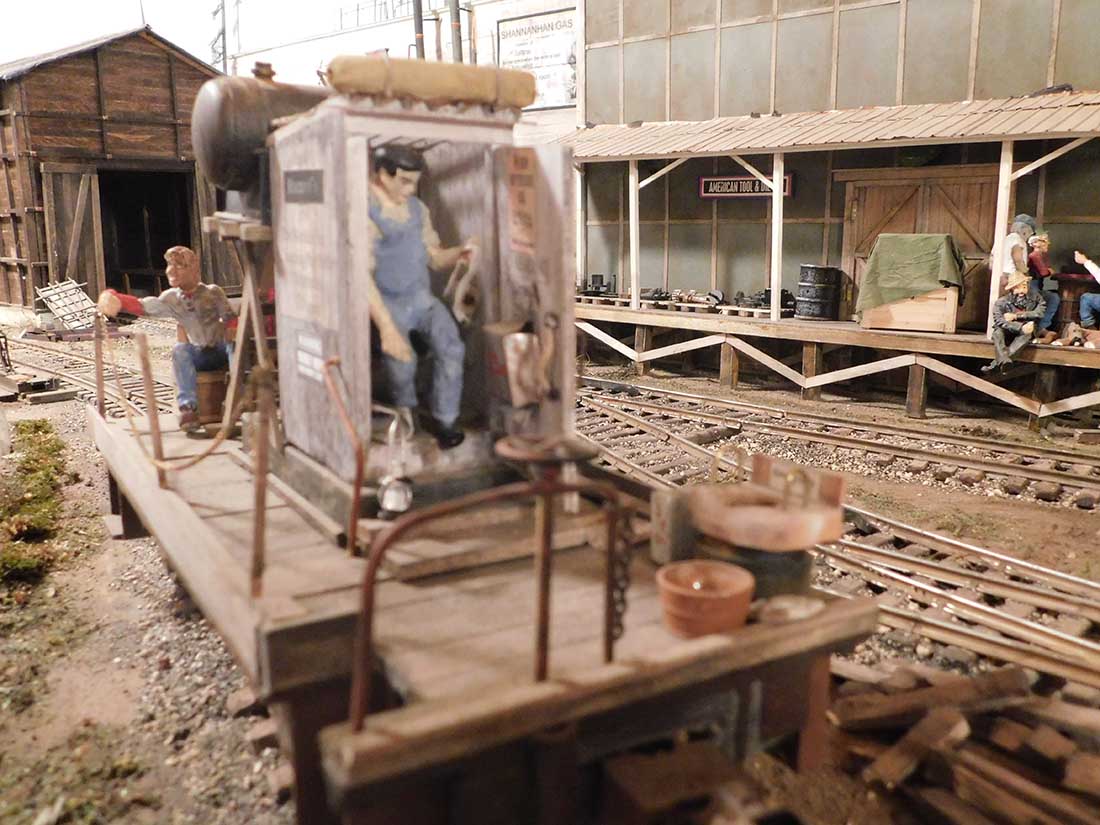
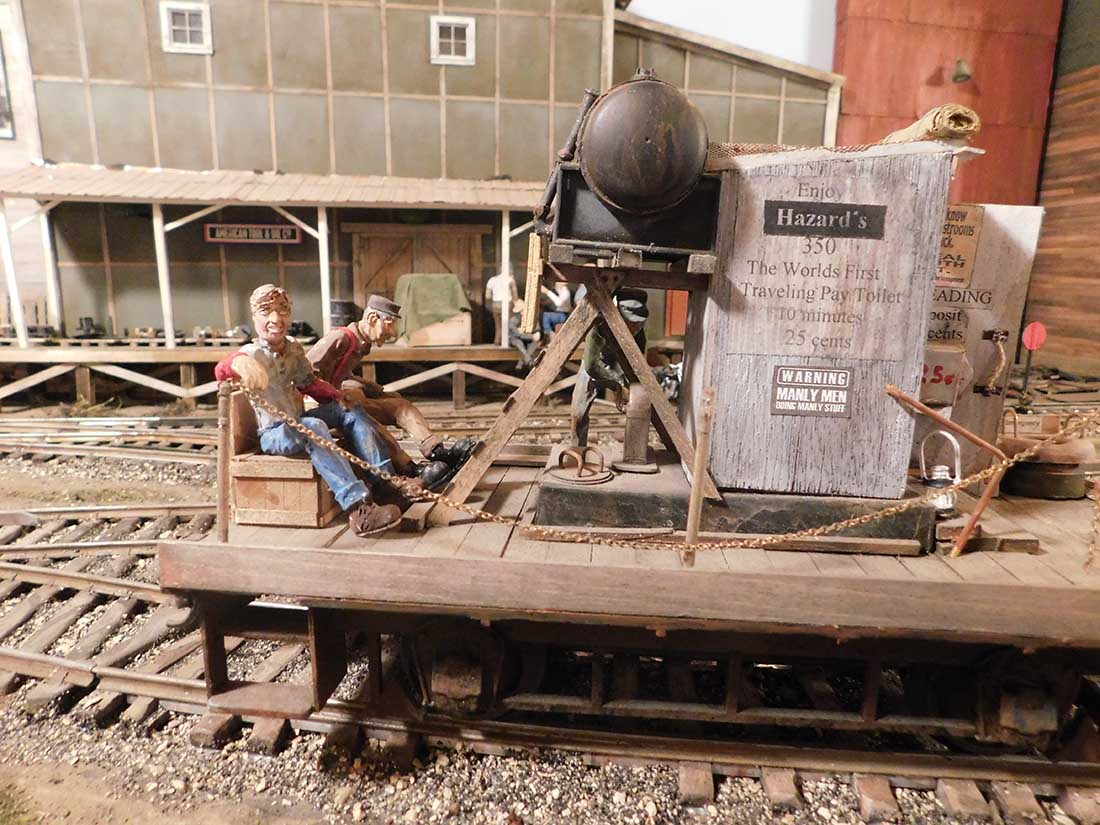
I love all the little scenes he has put together. I particularly enjoyed the ‘stick up’ and the barber. Did you spot them?

His narrative was also an eye opener – I never would have thought to look for roots, or paint the people like he does. Clever stuff.

Unbelievably, he’s sent in more pics of his On30 layout too, which I’ll post as soon as I can.

(His recent On30 layout post is here: On30 layout.)

That’s all for today folks.

Please do keep ’em coming – it’s still jolly quiet this end.

And if today is the day you get going on your layout, just like Tom, the Beginner’s Guide is here.

Best

Al

PS Latest ebay cheat sheet is here.


Model railroad quarry

John’s been back in touch – this time with a model railroad quarry! He’s been busy adding to his fab layout:

“Hi Alistair,

Well, the ‘new’ WV Energy railroad is still slowly coming together.

This time I’ll document the quarry stone handling building (quarry pit to come) and the town of Craig, WV.

The quarry. Staying with mining and mining type industries, I decided to add a stone quarry to the layout.

I’ve added the stone processing part of the quarry and am working on the quarry pit. It turns out that the quarry pit is more complicated than I thought.

I’ve been carving foam for a few days and have enough magnetic foam pieces stuck to me and my clothes and tools to make several Styrofoam coolers.

Anyway, the pit, once carved out of foam will be glued to the underside of the layout deck. I’ll document that foam adventure separately.

The quarry rock processing structure is a complicated model with a lot of operational possibilities, and the tracks to it will be a separate DC analogue block with it’s own power-pack.

I still have to add more trash and old stuff as well as a building or 2, probably some kind of office structure for the business end of operating a quarry.

Now to the town. The research I’ve done of the towns of Appalachia coal country proved sometimes to be depressing. These little coal towns prospered in the 40’s to 80’s with some coming to life and remaining alive, and others passing into history. Of those that have managed to survive, shall we say, the blush is well off the rose.

My little town is somewhere in between likely desertion and unlikely renewal. It’s based on 500 towns in Virginia, West Virginia, and Kentucky. The closest I have visited is Laeger West Virginia, next is Thurmond, an actual deserted town also in West Virginia. I plan to add the Thurmond portion across the main line tracks, like the real town. These will be ¼ deep against the backdrop.

My town is called Craig, and is a simple place where a few businesses are open, the only real buildings in reasonable shape are the Court house and the Blue Barrister building where lawyers have part-time offices for the 1 week a month when the Circuit Court is hearing cases. Road repair and general upkeep have fallen away. About 1/3 of the businesses are closed, some of the buildings boarded up.

In my travels through many such towns I noticed a depressing lack of people on the sidewalks and in the businesses. Many have just the business owner waiting for a customer. (sigh) I always stop in and buy something, mostly stuff I don’t need, talk to them and get their history…they need all the help they can get.

Anyway, before this gets to morose, some good news – I can now run trains from the lift bridge all the way around to the other end of the bridge, and most of the time back the train all the way around the other way.

I say most of the time because I have found that the best way to check track and how well cars work is to back a train, the physical dynamics of backing cars will find every rough spot, and help pinpoint where track repair is needed.

One last point and picture. At the end of the big valley bridges in several previous articles I added some tunnel openings and a part of the mountain. This helps mask the workbench lurking just after the big valley.

Take care miniature world creators all over the world, and again thanks Al for all you do!

John From Baltimore”

bridge to model railroad quarry

main street model train

main street model train buildings

main street model train buildings


main street sidings

main street model railroad

model train old weathered building

model railroad quarry

model railroad quarry

A huge big thankyou to John.

I think John’s layout is another fine example of how picking a theme really makes a layout stand out.

There was one line in his narrative that paints a vivid picture:

“My little town is somewhere in between likely desertion and unlikely renewal”

You only have to glance at his pics and see he’s nailed that. It really made me smile.

If you want to see John’s last post, it’s here: HO scale coal mine

That’s all for today folks.

Please do keep ’em coming.

And if today is the day you get started on your layout, the Beginner’s Guide is here.

Best

Al

PS Latest ebay cheat sheet is here.

PPS More HO scale train layouts here if that’s your thing.


Model train mountain scenery

Dean’s been in touch with a very good ‘how to’ on model train mountain scenery:

“Al, greetings from Dean in New Mexico.

After a long winter of time off, I am finally getting back to construction of the Conejos Valley Railroad.

With the table and supports built and the track laid down and tested, I am now moving on to scenery.

This is a tutorial on one of my two construction methods, building up hills and mountains around layers of Styrofoam.

I know that lots of modelers use the more expensive blue construction foam, but when cut with a hot knife, the Styrofoam gives nice smooth surfaces.

Today, I want to show how I built and put down scenery for a small hill in the left front corner of the layout.

Before proceeding I added fascia boards to the four sides. This gave a line for the top of the hill.

addind side to model railroad bench

Then I started cutting, with a hot knife, four layers of the Styrofoam to build up the hill.

cutting polystyrene for model railroad

I then glued the cut layers together with Liquid Nails.

gluing polystyrene for model railroad scenery

After the glue dried, I sanded off the rough surfaces to make a smooth hill.

sanding mountain scenery for model railroad

Then I coated the base form with plaster cloth. Incidentally, the cloth sold for body casting (sold by Amazon and others) is much cheaper than, and works just as good as, that sold for model railroads.

coating mountains with plaster cloth

I painted the dried cloth with a mixture of acrylic paint. I used Apple Barrel brand paints from Amazon (cheap) and varied the recipe until I got the effect I wanted; a slightly reddish-brown color like that found in my neighborhood. (16 oz Nutmeg Brown, 2 oz Yellow, 2 oz Khaki, diluted with 2 oz water.)

painting polystyrene mountains for model railroad

Here is my recipe for scenic cement. Many modelers use ModPodge instead of the white glue, but I bought a gallon of white glue several years ago, and still have half of it left.

recipe for model train ground cover


The scenic cement is painted on

applying ground cover for model railroad mountain

Then I covered the wet cement with Woodland Scenics scenic turf: lots of Earth, less of Yellow Grass and Burnt Grass, only a little Light Green, only a little black Soil, and very small bits of darker Green.

applying green to model train mountains

Finally, I use white glue to attach clump foliage (Light Green, Medium Green. And Dark Green, small amounts).

Since I am a sloppy worker, I always get spots of plaster on the track and roadbed. I treat it with water, and it is sucked up into the rubber roadbed. At that point I ballast the track. (Subject of a later discussion.)

And here is a photo of the final results


A big thanks to Dean for sharing his way of making model train mountain scenery – it’s a really clear ‘how to’.

That’s all for today folks.

Please do keep ’em coming – I know I keep saying it, but it’ still jolly quiet.

And if today is the day you stop dreaming and start doing, the Beginner’s Guide is here.

Best

Al

PS Latest ebay cheat sheet is here.